Multi-Step Checkout Module
Enhance user satisfaction and boost conversions by employing our multi-step checkout feature. Breaking down the process into manageable steps, not only creates a better user experience, but also significantly improves your conversion rates.
Add the Multi-Step Checkout Module to your Checkout Page or Theme Builder Template Assigned as Checkout Page.
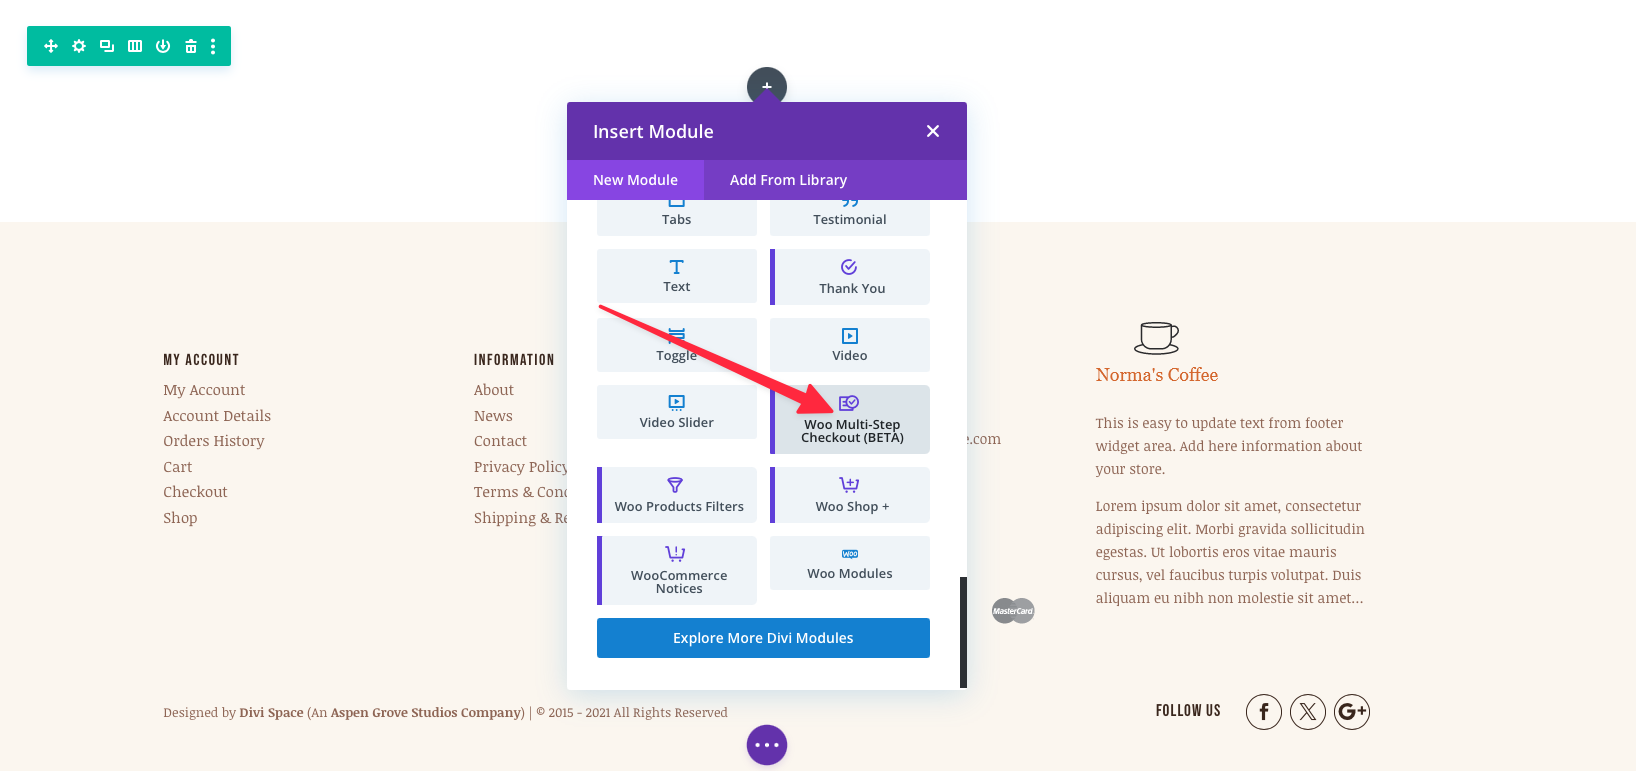
When inserting a new module, select the Woo Multi-Step Checkout Module from the list of options.
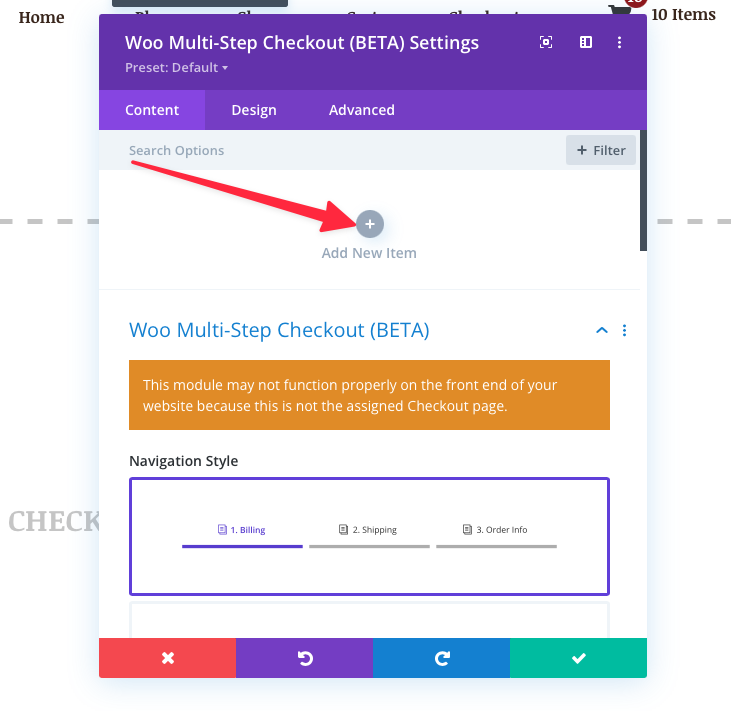
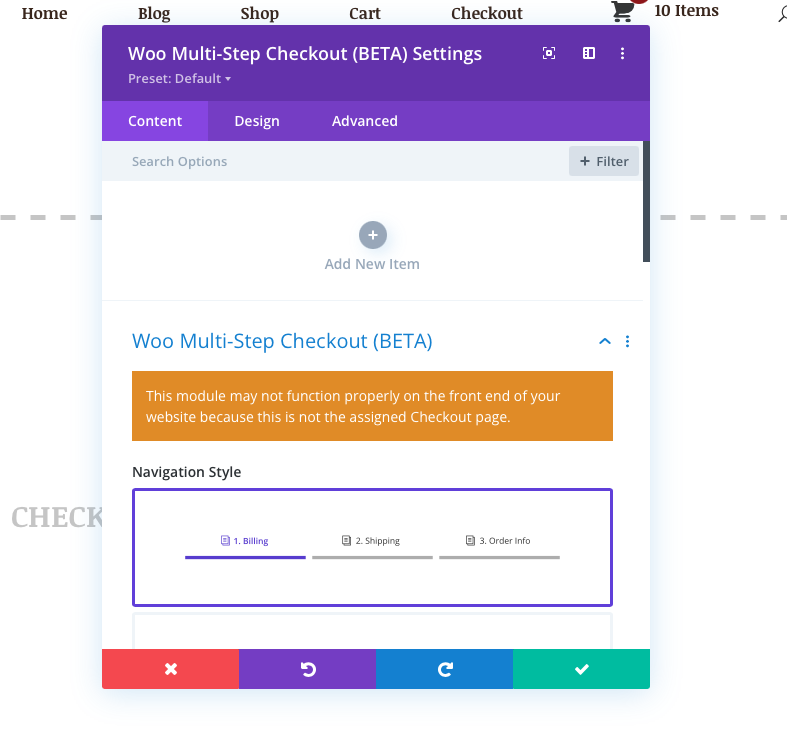
Please note that if the page you are inserting the module into is not designated as the “Checkout Page” in WooCommerce settings or in the Theme Builder, you will receive a notification as seen below:
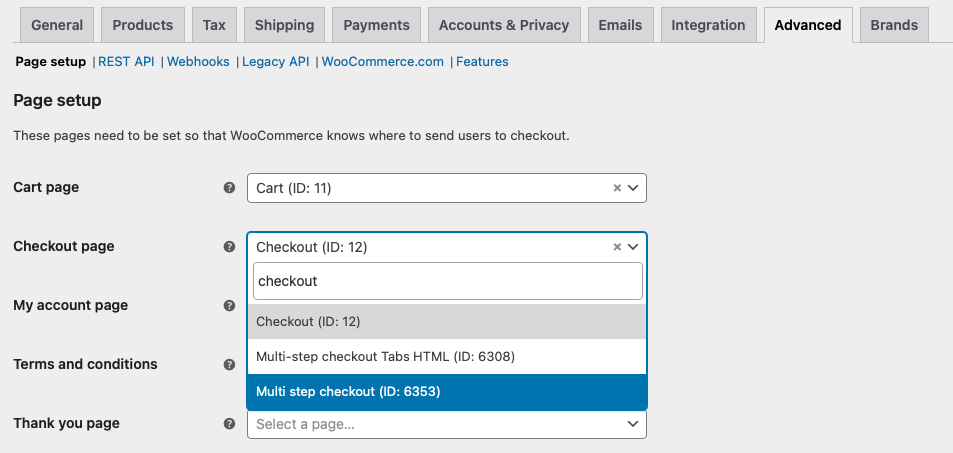
To designate a page as the “Checkout Page” , visit the WooCommerce settings page, and under the “Advanced” tab, you will see the option to set a checkout page. Choose the desired page and save changes.
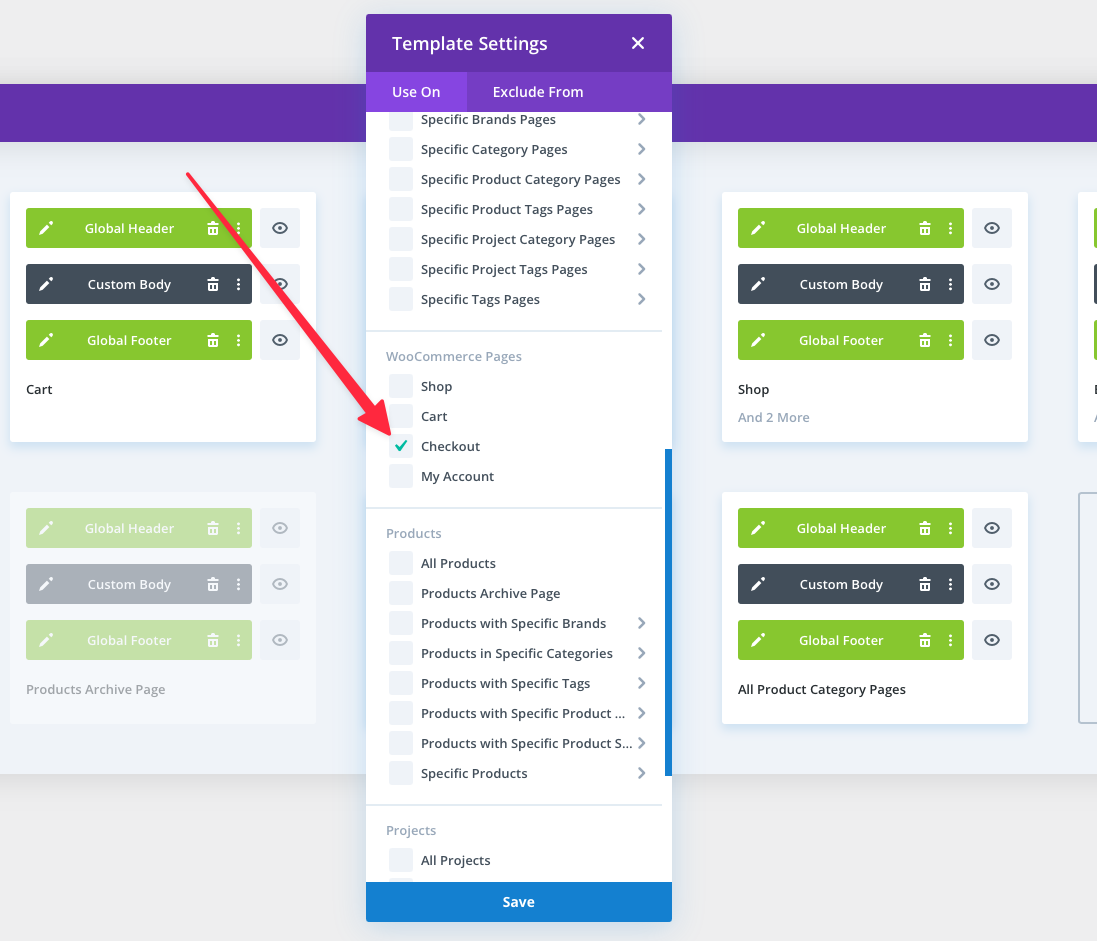
Alternatively, you can create a Theme Builder Template and assign it as “checkout” under the Theme Template Settings as seen below:
Add the Divi Shop Builder Notification Module
It is highly recommended that you add Divi Shop Builder’s Notification Module to your multi-step checkout in order to notify customers of missed input fields and any mistakes made during the checkout process. This module can be added above the Multi-Step checkout Module in the same Section.
To add the notification module, simply select to add a new module in the Divi Builder within the same section as the multi-step checkout module and select the WooCommerce Notices module from the designated Divi Shop Builder modules.
After you have added the module, simply drag it above the Multi-Step Checkout module and continue to configure. More information regarding the WooCommerce Notifices module can be found here https://wpzone.co/docs/plugin/divi-shop-builder/cart-page/#notices
Build Your Multi-Step Checkout Process
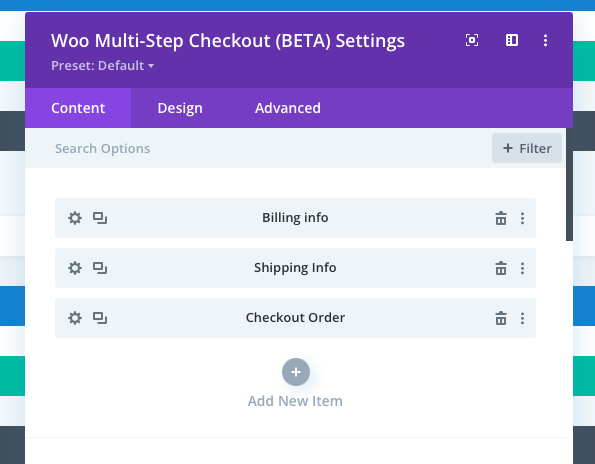
Within the multi-step checkout module you will see the option to “add new item”. Here you will begin building the multiple steps the customer will be presented during the checkout process. Typically, these steps will consist of Billing Details, Shipping Details, and Review Order.
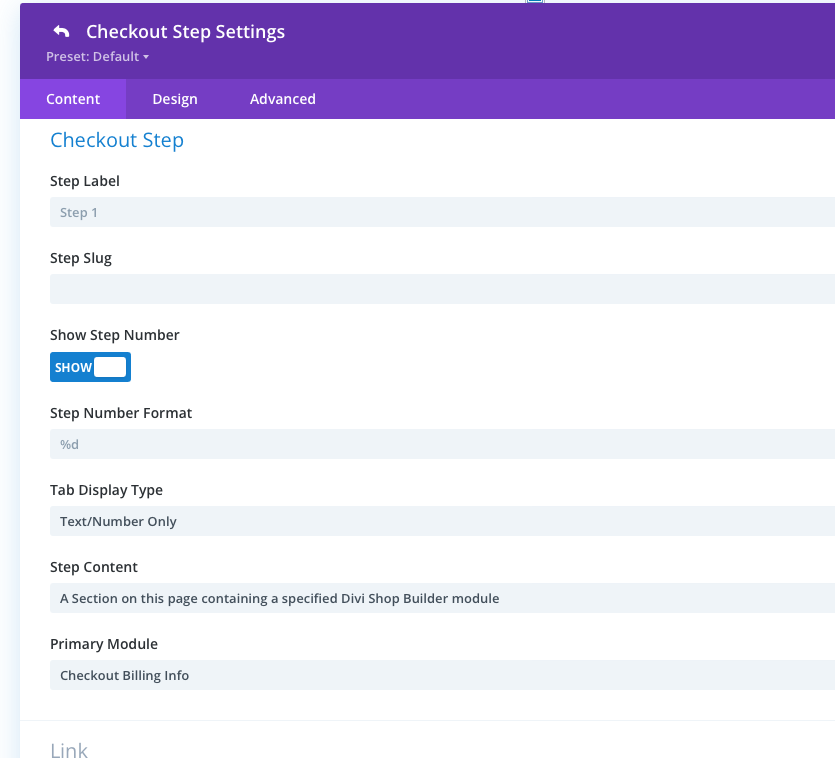
After the “add new item” icon has been clicked, you will be presented with a list of settings that allow you to create and fine-tune your checkout steps. Below is a list of options and explanations for each field option necessary for creating the checkout steps.
Step Label - The text entered here may appear in your checkout navigation. If creating the “Billing Details” portion of the checkout process, you may name this “Billing Details, or “Billing Information”, for example. Alternatively if you are creating the Shipping Details step, you can name it something like “Shipping Information”.
Step Slug - Here you will enter the unique slug/ID that will be used for hash navigation. The slug should be all lowercase. Examples of this are “billing-details’, “shipping-details”, “review-order”. (please note that this important and pertains to a future step of the set up process).
Show Step Number - Here you can choose whether or not you want to display the step number in the checkout navigation tabs.
Step Number Format - If you have opted to display the step number in the previous step, you can format it here. This field allows you to fine-tune how the step number will be formatted and presented to the customer. By default the format “&D” will display the step number by itself. If you would like to change the format, you could create a format like “&D.” which would display the step number followed by a period. Or “&D-” would display the step number followed by a dash, for example.
Tab Display Type - Here you can select how you would like the tab to be displayed. The options are “Text/Number only”, “Image + Text/Number” and “Icon + Text/Number”.
Step Content - Here you can choose where the particular step’s content is pulled/sourced from. The two options available are “A section on this page containing a specified Divi Module” or “A section layout in the Divi Library”. We will cover each of these options as well as the pros and cons of each below:
Create Step Content utilizing “A section on this page containing a specified Divi Module”
As mentioned, this option will allow you to pull from a checkout related module contained within its own section on the checkout page. Here you can select from modules such as Checkout Billing info, Checkout Shipping Info, and Checkout Order Review.
In order to utilize these modules in the multi-step checkout process, you must first add them into their own independent section on the checkout page and configure them individually. Documentation on each of the individual checkout modules can be found here https://wpzone.co/docs/plugin/divi-shop-builder/checkout-page/
It is also very important that you add the “Step Slug” created in the checkout step settings to the CSS ID field of the module, located under the Advanced Tab. This CSS ID must match the step slug.
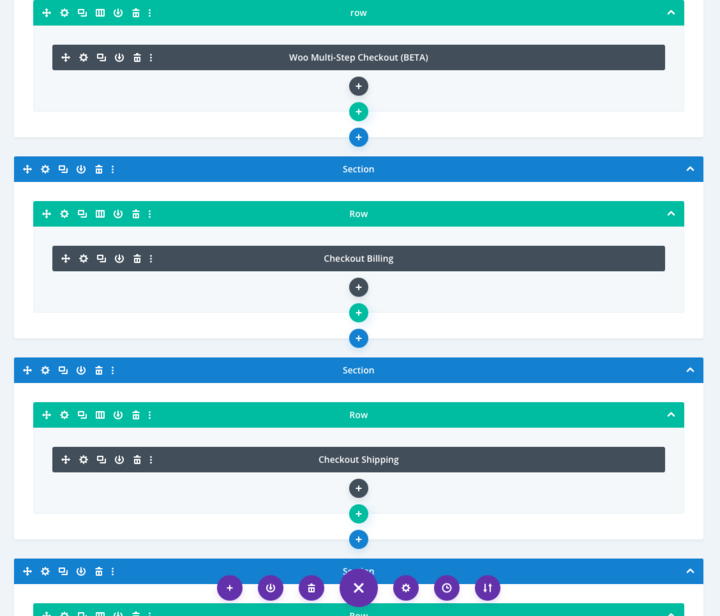
Once complete, your page layout will look something like this, with the checkout modules in their own sections below the multi-step checkout module:
You will then continue to “Add New Items” and configure each step until the steps of your checkout process are complete.
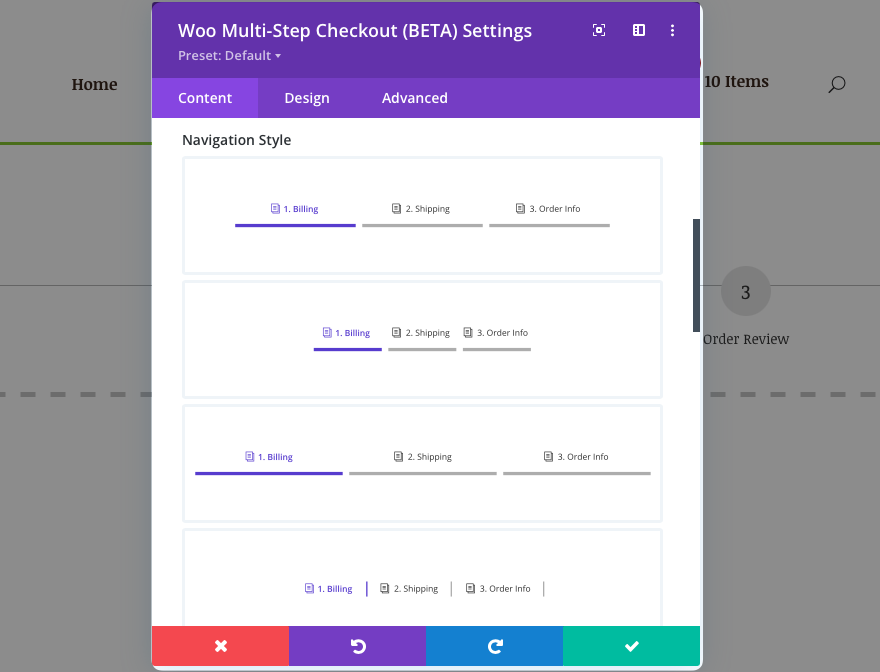
Choose the Navigation Style and Customize to Your Liking
The Multi-Step checkout module gives you the power to fully customize the navigation tab style of your checkout process. Within the primary content tab of the module settings you will see a section labeled “Navigation Style”. Here you can choose from a variety of navigation styles and choose which one best fits your needs from the options available.

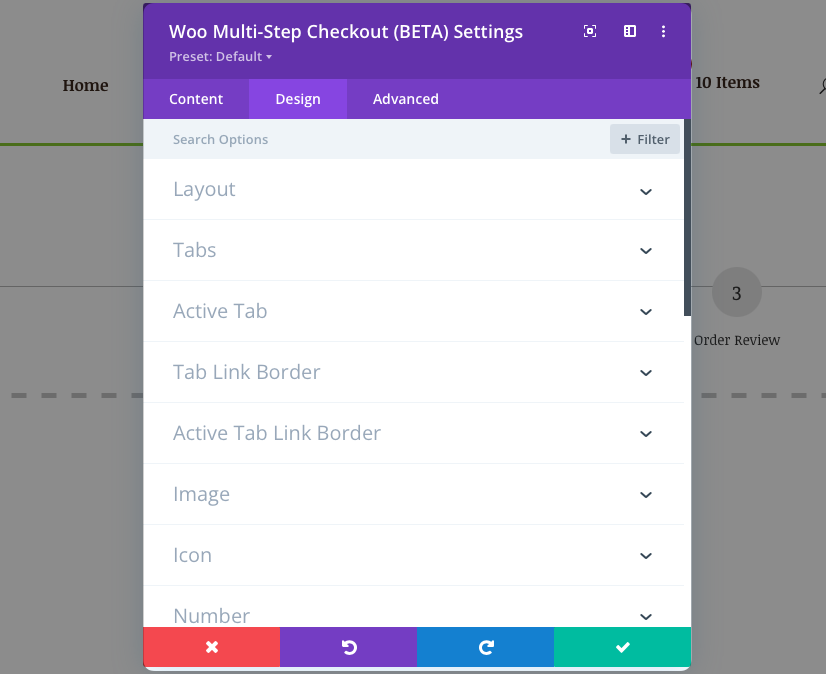
Additional styling options can be found under the “Design” tab of the module. These settings will allow you to fine-tune the navigation tabs in order to achieve the desired look and feel.
Using multiple Woo Multi-Step Checkout modules on the same page is not supported.