Course Scheduler
Plugin requirements
- Self-Hosted WordPress Installation
- LifterLMS - Please see LifterLMS plugin requirements and recommended server settings.
For the Course Scheduler Plugin to work, you must have LifterLMS. If you do not have it you can download it here. Once you have it, please install it on your self-hosted WordPress website.
Description
Out of the box, LifterLMS can only run a course for a certain date range. Each course can only have one start date and one end date. To run a course multiple times you have to copy the course as a new course for each time you want to run it. In other words, you can’t run a course for multiple dates. A plugin from WP Zone called Course Scheduler allows you to run the same course multiple times without having to make copies of the course. Set the start and end date, automatically generate future start dates based on a predefined schedule, and manage the dates for each student individually. In this walkthrough, we’ll go through each step, see how to install it, set it up, and see a few examples of how it works.
Installing Course Scheduler
With LifterLMS installed and activated, upload and activate the Course Scheduler plugin.

To install the plugin, go to Plugins Add Plugins in the WordPress dashboard, select Add Plugins, click Upload Plugins, and choose the plugin from your computer.
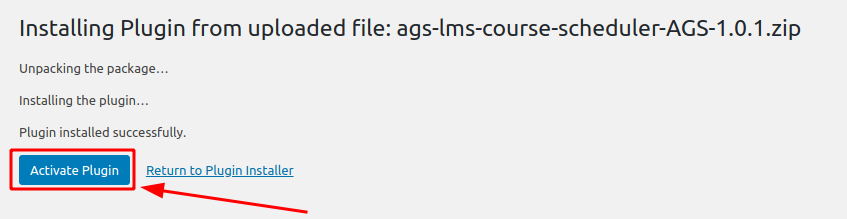
Once the Course Scheduler plugin is installed, it will take you to the next page where you can activate it.
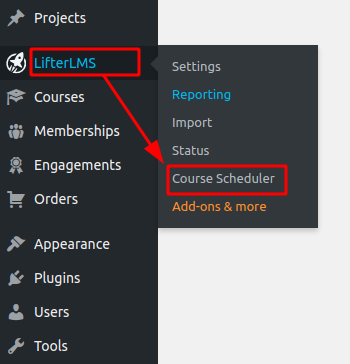
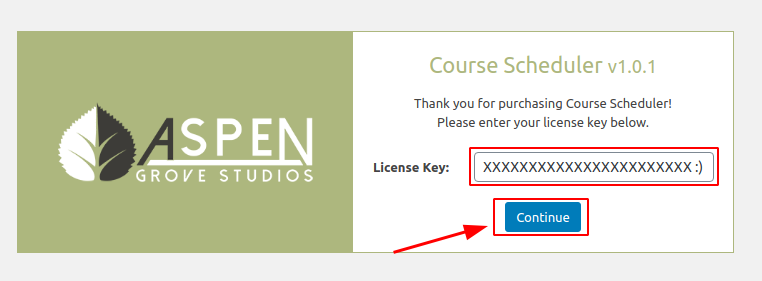
Next, you’ll need to enter your license key. Go to LifterLMS > Course Scheduler in the WordPress dashboard and add your license key. You’ll find your license key in the member’s area on the website where you bought the plugin (at WP Zone or Divi Space).
Set Missing Course Dates
If you have courses already created, you’ll need to click this button to add the course dates.
Example: John Doe has already site that has courses with enrollments. He wants to automatically populate the current course dates into student enrollment records.
** How to do that**: Just navigate to LifterLMS > Course Scheduler, and click "Set Missing Student Course Dates.
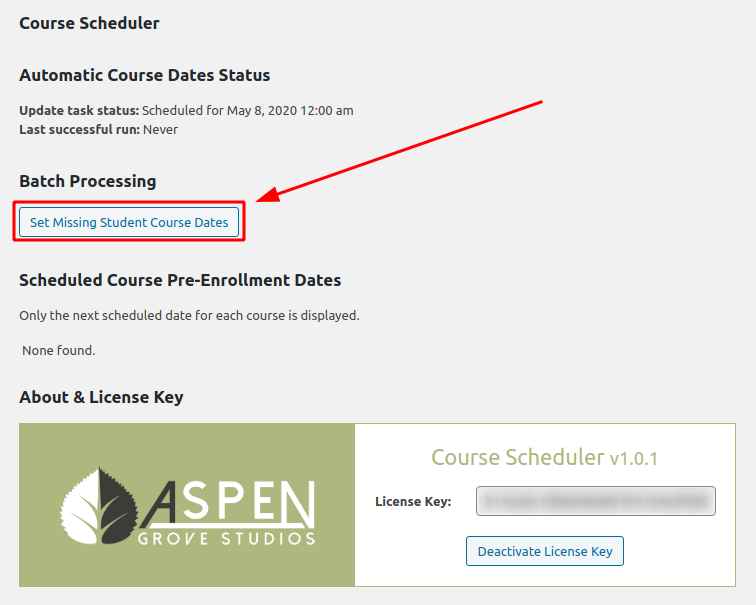
Once the plugin has been activated you’ll see a new set of features including a section called Batch Processing with a button labeled Set Missing Student Course Dates. This will populate the current course dates into the student records.
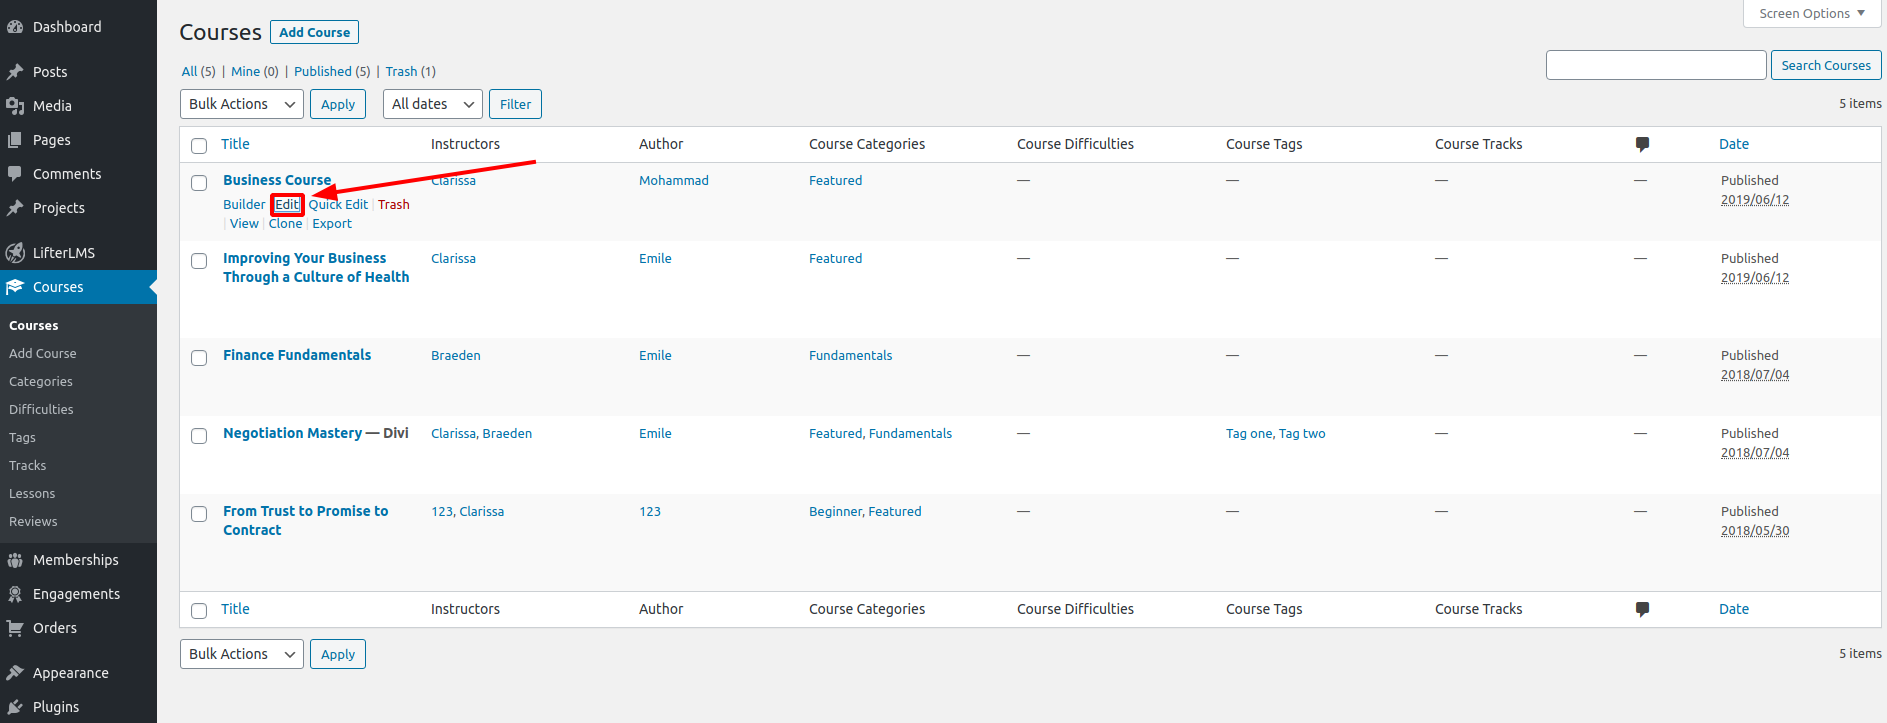
Where to Edit Courses
To use Course Scheduler with your current courses, you’ll need to edit the courses individually. In the WordPress dashboard, go to Courses > Courses. As you hover over a course, you’ll see several options that include Builder, Edit, Quick Edit, Trash, View, Clone, and Export. Select Edit.
This opens the course editor. Under the editor, you’ll find several fields that include Course Options, Access Plans, Custom Fields, Instructors, Student Management, and Automatic Start Dates. All of the settings for each course are found in Course Options (in the Restrictions tab), Student Management, and Automatic Start Dates. Once you’ve made your updates, select Update or save the course in the Publish section on the right side of the screen.
Update Start and End Dates for All Students
Course Scheduler allows you to set the start and end dates for all of your students at the same time.
Example: John Doe is a course instructor and running the same course at regular intervals, 5nd every month, and the course is taking 3 months. Previously he was creating copies of the same course. With course scheduler he will automatically generate future start and end dates without making duplicates of course.
How to set up course scheduler
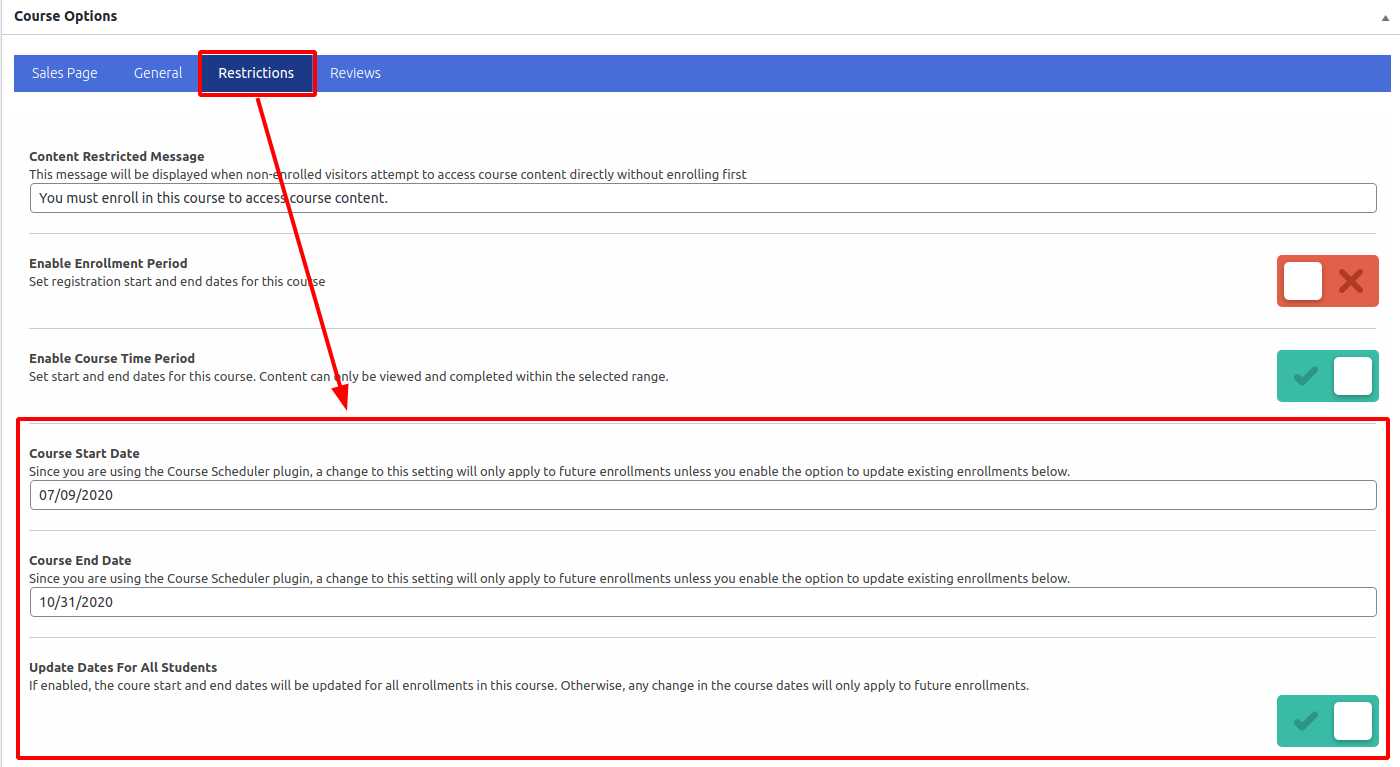
The LifterLMS start and end dates are set in the course editor. At the bottom of the editor is a section of settings called Course Options. You’ll find the start and end date options in the Restrictions tab. If you change the start and end date, it normally only updates for students that enroll after you’ve updated the dates. Course Scheduler adds a new feature to update all students at once. You’ll need to enable an option labeled Update Dates for All Students. Enabling this option automatically updates the start and end dates for everyone so you don’t have to update students individually.
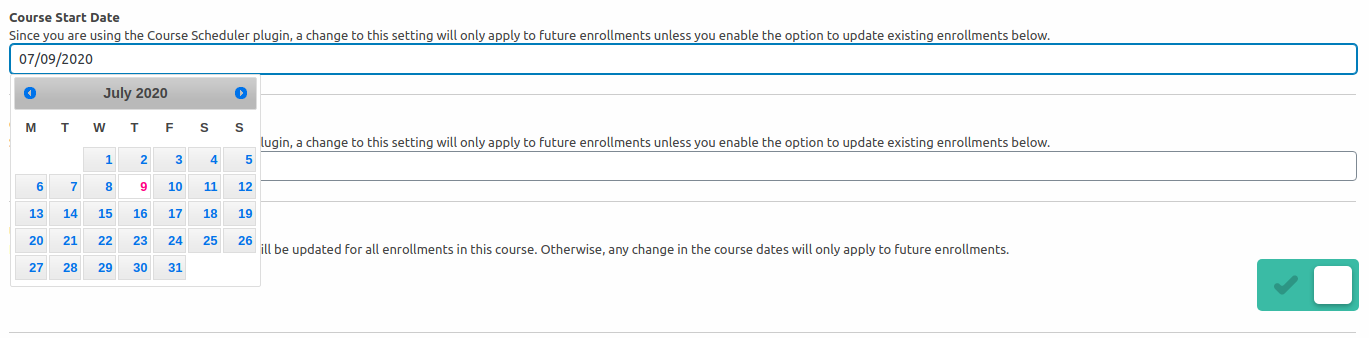
Select to enable the update to all students and then select the start and end dates from the date-pickers.
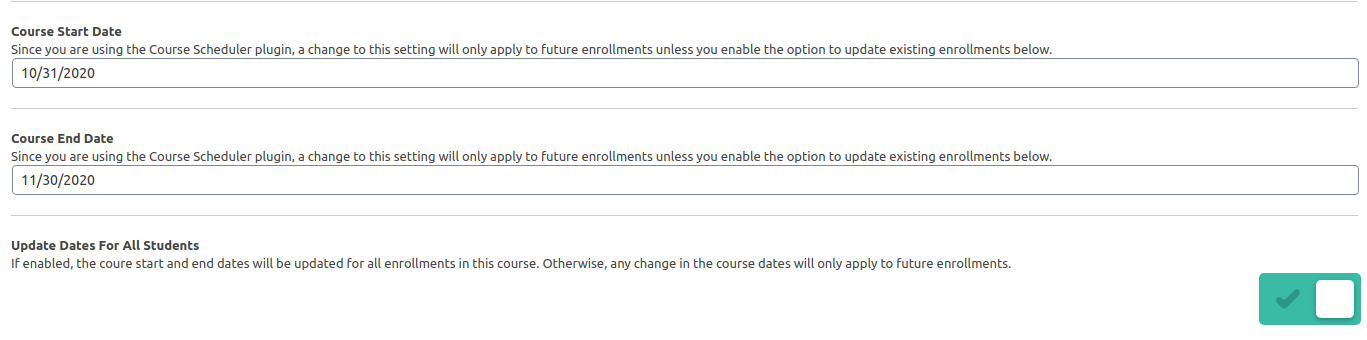
Now, once the settings are saved, all of the students will have the new start and end date.
Student Management

The standard Student Enrollment section at the bottom of the page shows the enrollment date. You’ll need to enable the start and end date options.
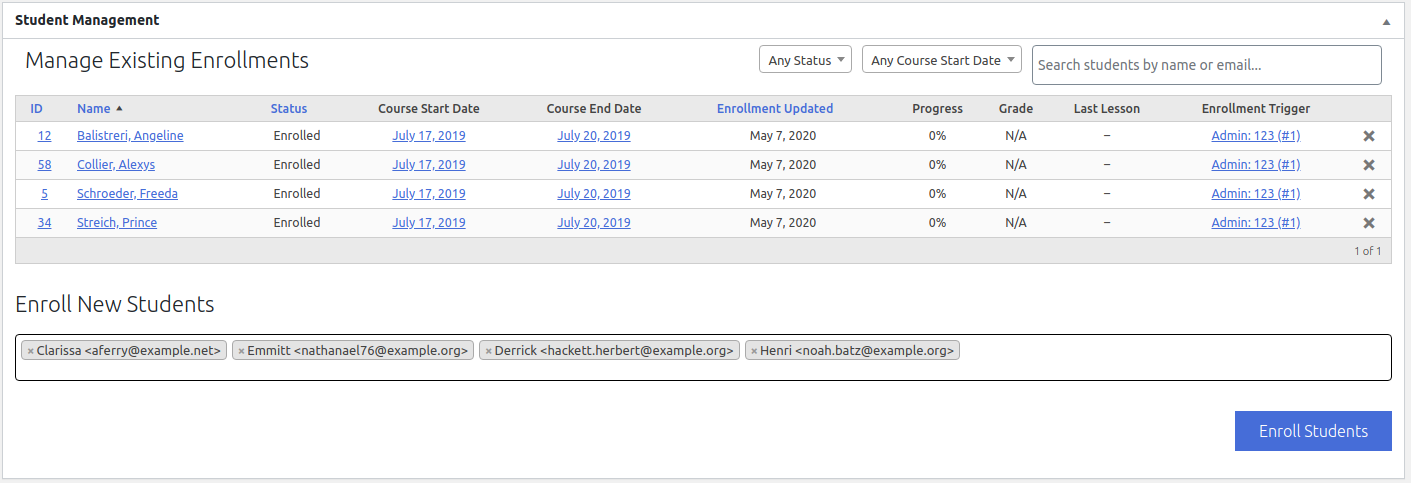
In the Course Options section, click the red button labeled Enable Course Time Period to enable it. It will change to a green check. Be sure to enable this on all existing courses and on every course you create. Update or save the course.
When students enroll, they automatically get the start and end dates for the course that’s set at the time they enroll. The default setting is the start and end date at the time the students enrolled, as seen in the example above. A new set of features is added to the Student Management section of the course editor where you can change the start and end dates for each student individually.
Example: John Doe’s student didn’t sign up for the course on time. The course has drip content enabled (so the student only has access to the second module 7 days after the course start date). The student doesn’t have access to lessons that other students are discussing in the Facebook group. John Doe wants to change the course’s start date only for this particular student.
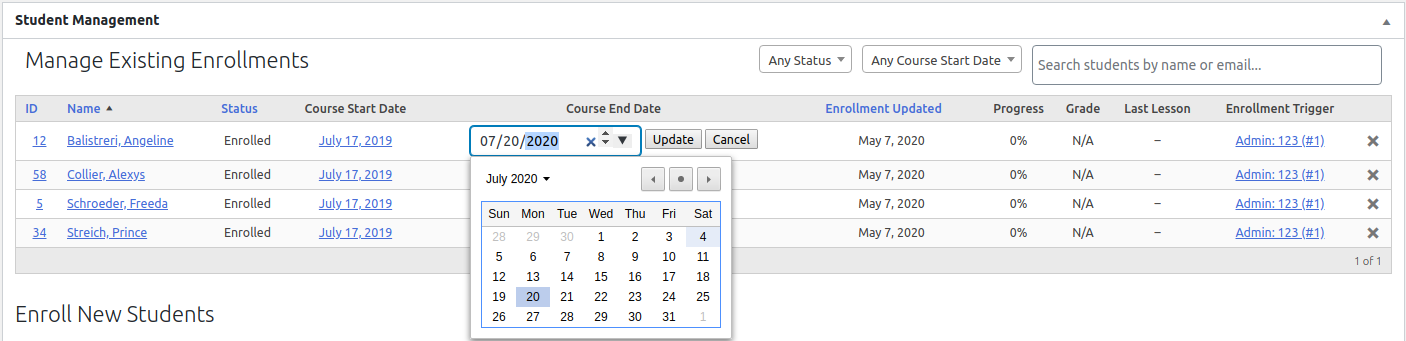
To manually change the dates, select the default date. This will open a date selector where you can enter the month, day, and year. You can adjust the date in several ways. Enter the date by hand, highlight the portion of the date you want to change and use the up and down arrows, or select the down arrow on the right side of the date selector to open the date picker. Update the course when you’re done. Once you’ve assigned start and end dates to the students, you can filter them by date.
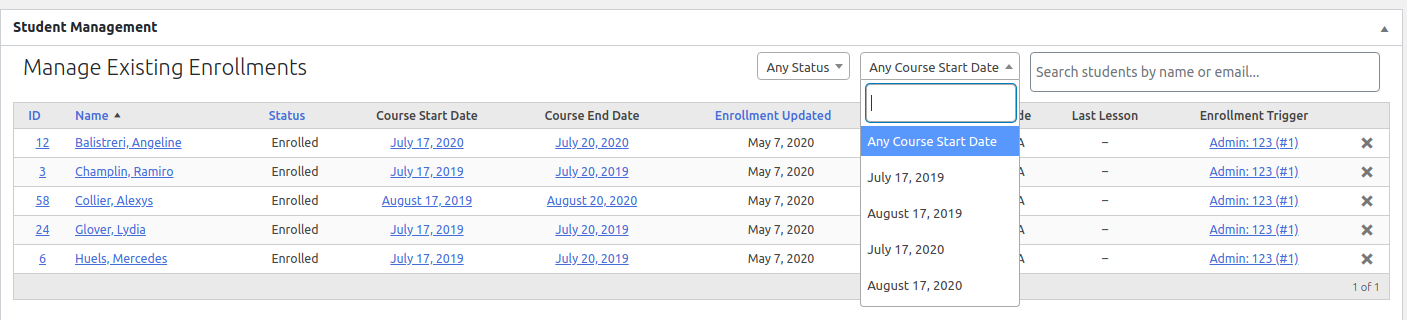
Example: John Doe is offering free webinars for students that started course April 1, 2020. He wants to filter all students by the start date.
How to do that:

Use the filter titled Any Course Start Date to enter a date or select a date from the dropdown box. This example shows the dates that you can select in the filter. They match the new start and end dates that were assigned to the students.

The results show the students with the exact date that you entered or selected from the list.
Automate Start Dates
You can also automate the start and end dates, and set up an automatic pre-enrollment date.
Example: John Doe is starting courses on the 5th of every month, but students should be able to sign up for the course on the 1st day of the month.
How to set up course scheduler
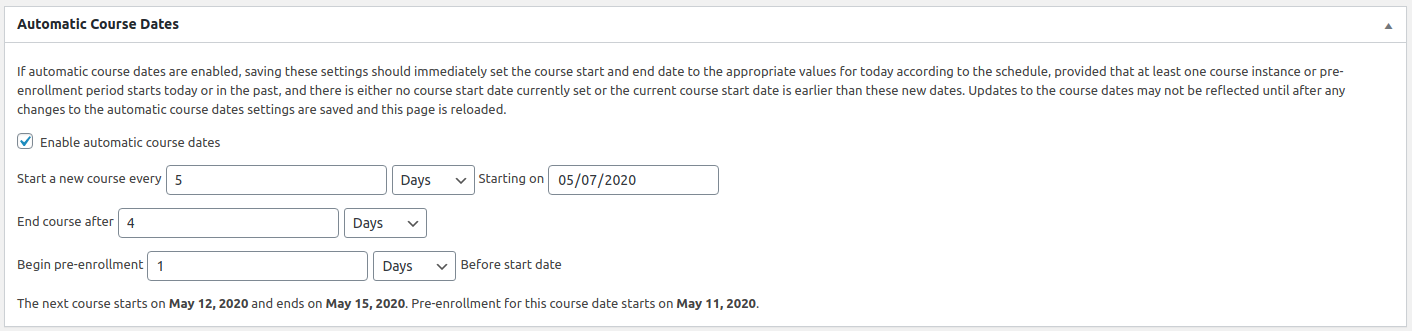
This is helpful if you have a course that starts on a specific interval, such as weekly or monthly. You set the interval, the starting date, how long until the course ends, and when to start the pre-enrollment. Set the schedule by enabling automatic course dates, enter the frequency, choose from days, weeks, months, and years, and then select the date the first course will start. Choose when the course will end by entering a number and selecting days, weeks, months, or years. Select the pre-enrollment period the same way. This changes the new dates for this amount of time before the course starts. In the above example, a new course will begin every 5 days starting on 05/07/2020. It will end after 4 days. Pre-enrollment will begin 1 day before the start date.
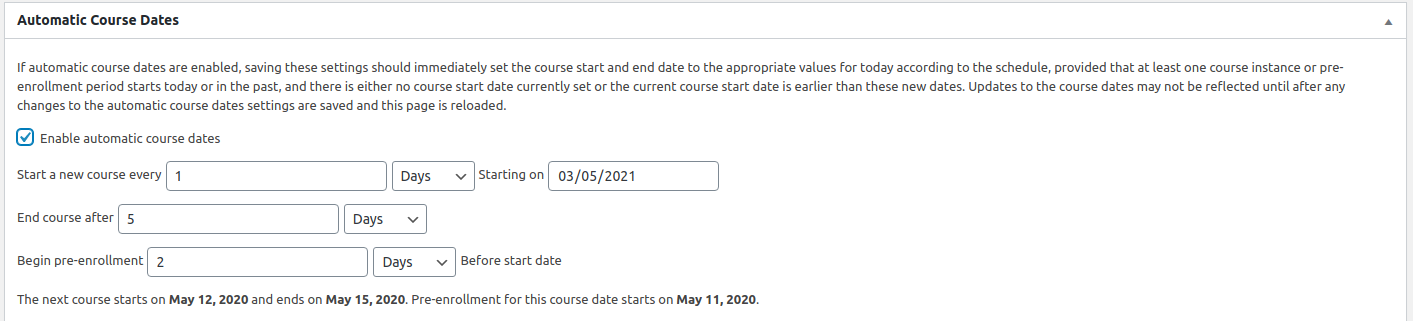
In this example, the course will start every month beginning 03/05/2021. It will end after 5 days. Pre-enrollment will begin 2 weeks before the start date.
Updates and Support
Course Scheduler includes automatic updates and one year of support.
If you do run into problems with Course Scheduler, our team of dedicated support staff is ready to help. Here are some steps you can take to speed up the troubleshooting procedure: before contacting support.
If you don’t find what you need there, contact us for help.
Changelog
See the changelog for this plugin by following this link https://wpzone.co/product/course-scheduler/changelog/