WP Zone Helper
This guide explains how to use the WP Zone Helper plugin to manage license keys, install child themes and plugins, connect an account, and get support from inside the WordPress dashboard.
Use the Index above to quickly locate usage guidance on specific features.
One-time login for all your license keys, direct access to all your WP Zone products right from the Dashboard, and direct access to support. Just log in to link your accounts and get a safer simpler way to manage your WP Zone products.
If you haven’t installed WP Zone Helper, visit the WP Zone Helper page to Download and explore the plugin’s features. WP Zone Helper is available for free to our customers. Connect a membership to automatically activate license keys, submit support tickets, and manage your installed products.
Initial Setup
To get started using WP Zone Helper plugin, install and activate the plugin on your WordPress website. If you are new to WordPress, here is a helpful guide on how to install WordPress plugins.
Overview & Activation
The WP Zone Helper plugin integrates with the WordPress dashboard. After installing and activating the plugin, a new WP Zone Helper item is added to the WordPress menu.
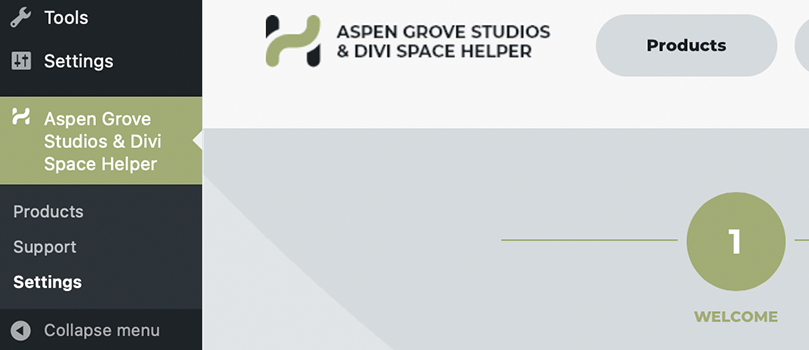
The first time you visit the settings page a simple three-step welcome wizard will guide you through connecting your Account and securely activating your API key.
From the welcome screen, click continue to add your account or click the skip button if you do not have a membership to connect.
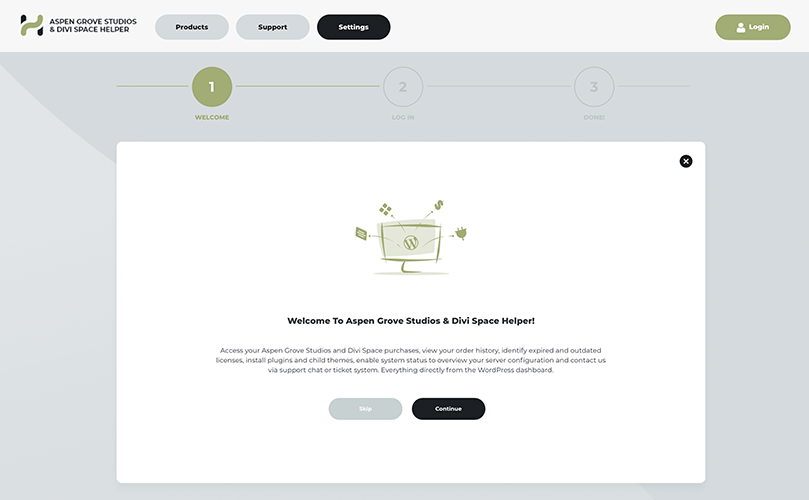
If you dismiss the setup wizard you can add and manage your accounts from the Settings screen. Learn more about adding a new account and managing existing accounts in the Settings Tab Overview section.
Purchase a WP Zone membership at wpzone.co for access to our suite of Divi modules, Divi extensions, WordPress and WooCommerce plugins, layouts, child themes, and discounted page builder hosting.
Products Tab Overview
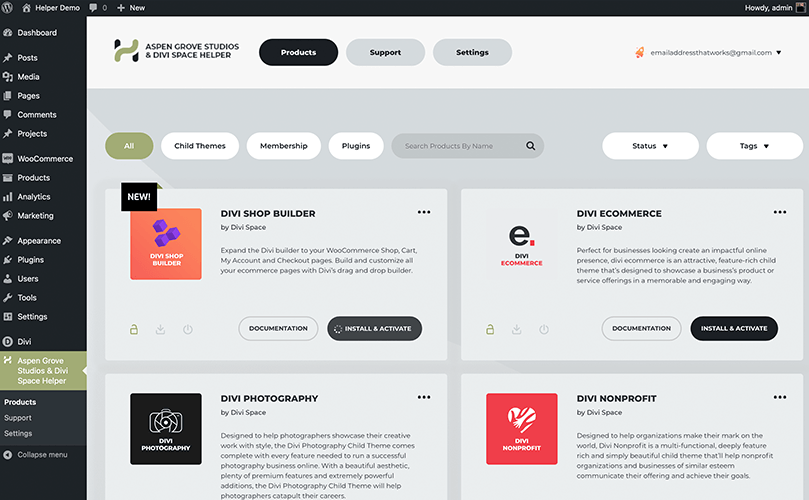
The Products tab allows you to find, install, activate, manage updates, and purchase WP Zone plugins and styling tools without leaving the backend of your site. Sort by product type and tag to find tools quickly.
Search
The WP Zone Helper plugin uses smart sorting to make recommendations based on your website’s setup. Typing a product name into the search bar will quickly locate a product in the library. Use the product type tags to sort based on your needs.
Product Type Categories Include:
- All - a list of every available product
- Child Themes - professionally designed site layouts with Demo content for quickly setting up Divi
- Memberships - get a membership with unlimited access to all the products on WP Zone
- Plugins - WordPress, WooCommerce, bbPress, Divi, and LifterLMS extensions
Click the Status dropdown button to sort products by:
- Available to purchase - premium products you can purchase
- Available to install - products you have purchased or are included in your membership
- Installed - plugins, themes, layouts, and other features you have already installed
- Activated - all WP Zone products installed and active on your website
- Free - available free products by WP Zone
Use the Tags dropdown to search products by how they are tagged.
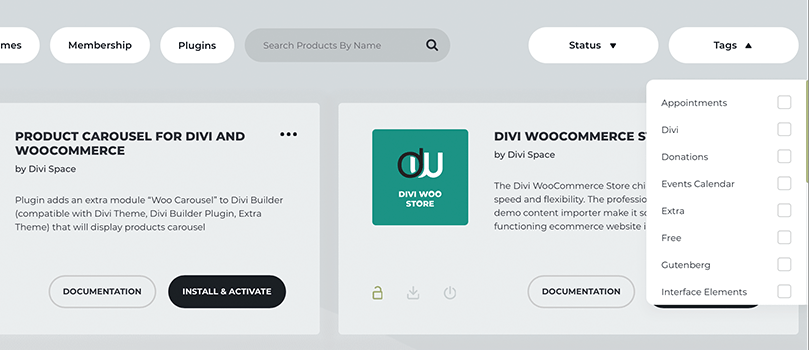
Refine your search by selecting multiple sorting options from the Category, Status, and Tags options.
Product Listing
In each product listing you will find helpful tools and hotlinks for installing, managing updates, getting support, and configuring. In this section, we will cover the available options for each product.
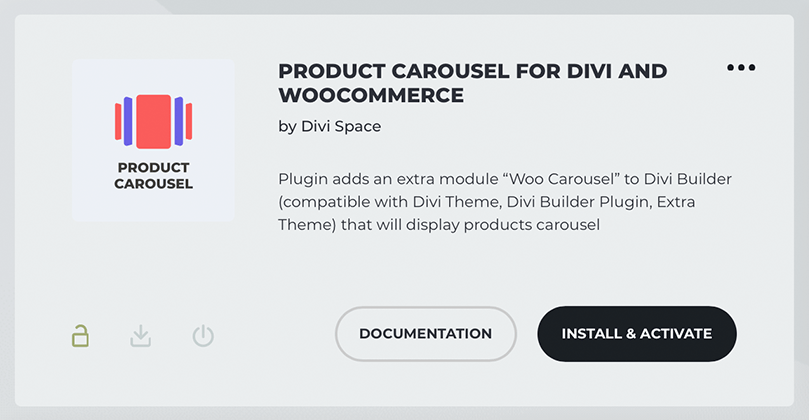
The three-dot icon menu drop-down, also known as the kebab menu, provides you with ‘more options’ or a ‘menu’ of other things that you can do for managing the selected product. These options will change based on the status of the plugin.
If the product is not installed, the only option will be support.
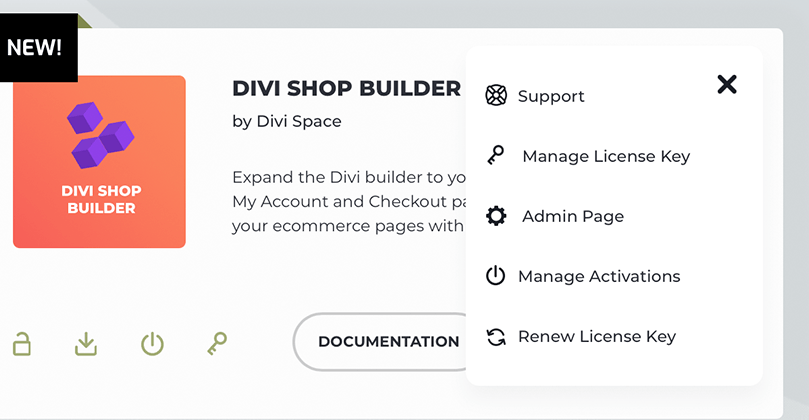
If the product is installed and active on your site, clicking the three-dot icon will reveal:
- Support - clicking support will open the support tab so you can get help with the product.
- Manage License Key - this option will let you deactivate, change remove, or set a new license key.
- Admin Page - this option jumps you straight to the plugins configuration settings page
- Manage Activations - this takes you to the accounts page on the WP Zone website where you can manage the websites using your license key. Deactivate a site or authorize a new website.
- Renew License Key - this takes you to the checkout screen where you can renew your license if it needs to be purchased.
Install & Activate
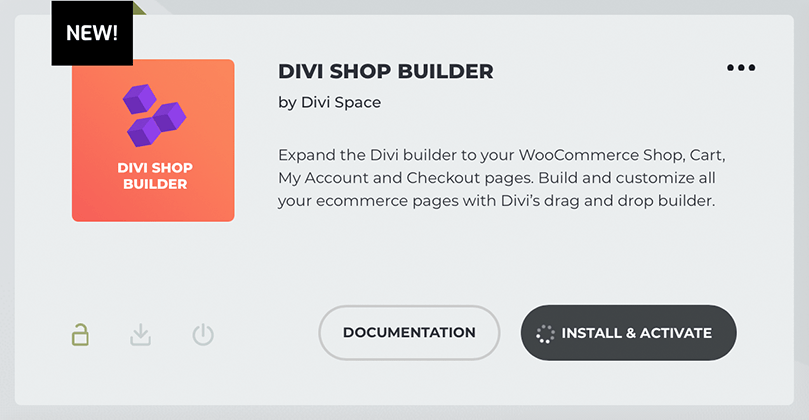
If a product is included in your membership or you have purchased the product, the Install & Activate button will show. Click Install & Activate to add the product to your website. The product will be downloaded and activated automatically.
Purchase
If you have not purchased a product or it is not included in your membership, use the Purchase button to get access.
Documentation
Each product has a documentation hotlink. Clicking the Documentation button on a specific product will open the corresponding documentation in a new tab. Our docs include an in-depth overview, configuration instructions, and settings so you can get things set correctly.
Status Icons
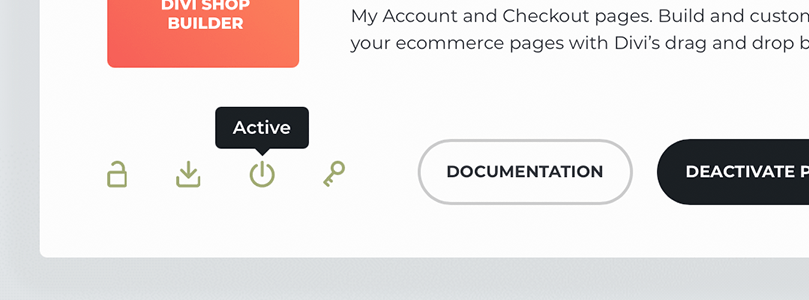
Below the product name and description are status icons to give you a visual reference for if the plugin is purchased, installed, activated, and connected.
- Lock icon - this icon is highlighted if it is purchased or included in your membership
- Download icon - highlighted when the plugin is installed
- Power on/off icon - notes if the plugin is active
- Key icon - lets you know if the license key is active and valid
Support Tab Overview
The Support tab in the WP Zone Helper plugin adds direct links to documentation, gives you the ability to contact support, grant secure temporary access to your site, and see and share system information from inside the WordPress dashboard. In this section, we will cover each module and the available support resources.
Note: Before opening a support ticket please read the Before Contacting Support document and follow the terms of service for your product and license. Following these guidelines help us provide fast quality service.
Find Your Answers Here Module
The Find Your Answers Here Module allows you to search the knowledge base and support documentation and links you directly to helpful configuration and troubleshooting instructions.
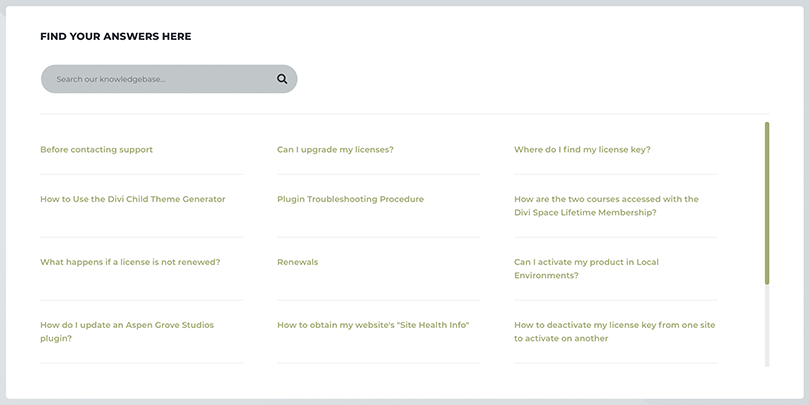
Clicking on a support document will open the guide in a new tab.
If you're not sure what you need, start typing in the search bar and the helper plugin will make smart recommendations for the appropriate documentation.
Product Documentation
The product documentation module provides links to the plugins you have installed. Click the eye icon to open the docs in a new tab.
Open A Ticket
Use the form to open a support ticket, share system information, and grant a support specialist access to the backend of your site.
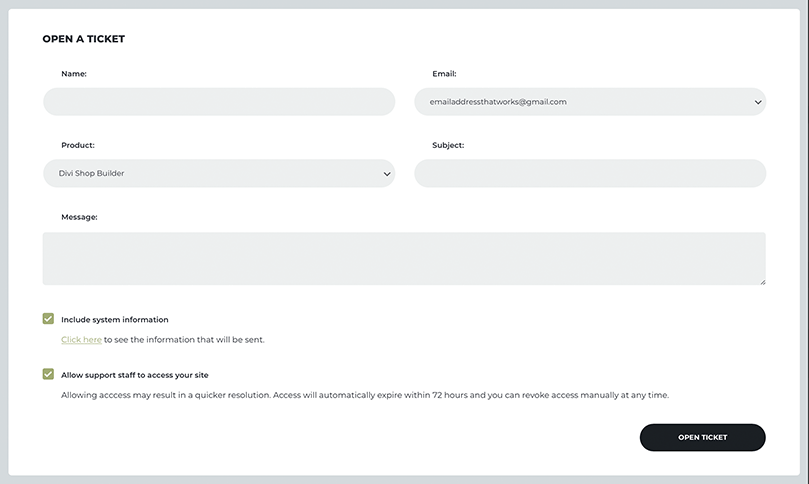
Support Form
Enter your name, email address, product you need help with, subject, and message.
Note: the product dropdown includes the plugins you have installed and activated. Select "other" if you have a pre-sale question or question about a service not included.
Include System Information
Use the included system information checkbox to send important system information about your site to our support team. Use the "Click here" link to view the system information report.
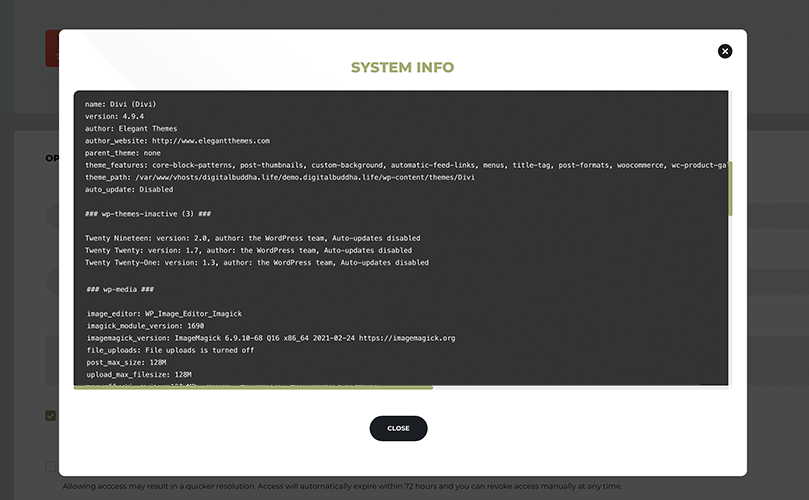
The system information report includes:
- Installed themes
- Installed plugins
- WordPress version and configuration
- Media usage
- Maximum upload file size
- Server information
- Database info
Allow support staff to access your site
Allowing access may result in a quicker resolution. Access will automatically expire within 72 hours and you can revoke access manually at any time.
When you enable support access, the plugin creates a separate user account for our support staff and sends us a randomly generated token that can be used to access your site under that user account. Authentication with the token is controlled by the plugin on your site, allowing it to expire or be revoked at any time, immediately preventing new logins from our support team until you decide to re-enable support access, at which time a new token will be issued. The plugin will never send us your WordPress account password (or the account password of the support user account).
Support Access Module
If you did not grant support access when submitting your ticket and need to give a member of our team secure access, you can give temporary access from here.
To give access to support, enter the email address associated with your account and click the Enable Support Access button.

This feature will never send us your WordPress account information giving you full control over when our support team has access to the site.

Settings Tab Overview
The settings tab is where you manage your keys and log in to your WP Zone account.
Connect your accounts to make managing license keys, installation, updates, and support easier.
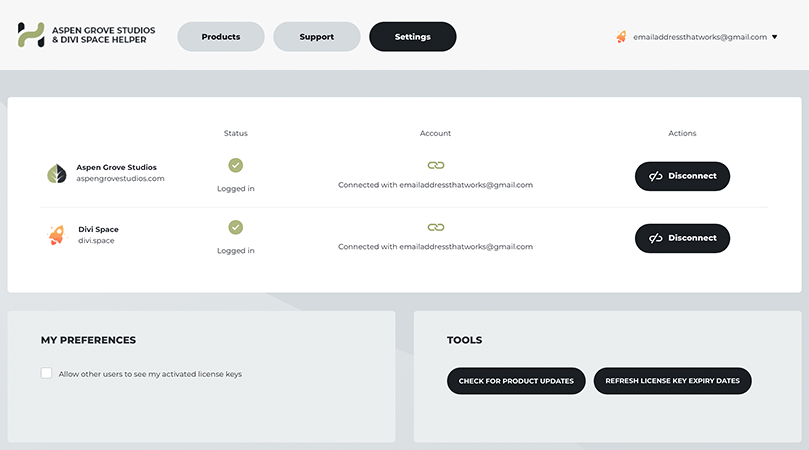
If you are not logged in, click the connect button to open the connect wizard. Use your account login credentials to connect.
For All-Access Lifetime members, both accounts should connect automatically and gives you access to both product libraries.
My Preferences Module
Toggle who can see keys and account information. By default, only the account holder can see keys. Check the box to allow other users to see activated license keys.
Tools Module
The tools module gives you the option to force an update check and refresh the plugin expiry dates.
Check For Product Updates
Clicking the "Check for Product Updates" button in the tools module will trigger your site to check for updates. Clicking this option will take you to the updates page on your dashboard and force the check so you can update to the latest available versions.
Refresh License Key Expiry Date
If you need it, clicking the "Refresh license key expiry date" button refreshes the keys connected to your account. This process generally works automatically on a scheduled basis.
Using this feature will force a check and reconnect after renewing your license. This is especially helpful if your account expired and you are trying to reconnect.
Uninstalling the WP Zone Helper.
To uninstall WP Zone Helper, it is crucial to follow these steps.
- Deactivate the WP Zone Helper plugin in the plugins list.
- Delete the WP Zone Helper plugin in the plugins list.
Once the plugin is uninstalled, all WP Zone Helper options and settings are deleted.
Frequently Asked Questions
Compatibility
-
Self-Hosted WordPress Installation
-
WordPress Single Site
-
WordPress Multisite
Requirements
WP Zone Helper is built to work on any well-maintained WordPress site and is compatible with plugins and themes that follow WordPress development guidelines.
Base requirements for WP Zone Helper:
- Self-Hosted WordPress Installation
- PHP version 7 or greater
- memory_limit 128M
- post_max_size 64M
- max_execution_time 180
- upload_max_filesize 64M
- max_input_time 180
- max_input_vars 5000
- MySQL version 5.6 or greater OR MariaDB version 10.0 or greater.
- HTTPS support
- Nginx or Apache with mod_rewrite module
Additional Information and Support
For general WordPress information – wordpress.org.
WP Zone Helper includes automatic updates and is product free of charge. If you do run into problems with plugin, our team of dedicated support staff is ready to help. Here are some steps you can take to speed up the troubleshooting procedure: before contacting support. If you don’t find what you need there, Contact Us for help.