Image Upload For bbPress
Requirements
- Self-Hosted WordPress Installation
- BBPress Plugin Thank you for purchasing the Image Upload for BBPress Pro plugin.
This brief manual will guide you through installing and using the plugin. The Image Upload for BBPress Pro plugin allows bbPress forum users to add inline images into their forum posts from their desktop and mobile devices via a responsive drag-and-drop image uploader. Features include image resizing, thumbnail creation, and a built-in lightbox. Optionally, use Amazon S3™ to store and serve uploaded images in submitted forum posts (requires add-on plugin purchase). ** Visit the Upload for BBPress Pro Page Here **
Installation
- Login to your WordPress Admin and select " Plugins" > "Add New" in the left sidebar menu.
- Click " Upload Plugin" at the top of the page.
- Select the plugin ZIP file and click "Install Now".
- Click " Activate Plugin".
- Select " Settings" > "Forum Images" from the left sidebar menu.
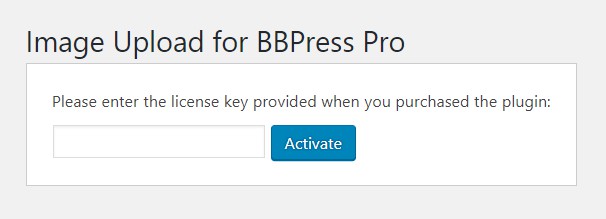
- Enter your license key, which was displayed after checkout and sent to you by email.
- Click "Activate".
The plugin is now installed and ready for use. Please note that you must also have the BBPress plugin installed and activated for this plugin to function correctly.
Configuration
- In your WordPress Admin, select " Settings" > "Forum Images" from the left sidebar menu.
- The following options can be set. Most options take effect for future uploads only.
Image Storage
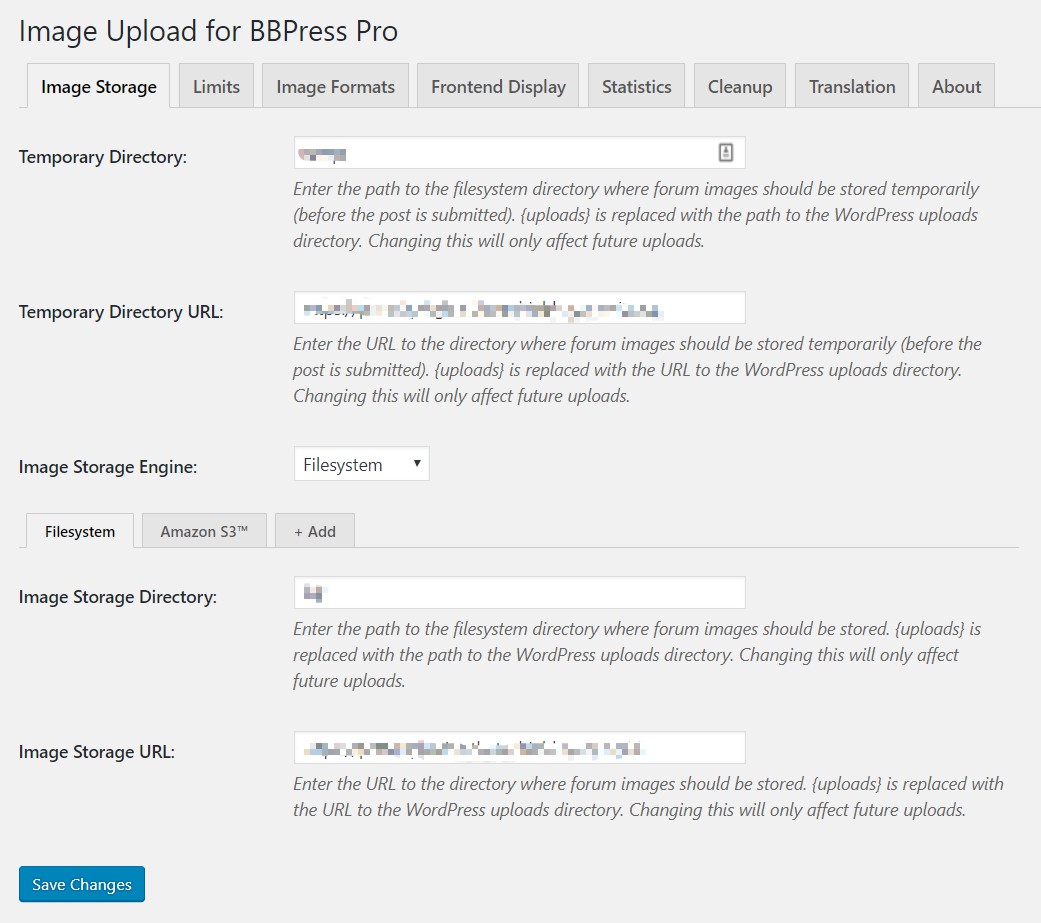
- ** Temporary Directory:** The absolute path to the filesystem directory where uploaded images should be stored before a user submits their post and the images are moved to the selected storage method. This directory must be web-accessible. Do not include a trailing slash. The string
{uploads}will automatically be replaced with the path to the WordPress uploads directory (without a trailing slash). - Temporary Directory URL: The URL to the directory specified in the previous option. Do not include a trailing slash. The string
{uploads}will automatically be replaced with the URL to the WordPress uploads directory (without a trailing slash). - Image Storage Engine: Select the storage engine to be used for storing images. Options that are disabled (greyed out) are missing critical configuration settings. Each of the installed storage engines can be configured using the tabs below.
- Filesystem: This is the default (included) image storage engine. It simply stores uploaded images in a publicly accessible directory on your web server.
- Image Storage Directory: The absolute path to the filesystem directory where image uploads should be stored. Do not include a trailing slash. The plugin will automatically create subdirectories in the specified directory for individual posts and temporary files. The string
{uploads}will automatically be replaced with the path to the WordPress uploads directory (without trailing slash). - Image Storage URL: The URL to the directory specified in the previous option. Do not include a trailing slash. The string
{uploads}will automatically be replaced with the URL to the WordPress uploads directory (without trailing slash).
- Image Storage Directory: The absolute path to the filesystem directory where image uploads should be stored. Do not include a trailing slash. The plugin will automatically create subdirectories in the specified directory for individual posts and temporary files. The string
Click here to visit our website to learn about other storage option(s) that we offer as add-on plugins.
Limits
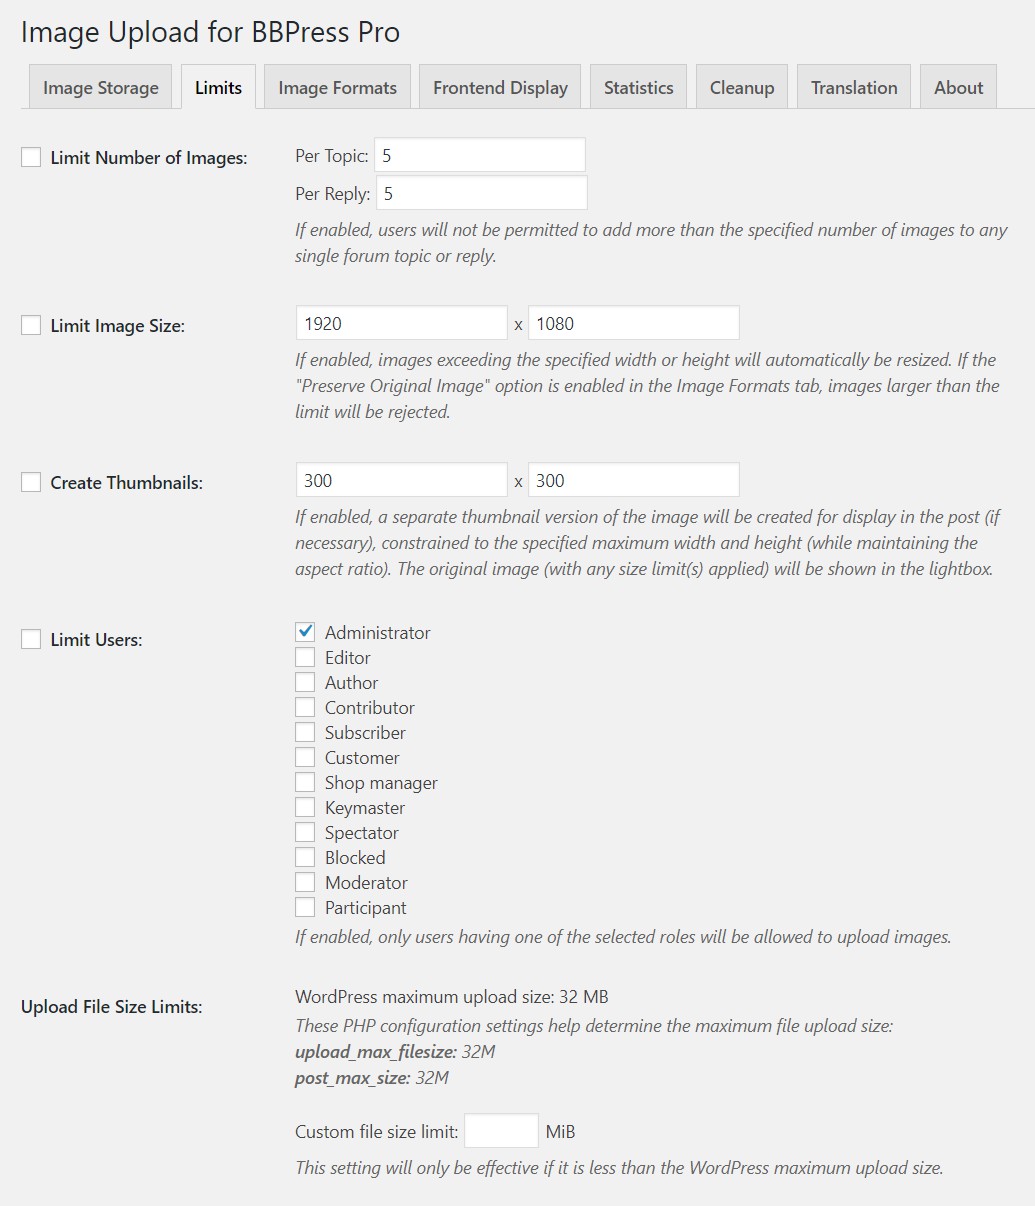
- Limit Number of Images: Enable/disable and set the maximum number of images that may be uploaded to any single forum topic or reply. This does not affect the number of images that can be embedded from external URLs.
- Limit Image Size: Enable/disable and set the maximum width and height of uploaded images. If either dimension is above the maximum, the image will automatically be resized (proportionally) to fit the specified limits.
- Create Thumbnails: Enable/disable thumbnail generation and set the maximum width and height of the thumbnails. If the original image is smaller than the maximum width and height, no separate thumbnail version will be created. This option is intended to be used with the built-in lightbox; the thumbnails are inserted into the forum post and the lightbox shows the corresponding regular-size image when a thumbnail is clicked.
- Limit Users: Enable/disable and select which user roles are allowed to upload images. If this limit is disabled, all users who are allowed to post topics and replies may also upload images.
- Upload File Size Limits: This section displays the WordPress upload file size limit and allows you to set an additional limit for files uploaded via the plugin. The custom limit will only take effect if it is less than the WordPress limit. The upload_max_filesize and post_max_size PHP configuration values are also displayed for informational purposes.
Image Formats
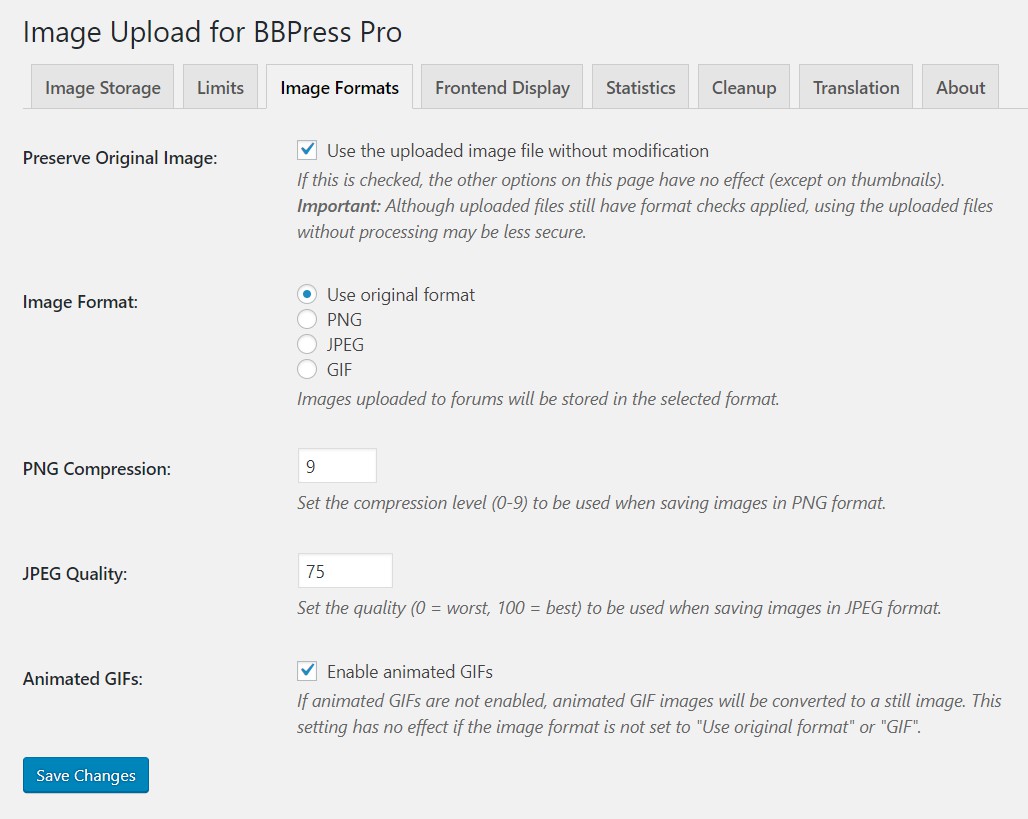
- Image Format: Select a format into which to convert all uploaded images, or choose "Use original format" to store images in the same format in which they were uploaded. All images are still loaded and re-saved for security reasons (and to resize, if applicable), and the PNG Compression and JPEG Quality settings are always applied to PNG and JPEG images.
- ** PNG Compression:** Set the PNG compression parameter to a value between 0 (no compression) and 9 (maximum compression).
- JPEG Quality: Set the JPEG quality parameter to a value between 0 (worst quality, smallest file size) and 100 (best quality, largest file size).
- Animated GIFs: Enable or disable support for GIF animation. If this option is disabled, animated GIF images will be converted to a still image. This setting does not affect if the image format is not set to "Use original format" or "GIF"; image files saved in JPEG or PNG format will render as still images.
Frontend Display
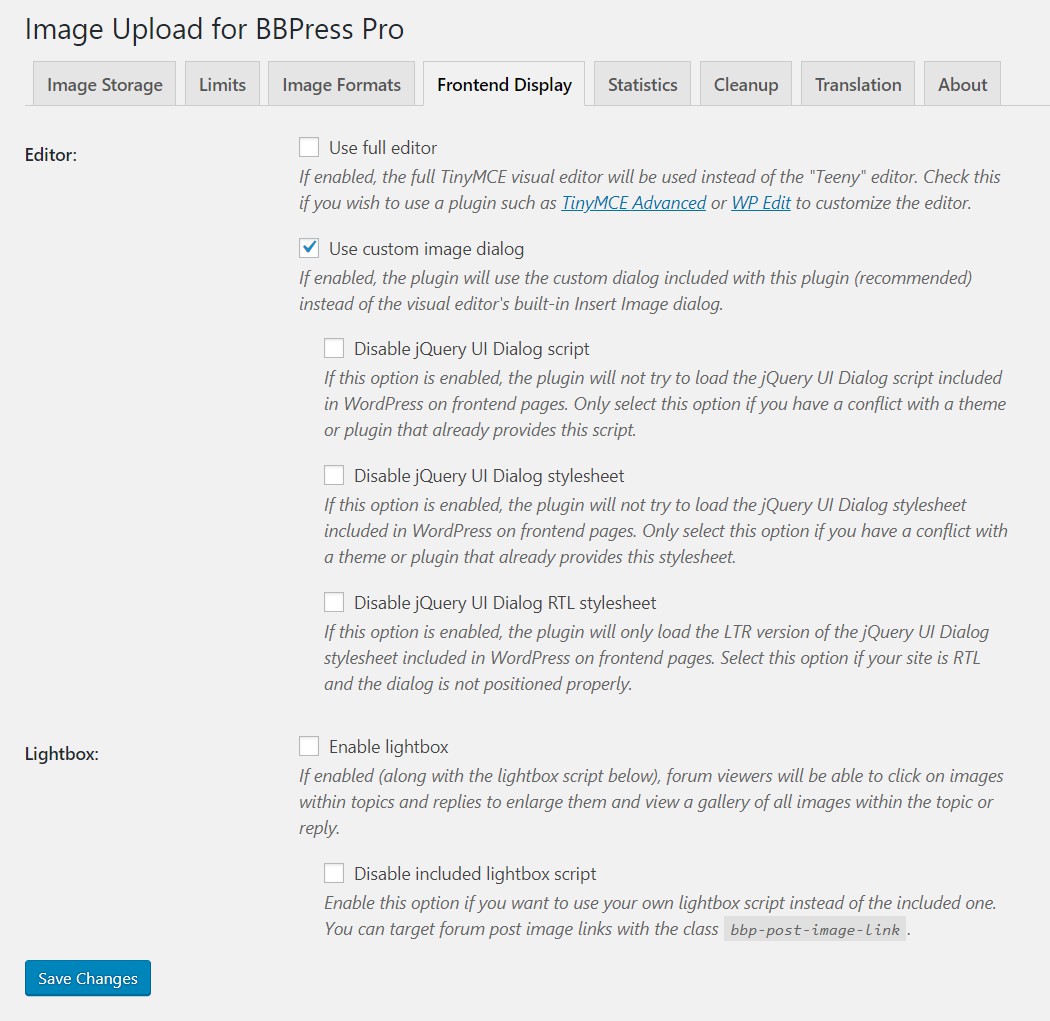
- Use full editor: If enabled, the full TinyMCE visual editor will be used instead of the "Teeny" editor. Check this if you wish to use a plugin such as TinyMCE Advanced or WP Edit to customize the editor.
- Use custom image dialog: If enabled, the plugin will use the custom dialog included with this plugin (recommended) instead of the visual editor's built-in Insert Image dialog. The included custom dialog is responsive, allows multiple images to be added at once, and supports drag-and-drop uploads.
- Disable jQuery UI Dialog script: If this option is enabled, the plugin will not try to load the jQuery UI Dialog script and stylesheet included in WordPress on frontend pages. Only select this option if you have a conflict with a theme or plugin that already provides this script. The script must be included by another source or the plugin will not work.
- Enable lightbox: If enabled, forum viewers will be able to click on images within forum posts to enlarge them and view a gallery of all images within the forum post.
- Disable included lightbox script: Enable this option if you want to use your lightbox script instead of the included one. You can target forum post image links with the class BBP-post-image-link.
Translation
** Custom Text:* Enter text to be displayed on the frontend instead of the corresponding text in the Default Text column.
Uploading Images
- To upload an image to a forum topic or reply, click the Insert/edit image button in the editor toolbar:

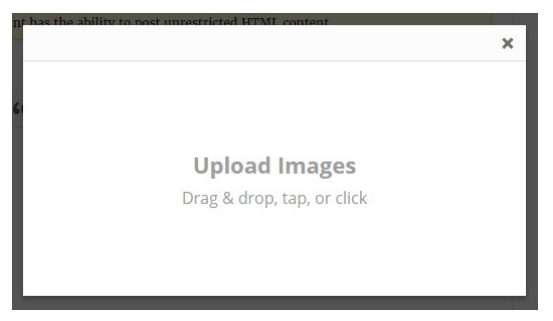
- If the
Use custom image dialogoption (in the Frontend Display tab) is enabled, either drag and drop your image file(s) onto the dialog or click/tap on it to select one or more image file(s) on your computer or mobile device:
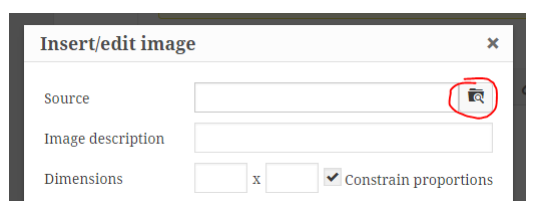
If the Use custom image dialog option (in the Frontend Display tab) is disabled, click the Browse button in the image dialog to select and upload an image:
Viewing Statistics
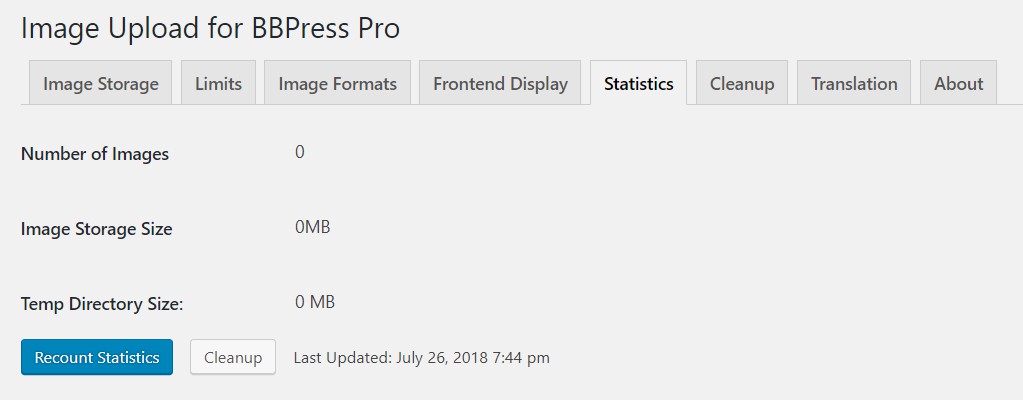
- In your WordPress Admin, select
Settings>Forum Imagesfrom the left sidebar menu. - Click the " Statistics" tab.
- The statistics that are displayed vary based on your selected image storage engine. The following statistics are displayed when the default Filesystem storage engine is enabled:
- Number of Images: The total number of images in the current storage directory (excluding the temporary directory).
- Image Storage Size: The combined file size of images in the current storage directory (excluding the temporary directory).
- Temp Directory Size: The combined file size of files in the temporary directory. Old files are automatically deleted regularly. You can also use the
Cleanup Unnecessary Filesbutton to manually delete old temporary files as well as image files for posts that no longer exist. This statistic is displayed regardless of the storage engine.
- Click the
Recount Statisticsbutton to trigger an update of the statistics manually.
Update Note
If you are updating from version 1.X, the plugin will default to the visual editor's built-in Insert Image dialog rather than the custom dialog included with this plugin. You can enable the included drag-and-drop upload dialog in the Frontend Display tab. Please test after enabling this feature to ensure that it works on your site.
Support
If you require support for this product, please e-mail us at [email protected]. Support is available for one year from the date of purchase.
License Information
Plugin code is licensed under GNU General Public License version 3 or later (available at https://www.gnu.org/licenses/gpl-3.0.html).
Documentation © 2022 WP Zone. All Rights Reserved.