Gravity Forms Styler For Divi
Design Gravity Forms BETTER AND EASIER! Gravity Forms Styler For Divi allows you to insert forms created with the Gravity Form plugin with the Divi Module, instead of hard-to-remember shortcodes. Also, it gives you endless design options right from the Divi visual builder.
Requirements
- Divi Theme by Elegant Themes
- Gravity Forms Plugin
- Self-Hosted WordPress Installation
- PHP version 7 or greater
- memory_limit 128M
- post_max_size 160M
- max_execution_time 180
- upload_max_filesize 160M
- max_input_time 180
- max_input_vars 5000
- MySQL version 5.6 or greater OR MariaDB version 10.0 or greater.
- HTTPS support
- Nginx or Apache with mod_rewrite module
Installation
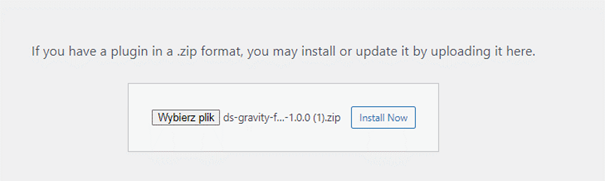
- Navigate to the**"Add New"**in the plugins dashboard
- Navigate to the**"Upload"**area
- Select ds-gravity-forms-for-divi.zipfrom your computer
- Click "Install Now"
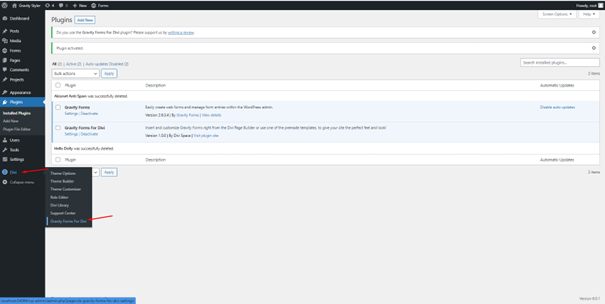
- Activate the plugin in the Plugin dashboard
- Enter License Key

Using Gravity Styler
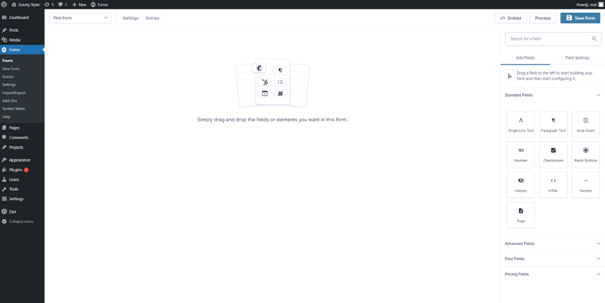
Create your Gravity From
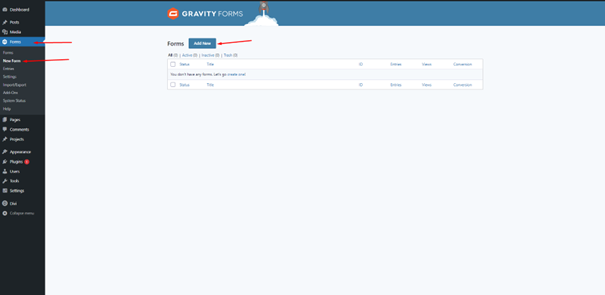
And create your form by drag and drop fields
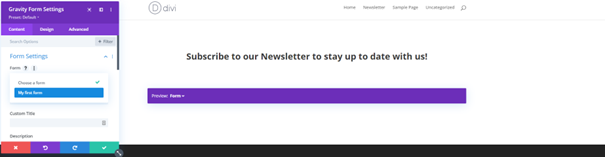
Once you have created a form in Gravity Forms you can go to the page where you want to place it and then in Divi Builder select the Gravity Form module:

Then in the module settings, select your form from the list
Title
This option allows you to choose what title to display and also if it should display on the front end.
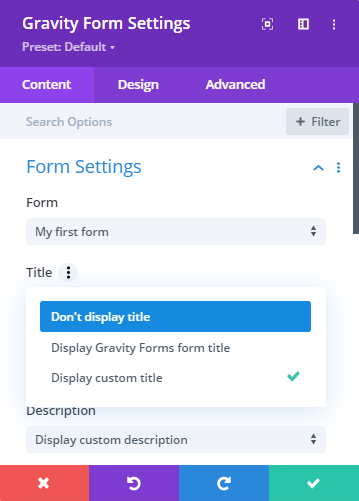
Available options are:
-
'Don't display title' - the title will not be displayed at all
-
'Display Gravity Forms title' - will display form name from the Gravity Forms form settings
-
'Display Custom Title' - allows you to enter your own customized title from the module settings
Description
This option allows you to choose what description to display and if it should be displayed on the front end.
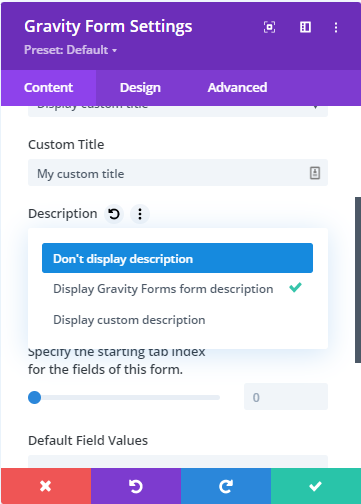
You can choose from the following options:
-
'Don't display description' - the description will not be displayed at all
-
'Display Gravity Forms description' - will display form description set in the Gravity Forms form settings
-
'Display Custom description' - allows you to enter your own custom description from the module settings
Use Ajax When Submitting
Specify whether or not to use AJAX to submit the form. With this option, when submitting the form, the page will not be refreshed if turned off.

Specify the starting tab index for the fields of this form.

Default Field Values
This option allows you to assign default values for given fields. Used for field_values shortcode parameter. The field_values parameter accepts multiple dynamic population parameters separated by an ampersand (&). For example, parameter_name1=value1

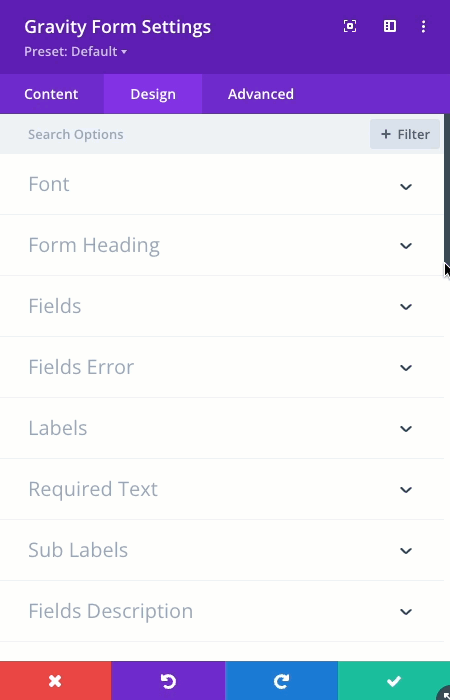
Design Options
You can find multiple design options in the Design Tab at the top of Gravity Form Module Settings
Preview Options
Above the module there is a purple bar that allows you to change the preview from the form view to allow designing different form views.
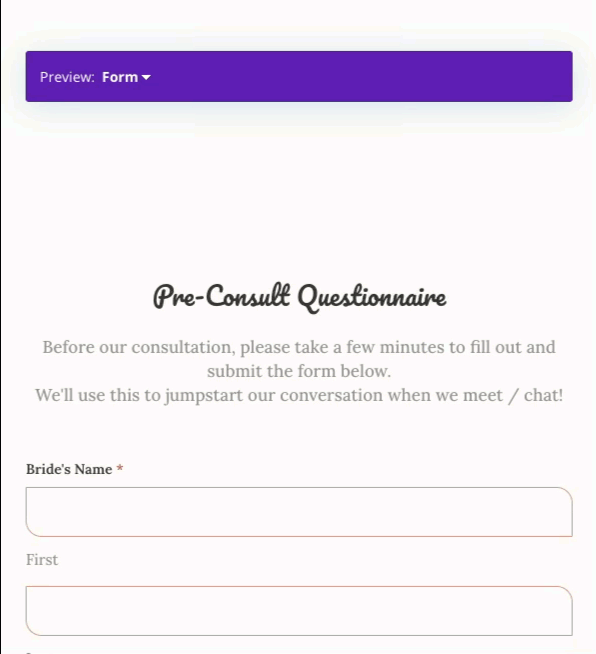
Available options are:
-
'Form' - default form view
-
'Form with validation error' - displays error text above the fields wherever there is a validation error. It informs users what should be changed to process the form correctly.
-
'Confirmation message' - Upon submitting a form in Gravity Forms, the user will be presented with a message or directed to a new page. By default, this is a simple message letting them know that the form has been successfully submitted and thanking them for their submission. You can configure your confirmation page from the Gravity Forms settings.
Layouts
Along with the plugin you get access to eye-catching predesigned module layouts.
Layouts can be downloaded from the product page when you are logged into https://wpzone.co/my-account/
How to Install Layouts:
- Log into your WordPress website Dashboard
- Navigate to Divi > Divi Library
- Click on ‘Import & Export’
- Select ‘Import’ from the ‘Portability’ pop up
- Click ‘Choose File’ and select the JSON file from your computer
- Once the JSON layout is selected, click ‘Import Divi Builder Layouts’ and wait for the import process to complete.