Custom CSS and JavaScript Developer Edition
Introduction
The Custom CSS and JavaScript Developer Edition plugin adds an easy-to-use and intuitive code editor to a WordPress website. This code editor allows the developer to add CSS and JavaScript code to a website without distractions, allowing code to be edited quickly, conveniently and effectively.
Visit the Custom CSS and JavaScript Developer Edition:
Description
With the Custom CSS and JavaScript Developer Edition plugin, users will have a dedicated space to write CSS and JavaScript code. Instead of using the standard Theme Editor console, where code files can get lost and aren’t easily accessible, the Custom CSS and JavaScript Developer Edition plugin adds an exclusive-use editor purely for CSS and JavaScript code.
Users can enjoy the structured, multi-tabbed appearance of the editor, whereby each .css or .js file displays in its own tab. To make writing code quick and effective, the plugin includes colorful syntax highlighting, line numbering and automatic indentation, and also supports SCSS for a more streamlined scripting experience—a feature currently unavailable in native WordPress. Users can export code from the plugin, either individual files or all files at once, into .css files, or alternatively, can import .css files directly into the plugin to save time in development.
Major Features
- Use an intuitive custom code editor to keep all CSS and JavaScript files in the same place
- Access CSS and JavaScript files quickly during development
- Use the tabbed multi-file interface to organize code files into separate entries
- Write clean code quickly, the plugin includes syntax highlighting, line numbering and automatic indentations
- Save your progress periodically, the plugin includes an autosave feature so you can work undistracted and not worry about losing process
- Reinstate a previous version of your code with the history revision feature
- Preview changes while you work, but only publish on the front-end when you’re ready
- Use a live view feature to view code changes in real time (available on certain browsers)
- Use SCSS for quicker and more efficient scripting
- Enable minification of code files to remove unnecessary characters, keep file sizes down and boost site performance
- Export code into .css files for later use, or import existing .css files directly into the plugin
Installation
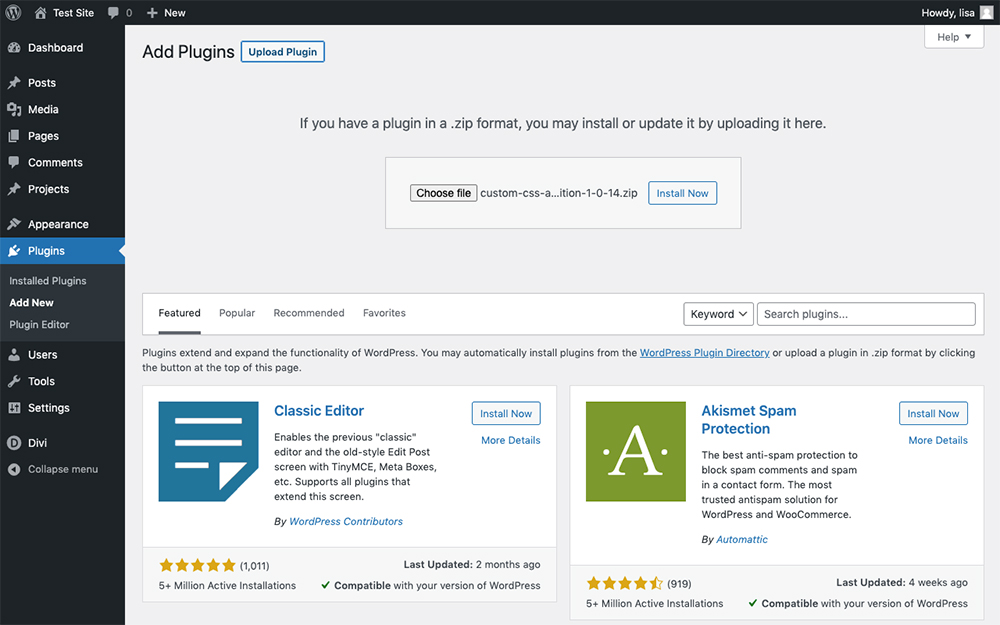
Download the Custom CSS and JavaScript Developer Edition plugin from WP Zone. To install the plugin, navigate to the Plugin menu and click Add New. Upload the plugin .zip file from your computer and click Install Now.
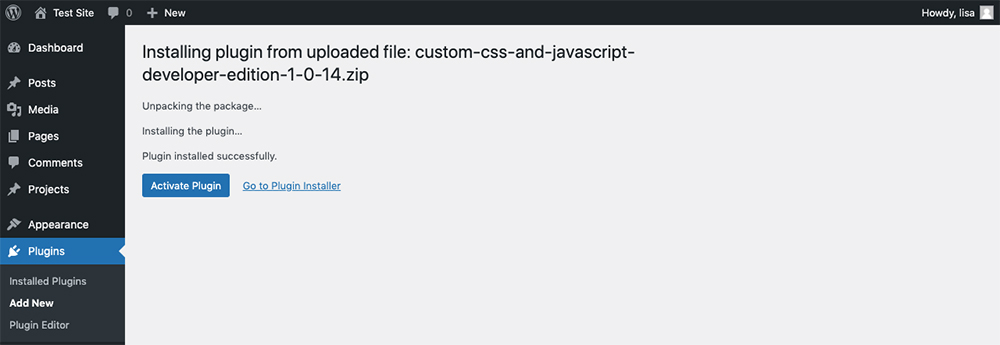
Once the plugin has been installed, click Activate.
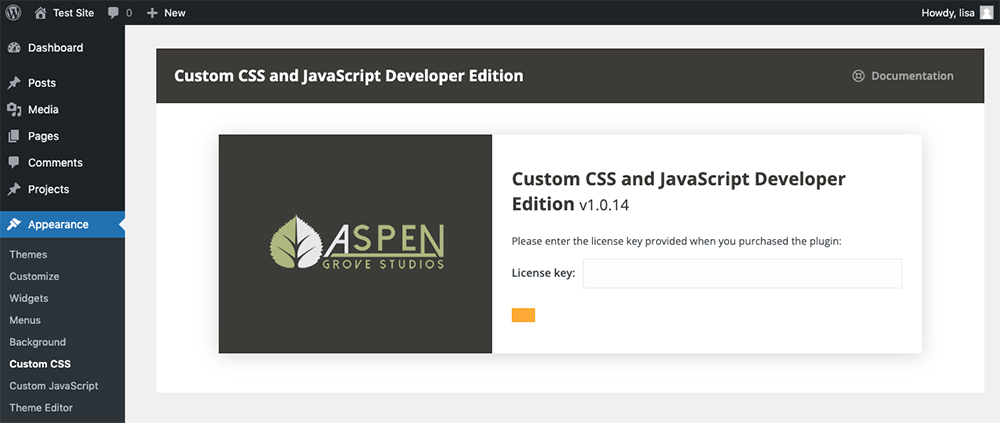
After installing and activating the plugin, Custom CSS and JavaScript Developer Edition creates two new menu items within the Appearance tab: Custom CSS and Custom JavaScript. Before you can begin using the plugin, you need to authenticate it by entering your license key.
Return to the WP Zone website, log into your account and navigate to Licenses, search for the plugin and copy the license key and return to your site to paste in the key.
CSS and JavaScript Developer Edition Setup
Once the plugin is installed and activated, it is ready to use. There are no additional settings or configuration steps to be taken, you can simply begin using the plugin.
Both the Custom CSS and Custom JavaScript look and perform in the same way. Below is a detailed explanation of the plugin using the Custom CSS menu as a demo.
Custom CSS
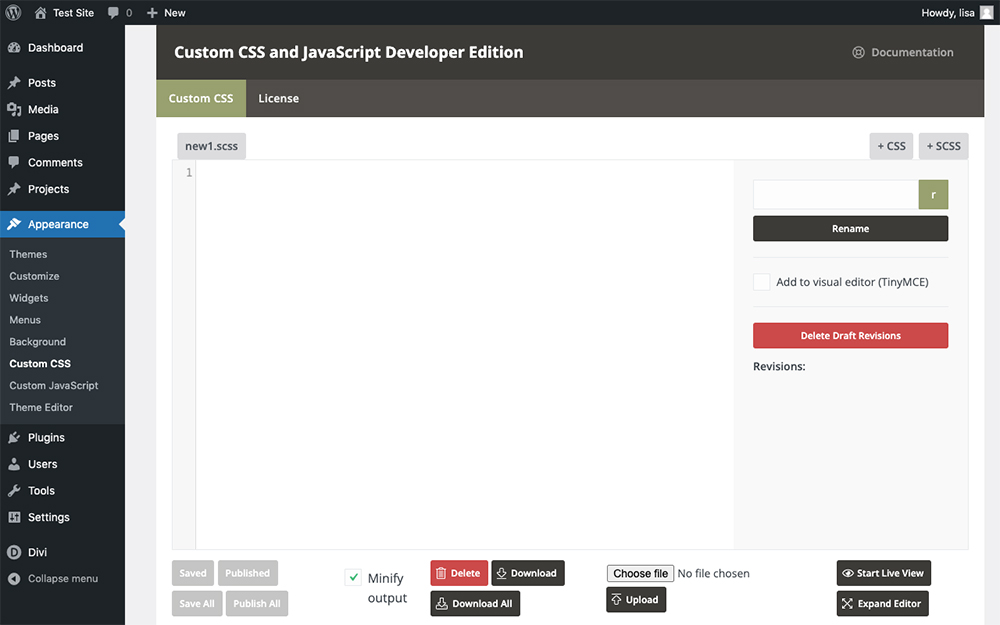
As you open the Custom CSS menu, you’ll see a code editor panel on the left-hand side of the screen with a few options on the right-hand side.
Adding a new .css file
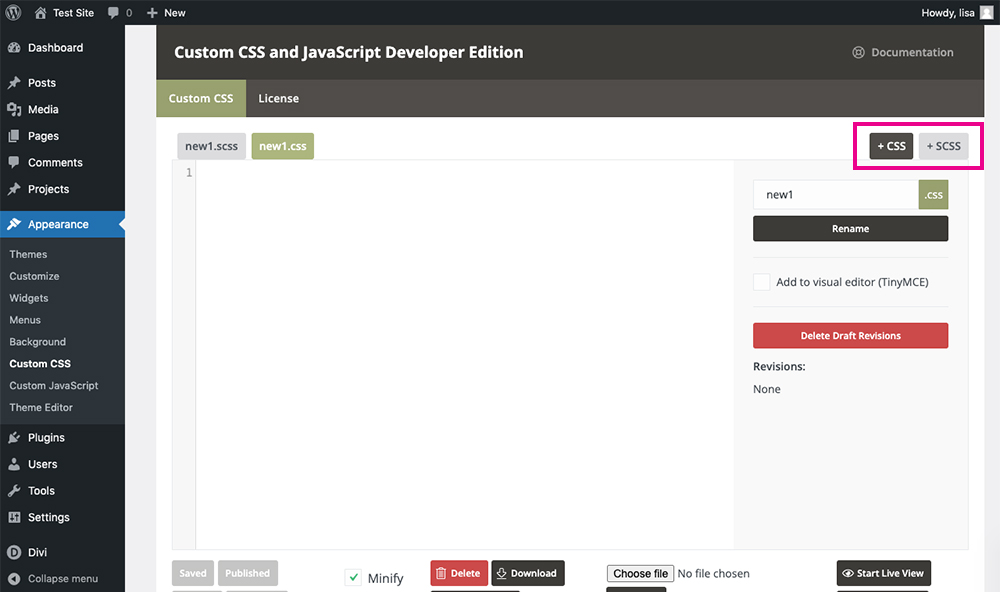
To add a new file, click either the + CSS or + SCSS tab. This will automatically add a new tab for you to work in. You can toggle between the tabs to view and edit your code.
Renaming Files
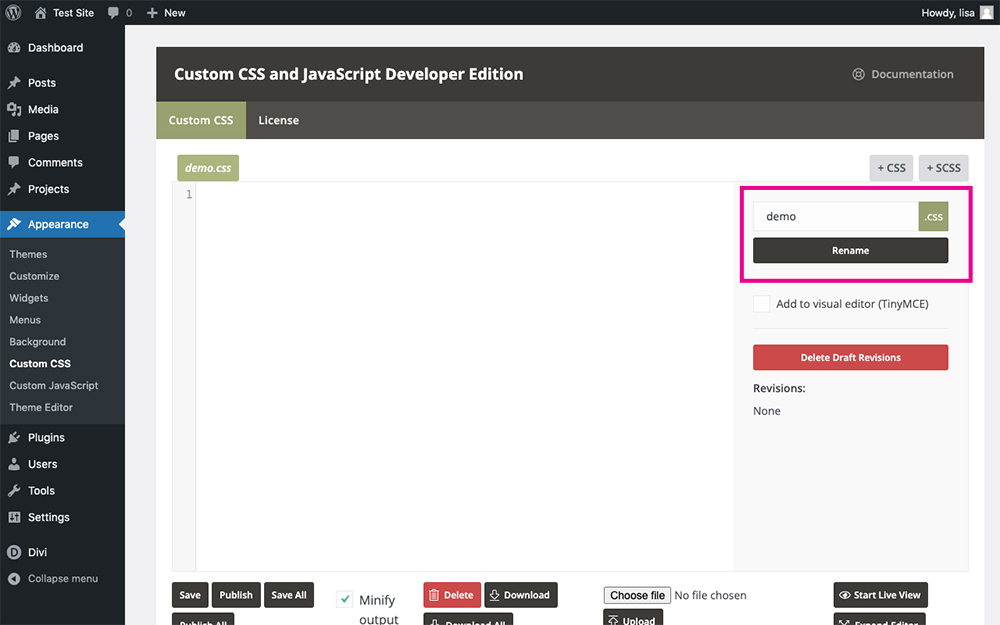
By default, any new file added will be assigned the name "new". To rename the filename, enter custom text in the text area and click Rename.
Visual Editor
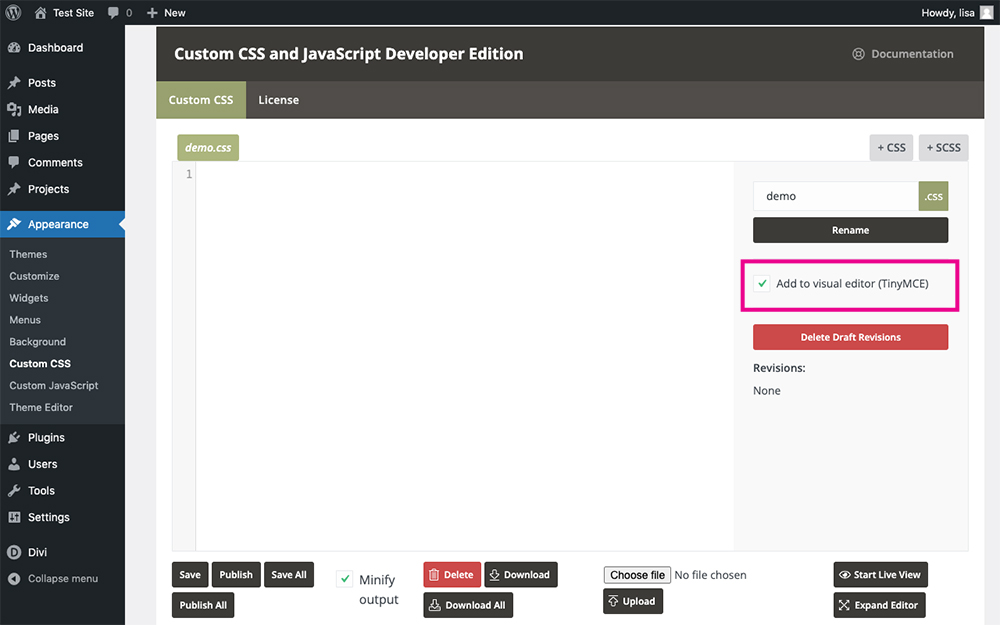
If you’d like to add it to the visual editor (TinyMCE), select this checkbox.
Syntax Highlighting, Line Numbering and Indentation
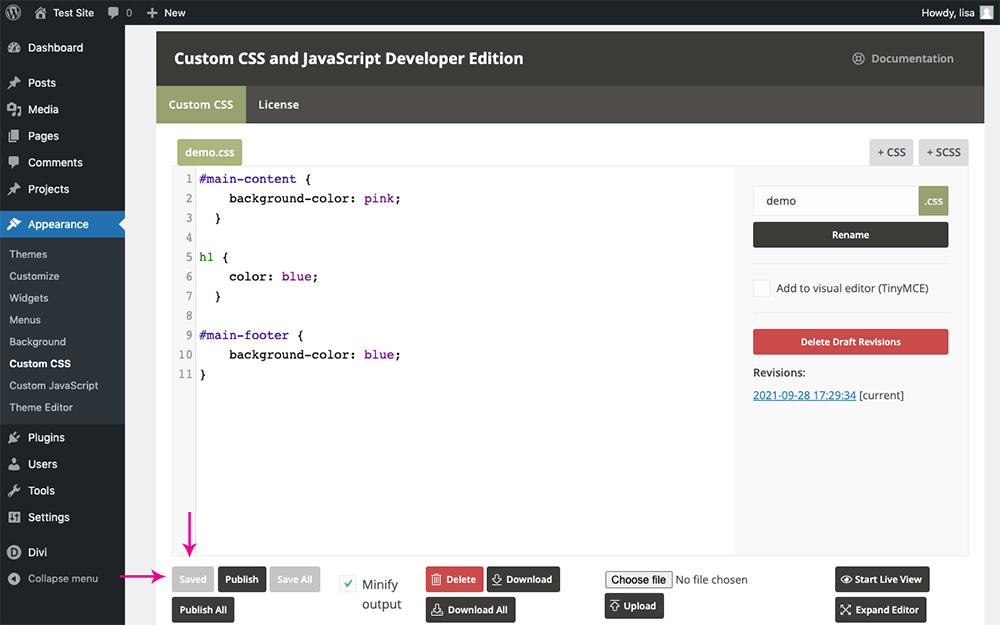
Once you begin adding CSS code, you’ll see that it formats with standard syntax highlighting, line numbering and indentations.
Saving and Publishing Work
To view your work, click Save and your changes will be visible on the front-end of your site. These changes will only be visible to users with Admin level privileges, not general site visitors.
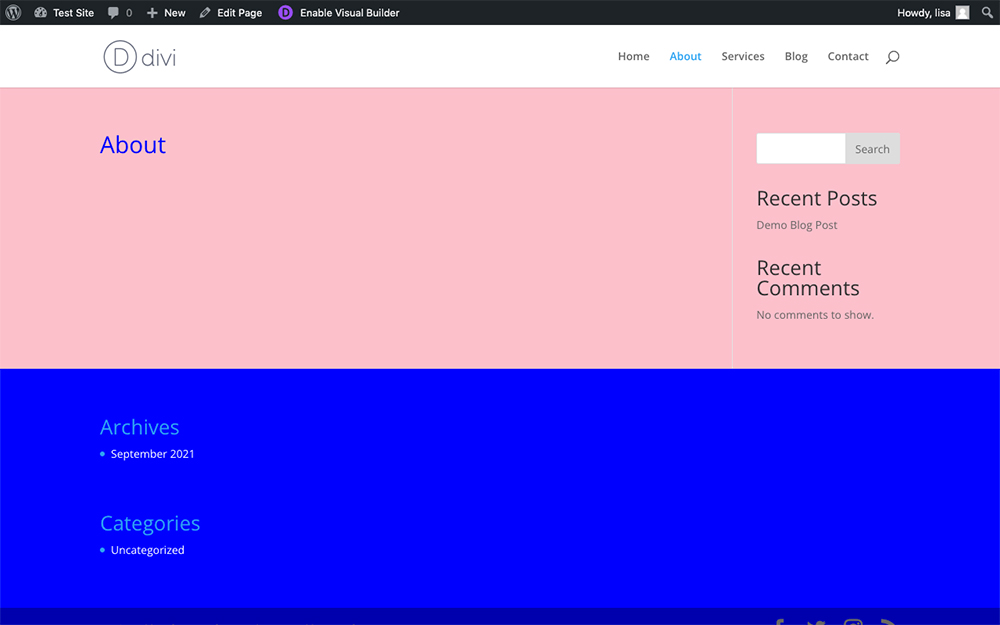
Once you are happy with your CSS, click Publish to deploy the code. Now, users logged out of the site will be able to view the changes.
Enabling Live View
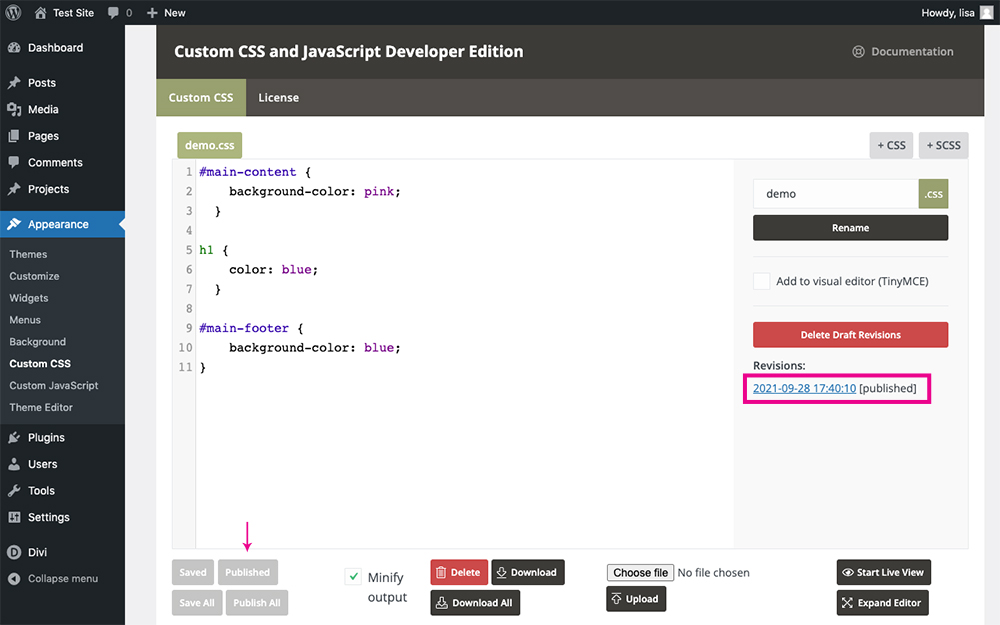
To preview your work while you are busy writing code, you can enable the Live View feature. This will open a new tab and show the CSS changes you're working on in real-time.
Revisions
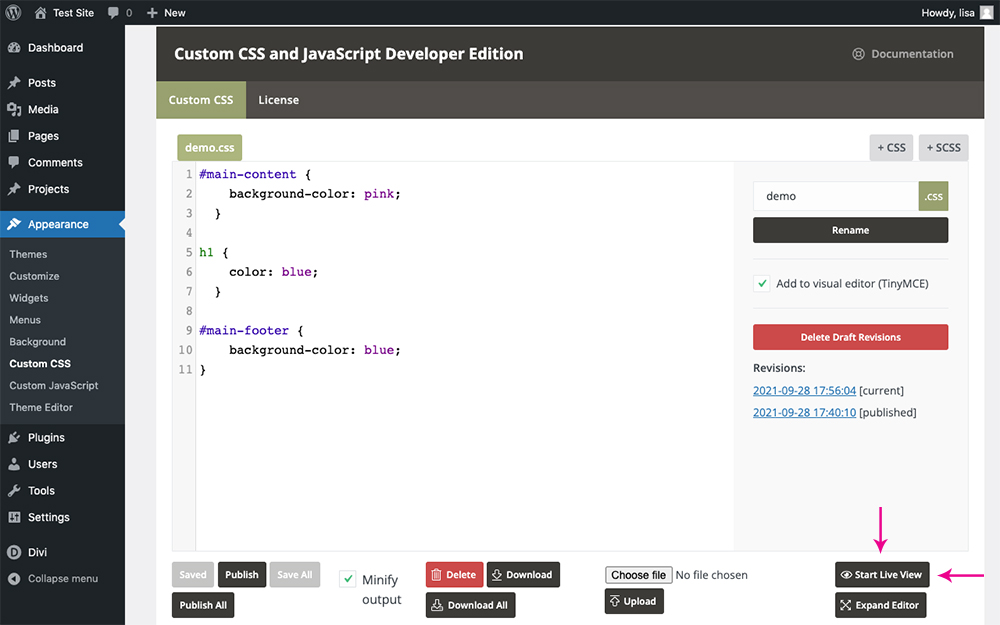
As you work, you’ll see a log of your progress begin accumulating in the Revisions column. At any point you can reinstate a former version of your code by simply clicking on the revision timestamp. If you like, you can also delete draft revisions that are no longer useful to you. Clicking the Delete Draft Revisions button will instantly delete all previous drafts.
Deleting Files
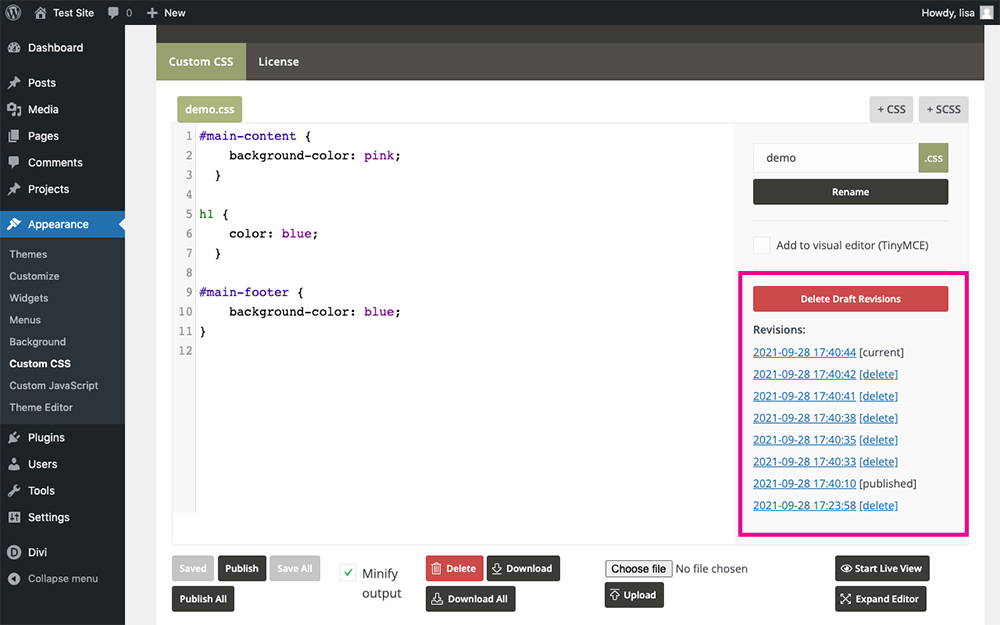
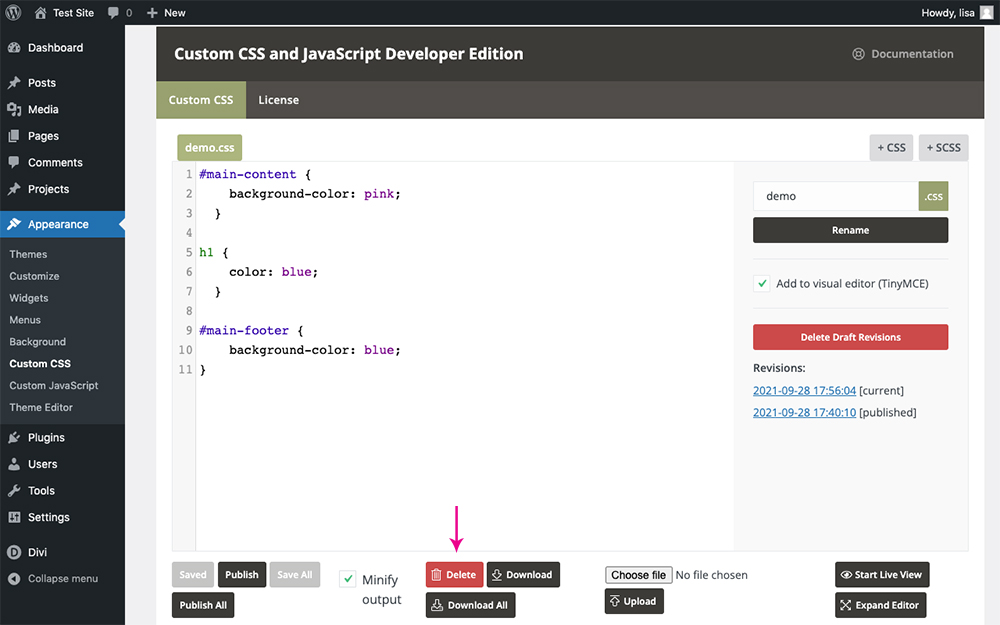
If at any point you need to delete a file, simply click the Delete button.
Enabling Minification
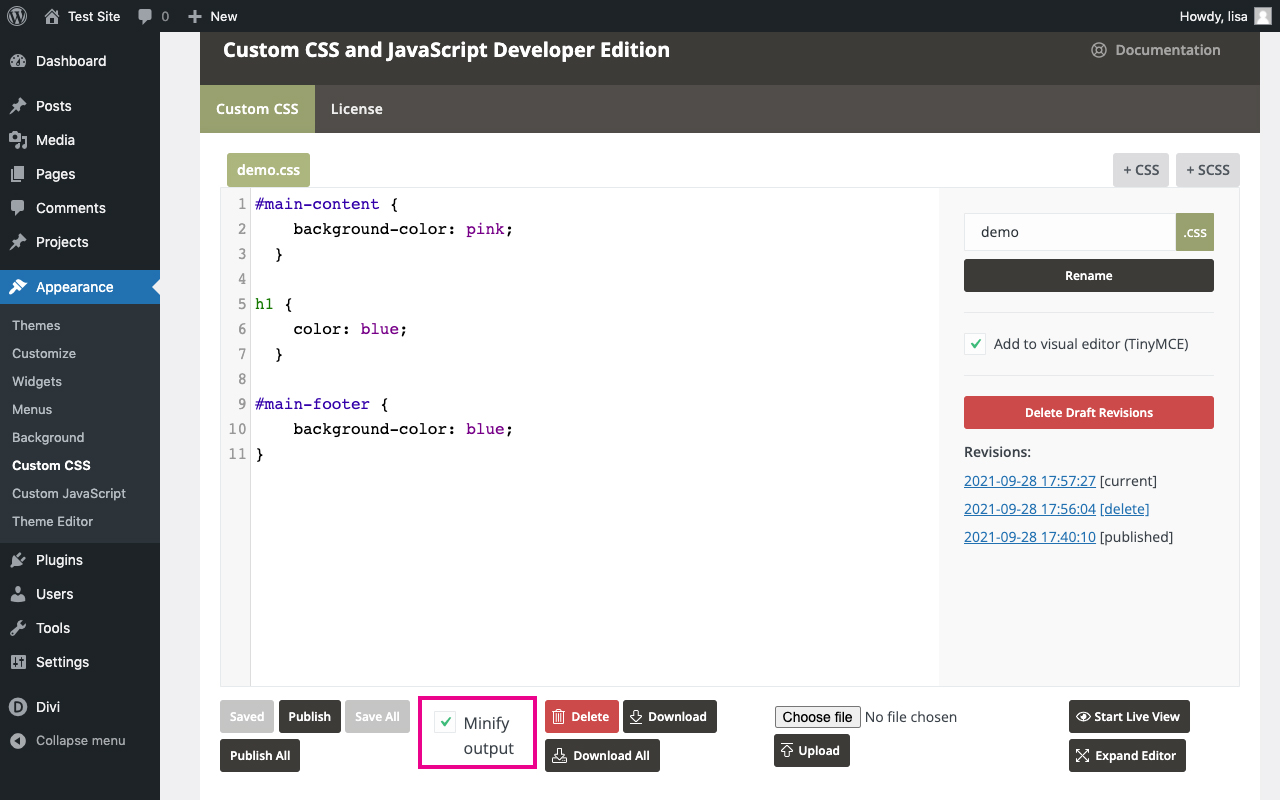
If you’d like your CSS files to automatically minify, select the Minify Output option.
Downloading/Exporting Files
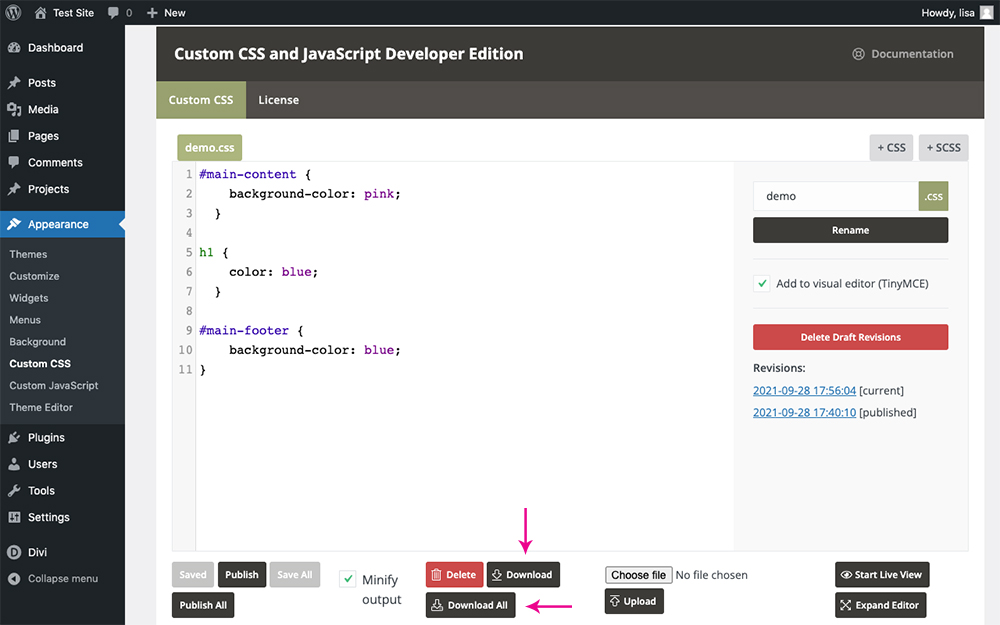
Once you are happy with your work, you can export the .css file and use it on another site. To do so, click the Download button, or alternately, if you have multiple tabs with multiple files, click Download All to batch download everything.
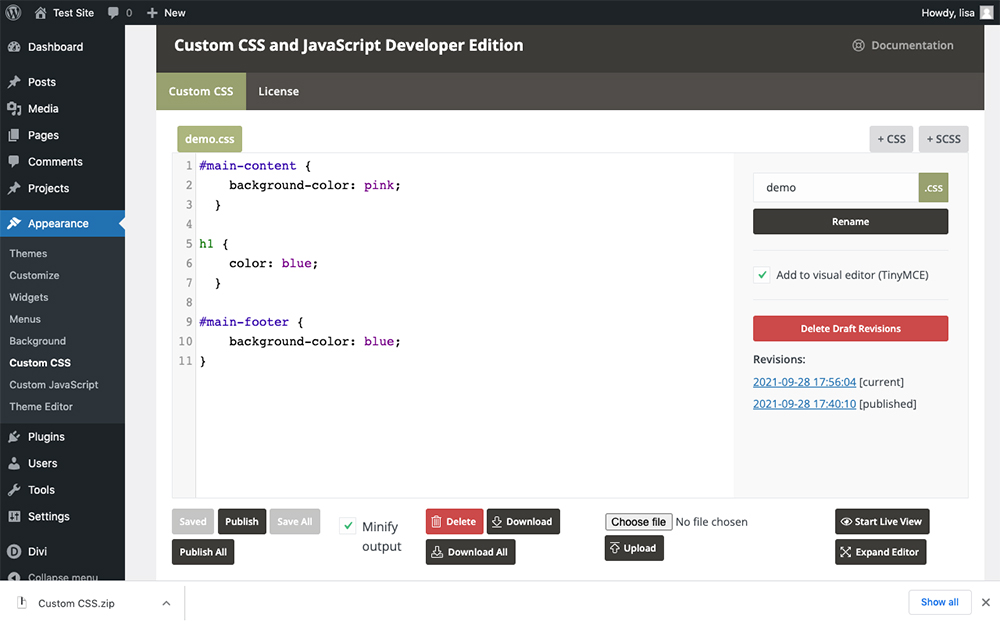
The files will save as a .zip file in your Downloads folder.
Importing FIles
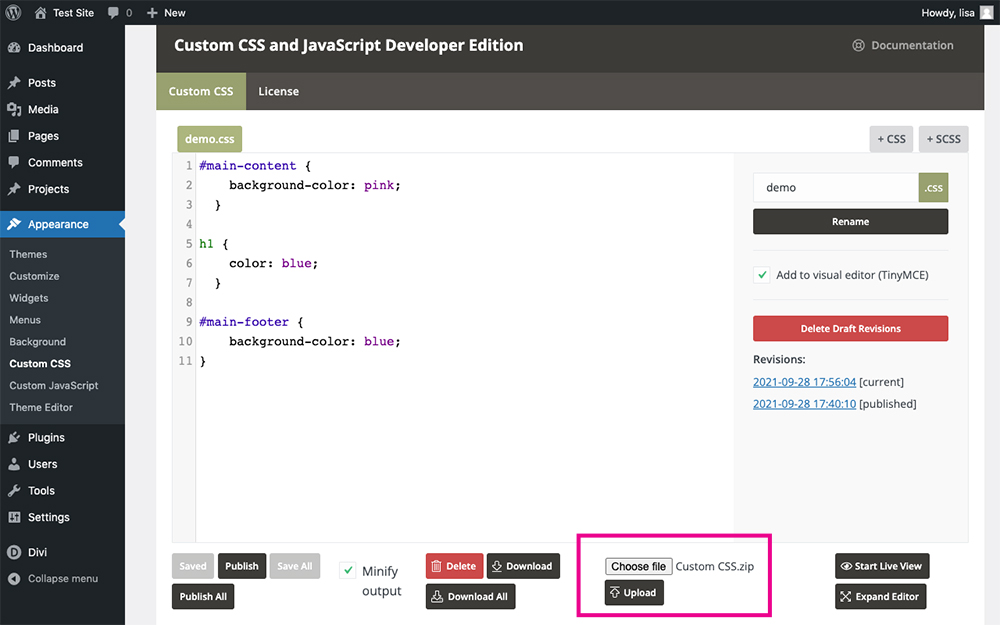
If you’d like to import an existing .css file into your website, you can do so via the plugin itself. To do so, click in the Choose File button, select the file from your computer and then click Upload. The screen will refresh and the files will be added to your website.
Expanding the editor console��
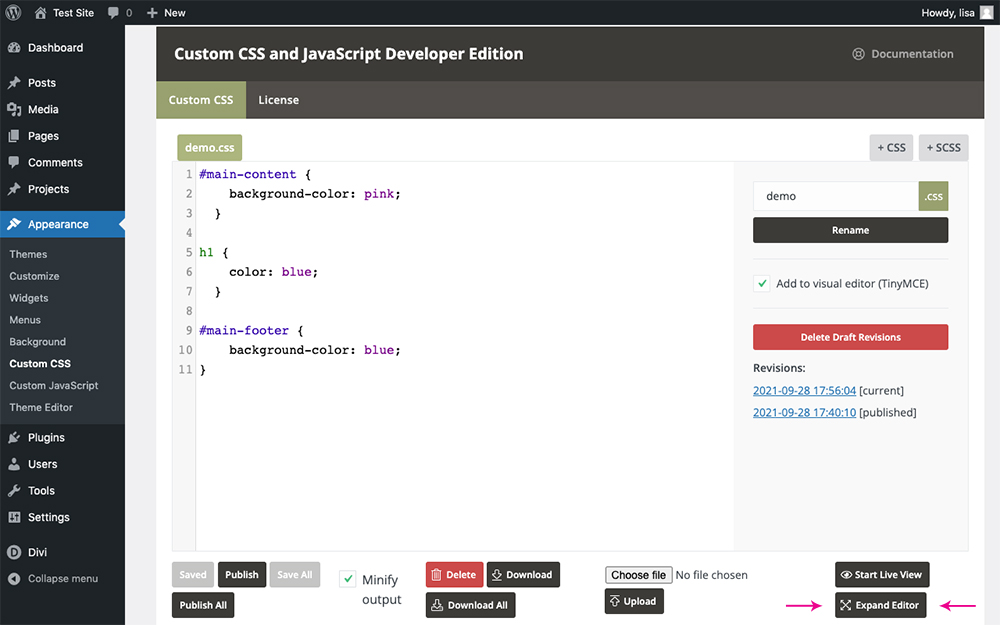
If you need more space to write code, click the Expand Editor button and the plugin will display in full screen view for an uninterrupted work experience.
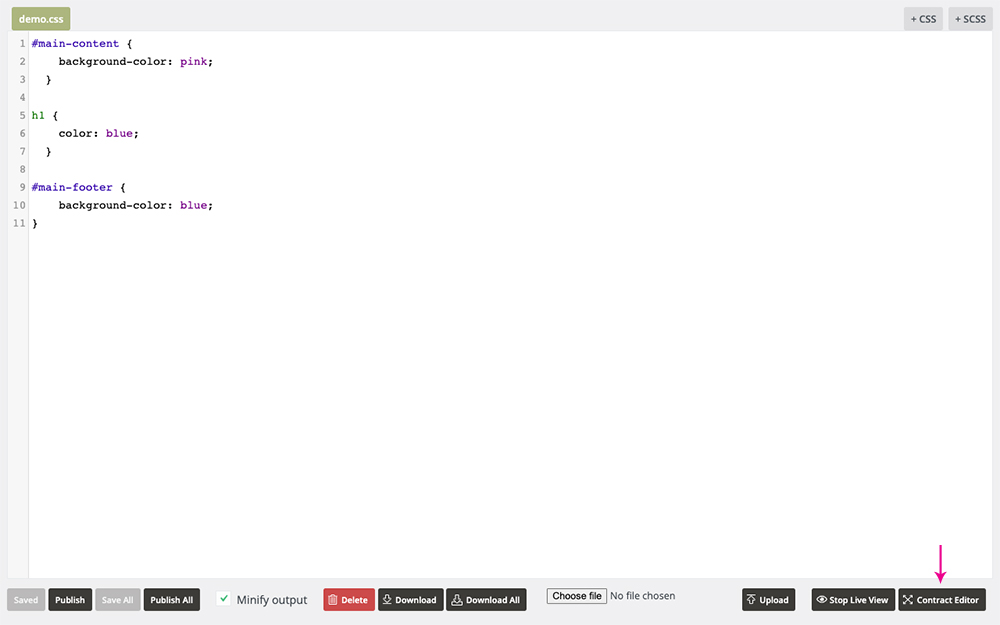
To return to the original view, click Contract Editor.
Custom JavaScript
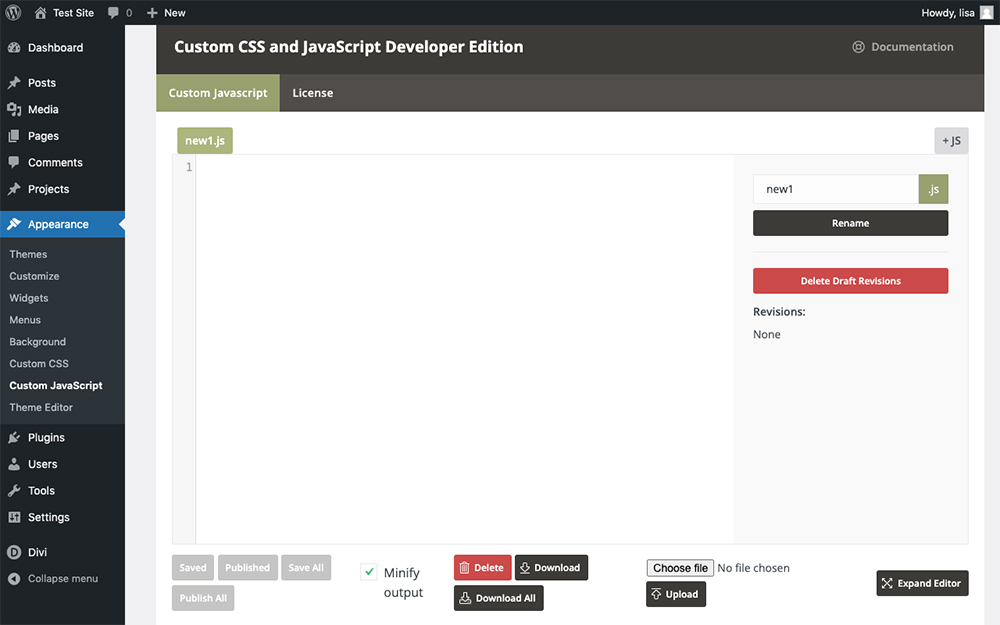
The Custom JavaScript menu functions in exactly the same way as the Custom CSS menu.
Uninstalling CSS and JavaScript Developer Edition
To uninstall the CSS and JavaScript Developer Edition plugin, follow these steps:
- Deactivate the CSS and JavaScript Developer Edition plugin in the plugins list
- Delete the CSS and JavaScript Developer Edition from the plugins list
- Once the plugin is uninstalled, all CSS and JavaScript Developer Edition options and settings will be deleted.
Additional Information and Support
If you experience problems with the CSS and JavaScript Developer Edition plugin, our team of dedicated support staff is ready to help you. Before you contact our support team, we suggest you attempt to troubleshoot the problem first. Here are some tips that can help you troubleshoot. If you are unsuccessful, please contact our support team.
If you like our products and would like to purchase similar plugins, please visit our shop page.
Changelog
See the changelog for this plugin by following this link.