When building a WooCommerce store, Woo users always want to improve the empty cart page. By default, the empty shopping cart message and page is bland and boring.
Today, we’ll show you how, with a little bit of PHP and CSS, you can transform the standard WooCommerce empty shopping cart page into a branded asset.
In the following Divi tutorial, you’ll use a few PHP lines and some CSS to create an attractive empty cart page for your WooCommerce store.
Are you looking for the code? Jump straight to the code library and add the code to your child theme.
If you’re looking for an easier way to customize your WooCommerce shop, check out our plugin Divi Shop Builder. It’ll let you customize the WooCommerce empty cart page using the Divi Builder, without touching a line of code.
Customize the WooCommerce Empty Shopping Cart Page
By default, the WooCommerce empty cart page states ‘Your cart is currently empty.’ Apart from this single line of text, there isn’t any other element on this page that either gives direction to your customer or encourages them to take a new action of any sort.
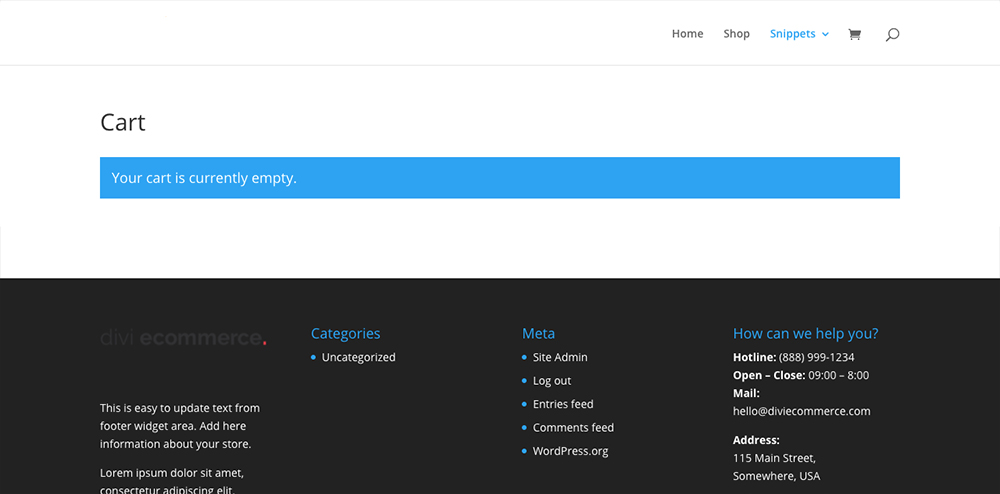
This is how the default WooCommerce empty cart page looks.
From a user experience perspective, this page is pretty unhelpful. Ideally, it’d be great to turn this page into a sales machine by encouraging your customers to head to your shop and get shopping.
Unforgettably, there’s no easy way to edit the empty cart page from the WooCommerce settings, but if you’re happy to dabble with some PHP and CSS, you can build a really interesting WooCommerce ‘Your shopping cart is empty’ page.
In this tutorial, you will:
- Add PHP to the functions.php file in your child theme
- Add CSS styling to the stylesheet of your child theme
If you haven’t already done so, we recommend installing and activating a child theme to protect your hard work. If you need a refresher, read our child theme guide and, when ready, download a free Divi child theme from Divi Space.
Step 1: Add PHP code to functions.php file
To begin, head over to the Appearance > Theme Editor console and locate the functions.php file in your child theme. Copy and paste in the following code before the closing PHP ?> bracket:
/* Create custom WooCommerce empty cart page */
function ds_custom_wc_empty_cart_text()
{
ob_start();?>
<div class="cart-empty">
<div class="empty-cart-header">
<?php woocommerce_breadcrumb(); ?>
</div>
<div class="empty-cart">
<span class="empty-cart-icon"></span>
<h2>Your Cart Is Currently Empty!</h2>
<p> Looks like you have not made your choice yet. Lorem ipsum dolor sit amet, consectetur adipiscing elit, sed do eiusmod tempor incididunt ut labore et dolore magna aliqua. </p>
</div>
</div>
<?php
$output = ob_get_clean();
ob_flush();
echo et_core_intentionally_unescaped($output, 'html');
}
remove_action( 'woocommerce_cart_is_empty', 'wc_empty_cart_message', 10 );
add_filter('woocommerce_cart_is_empty', 'ds_custom_wc_empty_cart_text', 20 );
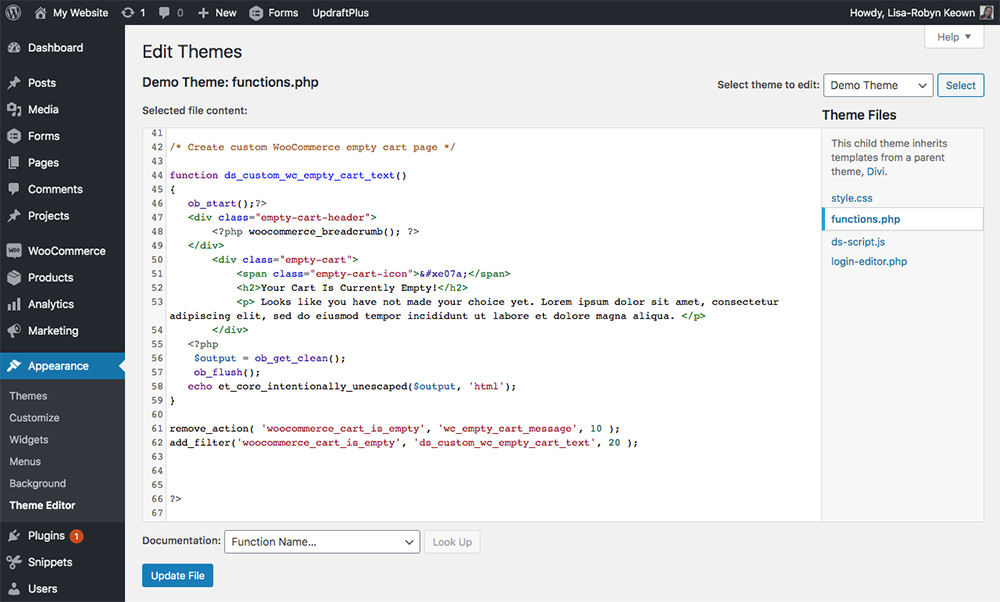
Add the following PHP code to your child theme.
Once complete, the front end of your site will look as follows:
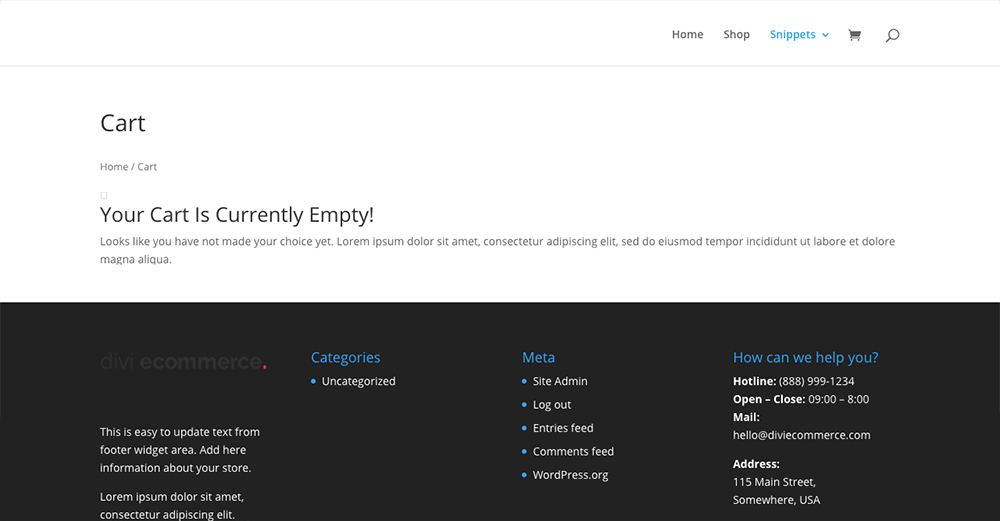
With PHP added, the page displays as follows.
You can see that a breadcrumb feature has been added to the page. You can also see that a new heading (H2 tag) and paragraph text (p tag) have been added.
Step 2: Add CSS code to styles.css file
Next, head over to the Appearance > Theme Editor console and locate the style.css file in your child theme. Copy and paste in the following code:
/* Styling for WooCommerce Cart page */

.empty-cart h2 {
   line-height: 2em;
   font-weight: 700;
   text-transform: uppercase;
   letter-spacing: 0.1em;
}

.empty-cart p {
   line-height: 2em;
   max-width: 600px;
   margin: auto;
}

.empty-cart {
   text-align: center;
   padding-bottom: 10vw;
}

.container p.return-to-shop {
   text-align: center ;
   padding-bottom: 80px;
}
.empty-cart-header {
   float: right;
   margin-top: -50px;
   position: relative;
}

.empty-cart-icon {
   display: inline-block;
   line-height: initial;
       font-family: ETmodules;
       font-size: 40px;
       color: #2ea3f3;
       border: 2px solid #2ea3f3;
       border-radius: 50%;
       padding: 30px;
       margin-bottom: 20px;
}
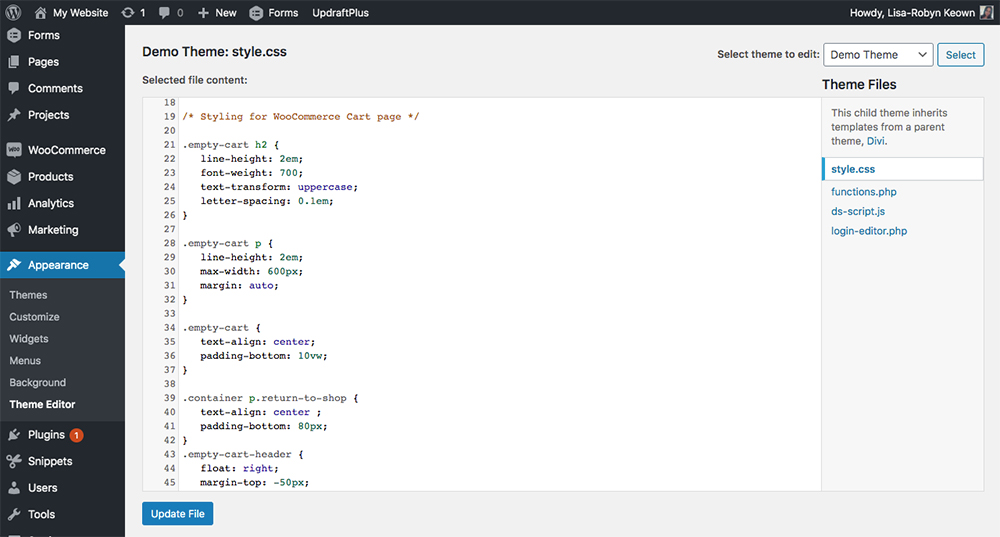
Add the following CSS code to your child theme.
Once complete, the front end of your site will look as follows:
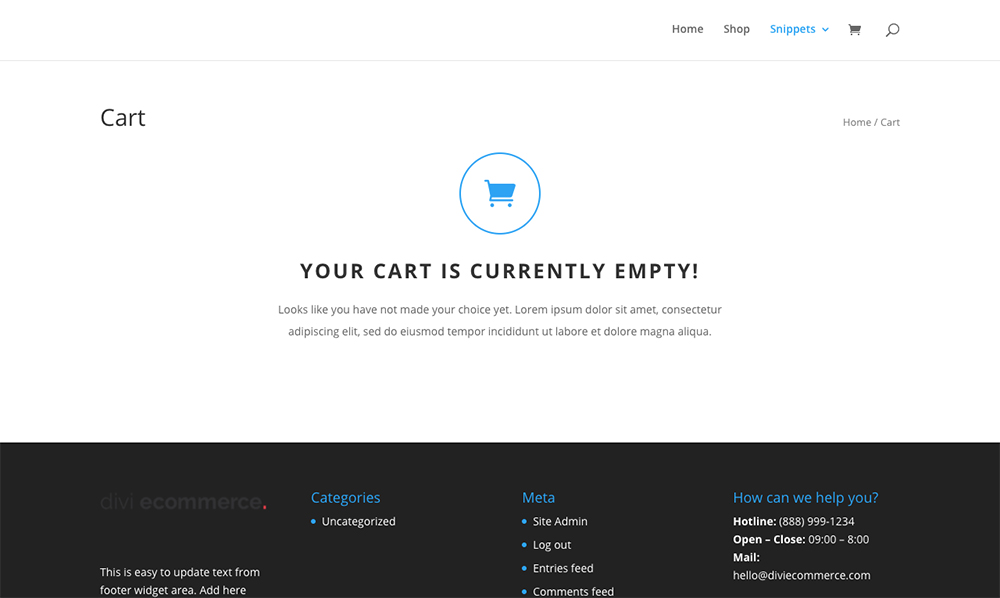
With a little PHP and CSS the WooCommerce empty cart page looks amazing!
And just like that, you’ve created an awesome empty cart page for your WooCommerce store!
You can get super crafty here by changing the heading and paragraph text. Have a look at the following example, which brings in a little bit of humor and some useful links.
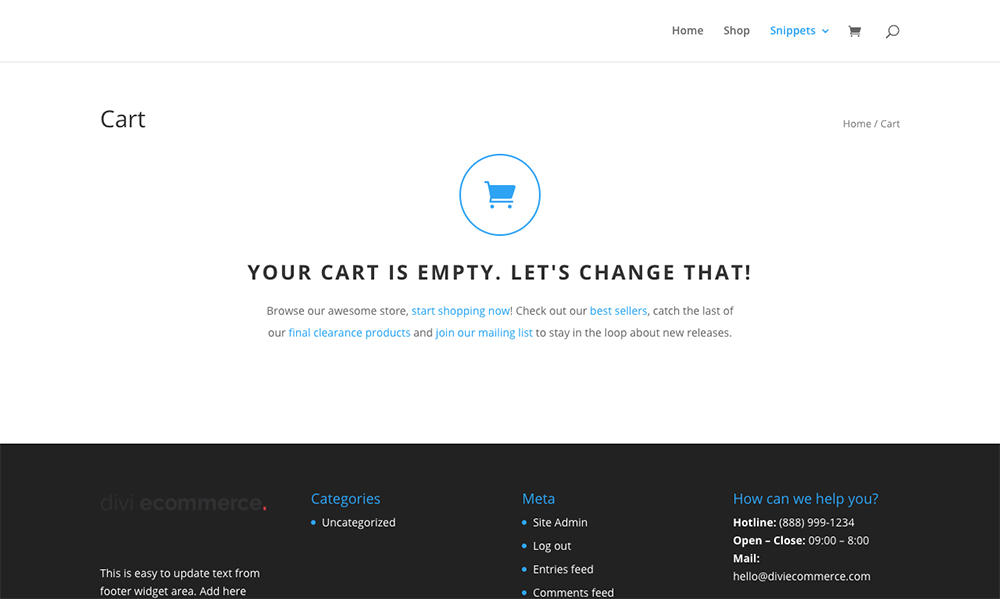
Get crafty with copy and create an engaging WooCommerce empty cart page!
To achieve this or similar, simply edit the text within the heading and paragraph text and add hyperlinks.
It’s easy to improve the user experience of your WooCommerce store. With just a bit of PHP and CSS, you would have totally transformed the standard empty cart page into a useful and interesting branded site asset.
If you want to edit the Cart and Checkout pages of your WooCommerce store using the Divi Builder, purchase the Divi Shop Builder plugin from our store.
If you want more code snippets, please post your snippet requests in the comment section below!

et_core_intentionally_unescaped this function causing an issue…
Fatal error: Uncaught Error: Call to undefined function et_core_intentionally_unescaped()
WHY? how to overcome ?
Hi, do you have Divi installed and activated? That’s where the function is registered
Hi,
Snippet works but leaves client with blank page if all products are removed from cart.
Is there a solution for this?
Thanks in advance!
Updating PHP code snippet should fix this issue.
Hi, the code works fine but when you remove all items on cart page itself, the message doesn’t show up and the user’s left with an empty page.
I have the same problem
Hi, we updated PHP snippet. Notice is now wrapped with
This didn’t work for me. I ended up with 2 CART IS EMPTY notices and a mangled looking page. Why can’t this be fixed in the Theme Builder?
Hi Darshan, this line is removing the default Cart is empty notice:
This removes a function “wc_empty_cart_message” from “woocommerce_cart_is_empty” hook.
Make sure this code added to your functions.php file. If that doesn’t work, try to change the the function priority by adjusting the 3rd function argument.
More information: https://developer.wordpress.org/reference/functions/remove_action/
We also can’t wait when it will be implemented to the Divi’s core. Until Elegant Themes will implemented it, you can use this free snippet we created and if you have any issues or questions, we are here to help!
The PHP works, but the CSS doesn’t work with DIVI Version: 4.9.4 🙁
Hello! The above code was tested with Divi 4.9.4 and it works perfectly. Make sure you are adding CSS the correct way 🙂