One of the most important web elements is the call to action. These can take the form of buttons placed throughout the site, but adding them into unconventional places can be great for catching a site visitor’s eye. One place that you should consider adding call to action buttons is in the Divi menu.
In the following tutorial, you’ll learn how to create an attractive and eye-catching call to action button for your Divi mobile menu.
Looking for the code? Skip the step-by-step Divi tutorial and jump straight to the code library.
Adding a call to action to the Divi menu
An often neglected web element is the navigation menu. Typically, it falls within the site header, along with the logo and possibly social media icons too.
To spice up your web design, you can easily create a stand out call to action from a Divi menu item. Instead of it displaying as per normal, as just a piece of text, with a little bit of CSS, you can style a menu item to look like a button.
Before you get started on this tutorial, please run a backup of your site before making any code edits and tweaks.
How to add a call to action button to the Divi mobile menu
This tutorial will be in a few parts:
- First, you need to create a menu and add the call to action button
- Next, you’ll need to add a custom class to the call to action menu item
- Finally, you’ll need to style the menu item using CSS
Let’s dive in!
Step 1: Create a WordPress menu
Navigate to Appearance > Menus and create a new menu. Be sure to include the page for the call to action. I’ve created a page titled “Schedule a Call”. This will entice site visitors to book a call with me.
Make sure this is set to the Primary menu. Remember to click the Save menu.
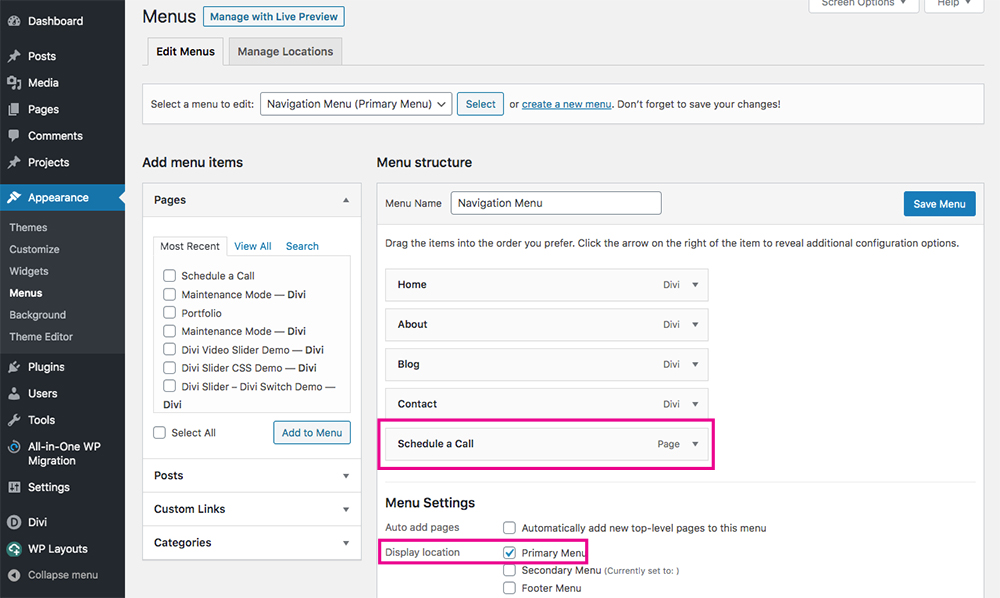
Adding a call to action menu item to a WordPress menu
On the front-end, the menu will look something like this:
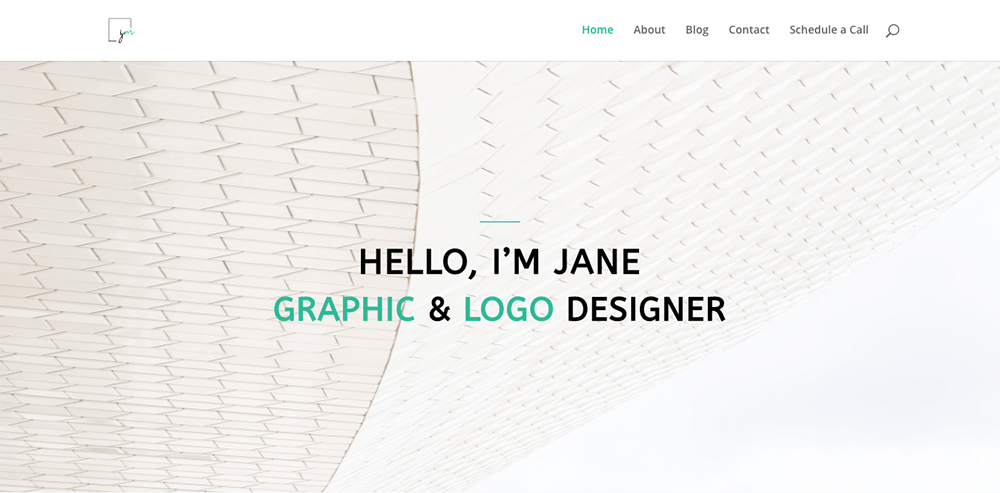
Example of the navigation menu
Step 2: Add a custom class to the call to action menu item
Return to the Appearance > Menus console. At the very top of the page, click the Screen Options tab and make sure that CSS Classes is selected. If not, select it by clicking the checkbox. This option will automatically update.
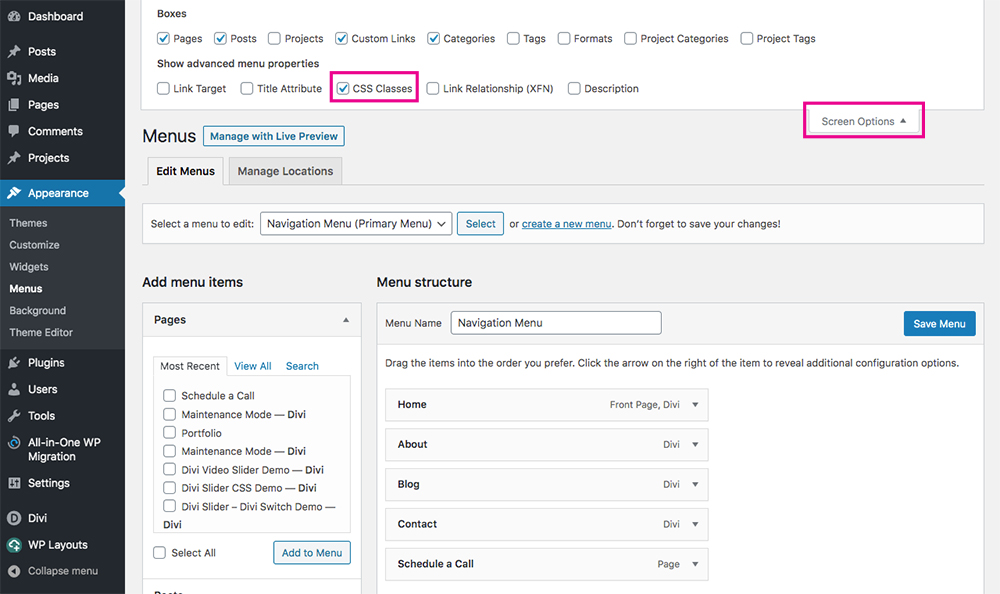
Click on the Screen Options drop-down menu to display more options
Then, locate the menu item that you want to customize to be the stand-out call to action button. In my example, it is the Schedule a Call menu item.
Click the small drop-down arrow to open up the menu customization options. In the field that says CSS Classes (optional), add the text: menu_cta
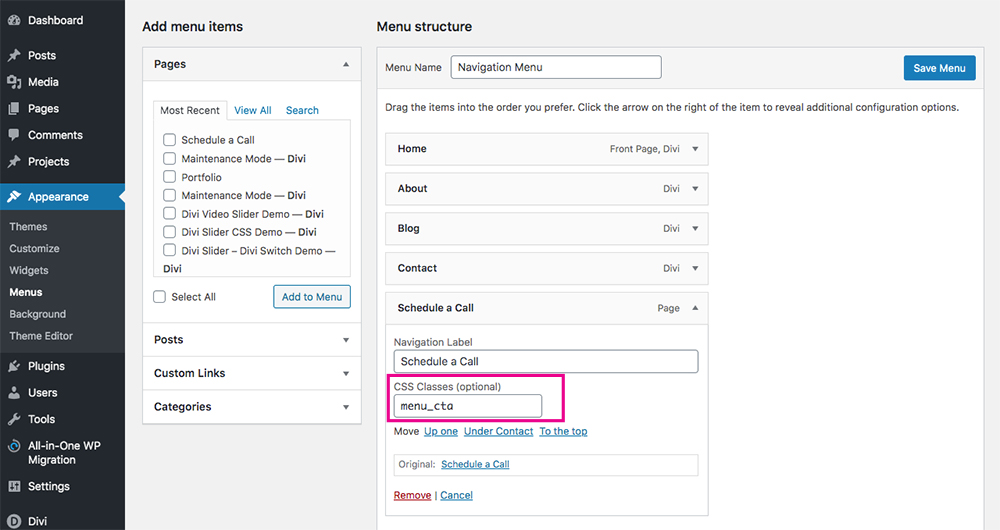
Assign a unique class to the menu item
Click Save Changes.
Now, you have just added a custom class to the menu. Next, we’ll use this class to target the specific menu item, and style it using CSS.
Step 3: Customize the call to action button with CSS
Now it’s time to customize the look and feel of the call to action button using CSS. You can add CSS to Divi in several ways. Our preferred method is to use the CSS stylesheet in our child theme.
If you don’t have a child theme already set up, you can download one for free here. If you need a bit more information about child themes and how to use it, read our handy Divi child theme guide.
Once your child theme is up and running, head over to Appearance > Editor and select the stylesheet. Copy the following code and paste it into the style.css file.
/* Divi call to action button normal state */

@media (min-width: 980px) {
.menu_cta {
padding: 0!important;
border-radius: 30px;
border: solid 2px #19ba97; /* change the color of the border */
transition: 0.3s;
background-color: #19ba97; /* change the color of the background */
}
.menu_cta a{
color: #f4f4f4!important; /* change the color of the button text */
padding: 15px 30px 15px 30px!important;
}

/* Divi call to action button hover state */

#top-menu-nav .menu_cta a:hover {
opacity: 1;
}

.menu_cta:hover {
border: solid 2px #fe8400; /* change the color of the hover border */
background: #fe8400; /* change the color of the hover background */
}
}
When complete, click Update file.
The code includes a regular display state and a hover state change. I’ve added a green color to match the site design, and an eye-catching Divi Space orange for the hover color.
There are comments in the code that’ll instruct you on which variables to change to add your own colors.
Styling the call to action button in the Divi menu
If you’d like to create a different look and feel for your Divi mobile menu, copy and paste the following code into your stylesheet.
Option 2
This will create a gray call to action button.

Create a striking gray menu item using CSS
@media (min-width: 980px) {
.menu_cta {
background-color: #f2f2f2;
background-image: linear-gradient(to bottom, #f2f2f2, #f2f2f2);
border: 1px solid #bfbfbf;
box-shadow: inset 0 1px 0 white, inset 0 -1px 0 #d9d9d9, inset 0 0 0 1px #f2f2f2, 0 2px 4px rgba(0, 0, 0, 0.2);
color: #8c8c8c;
text-shadow: 0 1px 0 rgba(255, 255, 255, 0.5);
border-radius: 3px;
font-family: Verdana, sans-serif;
transition: all 20ms ease-out;
}
.menu_cta:hover {
background: #f2f2f2;
border-color: #8c8c8c;
box-shadow: inset 0 1px 0 white, inset 0 -1px 0 #d9d9d9, inset 0 0 0 1px #f2f2f2;
}

.menu_cta a{
color: #23282d!important;
padding: 12px 30px 12px!important;
}
}

#top-menu-nav .menu_cta a:hover {
opacity: 1;
}
Option 3
This will create a blue call to action button.

Create a striking blue menu item using CSS
@media (min-width: 980px) {
.menu_cta {
width: 160px;
height: 46px;
background: linear-gradient(to bottom, #4eb5e5 0%,#389ed5 100%);
border-radius: 5px;
border-bottom: 4px solid #2b8bc6;
color: #fbfbfb;
font-weight: 600;
text-indent: 5px;
cursor: pointer;
}
.menu_cta:active {
box-shadow: 0px 2px 0px 0px rgba(0,0,0,.2);
top: 1px;
}
.menu_cta:after {
content: '';
width: 0;
height: 0;
display: block;
border-top: 22px solid #187dbc;
border-bottom: 22px solid #187dbc;
border-left: 16px solid transparent;
border-right: 20px solid #187dbc;
position: absolute;
opacity: 0.6;
right: 0;
top: 0;
border-radius: 0 5px 5px 0;
}

.menu_cta a{
color: #fbfbfb;
font-family: 'Open Sans', sans-serif;
text-shadow: 1px 1px 1px rgba(0,0,0,.4);
text-align: left;
padding: 15px 30px 15px 12px;
}
}

#top-menu-nav .menu_cta a:hover {
opacity: 1;
}
Option 4
This will create an orange call to action button with a phone icon.
Create a striking orange menu item with an icon using CSS
@media (min-width: 980px) {
.menu_cta {
background-color: #ff6900;
color: #fff;
padding: 0 !important;
}
.menu_cta a {
color: #fff !important;
padding: 10px 15px 10px 35px !important;
}

.menu_cta a:before {
content: '\e090';
color: #fff;
font-family: 'ETmodules';
font-size: 16px;
line-height: 1;
position: absolute;
left: 12px;
}
}
Option 5
This will create an orange call to action button.

Create a striking orange menu item using CSS
.menu_cta {
background-color: #ff6900;
color: #fff;
padding: 0 !important;
}

.menu_cta a {
color: #fff !important;
padding: 15px 15px 15px 15px !important;
}
Ending thoughts
Changing up the look and feel of your website is great for keeping your site visitors engaged and entertained. One way to catch their attention is by adding interesting buttons and call to action in unique places.
We hope you’ve enjoyed this tutorial and that it has increased the user experience of your site.
Let us know which Divi tutorials and quick CSS snippets you’d like to see in the future! Comment your snippets requests below!


I noticed that some people have mentioned that it pushed the menu items down slightly. It did the same for me and it also appears the same in your screenshots. I added this line to the CSS to resolve that:
#top-menu-nav ul.nav {
margin-top: -10px;
}
Thanks much! Saved me time! 👊🏻
what’s the code for a mail letter?
You can find full list here: https://www.elegantthemes.com/blog/resources/elegant-icon-font
Repeating this process keeps getting the menu aligned on top where as the button, because of the padding, gets misaligned below the center. Any way to fix it?
Hi, this may be specific to your website, can you share a link so we can figure it out?
HI there. How will I add the code for desktop and mobile view… when I add the code with margins at the top and bottom, the mobile button seems to go off-screen. But the desktop view is perferct. Thank you
This is the best and quickest way to add button immediately. Thank you very much!
My logo seems to be breaking my button. It’s matching the height of the Logo instead of actually using my padding size.
Hey Evan, did you ever get the above sorted?
I seem to be having the same issue.
Let me know if you did.
Thank you.
Can you add a link to your website?
I created my primary menu using a global header in the Divi Theme builder. The text color settings from that always override whatever is set in the CTA button CSS. Is there some way to target the element using the class that Divi adds to active menu item: current-menu-item?
Hello, check if adding the selector
will work in your case:
so in CSS replace
with
. If that doesn’t work, I will need a link to take a look.
Thank you very much for this code! It worked for me, except that I am not able to change the text color of the menu item at all. It is keeping the color that I have set for the rest of the menu items (blue) but I’d like it to be white. Seems like the settings I made to the module are overriding the CSS (I do have !important still included in the code). Do you have any advice?
I have successfully created a Call button on my menu. Previously I used the button module to add a button to the menu. But, it doesn’t look great. So, I ended up creating a different menu. One for the desktop version with a button module and another one without a button module. This is the website depaasdesigns.com where I have added the button. Thank you for this.
My menu background color is #f7f7f7 and menu items text color is #f50004. I created a CTA where background is #f50004 and text is #f7f7f7. Works fine, but on sticky menu when scrolling, CTA’s text color changes to #f50004. How do i keep it #f7f7f7 when scrolling? Many thanks
thanks for this ! how can I edit the text color when that page is active?
Contact button, in contact page
https://winonasearchgroup.com/contact-2/
You can target the element using the class that Divi adds to active menu item: current-menu-item
How do you add space between two buttons side by side?
Hi, you can add margin-right to the first button
How would I go about changing the size of the button to make it smaller? I don’t know css.
Change the number in the line
Is it possible to have 2 CTA buttons in the same menu? Thanks!
Of course, you just have to add the CSS class to each menu item you want to be styled like a CTA. If you want different styling for each menu item you need to create a new class like menu_cta_2 for example.
Thanks!
Could anybody tell me:
1) How to vertically centre the search-icon?
2) How to put the search-icon before the button? So that the button is the last item in the row of menu items.
Thanks again!
R
You can change the position of the search icon with
#et_top_search #et_search_icon:before {
    top: 10px;
}
Changing position is not that easy, I think the easiest way would be to build the menu with the theme builder.
Thanks for this but how do I get the cta button to appear the same on mobile?
Check out this snippet: https://wpzone.co/wordpress-and-divi-code-snippets/create-call-to-action-button-under-mobile-hamburger-menu/
But, given the tools afforded with 4.0, wouldn’t the best approach now be to just place the menu into a column by itself and a button module one more column to the right?
That depends on your design. This solution works if you are using the standard menu and the Divi Menu Module.