There are plenty of options in Divi to display content besides your standard modules, and being creative with them can pay off. One of the more interesting approaches you can use is to display your content is using timeline.
Timelines are perfect for telling stories and visualizing processes. You can use a timeline to give an overview of events, to highlight important points in time, and reveal things that people might have missed.
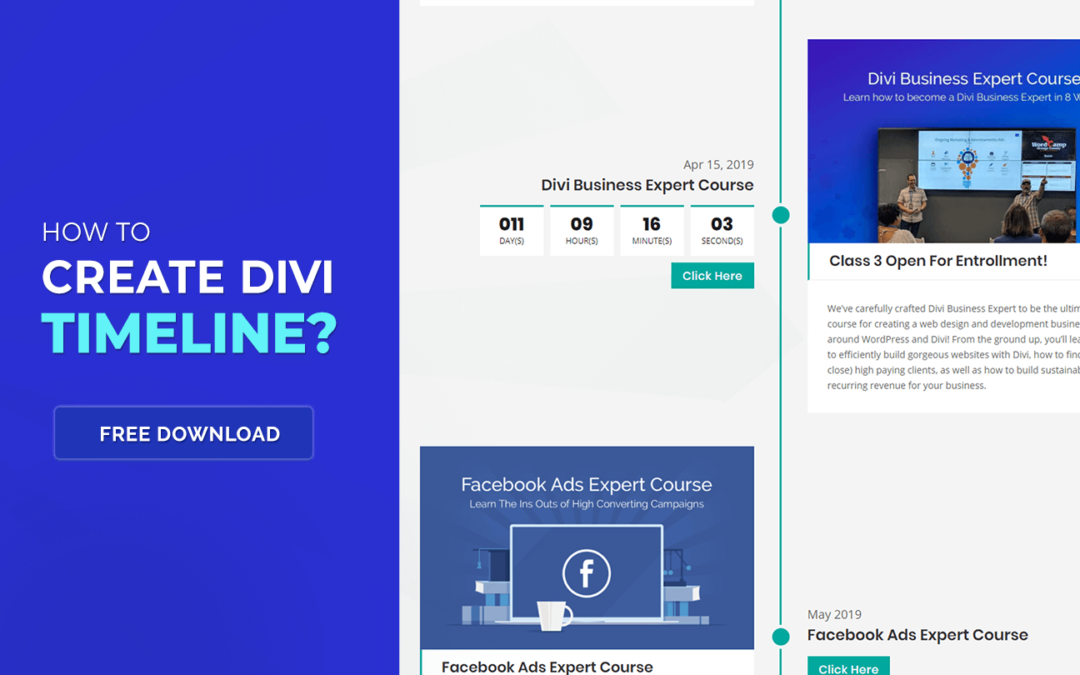
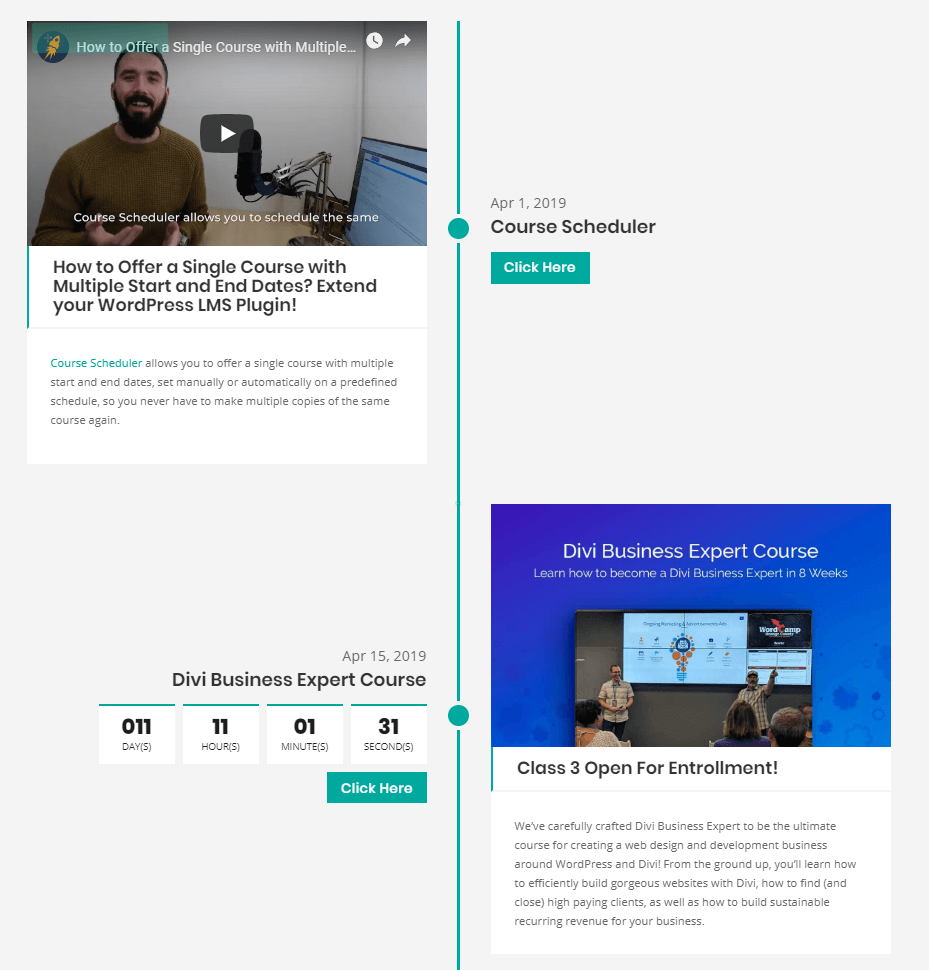
Result
Here is a preview of the timeline you can use in your projects.
How to Import the Layout
Step 1. Download Layout
- Fill out the form below and from received email download the .zip file.
- Unpack File.
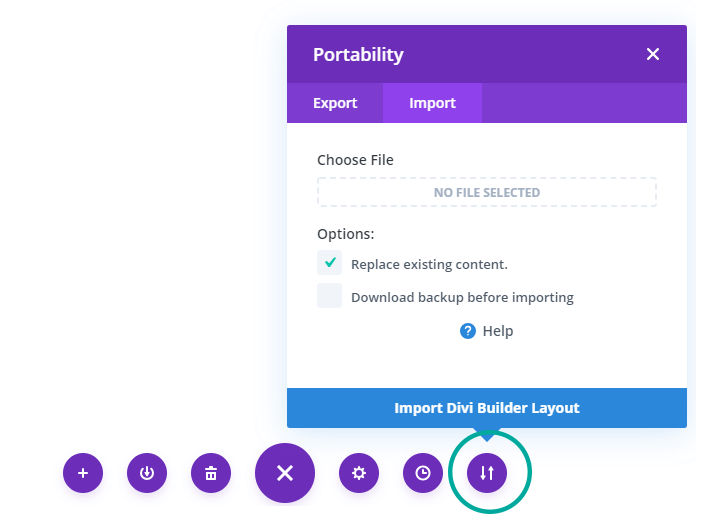
Step 2. Import Layout
- Create New Page
- Click Import/Export
- Choose Divi Space Timeline.json file
- Click “Import Divi Builder Layout”
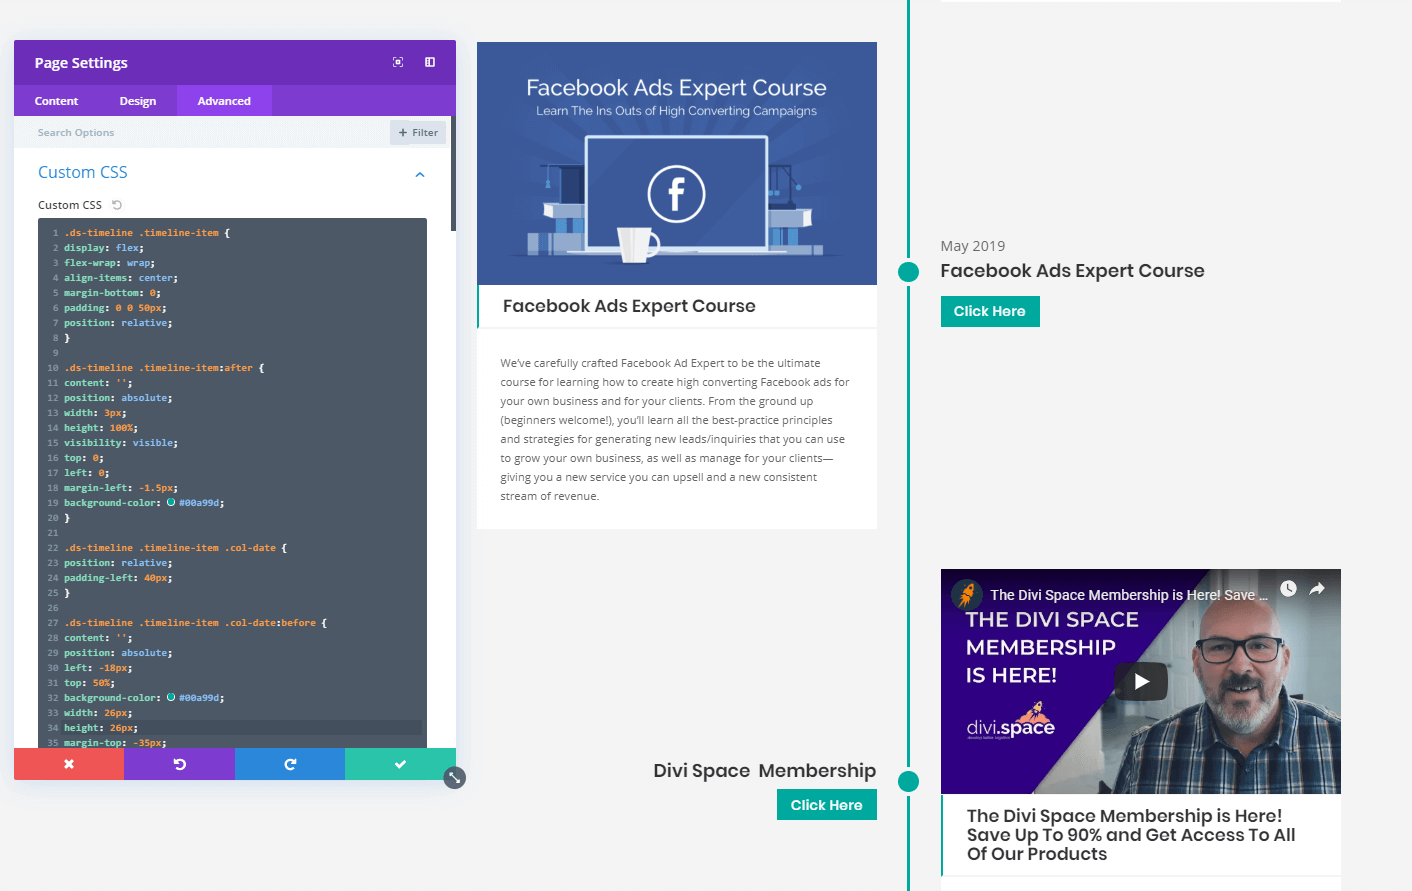
Step 3. Add CSS
Divi users can choose between five different methods to add custom CSS to their websites. In this case, we recommend adding CSS to your divi child theme or using Divi Builder Page Settings of an individual page.
- Open up the Divi Page Settings console,

2. Go to the Advanced Tab and scroll to the Custom CSS box.
3. Copy CSS from “Timeline CSS” file and paste to the Custom CSS Box.
Get your Free timeline layout!
There you have it, with just 3 step you can present your story in the timeline! If you have any questions or suggestions, make sure you leave a comment in the comment section below!

Hi Anna,
Just installed the timeline https://madecircularby.com/timeline-test but something is not as it should be. The even and odd sides don’t appear correct.
What can I do?
Michel
Hi Michel, CSS needs to be added to the site/ page. It’s included in the zip file.
Found the problem and the code works perfectly
Thank you
in English
Hello,
Thanks for your sharing.
Unfortunately, divi indicates that there is an error in the css.
Could you correct it?
Thank you in advance
We updated CSS 🙂
Hey guys, thank you for uploading this beautiful timeline.
The support from elegantthemes pointed out a css line which occurs a failure. Do you have an idea how to fix that?
.ds-timeline .timeline-item .col-details: 0 2px 2px 0 rgb(0, 0, 0, 0.12) 0.5em 0 0 #000000
Thank you so much
Eric
Thanks for the comment, we have updated CSS code to fix it 🙂
Excellent work, Anna. Everything works perfectly.
Great One. I have implemented it on my blog : https://eliquide-diy.fr/actus-eliquides/quest-ce-que-le-vapotage-vaping/
Excellent
I love this in 2020, thank you so much!
I tried this and works well but the fullwidth slider picture on mobile and tablet is disappearing
Hi Mulki, there are separate modules for mobile and tablet.
Hi, I added the JSON file and CSS as noted but now I’m a little lost on how to acutally have the timeline on my page. What do I do once I complete the steps you outline to add the module?
thank you!
This is a great solution. Also it looks beautiful like that. Thank you!
This is great! Thank you very much!
Can’t get the json file to upload. Tried chrome and safari browsers, have cleared caches on both.
Site running on wpengine.
Anyone run into this before? Ideas? 🙂
Note, I am trying to load this into a brand new page. It fails to load with no warnings/error messages.
I did also try loading it straight to the library but got a warning message that this was not a json file that could be loaded into the library.
Hi Brett, please make sure you are uploading .json file, not .zip file. You need to extract zip file 🙂 Let me know if that fixes your problem.
Is there a way to make this Horizontal instead of Vertical?
much needed and always overseen — a horizontal sliding in timeline!
I support this!
Anna this is great! I seem to be having a problem with the vertical line. It looks normal when viewing inside of the Divi builder. But when I view the page, the top line is missing down past the first dot, which also makes the spacing below the first dot look off. Any idea what could be the problem?
Disregard my previous comment. When I added a row above the timeline, it fixed the problem. Great stuff! Thanks again.
Thanks a lot for sharing! A live demo link (to test it in different devices) would be nice. Keep up the good work!
I really don’t need the 100th vertical timeline, I need a horizontal one.
The only realisation I saw until now is an Elementor Element … but in DIVI?
the system says “success” but i do not get a email.
i have tried it 2 times …
Hello, I have sent you an email with a link yesterday. Please check SPAM.
Thanks for that! Happy Easter!
Entered CSS code in the main element window of the Divi Builder Section after uploading the json file. Doesn’t work. Please advise.
Putting the CSS in Divi Theme Options works okay.
This is a great guide I was looking for and often wondered how to do it. Thanks, Super Anna
greetings
Pozdrawiam Lukas Wien