
You may think that once a purchase is final, the deed is done, but you’re wrong. Even after your customer has paid for their product, your job as a marketer has just begun, and it starts as soon as they see the WooCommerce thank you page on their screen. Once a customer has completed a sale on your website, you can begin to nurture the relationship with them to make sure they become loyal, repeat customers. A great way to hold their attention after the sale has been completed is to create a beautiful and engaging thank you page. By default, the WooCommerce thank you page is dull and boring; it merely recaps the order itself and can include a short message from you. This gets the job done, but it’s underwhelming and certainly won’t leave your customer with a positive lasting impression of your brand. Luckily for you, if you’re a Divi theme user, our plugin Divi Shop Builder will help you build a custom thank you page for your WooCommerce store in just a few seconds. This plugin extends the already amazing functionality of the Divi builder to include styling of the WooCommerce thank-you page. If you’re ready to hold your customer’s attention long after they’ve purchased from you, follow our detailed walkthrough of the Divi Shop Builder plugin. In this post, you’ll learn:
- Why you should customize the WooCommerce thank you page,
- How to install and setup the Divi Shop Builder plugin,
- A walkthrough of how to use the plugin to build a custom WooCommerce thank you page,
- How you can save time by using our included checkout page layout packs.
Why You Should Customize the WooCommerce Thank You Page
Even after your customer has paid for their product, their relationship with you as a brand is still going. Even if they’ve completed this sale funnel by purchasing a product from you, you should be thinking of ways to graduate them to another funnel or cross sell to them. Every interaction with your brand is a contact point, so you should be thinking of all the ways that you can engineer a great user experience at each touch point. Leaving the thank you page in its default state means you miss out on a great opportunity to leave a lasting impression. Here are some benefits of creating a custom thank you page:
- Good impression. Creating an on-brand thank you page for WooCommerce can be a great way to leave your customer on a good note. Simply recapping their order is boring and not much of a send-off, but adding a few branded imagery, a thank you note in your brand tone and just generally styling the page to look appealing will improve the shopping experience of your store.
- Unique look and feel. By customizing the WooCommerce thank you page design, your online store will look completely one of a kind. There are so many online stores that use WooCommerce’s default settings, and with your store going against the grain, it’ll stand out of the crowd.
- Added site functionality. Being able to customize the WooCommerce thank you page means you can add in all sorts of exciting web elements. As well as recapping the order, you could add links to other sections of your site, your blog perhaps, or send the customer to a review page where they can give you feedback on your brand. You could add social media icons to encourage the customer to follow you on your socials, or you could embed an opt-in form that subscribes them to an ‘insider’s list’ of promotions and discounts. The opportunities are endless.
The default WooCommerce thank you page can only be edited using code or a third-party plugin, but editing code is quite advanced for new users and installing one plugin to perform a single task is quite a waste. Our plugin Divi Shop Builder lets you extend the functionality of the Divi Builder to the WooCommerce interface. Here you can design a thank you page for your ECommerce store using the familiar drag-and-drop modular builder. Get ready to see how easy it is to build a custom thank you page for WooCommerce!
How to Create a Custom WooCommerce Thank You Page
Step 1: Install and Activate the Divi Shop Builder Plugin
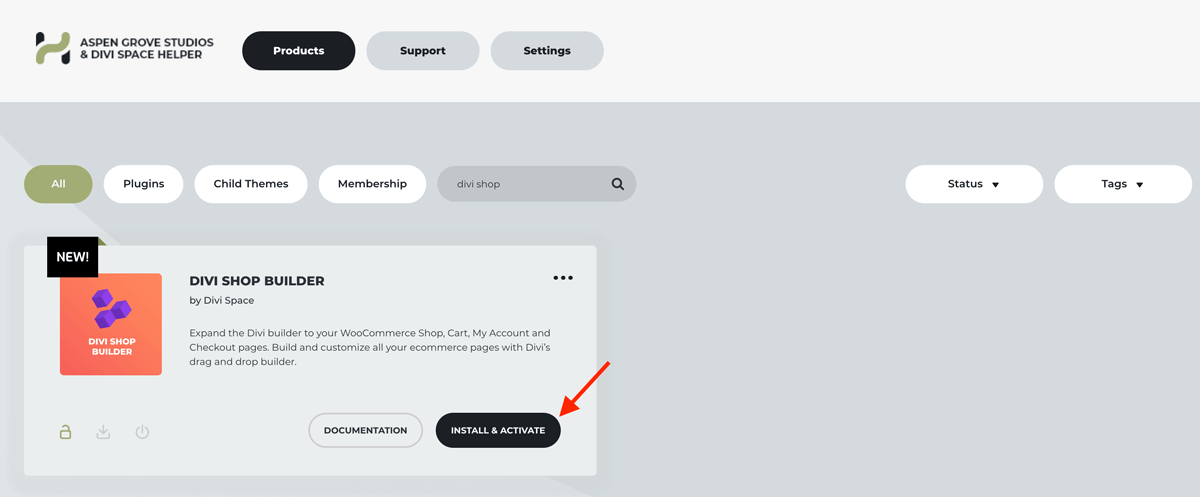
The next step is to install and activate the Divi Shop Builder plugin. If you haven’t already done so, head over to the Divi Space website and purchase the plugin. Once you’ve created an account, head to the plugin page and download it, then, install and activate the plugin in the regular fashion.
Alternatively, install and activate Divi Shop Builder from the Aspen Grove Studios and Divi Space Helper plugin.
When the installation is complete, the plugin will display in the Divi menu.
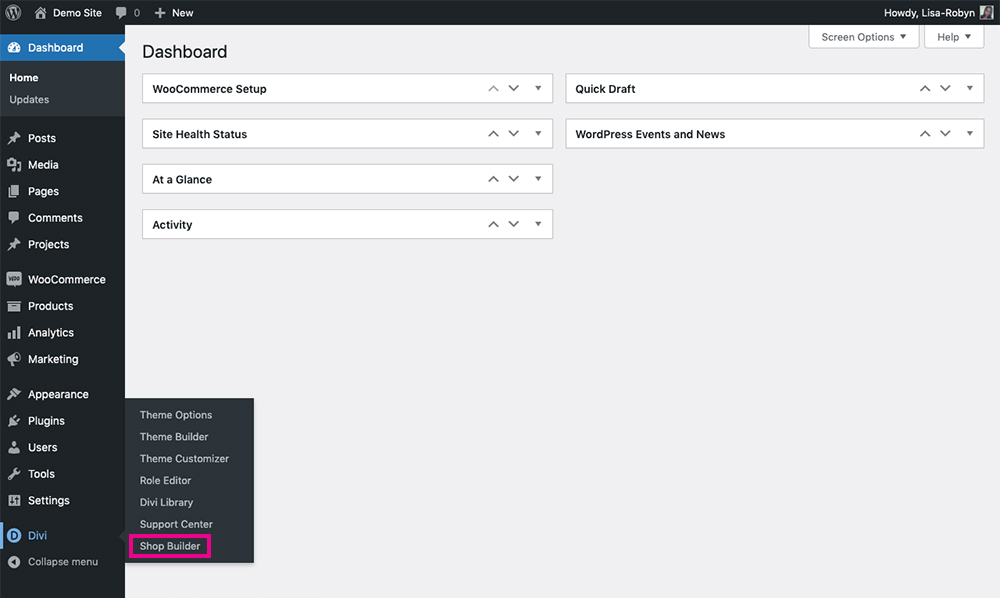
Look in the Divi menu for the plugin
You’ll be asked to authenticate your plugin purchase by entering your license key. To locate your license key, log into your account on the Divi Space website and head to Membership Details. Once you’ve authorized the plugin, you can begin using it. The Divi Shop Builder plugin doesn’t have any set-up steps or configuration, it simply works directly in the Divi Builder once it’s installed. The plugin dashboard page is more like a space that recaps the plugin features and promotes a link to the plugin documentation.
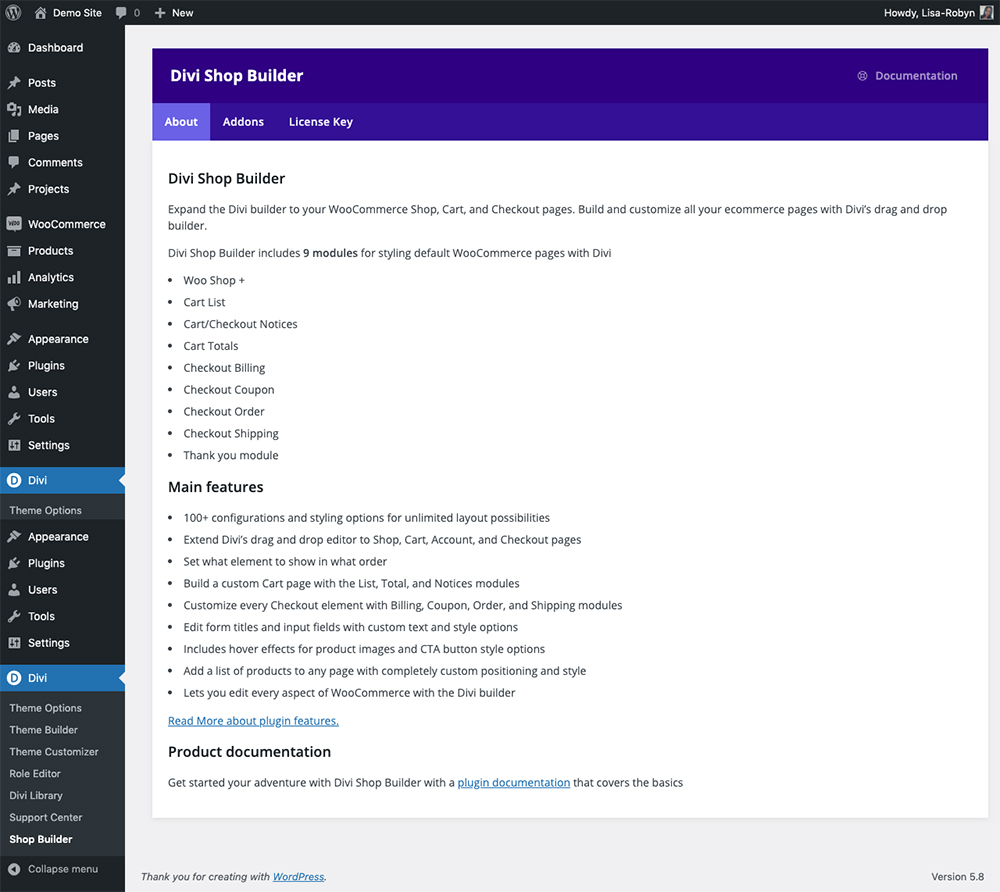
The Divi Shop Builder plugin details
Step 2: Set the Thank You page
Before you can begin using the Divi Shop Builder plugin, you need to set the thank you page in the back-end of the site. To do so, create a new page (title it something like Thank You Page) and then head to the WooCommerce menu, click Settings and navigate to the Advanced tab. Here, set the thank you page from the drop-down menu.
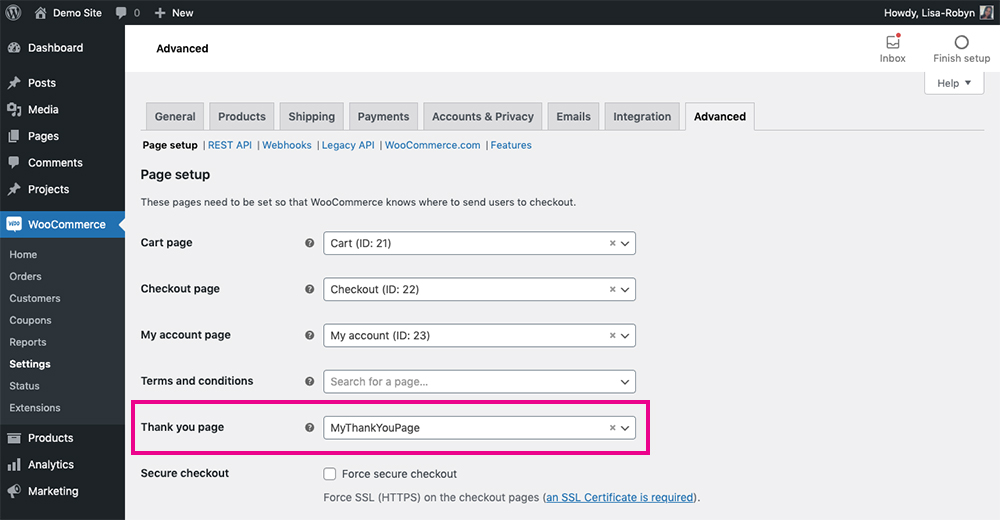
Set the Thank You page
After you’ve set the page, scroll to the bottom and click Save changes. Now that the plugin is installed and the thank you page has been assigned, you can finally begin using the plugin to build your custom WooCommerce thank you page!
Step 3: Create a Custom WooCommerce Thank You Page
To start using the Divi Shop Builder plugin, open the Thank You page and enable the Divi Builder. Add a section and row as per usual. When you add the Divi builder module selector, you’ll see a collection of new modules including the Thank You module.

Add the Thank You module
When you add the Thank You module to the page, it’ll automatically add the summary of the order including the Order Details and Billing and Shipping Addresses.
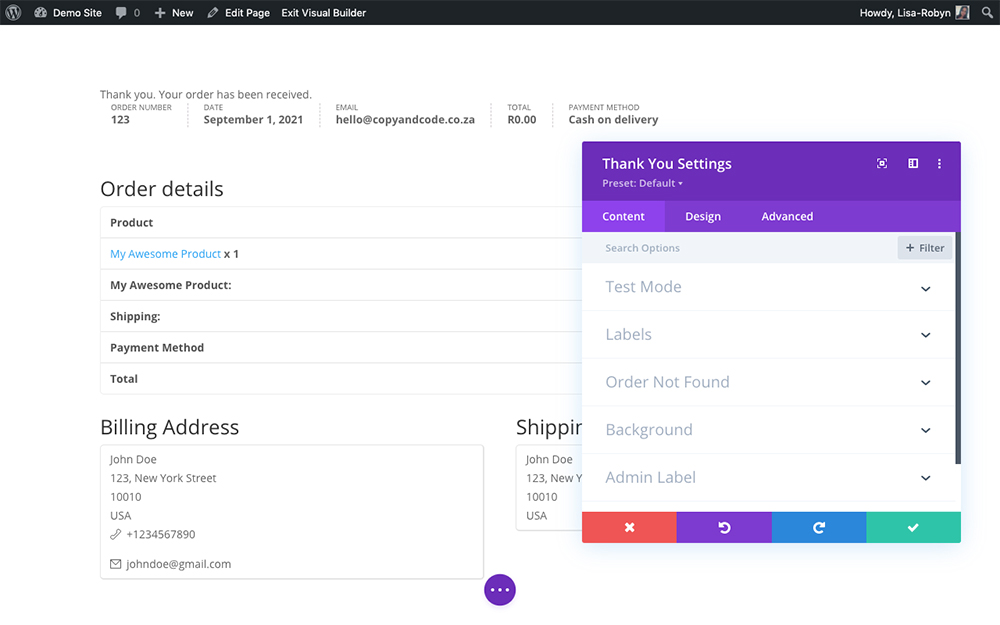
Start playing around with the Thank You module
If you open the Labels option, you’ll be able to edit every text title of the page. Instead of saying a standard, cold message like “Thank you. Your order has been received,” you can change this text to something quirky and on-brand like, “Thanks for shopping with us! The goods are on their way!”
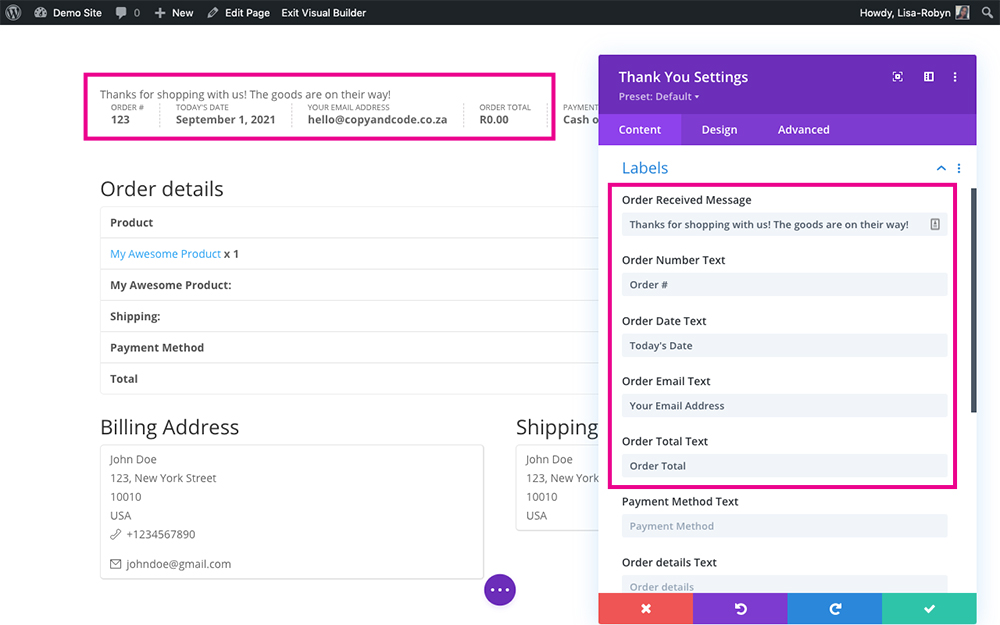
Add custom text to each of the labels
You can also change the default text of Order Details, Billing Address and Shipping Address to custom text.
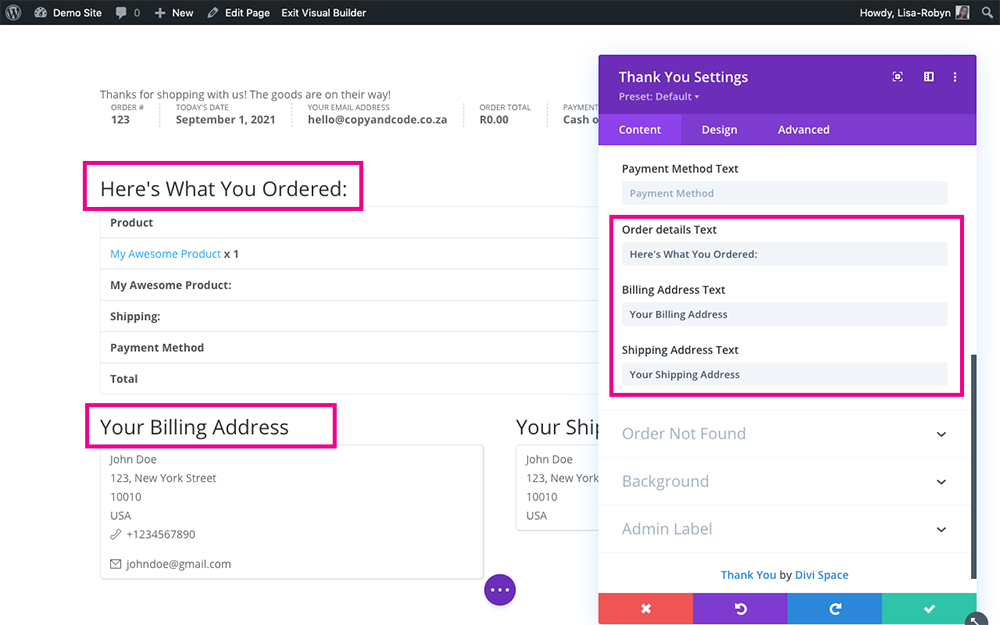
Add custom text to the Your Order, Billing Address and Shipping Address texts
Also within the plugin, you can change the default “Order Not Found” text to something custom.
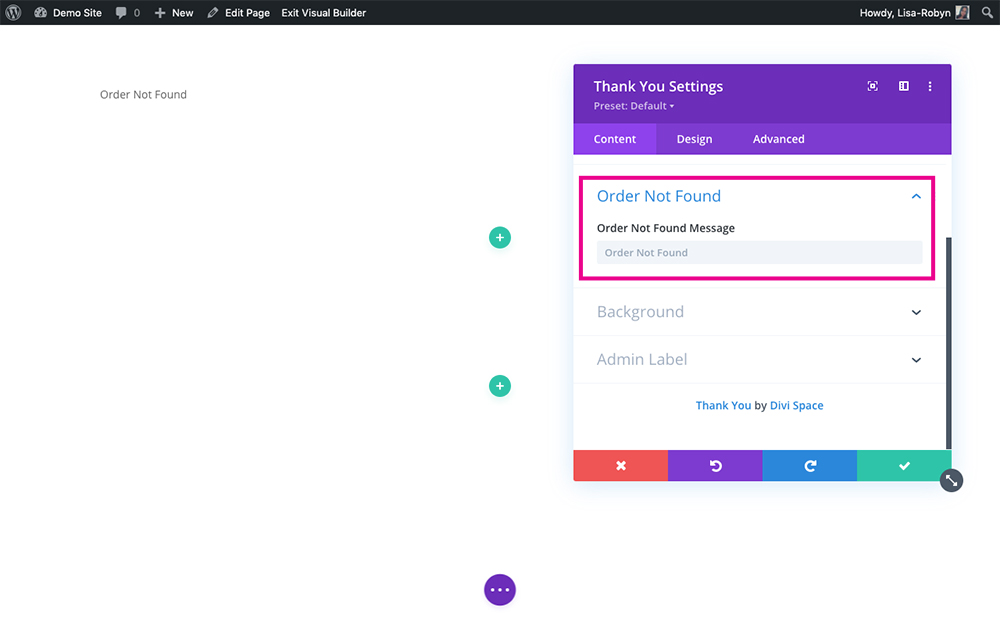
Set a custom Order Not Found message
If you’d like to add even more interesting elements to the page, you can add links to other areas of your site, a blog feed, an op-int form, social media icons, or anything really! Simply use the Divi Builder as per normal and you’ll have a rocking thank you page for your post-purchase display.
Customizing the WooCommerce Thank You page
As with all other modules in the Divi theme, the Thank You module in the Divi Shop Builder plugin can be custom styled to your heart’s content. Once you’ve set all of the text, head over to the Design tab and you can style each element on the page to match your brand identity or design.
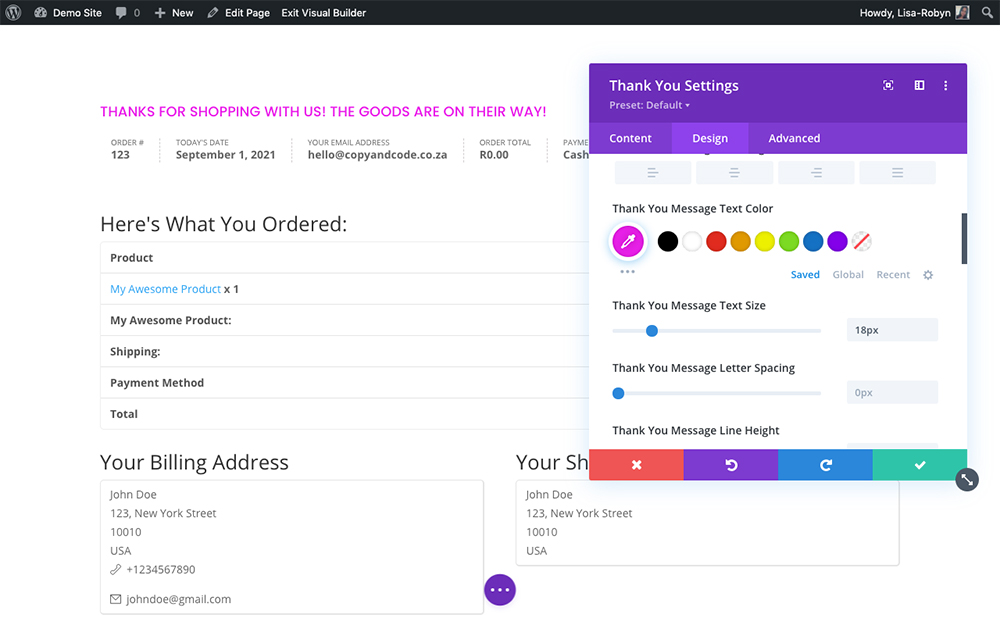
Style each element in the Design tab
If you want to add further customization to the Thank You module, head to the Advanced tab where you can assign custom classes and IDs, and also set the module’s positioning, transitions and more.
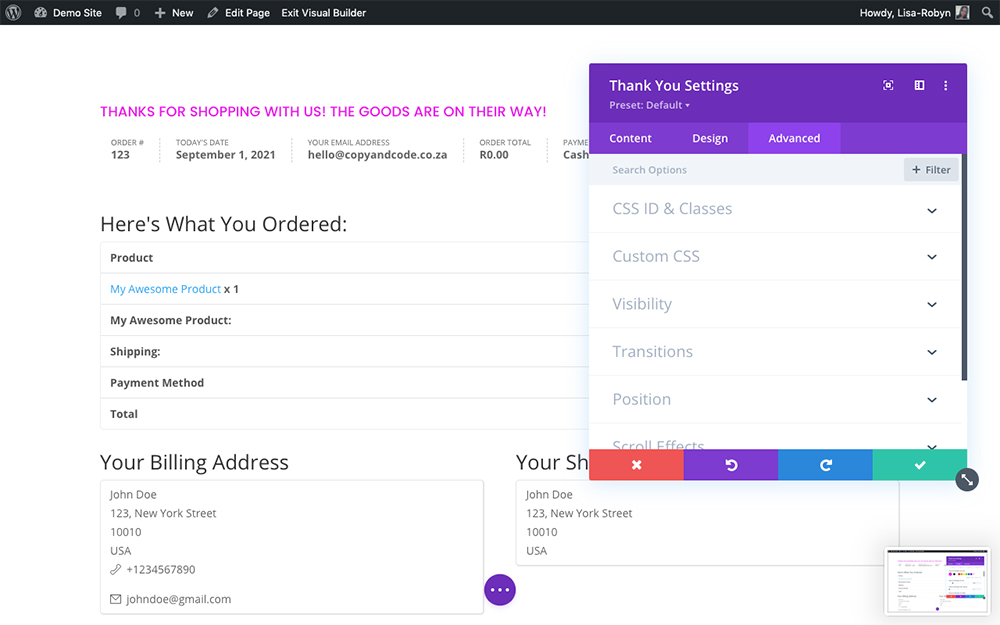
Add deeper levels of customization in the Advanced tab
Create Custom WooCommerce Thank You Pages Using Our JSON Layouts
If you want to save even more time in design, you can use a set of custom JSON layouts that our team put together. These JSON layouts have been specifically designed as Thank You pages. Here’s an example:
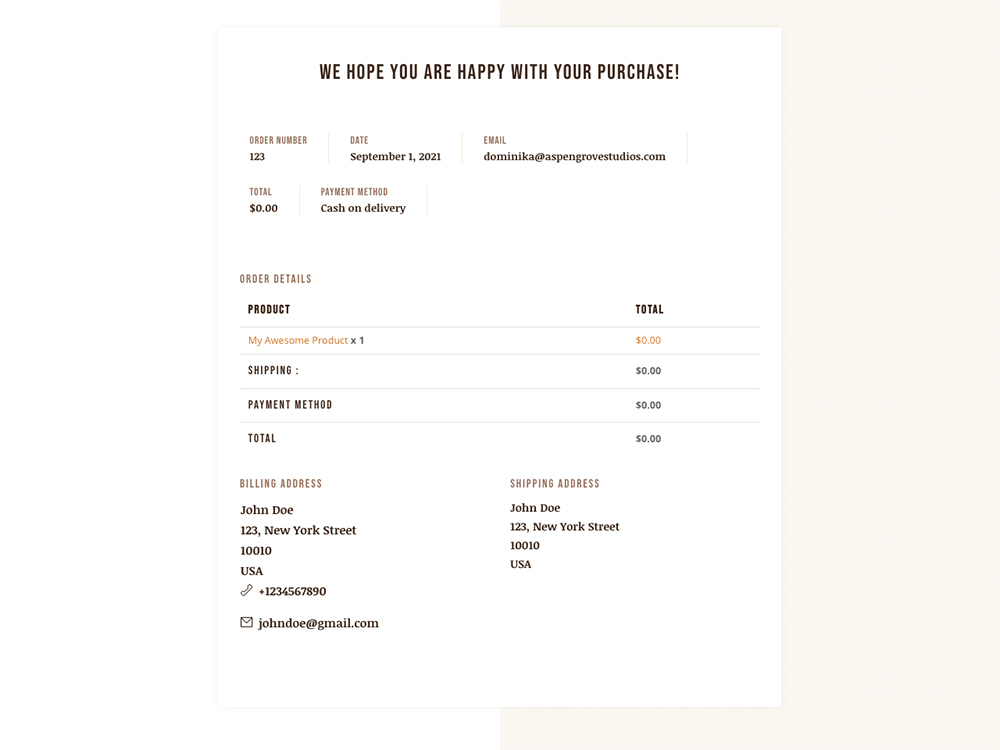
Use our beautifully designed thank you page layouts
These JSON layouts, as well as others, come free when you purchase the Divi Shop Builder plugin. All of the layouts are in JSON file format so they can be quickly and easily imported to the Divi Library and onto your thank you page in seconds.
Download the Divi Shop Builder Layouts
If you want to use one of our premade layouts in your WooCommerce store, as soon as you’ve purchased the Divi Shop Builder plugin, head to the demo showcase page and download the thank you page layout of your choice. Once the download .zip file is complete, unpackage the file and locate the JSON layouts inside. From here, head to the Divi Library and install the Divi Shop Builder layouts by clicking the Import & Export button. Once the pop up appears, click the Import tab and select the demo layout of your choice from your computer. As soon as the installation is complete, you’ll find the JSON layout in your Divi Library, ready and waiting to be used. Once the layouts are imported, head to the Thank You page and enable the Divi Builder. As the layout is a full-page layout, when adding it, do not create a new section, instead, click the plus icon in the Divi Builder console and navigate to the Your Saved Layouts tab. Locate the layout and add it to the page. Once the layout is installed, you can customize the options in the Content tab and style the modules in the Design tab. In just a few seconds, you would have created a stylish and striking thank you page for your online store!
Ending thoughts
Creating a custom thank you page for your ecommerce store will leave your customers on a high. Your brand would have carried through to each step of their buyer’s journey. As well as helping you create a custom thank you page, the Divi Shop Builder plugin also lets you create a custom Cart page, a custom Checkout page, create a product carousel, showcase your WooCommerce products in list view and so much more! Purchase the Divi Shop Builder plugin from Divi Space and start building beautiful, one of a kind online stores! If you’ve purchased the plugin and are already using it on your Divi and WooCommerce stores, send us a link to your thank you page, we’d love to see your designs! Thanks for reading!

Hey Lisa
Thanks for this!
Is there any way to create different thank you pages for orders in different categories?
For this it is easiest to install a plugin like Custom Thank You Page for WooCommerce