By default, the WooCommerce plugin only has a single interface for showcasing products. While the grid view is okay, it is rather commonplace and you may want to change it up. If you want to build an online store that is highly functional and looks great, try switching your WooCommerce shop page to list view.
Together, Divi and WooCommerce are a winning combination for ecommerce businesses looking to build an online store. Using the tried and tested pair of WordPress with WooCommerce, along with the ultra-powerful Divi Builder, means that you can enjoy levels of site customization, unlike other WooCommerce themes.
This being said, there are a few things that can’t be customized, such as the standard grid view for WooCommerce products. While there are several WooCommerce list view plugins available, these will only satisfy a singular function, and they’re not always compatible with Divi.
We created the Divi Shop Builder that includes the Woo Shop + module for Divi users wanting to build stand out online stores. One of the many features that this plugin includes is the ability to create a WooCommerce product list view with just a few clicks.
With the Divi Shop Builder in your development toolkit, you’ll be able to build a one-of-a-kind list view display for your WooCommerce products like this:
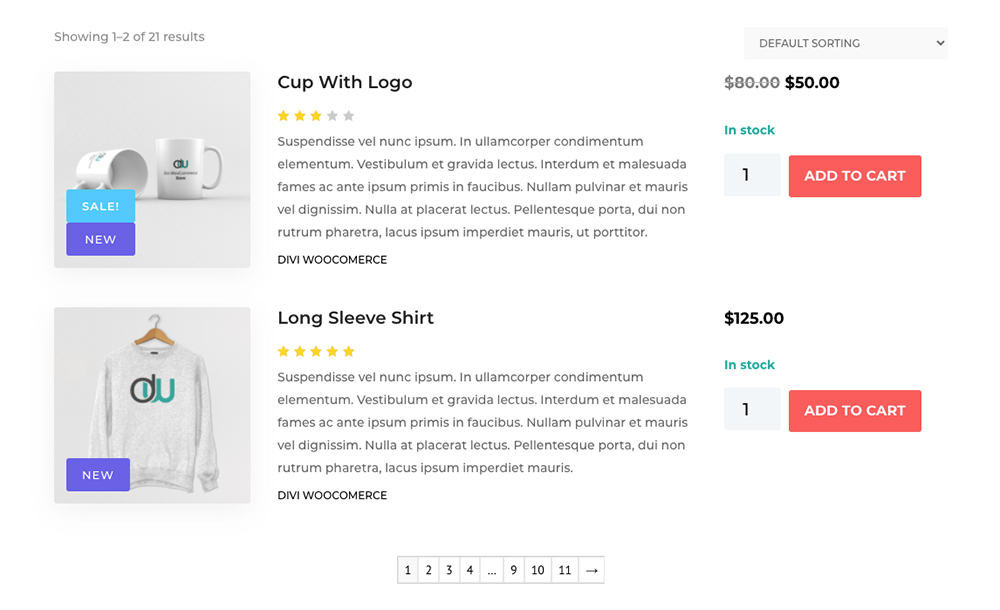
An example of the WooCommerce list view layout
Looks amazing, right?
Get ready for a detailed walkthrough of the Divi Shop Builder plugin, including:
- An explanation of why you should create a list view display for your WooCommerce store,
- An installation guide for the Divi Shop Builder plugin,
- A walkthrough of how to use the plugin to create a list view display,
- How you can save time by using the demo above on your online store.
Why You Should Create a List View for your WooCommerce Products
As mentioned above, the default WooCommerce shop layout display is a simple grid. This grid is often a few columns wide and displays several product elements, including the title, price, and featured image.
Here is an image of the WooCommerce product view in grid format from the Divi WooCommerce Store child theme.
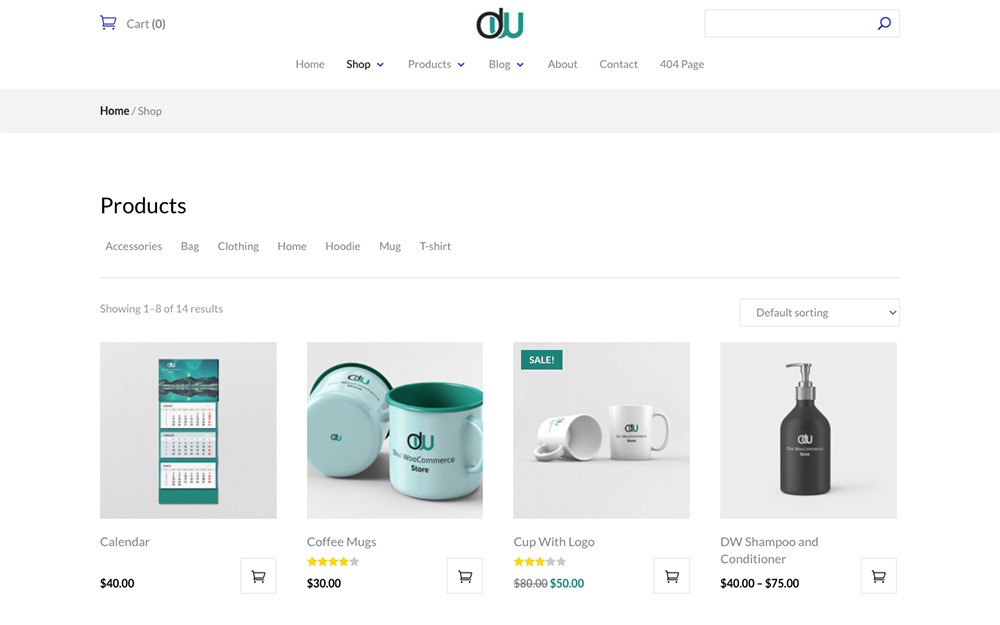
An example of a standard product grid view
With products in a grid view, they’ll automatically display with a large image. This compromises on space. As the image takes center stage, there’s little room to add any further information such as a description of the product, stock count or similar.
Generally, this grid layout is fine, there are no extreme problems with it, however, it is very limited. With this limitation, the grid layout doesn’t always fit every web design, business, industry, or client preference.
- Restaurants, spas, and other service businesses selling treatments will struggle with the grid view. Whether you’re selling food or treatment, menus have a very standard display of a list view of items, possibly including a short description of the product and the price. Creating an online menu with a grid is challenging.
- Brands that sell build-your-own-type products are also limited. If your customer needs to select multiple items at once in order to create a product out of their specifications, scrolling endlessly to get to each product piece will be irritating for them.
- Some products don’t need images at all. For these online stores, the grid view is both a waste of space, and also, without imagery, the grid will look a bit strange.
Our plugin Divi Shop Builder dissolves these stresses. With our plugin, you’ll be given the option to create a list view for your WooCommerce products.
Ready to find out how to build the online store of your dreams? Let’s check out Divi Shop Builder in action!
How to Create a List View of WooCommerce Products
Installing the Divi Shop Builder plugin
First things first, you’ll need to purchase the plugin from the Divi Space store. Once purchased, access the plugin from the My Account page and download it. Then install and activate the plugin on your site. You’ll be asked to enter your license key to authorize your plugin purchase.
Once the plugin is installed, activated and ready to go, you’ll be able to find it in the Divi menu.
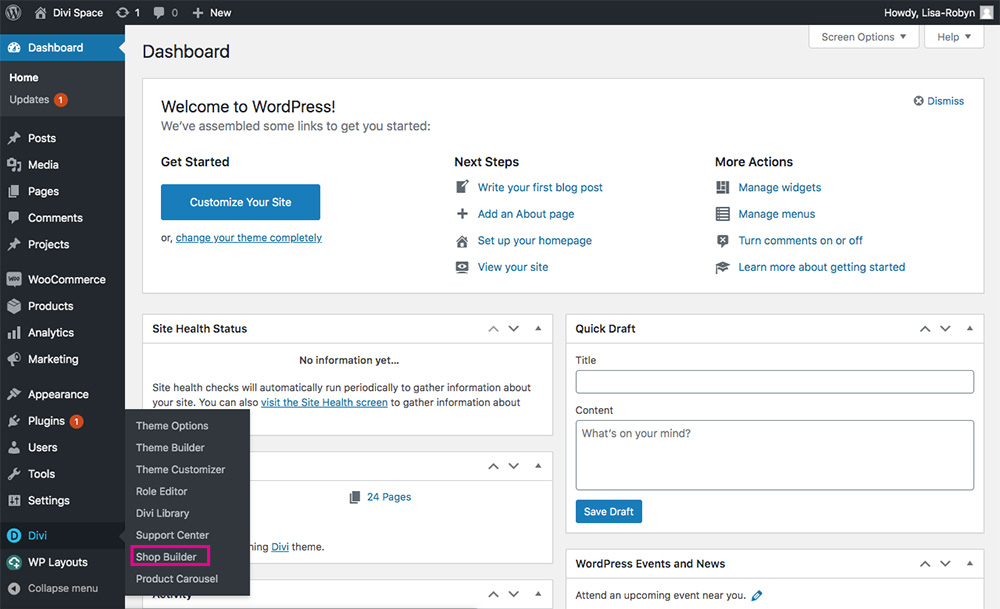
Find the Divi Shop Builder plugin in the Divi menu
Divi Shop Builder works by adding a series of modules directly into the Divi Builder. The plugin has no configuration settings or set up steps, instead, it serves as a central location to remind you of the plugin features. If you get stuck or are looking for support, you can return to the plugin dashboard page for help.
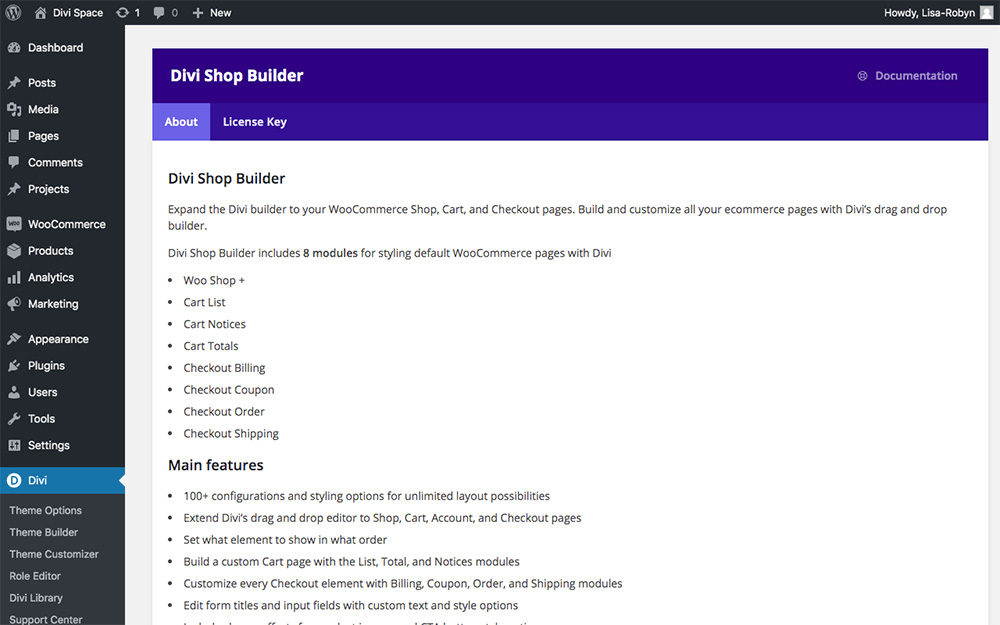
A preview of the Divi Shop Builder plugin dashboard
Before you dive into playing around with the Divi Shop builder plugin, make sure you’ve added a few products to your WooCommece store. Once you’ve added a few products, you can start using the plugin. Create a row and section as per normal, then add the Woo Shop + module.
Creating a WooCommerce product list view
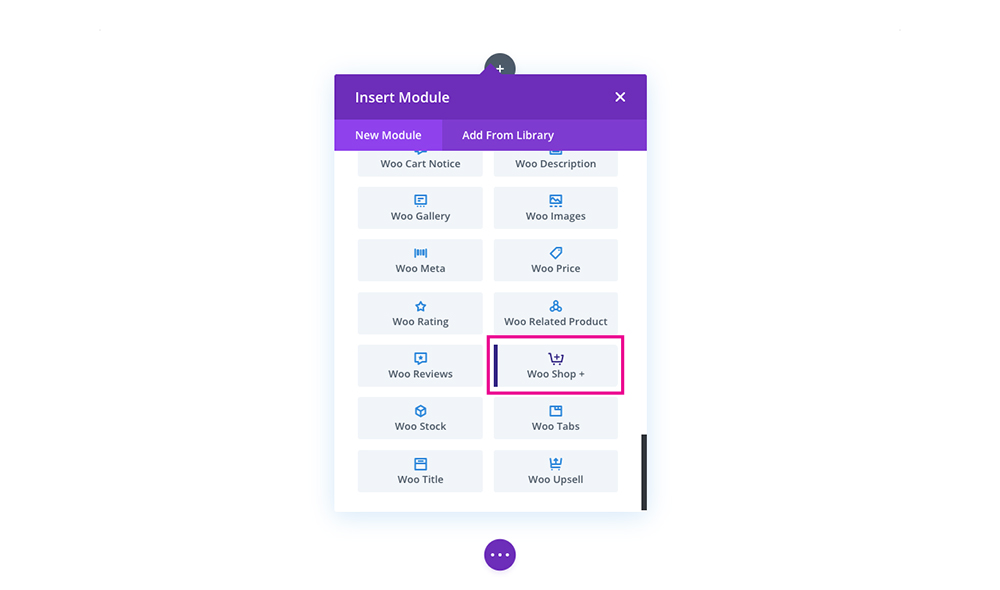
Select the Woo Shop + module
Once you’ve added the module, your products will display in the standard grid format.
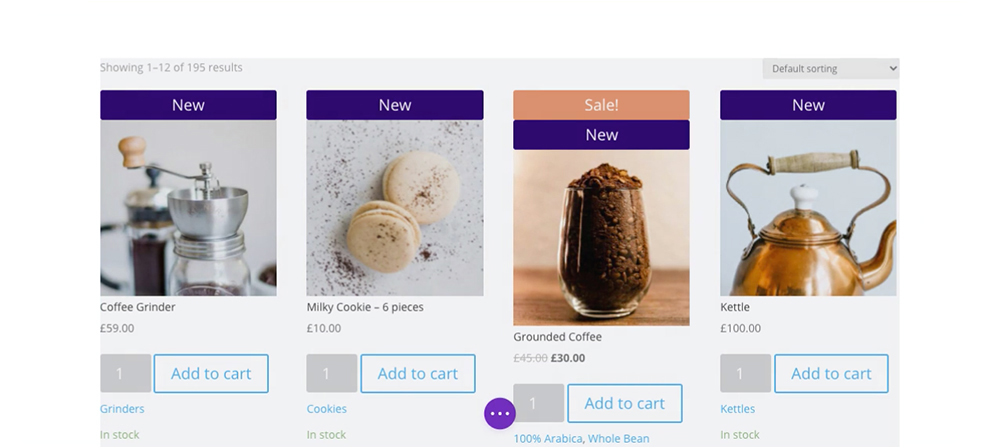
By default, the products will display in a grid format
By default, the Woo Shop + reflects the default Divi settings including the use of the Open Sans font and blue theme accent. It also automatically displays various product elements, such as badges, the featured image, title, ratings, price, product quantity, the Add to Cart button, categories, stock count and a product description.
Just like any other Divi module, each and every element in the Woo Shop + module can be custom styled via the Design tab. We’ll get to styling the module a bit later, for now, let’s shake up this standard grid format.
To change this into a list view display, all you have to do is open the module in the Product tab, scroll down until you see the Layout option, click on the drop-down menu, and select List.
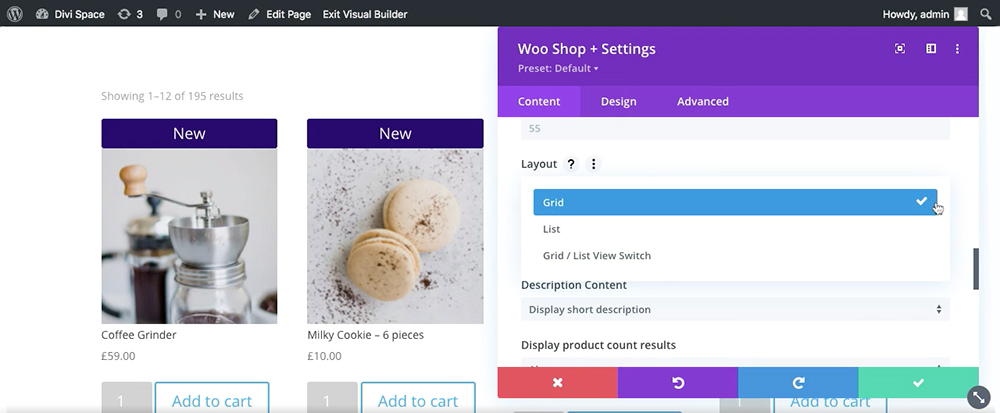
Scroll down until you see the Layout option, select List
In just a few seconds, you would have created a WooCommerce product list view display for your online store.
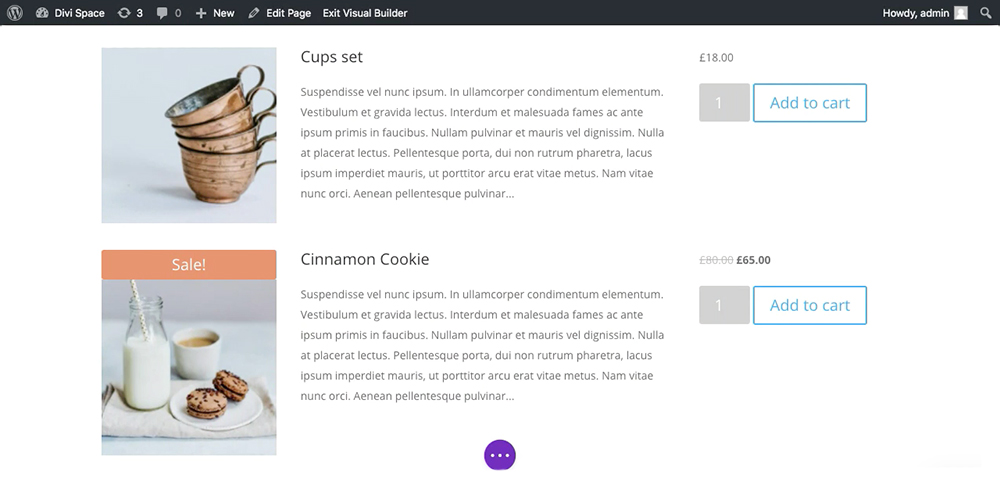
Now your WooCommerce products display in a list format
Can’t decide between the grid or list view? Selecting the option Grid / List View Switch from the Layout drop-down menu will add an icon that’ll toggle between both views.
When you add the Woo Shop + module to a page or post layout, the module will automatically display a product description, regardless of whether it is in Grid or List view mode. By default, this product description is set to cap at 55 characters. When you’re customizing your design, you can decide to cap the product description copy at any length.
To do so, navigate to the Product Description Length option and enter a custom value.
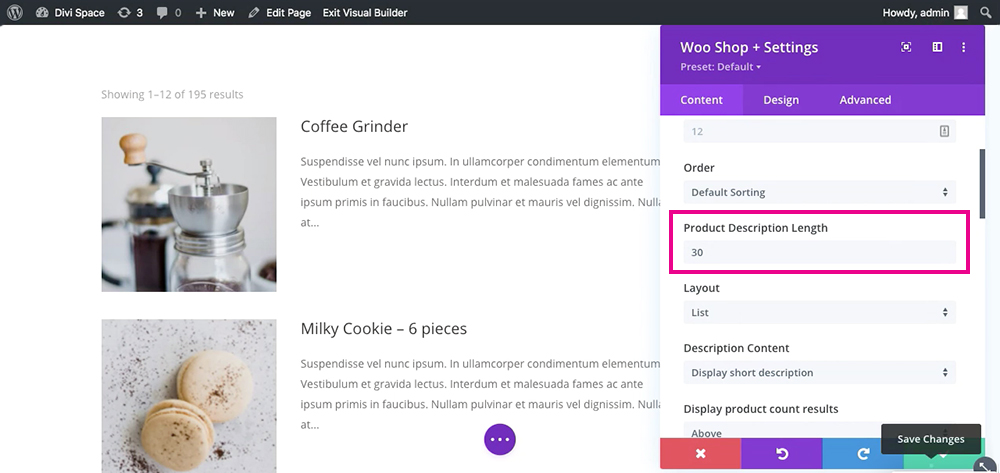
Here is an example of the Product Description Length option set to 30 characters.
To make sure your products display well across all devices, you can set a custom product description length for each device view of desktop, tablet and mobile.
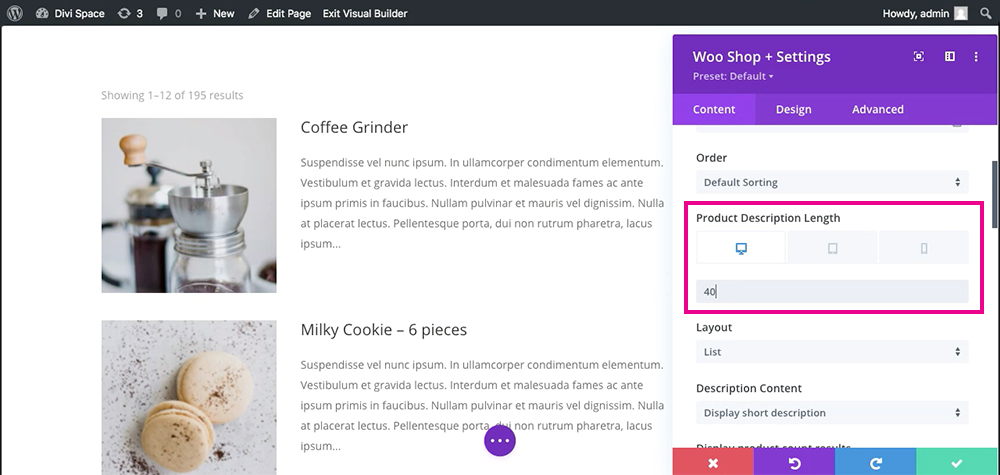
Set custom product description length word counts for each device
When setting the product description, you can decide where the plugin pulls the description text from. This can either be from:
The short description entered into the product listing…
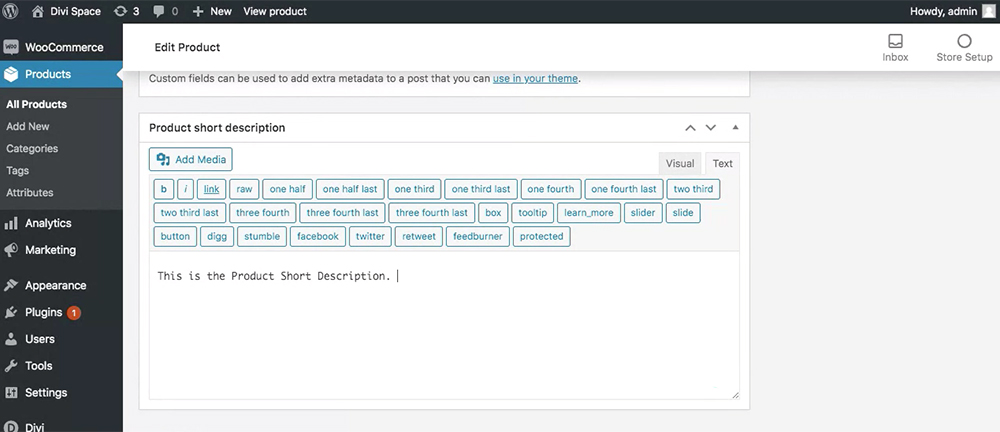
Enter text into the Product Short Description option
Or it can be entered into the Custom Product Short Description box.


Enter text into the Product Short Description option
When deciding which of the two options you’d like to display, head to the drop-down menu titled Product Description and select whichever option you prefer.
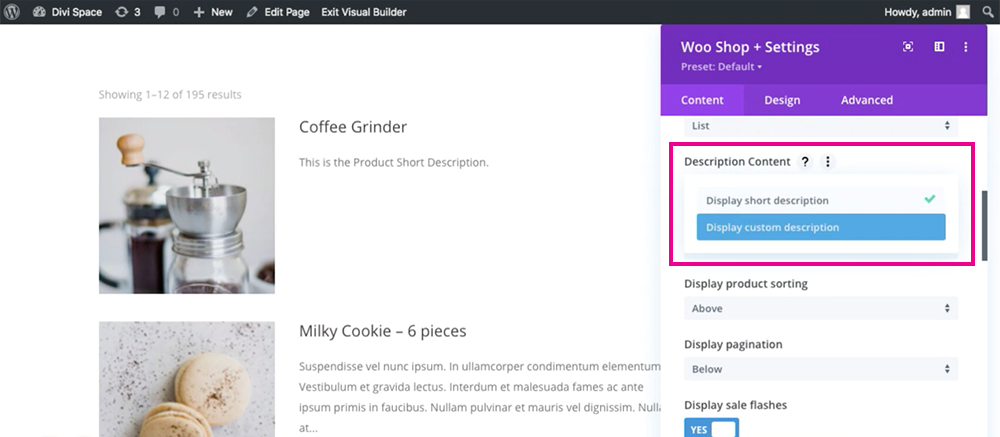

Select whichever option you’d prefer for the product description.
Once List view is enabled, the plugin will, by default, display the text of the Short Description added to the product listing itself.
When writing product copy, whether you choose to display the text of the Short Description or Custom Product Description for the Divi Shop Builder, remember to keep the text interesting and engaging. You only have a few characters, together with the product featured image, to entice your store visitor to inspect a product further. If you have items that are very similar in nature, you may find it difficult to craft copy that describes each product in a unique way. If you struggle with writing product copy, work together with a copywriter.
Exploring the Divi Shop Builder plugin settings
Once the List layout is set, you can start playing around with the other settings in the Woo Shop + module.
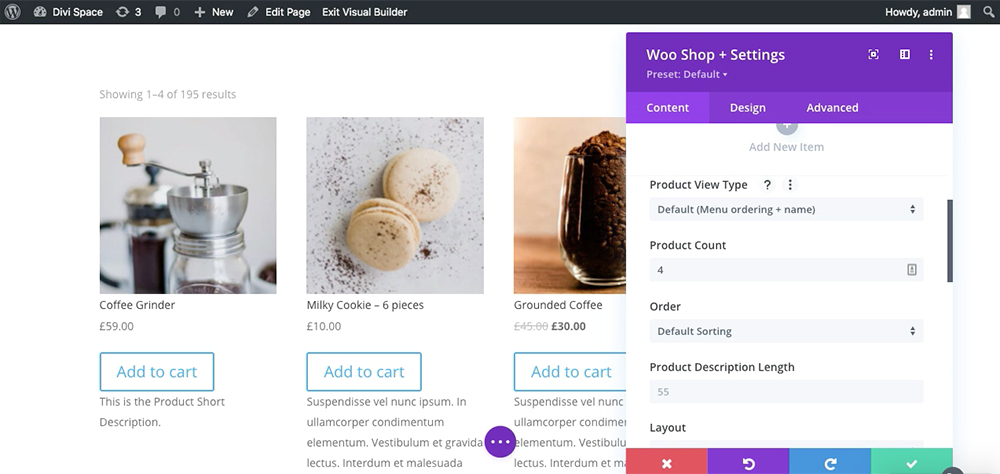

View the plugin options
- Product view type: Here, you can decide which products you’d like to display, such as all products, featured products, products on sale and so on.
- Product count: Next, you can decide the number of products you’d like to display in this particular Woo Shop + module.
- Order: Then you can determine which order to display the products; by popularity, rating, date, price, etc.
- Product description: Length: Set a character limit for the product description length display, as well as custom limits for desktop, tablet and mobile.
- Layout: Here, you can select whether you’d prefer a grid or list-based display, or, whether you’d like to set up a toggle that switches between both views.
- Description content: Select between the short description and custom description to describe the product.
- Display product count results: If you’d like to show the total product count text, for example, “Showing 1 – 12 of 24 results” you can decide whether this should show above, below, in both positions or none at all.
- Display product sorting: Select where you’d like to display the product sorting drop-down menu, if at all.
- Display pagination: Here you can decide whether you’d like to display the pagination count at the top of the shop display, at the bottom, in both positions or neither.
- Display sale flashes: Toggle this option either on or off to show flashing sale badges.
- Badges position: Set whether the badges overlay on the image, and if so, in which position.
There are also a series of toggles for you to decide whether you’d like to:
- Display the add to cart button
- Display the cart quantity field
- Set a default value for the quantity field
- Display the product image
- Display the product price
- Display product star ratings
- Display categories
- Display the product stock counts
- Display the New! badge
Styling the Divi Shop Builder plugin
Once you’ve set up your product view to display as you want, you can style it to match your brand design. As with all modules in the Divi theme, each element in the Woo Shop + module can be custom styled using the Divi Builder. This is a game-changer, as previously, this level of customization could only be achieved using advanced code and CSS.
In the Design tab, you’ll find countless options that’ll allow you to style the:
- Add to Cart button
- New badge
- Sorting drop-down menu
- Every single text element from the product title text to the stock text
- Image
- And much more.
Absolutely everything is customizable; each segment of text, each button or badge, even the quantity field, pagination and results count elements are easily styled from within the Design tab of the Divi Builder.
One extra awesome feature that really improves the user experience of the online store is the View Cart button that automatically displays once someone adds a product to the cart. This button can also be custom styled via the Design tab.
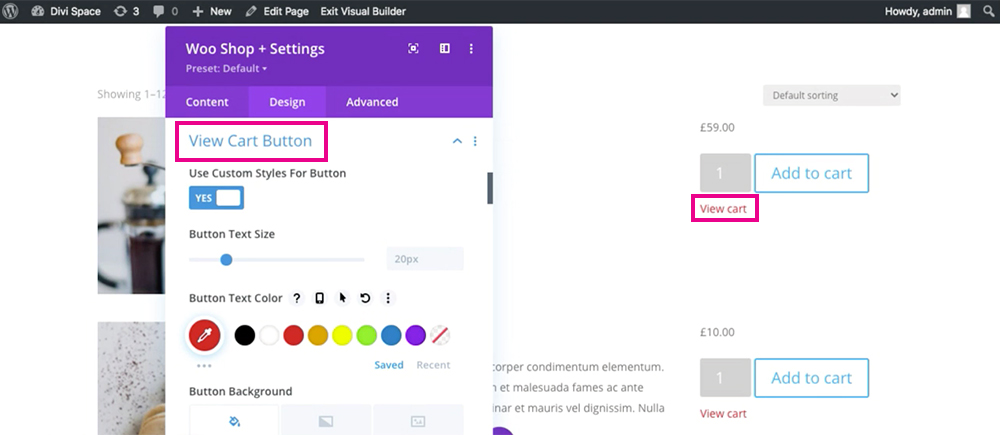

Style the View Cart button
Advanced Customization for the Divi Shop Builder plugin
Finally, in the Advanced tab, you’ll find all of the standard settings for advanced module customization such as CSS classes and IDs, visibility settings for devices, positioning options and so on.
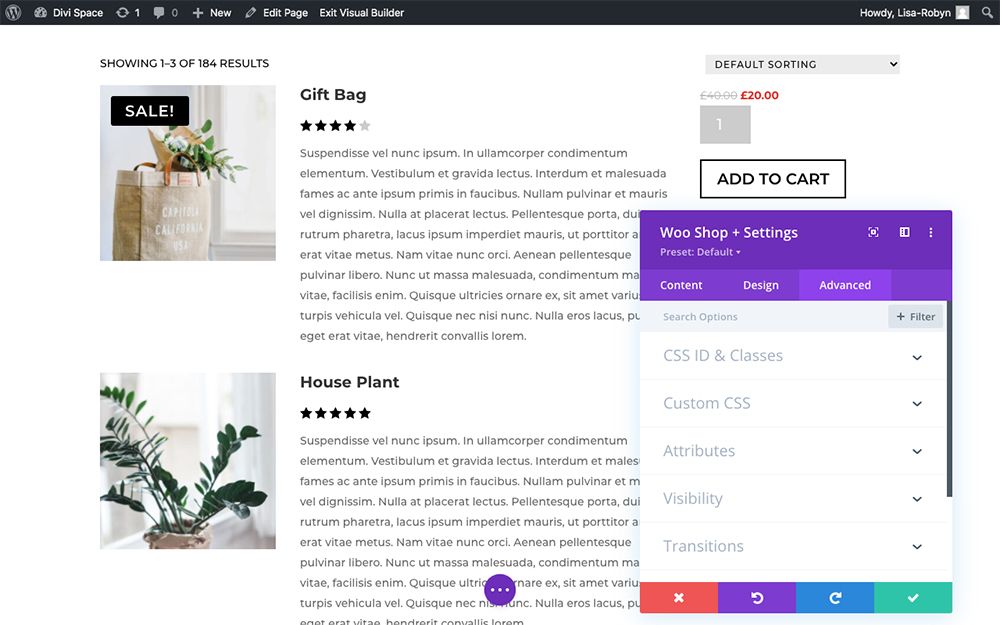

Use the Advanced tab to add deeper customizations
And there you have it! In just a few clicks, you would have set up a truly divine list view for your WooCommerce products. Your online shop will look unlike anything else around!
Create Product List View Displays Using Our JSON Layouts
This quick demonstration gives you an overview of the layouts and designs you can create. As mentioned above, each element is editable via the Divi Builder, and can be styled with just a few clicks, so you can easily customize the Woo Shop + module to match your brand colors.
If you’d like to bypass the module setup and styling process, simply use one of our expertly designed layouts, such as the one previewed at the beginning of this post as well as the following:
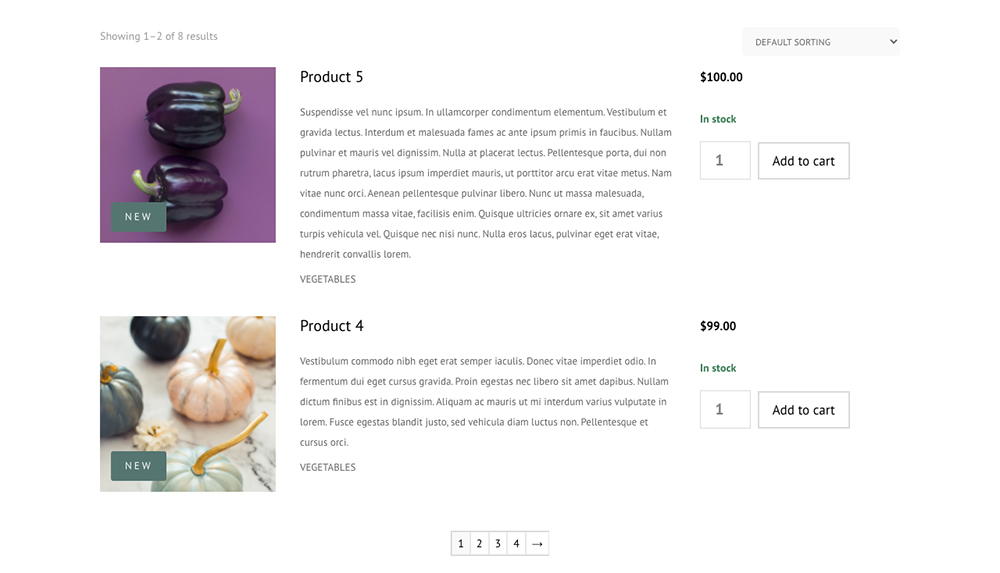

An example of the WooCommerce list view layout
Or, create a user-friendly page design that uses the toggle feature to switch between grid and list view.
These gorgeous layouts, as well as countless others, are free when you purchase the Divi Shop Builder plugin. Available in JSON file format, these layouts can be imported to the Divi Library and added to a page in a few seconds. You can use these layouts as many times you like, on unlimited sites.
Download the Divi Shop Builder Layouts
Once you’ve purchased the plugin, head to this demo showcase page and click Download All Layouts. A download will begin, and when complete, you’ll find a .zip file in your downloads folder called Woo-Shop-Demos-UNPACKAGE-THIS-FILE. As the name suggests, double click on the file and unzip it. When complete, you’ll find the layouts inside.
Install the Divi Shop Builder Layouts
Now, head over to your website and click on the Divi Library in the Divi menu.
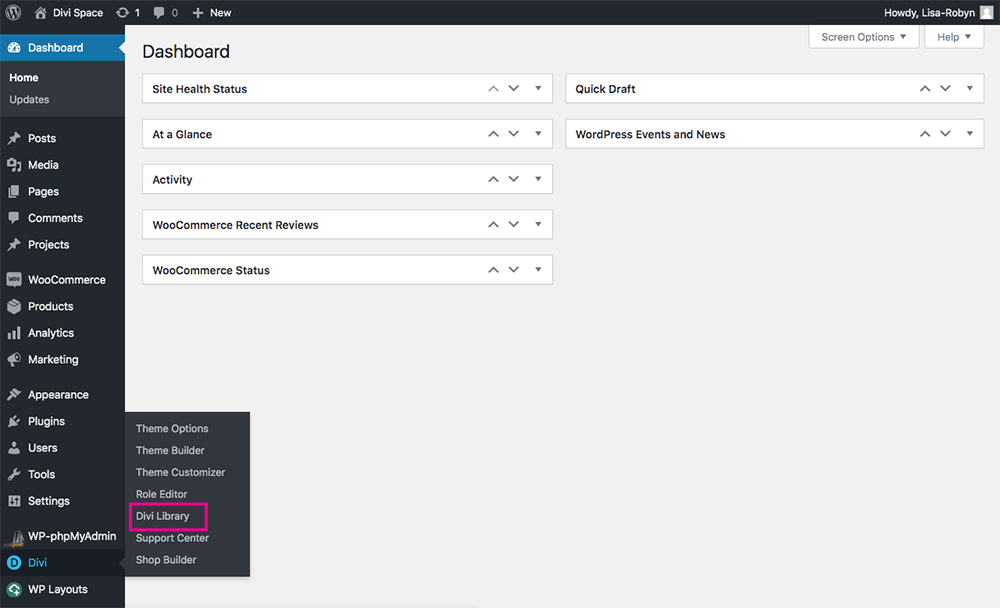

Access the Divi Library from the Divi menu
Inside the Divi Library, click the Import & Export button and a pop up will appear. Click the Import tab and select the Woo Shop + demo layout of your choice from your computer.
The two layouts showcased in this tutorial are:
- Woo Shop + Module – Demo 5 (mug and t-shirt example, displayed at the beginning of this post)
- Woo Shop + Module – Demo 7 (vegetable example, displayed at the beginning of this section)
Let the installation run to completion. When finished, you’ll see all of the layouts loaded into your Divi Library, ready and waiting for you to use!


Just like that, the two demos will be added to your Divi Library
Use the Divi Shop Builder Layouts
To use the Divi Shop Builder layouts, create a new page and enable the Divi Builder. These two WooCommerce product list view demos are both sections, when you add a new section, click the Add from Library tab and the two list view modules will appear.
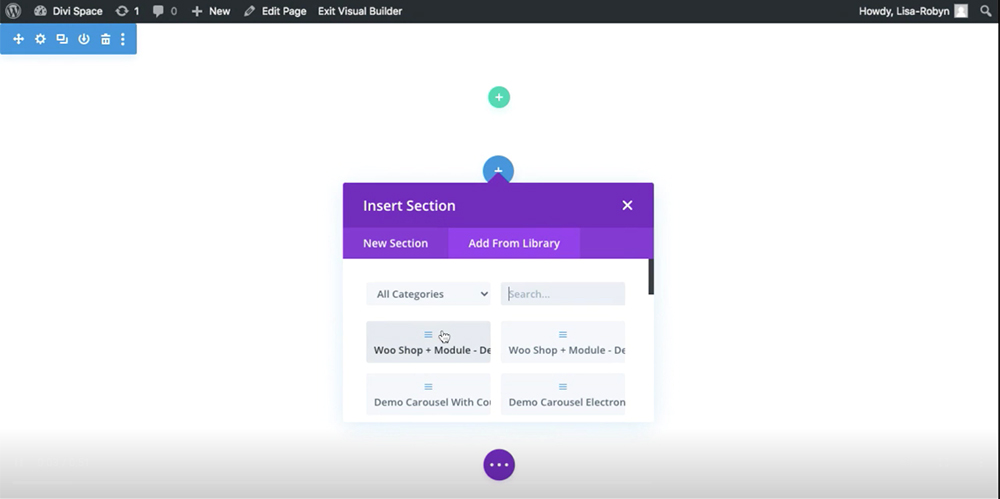

Add the layout
Using these two free demos will save you so much time in development. Once they’re installed, you can edit the options in the Product tab to set your configurations of choice. If you want to tweak a few design variables, you can head to the Design tab and play around with the various styling options for each element.
Ending thoughts
If you’re looking to create a seriously one of a kind product view for your online store, look no further than the Divi Shop Builder plugin. As you’ve just seen, creating a standout list view for your WooCommerce products is quick, easy and code-free.
This is just one of the many, many features of this plugin. Other features include styling the cart page, creating a custom checkout experience and much, much more!
We hope you’ve enjoyed building a beautiful list view for your WooCommerce product list. If you have any questions about the Divi Shop Builder plugin, drop them in the comments below! We’re constantly adding new features to this amazing plugin, if you have a feature request, contact our support team with your suggestion!
If you’ve purchased the plugin and have used it to make a list view, feel free to add a link to your WooCommerce products in list view, we’d love to see what you create!


Hello, is there any way to do this only with PHP and CSS? And it must be like default for all categories?
Hello, i would like to try a demo or free version of your plugin, is there any way=?
Hello, we do not have a demo or free version of Divi Shop Builder, but we do have a 14 day money back guarantee should you find the plugin doesn’t meet your needs.
Is there support for product list view on mobile?. I tried the demos but they don’t work on mobile, just on desktop.
Hello, what view exactly would like to achieve on mobile?
List … by list
Keeping 3 columns on mobile devices wouldn’t look good. But this is achievable with CSS
A question about your plugin. Can I decide the variables I want to show on a list. I want to show on one page a price for the physical store and another on another page for the online store. It is for a restaurant that has different prices if they take it at the table (more expensive) than if they buy it online to consume at home
How the prices are set on the product page? You could use a custom product meta field to display different prices.

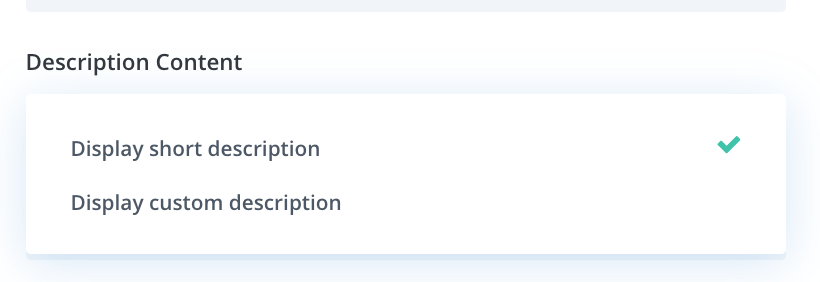
You can set custom description – price in your case under product settings.
How can I display the product list view in the Products search results?
Hi Janny, you can do it with Theme Builder and Divi Shop Builder.
1. Go to the theme builder.
2. Create template and assign “Search results”
3. To the body insert Woo Shop + Module and change layout to list.