
Two of the most important steps of setting up a Divi and WooCommerce store are configuring shipping and taxes. These settings can be confusing, so we’ve created a handy guide that’ll help you navigate these steps.
Geared for growth, highly customizable, and cost-effective, WooCommerce is renowned as the best ecommerce platform for entrepreneurs looking to build an online store. While WooCommerce becomes easy to use, it does have a learning curve, and certain configurations can be confusing for first-time users.
Two of the areas that have intricate settings are the set up of shipping and taxes. These two settings are separate entities, but they do cross over and, when set up, will work together automatically. You can set up various defaults, allowing you to charge a different tax based on the shipping location or other variables that are calculated automatically.
In this tutorial, we’ll look at how to set up shipping and taxes in WooCommerce so that the process is streamlined for both you and your customers.
Basic Shipping and Taxes Setup with the WooCommerce Setup Wizard
First, let’s take a look at the WooCommerce Setup Wizard.
A look at the WooCommerce Setup Wizard
When you first install WooCommerce, the Setup Wizard will run. This wizard gives you a brief overview of the various configuration settings for a WooCommerce store. These settings include both the shipping and tax settings.
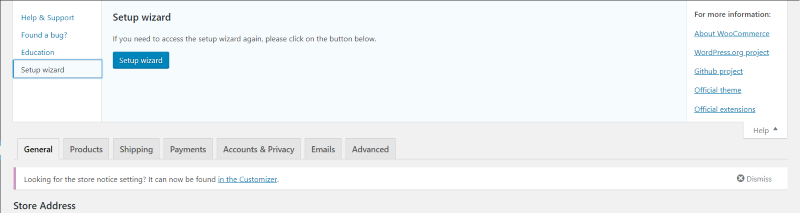
If you’ve already gone through those settings and need to get back to them, at the top of your dashboard click Help and then select Setup Wizard on the left and click the button.
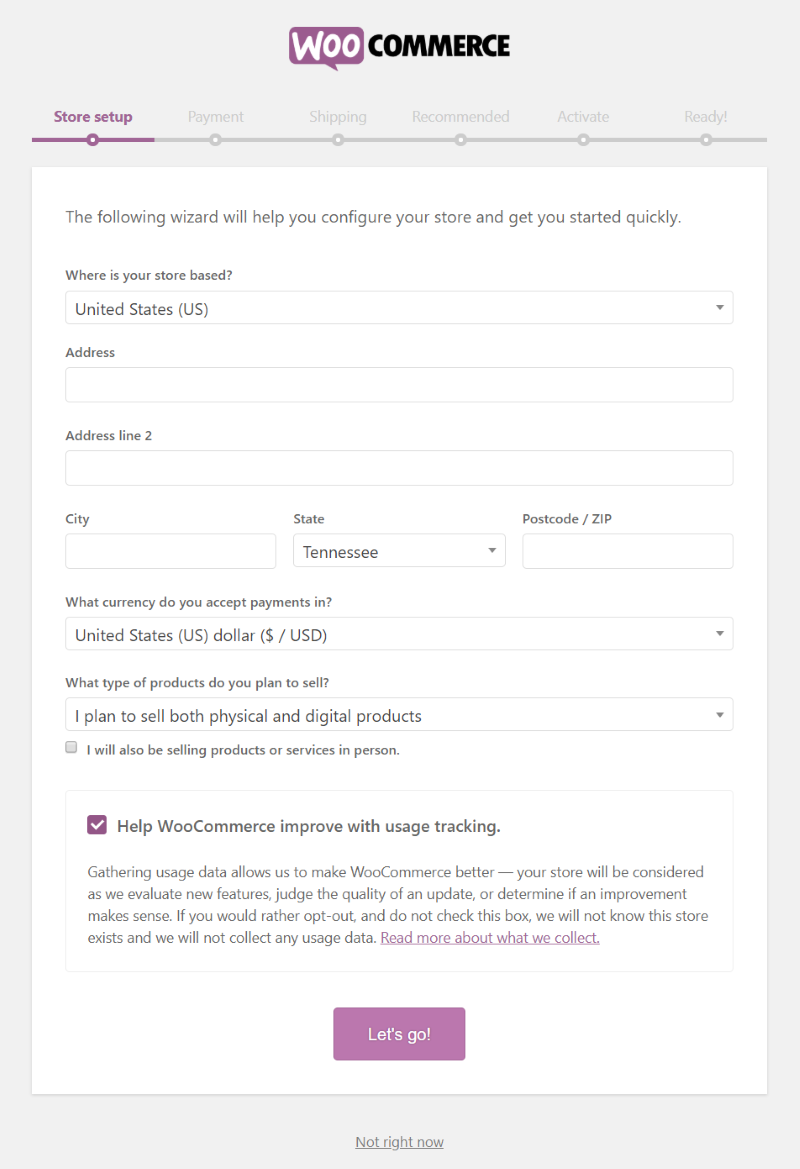
A look at the WooCommerce setup wizard Store setup page
Go through the setup one section at a time; you’ll see the progress along the top of the setup wizard. We’ll focus on the Shipping and Recommended sections. In previous versions of WooCommerce, the shipping and taxes setup used to be combined, but it’s now a little more streamlined. They do still work together as before.

A look at the WooCommerce setup wizard Shipping settings
The Shipping tab lets you choose your preferred weight and dimension units.
- Weights include kg, g, lbs, and oz.
- Dimensions include m, cm, mm, in, and yd.
These are the basic settings for shipping, you’ll continue the shipping set up in the main settings. Set your selections and click Continue.
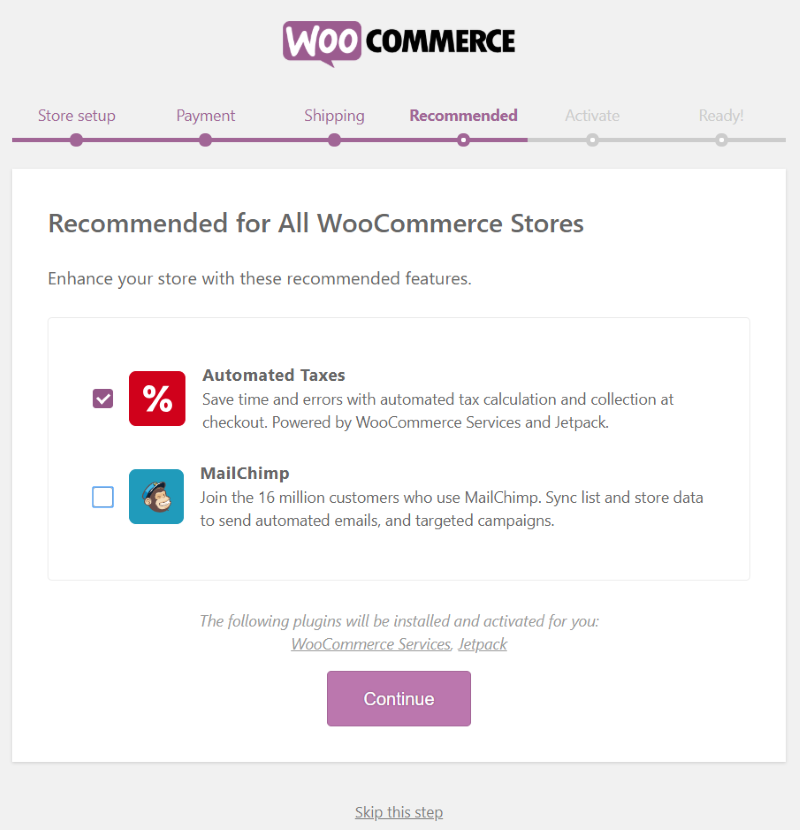
A look at the WooCommerce setup wizard Recommended settings
The next tab, Recommended, includes the settings for automated taxes. If you select this it will activate two plugins: WooCommerce Services and Jetpack. Make sure the box is checked and click Continue.
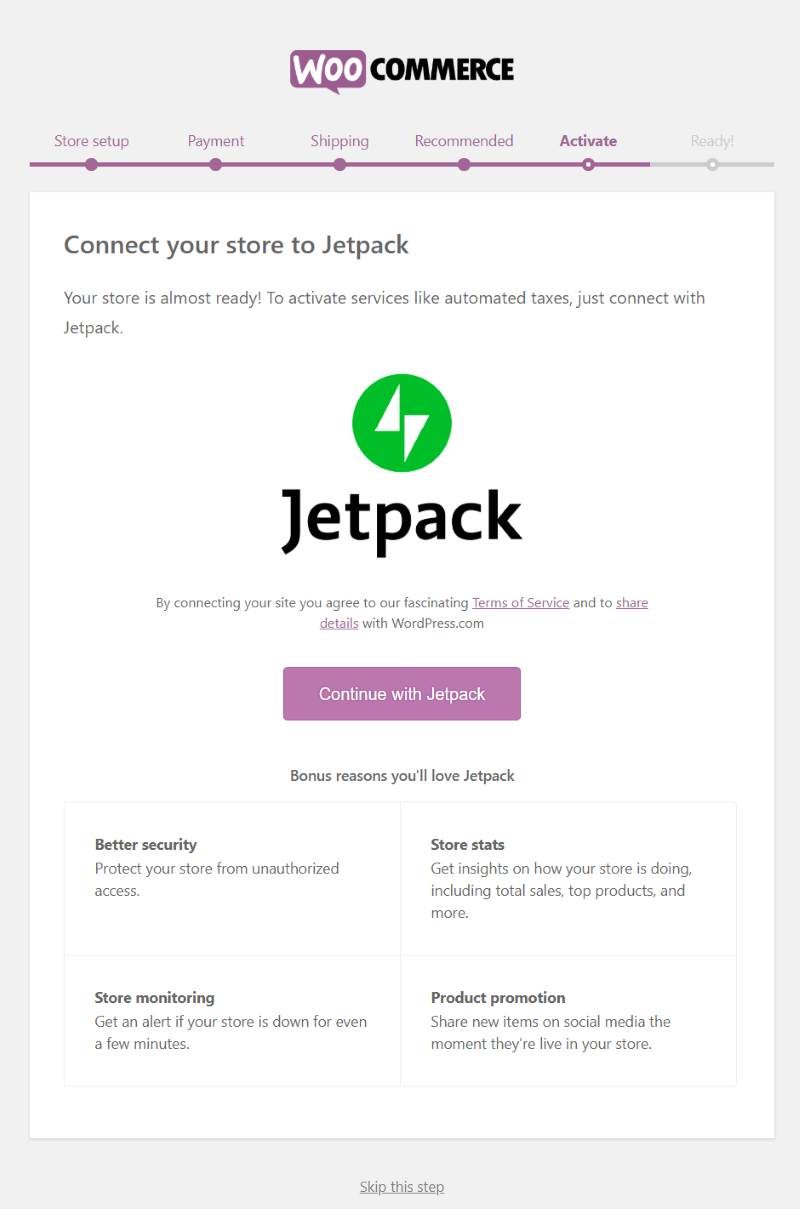
Continue the setup by connecting to Jetpack
The next screen with activate Jetpack. This is required for automatic taxes.
Shipping Settings
Once WooCommerce is installed, you’ll need to continue the setup. In the dashboard menu, go to WooCommerce > Settings.
Shipping Zones
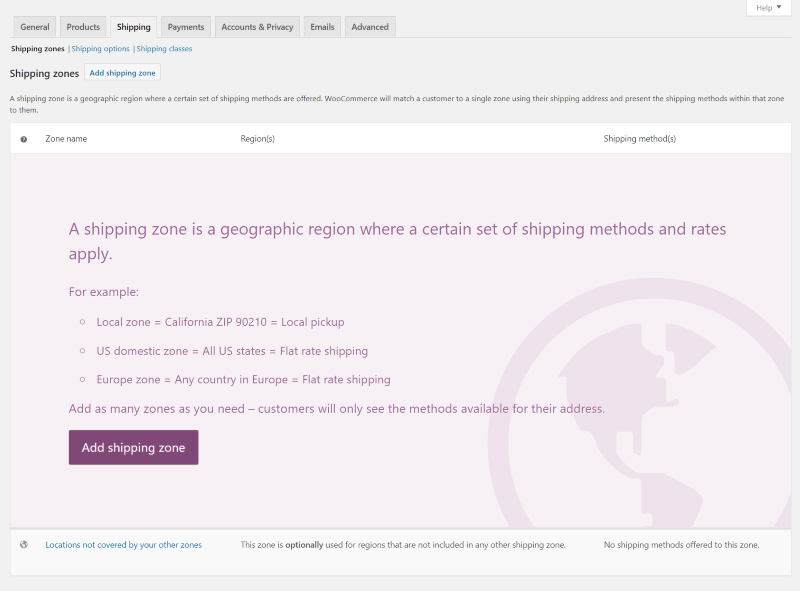
Add a shipping zone
First, you’ll need to add a shipping zone. This tells WooCommerce the types of shipping options that are available, such as flat rate shipping, free pickup, etc. You can add multiple shipping zones. Click Add shipping zone.
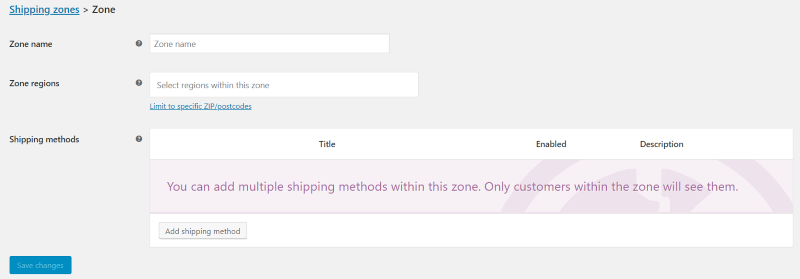
Set the particulars for your
First, provide a zone name for your own reference, then add the regions that the shipping zone will cover. You can limit this to specific zip codes if you want. To provide the shipping methods click Add shipping method.
Add a shipping method
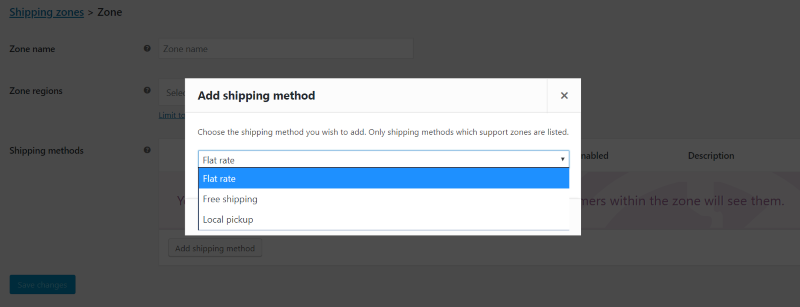
A modal provides a drop-down box where you can choose either a flat rate, free shipping, or local pickup. You can have free shipping to trigger based on coupons or a minimum spending amount. With the local pickup option, local taxes will be applied regardless of the buyer’s location.
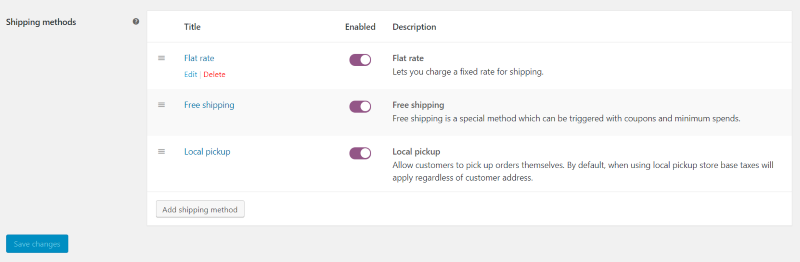
A look at the various shipping methods
You can edit, delete, enable or disable, and add as many shipping methods as you want.
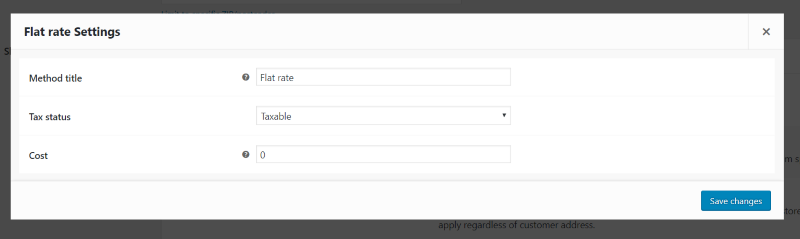
Preview of the WooCommerce flat rate shipping settings
Clicking Edit opens a modal where you can provide a title, choose the tax status (taxable or none), and add a cost. For the cost, you can add calculations such as 10.00*qty. Hovering over the question mark provides examples of how to add the calculations.
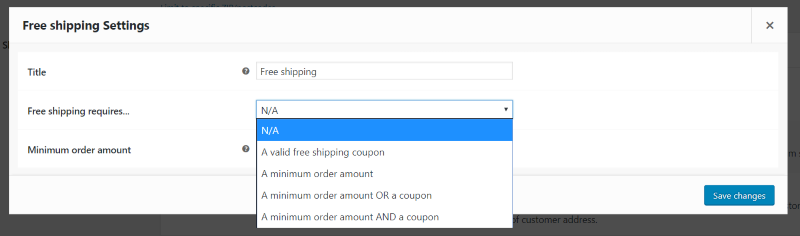
Set the requirements for free shipping
For free shipping, add a requirement from the drop-down box and add a minimum order amount.
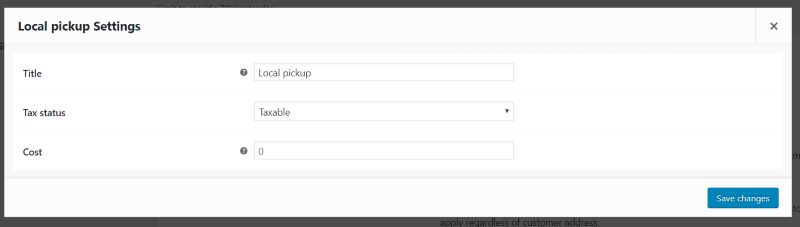
A preview of the WooCommerce local pick up settings
For local pickup, you can determine if it’s taxable or not and add a pickup cost if you want.

Configure shipping settings for locations outside of your designated zones
Under the zones that you create is another link with options for locations outside of your region.
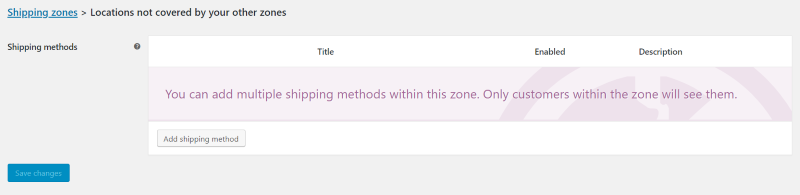
Add a shipping method for locations outside of your designated zones
Here’s where you add shipping methods for each of the shipping zones. Click Add shipping method.

Select the applicable shipping method from the dro- down menu
This opens a modal where you can choose between flat rate, free shipping, or local pickup. It’s exactly the same, with the same features, as the regular shipping zones.
Be sure to save any changes before leaving this page.
Shipping Options
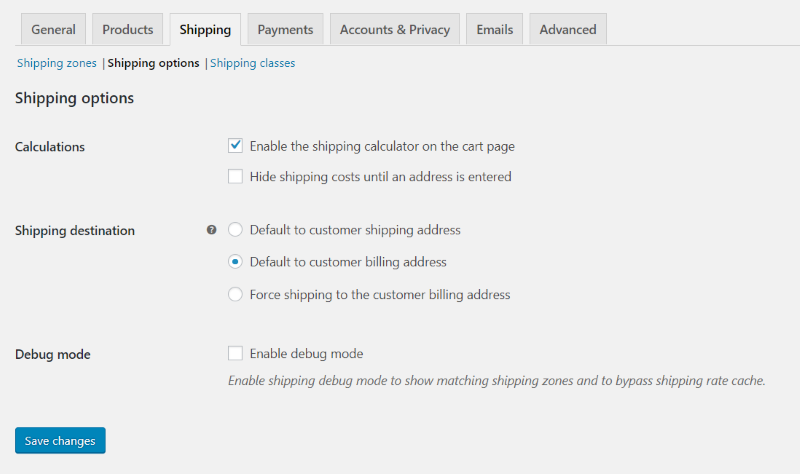
A look at the WooCommerce Shipping Options menu
Under the shipping tab is a list of sub-tabs; select Shipping Options. Here, you’ll be able to choose:
- calculations options, whether you’d like to enable the shipping costs until an address is entered.
- default shipping destination, which includes the customer’s shipping address, the customer’s billing address, or to force the shipping to the customer’s billing address if you don’t want to provide the option to ship somewhere else.
The debug mode shows matching shipping zones and bypasses the shipping rate cache, which performs the calculation every time.
Shipping Classes
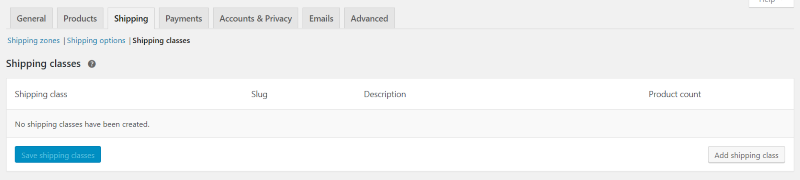
A look at the WooCommerce Shipping Classes menu
The Shipping Classes help you to group products by type. The shipping methods can use these product groups and apply different rates to different classes. This is especially helpful when products are fragile, expensive, too small and light to make much difference, etc.
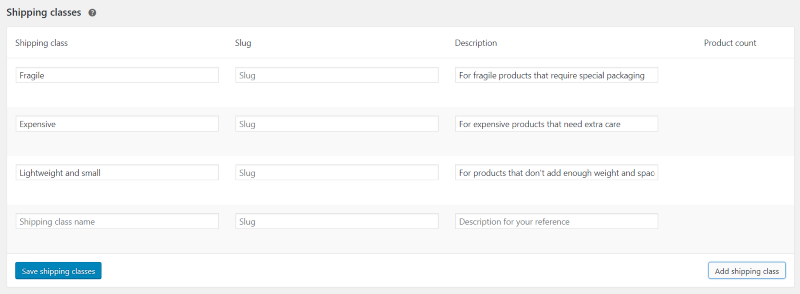
Configure the Shipping Classes
Click Add shipping class and enter the name, slug, and description into the fields. You can add as many shipping classes as you want.
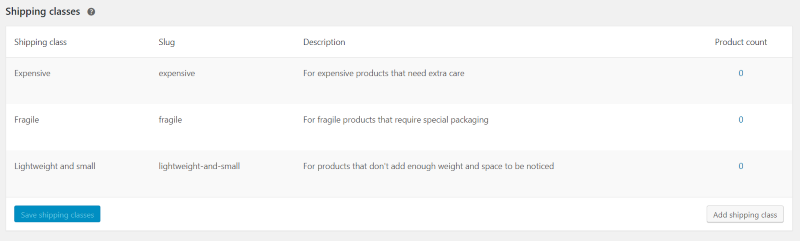
An example of shipping complete shipping classes
Once you save the shipping class it will use the title for the slug if you don’t enter a separate name for it, and show you the product count for each one.
WooCommerce Services

A preview of the WooCommerce Services plugin
When the WooCommerce Services plugin is installed, a new link is added to the Shipping Settings tab called WooCommerce Services. This allows you to purchase and print shipping labels. This can be disabled, but… um… why would you do that? This will save you time but will have to print the labels yourself.
Choose your paper size (the size of the label you’re printing) from Label, Legal, or Letter. Add a credit card so you can pay for the label. Email Receipts will send a receipt of every label you purchase to your email address.
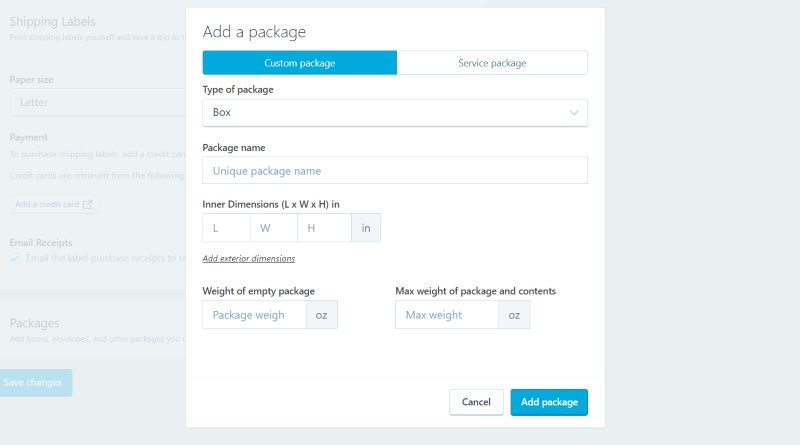
Click Add Package and enter the information. Click Add package when you’re done.
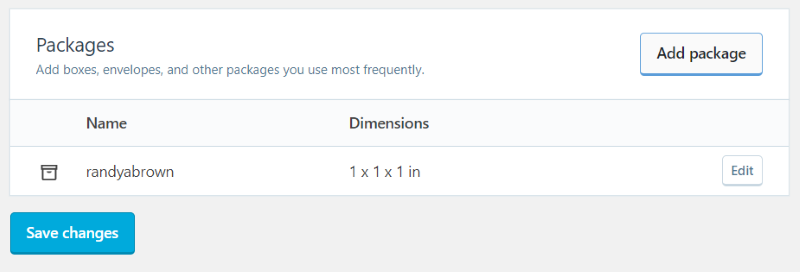
This will add the label to the list. Add as many packages as you want and print them all at once. If you have any questions check out our comprehensive WooCommerce shipping guide.
Tax Settings
With WooCommerce Services installed, a new tab is added to the WooCommerce Settings that includes Tax options, Standard rates, Reduced rate rates, and Zero rate rates.
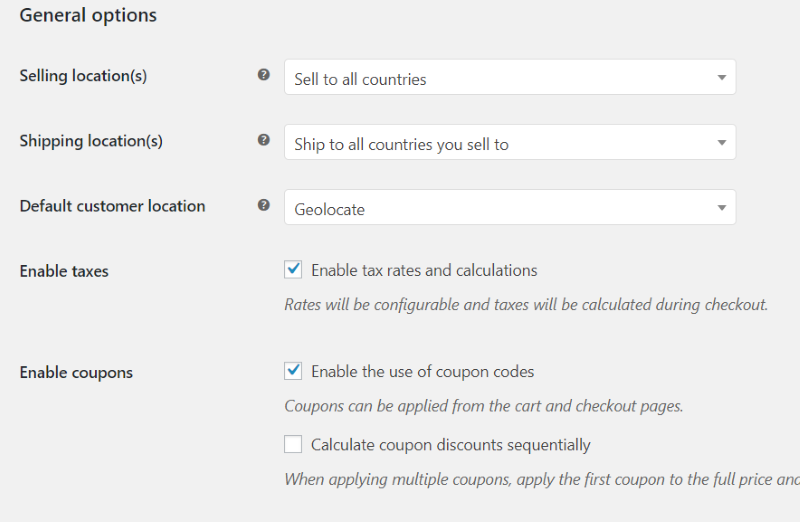
A new feature is added to the General settings tab to enable tax rates and calculations. This is enabled by default.
Tax Options
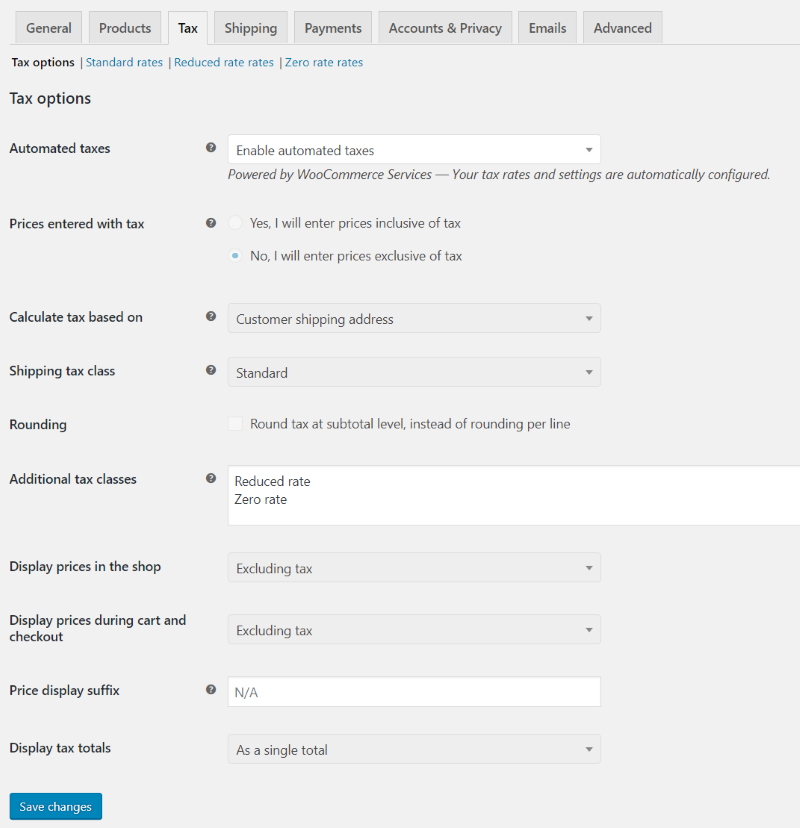
In the Tax options tab you can enable automated taxes, include or exclude taxes when prices are entered, choose what to base the calculation on, select a shipping class, round at the sub-total level, add additional classes, display the prices in the shop, display the prices in the cart and during checkout, show the price suffix, and display the tax totals.
Standard Rates

Here it will show a list of the tax rates that you’ve set up. Click Insert Row or Import CSV to add a tax rate.

Enter the country code, state code, zip code, city, percentage, a name for the tax, priority (in case there are multiple tax rates for the same area), choose if it’s a compound rate, and choose if the tax rate should be applied to the shipping.

Add as many as you want.
Reduced Rate Rates

Reduced rate rates lets you enter locations that will receive a reduced rate for taxes.
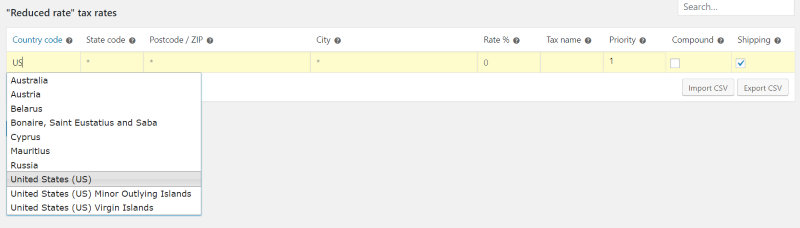
It will suggest options for the country code as you enter the information. You can add as many as you want.
Zero Rate Rates
For Zero rate rates, enter the locations that you want to exempt from taxes. This is great if there are certain locations that you want to pay the tax for them as a bonus for that location, such as a disaster area.
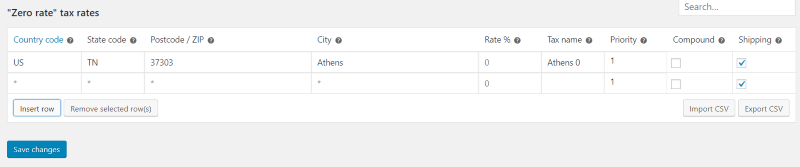
Like the other tax rate options, you can add as many as you want, make it the priority, and import or export the data as a CSV file.
Ending Thoughts
Setting up the shipping zones and automatic tax rate is not difficult and it is a great way to add options automatically with no extra steps required at checkout. Even though WooCommerce does require extra plugins for the automatic tax settings, the setup wizard adds those plugins and seamlessly integrates them so all you have to do is add your tax settings. Setting it up does require a few extra settings, but the features are more than worth the effort.
Do you use WooCommerce’s automatic shipping and tax features? Let us know about it in the comments.

Great article, except for having to install and use Jetpack. Is there a way to set to set up the shipping using a different plugin?
Thanks!