As a webdesign/product business, we put a lot of thought into our buttons. Why is that? Calls to action aren’t just important for business, they drive everything including lead and revenue generation, better click-through rates, superior user experience and more – customers want and expect them.
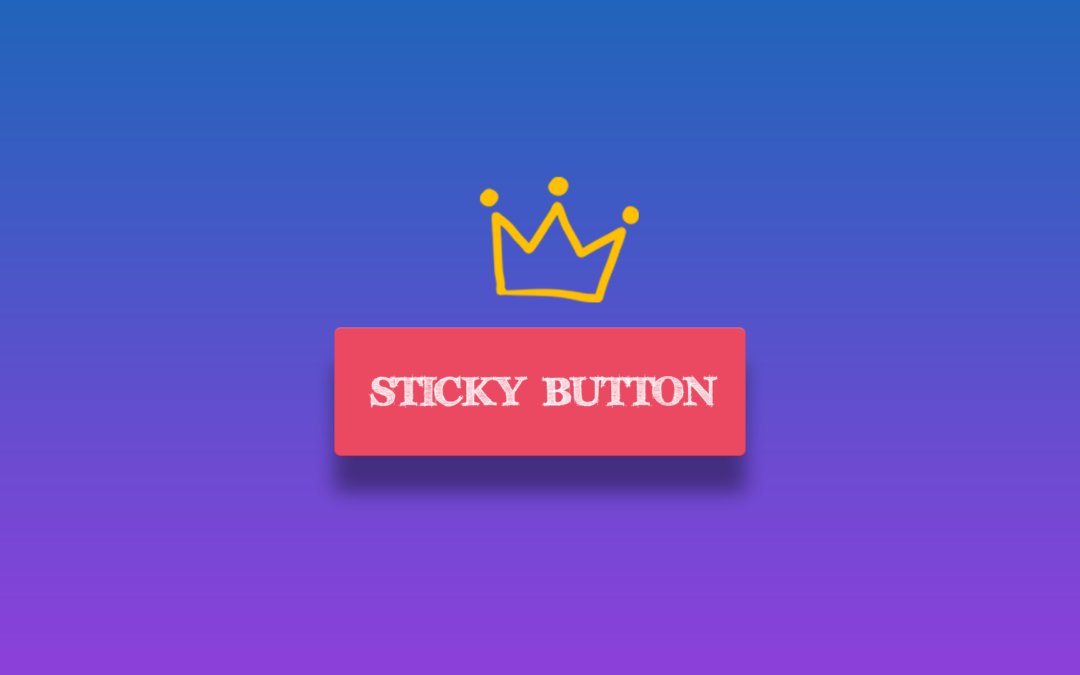
In this tutorial I will show you how to create a highly converting, site-wide floating button for any Divi powered website.
Let’s get started!
How to Create a Good Call-to-Action Button?
1. Make your Call-to-Action buttons look like buttons
Remember that you want users to take an action, which they’re only going to do if it’s clear what that action is. We don’t push diagonal bits of text, or weird bouncing icons: We push buttons.
2. Ensure your CTA button stands out
A general rule to follow is that your button stands out from the rest of the page design, you can achieve this in a number of ways but some of the most common approaches include bolder text, increased padding and white space, different or larger fonts and in some cases a background color that is reserved only for CTAs.
3. Write copy that encourages action
Particularly in the case of sales/product pages, your content should build up to the user taking an action. By the time they finish reading, users should know exactly what you want them to do and should be actively seeking out the next action.
4. Choose a bold colour for your buttons
Again, it all comes back to making sure they stand out. A good test is to scroll quickly through your content, did your buttons still catch your eye?
5. Ensure you have good contrast between text and button colour
Whether it be dark on light or light on dark, ensure your text is not washed out. Bear in mind that people see colors differently where as contrast is relatively consistent.
6. Make your buttons mobile and desktop optimised
This isn’t a principle reserved for buttons, but there is a lot more to lose from poorly optimised call-to-actions. Check that longer words aren’t being cut in half and placed on two lines and consider making your buttons span the entire view-port when your content is showing in a single column, on mobile for instance.
7. Put your first Call-to-Action button above the fold
in the case of ‘buy now’ buttons, consider that your user has already landed on the page with the intent of taking the next action. Don’t make them work for it.

Did you know that...
More than 90% of visitors who read your headline also read your CTA copy.
Why Do I Want to Create a Floating Button?
Consider this: A customer is shopping on your client’s page and scrolling through a product description. The customer is getting excited to buy the product, but they don’t see a ‘buy now’ button. The first CTA has been scrolled past and it’s a while before the next one comes into view, so the customer leaves. It happens.
With a floating button, your call to action is always visible to a website visitor. The button floats in a set position to follow the visitor’s activity, moving up or down the page as they scroll, so at they point they make a decision to take an action, they’re able to.
The type of button you choose to use is subjective and should be tweaked and informed by how successful it is. What works for other people may not work for you. Successful CTAs require a ton of experimentation, A/B testing, and a willingness to keep trying new things, even when you’re getting “good” results.
Good can always be great, with work.
How to Add Sticky Button Site-Wide
Step 1.
- In the back end of your site, go to “Divi > Theme Options”, where you will find the Divi theme options.
- Open the “General” tab (it should be the current one).
- Scroll down to the bottom of the tab.
- There you will find a box named “Custom CSS”.
- Paste the CSS code below into the box after anything else that may already be in there.
- Press “Save”.

.sticky-divi-button {
color: #ffffff; /* You can change font color */
font-family: "Raleway";
font-size: 18px;  /* You can change font size */
background-color: #f5a623; /* You can change color button */
border-radius: 4px;
letter-spacing: 0.8px;
text-transform: uppercase;
text-decoration: none;
box-shadow: 0px 25px 28px -21px rgba(194,180,190,1);
padding: 20px 3%;
z-index: 10;
position: fixed;
bottom: 40px;
right: 40px;
}

.sticky-divi-button:hover {
background-color: #3ccee2; /* You can change color button on hover */
box-shadow: none;
}
Step 2.
- Go to “Divi > Theme Options”, where you will find the Divi theme options.
- Go to the “Integration” tab.
- There you will find a box named “<body>”.
- Paste the code below, into the box. Again, after anything else that’s in there.
- Replace # with your link.
- Press “Save”.

<a href="#" class="sticky-divi-button">Buy now</a>
Do you want to add a button to single page?.
Add the code to a Divi Code Module, instead of into theoption.
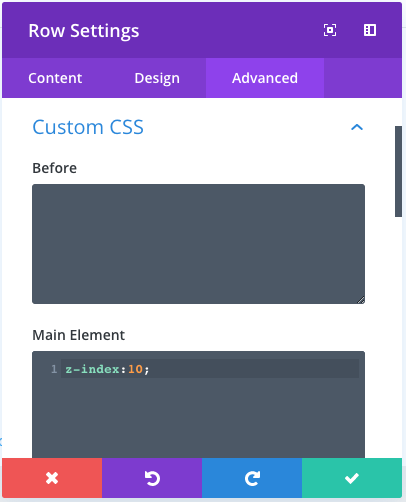
1. Create a A ROW, add code “z-index:10;” to the custom CSS tab
2. Create Code Module in the row and insert the code “<a href=”#” class=”sticky-divi-button”>Buy now</a>”
There you have it, with just two chunks of relatively simple code you have a sticky button! If you have any questions or suggestions, make sure you leave a comment in the comment section below 🙂

It works really well but there are two things i have a question about:
– How can I change the font style? The font-family in the code is Raleway but i like to change the fontstyle just like the rest of the website. When i change ‘raleway’ to ‘roboto’ as a example the total layout of the button is gone.
– How can i put a icon in the button? Just like the support button on this website.
1. You can try to delete the line “font-family:” from CSS, so default font will be used.
Or change it to Roboto with :
2. You can add icon by adding CSS.
You can use CSS from this tutorial: https://wpzone.co/wordpress-and-divi-code-snippets/create-call-to-action-button-in-the-divi-menu/
This link can be also helpful https://www.elegantthemes.com/blog/resources/elegant-icon-font
Hi, I’ve implemented the sticky button on a single page. Because of some typos in the instructions, it was a little unclear about where to put the code 🙂
Now I’ve managed to do it, but I cannot set the font color of the button text. I want it to be white #FFFFFF, but it seems to be stuck on another color (perhaps a theme color). I have successfully changed the background color , so it seems strange that the font color won’t change.
Any ideas?
Hi David, if you need help with any step, let us know. Link to the website is always helpful. Button text color can be changed with
 .sticky-divi-button {
color: #ffffff; }
or overwrite above with
.sticky-divi-button { color: #ffffff!important; }when i click on the button a pop up screen will appear….how can I do this?
Please help me.
You can use any popup plugin to set it up. Make sure the button has the correct class and set click the button as a trigger. We recommend Divi Overlays or Popup Maker plugin.
Exactly what I was looking for. I was able to implement and customize it easily in another theme. Thank you.
This is What I was looking for for, thank you so much it helps
Hi I was wondering how I could make this align to the furthest right of the page with vertical text and keep it centred?
Thank you for this, works perfectly 🙂
Hi! This works, but I can’t seem to change the font. Any Advice?
Thanks for this article! It is super helpful.
How would you move this button to the left of the screen?
Cheers!
I am trying to have 2 floating buttons at the same time.
Hey Anna, would love to be able to change the button to an image of a brick as I’m trying to achieve a Buy a Brick button for a charity site I’m working on. Would love to hear if it was possible. Thanks
How to display this button according to the language?
Hi Anna I really like the idea of this but struggling to get it to work. It stays in one place and does not float when the site is scrolled. Any Suggestions appreciated
Hi Mark, what do you mean by “does not float”?
Great article. I have added this to several sites and my clients love it. Thank you!
I know this is getting a bit more technical, but do you know of a way to replace the button with just an image? I have tried widgets and child themes and have had no luck with getting it to appear in the bottom right. I have been researching this all week and can not seem to find a solution. I did not know if there was a somewhat simple way of piggy-backing off what you guys have already done or if this would be something entirely different. Thank you 🙂
You just need to load a pic in the background.
Is there any way to add a “close” button to remove the floating button?
I was a bit disappointed here. While it does put a sticky button on pages what it is not doing is the function of a buy now button. Surely that should take the quantity and any other selections you’ve made and transfer you directly to the checkout page with everything filled in ready to go? This leaves me wondering how to actually add that functionality to the button.
There is no one solution for that one. For EDD ou can generate a link that adds a product to cart <a href=”http://example.com/?edd_action=add_to_cart&download_id=ID_OF_THE_DOWNLOAD” class=”sticky-divi-button”>Buy now</a> ( More info here https://docs.easydigitaldownloads.com/article/268-creating-custom-add-to-cart-links), or put a shortcode for Woo
[add_to_cart id="ID_OF_THE_DOWNLOAD" class="sticky-divi-button"]. Maybe you are looking more more advanced solution, to have autogenerated button for the viewed product?Having trouble adding to a single page. Also how do you add a link to the button?
Add the CSS code to a Divi Code Module, instead of into the Divi options.
1. Create a ROW, change the row z-index to 10.
2. Create Code Module in the row and insert the code <a href=”#” class=”sticky-divi-button”>Buy now</a>
3. To The Code Module add class sticky-divi-button
Replace # with your link.
Hi, Is there any way that I can disable this on mobile ?
Hi, Thank you very much for this splendid tutorial, I am using divi overlay from divi life which can trigger an overlay when you click the button, So I want the floating button to trigger an overlay not a separate link, for that to work I need to add the unique CSS ID to the button, Normally I do it by going to the advanced tab in button module settings. But how do I add the CSS ID in this floating module ? can you please help , I really need this. Thank you.
How do I change the text from BUY NOW to BOOK APPOINTMENT?
I added the code and the button does not appear. My website is theitalianontour . com
I added the code and put the html in the body area, but it is appearing at the bottom of the site instead of as a floating button. Please see the “Book Online” text at the bottom of iceberghealth . com
Thanks in advance for the help!
Hi Vinay, try to copy the html code again, or delete the ” sign and type it manually.
Can you provide a little more step by step for the “add a button to single page option”
I created a row and added the Code Module, but there is no “tab” that I could find identified as the “CSS”.
And once I add the CSS code, where do I put the html code.
1. Create a A ROW with z-index:10; in CSS tab
2. Insert Code Module in there
3. Insert Code
I tried many different options with no success.
Thanks for any help for us newbies.
Hi David,
here is way you put the css for the row: https://wpzone.co/wp-content/uploads/2019/08/Call-to-Action-Row-Settings.png
and put the html code in the Codule Module 🙂
Is it possible to make this button only show once the reader starts to scroll?
It’s possible with additional jQuery code.
This is so helpful!
Is there a way to switch the button off on mobile?
You can use media queries ? https://wpzone.co/divi-tutorials/divi-media-queries/
and display:none;
I second this!
Awesome!
Thank you worked great!
This is exactly what we were looking for, cheers Stephen!
Is is possible to add a icon on the right side of the button?
Best regards,
Stan
Yes 🙂 Add CSS:
.sticky-divi-button::after {
font-family: ETmodules;
content: “\35”;
padding-left: 10px;
}
to display on the left side
.sticky-divi-button::before {
font-family: ETmodules;
content: “\35”;
padding-right: 10px;
}
Unicode Reference Guide
https://www.elegantthemes.com/blog/resources/elegant-icon-font
HAD A STACKING ISSUE, TOO
Anna solved it
1. Create a A ROW with z-index:10; in CSS tab
2. Insert Code Module in there
3. Insert Code provided in this blog post in Code Module
4. Done 🙂
Thank you Chris! I updated post to include that information.
Hi,
I don’t understand this. Could you please explain?
Thanks!
Epic – thank you!
How do I center the button on a mobile phone?
@media all and (max-width: 768px) {
.sticky-divi-button {
bottom:10px; /*center button on mobile*/
left: 46.5%; /*center button on mobile*/
width: 7%; /*center button on mobile*/
}
}
How can I make the button smaller?
@media all and (max-width: 768px) {
.sticky-divi-button {
padding: 10px 15px; /*smaller button on mobile */
font-size: 15px;/*smaller button on mobile*/
}
}
Yes, you can use page and post id to make the floating button not show up on certain pages.
For posts:
.postid-XXXX .sticky-divi-button {
display: none;
}
For pages:
.page-id-XXXX .sticky-divi-button {
display: none;
}
How to find the page ID?
1. Go to the Pages list inside your dashboard.
2. Edit the page you want to work with.
3. Look at the URL in your browser’s address bar and find the section that looks like this: “post=[ID-NUMBER]“.
6. That number will compose your class, that should look like this: “.page-id-[ID-NUMBER]“.
Follow the same steps for posts, You can also inspect your page and find css class inside body,
Is there a bulk way to get rid of the floating button on each post without individually adding the post id for every one?
yes, you can use class .single-post
How do I make the floating button not show up on certain pages?
How can I stop the button showing on some pages?
How can I change when the button appears or whether its just mobile?
Hi Andrew, use media queries 🙂 https://wpzone.co/divi-tutorials/divi-media-queries/
Is there some sort of code I can add to have the button NOT show on specific pages?
Yes, you can use page and post id to make the floating button not show up on certain pages.
For posts:
.postid-XXXX .sticky-divi-button {
display: none;
}
For pages:
.page-id-XXXX .sticky-divi-button {
display: none;
}
Also is it possible to only have the button appear on certain pages as it appears on the page they are sent to when they click the button and that doesn’t make sense.
Is it possible to have the text colour also change when hovering?
Sure!
.sticky-divi-button:hover {
color: #ffffff; /* Buttom text color on hover */
}
I can’t get it to stack properly. Anna, I didn’t know how to reach you but the button is on the home page of TeachU.com
Chris, a row with Divi Code Module needs to have z-index:10; property
Brilliant! Thank you. I tried putting that on the code module but it didn’t work. It did work great when adding it to the row as you instructed. Thank you so much!
Awesome, works well.
Thank you for this interesting tutorial
I got it working but have trouble with the stacking. It gets lost behind some things and others only part will serve as the link. I tried increasing Z-index to 99 but it made no difference. I love the idea if I can work out the “always on top” issue. I have it on my homepage now.
Any ideas?
Can you please send me a link to the website?
Good article.
Thanks for the ease of use for it
Thank you! Working perfectly.
This is great. Thanks so much for sharing.
Is there a way to have a side floating button on desktop and tablet and a bottom floating one on mobile?
Of course, change CSS to:
.sticky-divi-button {
color: #ffffff; /* You can change font color */
font-family: “Raleway”;
font-size: 18px; /* You can change font size */
background-color: #f5a623; /* You can change color button */
border-radius: 4px;
Letter-spacing: 0.8px;
text-transform: uppercase;
text-decoration: none;
box-shadow: 0px 25px 28px -21px rgba(194,180,190,1);
padding: 20px 3%;
z-index: 10;
}
.sticky-divi-button:hover {
background-color: #3ccee2; /* You can change color button on hover */
box-shadow: none;
}
@media all and (max-width: 767px) {
.sticky-divi-button {
position: fixed;
bottom: 40px;
right: 40px;
}
}
@media all and (min-width: 768px) {
.sticky-divi-button {
position: fixed;
bottom: 40%;
right: -4%;
transform: rotate(90deg);
}
}
Hello, you are a genius, sorry and could you tell me what to add so that this button is on top of my web menu?
Benjamin, check out this tutorial: https://wpzone.co/divi-tutorials/how-to-create-a-call-to-action-button-in-the-divi-menu/