
Have you ever logged onto your WordPress website and wished you could white label the dashboard to match your brand and add better information? It’s not visually appealing and the widgets, although functional, aren’t particularly helpful for client sites.
By default, the WordPress dashboard pulls in various widgets and displays them at first login. While these widgets could be helpful to some users, generally, they are overlooked and tend to create clutter to the visual interface.
Wouldn’t it be great if you could create a custom WordPress dashboard?
Great news for Divi users, our plugin Divi Ghoster lets you white label Divi and WordPress and create a custom dashboard for either your or your client’s website. Instead of presenting the standard WordPress dashboard, you can create a unique layout with the Divi Builder and set it to display as the first thing they see when they log into their site.
In the following post, we’ll show you three ways to customize the WordPress dashboard:
- Divi Ghoster Plugin
- Free Dashboard Layout Pack for Customizing
- Divi Dashboard Welcome Plugin
Ready to see the Divi Ghoster custom dashboard in action? Download Divi Ghoster and follow along.
Create a custom WordPress dashboard with the Divi Builder
Once you have Divi Ghoster installed, activated and your license key is authorized, click on the Customization tab. Here you’ll see an option called Dashboard Welcome Page Layout.

Look for the option titled Dashboard Welcome Page Layout
We’ll return here later, for now, create a new page and title it something along the lines of ‘Dashboard Layout’ or similar. As soon as you create the page, head to the Page Attributes console and under the Templates drop-down menu, select the Blank template.

Select Blank Page as the Template
Selecting the blank template will remove the header and footer, allowing for a clean and minimalist look and feel.
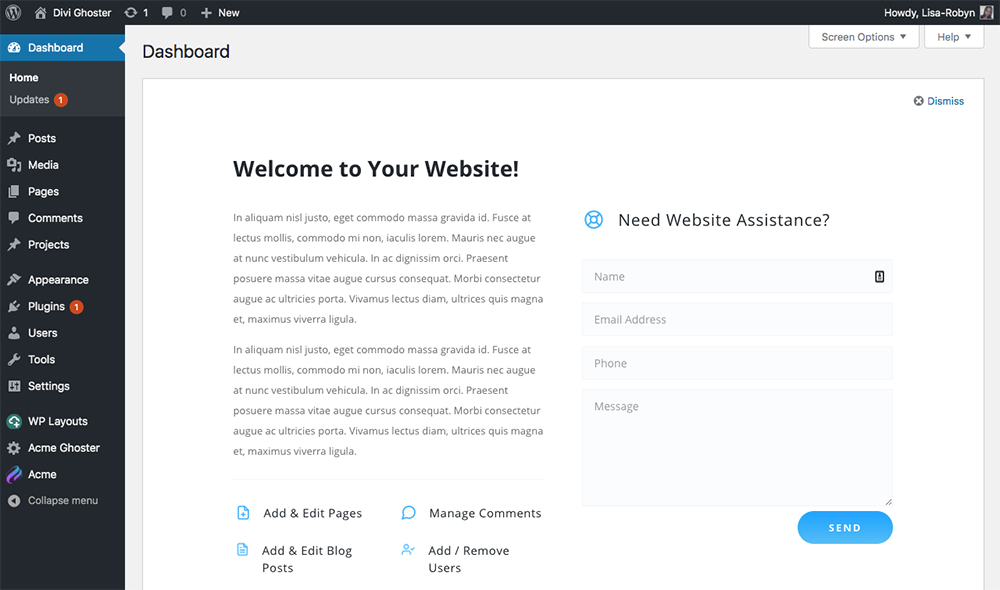
This is a very simple example of what you could create.

An example of the dashboard you could create
At this point, do not Publish the layout, instead, click Save Draft. Exit the visual builder and return to the back end builder. Here, save the page as Private.
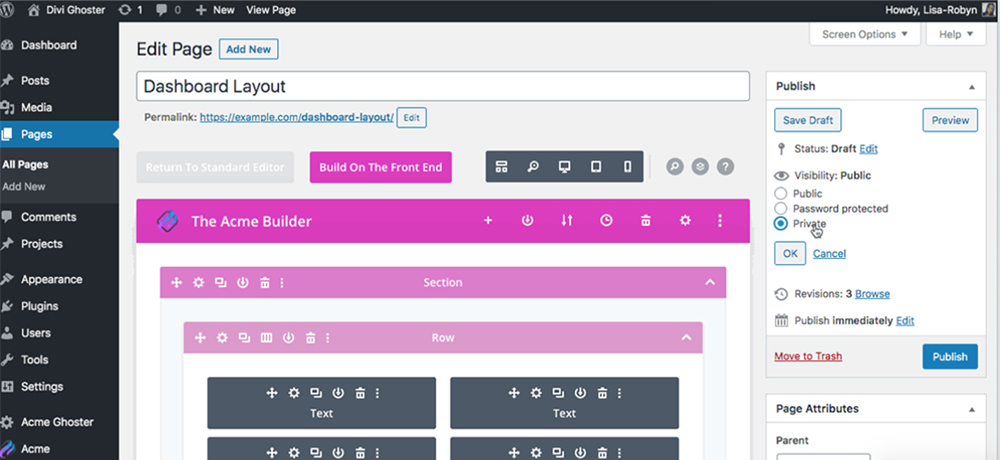
Save the layout as Private
Now that the page is saved privately, head back to the Divi Ghoster Customization tab.
Now you’ll see the page you’ve just created is listed here as an option to choose from. Click on the drop-down menu and select the private layout from the list.

Select the layout from the list
Scroll to the bottom of the page and click Save Changes then head to the WordPress dashboard. Here you’ll see your custom layout displaying.
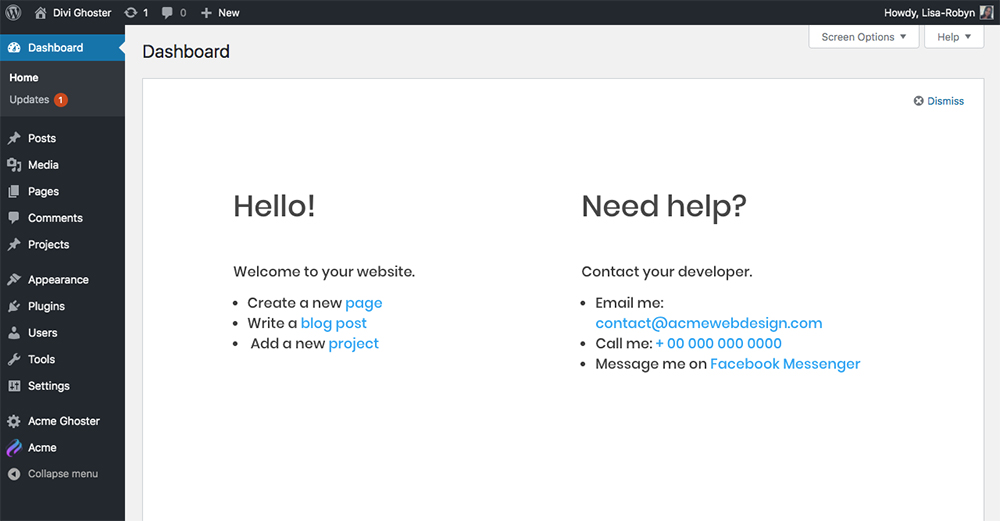
Enjoy your new custom WordPress dashboard!
If for some reason your layout is not displaying, click on the Screen Options tab at the top and make sure Welcome is selected.

Open the Screen Options menu
Create a custom WordPress dashboard with our free layouts
To help you in your development process, we’ve created a number of free layouts that you can use in your site. These layouts have been designed with your clients in mind, and are intended to give them direction and assistance when they open their website.
To download the layouts, head over to the Divi Space site and get the free Premium Layouts Bundle.
For this demonstration, I’ll be adding the layouts manually to the Divi Library. These layouts are all available through our free plugin WP Layouts, so you can also load the layout that way. I’ll give you a demonstration of this process a bit later in the post.
Once you have successfully downloaded a layout of your choice, you can add the JSON file to your website and use it for your build. To do so, hover over the Divi menu and click on the Divi Library. I have changed the Divi brand name to the custom name of Acme hence why it reflects as such.
Here, click on Import & Export. When the pop up arises, click on the Import tab. Select the JSON file of the layout you want to use and click Import.
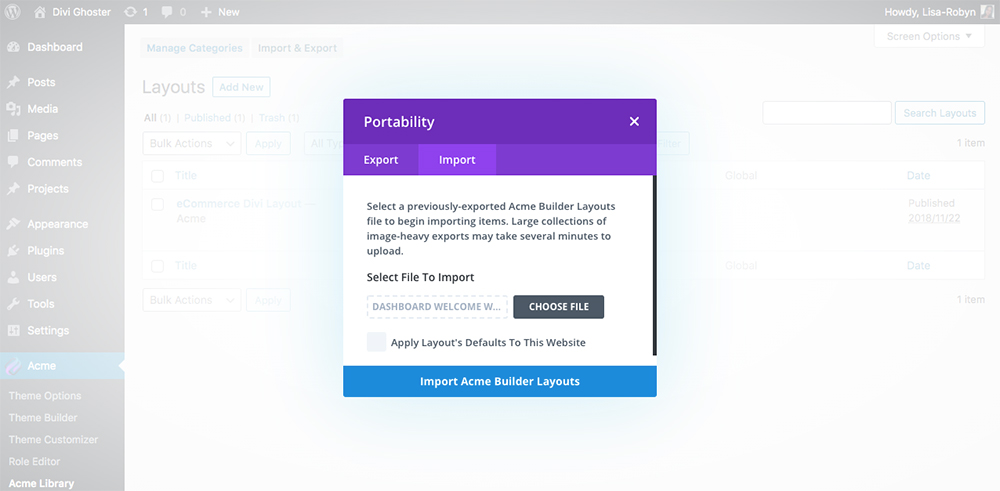
Import the JSON layout
Once the files have successfully been imported, they’ll look similar to this.
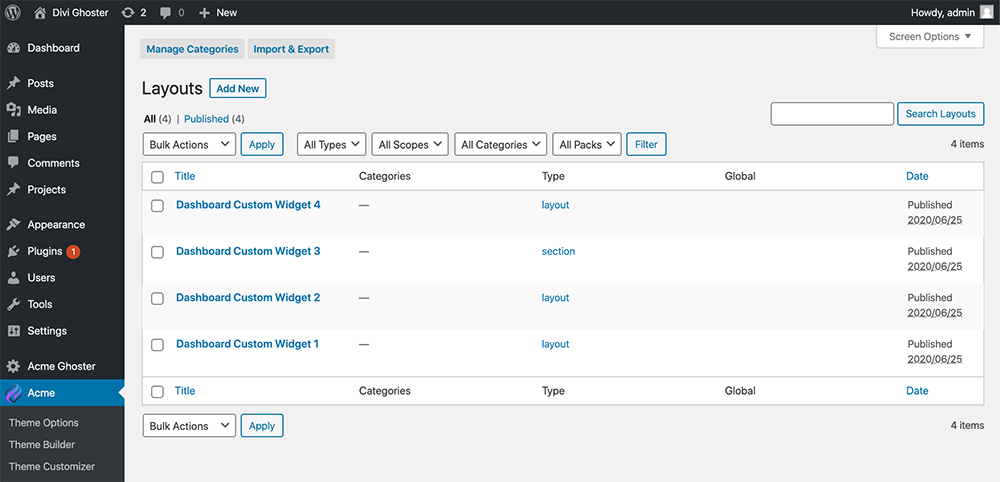
All files successfully imported
To use the layout, start by creating a new page. Enable the Divi Builder (or Acme Builder in my case as Acme is the custom brand name I’ve chosen). To remove the header and footer from the layout, select Blank Template from the Template drop-down.
Select Blank Page as the Template
Open the builder and add a new layout. In the Your Saved Layouts tab, select one of the layouts and let the file install.
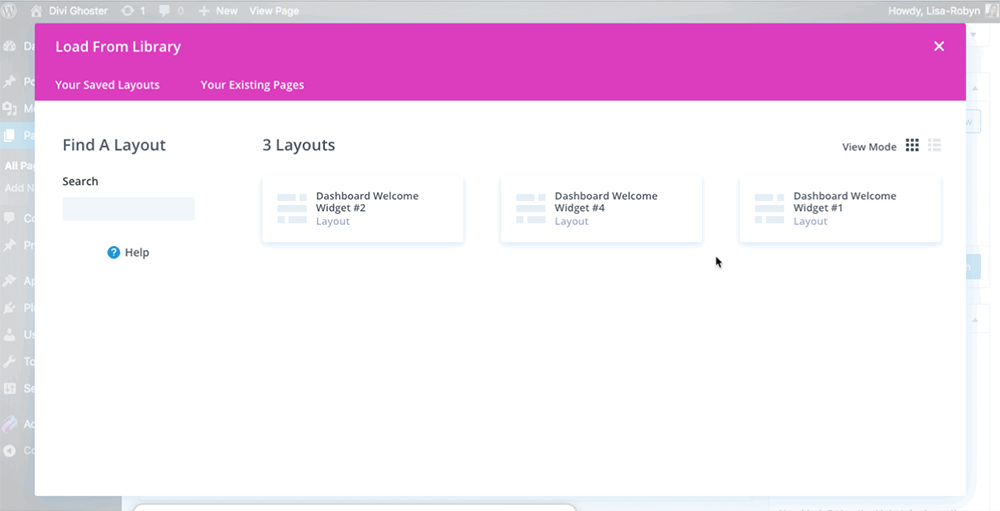
Select the layout
If you preview the layout, it’ll look like this:
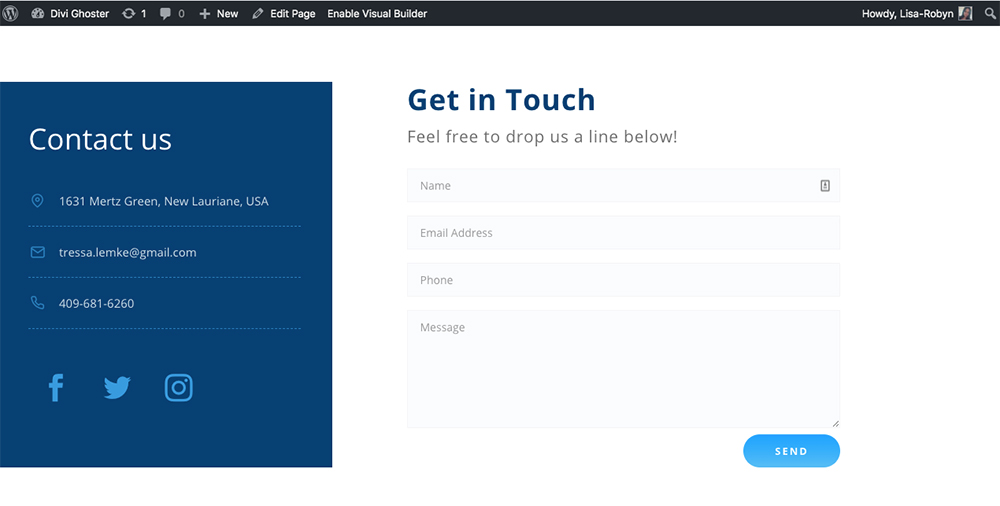
A preview of the new dashboard
To proceed, select Private and publish the page.
Custom WordPress dashboard publish as private
Now, return to the Divi Ghoster menu and click on the Customization tab. Here, scroll to the Dashboard Welcome Page Layout and select the layout you’ve just created from the drop-down menu. Scroll to the bottom of the page and click Save Changes.

Select the layout
When you revisit the home page, you’ll see your layout has been added:
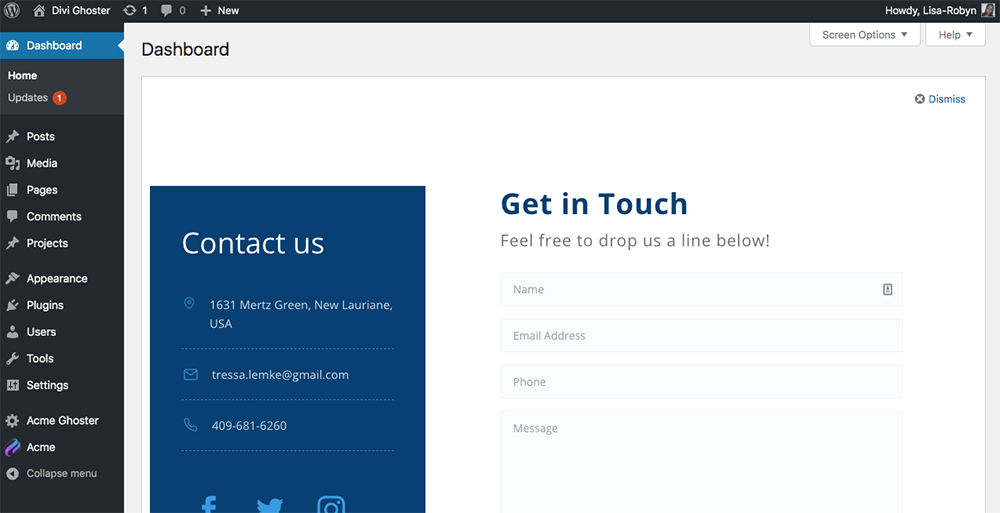
Your layout has been added
Love the look of this layout? Download the free layout pack here!
Create a custom WordPress dashboard with WP Layouts
As mentioned above, these layouts are all available via WP Layouts. WP Layouts is our free plugin designed to help you add layouts quickly and easily. Instead of manually installing each layout and not being able to preview what each layout looks like, WP Layouts serves the layouts from our cloud storage server, offering you a visual of each layout beforehand.
If you don’t already have WP Layouts on your site, head over to the WP Layouts website and download the plugin for free.
Once you have installed and activated the WP Layouts plugin, create a new page, open the Divi Builder, and you’ll see two new tabs titled WP Layouts and My WP Layouts. Click on WP Layouts and open the Miscellaneous tab. Here you’ll find a selection of miscellaneous layouts, including the dashboard welcome layouts. Select the one that you feel best fits your brand and click Import layout.
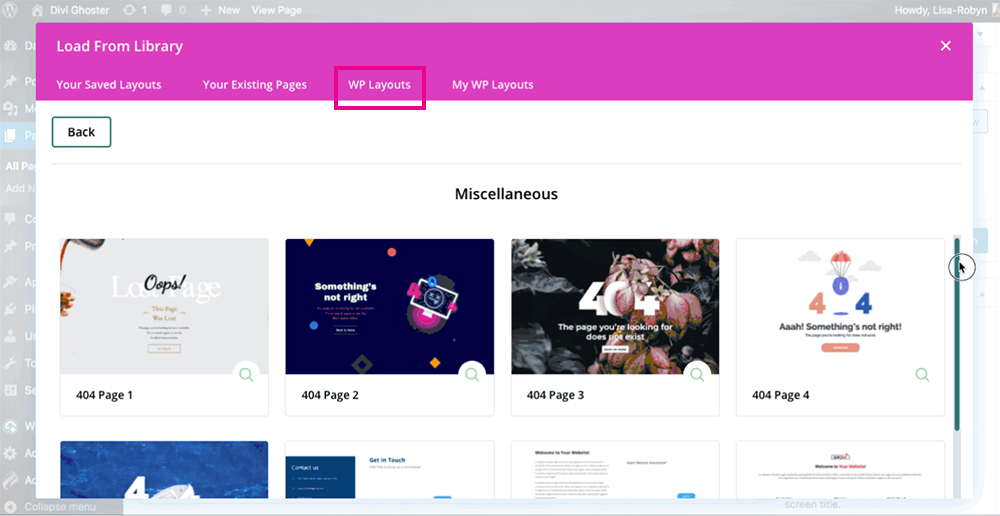
Navigate to WP Layouts and select the layout
When the layout had loaded, publish the page as private and return to the Divi Ghoster plugin,
Open the Customizations tab and scroll to the Dashboard Welcome Page Layout option. Select the layout you’ve just created from the drop-down menu. Scroll to the bottom of the page and click Save Changes.

Select the layout from the drop-down menu
Return to the dashboard and you’ll see your layout has been successfully added to the dashboard.
You’ll see your new layout on the Dashboard
Create a custom WordPress dashboard with Divi Dashboard Welcome
One final method of changing the dashboard welcome screen is to use the Divi Dashboard Welcome plugin. This plugin, from our friends over at Divi Life, is a great and straightforward plugin to use, and sells for $22.00 per site.
Check out Divi Dashboard Welcome here.
Ending thoughts
Now that you know how to create a customized and on-brand dashboard page for your Divi website, your WordPress website will seriously level up a couple of notches. With a beautiful branded dashboard, you’ll have created an on-brand experience for your site, both inside and out.
If you’re ready to start using Divi Ghoster, purchase the plugin from the Divi Space website for just $29.00 for a single site. Instead of using a single WordPress custom dashboard plugin, Divi Ghoster will let you customize the Divi Builder on the back end, hide your use of Divi in development from your clients and much much more. Buy this powerful plugin here.
We want to hear from you!
How do you feel about the WordPress dashboard? Do you use the widgets as soon as the dashboard opens? Have you tinkered around and tried to change these? Let us know in the comments section below!

Thanks!
Now how do I remove the default admin menu (on the left)?
Since I’ll have all the links on the page. It is redundant and tacky to keep the menu.
* also, is there a way to keep it on screen at all times?
Maybe remove the “dismiss” button?
can this be done in free like we have for elementor?
Can this only be done with the Divi Space plugin then?