On Friday the 13th of July, Divi Space hosted the third in their series of Facebook Live webinars about supercharging the Divi modules. This episode focuses on the Pricing Table module, showing you how to build one that dynamically switches between monthly and yearly pricing.
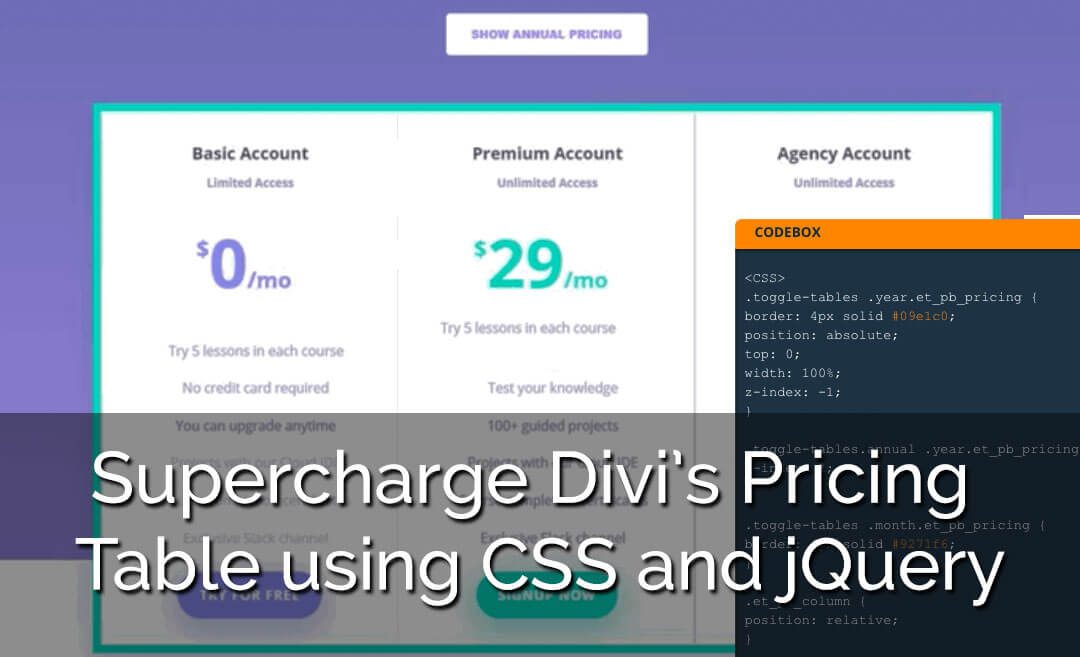
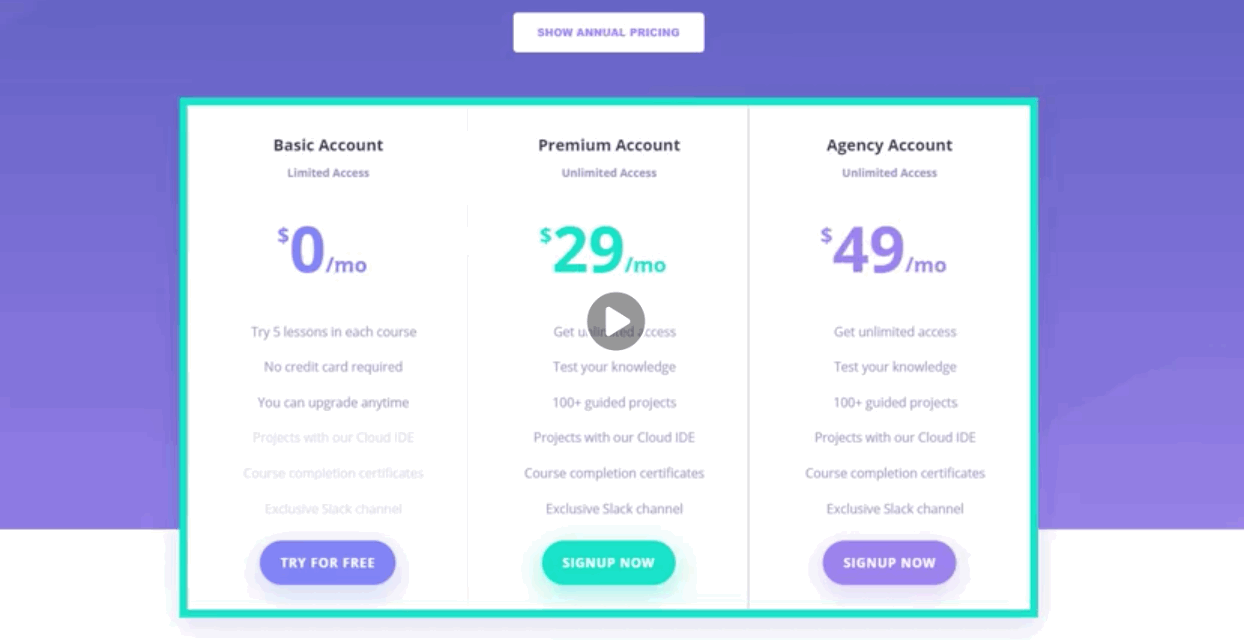
Here’s a preview of what we’ll be making:
Here’s the complete video:
https://www.facebook.com/wpzoneco/videos/1811085902272875/
SJ has looked at several different ways to accomplish this and is sharing the method he found to be the best.
SJ is using an ET Divi layout that has a pricing table already. The only thing he’s done for set up is to adjust the text slightly and gave the module he already has a class of month. He opens up the row and gives it a CSS class of toggle-tables. Inside that row he creates a duplicate module then changed all info from monthly to yearly. You’ll now have both tables showing. You could create lots of differences between your tables but we’re changing just the price in the example.
Looking through the code we find the unique class for the table we want to work with, which in this case is .year.et_pb_pricing. Adding a border helps us see that our CSS is working and differentiate between our tables.
Adding position relative to the parent class that affects both tables, .et_pb_column, ensures our elements can’t become too large.
Going back to our year table, setting the top to 0 and width to 100% places the two tables on top of each other. We can toggle which one is on top just by adding or removing a z-index of -1, which will come in handy later.
We add our other table, .year.et_pb_pricing., to our CSS and give it the same styling but with our other featured color. Add the parent class of toggle-tables to both tables. Make sure to save your CSS or you could lose it as the page refreshes.
Now we insert a code module to house the jQuery all in one place. Code the jQuery document ready function and then add the code to toggle on click. This method of storing our jQuery and CSS keeps it all in one place, makes it easier to share, and allows it to function without a child theme.
Now we create a text module under the title with the text for our toggle button. Place both sets of text into spans. You can then turn them into buttons using classes and programming them to target the spans.
You’ll see in SJ’s example that the prices are changing correctly but the label isn’t. It takes a bit of searching the code to find the error that wasn’t letting the button label toggle but SJ finally found the trouble in the syntax. The code had show-yearly when the class was show-annual. Getting to see troubleshooting like this is one of the biggest advantages of a live webinar and it’s one of the reasons they do this live.
To make it look like a button we code a background color, add some padding, a border radius to round the corners, and center it on the page. You could also code in a change in the pointer and tweak the appearance of the text at this time.
While coding we got the button labels reversed, so change when the ‘block’ and ‘none’ commands are given to have them display at the proper time.
We copy all our CSS into the CSS options for the page. This way of implementing the code makes it easier to move from page to page or even to a different site regardless of the theme running.
If you use this code for any of your projects please let someone at Divi Space know. We always enjoy seeing what you have done with it.
Here’s the code:
<CSS>
.toggle-tables .year.et_pb_pricing {
border: 4px solid
;
position: absolute;
top: 0;
width: 100%;
z-index: -1;
}

.toggle-tables.annual .year.et_pb_pricing {
z-index: 1;
}

.toggle-tables .month.et_pb_pricing {
border: 4px solid
;
}

.et_pb_column {
position: relative;
}

.toggle-tables.annual .show-monthly {
display: block;
}

.toggle-tables .show-monthly {
display: none;
}

.toggle-tables .show-annual {
display: block;
}

.toggle-tables.annual .show-annual {
display: none;
}

p.pricing-toggle {
background:
;
display: block;
color: #303030;
font-weight: 700;
padding: 10px 20px;
border-radius: 5px;
cursor: pointer;
width: 220px;
margin: 0 auto;
}

<JQUERY>
<script>
jQuery(document).ready(function($){
$(".pricing-toggle").click(function(){
$(".toggle-tables").toggleClass("annual");
});
});
</script>

<html for the button>
<p class="pricing-toggle"><span class="show-annual">Show Annual Pricing</span><span class="show-monthly">Show Monthly Pricing</span></p>
To learn more about coding with Divi, CSS, and jQuery, take a look at SJ’s course- Transforming Divi with CSS & jQuery Course.
Also, if you’re interested in learning to start your own web design business from the ground up, check out David and Tim’s new course – Divi Business Expert Course.

Great guide. Thank you for your work and efforts. I have a question. How to add a 3 button that will change the price?
Regards Krzysztof
This is amazing! Thank you!! I have still not been able to get the button to toggle – I can’t figure out what I’ve missed!