
Despite Divi’s highly customizable nature, creating a unique-looking Divi header can be quite challenging.
In the following tutorial, we’ll show you how to create a unique header with text overlays for your Divi website using a bit of CSS.
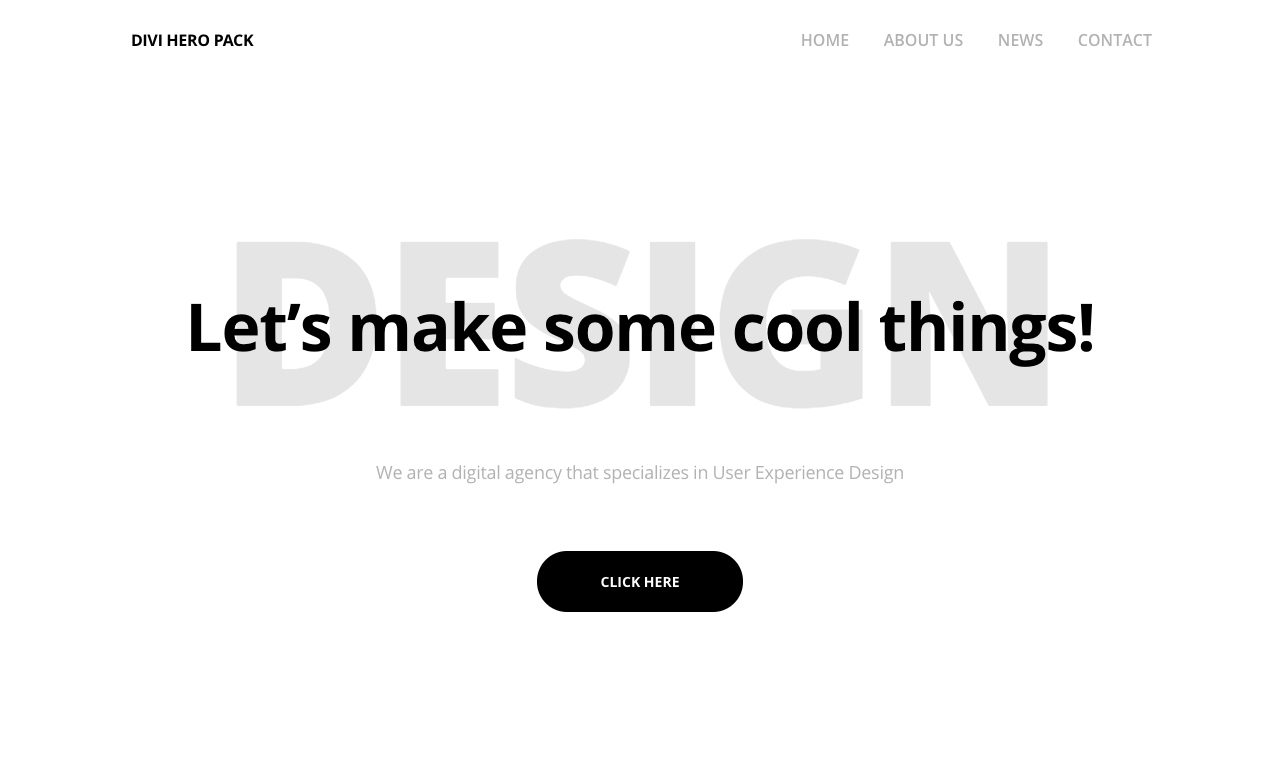
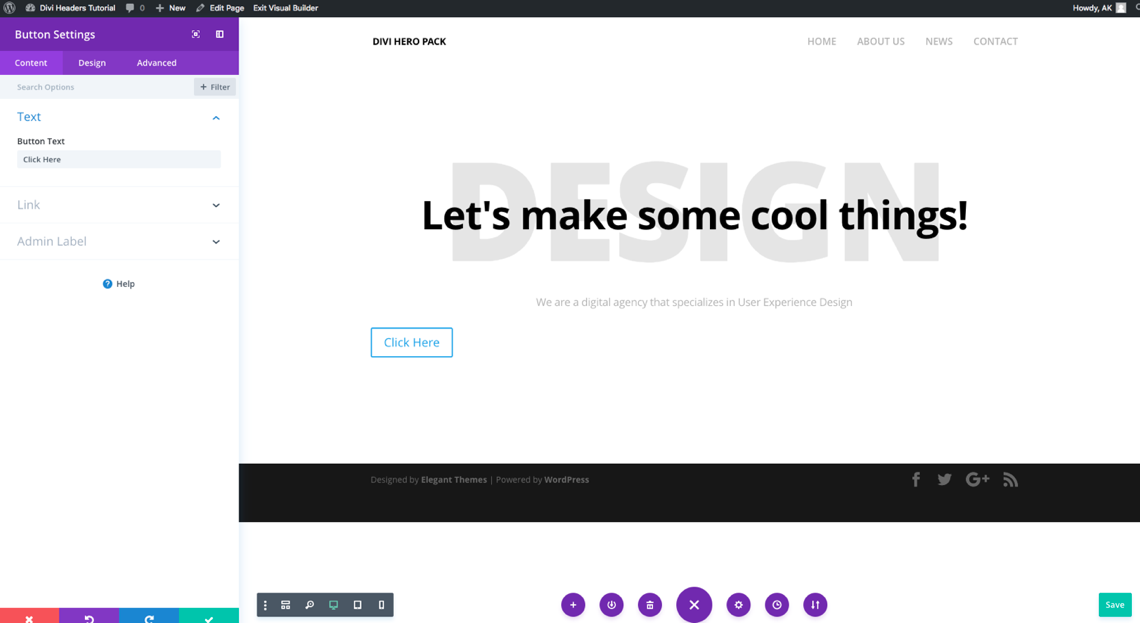
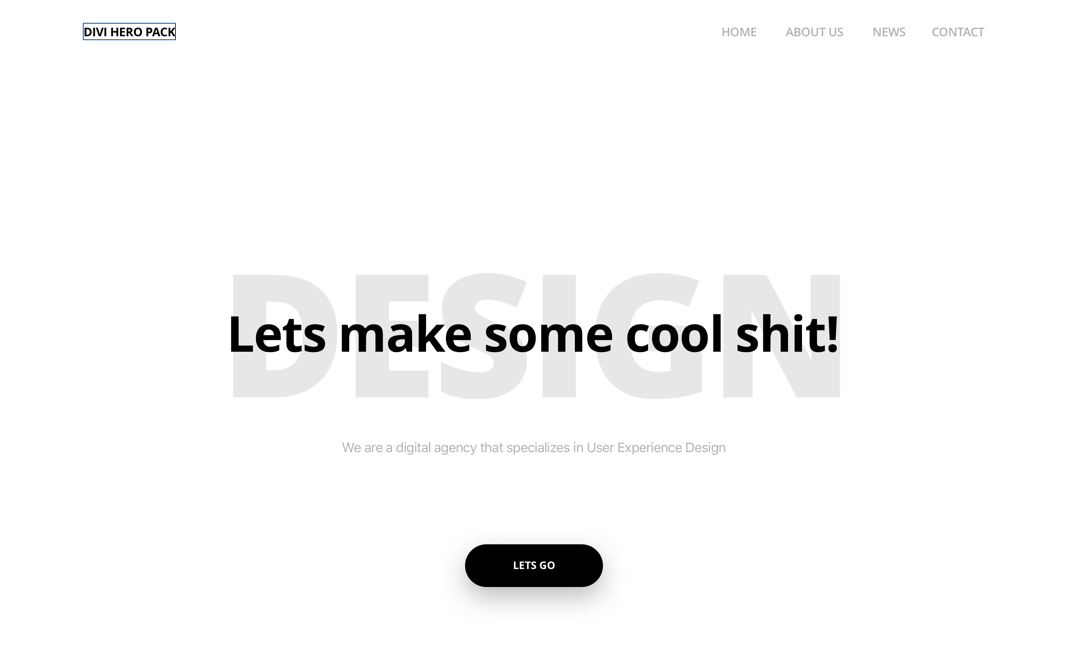
In this tutorial, we’ll create an attractive header, as pictured below:
Watch Video Tutorial
Set Up Guidelines
As with all tutorials, it is advised to test out new code in a testing or development site. If you need to set up your own testing environment, use one of the following tutorials:
- How to Set Up a Local Development Environment Using Local by Flywheel (Divi Space)
- How to Set Up a Local Development Environment Using DesktopServer (Aspen Grove Studios)
- How To Create A Local WordPress Installation On A Mac Using MAMP (Elegant Themes)
How to Customize the Divi Header Using CSS
Step 1: Add your logo
To begin, add a logo to your site by navigating to the Divi Theme Options > General tab and clicking Upload from the Logo option.
![]()
Search for and select your logo in the Media Gallery, and then click Save Changes at the bottom of the screen.
![]()
If you don’t have a logo, you can easily download the logo used in the demo.
Step 2: Create the menu
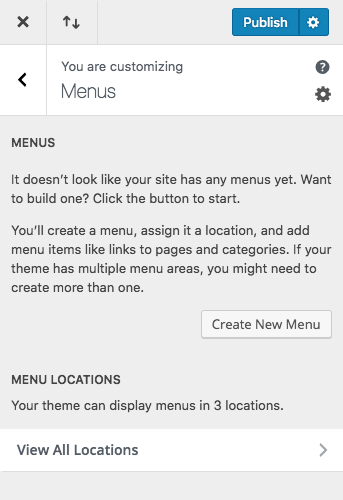
If your menu is already set up, skip this step. If not, navigate to Appearance > Customize and wait for the Customizer Settings panel to open. Alternately, you could set up your menu using the Appearance > Menu console.
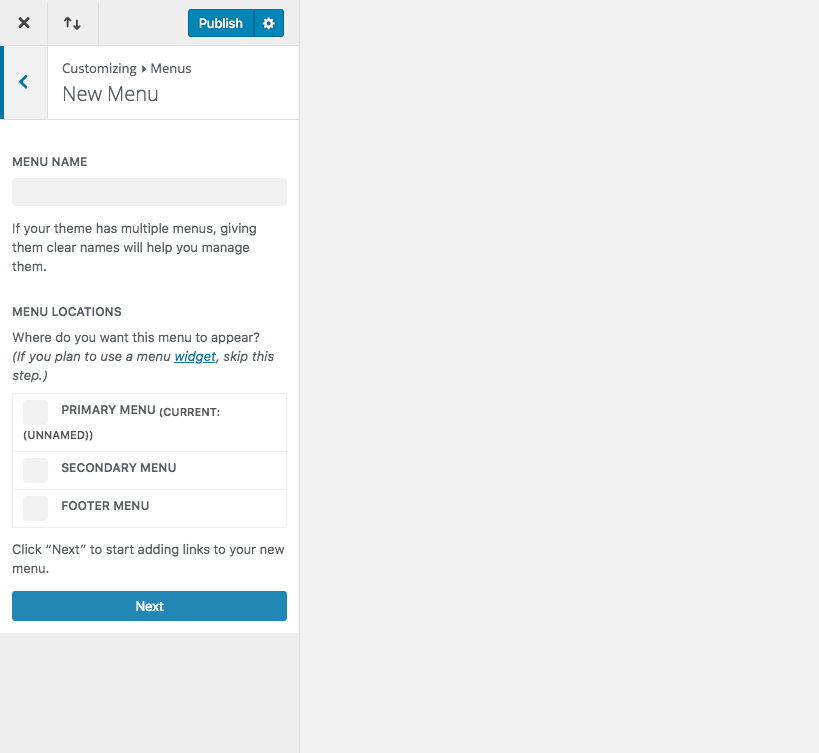
Once inside the Customizer Settings, click on the Menus tab and then click Create New Menu.
Give your menu a unique name, assign it to the Primary Menu location and clickNext. In the following options, click Add Items and select the relevant Pages, Posts, Custom Links etc., that you’d like to add to your header menu.
Step 3: Customize the menu
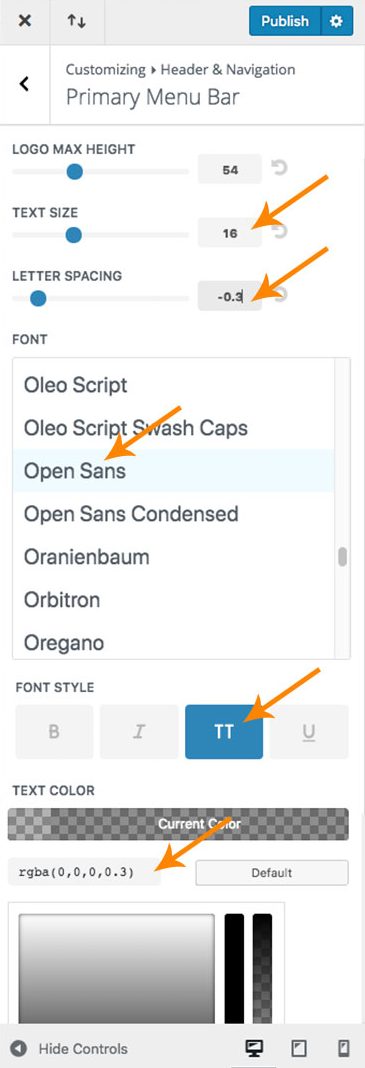
Now that you’ve set up the menu, it is time to give it a nice design. To do so, remain in the Customizer Settings and navigate to Header & Navigation > Primary Menu Bar and enter the following settings:
- Text size: 16
- Letter spacing: -0.3
- Font: Open Sans
- Font style: Uppercase
- Text color: rgba(0,0,0,0.3)
Once complete, hit Publish and the menu settings will save.
At this point, it’s time to add some CSS to your website. CSS can be added in the following three ways:
- Custom CSS console in the Divi Theme Options > General tab
- Custom CSS and JavaScript Developer Edition plugin
- Style.css file in the website’s child theme
If you don’t already have a child theme setup, you can create a blank one using the Divi Space Child Theme Generator. If you need assistance in using the child theme generator, read our blog post that provides easy step by step instructions on How to Use the Divi Space Child Theme Generator.
If you are brand new to WordPress and/or Divi, and are unfamiliar with the concept of child themes and why they’re important for web design purposes, the following posts will help you to learn more about them and how to use child themes:
- Everything You Need to Know About Using a Child Theme with WordPress and Divi
- What Is The Difference Between a Child Theme and a Premium Divi Child Theme
For this tutorial, we’ll be using the Custom CSS box. To access it, navigate to the Divi Theme Options > General tab and scroll all the way to the bottom.
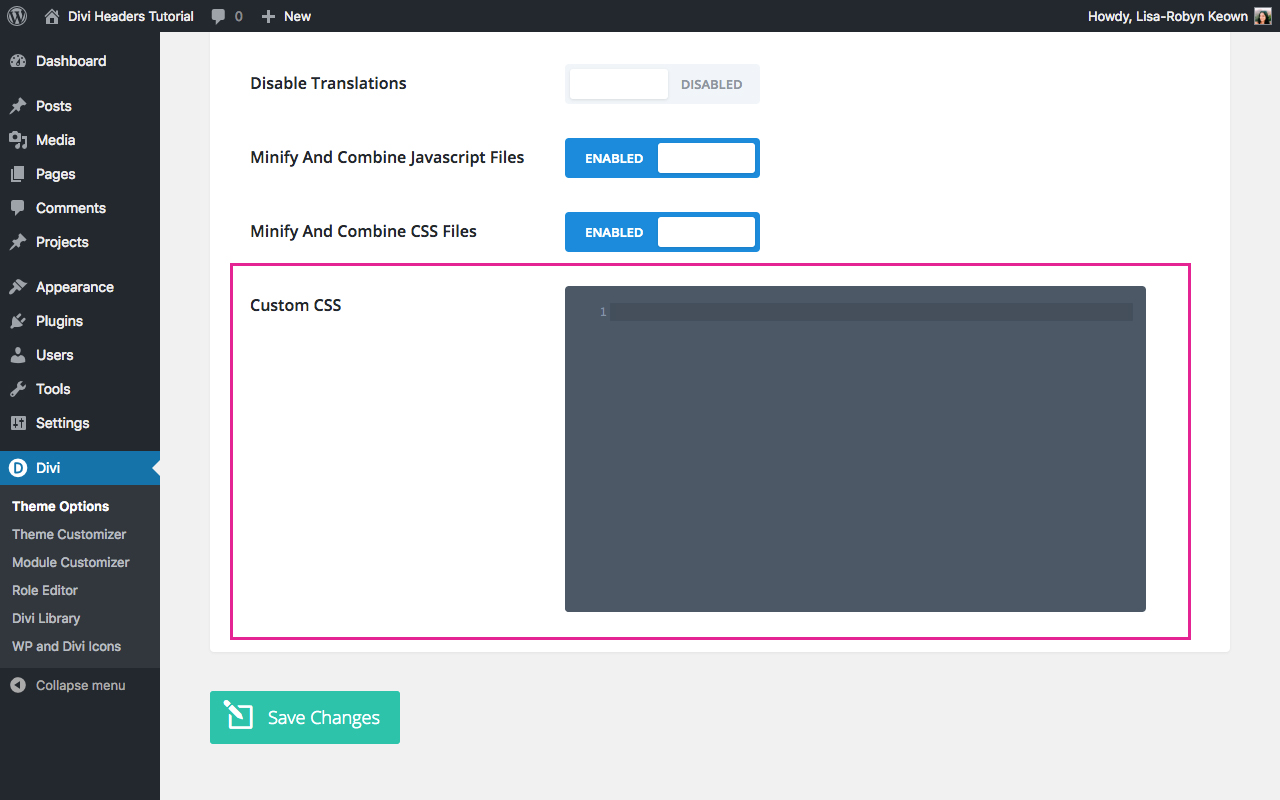
Copy the code below and paste it into the Custom CSS box.
#top-menu>li>a {
font-weight: 600;
}

#main-header {
box-shadow:none;
}

#top-menu li {
padding-right: 31px;
}
Click Save Changes.

Step 4: Customize the header
Now that the menu and logo are set up, it’s time to create the header.
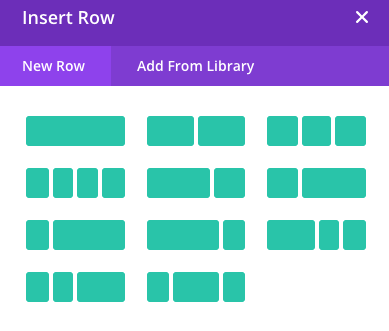
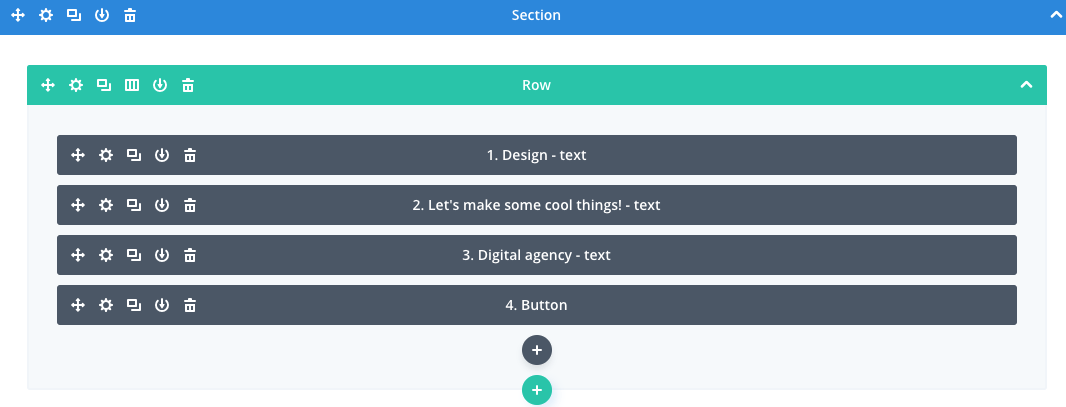
To begin, create a new page and enable the Visual Builder. Next, insert a regular section and one single row.
Next, add 3 text modules and button module into the row.
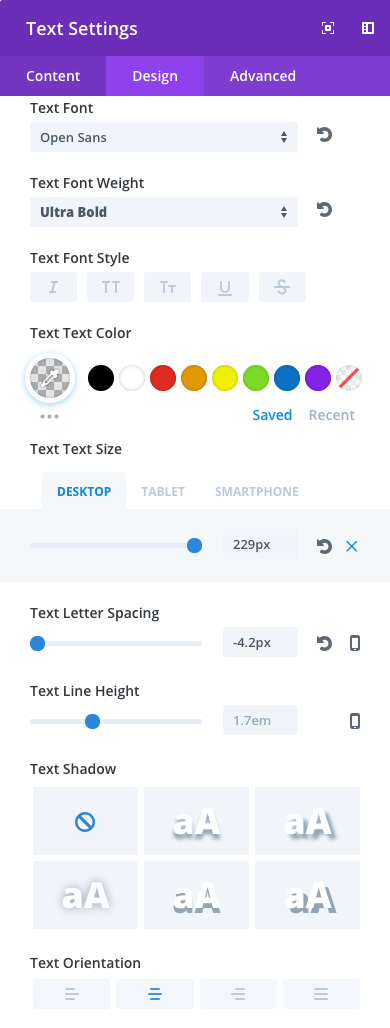
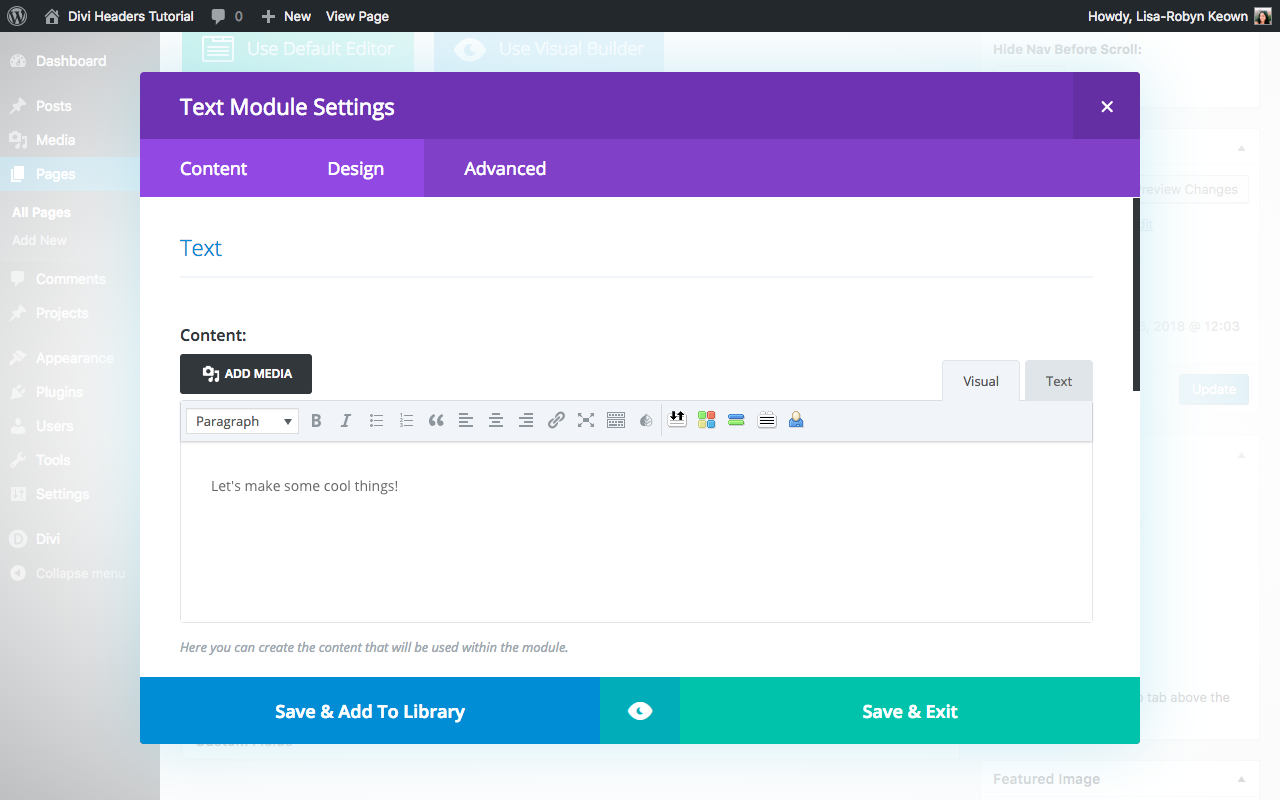
Open the first text module. In the Content tab, enter the wordDesign.
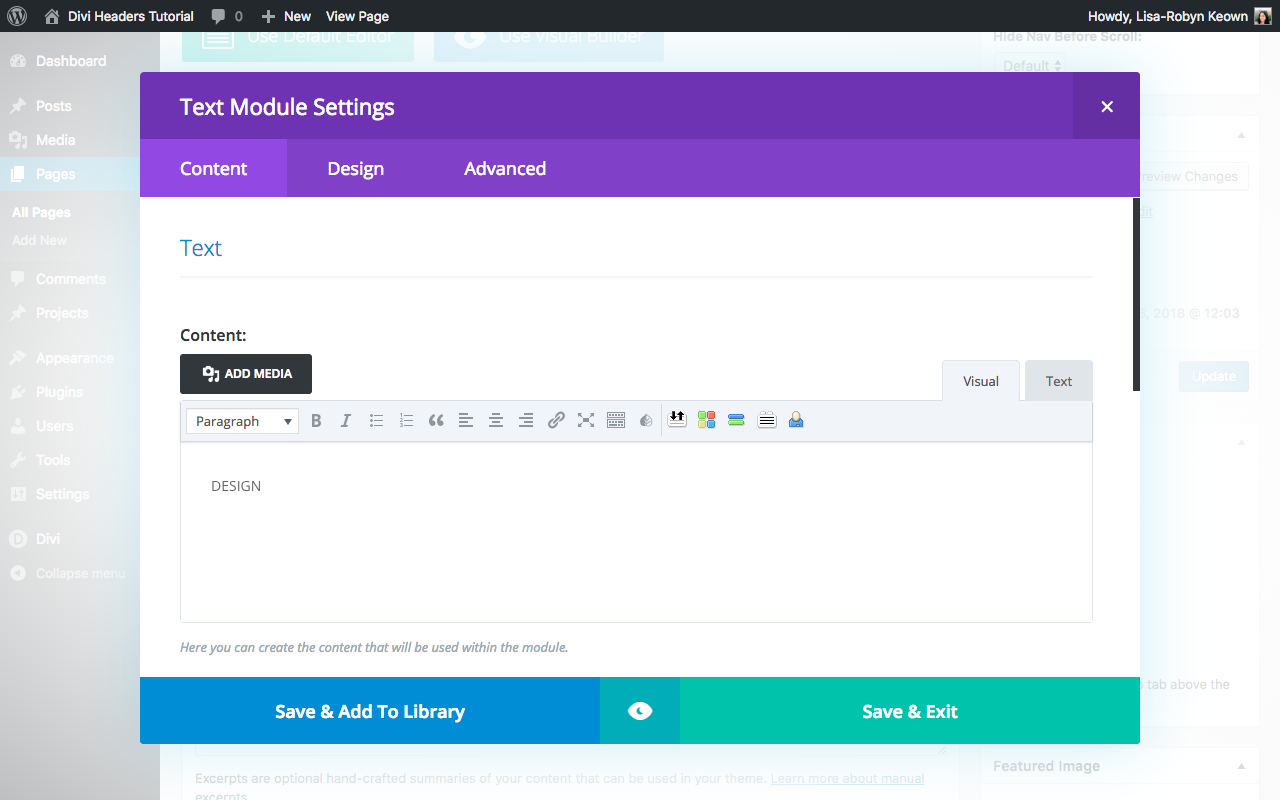
Then, navigate to the Design tab and enter the following settings:
- Text Font: Open Sans
- Text Font Weight: Ultra Bold
- Font Size:
- Desktop 229px;
- Tablet: 120px;
- Smartphone: 86px;
- Text Color: rgba(0,0,0,0.1)
- Text Letter Spacing: -4.2px
- Text Orientation: Center
Now, in the second text module, enter text relevant to your website, or, use our tutorial text, “Let’s make some cool things!”
Next, head over to the Design tab and enter the following settings:
- Text Font: Open Sans
- Text Font Weight: Bold
- Font Size
- Desktop 66px
- Tablet: 45px
- Smartphone: 40px
- Text Color: #000000
- Text Letter Spacing -1.2px
- Text Line Height: 1em
- Text Orientation: Center
Open the Spacing settings and enter the following:

Custom Margin, Top:
- Desktop: -65px
- Tablet: -63px
- Mobile: -32px;
Now, open the third and final text module. Enter your original content, a single sentence, or copy our demo content, “We are a digital agency that specializes in User Experience Design”
In the Design tab, enter the following settings:
- Text Font: Open Sans
- Font Size: 18px
- Text Color: rgba(0,0,0,0.3)
- Text Letter Spacing: -0.3px
- Text Line Height: 1.6em
- Text Orientation: Center
Also in the Design tab, in the Spacing option, enter the following settings:
Custom Margin, Top:
- Desktop: 120px
- Tablet: 90px
- Mobile: 50px
Exit out of the module and open the Section settings. Navigate to the Design tab, open the Padding option and enter the following:
Custom Padding, Top:
- Desktop: 200px
- Tablet: 50px
- Mobile: 80px
Custom Padding, Bottom:
- Desktop: 150px
- Tablet: 50px
- Mobile: 70px
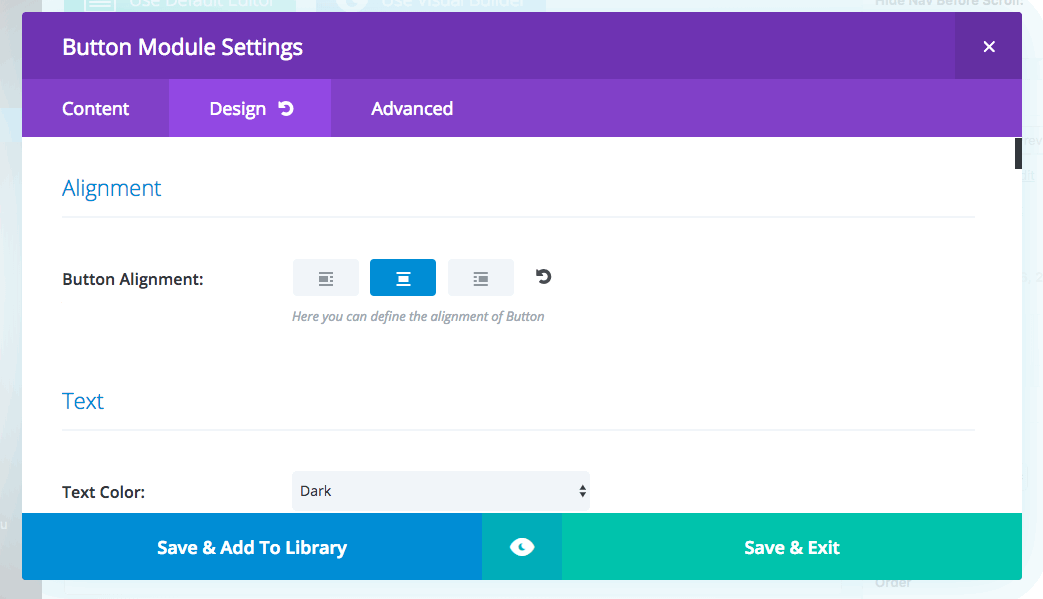
Now, open the button module, change the Button Text to ‘Click Here’ or something similar.
Navigate to the Design tab and select Yes for the Use Custom Styles for Button option.
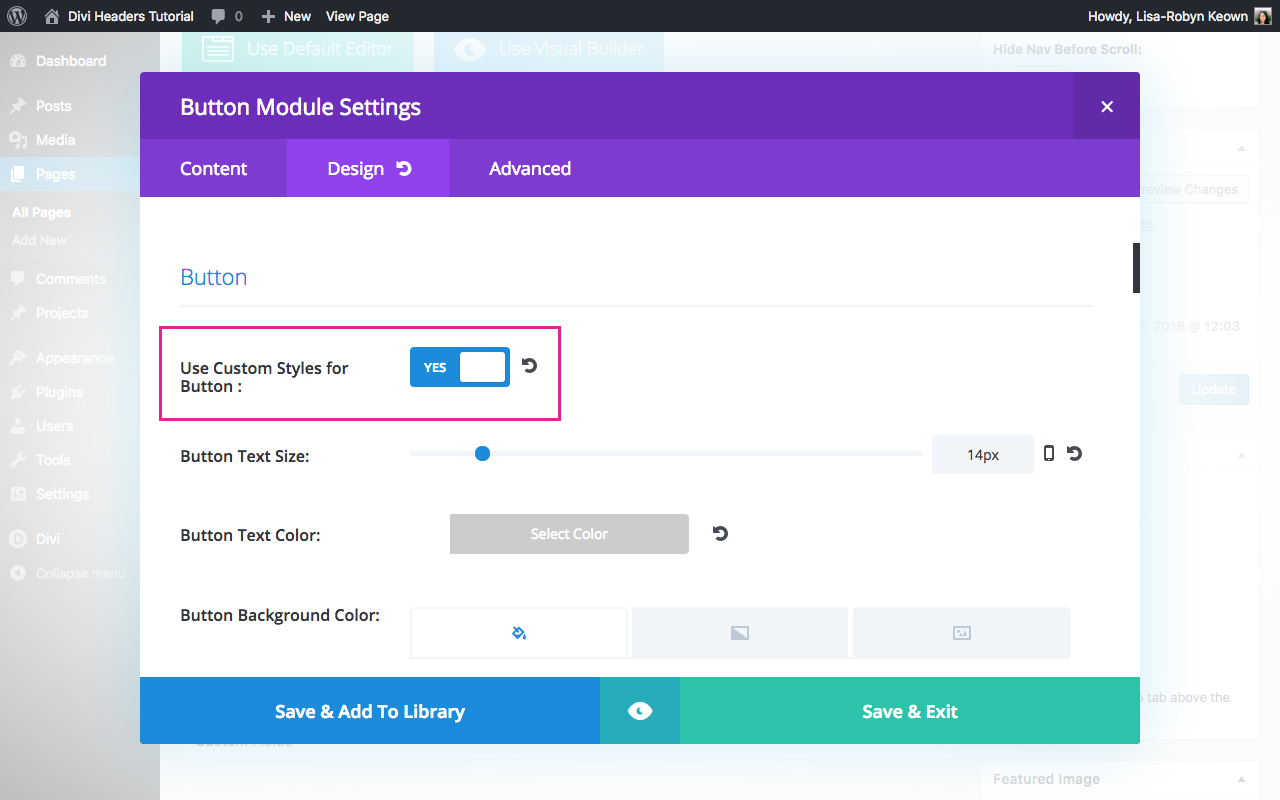
Enter the following settings:
Alignment
- Button Alignment: Center
Button
- Button Text Size: 14px
- Button Text Color: #fff
- Button Background Color: #000
- Button Border Width: 0px
- Button Border Radius 32px
- Button Font: Open Sans
- Font Weight: Bold
- Font Style: Uppercase
- Show button Icon: No
Spacing
- Custom Margin:
- Desktop – Top: 65px
- Custom Padding:
- Desktop – Top: 19px, Right: 64px, Bottom: 19px, Left: 64px
- Tablet – Top: 19px, Right: 64px, Bottom: 19px, Left: 64px
- Mobile – Top: 14px, Right: 40px, Bottom: 14px, Left: 40px
Box Shadow
- Box Shadow Horizontal Position: 0px
- Box Shadow Vertical Position: 2px
- Box Shadow Blur Strength: 35px
- Box Shadow Spread Strength: 0px
- Shadow Color: rgba(0,0,0,0.26)
Voilà! The header is complete!
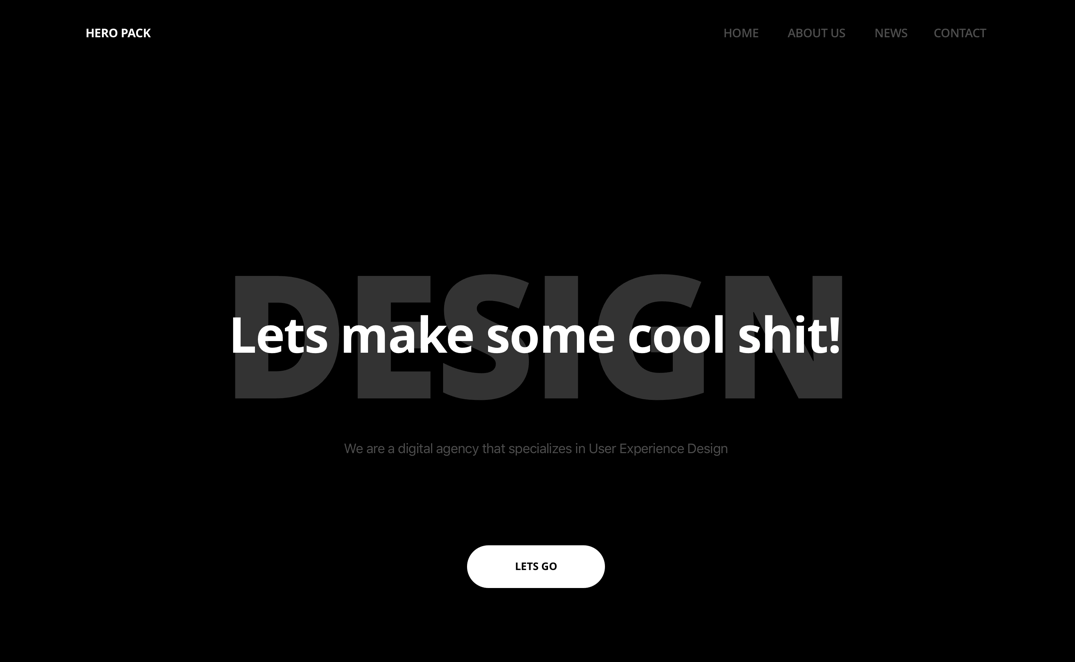
If you’d like to create a dark version of the header, change the following colors:
- Change the Section background color to #000000
- Change the text color of the ‘Design’ to rgb(255, 255, 255, 0.2)
- Change the text color of the ‘Let’s make some cool things!’ to #ffffff
- Change the text color of the ‘Digital agency’ to rgba(255,255,255,0.3)
- Change the Button background color to #ffffff
- Change the Button text color to #000000
We want to hear from you!
We hope you have enjoyed this tutorial and that you’ll create incredible Divi designs! If you have any questions or comments, please share them below!
Thanks for reading!

Keep getting error when trying to import the .json file. It says “this file cannot be imported in this context” no matter what I try.
Unzip file -> Go to Divi Library -> Click Import -> choose Divi Space Divi Headers Tutorial.json 🙂
wow, gud bro
Thank you. This is a very useful tutorial. I appreciate the very well-labeled modules! Very professional.