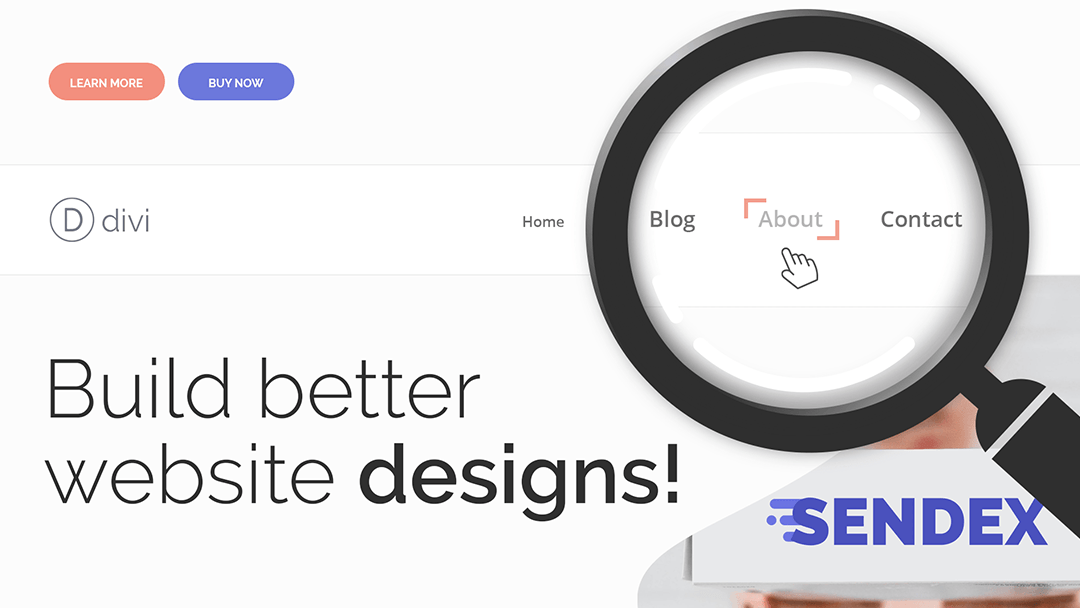
Adding a hover animation effect to your navigation menu is both a smart design option for assisting users moving around your site and grabbing their attention. Quick mouseover animations give visitors visual queues on where to click by highlighting what’s important.
Typically, hover effects are done by targeting an element and writing CSS code to focus on the element’s hover state. But thanks to Divi’s large user base and supportive community, there are simple free hover animations already coded for you and premium plugin options for quickly adding these special effects to your design arsenal.
In this tutorial, you will learn how to implement, style, and edit menu hover effects for your WordPress website with Divi. This guide looks at both adding menu effects using:
- CSS with the included built-in Divi tools
- And, Toggle animations included in Divi Switch.
If you’re not familiar with Divi Switch, it is a feature expansion pack for the Divi page builder. Switch adds toggle controls for over 50 features and design tweaks making setting up a site easier for a new user and saving type for designers and agencies. Learn more about Divi Switch or download it so you can follow along and try it risk-free.
Adding Hover Animations to the Navigation Menu with CSS
Divi makes it easy to add your own custom CSS or paste in code snippets. Familiarizing yourself with CSS opens up a bunch of design possibilities with the Divi page builder. You don’t need to be able to write CSS from scratch to make significant improvements and add effects. You just need to know where to look and what lines to change when styling.
Following this piece of the tutorial is beneficial if you are wanting to better understand CSS in Divi or just looking to apply menu hover animations for free. Jump to the Divi Switch section below if you just want to save time and speed up development adding and customizing animations with simple controls.
Basic Slide-in Underline Animation
For this example, we are using the code snippet provided on Elegant Themes own website. When adding code to your site, it is good to use a trusted source. Pulling snippets from a comment section or social chat channel that is not supported may cause your styling to break. Elegant Themes is the team that built Divi, so you can rest easy it’s not going to break anything, it’s trusted, and maintained.
This specific example works for the default menu settings, so if you are working with a fresh Divi install you do not need to do anything. If you are not currently set to the Default menu settings, in the Customizer select Header & Navigation and choose Default under the header styles.
This free code snippet adds a line that appears to grow from left to right beneath the menu when the cursor passes over it. And a static line will show beneath the active page link.
We chose this effect because it is clean, popular, and can be used on almost any site. Plus, it’s easy to edit for any level user. That makes it a great introduction to CSS and adding custom CSS to Divi.
From the WordPress dashboard select Theme Options under the Divi menu and go to the General tab. Divi > Theme Options > General
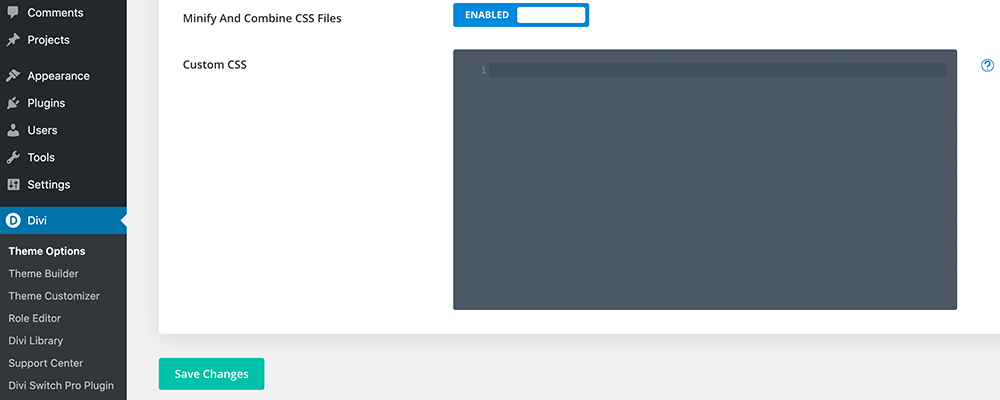
Paste the following code in the custom CSS box at the bottom of the General page:
#top-menu .current-menu-item a::before,
#top-menu .current_page_item a::before {
 content: "";
 position: absolute;
 z-index: 2;
 left: 0;
 right: 0;
}
#top-menu li a:before {
 content: "";
 position: absolute;
 z-index: -2;
 left: 0;
 right: 100%;
 bottom: 50%;
 background: #15bf86; /*** COLOR OF THE LINE ***/
 height: 3px; /*** THICKNESS OF THE LINE ***/
 -webkit-transition-property: right;
 transition-property: right;
 -webkit-transition-duration: 0.3s;
 transition-duration: 0.3s;
 -webkit-transition-timing-function: ease-out;
 transition-timing-function: ease-out;
}
#top-menu li a:hover {
 opacity: 1 !important;
}
#top-menu li a:hover:before {
 right: 0;
}
#top-menu li li a:before {
 bottom: 10%;
}
And click the Save Changes button.
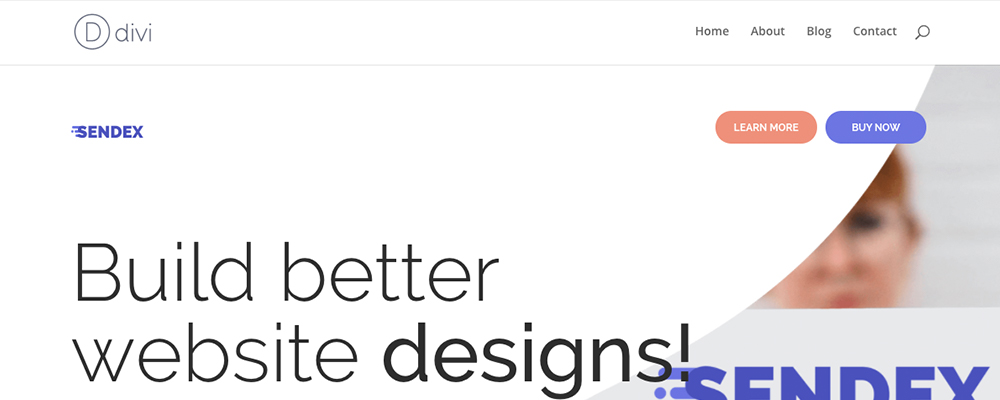
Now when you visit your home page and hover over one of the items in your menu, the line will animate in, and when a page is selected the bar will display.
You will notice, the code has some comments that note where to edit the different elements of the animation.
Change the color by pasting a different hex color on the background line. A good choice here is to use one of the accent colors for your brand. Remember, with hex colors remember to include the # sign at the beginning.
Adjust the thickness of the line animation by changing the height. This is set to be measured in pixels. To make a thin pinstripe line set the height to 1px.
Set the speed of the animation by changing the transition-duration. This is noted in seconds. But be careful not to set this to move in too slow. Animations can be eye-catching if implemented correctly or a user experience nightmare when done poorly. Distracting at best and slow down productivity at worst.
Play with the other options to reverse the animation and adjust the position.
Troubleshooting Your Menu Animation CSS
The beauty in adding your code to the Custom CSS module in Divi is it provides a safe space to test and then revert quickly if it creates a styling issue. No more uploading and downloading stylesheets from SFTP.
If you do encounter an issue and would like to troubleshoot before deleting and moving on, here are some tips you can follow:
- Make a backup and edit from a staging environment. This should go without saying. When making changes to your site design or code a backup will save you a lot of heartache if anything goes wrong. If you’re are using premium hosting or quality managed WordPress hosting, staging and managed backups are built-in. Use it!
- Check the code against the original snippet to make sure when copying and pasting you did not miss a tag or line at the top or bottom. This is the most common problem when copying code snippets. If you don’t paste the whole thing it will cause and issue.
- Make sure the code is coming from a reliable source and check the comments to make sure other users are not experiencing an issue.
- If you made changes, make sure colons, semicolons, hash markings, and other markup was not accidentally removed.
- Finally, stay calm and if you run into any issues ask the community, in the comments section below, or if you’re one of our lifetime members, reach out to our support team. we would be glad to help.
Menu Hover Animation Effects With Divi Switch
Divi Switch has 7 built-in menu animation styles with controls for adjusting color and line weight without messing around with code. It literally unlocks hundreds of custom style configurations with the flip of a Switch.
Our demo site has a fresh install of Divi and Divi Space along with the Divi Space eCommerce layout pack on a single page. You can find this layout in the layout bundle here and recreating this site can be done in a matter of a few minutes. You can see we also published several pages and set up a menu so we can get an idea of how hover effects change the look and feel of the page. Here is what our demo layout looks like:
This is what our demo site looks like without any hover effects
To add a menu hover state animation, open the Divi menu in the WordPress dashboard and click on the Divi Switch tab.
This should open on the Header tab by default. If you already have Divi Switch open select the Header tab.
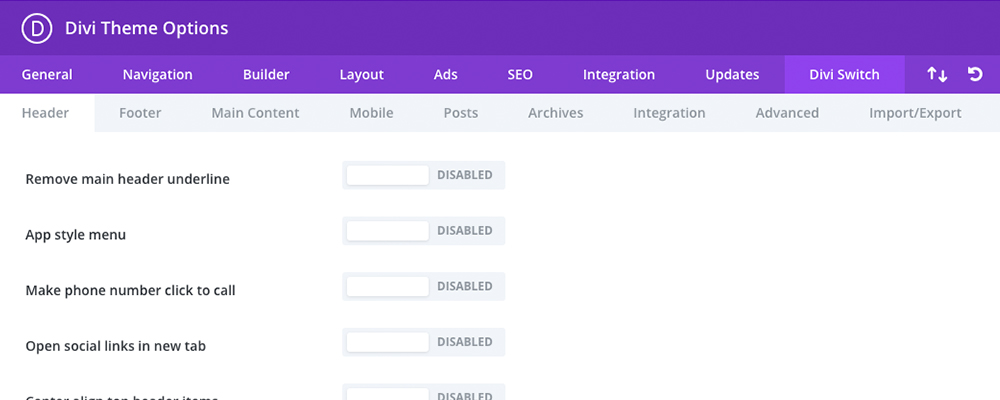
The Divi Switch menu item opens to the header tab options by default
The menu customization switches are located at the bottom of the Header tab.
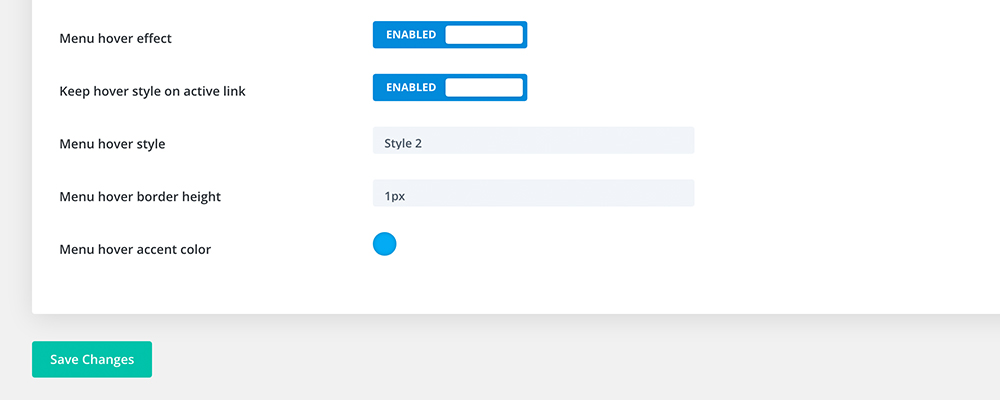
Menu hover controls are located at the bottom of the header tab
Click the “Menu hover effect” switch to enable the built-in Divi Switch hover effects and click the “Save Changes” button.
With this enabled, you can begin playing around with animations and other features like:
- Keep static hover style on the active link
- Select one of the built-in hover styles to change animations
- Adjust line weight with the boarder height option
- And, use the color picker to set an accent color for your animation.
Choose from one of the available hover styles. There are 7 included animation styles to select from. You can see all of the styles in the Divi Switch documentation and we’ve added examples of each below. To set a style, click on the Menu hover style drop-down and pick a style you would like to use. Click Save Changes and return to the front-end of your site and refresh the page to see your changes.
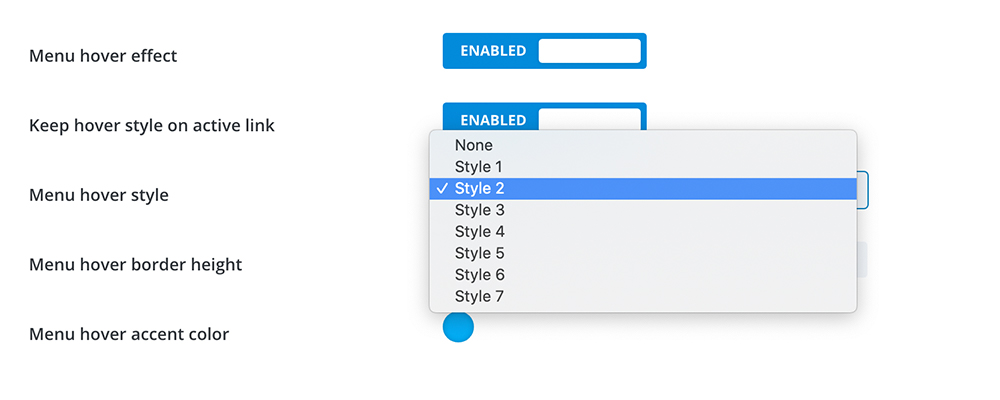
Choose 1 of the 7 included hover styles
Here are examples of how each of the menu hover styles will change your site hover and a quick breakdown of all of the built-in hover styles for the Divi menu:
Style 1 Animation
Style One Animation
Try the hover style animation by hovering over the “Style One Animation” text above.
Style one is similar to the basic line slide in beneath in the CSS example above. Accept now you just do it with a switch and style with a few simple toggles.
Style 2 Animation
Style Two Animation
Style 2 introduces horizontal lines at the top and bottom of the menu item, both animating side to side in alternate directions.
Style 3 Animation
Style Three Animation
The 3rd style makes use of a single solid line that animates upwards, moving close to the menu item on hover.
Style 4 Animation
Style Four Animation
This style displays two horizontal lines above and below the menu item. Unlike Style 2, these lines do not animate side to side.
Style 5 Animation
Style Five Animation
This adds two horizontal lines both above and below the menu item expand horizontally outward.
Style 6 Animation
Style Six Animation
This introduces two 90 degree angle shapes on the top left and bottom right corners of each menu item. These angles expand on hover.
Style 7 Animation
Style Seven Animation
The final style shows two horizontal lines on either side of the menu item. These horizontal lines that expand outward on hover.
Additional Configuration Options
With Divi Switch, you can customize your menu even further. Return to the Divi Switch option Header tab and you’ll find the menu hover options. Here, you can set the height of the borderline by increasing the value of the Menu hover border height. By default, it is set to 2px.
Use the Menu hover accent color option/switch to change the color of the line.
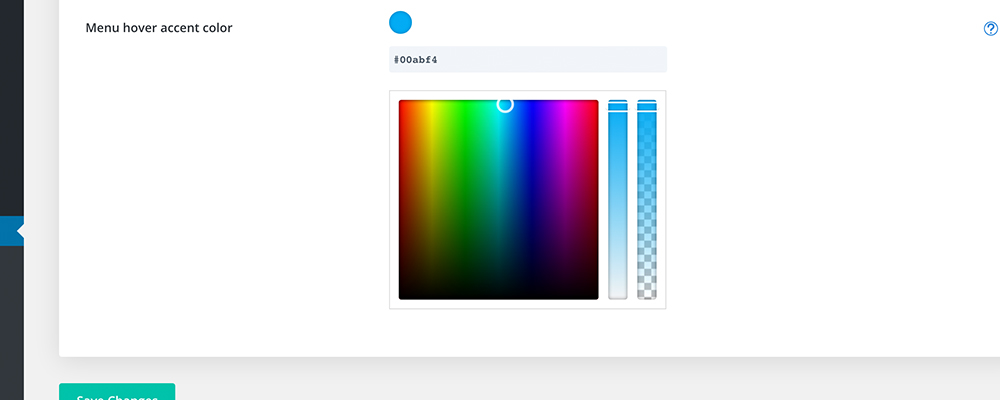
Add your hex value or pic a color with the built-in selector
With these simple settings, you can create some awesome visual effects.
You may have noticed one other switch in this section, the Keep hover style active link. Enable this option to display the completed hover state for active links.
The animation style can be used for active links
You can see how this changes your active link in the sample below:
Adding and customizing animated hover effects with Divi Switch is just that easy. Plus, there are loads of other options for quickly customizing all the other areas of your site without a single line of code including:
- Transparent header for the homepage – for seamlessly integrating your menu into hero images or sliders
- Customizing the 404 error page on your website – keep users engaged when they land on a page that does not exist.
- And, 7 all-new switches in the latest version of Divi Switch – a full rundown of what’s been developed and what’s to come.
Upgrade today and don’t waste another second researching how to make simple design tweaks. Get started with Divi Switch risk-free.
If you have any questions or comments, we’re here to help! Tell us how you’re using animations or other switches on your site to improve engagement. Have an idea for a new feature? We’d love to hear your feedback.
Enjoy!

Recent Comments