
One of the newer features of Divi is the ability to add overlays to the image module. It’s cool and gives you access to the same overlay set-up that you’re used to on the portfolio module (overlay color + icon), but if you wanted to add your own image overlay then it doesn’t really offer what you need. Fortunately, it is simple to achieve a custom image overlay with a few lines of CSS. This type of effect is great for watermarks etc.
Here’s an image to show you what I mean…

Making it work.
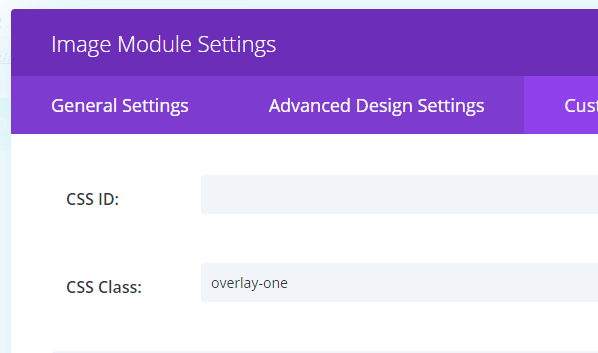
To get this effect on an image module, you just need to give the module a custom CSS class. In our code example we used ‘overlay-one’.
Then just add the following code. The only line you need to change is the url path to your overlay image.
/* Make sure our absolute positioned overlay doesn't cover more than we want it to... */
.overlay-one { position: relative; }

.overlay-one:after {
 position: absolute;
 content: '';
 background: url('newimagepath/overlay.png');
 background-size: cover; /* Make overlay fit the window of our original image */
 top: 0;
 right: 0;
 bottom: 0;
 left: 0;
 opacity: 0; /* Make's the overlay invisible until we hover */
 transition: .5s ease all; /* How long the transition takes */
}

.overlay-one:hover:after {
 opacity: 1; /* Make Image Appear */
}
That’s all there is to it! I hope you found this post useful. 🙂

Why don’t do this instead?
.overlay-img img:hover {
opacity: 0.1 !important;
transition: 0.5s;
}
Hi Stephen,
I call you for another subject that could interest many users : How did you manage to implement you Avatar image below your post and even better above centered to your post image.
Best.
Nathan B thanks for the info on linking. Anyway to make it so the image doesn’t disappear when hovered over? (and thanks everyone for the article, really helpful)
In the last two code blocks try this:
.overlay-one:hover:before {
opacity: 0.9; /* Make Image Appear */
}
.overlay-one:hover img {
opacity: 0.2;
}
Still in the Image Module Setting, active the option “Place Gradient Above Background Image”, the result may be better.
After a couple hours of frustration, I finally figured out how to make the overlay image become a link. Hopefully this will be useful:
To have the overlay image become a link, first add the link to the page you want to visit in the link URL box in the divi image module editor.
Then, change “.overlay-one:after {” to “.overlay-one:before {”
and change “.overlay-one:hover:after {” to “.overlay-one:hover:before {” in the CSS code provided above.
At the bottom of the css code, include the following:
.overlay-email:hover img {
visibility: hidden;
}
I made a mistake on the code to include at the bottom of the css code. It should be:
.overlay-one:hover img {
visibility: hidden;
}
Hey! Its great but how do we turn the overlay image into link??? This effect does not make any sense otherwise..
Can I add a link to a inner page with the overlay?
The overlay effect is nice. How about coding for different effect like, mousing hover girls head MSG1 and mousing hover boys head MSG2?
Thank you, it works great!But I have a question: is it possible to use the image overlayed like a link?
So, what I want to say is that when image appears on hover, I would like to link on it to arrive in another page.
Ciao, come faccio a inserire un link cliccabile nell’overlay o utilizzare l’immagine come link?
Hi Stephen…thanks for the post. I am trying to use on a column photo (row) and I can’t seem to get it to work. When I put in Column 2 custom class and column 2 main element, nothing. Any suggestions?
Thanks
Larry
Isn’t this possible with color overlay?
Yes, this post is from about a year and a half ago and this is now built into Divi. Ahh the evolution of Divi :)!
Hi,
How can I remove the overlay icon?
Thanks
I cannot get this to work. I’m not sure what I could be doing wrong. I also can’t seem to get a regular text overlay to appear. Can you think of any reason why I might be having trouble?
Hi
How do i get the text to align center?
Thanks
I’m a little confused- it doesn’t seem to be working. Also, is there a way to make this work without an actual png? something generated by the site?
Is it possible to remove the overlay on scroll? I’m looking to find more of a reveal effect…
Hi, it works but how can i do to make it an anchor? So when the overlay appears i click and it takes me in an another part of the site or another link. Can i do it?
I came to the comments to ask this. I’d like to use this effect on “normal” images in my website. Images that are inside Text modules, etc.
Hey! did you ever figure this out? I’m needing help with this too
This is great! Question: Is it easy to add something in the CSS so that the overlay is constant – creating a filter like feeling?
Hey, sure. Just apply the effect to the solid states instead of the hover states instead, so removing :hover
Is it possible to use overlay on a background video?
doesn´t work
i ve tried putting it in before / after / main nothing does the trick
if i put the code in the divi-options all pages do it with the same image???
Yep, theme options or child theme is the place for the code. It’ll only effect images where you’ve added .overlay-one as a class. If you want to use different images, simply use different classes.
Great tut SJ! I’ve been getting some questions about this very thing from time to time. I can now point people to this post 🙂
Awesome 🙂 Glad to be of help. Thanks