Web security and data protection are of utmost importance, and knowing how to install an SSL certificate on your WordPress website is critical. Whether you opt for a manual route of methodically installing an SSL certificate or have the luxury of a one-click installation from your hosting company, having an SSL certificate is crucial for website security.
As a web developer or online business owner, you need to make sure your site visitors and customers are confident in giving their personal, private data to you. To make sure your website is implementing the latest, most advanced security measures, you need an SSL certificate installed.
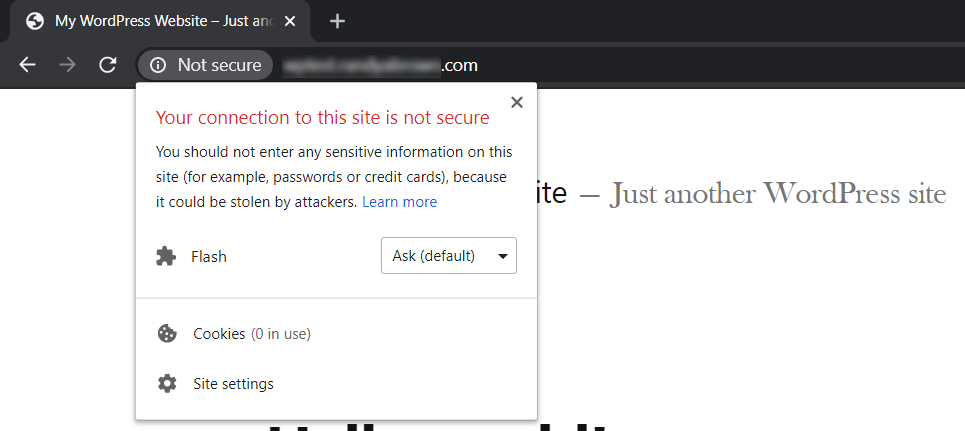
Websites that are not secure that do not have SSL certificates installed are extremely vulnerable. Cybercriminals, data thieves, and hackers can access the site and steal precious data to use this information in devious ways. Because of this, Google marks any website without an SSL certificate as not secure, which can result in visitors avoiding your website or your website getting blocked by browsers.
Fortunately, it isn’t that difficult to install an SSL certificate.
In the following post, you’ll learn:
- What an SSL is and why you need one for your website
- How to get an SSL certificate for WordPress
- How to install an SSL certificate on your WordPress website
- How to install an SSL certificate with a one-click process via your host
Let’s dive in!
What is an SSL Certificate?
SSL (Secure Sockets Layer) is a global standard security protocol designed for data encryption. This technology is used to both encrypt data such as internet traffic as well as verify server identities.
An SSL certificate will authenticate a website’s identity and enable it to move from HTTP to HTTPS. Any data entered to the website will be encrypted by scrambling the data into an unreadable format that can only be decoded with a decryption key.
SSL certificates are used by countless online businesses to protect their site visitors’ and consumers’ sensitive and personal information data. Essential data such as user names, passwords, credit card details, and more are protected against crime, theft or tampering from hackers and other criminals.
As well as encrypting the data transmitted from a website, an SSL certificate will also authenticate the identity of the website itself, signaling to site visitors that the website is legitimate.
Why You Need an SSL Certificate
Over the past few years, web browsers have transferred from HTTP to HTTPS. Websites that are not running via HTTP lack critical security technology and are vulnerable.
Without HTTPS, cybercriminals and hackers can intercept the connection between a server and a browser, gaining access to any data shared on the website. This data can include names, email addresses, passwords, or credit card information.
Even if your site doesn’t collect money, process credit card information, include forms or accept comment submissions on blog posts, it’s still important to install an SSL certificate on your WordPress website.
Without an SSL certificate, your website visitors will have a bad impression of your brand and business and likely, opt for competitor products or services. Beyond first impressions, search engines prefer secure websites, and so, in seeing your site as threatening, they’ll negatively impact your search rankings.
How to Get SSL Certificates
There are a few ways to get an SSL certificate for your WordPress website. If you have subdomains, then you’ll need a wildcard certificate. Otherwise, you need a standard certificate.
Ways to get SSL certificates:
- Your hosting company. Many hosting companies provide SSL certificates for their users. Some hosting companies, such as Divi Space Hosting, offer free SSL certificates, as bundled into the cost of hosting, while other hosts charge for them.
- Third-party sellers. Next, you can buy SSL certificates from third-party providers. The SSL certificate cost may vary between providers.
- Free SSL certificate. Finally, you can opt to get a free SSL certificate for your website. Some of these SSL certificates only work for three months, after which, you’ll need to renew the certificate. SSL For Free and Let’s Encrypt are two of the most popular free SSL certificate vendors. Both provide free SSL certificates for personal and commercial use, and they include both standard and wild card certificates.
How to Install an SSL Certificate on a WordPress Website
Once you have your SSL certificate, you’ll need to install it on your server and then activate HTTPS on your WordPress website.
Installing an SSL Certificate on Your Server
Before you can convert your WordPress website to HTTPS, you’ll need to install your SSL certificate on your server. This is done by enabling the host’s SSL certificate, or by copying and pasting the files within fields in the cPanel.
SSL Certificates have several components:
- Certificate (CRT)
- Private Key (KEY)
- Certificate Authority Bundle (CABUNDLE)
Each of the components must be pasted into their fields individually. If this feels too advanced, you can also ask your host for assistance as some may install it for you.
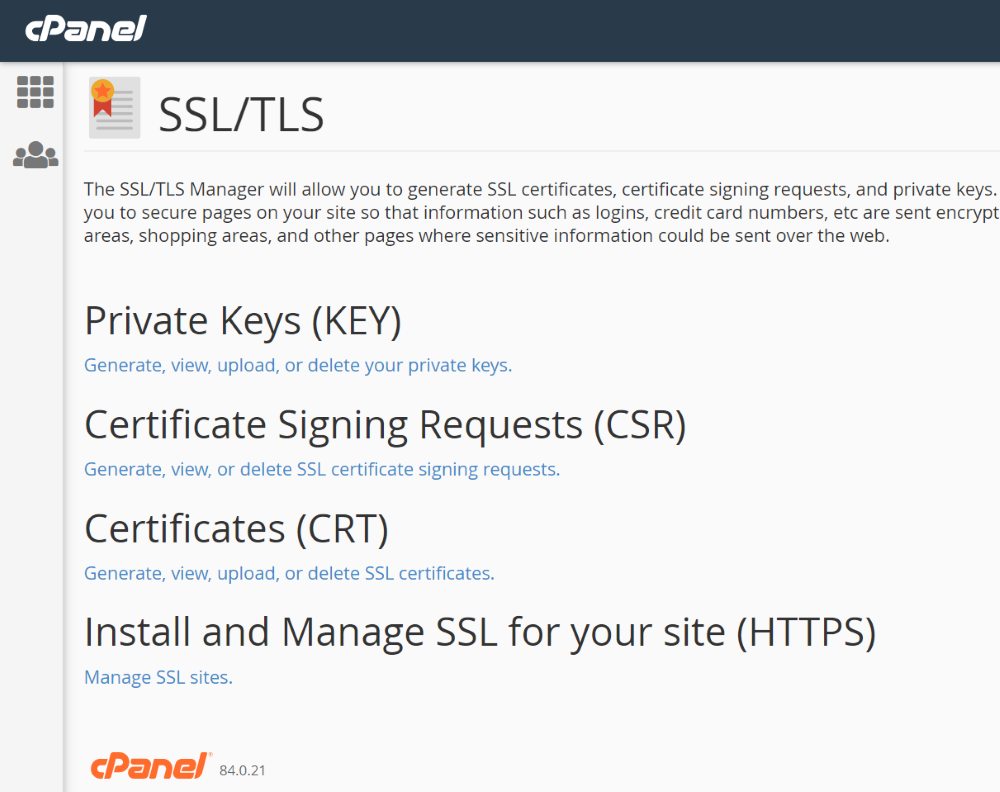
Below is a demonstration of how to install the SSL certificate manually. First, log into your server and, once inside your server’s cPanel, go to the section for security and click on SSL/TLS.

Look for SSL/TLS on your Cpanel dashboard
Your cPanel might look slightly different with different components displaying at different places, but it should function the same way.
Begin installing the SSL certificate
Next, you need to install the SSL certificate. In my example, the option Manage SSL sites is found under Install and Manage SSL for your site (HTTPS).
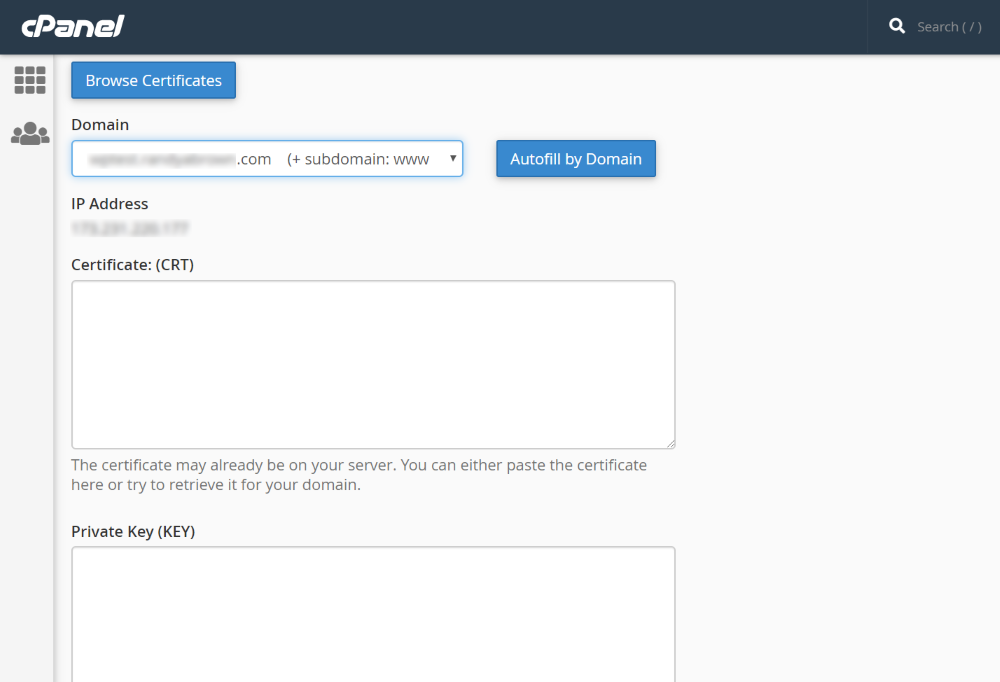
Enter the SSL certificate details
In this example, my host provides free SSL, so it’s available to me as an autofill. I can also paste in the certificate components manually if I’ve gotten the SSL certificate from a third-party provider. If you’ve purchased from a third-party brand, you’ll need to include both your domain and the www subdomain if you get a third-party SSL certificate. Free certificates are usually provided as individual files that you simply copy and paste into these fields.
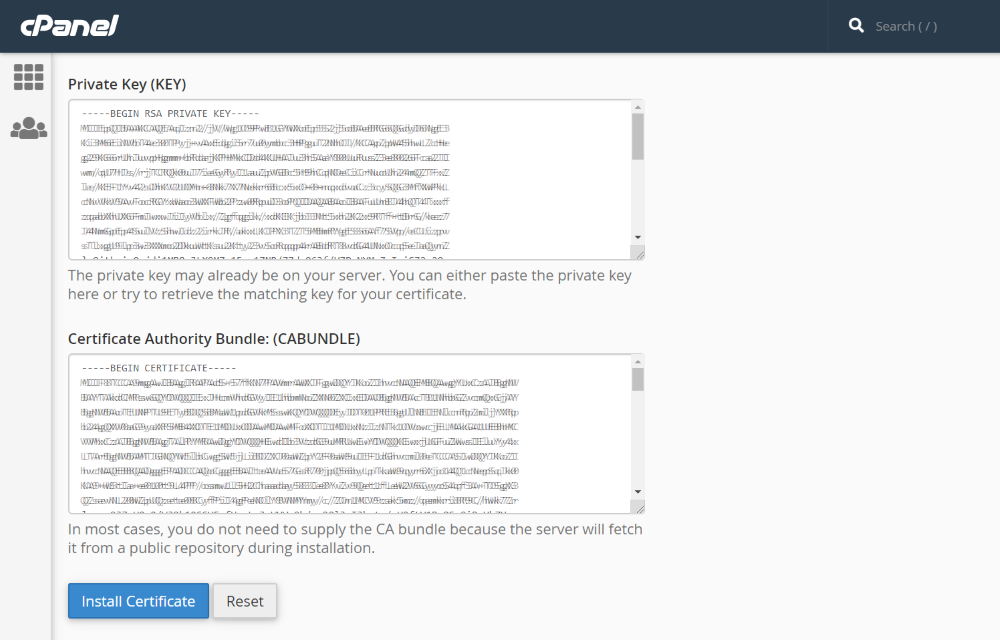
Click Install certificate
Once you’ve pasted in your keys, click Install Certificate. Your server now has SSL available for your WordPress website to connect to.
Enable HTTPS on your WordPress Website with a Plugin
Once you’ve activated your SSL certificate for your domain, you’ll need to change your website from HTTP to HTTPS for all of your URLs and files. The easiest method is to use a plugin that makes the changes for you as they also handle the 301 redirects and mixed content, taking a lot of time and pain out of the process.
Really Simple SSL
Download the Really Simple SSL plugin from the WordPress repository
There are several good plugins to use SSL with WordPress; Really Simple SSL is the most popular by far, with over 3 million active installs. Once you’ve gotten your certificate, Really Simple SSL automatically detects your certificate and handles the move to HTTPS for you. You don’t have to do anything else for basic SSL.
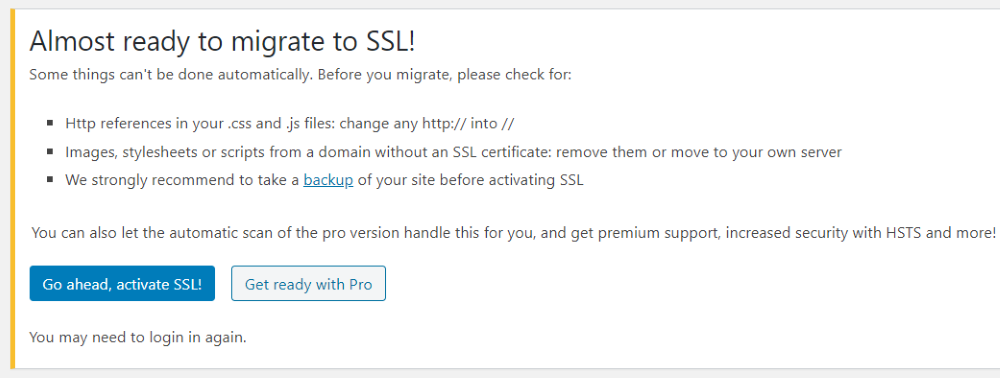
Activate SSL using the Really Simple SSL plugin
Once the plugin is activated, it will provide some information and ask to activate SSL. Be sure to make a backup of your website first. Once you activate the plugin your site will automatically become an HTTPS domain.
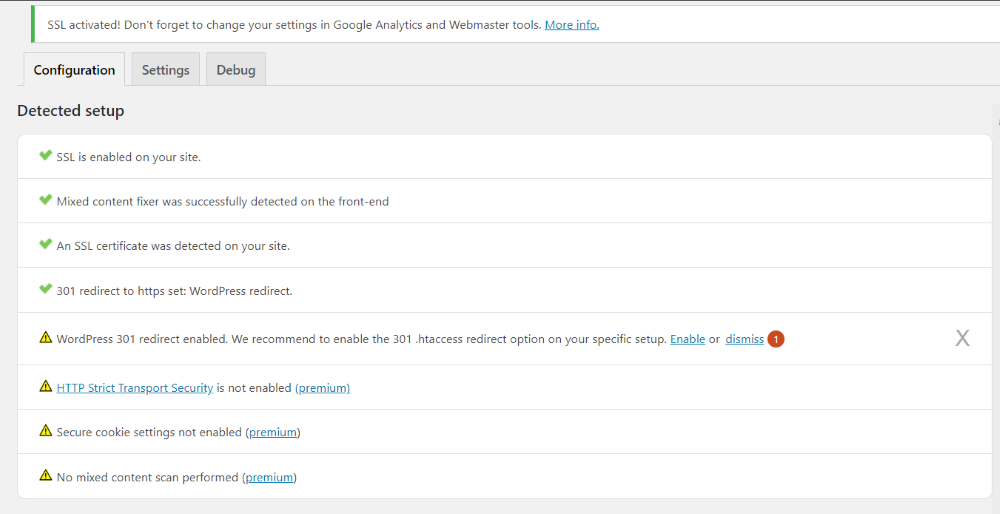
Configuration information of the Really Simple SSL plugin
Your certificate will be detected and enabled automatically. The site is now on HTTPS with no changes required. It does have a few features that require the premium edition, but the free version will handle the SSL, set your WordPress installation to use HTTPS, fix mixed content, and handle the 301 redirects from HTTP to HTTPS.
If you’re using them (and you should), you’ll also need to change the settings in Google Analytics and Webmaster tools to target HTTPS. This will be done within your Google account.
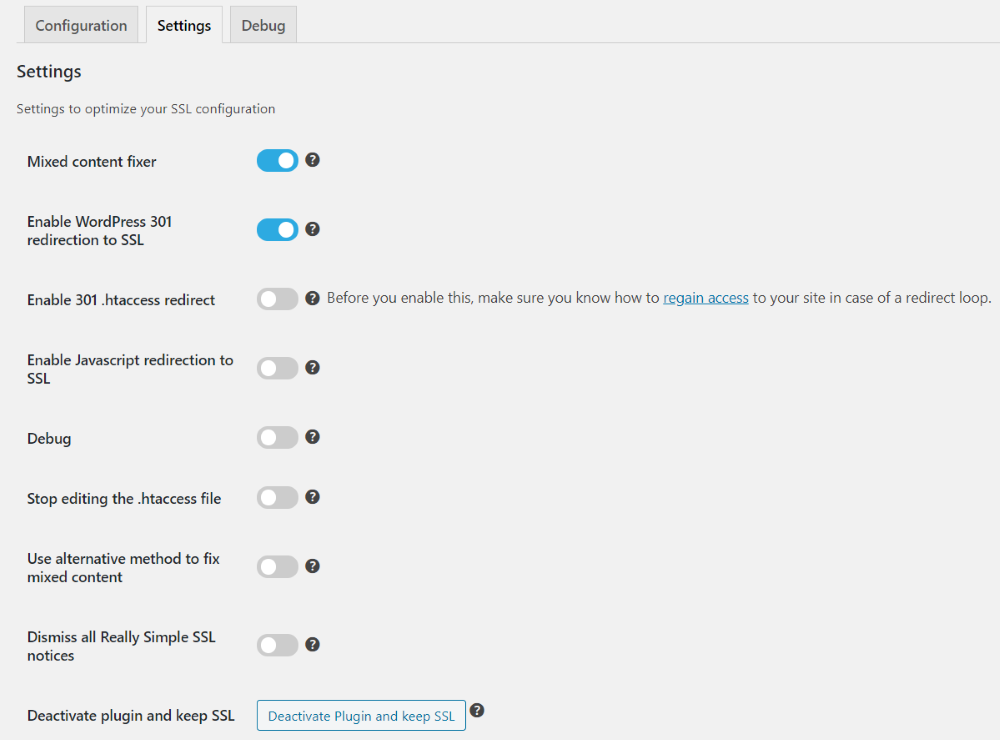
View the Settings of the Really Simple SSL plugin
The Settings tab includes a few other features you can enable. I recommend leaving these settings at their defaults and only use them if the default settings don’t work for you.

Really Simple SSL plugin information
The plugin replaces content as the page is loading. This could have a negative impact on your site’s loading speed. The impact is small, so it’s well worth using this plugin. We recommend using a caching plugin, such as Divi Rocket, to minimize any speed impact. It’s tempting to simply deactivate the plugin, but if you deactivate the plugin as normal, your site will revert back to HTTP.
Deactivating the Really Simple SSL plugin
Deactivating the Really Simple SSL plugin
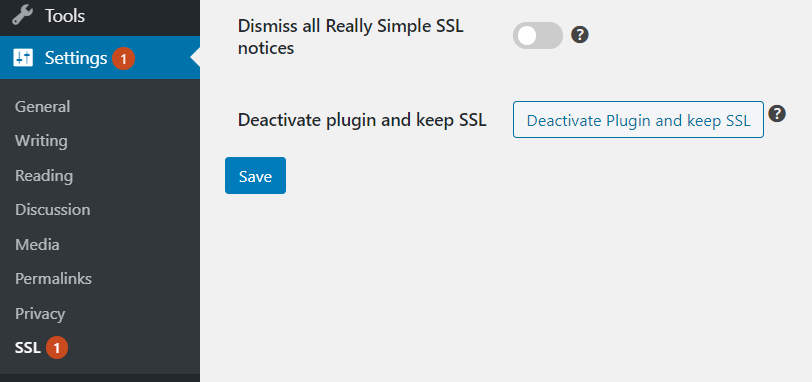
Fortunately, there is a way to deactivate the plugin and retain SSL. In the dashboard menu, go to Settings > SSL Settings. Scroll to the bottom of the page and click Deactivate Plugin and keep SSL.
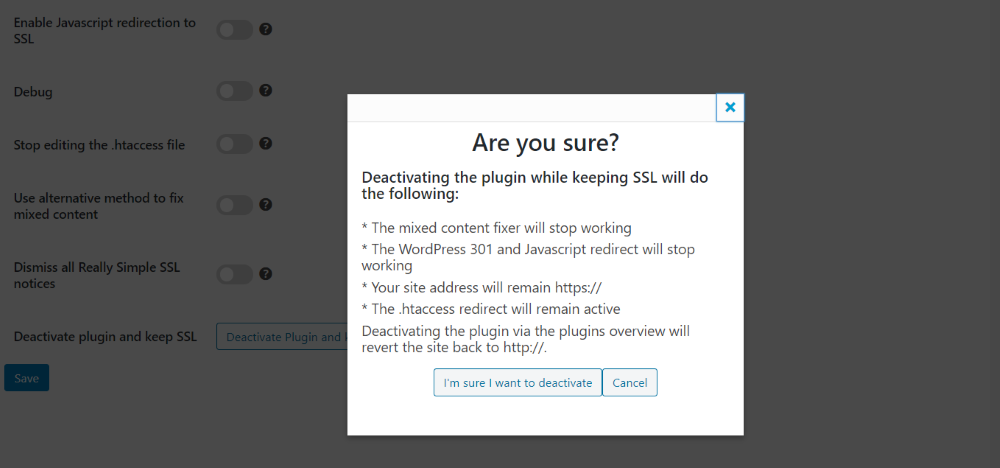
Deactivate the plugin
It’s still possible, but not guaranteed, to have mixed content errors, and 301 and JS redirect will stop working. I recommend keeping Really Simple SSL active and using Divi Rocket to help with any negative impact the plugin might have.
Using Divi Space Hosting’s One-Click Process to Install SSL Certificates
If the manual installation process above feels a bit too advanced for your liking, opt for a host that includes an SSL certificate for free, and that offers a simple one-click installation.
Divi Space Hosting is a top-class managed WordPress hosting solution created specifically for Divi websites. These servers are configured to match the exact server requirements for running a Divi website, as recommended by Elegant Themes.
Along with daily backups, one-click staging sites and more, Divi Space Hosting also includes free SSL certificates integrated via Lets Encrypt. These SSL certificates can quickly be installed using a one-click process. It couldn’t be easier.
Once you’re inside your Divi Space Hosting console, click on the Security tab.
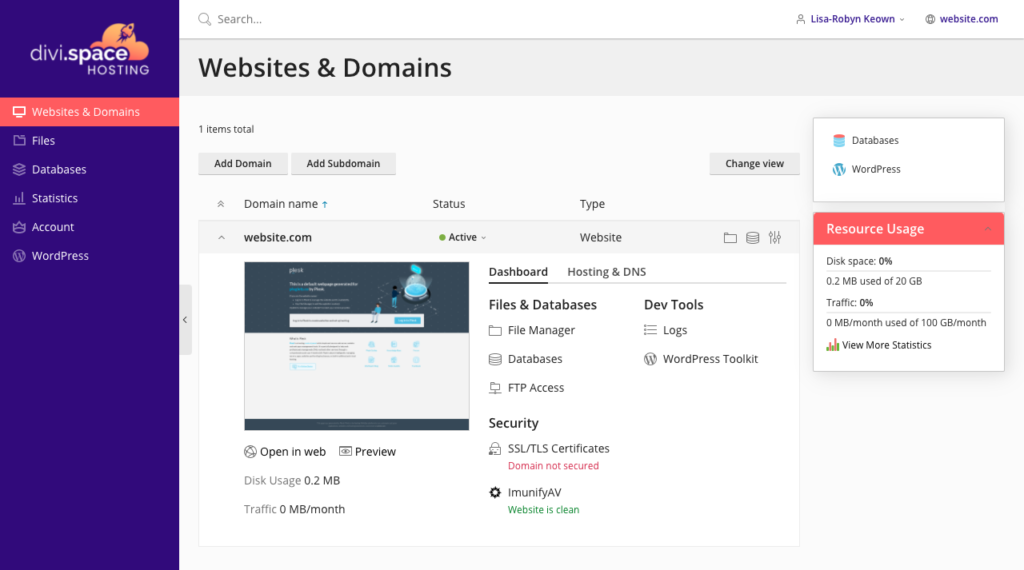
From the main Divi Space Hosting screen, click on the Security tab
This will take you to a new page. Here, you’ll be able to either get an SSL certificate using Let’s Encrypt or upload an SSL certificate.
From the main Divi Space Hosting screen, click on the Security tab
Ending Thoughts
That’s our look at how to install an SSL certificate on your WordPress website. A plugin is the easiest way to handle the SSL certificate on your WordPress website, but you still need to get your certificate from your host or a third-party supplier and have it activated on your server. Many hosts such as Divi Space Hosting provide free SSL certificates, and it’s super easy to get this set up and installed.
It does take a few steps for both your server and your website, but it isn’t difficult to do and it’s well worth the effort. Not only is your website more secure for your visitors, which in turn looks more professional and builds confidence in your website, but it will also get a better search engine ranking.
Have you installed an SSL certificate on your WordPress website? Let us know about your experience in the comments!
Thanks for reading!

Hi Randy,
Well written article!.. But I hope this article is missing some important part i.e., how to generate SSL cert and install it on host before forcing HTTPS. I would highly recommend adding “WP Encryption” WordPress plugin which makes the SSL cert generation super easier. I have used it on countless sites of mine.
Good feedback. We’re always working on improving our articles. Thanks for the additional details. We’ll add these in the near future.
Normaly web hosting prividers, with cPanel, uses an automatic SSL Free. These certificates are installed automatically once the domain is pointed to the hosting, although it may take time for the cron to run, you will see it installed soon. Free SSL certificates last 3 months but they auto-renew a few days before expiration so you won’t have to worry.
Why would you use a plugin for ssl instead of just doing it manually. Change the url to https, modify htaccess file and done.
Thanks for the walk-thru Randy. Again, another well written/researched article pertinent to our daily work.
I used to follow the same procedures when our agency was using our previous hosting vendor.
However since switching a year or so ago to our new vendor and a monster VPS and SSD-driven-server, we have every site/domain we host automagically setup with SSL whenever we create a new account.
Have you had experience with this?