If you a web developer that travels or wants to work remotely, a localhost on your computer lets you continue building websites and work with WordPress, no matter where you are in the world – whether or not you have a stable internet connection.
Using a localhost is a great way to keep your business going without a server or internet connection. In this post we will look at how to use Local by Flywheel to save on operation costs, limit your bandwidth exchange or work in a remote destination.
You’ll learn:
- What is a a local host,
- Why Local is a good choice for localhosts and,
- How to set up Local as your localhost to begin building WordPress websites offline
What is a localhost and why should you use one?
Localhost software is a tool that, when installed on your computer, allows you to build a website offline. The technology essentially turns your computer into a server, negating the need for a live server from a web hosting company.
Using a localhost and developing offline is perfect for those who:
- have spotty and unreliable internet connections
- work remotely, often fully off the grid
- want to keep costs (such as server costs and bandwidth costs) to a minimum
A popular WordPress localhost is Local. This tool was created by Flywheel; a managed WordPress web hosting company. Local can be used whether you are a Flywheel customer or not. If you are, there are a few benefits such as easily moving site changes and updates between the localhost and the live site. If you’re not looking to host with Flywheel, we recommend Divi Space Hosting, which is both a WordPress and Divi managed hosting solution.
Local Features
Live Links: Out of all localhost platforms, Local is the only option that allows you to share a live URL of the site. This is great for clients who want to preview the site while it’s being built. With other WordPress localhosts, you wouldn’t be able to offer this sort of functionality. If you were building a site for a client locally, and wanted to show them your progression, you’d have to move the site to a live staging server—FTPing over site files, and exporting and importing the database—just to preview the site.
While you’re building using Local, at any point, you can create a live version of the site by clicking the Enable button next to the Live Link option at the bottom of the screen. This will generate a URL that, when copied over into a browser bar, can be viewed as if it were a live URL.
An alternate solution would be to opt for a managed WordPress host that includes a staging site such as Divi Space Hosting. This way you can build a website on a live server that isn’t indexed in search. Your client can view your progress periodically.
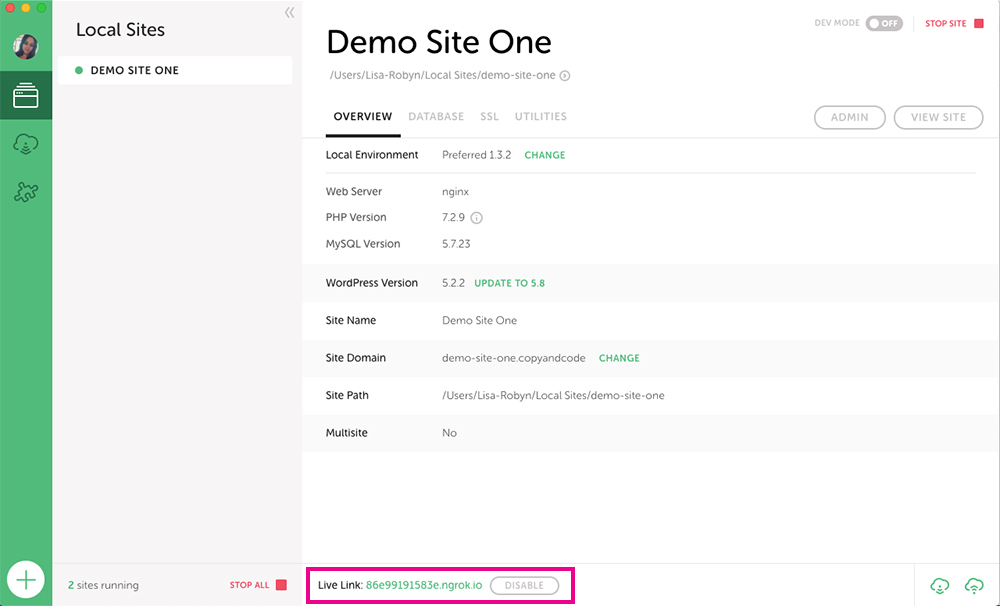
Enable the live link and send a live URL of your offline site
Push and Pull: If you are building a WordPress localhost site using Local, and are hosting the final, live site with Flywheel, you can quickly ‘push and pull’ between your local development and live environments.
In the menu item, Connect to Flywheel, you’ll find a list of all of your local sites that have live counterparts. If you click the button titled ‘Pul to Local,’ Local will immediately begin copying down the latest version of the live site into the local, development environment. Within minutes, you’ll have an up to date version of your site ready to work on.
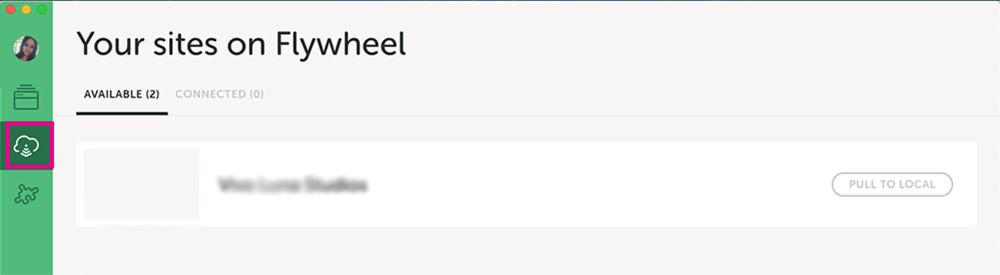
Click the Pull to Local button to pull your live site down to your localhost
Then, once you have completed your site updates and are ready to take these edits live, click the Push to Flywheel button in the bottom right-hand corner, and your site edits will be pushed to your live site.
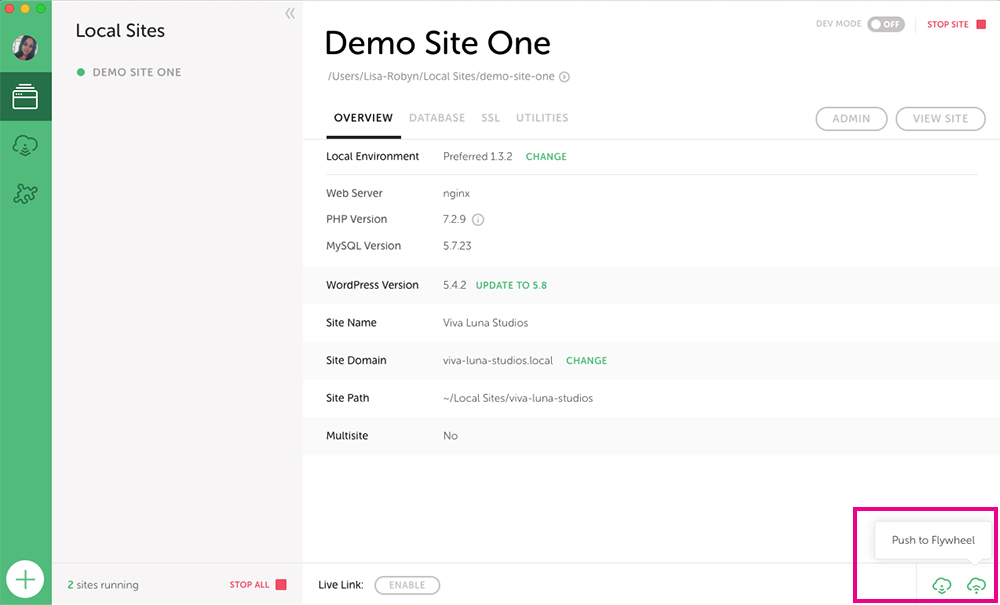
Click the Push to Live button to deploy the changes on the live site
Easy-to-use: Local is user friendly, it’s easy to set up and easy to use. Unlike other local host platforms which include clunky setup and configuration processes, Local is a stylish piece of software that works well and is fun to use.
How to Set Up the Local WordPress Localhost
First, head to the Local website and click ‘Download for Free’. A pop-up will arise asking to you confirm which platform (Mac, Windows, Linux) you are using.
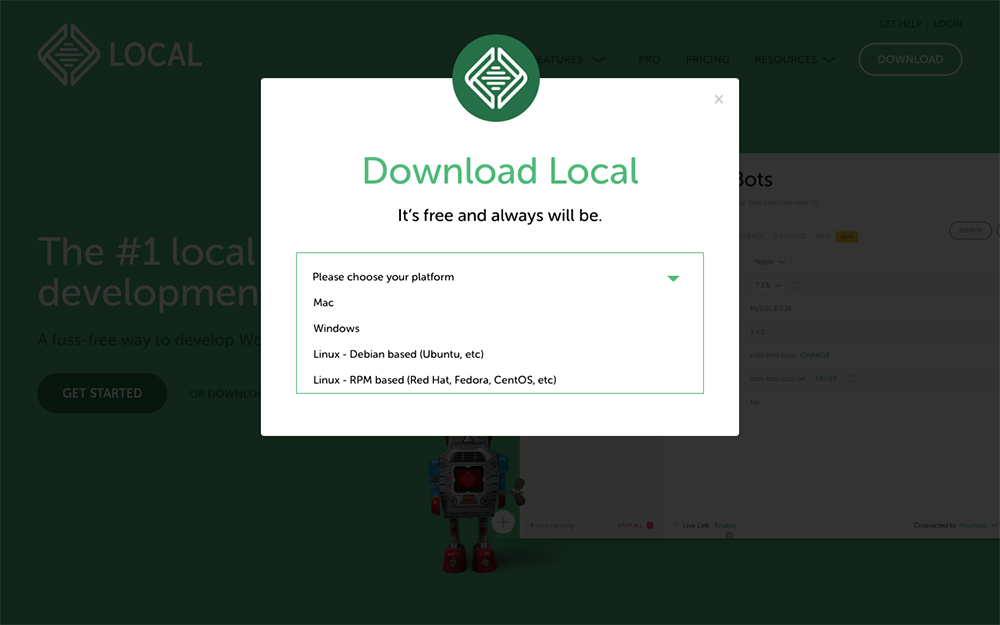
Download Local
Once you’ve made your selection, you’ll be asked to enter a few personal details such as your name, email and number). When ready, click ‘Get it now,’ and the program will automatically begin downloading. When it has been completed, follow the prompts to install the Local software on your computer.
To add a new site, click the green Create a New Site button.
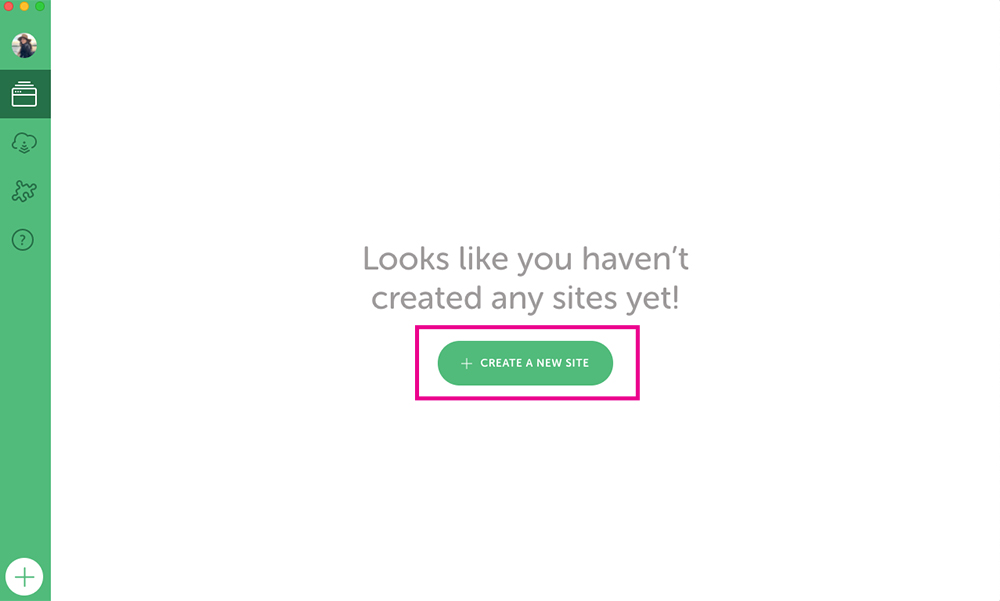
Click the Create New Site button
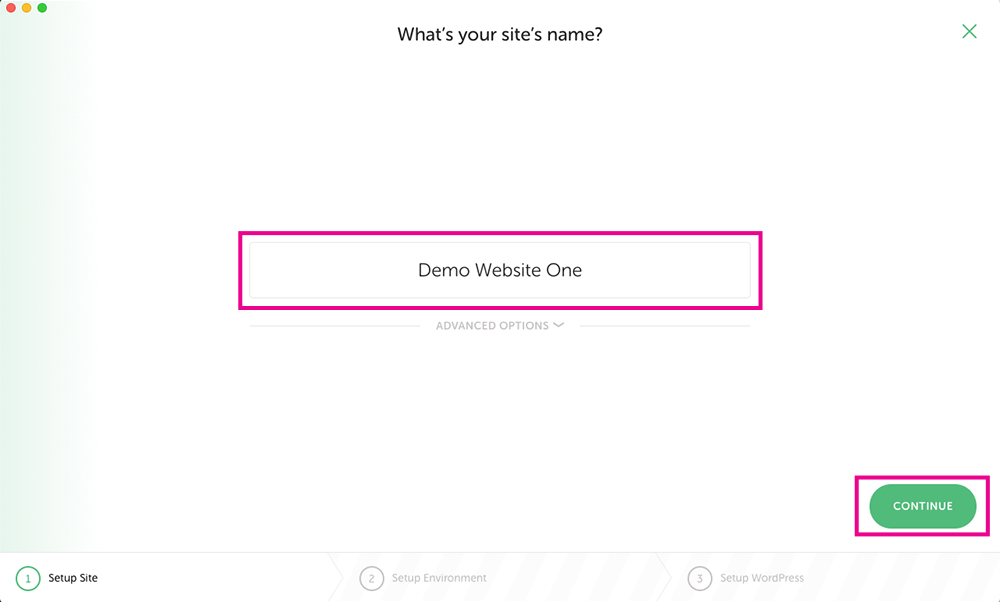
You’ll be asked a series of question prompts, first, to enter the name of your website.
If you click Advanced options you’ll find more setup configuration options such as:
- Renaming the local site domain: If you want the domain name of website.local to be different to the site title or site name, you can rename it here. For example, if your site title is ‘Bob’s Burgers’, the domain will automatically format to bobs-burgers.local. Here, you could change it to bobsburgers.local.
- Reassign the local site path: By default, Local will create a folder called ‘Local Sites’ on your computer to store all of the relevant site files and data of each localhost site you set up. If for some reason you’d like the site files of a local website it rest somewhere else, you can change the path here.
- Creating a site from a blueprint: A ‘Blueprint’ is basically a template site that, through Local, you can use to save time. You can create a Blueprint to have basic WordPress settings, customizer settings, themes, a blank child theme and plugins already set up, so that when it’s time to start developing, you can jump right into working on the site itself without having to worry about configuring the same set up steps over and over again.
Once you’ve entered the relevant information, click Continue.
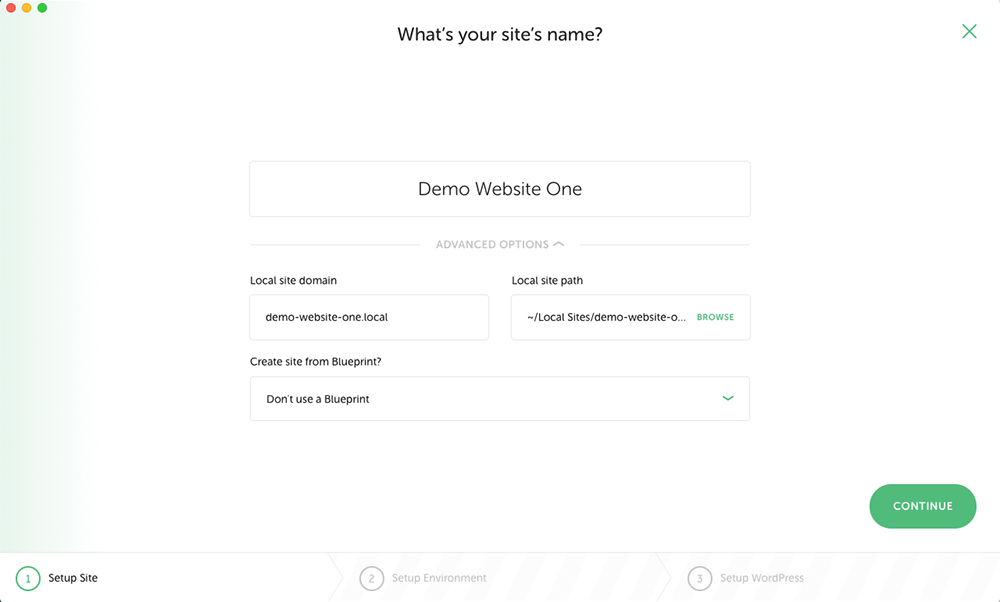
Use the advanced options for more configuration settings
Alternatively, you can choose to custom create the Environment by setting the PHP, web server and SQL settings manually. Unless you are a pro-developer with advanced knowledge of server configurations, we recommend selecting the Preferred option.
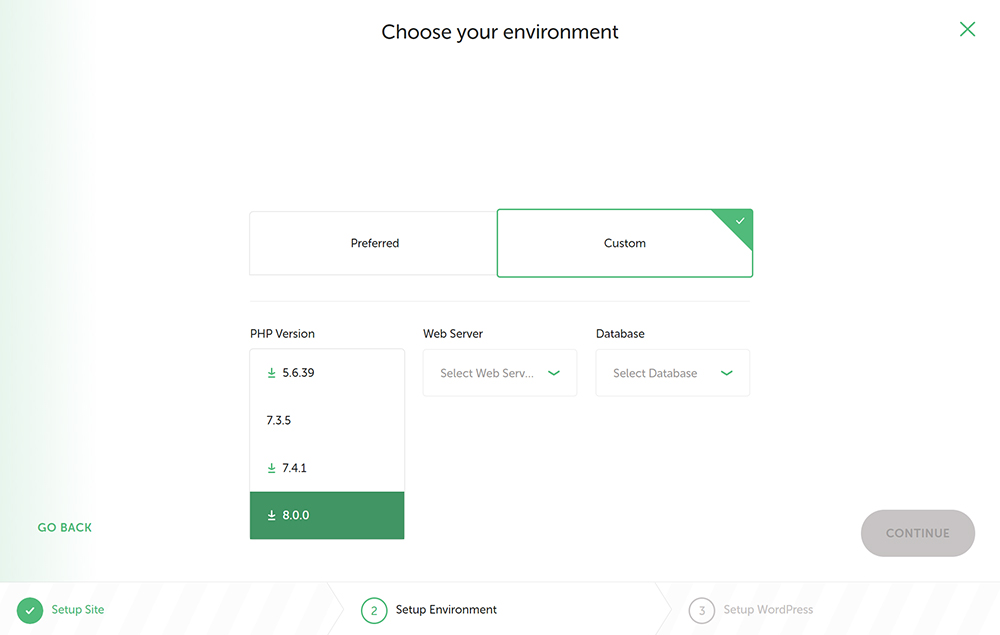
You can set the PHP version, web server and database particulars in the custom environment options
Then, you’ll be asked to enter details relating to the WordPress installation itself, including the:
- WordPress username
- WordPress password
- WordPress email
Once you’ve entered the information, click Add Site.
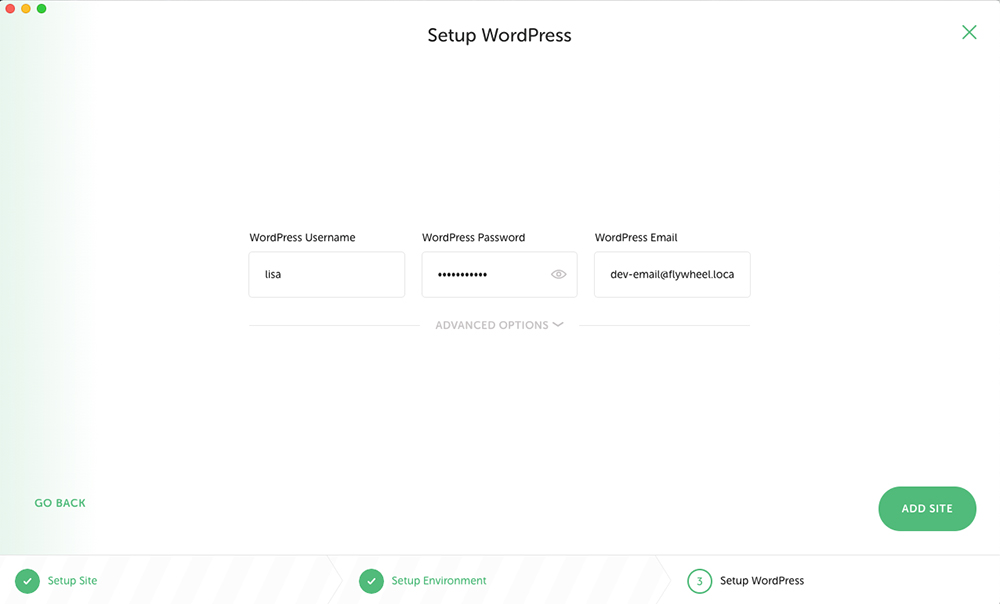
Enter the WordPress details
If you click Advanced Options, you’ll be given the option to select whether the website is a multisite.
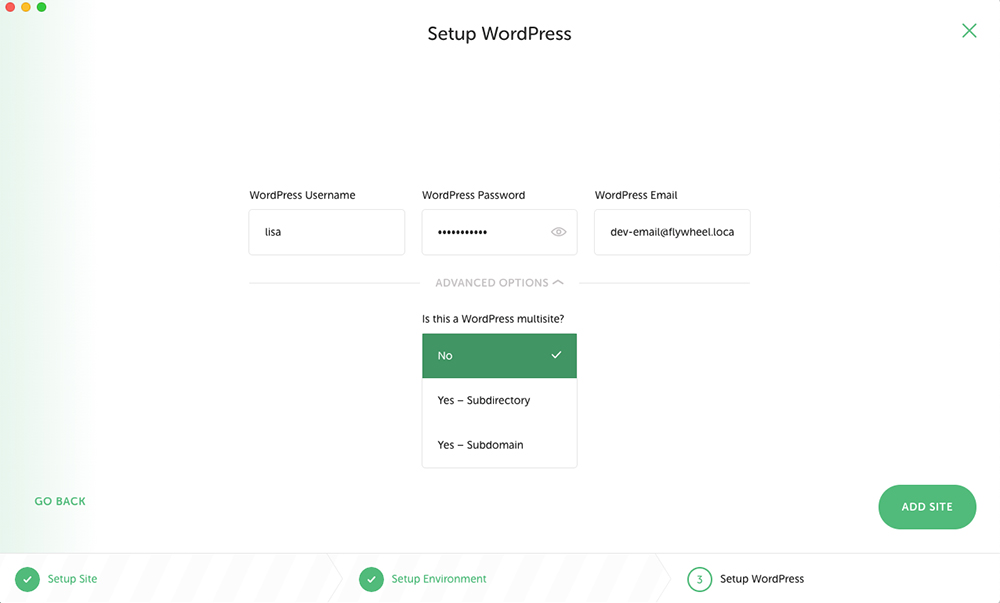
If you have a multisite, select Advanced Options
Once you’ve added all of these particulars, the local host will begin installing.
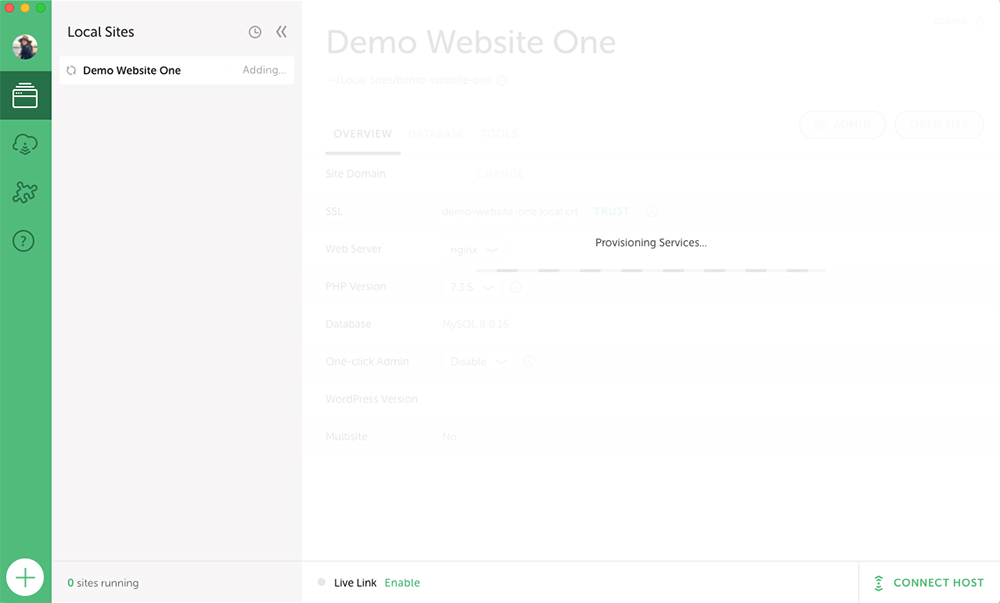
Let the installation run
You’ll be prompted to enter your computer’s administrator password. When the installation is complete, you’ll see your brand new WordPress localhost website in the left-hand side panel. In our example, the website is called “Your Site Name.”
As you start adding more and more sites, they’ll appear in a list in the left-hand side panel. Whenever you click on one of the sites, its details and navigation options will appear on the right-hand side. There are four tabs to navigate though, they are:
- Overview
- Database
- Tools
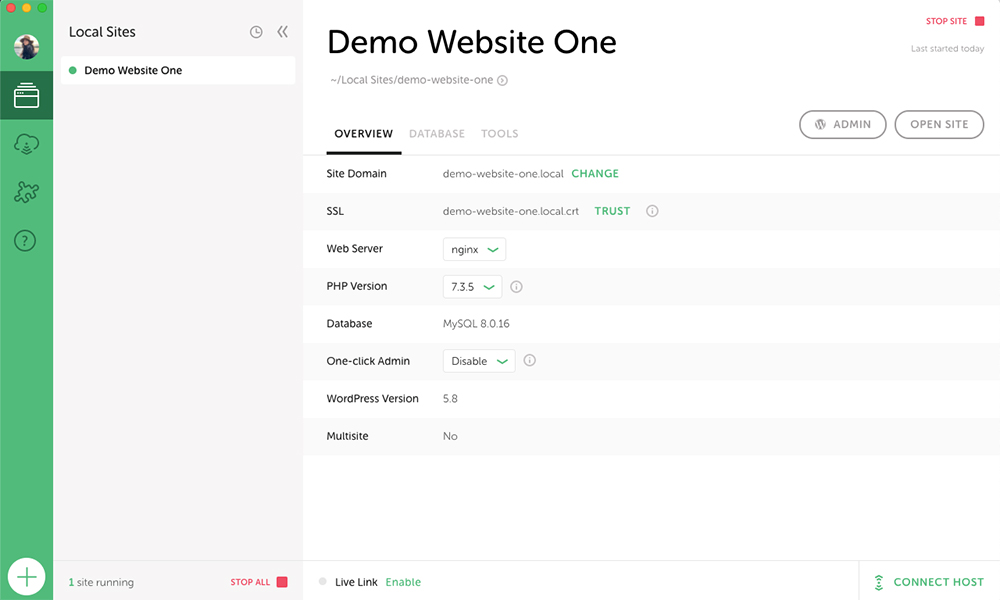
In the Overview tab, you’ll find all of the information related to your site, such as the domain, server, database and WordPress version details.
An overview of the Overview tab
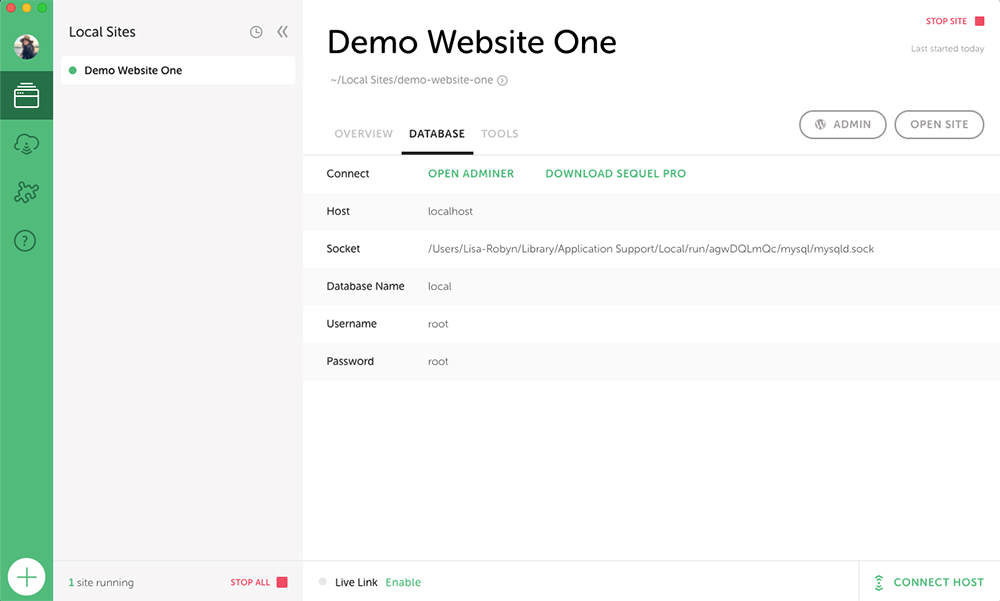
In the Database tab, you’ll find further information related to the database of the localhost site, such as the database name, username, password and port.
An overview of the Database tab
Finally, in the Tools tab, you’ll find the access portal to Mail Hog, an email testing environment that lets you test email sending and receiving abilities. You’ll also find options for Live Links, the feature that lets you create a live link of your offline website.

An overview of the Tools tab
Now that Local is set up on your computer and you’ve created your first demo, you’re all set and ready to create your WordPress website. To begin, click the Start Site button on the top right-hand side of the screen.
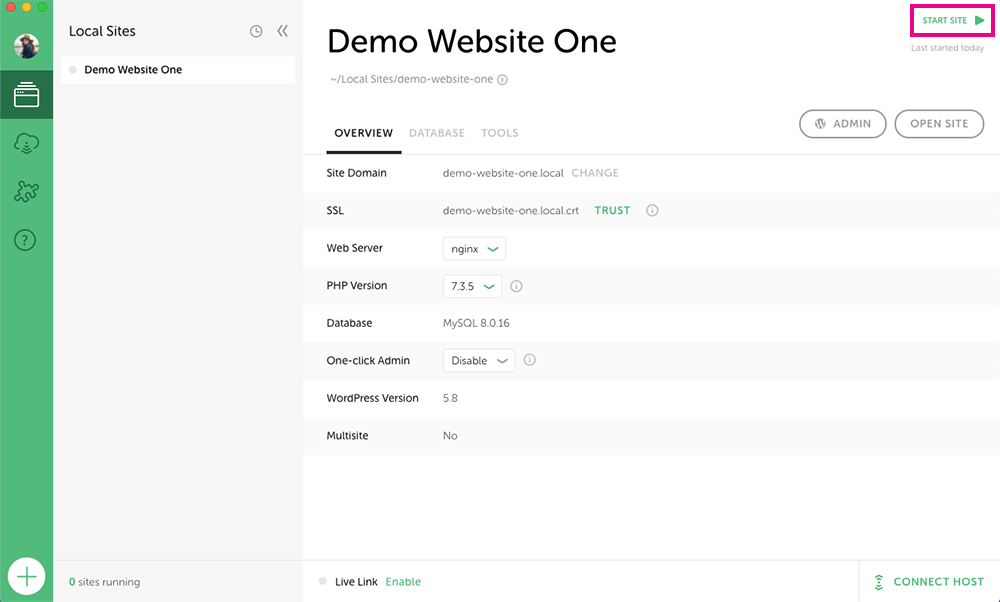
Click Start Site
Once the site is up and running, you can click either the Admin button which will take you to the wp-admin login screen.
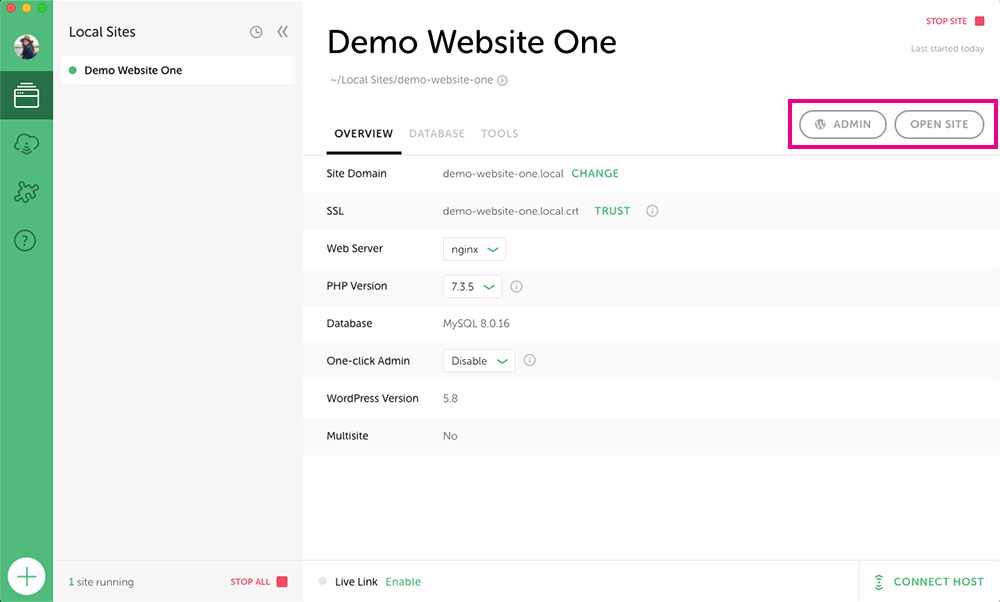
Click on either the WP Admin or Open Site buttons to visit the front or back end
Or you can click on the Open Site button which will take you directly to the front-end of the site.
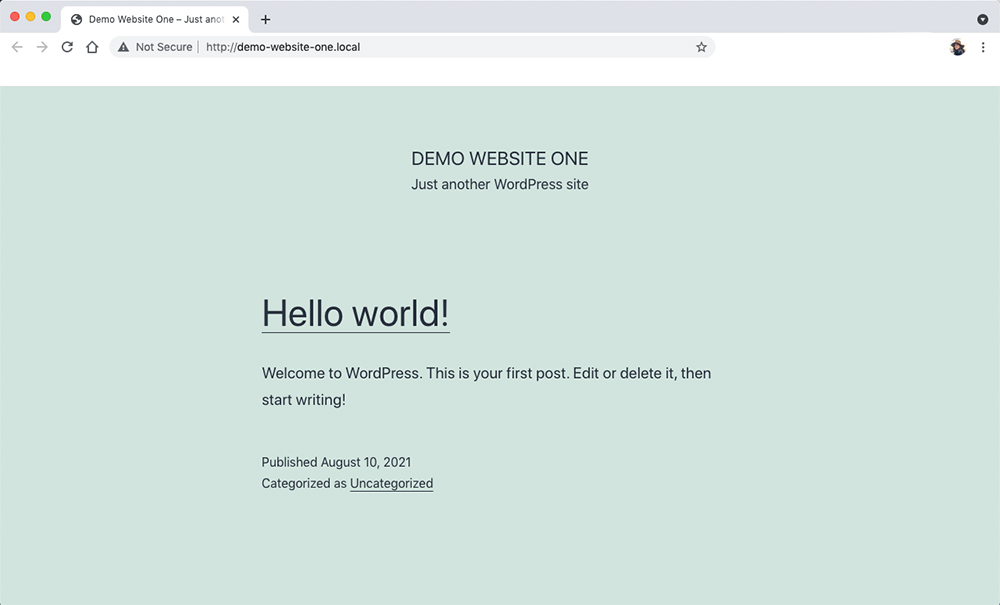
The front-end of your new website
Once the site is up and running (the program will alert you as to when it’ll be ready), you can start working. Click the Admin button to head to the wp-admin page or immediately to the WordPress dashboard if you’re previously logged in), or click the Open Site button to head to the front-end.
Ending thoughts
Local is a good WordPress localhost option. It’s easy-to-use, the interface is pleasant and it’s additional features such as Live Link make it a great tool to have in your development toolkit. Pairing Local with managed WordPress hosting of Divi Space Hosting is a winning combination!
Do you use a localhost to develop WordPress websites? Have you used Local before, if not, which is your top local platform? Tell us your experience with these offline website building tools in the comments section below!
Thanks for reading!

Hi Lisa,
I tried this software for my offline practice on WordPress themes. This is best localhost for beginners.