
Divi Ghoster, our white label and rebranding plugin for Divi and WordPress is a game changer for developing client sites. Not only is it super lightweight and powerful, but this nifty tool gives you all the controls you need for creating a truly custom web presences for your customers.
With Divi Ghoster, you can white-label your Divi or Extra site and hide any instance of the Elegant Theme package from your clients. End users, even those with admin-level privileges, will never know that you’ve used the Divi or Extra theme in development.
In the following post, I’ll show you how you can install and set up the plugin to fully white label your site.
Note: While this demo showcases the setup process for a Divi website, Divi Ghoster is also compatible with both the Extra theme and child themes, and will function the same as demonstrated below.
How to install and set up Divi Ghoster
Divi Ghoster is a premium plugin available from Divi Space. Once you have purchased the plugin you can use the Aspen Grove Studios and Divi Space Helper plugin to install Divi Ghoster right from your WordPress dashboard. If you do not have Helper installed on your site, you can log into your account via the My Account tab, then, click on My Downloads. Here you’ll find a list of all purchases and the respective files. Click on the download button and the Divi Ghoster .zip file will begin downloading.
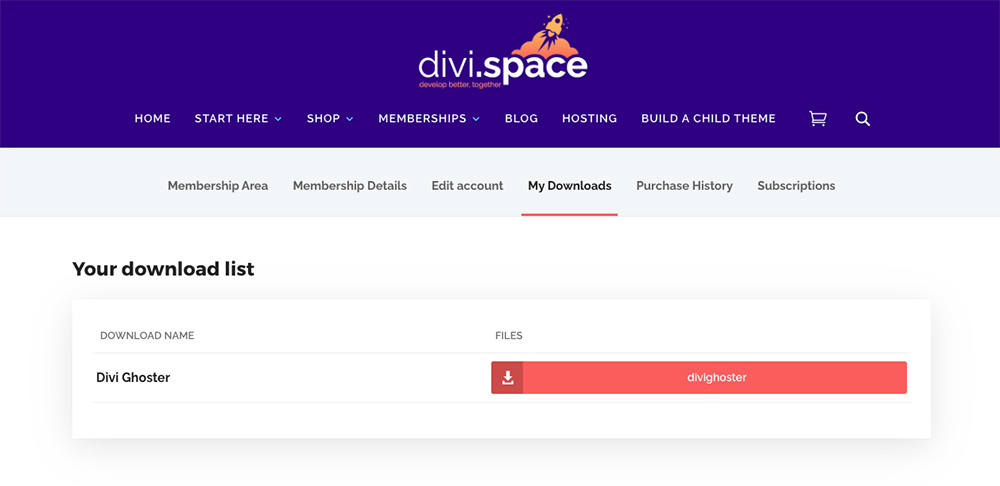
Download the Divi Ghoster plugin
Once the download has completed, do not unzip the file. Head over to your WordPress website, log in, and navigate to the Plugins menu. To add the plugin, click Add New, then Upload Plugin and finally select the .zip file from your downloads folder.
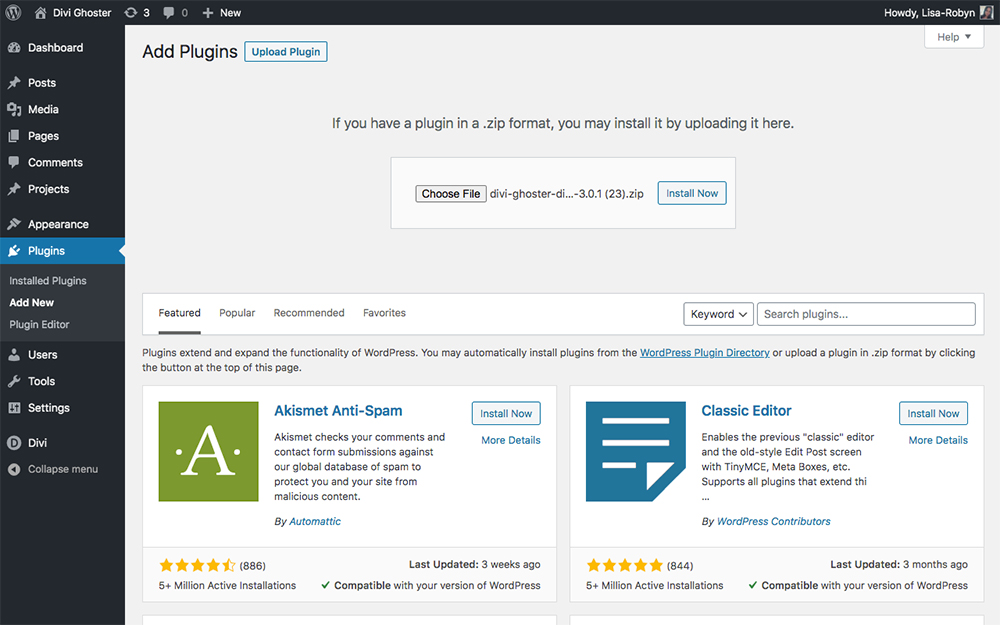
Click Install Now
Once the plugin is installed, click Activate.
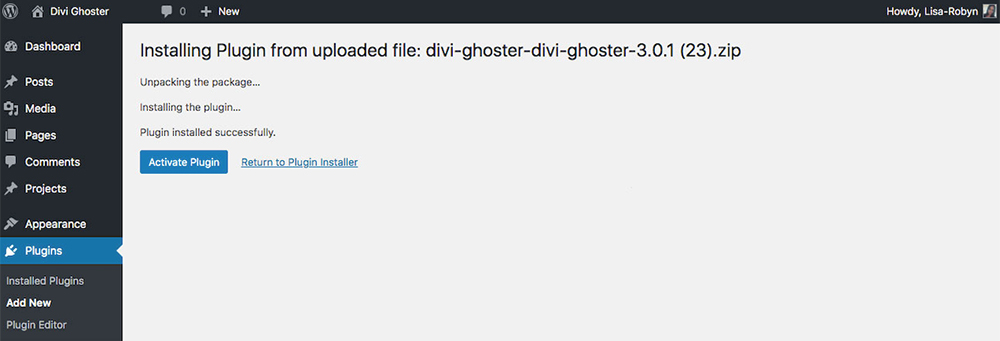
Click Activate
Once the plugin is installed, you’ll automatically be redirected to the Divi Ghoster plugin dashboard. Here, you’ll be asked to enter your plugin license key. To locate the license, log into your account on the Divi Space site, click on Purchase History and click on Licenses. On the following screen, click the key emoji and copy the license number.
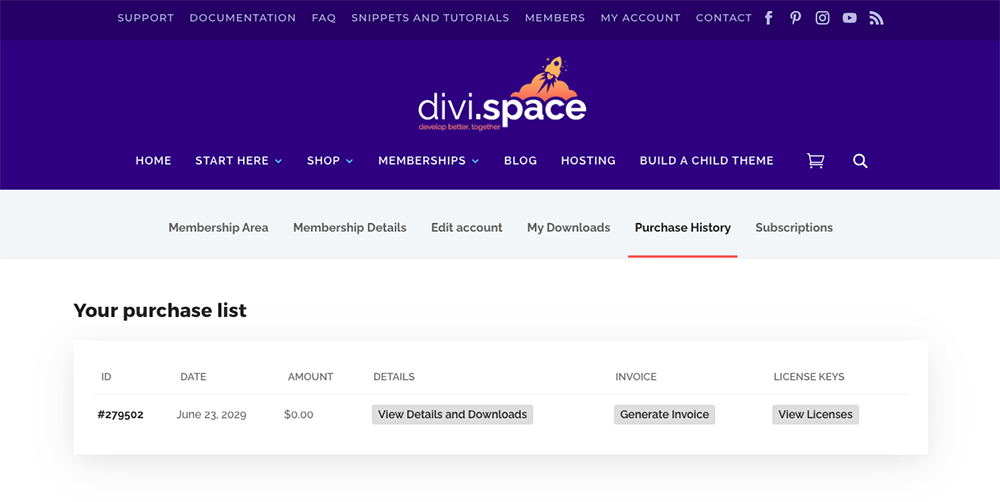
Locate your license key
Return to your WordPress website and open the Divi Ghoster menu. Paste the license key in and click continue.
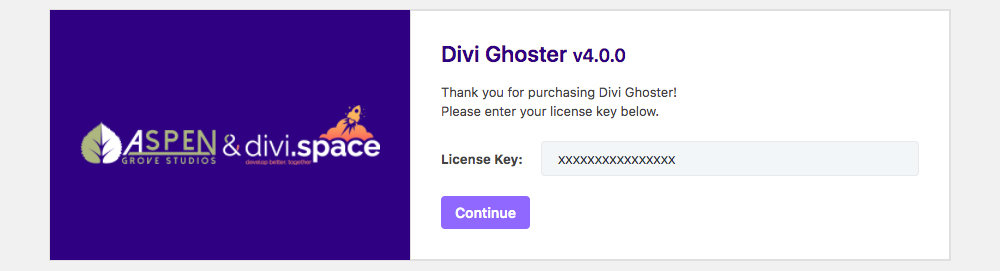
Enter your license key and click Continue
As soon as the license key is entered, your browser window will refresh and you’ll see the Divi Ghoster dashboard.
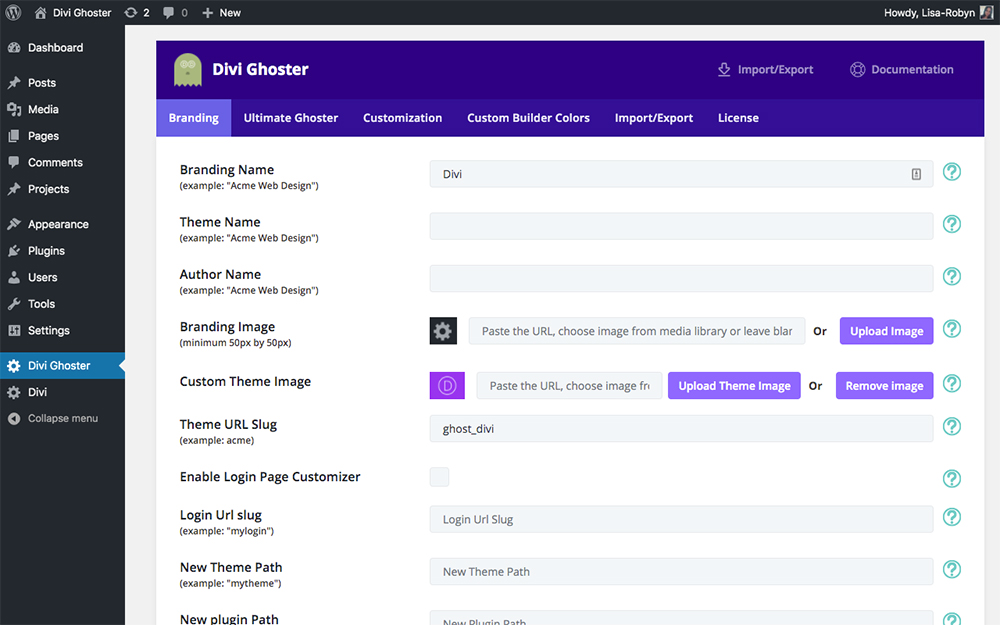
Head to the Divi Ghoster menu and you’ll see the plugin’s settings
Divi Ghoster Branding Settings
Let’s begin in the Branding tab. Here you’ll find multiple options for customizing your site, such as renaming and rebranding any instance of Divi with your own brand, or that of your client. For this example, we’ll use the fictitious brand, Acme Web Design.
First, let’s change the brand name. In Branding Name, enter a custom brand name, either your own or your client. This will change any text on the back end that registers as ‘Divi’ into whatever custom text you enter. Once you have entered your brand name, scroll all the way to the bottom of the page and click Save Changes. When you refresh the page, you’ll see that the Divi menu and the Divi Ghoster have been renamed to your custom brand name.
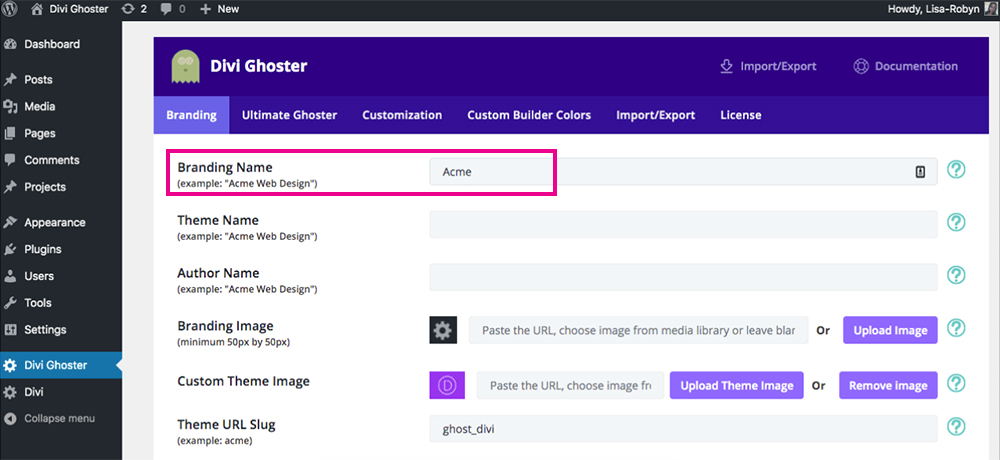
Enter a custom branding name
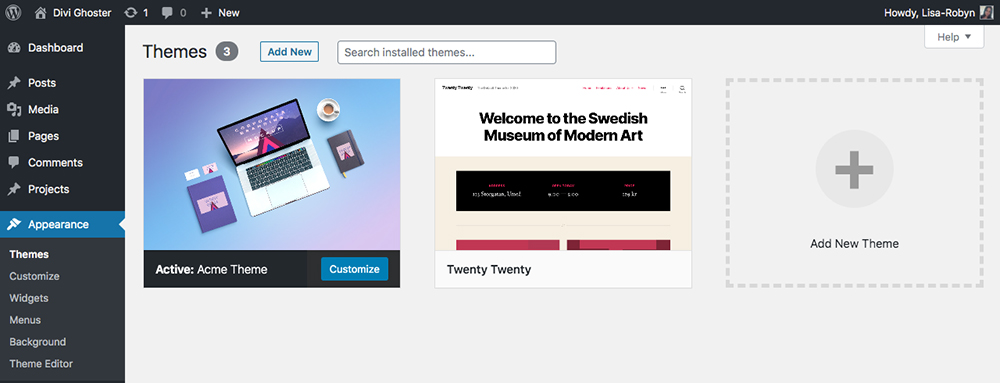
Next, you can change the theme name so that, instead of Divi, the theme will reflect as your own. Initially, the themes dashboard looks like this:
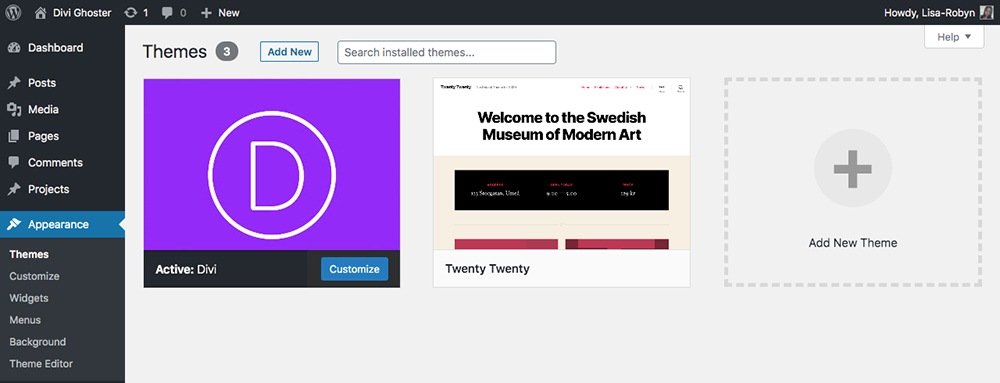
By default, the theme name is set to Divi
Here, you can see the active theme is titled “Divi”. The plugin has added a second theme To change this, head over to the Divi Ghoster menu and enter a custom brand name in the “Theme Name” option. Remember to click Save Changes.

You’ll see the new theme name reflecting
When you return to the Theme dashboard, you’ll see that the custom name is present.
Next, changing the Author Name will change the default text of anonymous to any custom text you choose. Simply enter a custom author name, click Save Changes and refresh your page to view the updates.
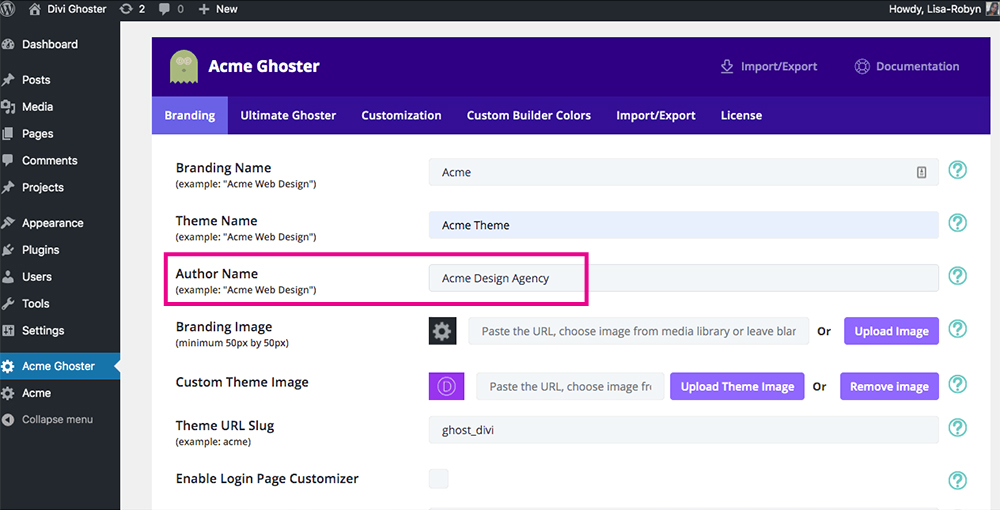
Enter a custom author name
Next, you set a custom branding image. By default, the plugin includes a gear icon graphic so that the back end does not display the Divi logo (the D in a circle). If you’d like to add a custom graphic here, simply upload a custom image to the Media Library and set it as your Branding Image.
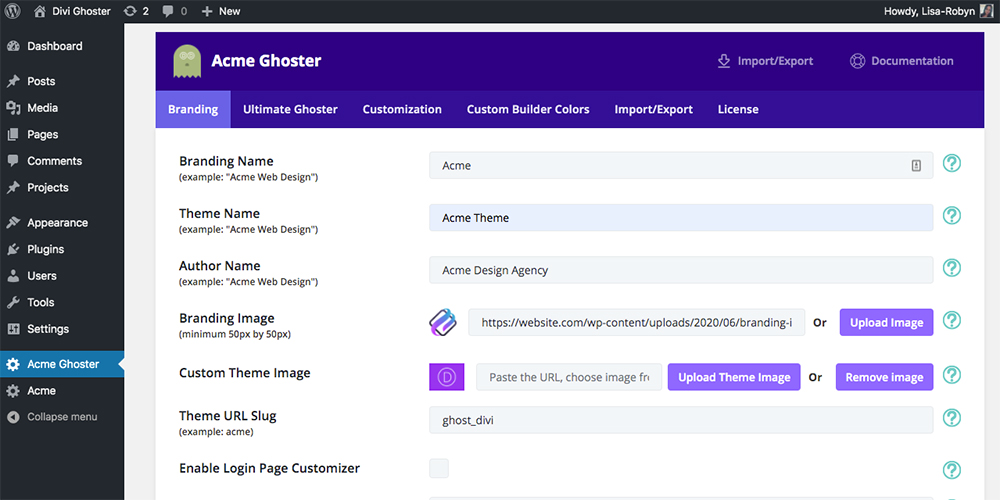
Next, set a custom branding image
When complete, you’ll see that the gear icon for the Divi menu (now Acme menu) reflects a custom image.

You’ll see the custom branding image reflect
If you were to create a new page or post, you’ll see that all traditionally named ‘Divi’ elements, such as the Divi Builder or Divi Page Settings, have been renamed, and the Divi logo replaced.
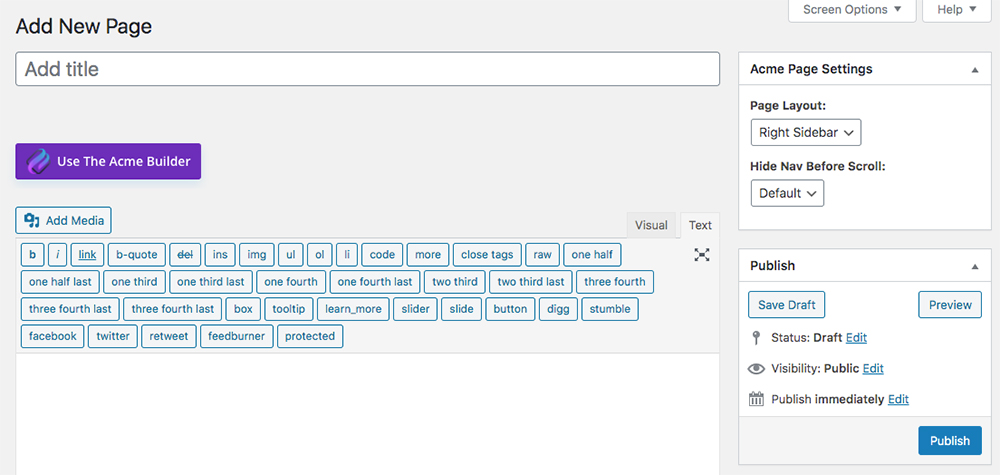
The old Divi Builder button now reflects your custom brand name and logo
Next, to change the default Divi theme image, upload a custom image to the Media Library and set it in the Custom Theme Image option.

Add a custom theme image
When complete, you’ll see your custom image reflecting as the main theme image.
The Divi theme image will now be replaced by your custom image
Next is one of our most popular plugin features, the Login Customizer. By selecting the checkbox Enable Login Page Customizer, you’ll see a new button appear.
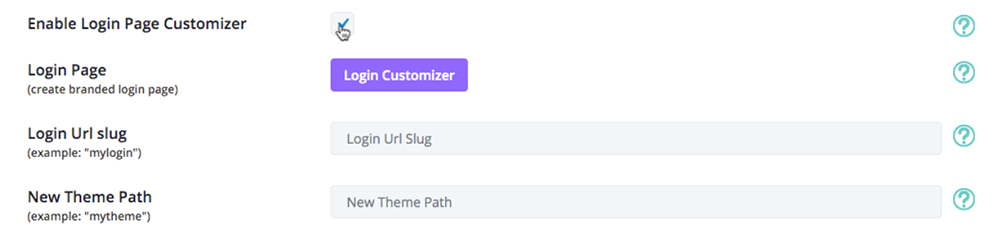
Enable the Login Customizer
Clicking this button will open a new Customizer tab where you can create a brand new design with the default WP login page. This is such a great feature as it’ll help you fully customize your client’s website presence from the very first second they login to their back end.
Here, you can custom style the login page by either adding a background image, changing the background color, adding a custom logo and much, much more.
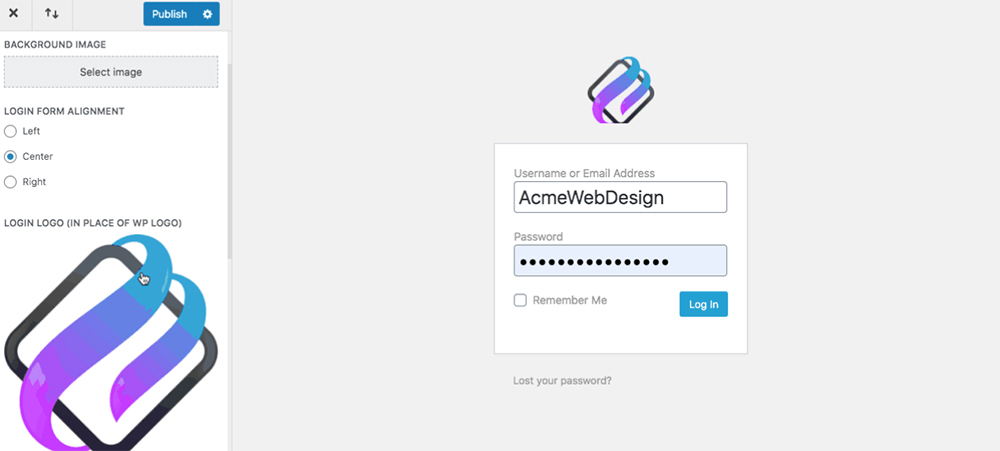
Create a totally custom login page
To help you protect your site even further, Divi Ghoster allows you to customize the login URL for your WordPress website. By entering custom text of your brand name or your client’s brand name into the Login URL slug option, you can create a custom login page, and bypass the wp-login or wp-admin URL that so many hacking attackers.

Create a custom login URL
Not only does creating a custom login URL increase the security of your site, but this, together with a custom-designed login page, will help you create a unique dashboard login for your or your client’s brand. With a tailored login URL and login page, your client may not even know that you’re using WordPress in the first place.
The next customization options in the Divi Ghoster Branding tab includes changing the theme path or plugin path. Adding custom text to these options will change the actual path file name in the file system.
This replaces the default theme URL with a new URL when you rebrand it. For example, the default URL is https://your-site.com/wp-content/themes/your-theme-name. If you change the theme path to AcmeTheme, the new URL will be https://your-site.com/wp-content/themes/acmetheme.

Enter a custom path name
As well as creating a unique web presence, changing the path names to a custom name will also baffle other developers who will try and inspect your source code to see which theme you’re using.
Divi Ghoster Ultimate Ghoster Settings
The next tab in the Divi Ghoster plugin menu is the Ultimate Ghoster settings tab. Ultimate Ghoster takes Divi Ghoster quite a few steps further and fully hides not only the Divi menu and all of its options but all of the Divi plugins installed on a site, as well as Divi Ghoster itself.
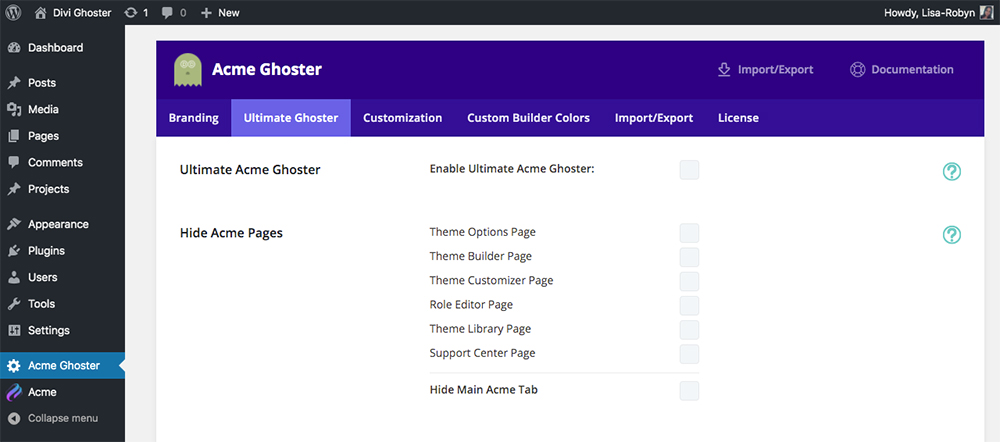
Explore the Ultimate Ghoster settings tab
Enabling Ultimate Ghoster will leave absolutely no trace of your use of the Divi theme in development. This, enabling Ultimate Ghoster, comes with a few caveats. All of the settings and rules relating to Ultimate Ghoster can be found by scrolling down in the Ultimate Ghoster tab.
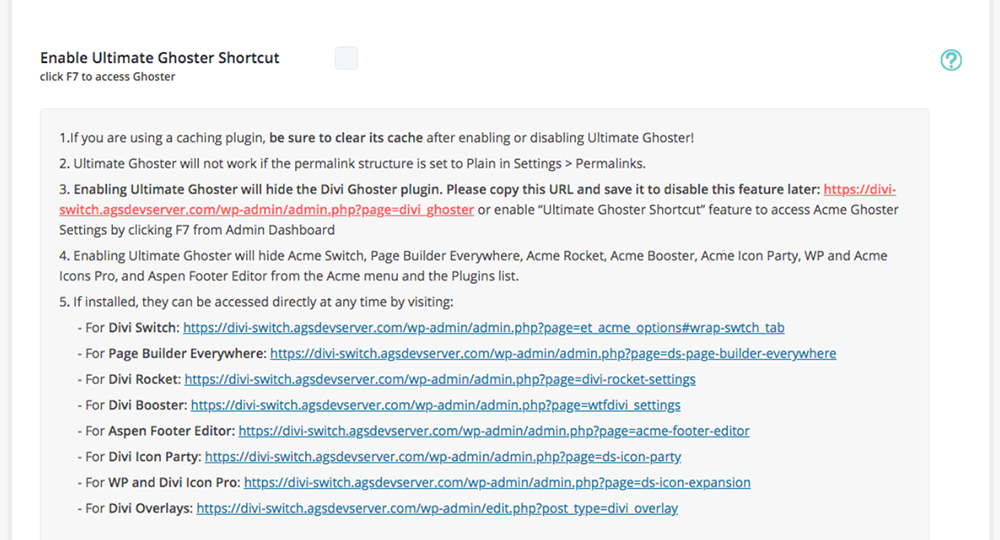
View all of the Ultimate Ghoster settings
For Ultimate Ghoster to work, you need to take the following into account:
- If there is a caching plugin installed on your site, be sure to clear the cache when enabling or disabling Ultimate Ghoster.
- Your permalink structure must be set to anything other than Plain.
- When Ultimate Ghoster is enabled, Divi related plugins such as Divi Switch, Page Builder Everywhere, Divi Rocket, Divi Booster and more will be disabled. They can only be accessed using a unique URL, provided in the Ultimate Ghoster settings tab.
As enabling Ultimate Ghoster will hide the Divi Ghoster plugin from your dashboard, you have to take special care to document the retrieval URL.

Note the retrieval URL
Make sure you store this URL somewhere safe so that you can access the plugin settings at any time.
To begin playing around with the Ultimate Ghoster settings, select the checkbox titled Enable Ultimate Ghoster.

Check the checkbox to enable Ultimate Ghoster
Clicking this checkbox will bring up a selection of other options for the Ultimate Ghoster. This is great for getting really specific about the Ultimate Ghoster settings.
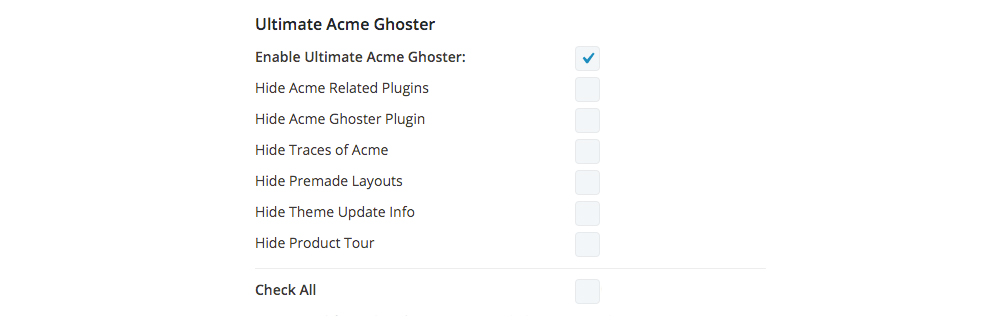
Select the options you’d like to enable
Here you can:
- Hide all of the Divi related plugins as mentioned above, including Divi Switch, Divi Booster and more
- Hide the Divi Ghoster plugin
- Hide all traces of Divi across the back end of the site
- Hide the Divi premade layouts entirely
- Hide all theme update related information
- Hide the Divi product tour
If you check all of the boxes, scroll down and click Save Changes and then refresh your page, you’ll see that the Divi Ghoster (or relabeled to Acme Ghoser in this case) has disappeared from the WordPress menu.
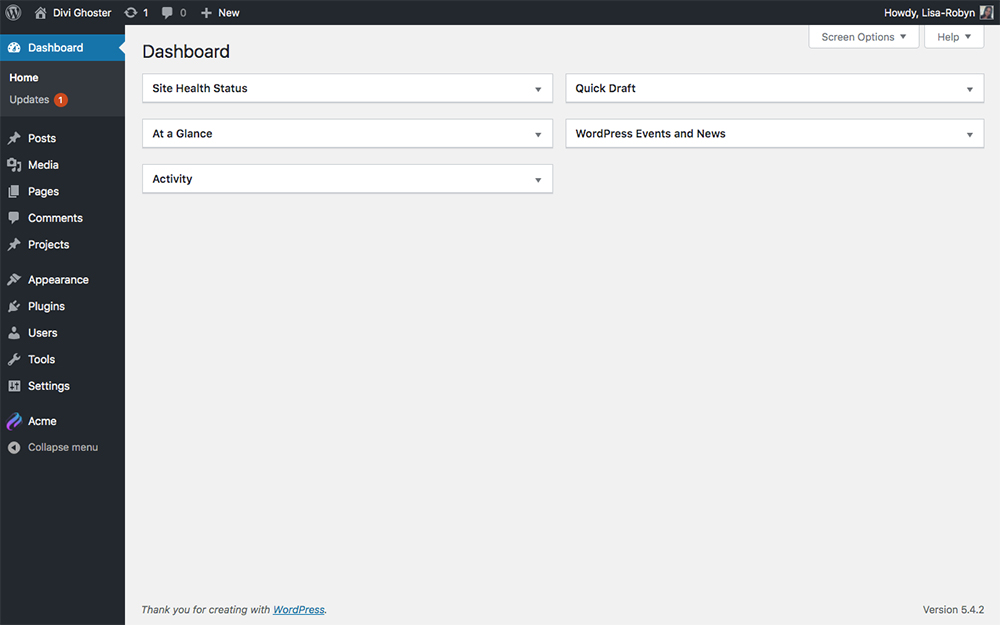
Now the Divi Ghoster plugin has been removed
To retrieve the Divi Ghoster options, visit the saved URL, deselect the Enable Ultimate Ghoster option and Save Changes.
The Ultimate Ghoster also allows you to hide the main Divi menu on the WordPress dashboard. This has been renamed to Acme to fit the demo example. In the Ultimate Ghoster tab, you can decide whether you’d like to hide all or part of the Divi menu settings.
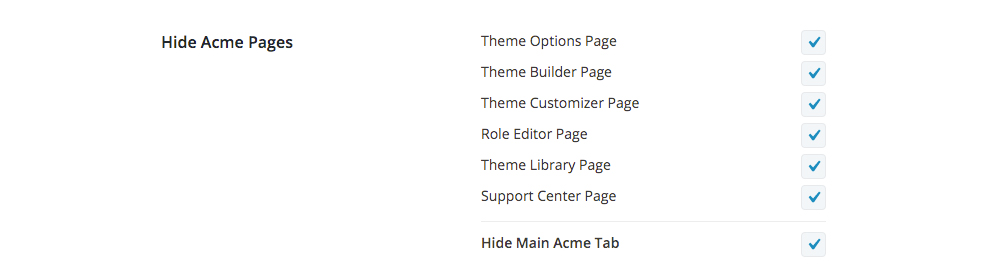
Select which options you’d like enabled
Opting to hide all of these options will fully remove the Divi menu. If you decide to hide the Divi menu pages and enable Divi Ghoster, remember to save the retrieval link, and you can easily disable these options at a later stage.
Divi Ghoster Customization Settings
The next tab in the Divi Ghoster settings is the Customizations tab. Here you can get really specific with how you want the back end of your WordPress website to look, by choosing to hide key WordPress menu items such as the appearance tab, the plugins tab and more. Not only does this present a sleek, simple and streamlined dashboard for your clients, but it also stops them from fiddling around with important sections of the site such as the Theme Editor.
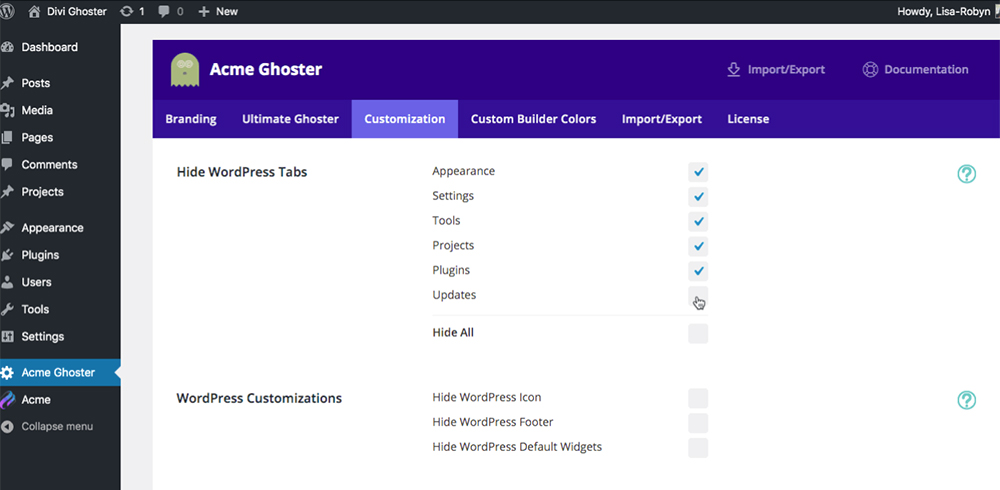
Explore the Customization tab
Next under WordPress customizations, you have even more options. Here, you can:
Hide the WordPress logo at the top left-hand side of the Dashboard. This replaces the logo with a house icon.
Hide the WordPress icon
Remove the “Created with WordPress” footer text. This leaves this section blank.
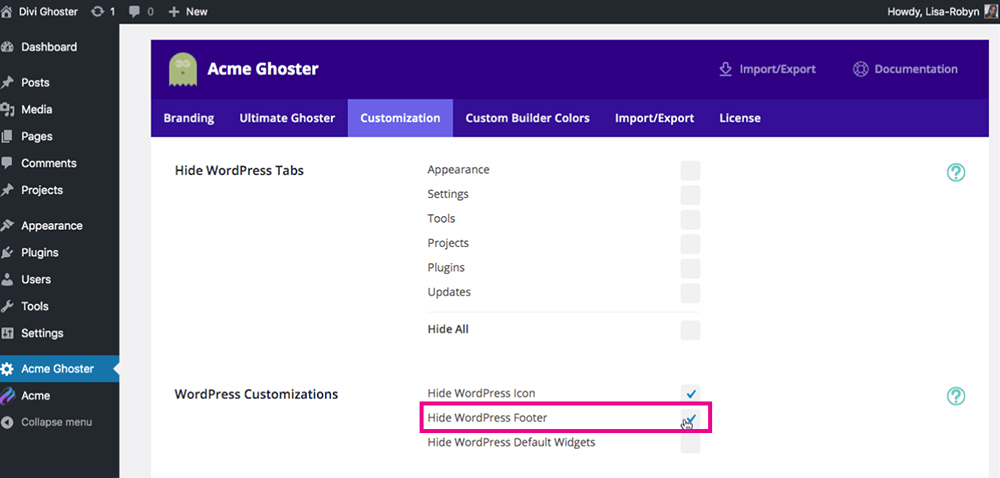
Hide the WordPress footer
And finally, you can hide the various widgets that display in the Dashboard.
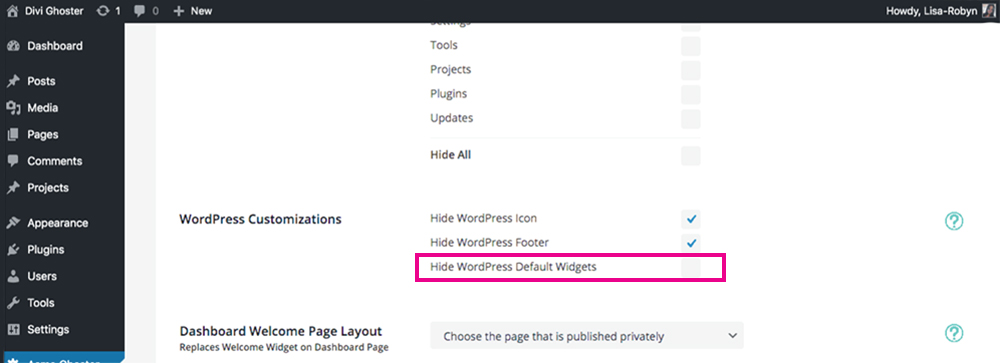
Hide the WordPress Dashboard
Another incredible feature of the Divi Ghoster plugin is that it gives you control over the Dashboard. Here, you can create a layout using the Divi Builder, and set this layout as the main Dashboard Welcome Page Layout.

Create a custom page for the WordPress dashboard
To create a custom Dashboard, create a layout, save it as a Private page, open Divi Ghoster’s Customization settings and select the layout from the Dashboard Welcome Page Layout list.
Divi Ghoster Custom Builder Colors Settings
The next option in the Divi Ghoster settings console lets you take even more control of the Divi-related back-end elements. As mentioned above, Divi has very distinct branding. Not only is the Divi logo instantly recognizable, but the bright purple coloring is also a dead giveaway.
Now Divi Ghoster lets you add custom colors that will match either your brand or your client’s brand palette to create a truly custom website both on the front and back-end, with no trace of the Divi theme at all.
By default, the standard Divi colors are displayed:
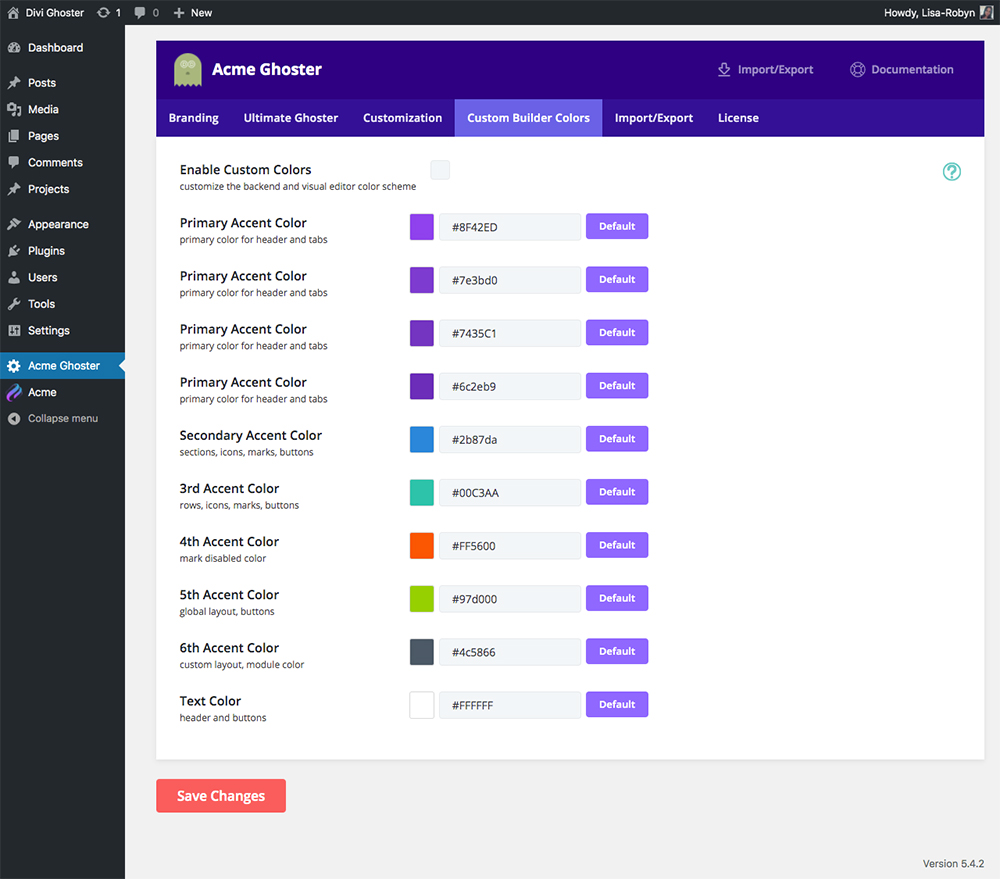
Divi’s default colors
You can add any color combination here and create a very cool aesthetic for your site.
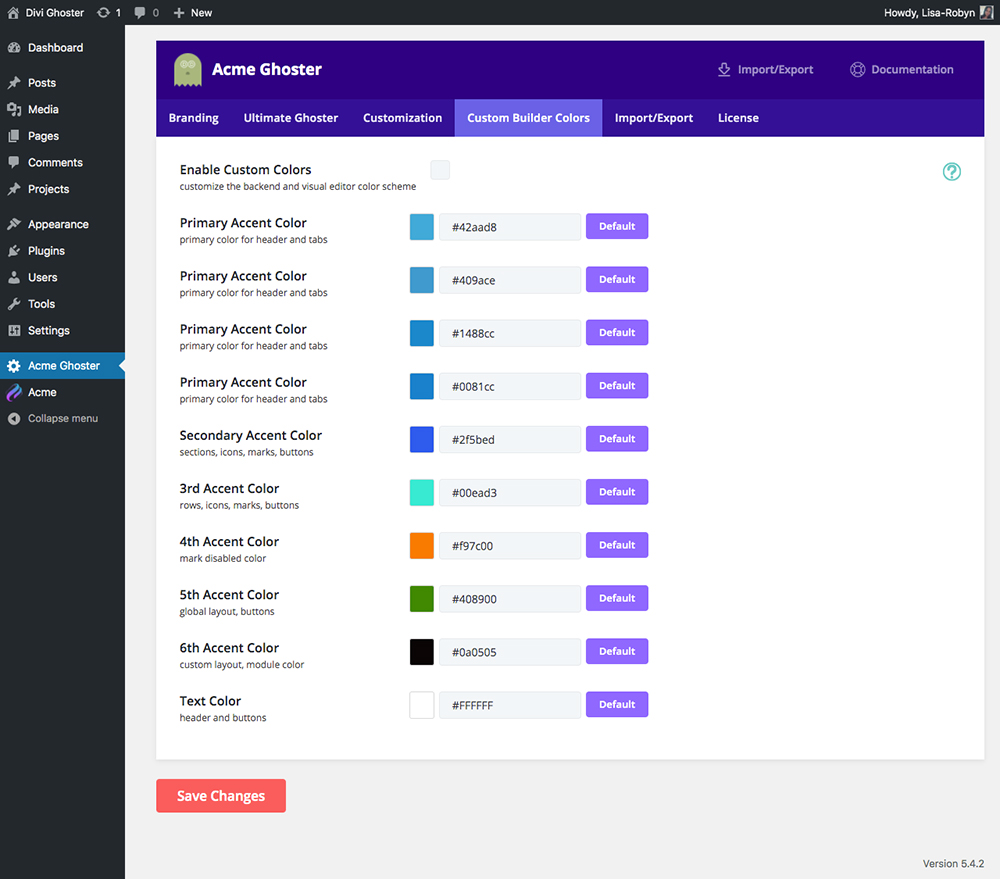
Add custom colors to replace the default Divi colors
With this setup, the Divi Builder, Role Editor, Theme Options and Theme Builder will all reflect the new colors set in the Custom Builder Colors tab.
Enjoy using a custom branded Divi builder
Divi Ghoster Import and Export Settings
To make your development process even quicker, Divi Ghoster gives you the option of exporting and importing the plugin’s settings. These options can be found in the second last tab, the Import / Export tab.

Save time and export your Divi Ghoster settings for your next site
It takes a fair deal of time to fully set up and configure the Divi Ghoster plugin, so to help you streamline your development tasks, the plugin settings can be exported via a JSON file and imported into a new site.
Click the Export button to begin the process, and a JSON file will automatically download to your computer. To add these settings to a new site, install and activate the Divi Ghoster plugin on the new site, click Choose File to select the JSON file and click Import Settings.
Ending thoughts
There you have it! With Divi Ghoster in your back pocket, you can disguise Divi or Extra theme in development, and present a totally rebranded, one of a kind website for your clients.
With no trace of the theme and various aspects of the WordPress website, your clients will be blown away at your web dev skills! If you’re ready to white label your Divi or Extra website and create a custom build for your clients, purchase Divi Ghoster for as little as $29.00 for a single site.
We hope you enjoyed this tutorial and that it gave you an overview of everything that Divi Ghoster can do! If you have any comments or questions, share them below!

So — this is for building directly in Divi, correct? Not a child theme… or with a child theme how would that work? How would updating the Divi theme work? I’m willing to give it a try, but wondering ahead of time about these things.
Divi Ghoster is working also with child themes, you can hide update notices or just rebrand them.