With over 2 billion users on Facebook per month, Facebook ads are a great way to raise awareness about your business and promote your products. You have complete control over the ads. Create ads for any budget, choose the audience, and choose from multiple ad formats. You can even improve your ads’ performance using a/b testing and reporting tools.
Fortunately, Facebook ads are not difficult to create and the benefits far outweigh the effort. In this article, we’ll walk through how to advertise your business using ads on Facebook.
Facebook Business
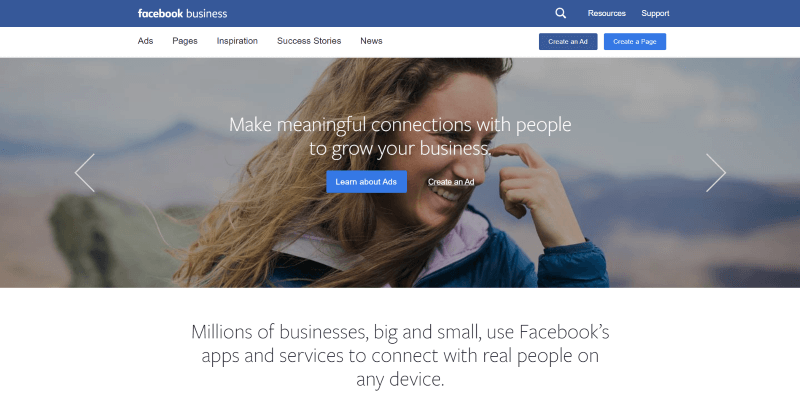
To create your ad, go to FacebookBusiness.com. Here, you can learn more about ads, create new ads, or edit existing ads. Click Create an Ad in the upper right. Be sure to turn off any ad blockers.
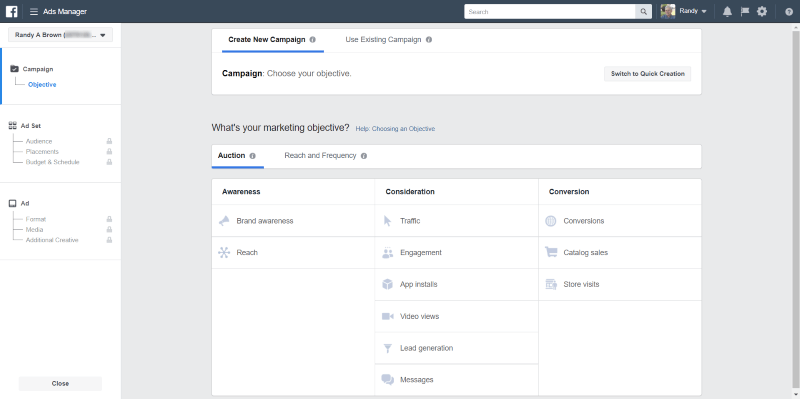
This opens the Ads Manager where you have access to everything you need to create and track your ads. Create New Campaign is selected by default.
You have 2 options for creating the ads:
- Guided Creation
- Quick Creation
Let’s take a look at both.
Guided Creation
Here’s a quick run-through of the Guided Creation tools.
Choose your objective
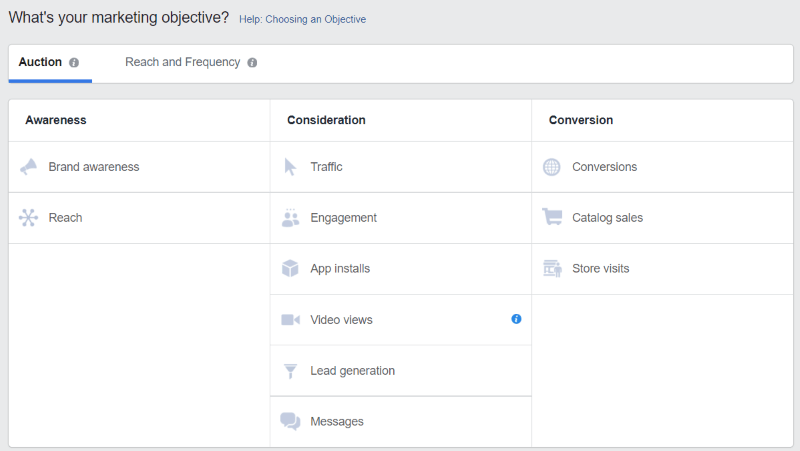
You start by determining your marketing objective. Each of the options has a popup with a description. Auction lets you choose your bid strategy. Choose your objective from the choices of Awareness, Consideration, or Conversion.
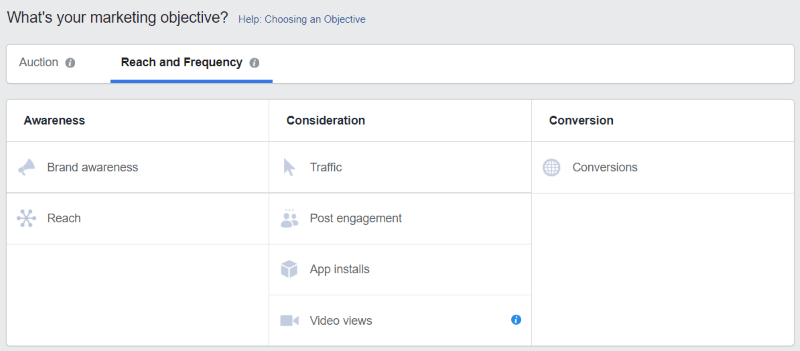
Reach and Frequency gives the same categories but includes fewer choices within them.
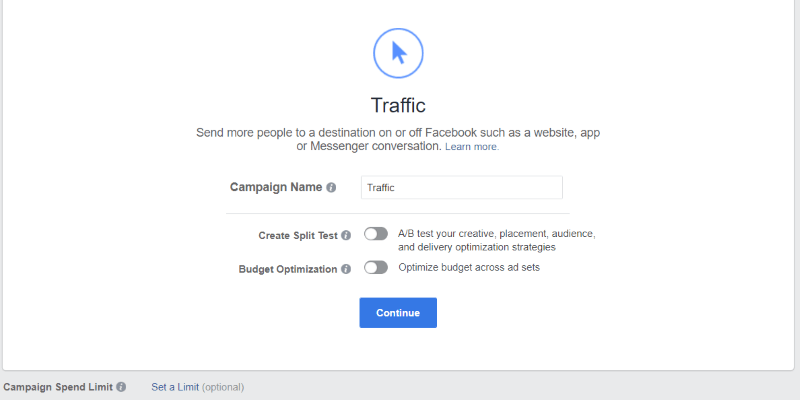
Once you make a choice you’ll see a field where you can name the campaign and continue. Some include options for split testing and budget optimization.
Select your audience
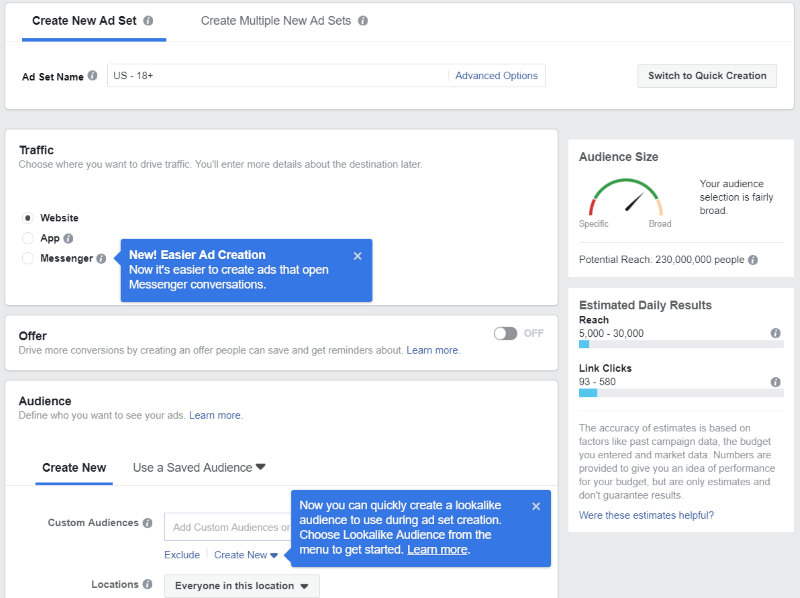
The Audience selection screen will have different options that are based on the type of ad you want to create. This is the choices for Traffic. You can send the traffic to your website, an app, or Messenger.
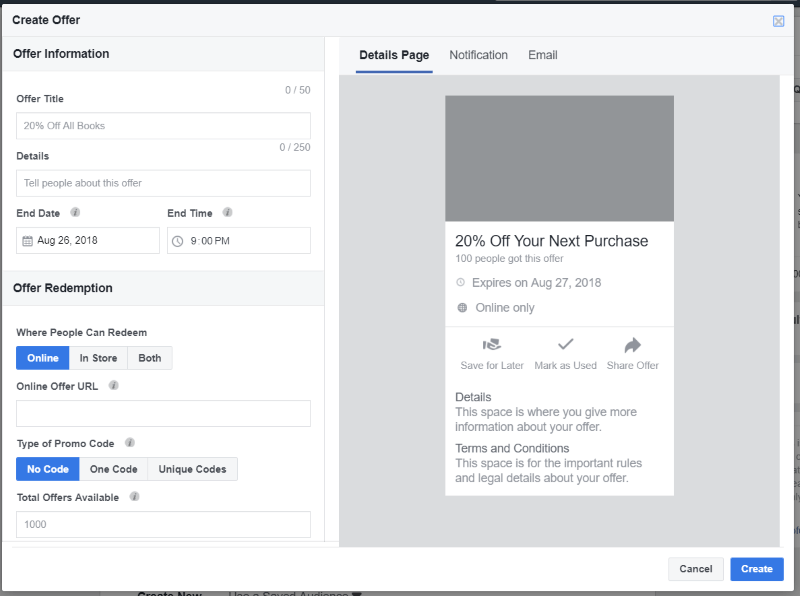
You can also select the type of offer you want to give them and send them to a custom URL. This is a great way to offer a coupon.
Audience
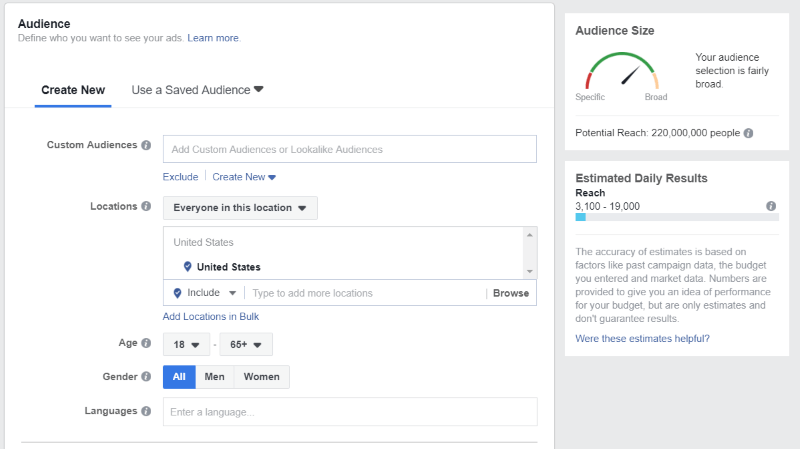
Create a new audience so Facebook knows who to show the ad to. Choose their location, age range, gender, and language.
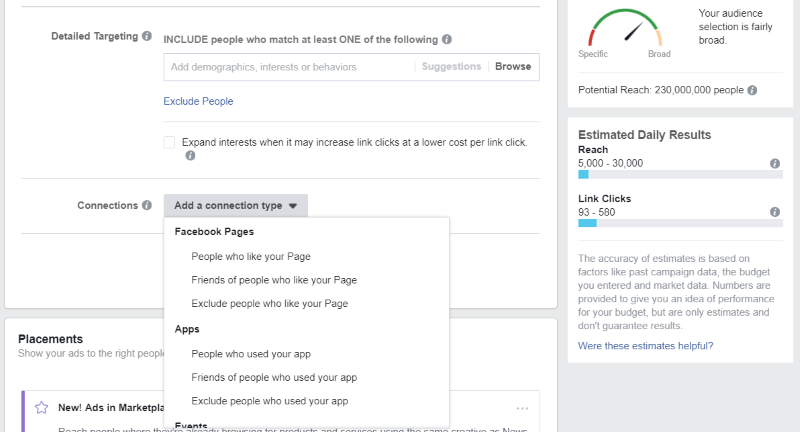
Next, add demographics, interests, or behaviors, and choose who to exclude. Connections let you choose people based on pages, apps, events, or a custom combination.
Placements
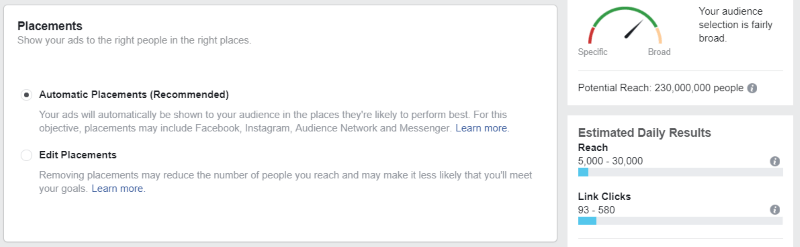
Choose the ad placements to get the best performance. Facebook recommends using the automatic placements, but you can edit them if you want.
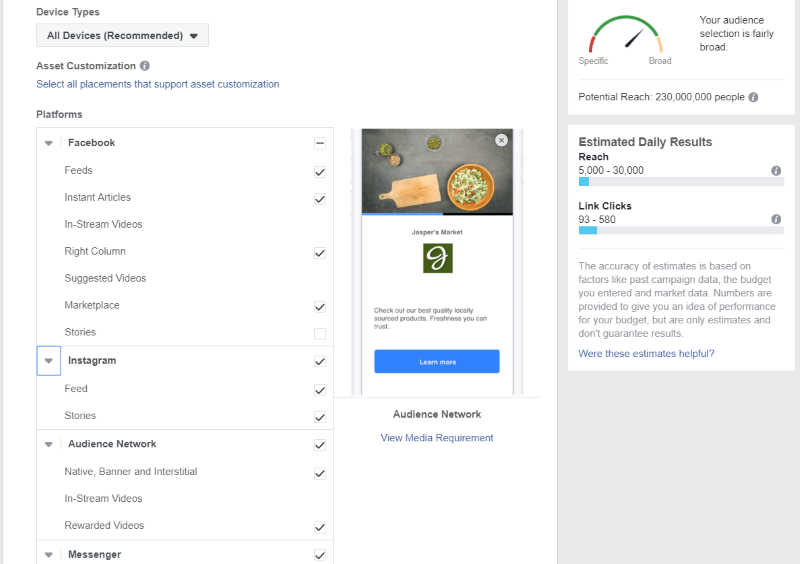
Edit by device type and platform (platforms include Facebook, Instagram, Audience Network, and Messenger). Choose where in each platform the ad appears. It shows a preview of what the ad would look like.
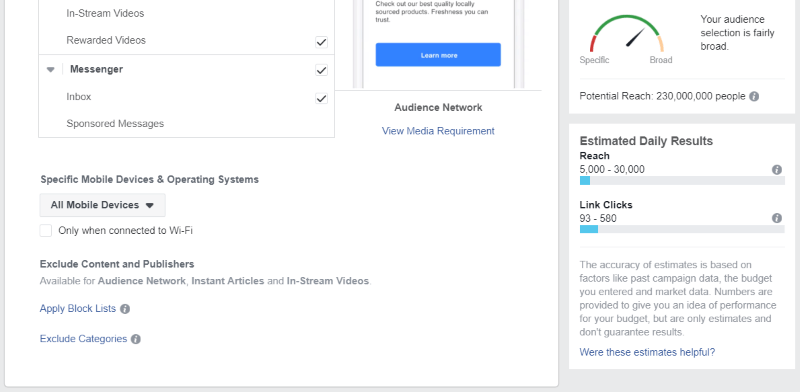
Select the mobile devices that can see the ad. This is especially helpful if you’re trying to target certain devices. For example, if you have an app or blog that focuses on iOS, then you don’t want to waste advertising dollars on users that can’t use your app or blog.
Budget and Schedule
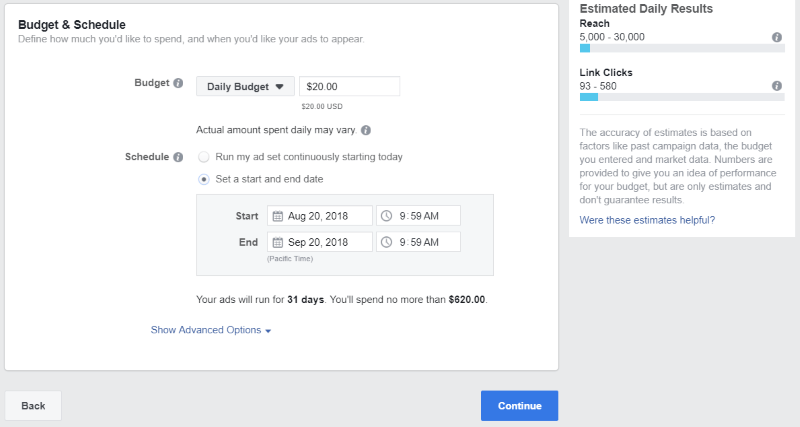
Set the budget as either daily or lifetime and enter the amount. Schedule the ad to run continuously or set the start and end date manually. It shows the amount you’ll pay for that time.
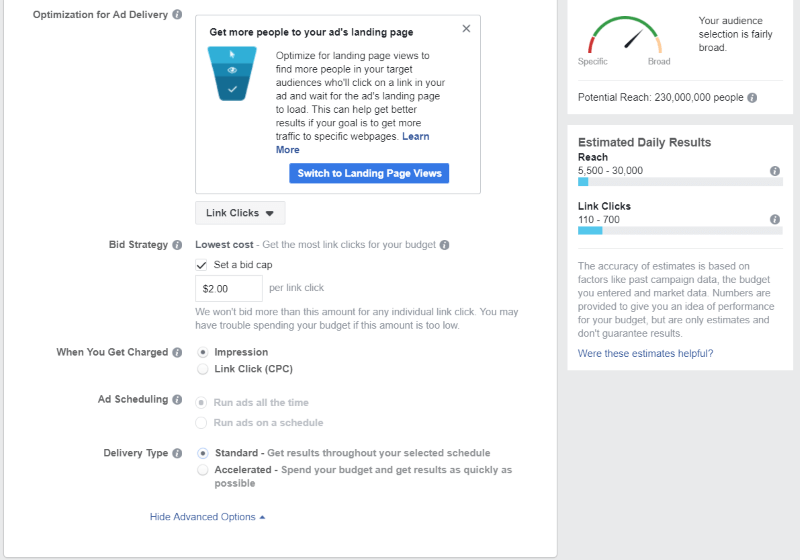
Click Advanced Options to optimize your ad delivery. Choose Link Clicks, Landing Page Views, Impressions, or Daily Unique Reach. Set your bid strategy (if you’ve chosen Auction) in order to control your budget. This is the largest amount you’re willing to spend on an ad. You can also choose when you get charged, the ad scheduling, and delivery type (which determines how soon you spend your budget).
Identity
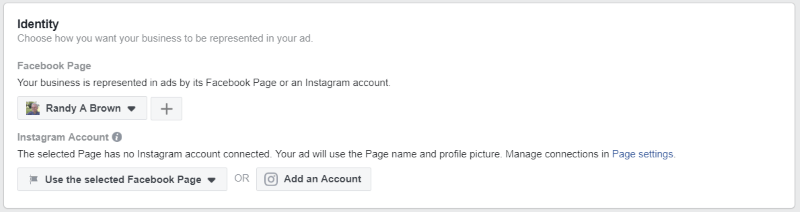
Once you’ve created the ad you can choose which of your Facebook pages the ad is for. Choose your page from the drop-down list or create a new page.
Format
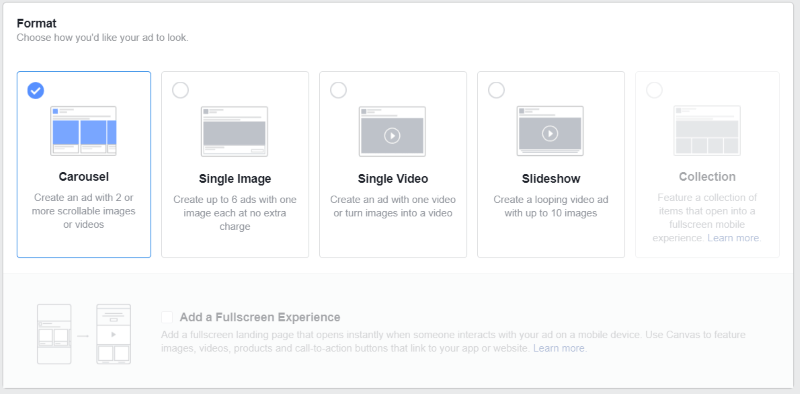
The Format determines the look of the ad. Choose from an image or video carousel, a single image, single video, slideshow with up to 10 images, or a collection that opens in fullscreen for mobile.
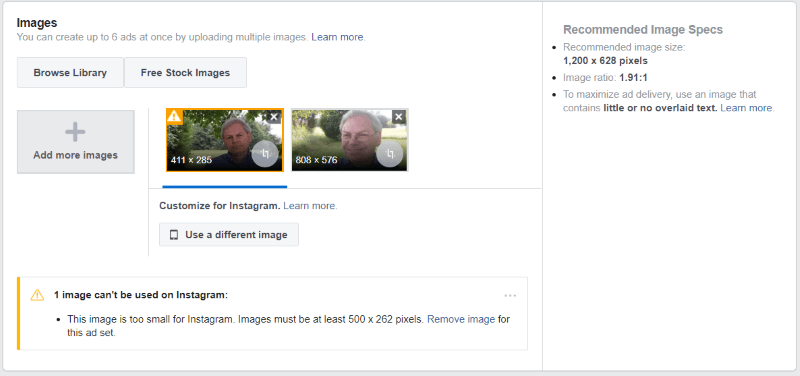
For this example, I’ve chosen Images and uploaded a few photos to use. It shows the sizes it prefers and warns me that mine doesn’t match the preferred size. It does let me use them though.
Links
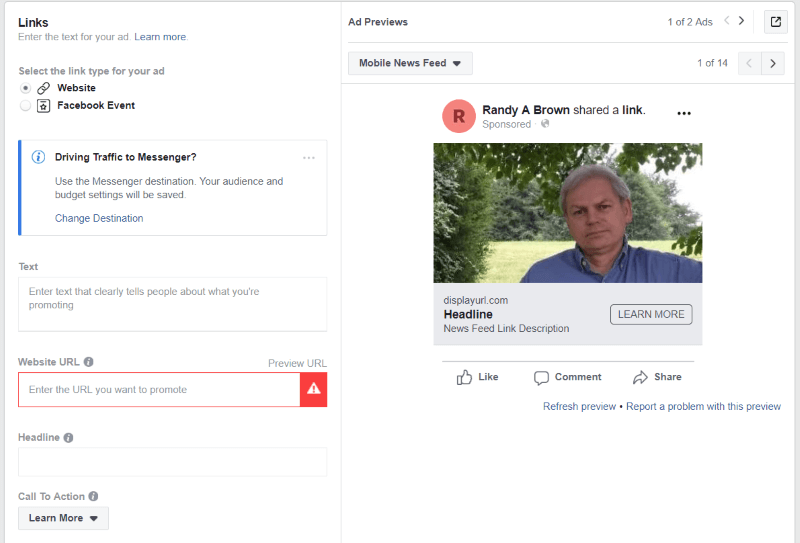
Set the link to open the website or a Facebook Event. Add the text you want to display, the link or event, a headline, and call to action.
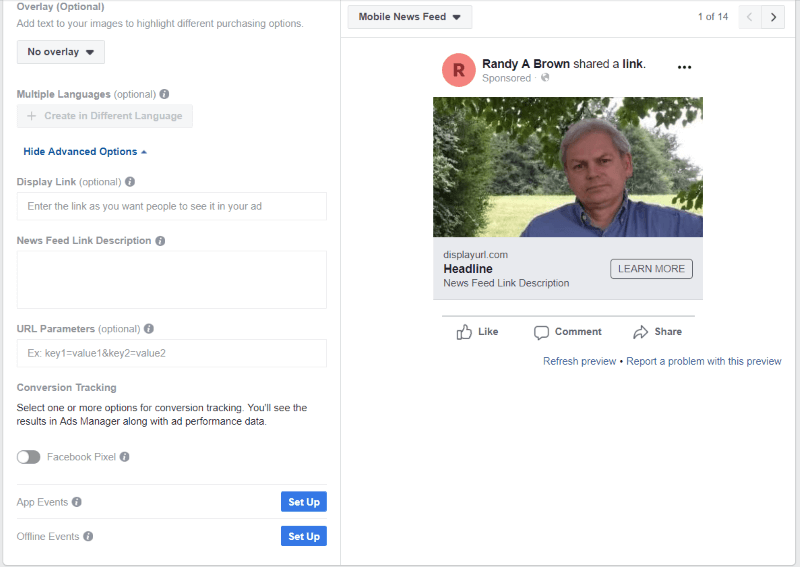
Add an overlay to show cash on delivery or free shipping. You can also add different languages. Advanced Options let you determine how the link will look, provide a news feed link description, set the URL parameters, and do conversion tracking (use Facebook Pixel and set up app or offline events).
Quick Creation
The easiest way to create an ad is with the Quick Creation tool. You’ll see a button that says Switch to Quick Creation.
New Campaign
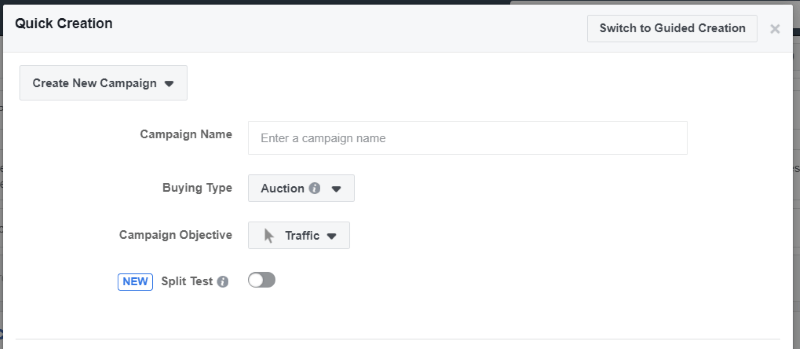
You can create a new campaign or use an existing campaign. A new campaign is the default. Enter the name for the campaign. Choose the Buying Type. Auction allows you to bid for the ad space. Reach and Frequency lets you pay a fixed price to reach your specific audience. You set the budget.

Choose the Campaign Objective. Choose from Awareness (lets potential customers know about your business), Consideration (choose what you want the visitor to do), or Conversion (choose how you want customers to interact with your store). Each option has detailed selections so you can determine the exact purpose for the ad.
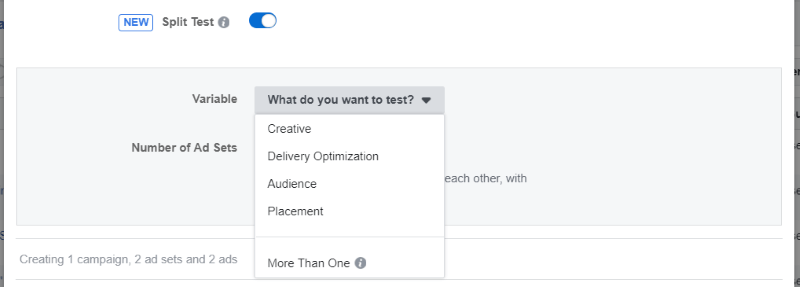
Split Test lets you create an a/b test for Creative, Delivery Optimization, Audience, and Placement. You can set up multiple tests and select up to 5 ad sets to compare.
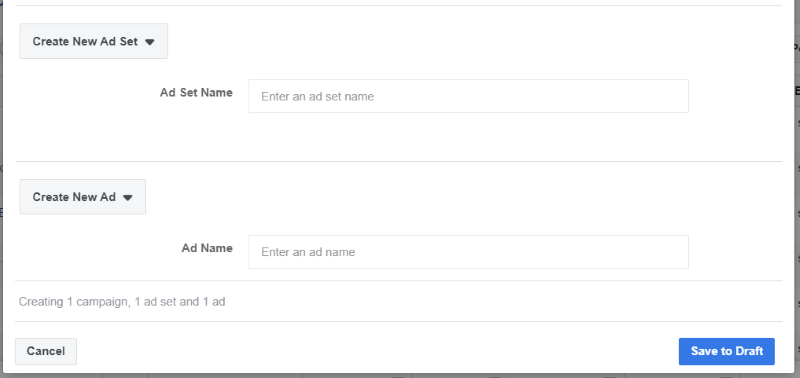
Enter a name for the ad set and ad name and save to draft.
You’ll have a chance to review the ad’s settings before publishing the ad. Click Review and Publish when you’re ready.
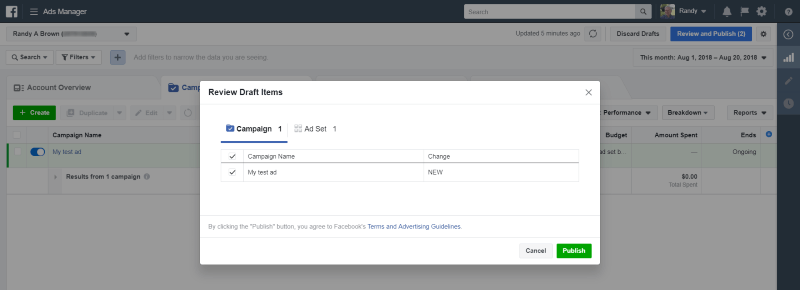
It gives you one more chance to confirm that you’re ready to publish the ad. Once you’re sure, click Publish.
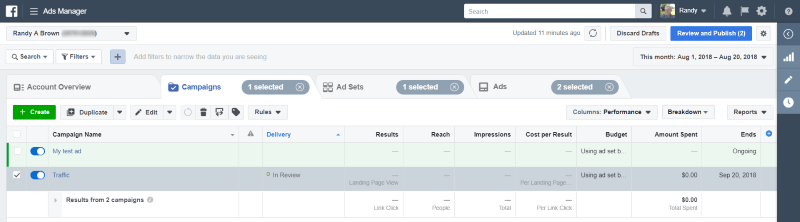
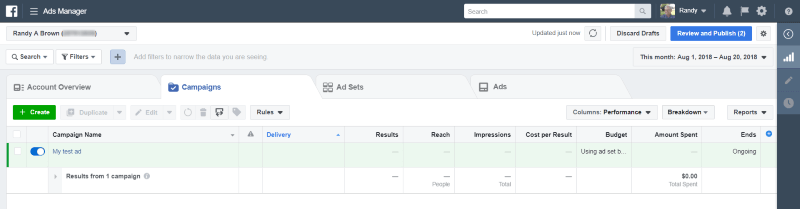
You can see the ads that you’ve created and edit each one. See the Campaigns, Ad Sets, and Ads by clicking the tabs for each. You can choose how you want to sort and view the ads. There’s also a reports tab to the right.
Measuring Ad Performance
There are several ways to measure ad performance. You can view the data online or export it. Here’s a look at a few methods.
Account Overview
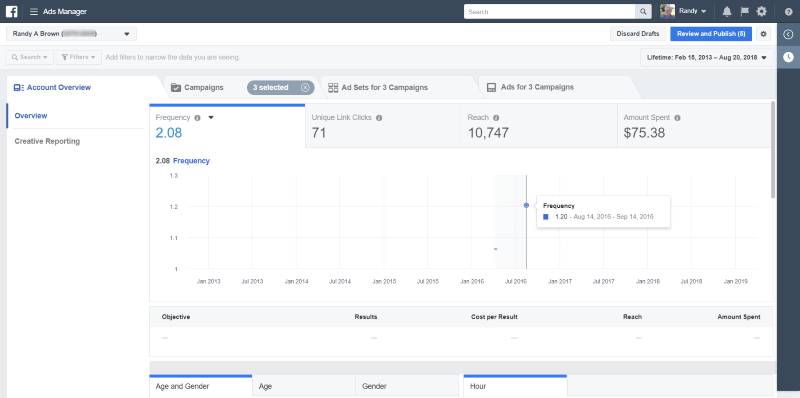
The Account Overview tab provides an overview of the data. Here you can see the Frequency, Unique Link Clicks, Reach, and Amount Spent.
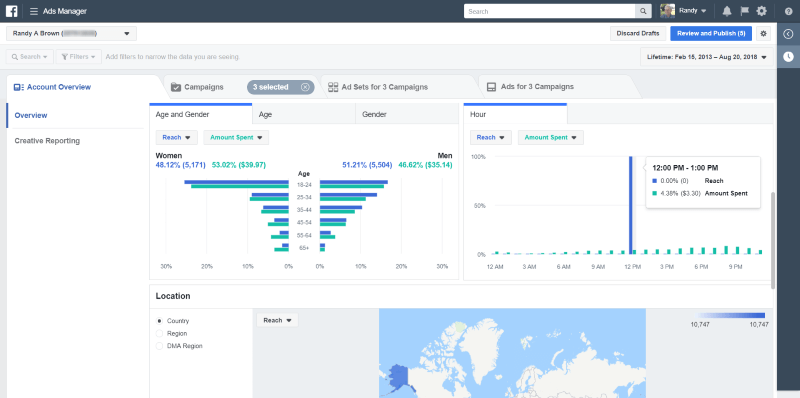
Scroll down to see the demographics, times, location, and more.
Reports
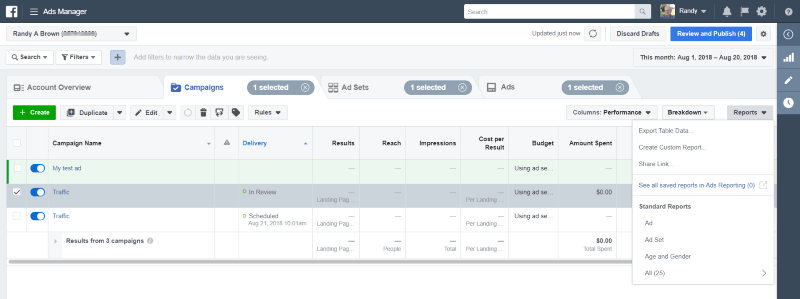
The Reports tab gives you lots of options to analyze your data. Another option is clicking the chart symbol on the far right. I haven’t run these ads, so I don’t have data there.
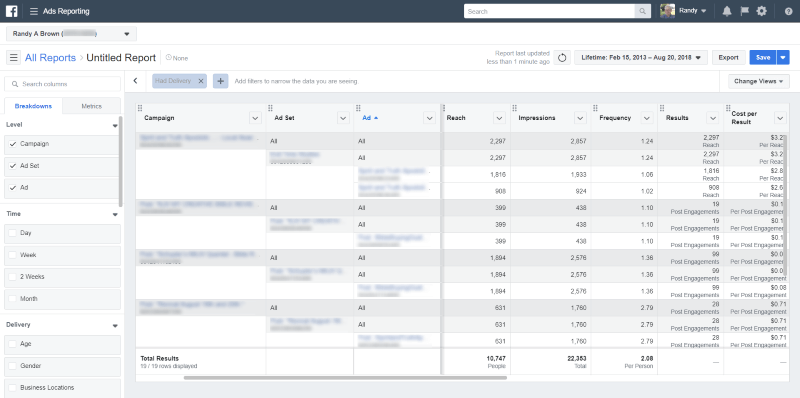
There are several analytics tools to help you understand the performance of your ads. This is the Ads Reporting tool displaying reports from previous ads that I have since deleted.
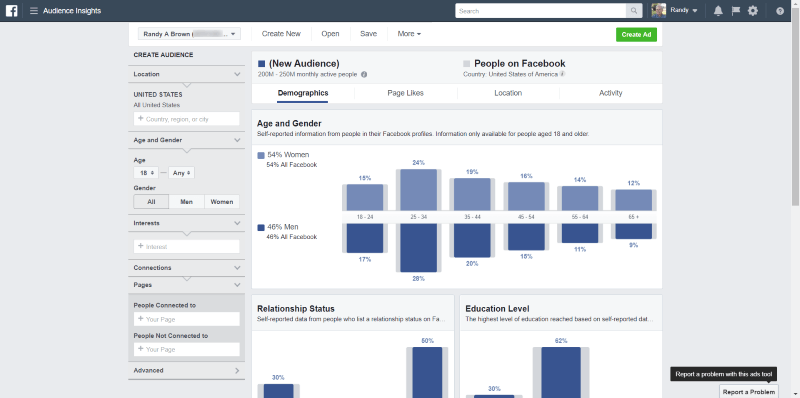
Audience Insights shows the demographics of your audience.
Ending Thoughts
That’s our short walkthrough of how to advertise your business with Facebook ads. It’s not that difficult to set up an ad and you have lots of options to create the perfect ad for your needs. I especially like that ads can do practically anything you want them to, such as sending someone to your website or making them a special offer. I also like the a/b testing so you can make adjustments to your ads to improve their performance. Whatever your specific needs are, you can’t go wrong with Facebook ads.
Have you advertised your business with Facebook ads? Let us know about your experience in the comments.

Good, detailed post. I’ll refer to it soon, when I get ready to do a campaign.