If you’ve built online stores with WooCommerce for some time, you’ll know that there are a few things the powerful ecommerce platform can’t do. One of these things is displaying a ‘new’ badge for recent products. In the following post, we’ll explain how our plugin Divi Shop Builder will help you showcase your latest releases and transform your Divi and WooCommerce store into an ecommerce powerhouse.
WooCommerce is the best ecommerce platform around, and while this software package is fantastic in many regards, it does have some limitations. By default, products marked with a discounted price are automatically assigned a WooCommerce sales badge. This badge can then be styled with CSS to match the brand colors in question. However, the same functionality is not available for ‘New’ badges.
WooCommerce users wanting to highlight their latest releases with a ‘New’ badge will have to custom code this functionality, or turn to a third-party plugin. This can often lead to errors in code if scripting from scratch, or mishaps with plugins that aren’t all compatible with the Divi theme.
We built an incredible plugin called Divi Shop Builder that does just that. With just a few clicks, you can add a ‘New’ WooCommerce product badge to your latest products. No scripting of code or plugin configuration required!
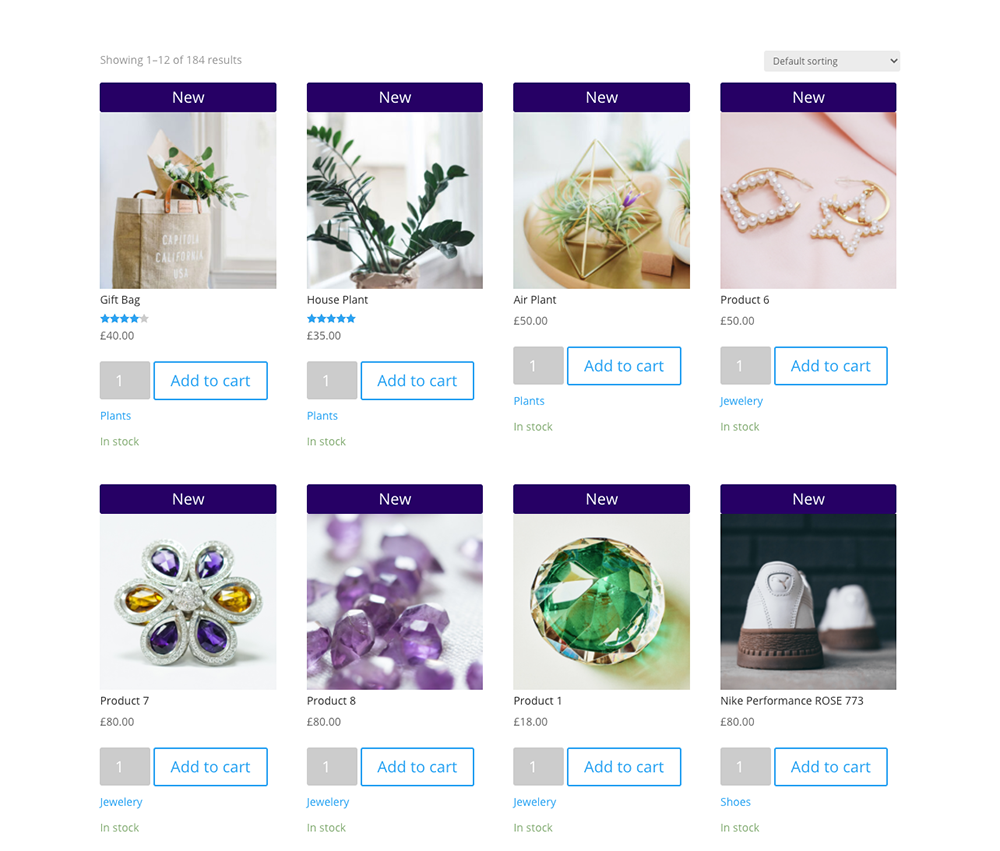
Here’s an example of a unique WooCommerce shop layout, complete with a stand-out New badge, that you can build in just a few seconds:
An example of a WooCommerce product list with New badges enabled
These vibrant New badges are certainly eye-catching, they’re bound to make your latest releases stand out!
In the following post, we’ll show you how you can use the Divi Shop Builder plugin to add a ‘New’ badge to make your newest products pop. You’ll learn:
- Why you should use a New badge for your latest products,
- How to install the Divi Shop Builder plugin,
- How to use the plugin to create a New badge
- How you can save time in development by using the demo above for your online store.
Why You Should Use WooCommerce ‘New’ Product Badges
While WooCommerce includes a ‘Sale’ badge in its package, it doesn’t offer this functionality for other badges, or, give users the option to edit the WooCommerce Sale badge text to reflect a different notice. To mark recent products with a badge, WooCommerce users have to resort to custom coding or third party plugins just to achieve something quite small.
Cutting straight to the point, adding a ‘New’ badge to your recent products will increase your sales.
- Adding a brightly colored badge to select products is sure to catch your customer’s eye while they’re browsing through your store. The badge will grab their attention by breaking the visual monotony of the product feed.
- Customers are curious and are always looking for a deal. Noticing products that are new releases will pique their attention and encourage them to click through to view your newly added products.
- New badges will create a sense of excitement and joy around your latest releases, which encourages customers to purchase quickly. If your product listing follows through with great imagery and convincing sales copy, you’ll more than likely land the sale.
Even though native WooCommerce doesn’t allow for this functionality, our plugin Divi Shop Builder makes adding a ‘New’ button a painless, code-free process. In the next section, we’ll show you how to create a ‘New’ badge for your WooCommerce recent products in just a few seconds.
How to Create a ‘New’ Badge for Your WooCommerce Recent Products
Installing the Divi Shop Builder plugin
First, you need to purchase the Divi Shop Builder plugin from Divi Space. Once you do so, download the plugin from your Account page and upload and install the plugin on your WordPress website. Following installation, you can find the plugin resting in the Divi menu.
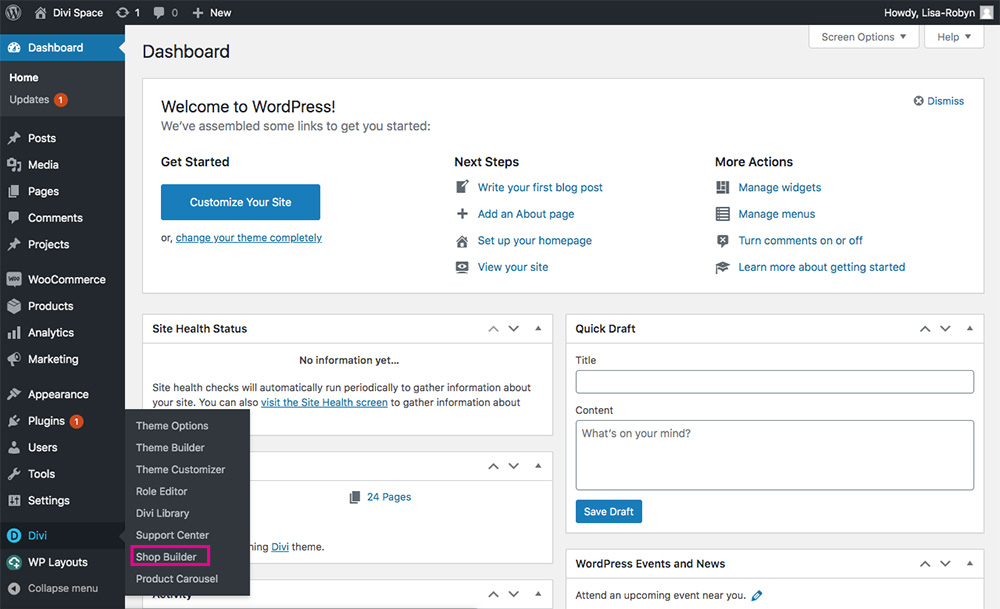
Find the Divi Shop Builder plugin in the Divi menu
In the plugin dashboard, you’ll be asked to authenticate the plugin using your unique license key. This can be located via your account page on the Divi Space website. When the plugin is fully authorized, you’re ready to go!
The Divi Shop Builder plugin has no set up steps or configuration. Instead, the plugin dashboard serves as a notice board. Here, you’ll find a recap of the plugin features and a link to the plugin documentation.
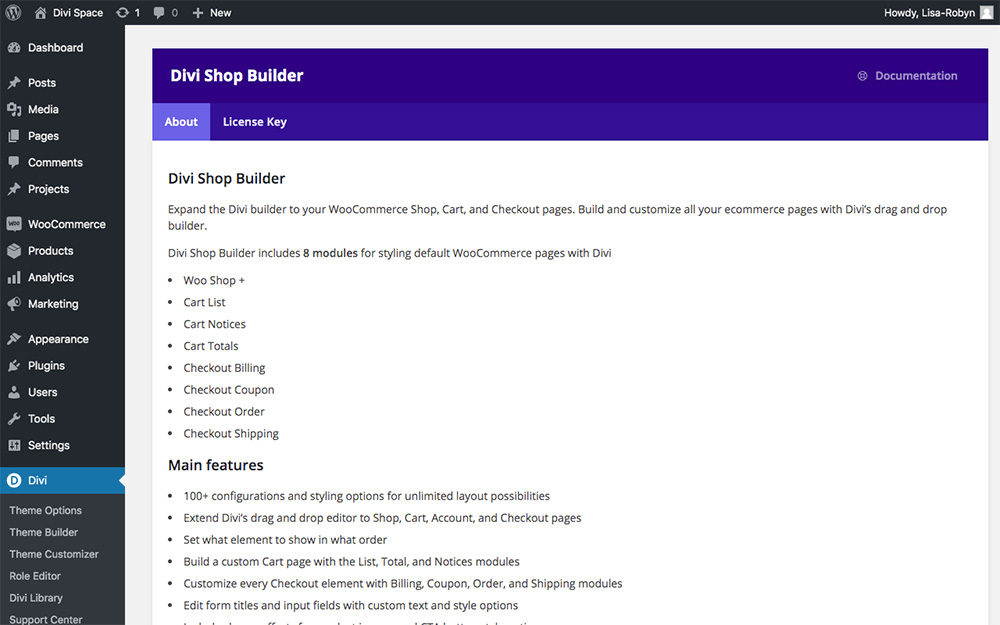
A preview of the Divi Shop Builder plugin dashboard
The plugin automatically adds a series of modules to the Divi Builder. You’ll be able to access these modules as you would normally use the Divi Builder.
Before you start using the Divi Builder to create a shop layout, make sure to add a few products to your WooCommece store.
Creating a WooCommerce product display with New badge enabled
Once you’ve added a collection of products to your store, you can start using the plugin. Create a row and section as per normal, then, open the Divi Builder and add a module titled Woo Shop +.
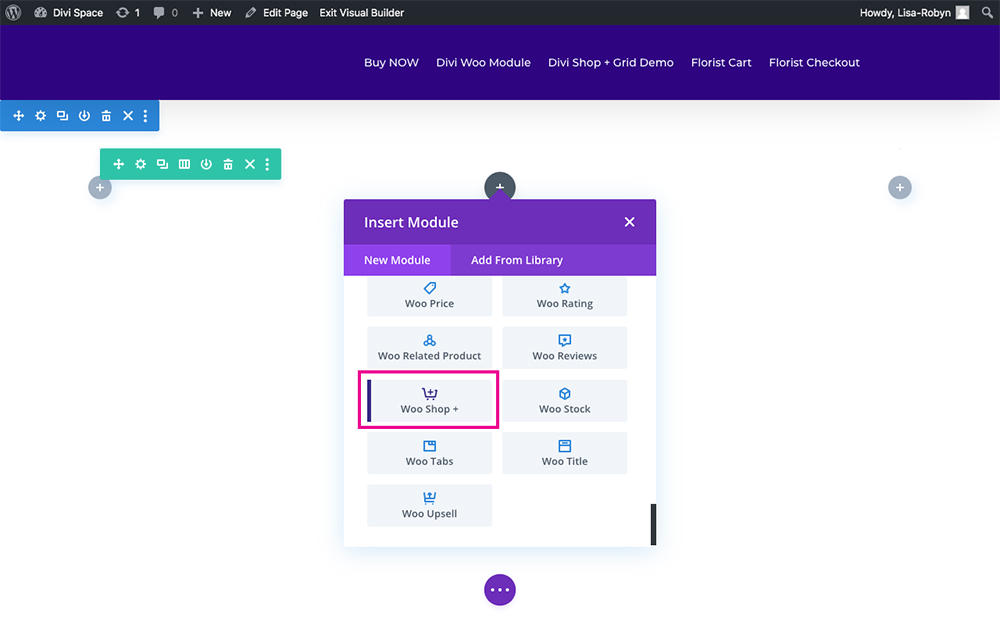
Add the Woo Shop + module from the Divi Builder
Once you’ve added the module, your product will display in the standard grid format. By default, like all other modules in the Divi Builder, the Woo Shop + module, inherits the default Divi design settings including the Open Sans font and blue accent color.
Like the other Divi modules, each element in the Woo Shop + module can be custom styled to match any brand identity from within the Design tab. We’ll style the Woo Shop + the module a bit later, for now, let’s play around with the New badge.
By default, the Woo Shop + module will display as such
By default, the Woo Shop + module adds several items to your product feed display. These include:
- Sale badge
- New badge
- Featured image
- Product Title
- Ratings
- Price
- Add to cart quantity counter
- Add to cart button
- Categories
- Stock count
You’ll see the New badge is automatically added by default to the element list.
Here you’ll see the New badge option
If you don’t like where the WooCommerce New badge is sitting, you can click, hold and drag the item and place it anywhere within the element stack. To remove an item, simply click on the tiny trash can icon on the right-hand side of the item bar.
If you remove the New badge by mistake, you can always add one.
To add a New badge, click on the Add New Item button. This will open a new screen. Here, click on the Choose Item menu. This opens a drop-down list of available items. From this list, select the New badge. By default, the New badge is added to the very bottom of the element stack. Drag it around until you’re happy with the placement.
Next, you can decide where you’d like the badge to sit. Scroll a bit further in the Content tab until you see an option called Badges Position.
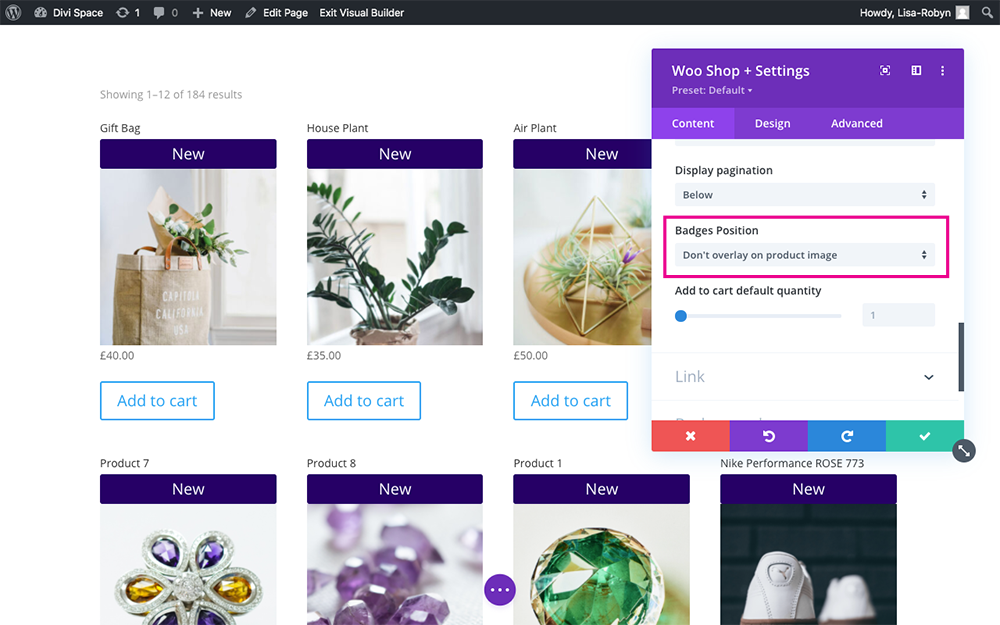
Scroll until you see the Badges Position option
This option lets you decide where you’d like the badge to be displayed. By default, it displays above the featured image. If you click on the drop-down menu, you can select from an additional four placements.
- Top left
- Top right
- Bottom left
- Bottom right
Select whichever option works best for your online store design.
Styling the WooCommerce New Product Badge
To spice up the New badge and make it align with your brand identity, head to the Design tab to find the styling controls. Each of the items available in the Woo Shop + module can be styled using the Divi Builder. Absolutely everything can be customized to fit your store design.
Open the Design tab and scroll down until you see the New Badge option. Here you’ll find several styling settings for the New badge.
- The first setting is called Days. Here you can decide how long the New badge should display, based on the number of days specified. Products created within the last X amount of days will showcase the New badge.
- The next option lets you set the background color of the badge.
- Next, you can style the text of the New badge, setting the font, font-weight, text-decoration, alignment, font color, size, letter spacing and line-height.
- Then, you can spice up your WooCommerce New product badge by adding rounded corners.
- Finally, you can choose to add a border and style this to suit your tastes.
Use Ready-Made JSON Layouts for your WooCommerce and Divi Store
This tutorial shows you just how quick and easy it is to add a New badge to your WooCommerce store display, but wouldn’t it be great if this process was even easier?
At the beginning of this post, we showed you an example of an online store layout created with the Divi Shop Builder plugin with the New badge enabled. Here’s another stunning layout created by our design team, again, with the New badge enabled:
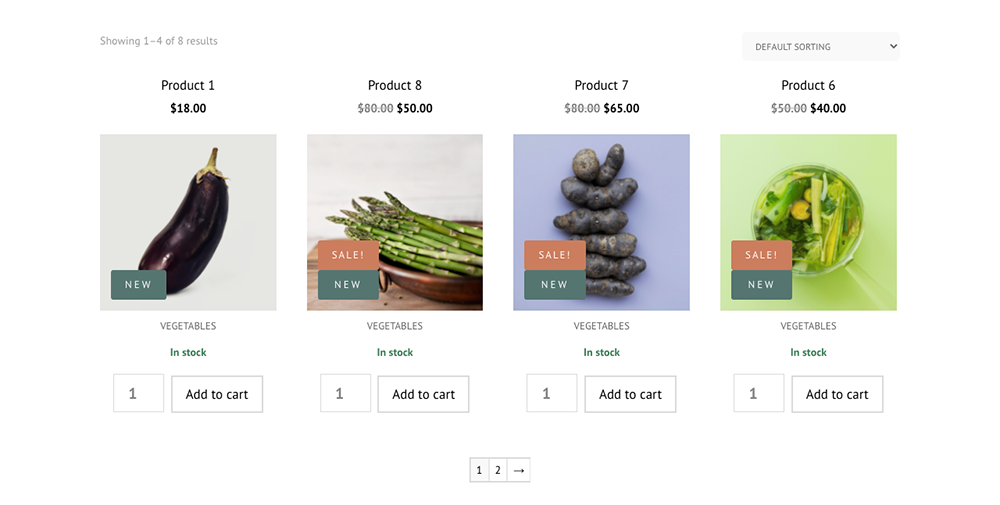
An example of the New badge enabled
These stylish layouts, as well as others, are available for free when you purchase the Divi Shop Builder plugin. Even though elements added via the Woo Shop + module can easily be styled, you can totally bypass the module setup and styling process by using one of our free demo layouts.
Download the Divi Shop Builder Layouts
As soon as you have purchased the plugin, head to this demo showcase page and click Download All Layouts. Alternately, you can scroll through each demo and download the individual layout of your choice.
Once the layout download is complete, you’ll see a .zip file in your downloads folder called Woo-Shop-Demos-UNPACKAGE-THIS-FILE. As the name suggests, double click on the file and unzip it. When complete, you’ll find the JSON layout file and an instruction document inside.
Install the Divi Shop Builder Layouts
Return to your website and click on the Divi Library in the Divi menu.
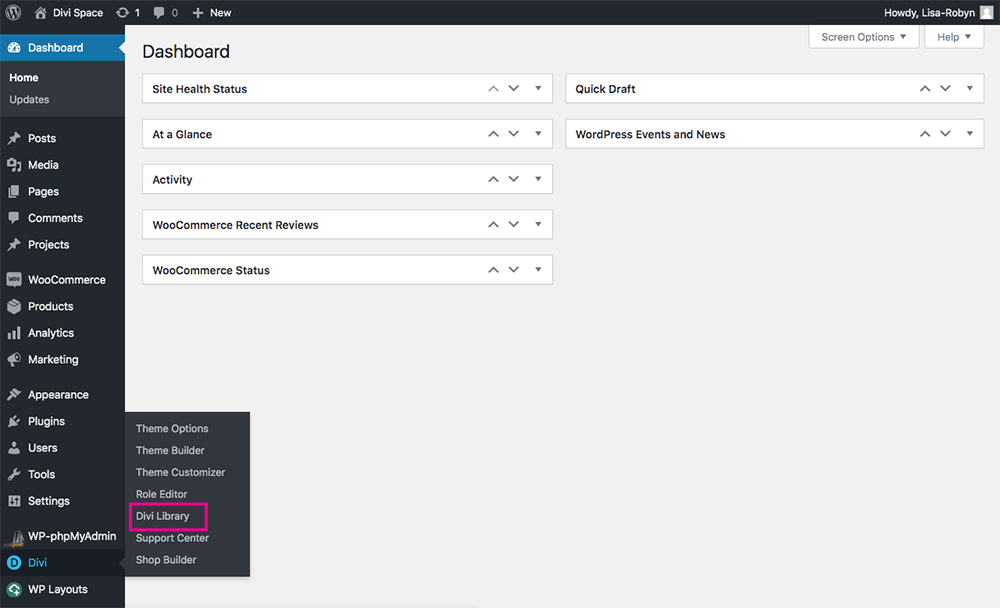
Access the Divi Library from the Divi menu
When the Divi Library loads, click the Import & Export button and a pop up will appear. Here, click the Import tab and select the Woo Shop + demo layout of your choice from your computer.
The two layouts showcased in this tutorial are:
- Electronics Shop Demo (phone and tablet example, displayed at the beginning of this post)
- Woo Shop + Module – Demo 6 (vegetable example, displayed at the beginning of this section)
Once the installation is finished, you’ll see all of the layouts loaded into your Divi Library, ready for you to use.
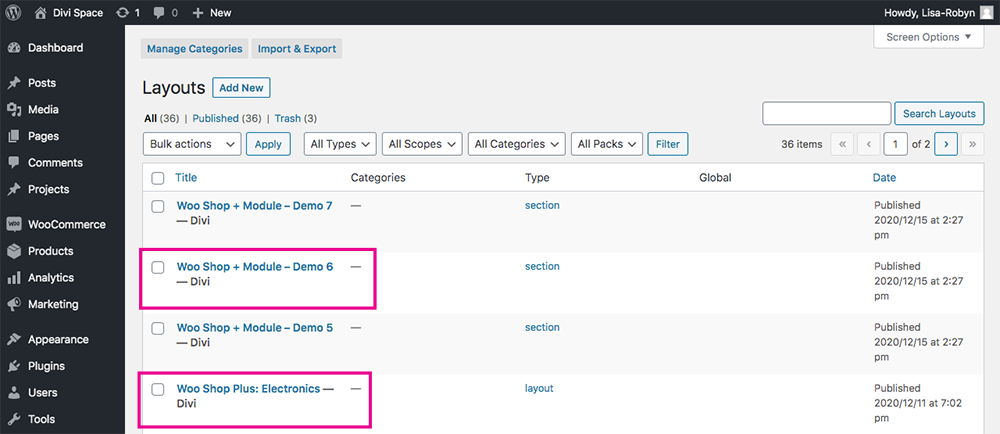
Just like that, the two demos will be added to your Divi Library
To make the layouts easier to use and manage, I’ve assigned both of the new layouts to the category of New Badge Demo. This will help me find them quickly when I’m designing the page.
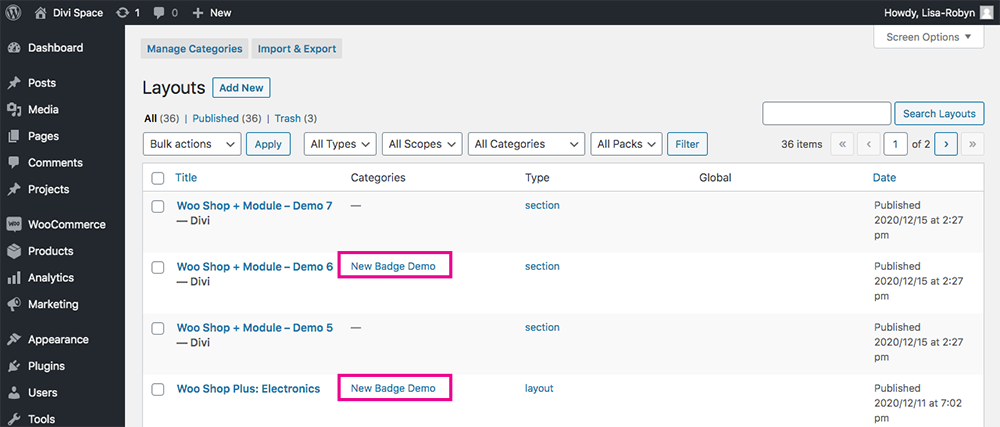
Assign categories to your layouts to keep them ordered
Use the Divi Shop Builder Layouts
To use these awesome JSON layouts, create a new page and enable the Divi Builder. The Electronics Shop Demo is a full layout. To add it, click the + icon in the Divi Builder to open the Load from Library panel, then, click on Your Saved Layouts. You’ll see the categories listed on the left-hand side, select the relevant category, and your layout will display. Once added, you’ll have a gorgeous layout for your store.
The Woo Shop + Module – Demo 6 layout is a section. When you add a new section, click the Add from Library tab, select the relevant category and search for the demo layout.
Once added, you can either keep the modules as is or tweak the styling in the Design tab to match your brand style guide.
Ending thoughts
Showcasing your new products with a New badge is a great way to entice your site visitors. Adding the badges in conjunction with your product launches is a great way to increase sales.
If you’ve struggled to add and style a New badge to your WooCommerce products, this gem of a tool is for you. Start amping up the volume on your WooCommerce store, purchase the Divi Shop Builder plugin from Divi Space. It comes with a host of amazing features, such as creating totally custom cart and checkout pages among others.
We hope you enjoyed this tutorial. The possibilities are endless with the Divi Shop Builder plugin! Let us know your thoughts about the plugin below in the comments, and if you’ve used Divi Shop Builder, please share your feedback! Thanks for reading!

Recent Comments