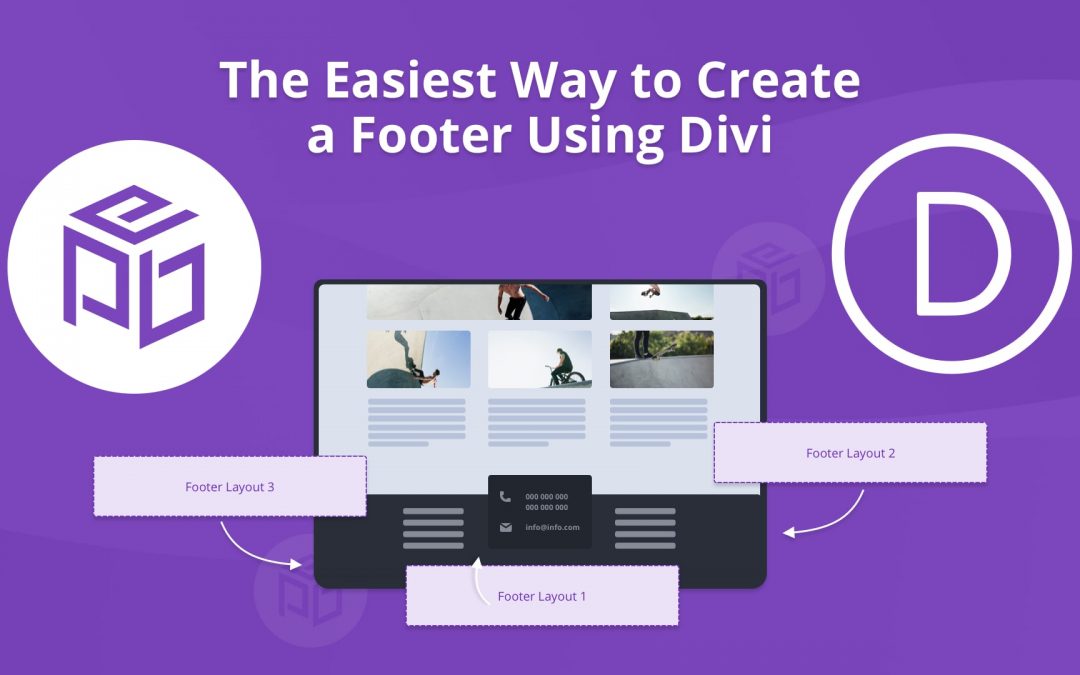
The footer is one of the most important sections in a website. Not only does the footer give a website a finished feel, but it can also be filled with important elements – such as company information, navigation elements, links to popular content, social media account icons – that can seriously improve the user experience of your site and allow your visitors to flow much easier into other areas of your site.
The standard way to add a footer to a WordPress website is to use the footer widgets located in the Appearance section on the dashboard. This tried and tested, traditional way is easy to set up, but opting for this route means that you’re restricted to the standard aesthetics of the WordPress footer as laid out by the theme you’re using – even more so if you lack the tech savvy to add custom CSS styling to your website.
It is possible to create a footer layout using the Divi builder, but you’ll need to add the module to each and every page you create. Sure, creating a footer and setting it as a global module is an okay solution, but on one hand, it is laborious, and on the other, you’ll be forced to use the Divi Builder throughout the site, including in blog posts, and any pages that don’t support the builder, archives for example, will not show the footer you’ve created.
 Our plugin, Page Builder Everywhere, offers a simple solution to this. With Page Builder Everywhere, you can build a footer layout using the Divi builder and, in just a few quick steps, instruct the layout to display in the position of the footer, site-wide.
Before we dive into the tutorial, there are two other plugins available that’ll help you build an awesome footer for your Divi website.
These plugins are:
- Divi Switch. One of the most popular plugins developed specifically for the Divi theme. Divi Switch offers a series of toggles or switches that can be turned on or off from the WordPress dashboard. These switches allow you to make powerful changes to your Divi website that would otherwise require hours of custom development. One such switch allows you to set a custom Divi layout built with the Builder as the footer.
- Divi Footer Editor. Another great plugin of ours, the Divi Footer Editor was created for the exact purpose of helping Divi users build a custom footer with little to no fuss. Instead of using the standard WordPress footer widget, the Divi Footer Editor plugin lets you add a unique footer by using a handy WYSIWYG editor that mirrors the classic pre-Gutenberg TinyMCE WordPress editor. With Divi Footer Editor, you’re able to build a deeply engaging footer for your Divi website, one that includes imagery, embedded videos, hyperlinks and much, much more.
Even though the Divi Switch and Divi Footer Editor plugins are great solutions for building unique and stand-out footers for a Divi site, Page Builder Everywhere is still the quickest, easiest and most feature rich option.
Without wasting a second longer, let’s get started with the tutorial, and build a beautiful footer for your Divi website with the Page Builder Everywhere plugin.
Tutorial Set up
For this tutorial, you’ll need to have a WordPress installation set up and running, with the Divi theme already installed. For testing code and site changes, we recommend using a development or testing environment and not working on a live site.
If you’d also like to set up a testing environment for your website work, follow one of the following tutorials:
- How to Set Up a Local Development Environment Using DesktopServer (Aspen Grove Studios)
- How to Set Up a Local Development Environment Using Local by Flywheel (Divi Space)
- How To Create A Local WordPress Installation On A Mac Using MAMP (Elegant Themes)
The Easiest Way to Create a Footer using Divi
Page Builder Everywhere is an incredibly powerful plugin that lets you use the Divi Builder plugin in places that it generally can’t be used. In brief, the plugin works the following way:
- Create a layout using the Divi Builder
- Save the layout to the Divi Library
- Assign the layout to an area in the Divi website using the Page Builder Everywhere widget
Page Builder Everywhere certainly offers a lot more, such as conditional logic for layouts and the ability to nest layouts within each other, however for this tutorial, the above-mentioned steps will be followed.
First things first, you’ll need to design a footer with the Divi Builder. To do so, create a new page and add the relevant section, row/s and modules that you’d like to use for the footer. Once you’ve created your footer, save it to the Divi library.
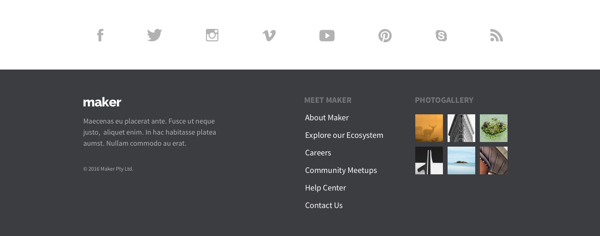
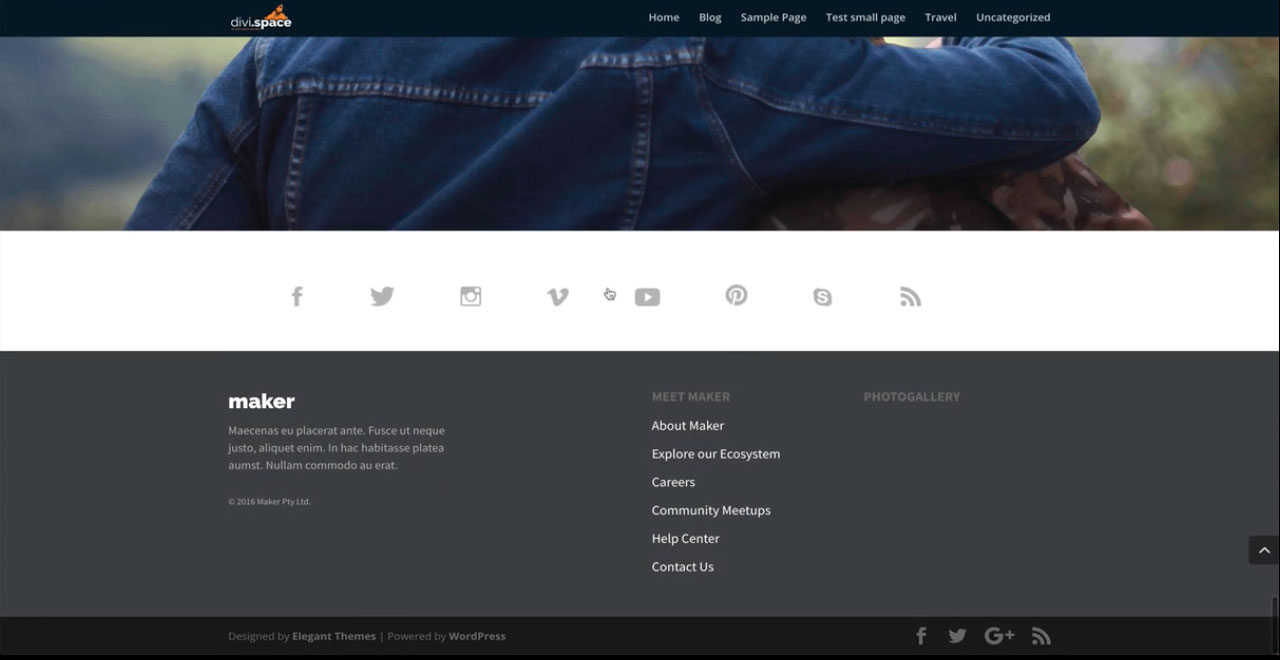
If you’d prefer an alternate method, you could use a pre-made footer like these footers from Elegant Themes. In our example, we’ve used one of the free footer layouts from Elegant Themes, number six to be precise.
Originally built using the Divi Builder, these layouts can easily be edited and customized to fit a brand identity or style guide. To use one of the layouts, head over to the Elegant Themes blog post and download the layout pack. You’ll need to add the entire group to your Divi Library and isolate the exact layout you’d like to use.
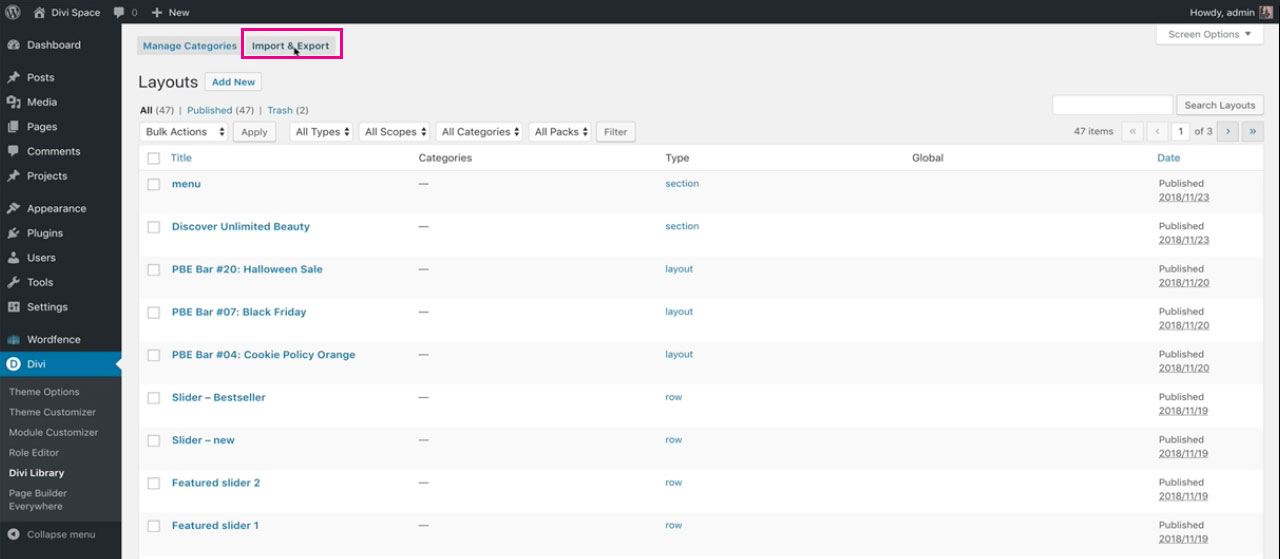
Log into your WordPress website and navigate to Divi Theme Options > Divi Library.
Once you’re inside the Divi Library, you’ll need to import the layouts downloaded from the Elegant Themes post. Click on Import / Export and wait for the pop-up.
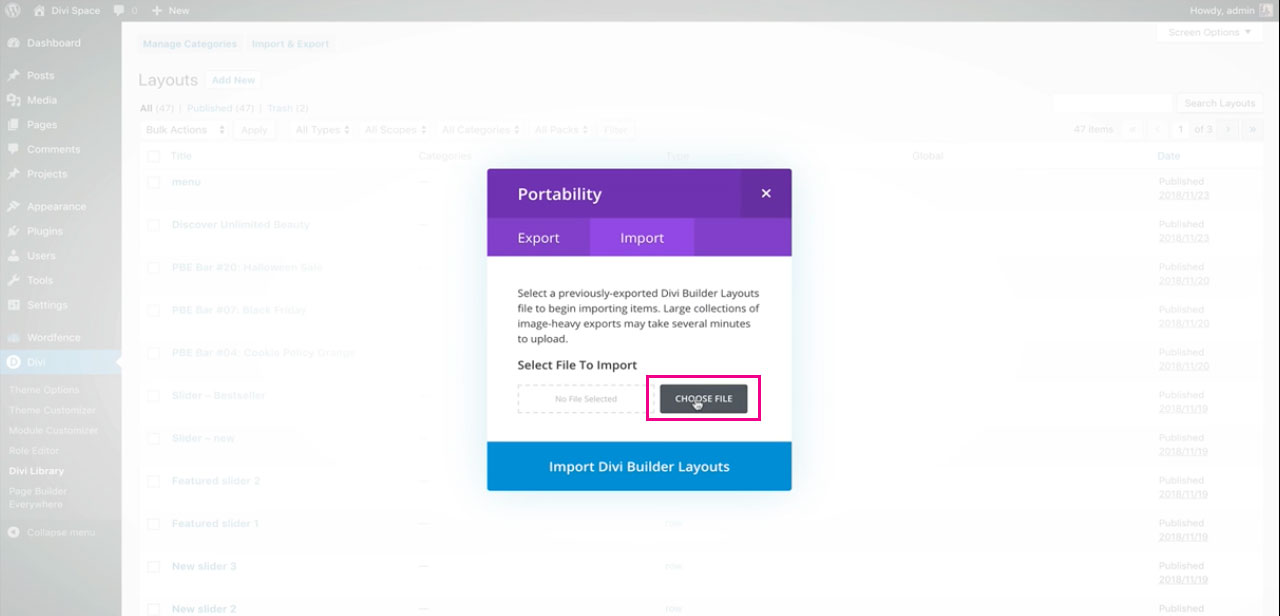
Once the Portability console pops up, click on Choose File and select the previously downloaded JSON files from your computer. Once the files have been selected, click Import Divi Builder Layouts and let the installation run its course.
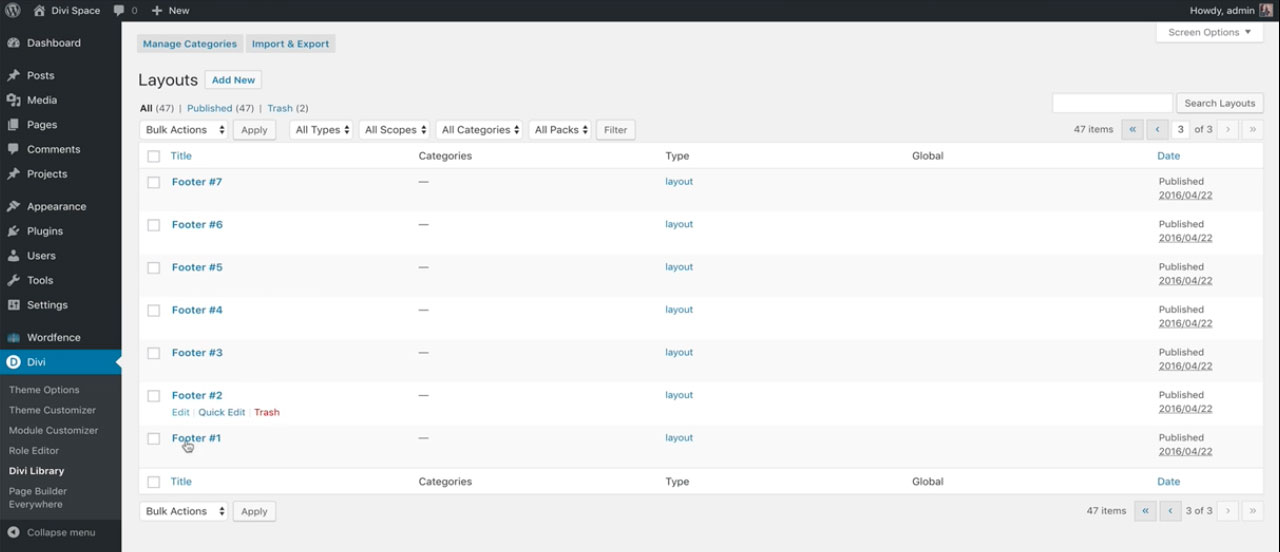
At this point, you’ll see the layouts installed in the Divi Library. Unfortunately, there’s no way to preview the layout themselves so, in this case, you’ll need to take note of which layout you’d like to use in your design.
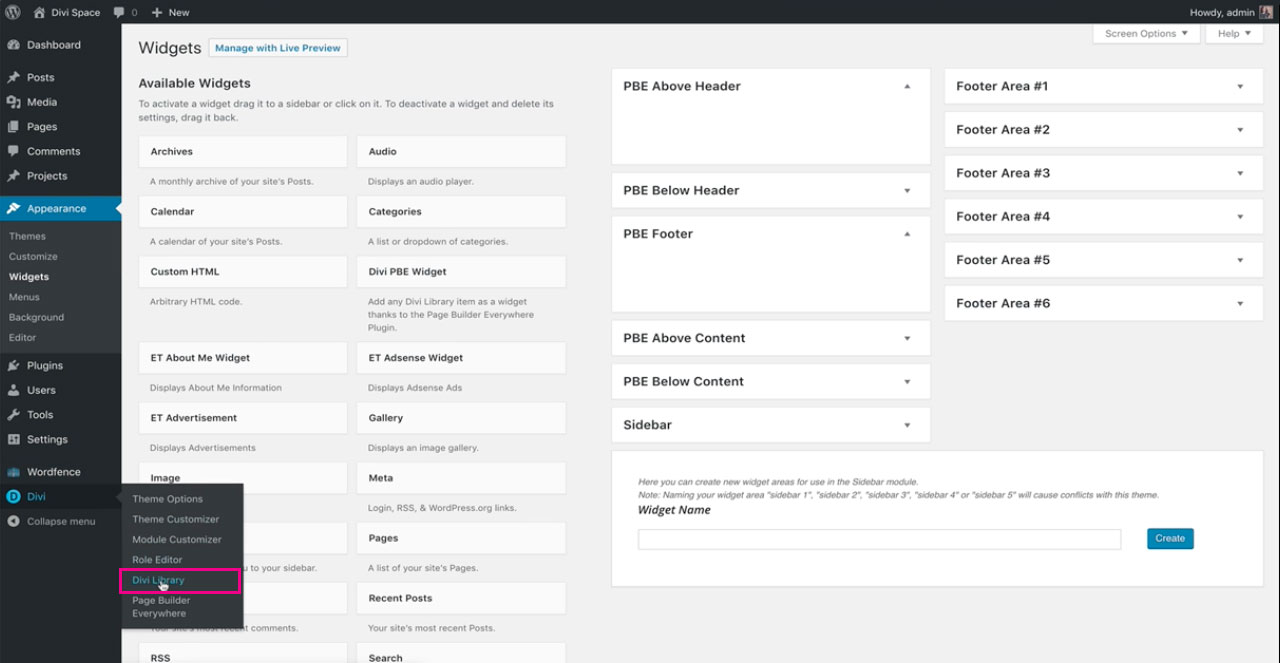
Now, navigate to Appearance > Widgets.
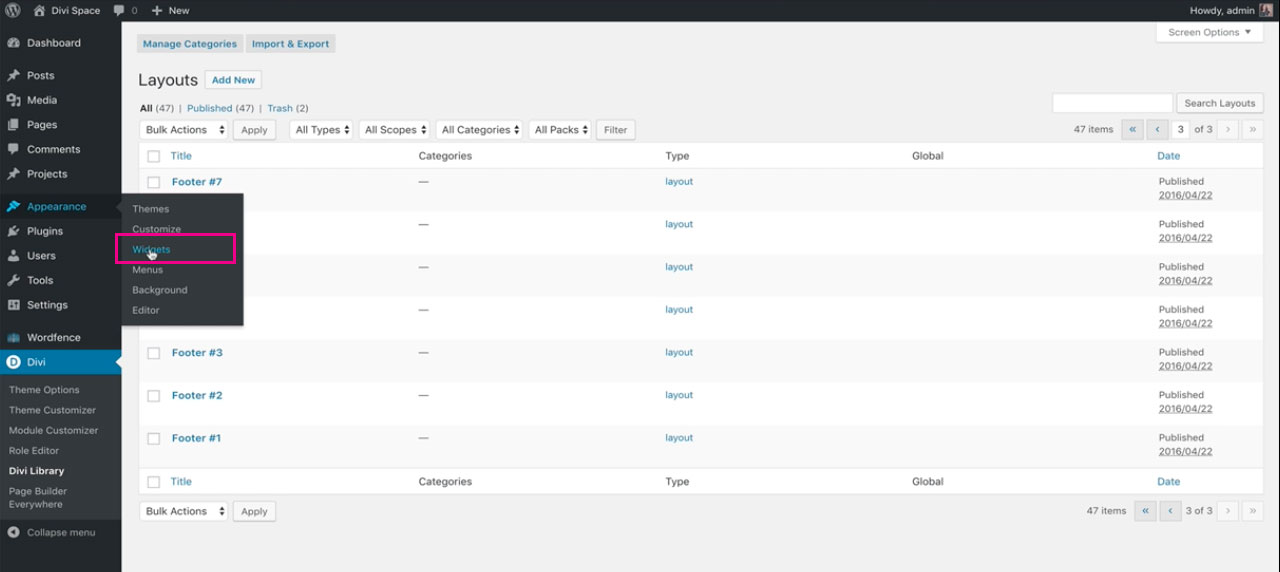
From the Widgets console, locate the Divi PBE Widget option in the left-hand column.
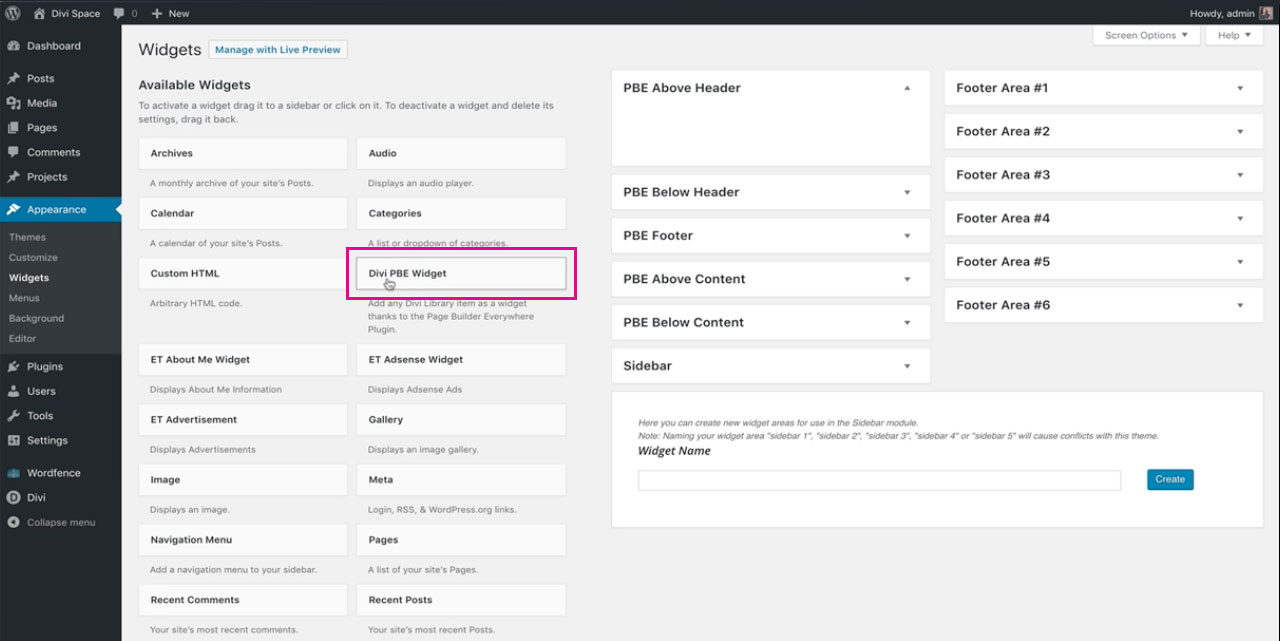
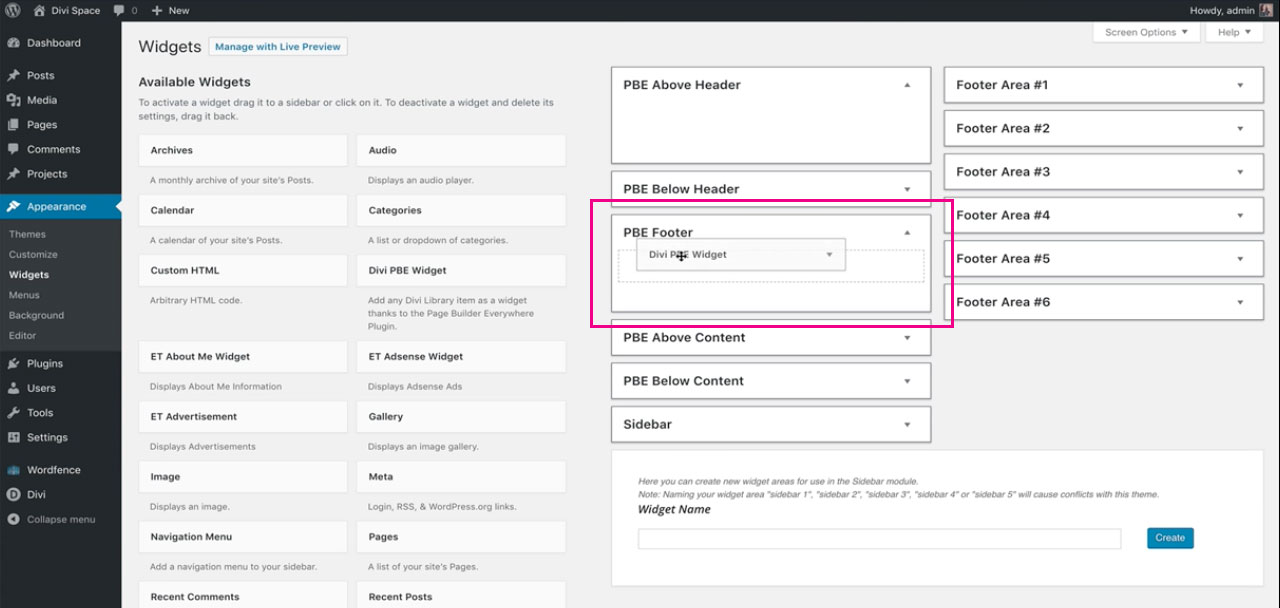
Click, hold and drag the Divi PBE Widget to the relevant section in the right-hand column. For this tutorial, place the widget into the PBE Footer area.
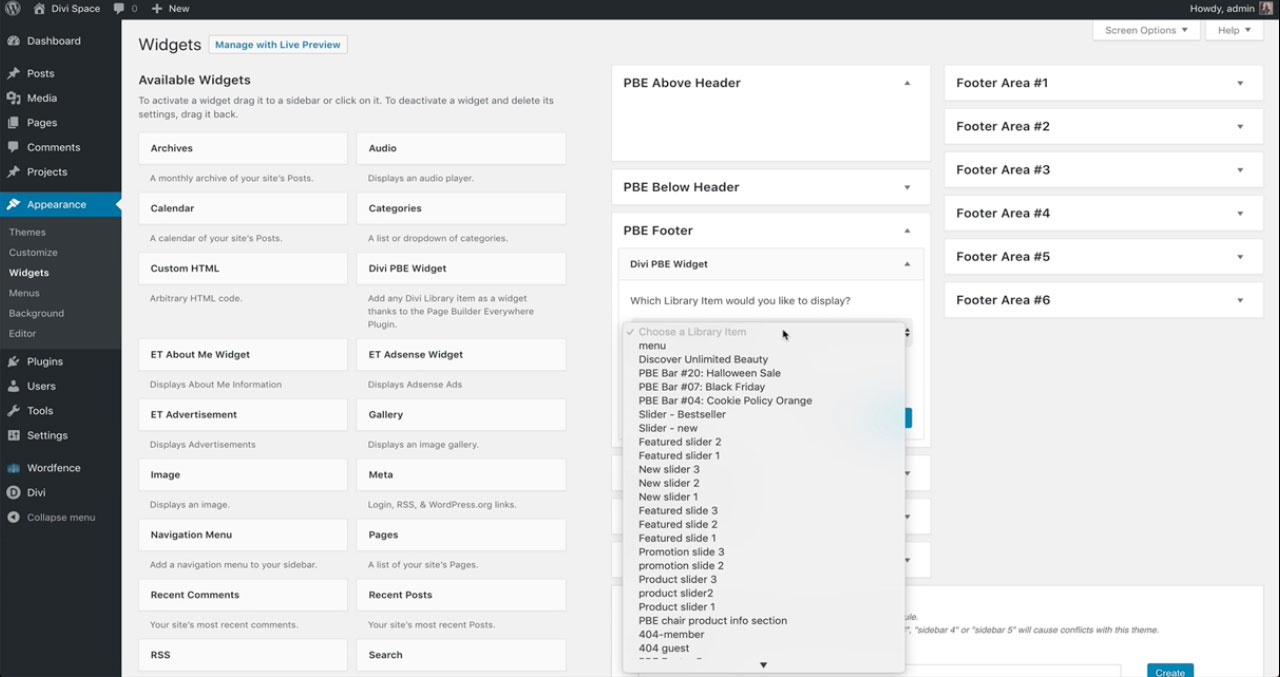
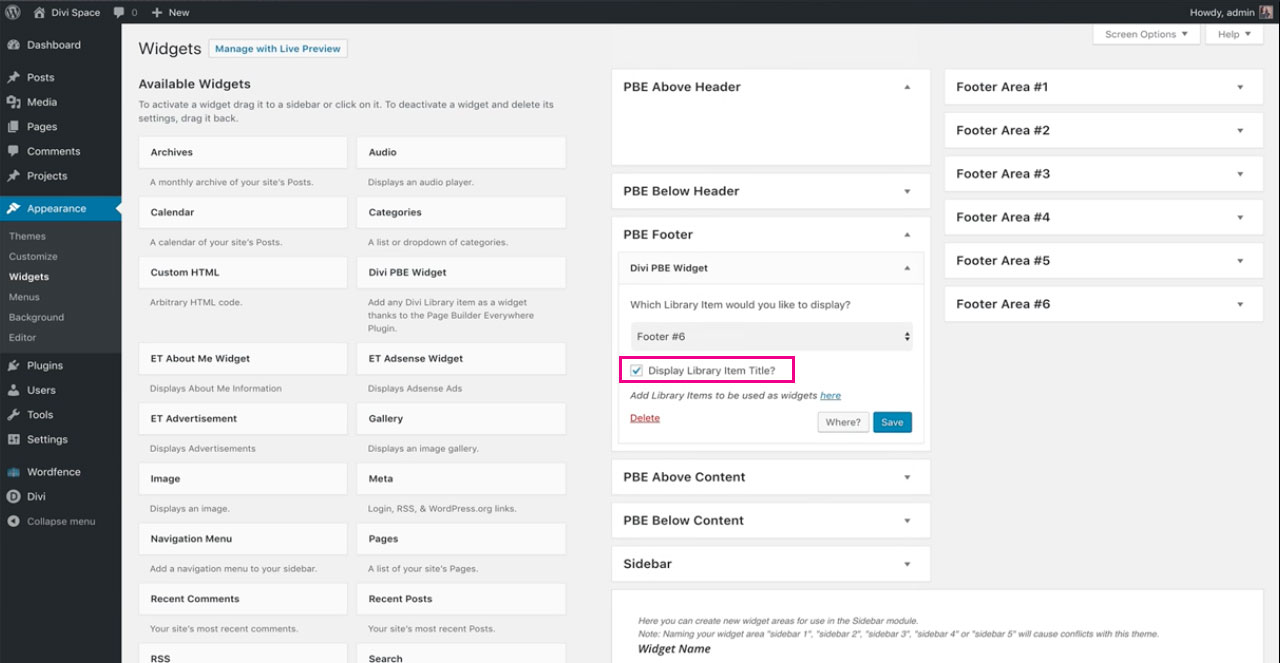
Once the widget is placed you need to select the layout that you’d like to display in the footer section. Click on the Choose a Library Item dropdown and you’ll see each layout added to the Divi Library. Select the correct layout, in our example, Footer #6.
Next, for this example, deselect the Display Library Item Title? Option and click Save.
Now, return to the front end of your Divi website and you’ll see the footer reflect throughout the site, including in blog posts.
How easy is that? In just a few quick steps, you would’ve created a stylish, stunning footer for your Divi website.
The most powerful Divi plugin available, with Page Builder Everywhere in your development toolkit, you really can build any web design that your heart desires… without ever having to worry about understanding or manipulating code.
To start building amazing Divi layouts with ease, purchase the Page Builder Everywhere plugin from Divi Space. This plugin will totally transform your web designs, no questions asked.
We want to hear from you!
Does your website have a great footer? Which elements did you include in the footer? Have you used Page Builder Everywhere in a Divi website? Let us know your thoughts on footer design and the Page Builder Everywhere plugin in the comments below. We love receiving your feedback!
Thanks for reading!

Thank you!
I’ve used page builder everywhere for this exact application and it works great. Absolutely no fuss, it just works. Any plans to make page builder everywhere compatible with the Extra theme?
Hello,
Thank you for this new tutorial of your PBE plugin.
I use this plugin on 3 sites and soon 4 and I must say that it is really great!
It’s simple we can add any element of the library … anywhere in the site!
Thanks again
Google translate fr >> en
hi bruno can I ask you if with this method the injected sections are correctly rendered in the visual builder? or you will loose the styles in the visual builder but then is showing good in the frontend?
Good question Wassy about the compatibility with the builder. I am following for a response. Thanks.