To give these undecided potential customers a nudge in the right direction, why not let your satisfied customers do the talking?
Testimonials have become extremely important to include in a website. If your business sells products or services, incorporating these powerful elements into your website will improve the appearance of your brand and place it in a positive light.
In the following tutorial, we’ll take you through the step-by-step process of adding an attractive and eye-catching testimonial slider to your Divi website. For this tutorial, we’ll be using our plugin Page Builder Everywhere.
What is Page Builder Everywhere?
A lightweight and powerful Divi plugin, Page Builder Everywhere lets you use the Divi Builder in even more sections in your website. By default, the sidebar, archive pages, footer, header and a few other areas are off-limits to the Divi Builder, and any edits or enhancements you’d like to make in these areas have to be done by editing code or through the use of CSS styling.
With Page Builder Everywhere, you can edit these impossible-to-reach sections with very little hassle, using the Divi Builder as per normal.
One of the best features about the Page Builder Everywhere plugin is that it gives you the ability to nest modules.
With this, you can place modules within modules, and build out truly unique web presences, all with the familiar and easy to use Divi Builder. You can see a number of these examples in action here.
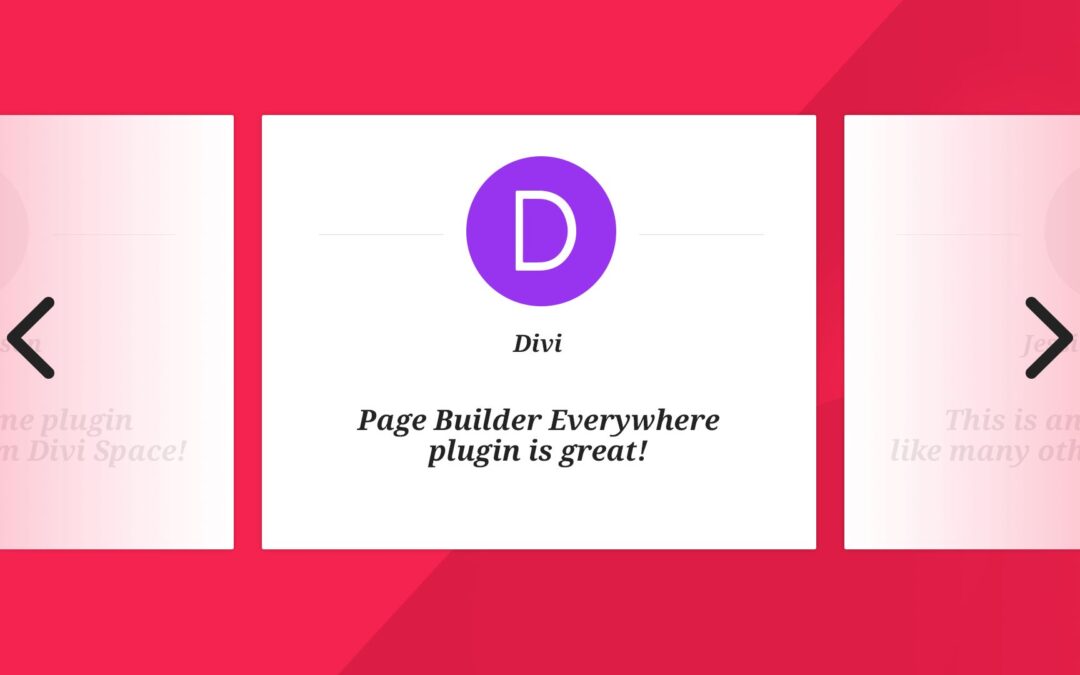
With Page Builder Everywhere giving you the ability to nest modules, you can create a seriously slick-looking testimonial feature for your site, dropping a number of testimonial blurbs into a single slide of the slider module.
To learn how to create an awesome Divi testimonial slider, follow the step-by-step tutorial below!
For more advanced testimonial slider designs – Testify Plugin
Page Builder Everywhere Plugin was created to make the impossible possible. You can create so many beautiful designs with it, without the Divi limits. Promo bars, tabs with pricing modules, tabs with slider and shop modules inside… Really no limits! It’s like discovering new planets beyond the Divi System! Slider with testimonials is just a one of the many examples.
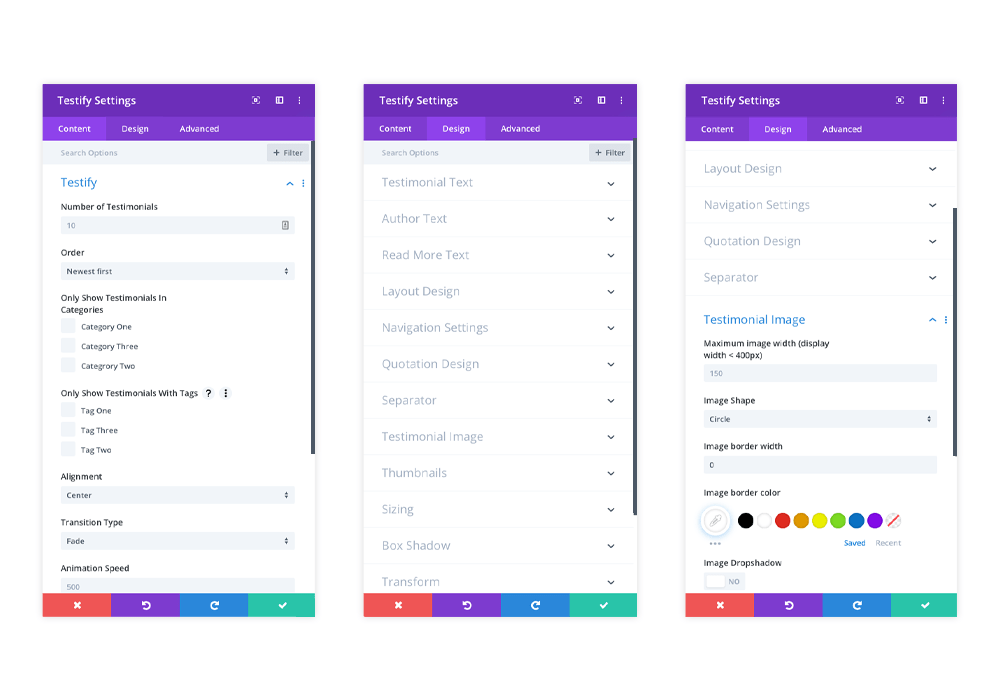
If you are looking an easier way and more compelling way to create Divi testimonial sliders, you should check out the Testify plugin. It is extremely easy to customize and can be styled to match any brand identity. It offers a lot of new features compared to the standard Testimonial Divi Module. Copy, author name, image, quotation mark and navigation type – every part of the testimonial can be stylized.
Also, testimonial thumbnail images can be designed on the parameters of size, spacing, animation type, animation duration and autoplay settings. Testimonials can be styled on an individual basis, or alternately, multiple styles can be set using the taxonomy system.
Can’t decide which plugin is right for you? You don’t have to choose. You can lock in access to the two plugins (plus nearly a hundred other products!) by joining our Membership. Read more about Membership Plans.
How to Make a Divi Testimonial Slider with Page Builder Everywhere
If you prefer to watch a video of the same tutorial, head on over to our YouTube channel.
To begin, you’ll need to purchase the Page Builder Everywhere plugin from WP Zone. Once you have purchased the plugin, download the .zip file of the plugin, and head over to your WordPress website.
Install the plugin by clicking on Plugins > Add New, and follow the installation prompts. For more information on installing plugins on a WordPress website, read our guide How to Install a WordPress Plugin (Step by Step Guide for Beginners) or watch the video How to Install the Page Builder Everywhere Plugin for Divi on YouTube.
Once the plugin is installed, be sure to enter your unique license key relating to your purchase. Once the license is entered, you can begin with the tutorial!
In our example, we’re modifying one of our free layouts, eCommerce Layout. Click here to see the eCommerce Layout demo or download it for free.
In the tutorial, we’ll be editing the static testimonial section to become a slider with multiple testimonials.

To begin, isolate the three testimonial blurb modules by creating a new section and row with just the testimonials in it. If you’re starting from scratch, create a new section with a three-column row and add three respective blurb modules.

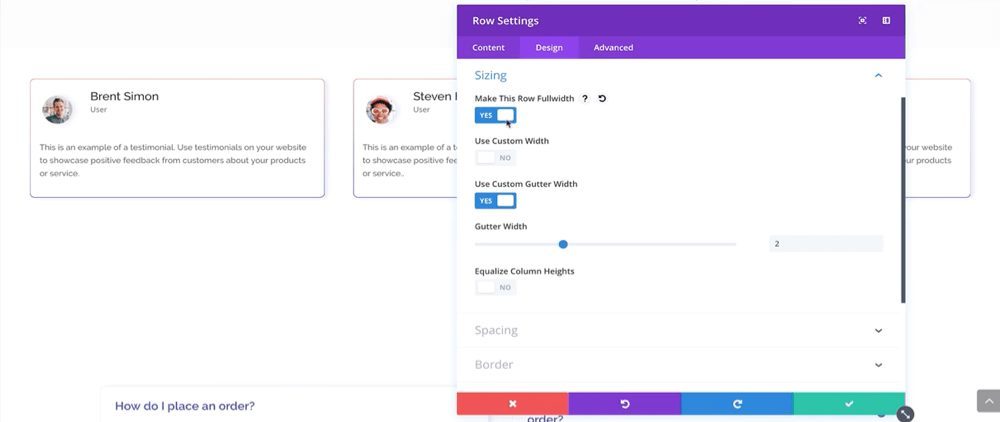
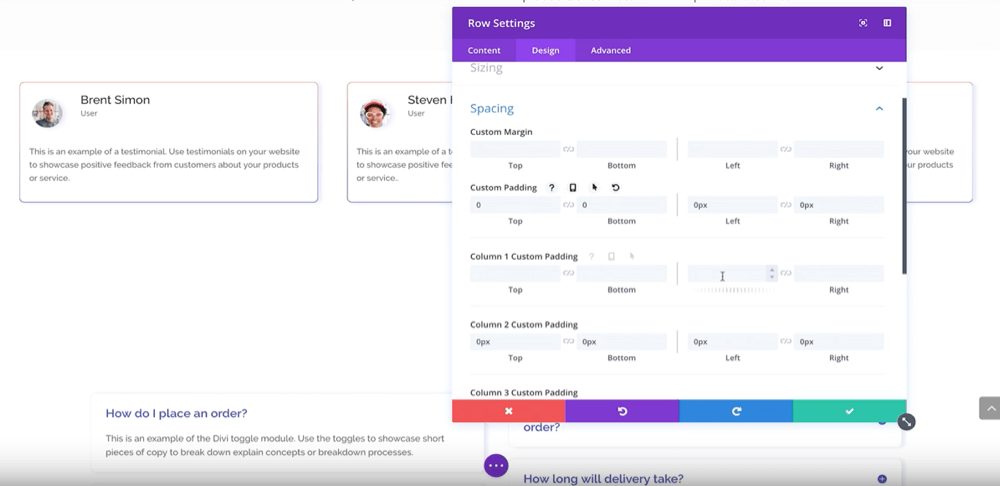
Also remove the padding around the top and bottom of the row. If you don’t remove the padding, you’ll end up with double padding across the two modules.
Once you have made these changes, right-click on the row and click Save to Library.
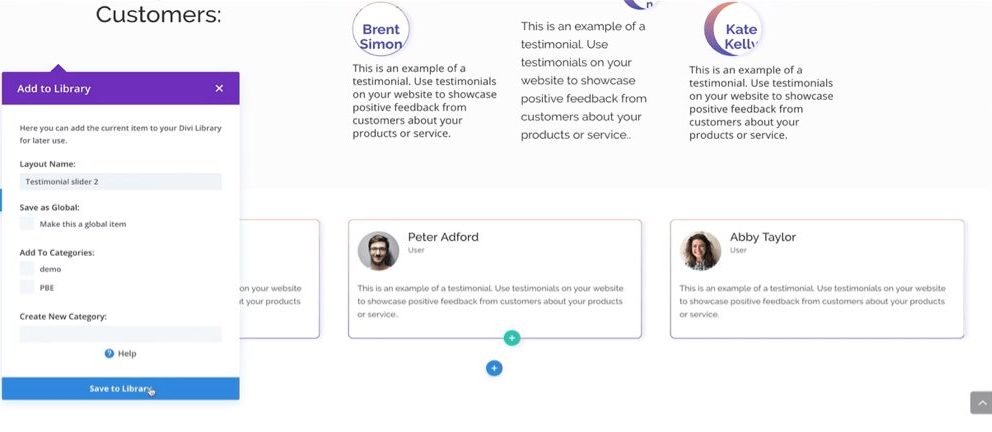
At this point, duplicate the set of blurb modules and enter the next collection of testimonials. In our example, we’ve changed the profile picture icons and names of the demo testimonials.
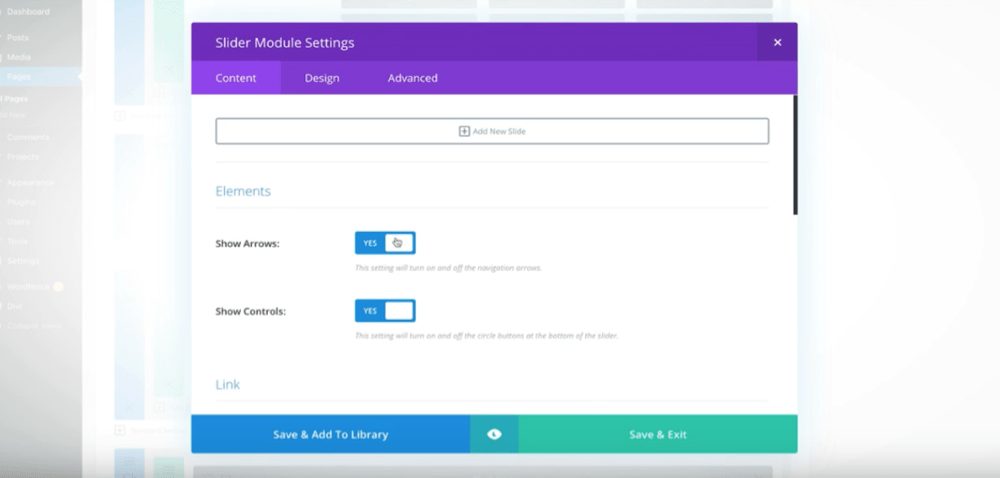
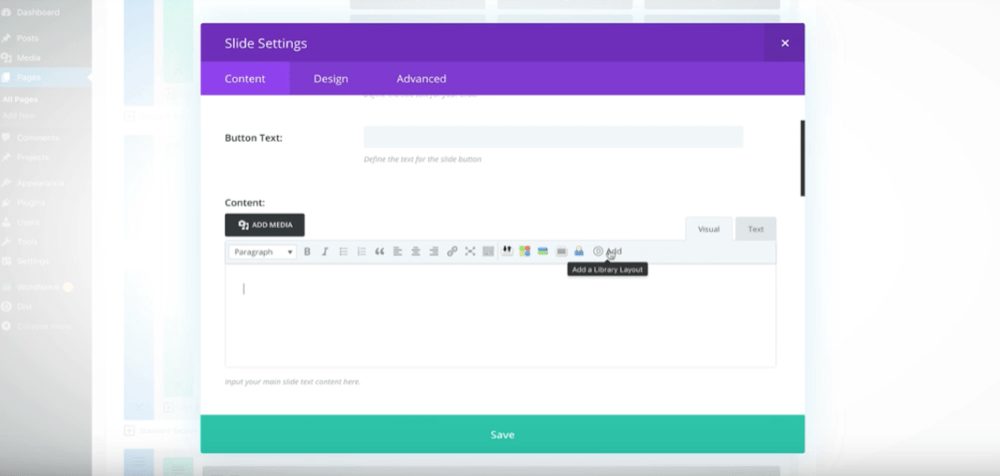
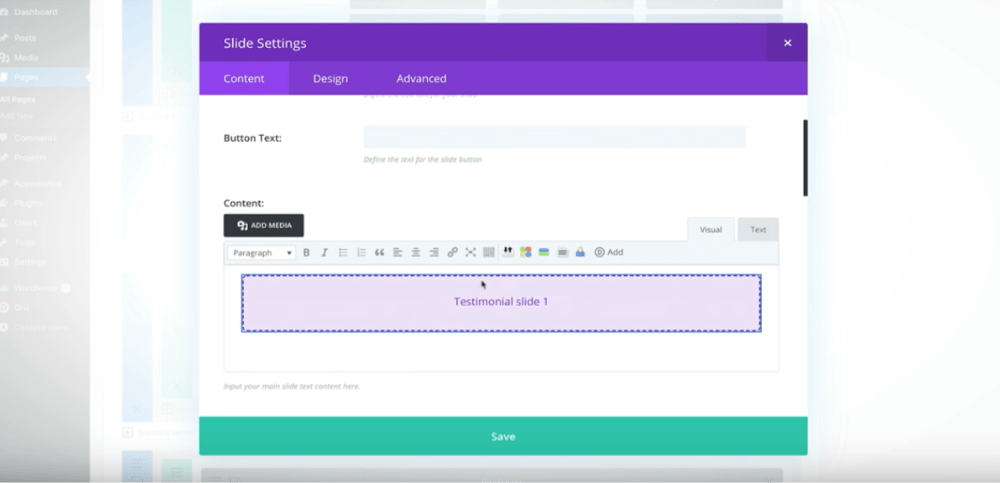
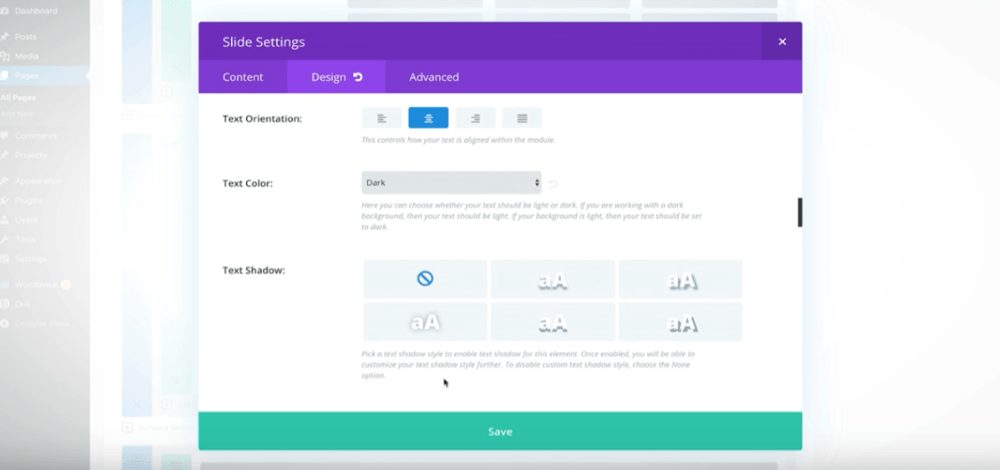
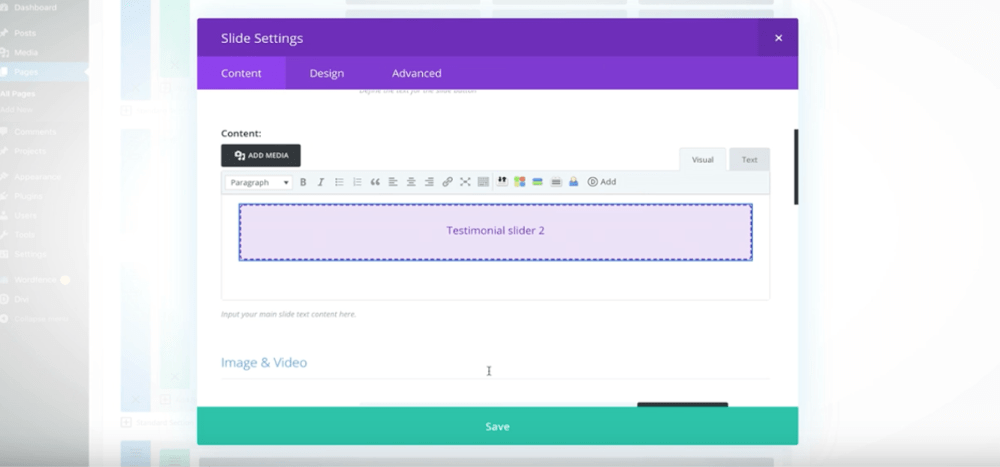
Now for the fun part – creating the actual Divi testimonial slider with Page Builder Everywhere. Where relevant in your layout, add a new row, section and add in a Slider module. While there’s no right or wrong space to add testimonials, they should generally be around a call to action such as a contact form, newsletter sign up or further link to services, placed nearby to an element where an inspired customer can make contact with your brand.

Now, return to the front end of your site and you’ll have a stunning Divi testimonial slider showcasing positive feedback of your brand!
Let us know which other Divi tutorials you’d like us to create for you!

I was getting a problem setting up testimonials on my business website but after going through this article I have successfully incorporated it into my website. Thanks for providing the solutions.
Thats what I find want. Thanks you for helping me. Now I slide my testmonial.
I am looking for testimonial template to posted in my social media; come across your post, I can one stone kill 2 bird.
Create a testimonial at my blog as well as screen shot the image posted in my social medial update.
A very timely post which I’m going to give a try today.
Thanks for the post