Adding an events calendar to your website is a great way to inform your audience about your upcoming events and events within your industry. In this article, we’ll see how to add an events calendar on a WordPress website.
The Events Calendar

One of the easiest ways to add an events calendar is with a plugin called The Events Calendar. It’s available in both a free and a pro version. I’m using the free version. The Pro version adds a lot more features and is better for adding events to your Divi layouts and creating your own events pages.
Events Calendar Settings

Once you install and activate your plugin, you’ll see an option for settings. This includes general settings, display, license, APIs, imports, and a tab to upgrade if you’re using the free version. Most of the settings can be left at their defaults, but I recommend going through them to see what you want to enable.
Creating an Event
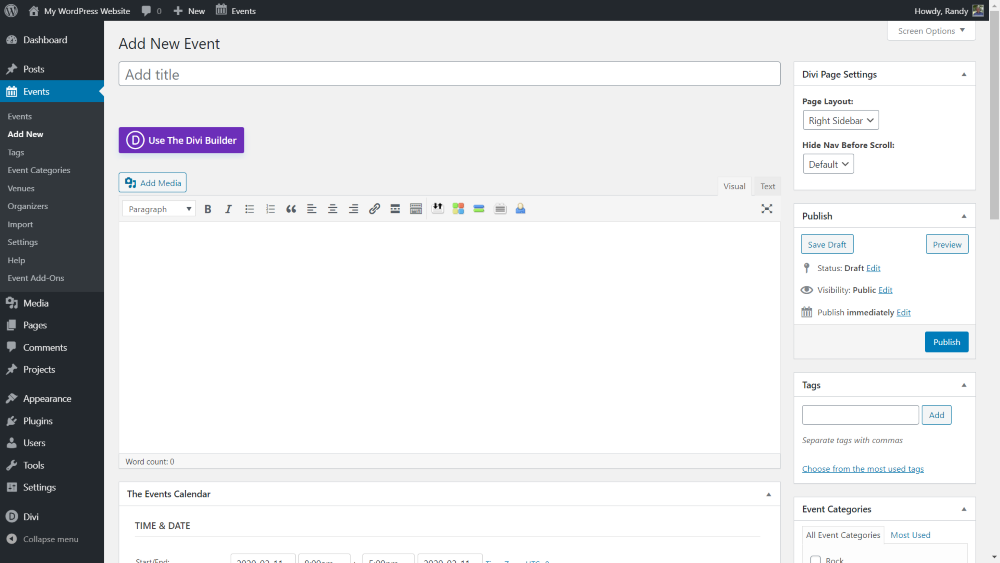
The plugin adds a new custom post type called Events. Within the Events menu in the dashboard, select Add New. This opens the editor where you can add content and event details. You can use the regular editor or the Divi Builder for the event content.
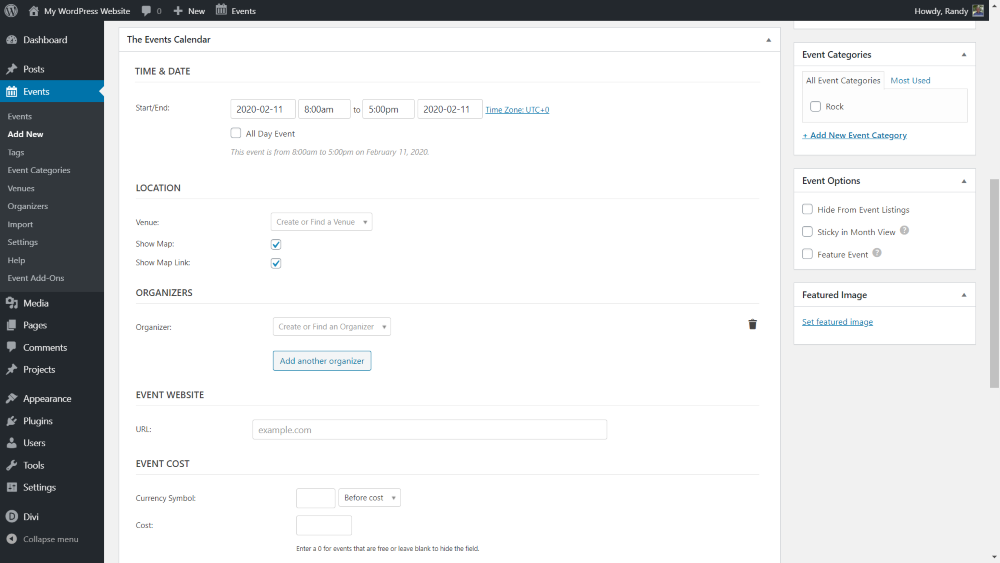
Under the editor, you’ll see a section for event details. This includes the start and end time and date, location, organizers, website, cost, and additional functionality if you have add-ons installed. On the right is the event categories, event options, and featured image.
Date and Time
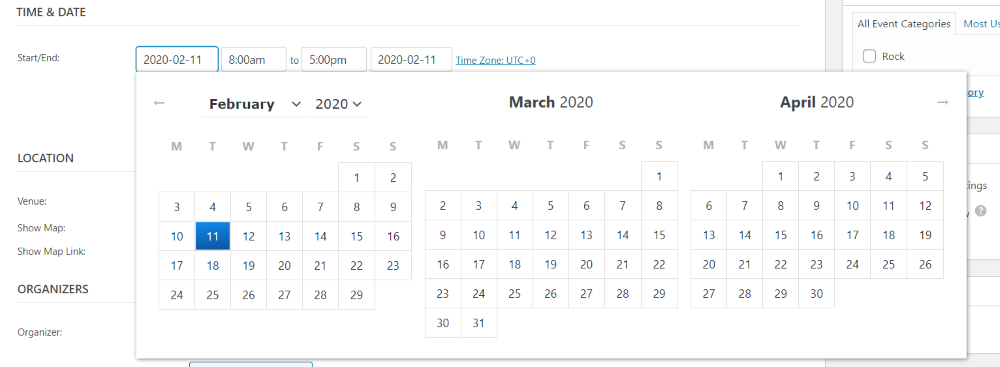
Selecting the date opens a calendar where you can choose the dates for the event to start and end.
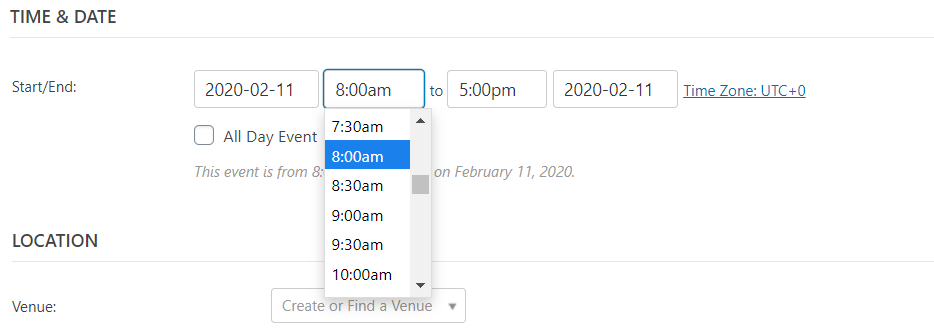
Selecting the time opens a dropdown box where you can select a time. The times start every half hour.
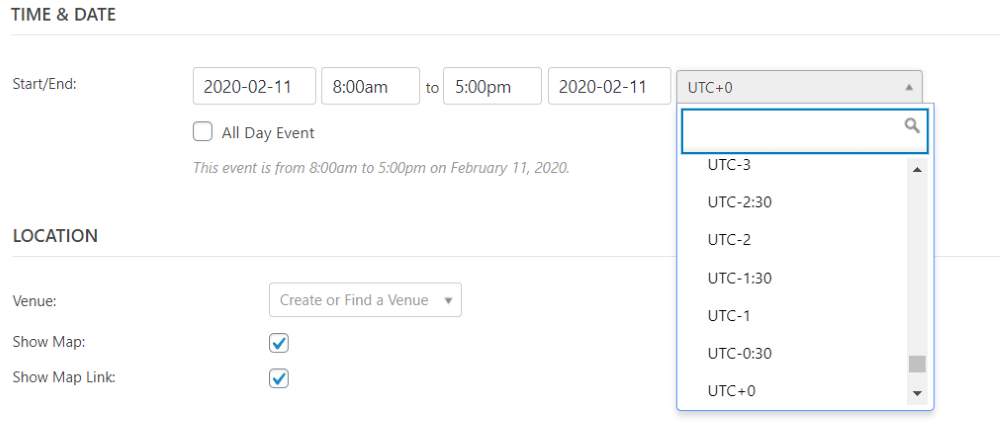
Select the time zone to open the dropdown box to choose the time zone for the event if it’s different from the default.
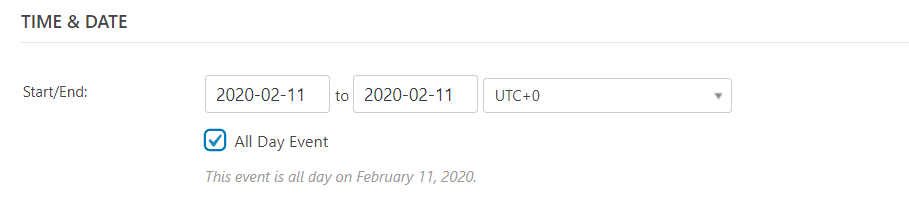
Select All Day Event if you want to remove the times and just post the dates.
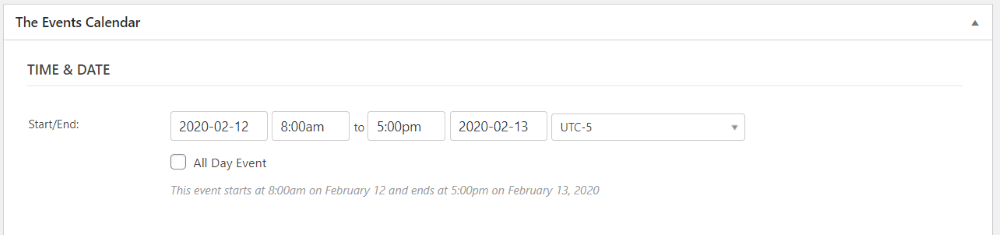
I’ve set my event to start February 12th at 8:00 am and run to February 13th at 5:00 pm for the UTC-5 time zone.
Location
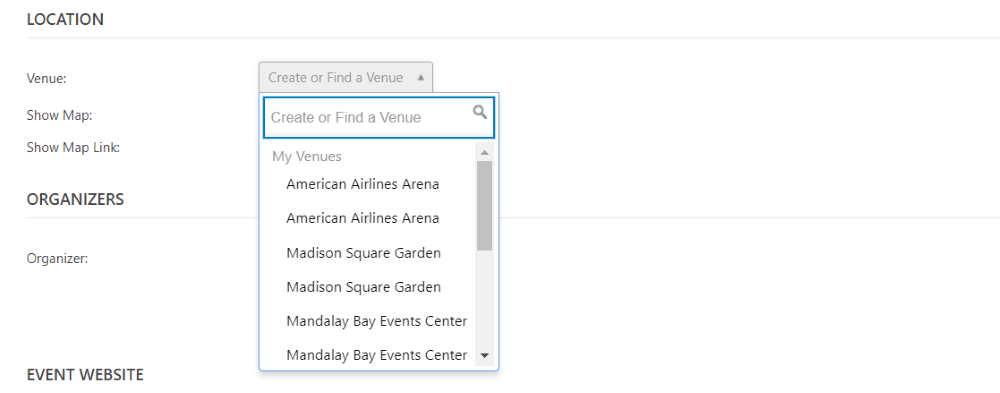
The location provides options to create or find a venue, show the map, and show the map link. This image shows the drop-down box for the venue. It lists My Venues and Available Venues. You can search for them.
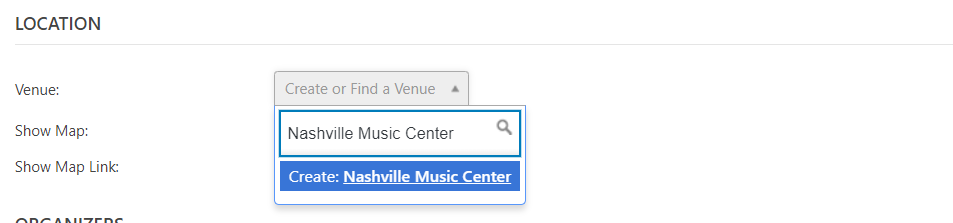
To create a new venue, just enter the name and then click the Create link that appears.
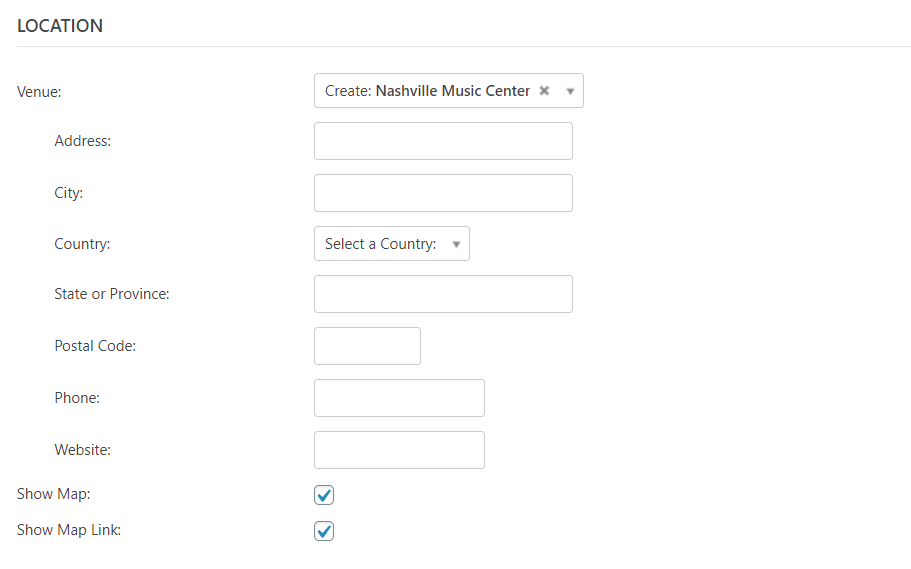
This opens more fields where you can enter the address, phone number, and website.
Organizers
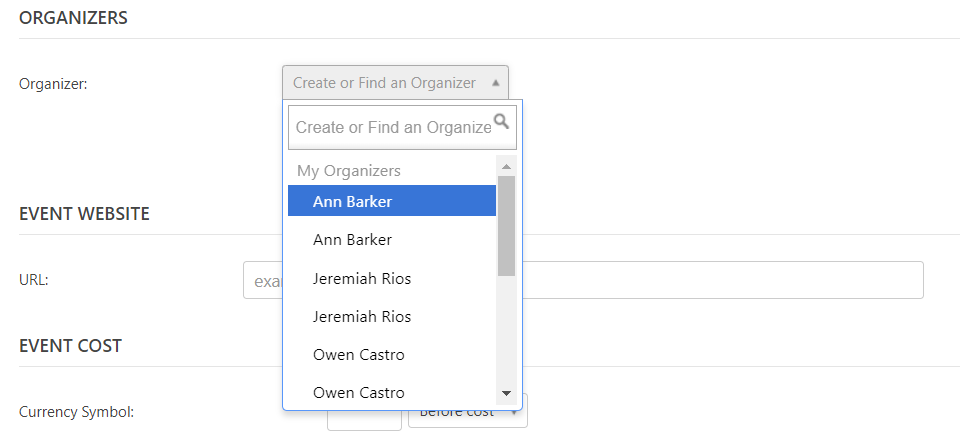
Choose an organizer from the drop-down box. It shows My Organizers and Available Organizers. You can also add your own by entering the name and clicking Create.
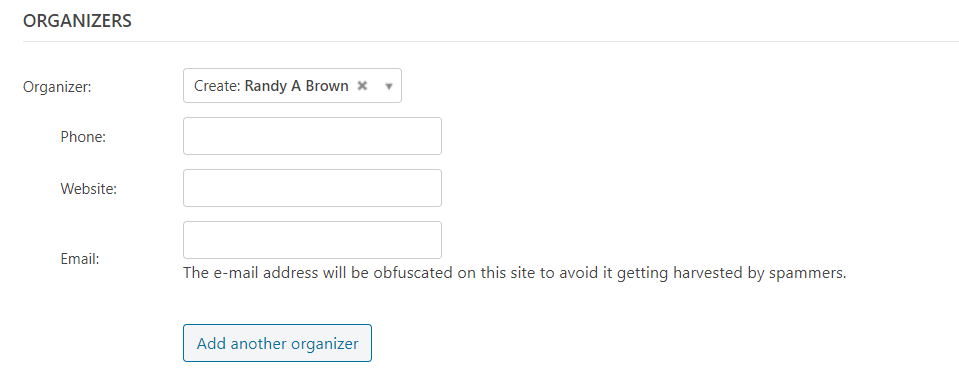
Creating your own organizer opens more fields where you can add a phone number, website, and email address.
Website

Enter the website for the event. If there is a specific page for that event on the website, be sure to include it, but this isn’t needed if the entire site is about the event. This will add a clickable link.
Event Cost
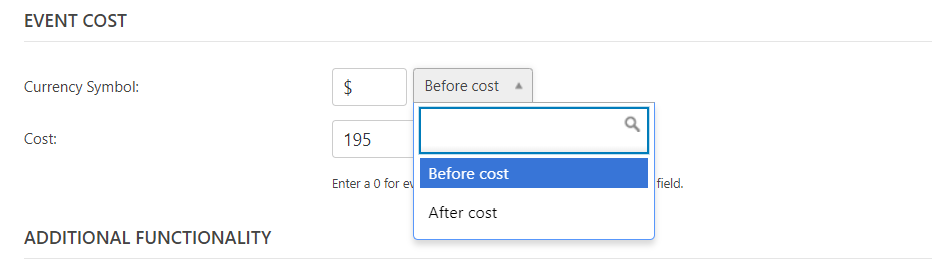
For the event’s cost, enter the currency symbol, choose if you want the symbol to appear before or after the cost (it’s set to Before cost by default), and enter the amount.
Additional Functionality

Additional Functionality will include features of any add-ons you have installed. It will also include a link to the available add-ons.
Clicking the link opens a page where you can see all of the available add-ons and make a purchase.
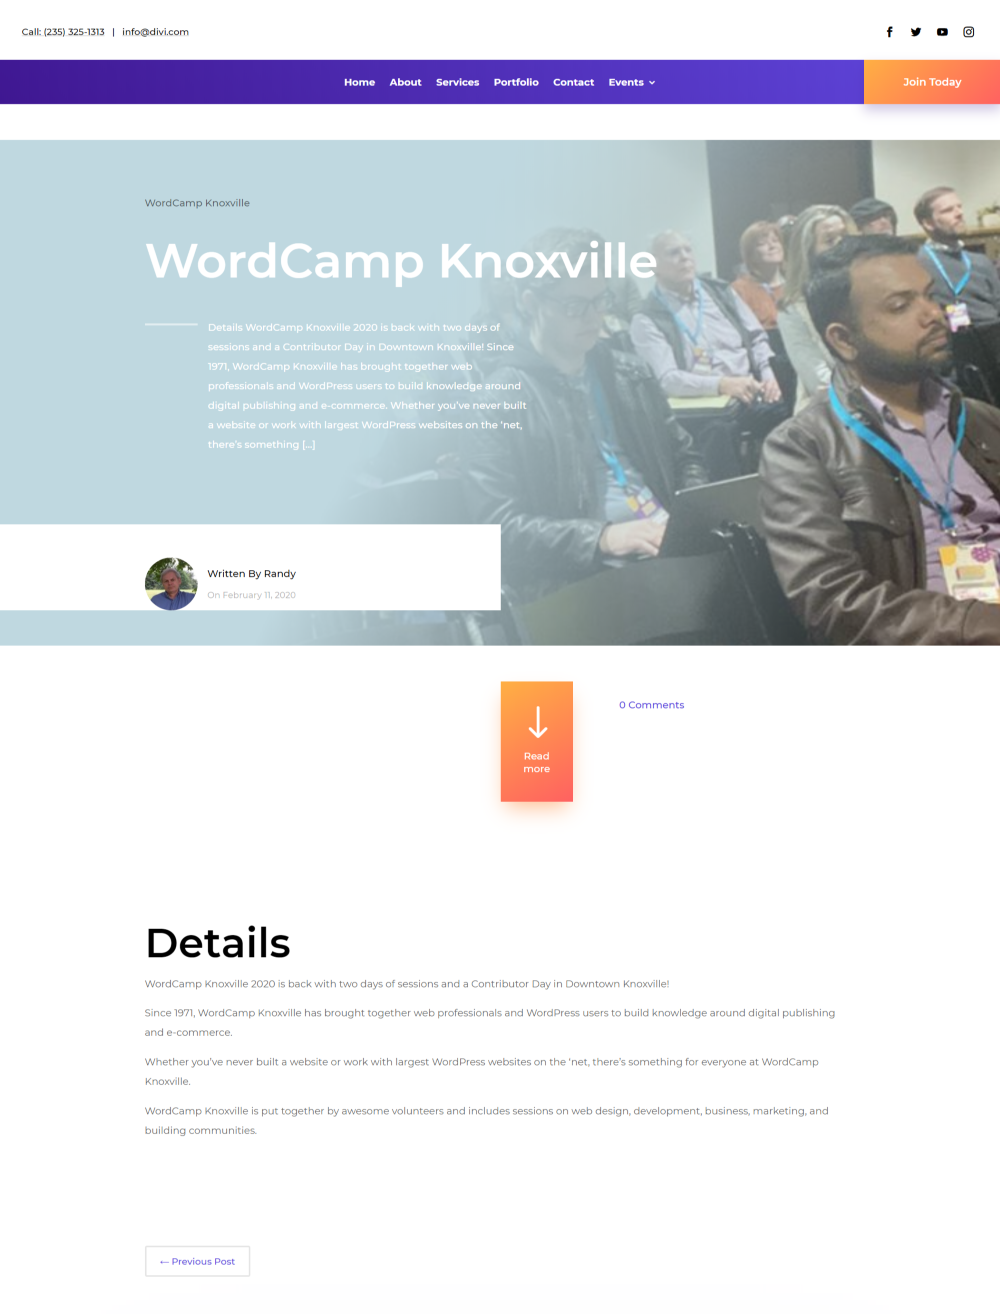
Example Event
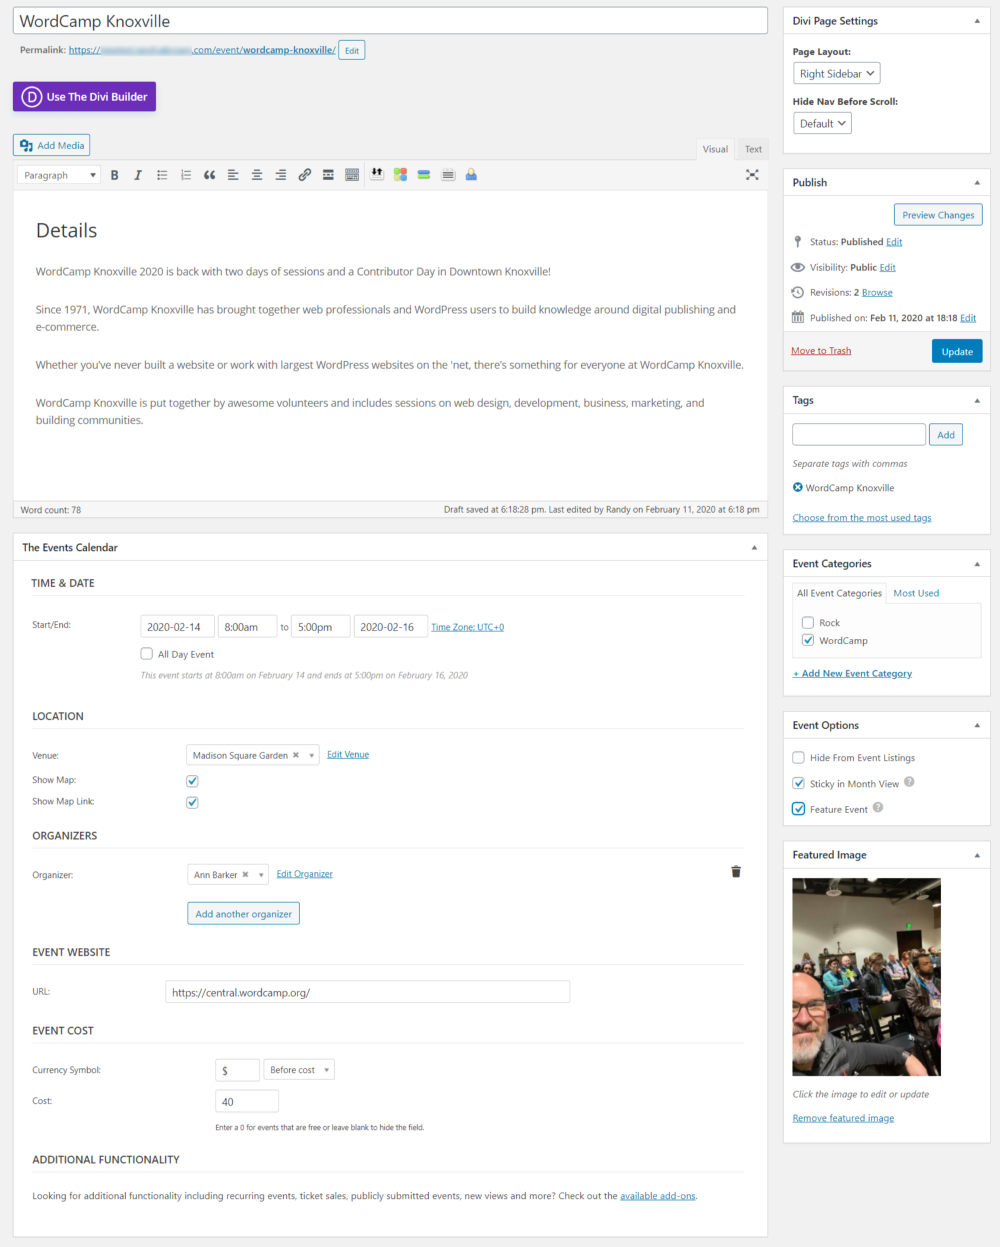
For my example event, I used some of the text and an image from the Phoenix WordCamp to create a mockup WordCamp event. I’ve selected Feature Event in the event options. This automatically selected to make the event sticky in the month view. I added a tag for WordCamp Knoxville and a new category for WordCamp.
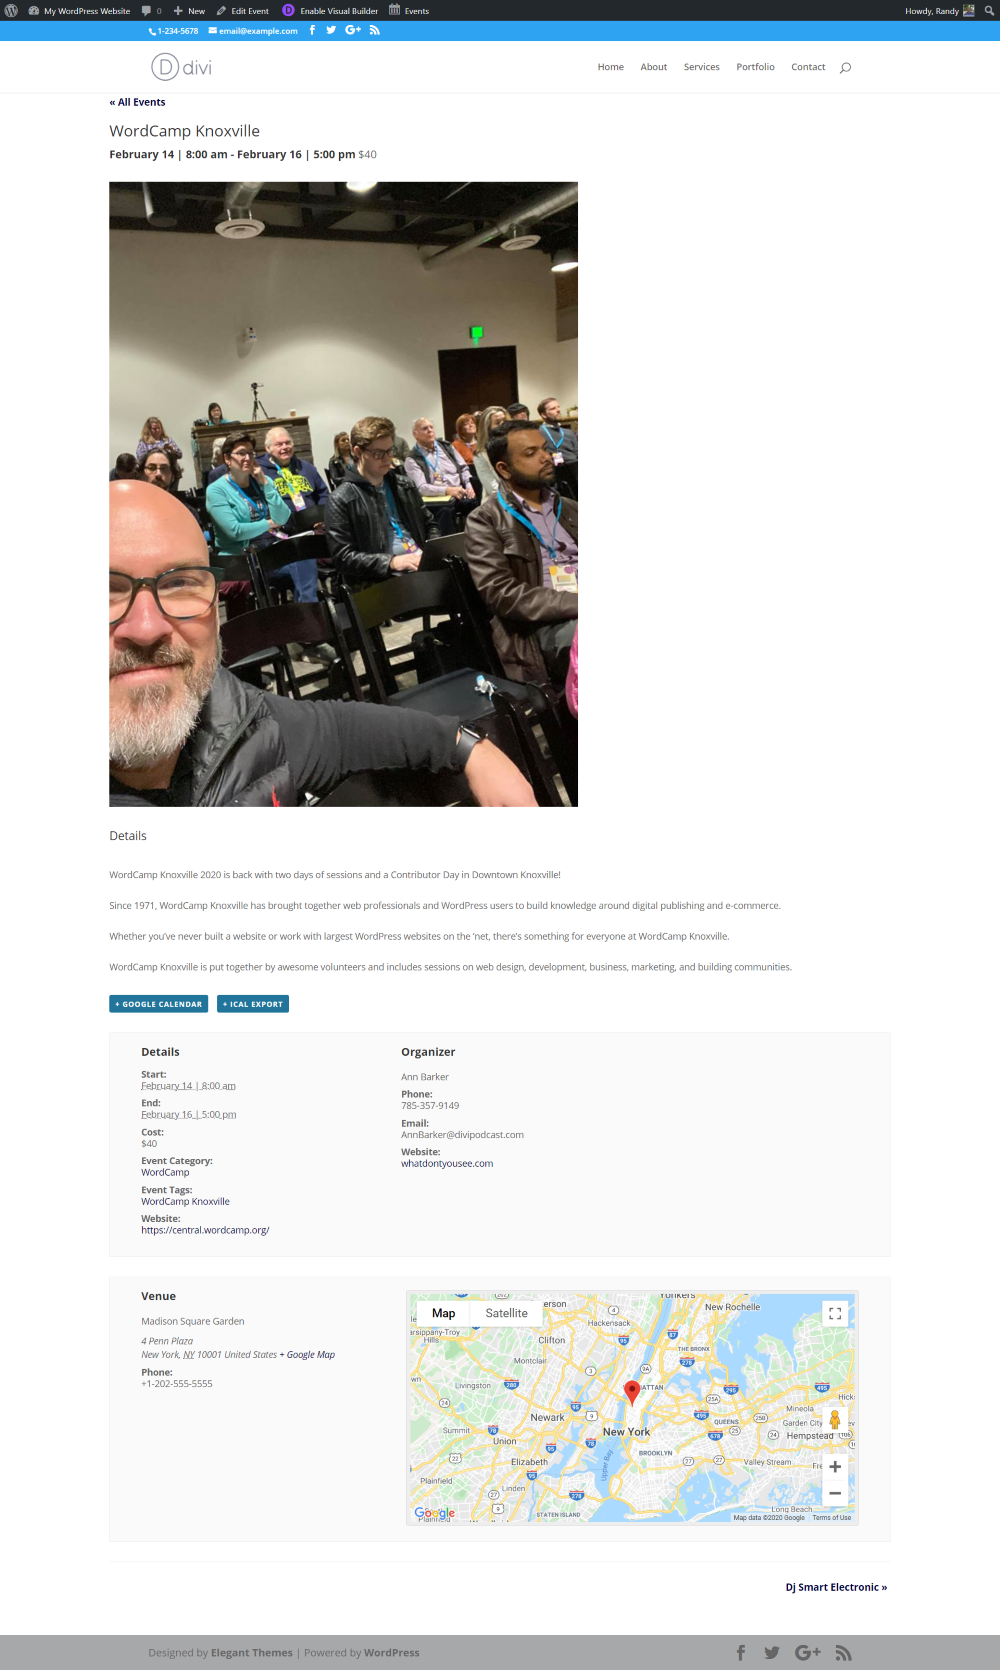
Here’s the event on the front-end. It shows the title, date, and time, and price across the top. Next, it shows the featured image and content. Following this are buttons for Google Calendar and iCal. It then provides a list of all the event and organizer details. Finally, it shows the venue name, address, phone number, and a Google map.
All Events
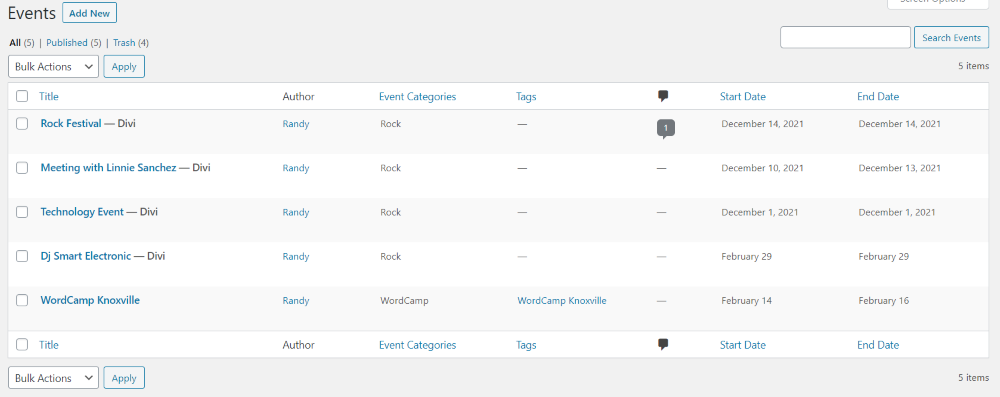
The events will be listed in the Events library, where you can edit or delete them.

It places the events on a category page in the front-end. The page includes a filter where you can select a day, search by keyword, and choose the type of view you want them to display. The top of the page includes a filter that lets you search the events and sort them. This shows the view options (list, month, and day).
List View

This is the list view. They’re automatically sorted by date. Some of these events are from the Podcast child theme.
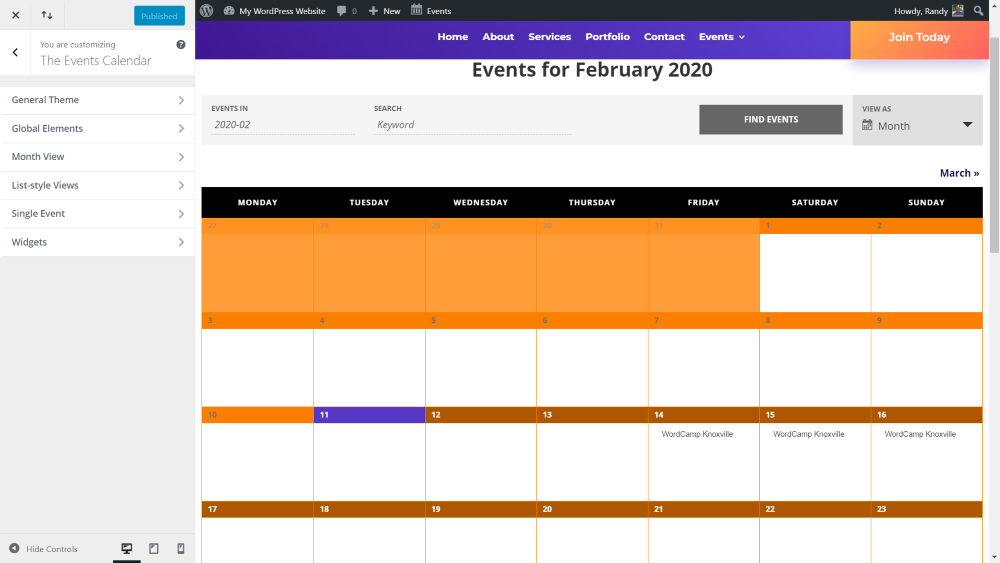
Month View

This is the month view. It automatically creates the calendar. It includes navigation for the previous and next month and a button to export the events.
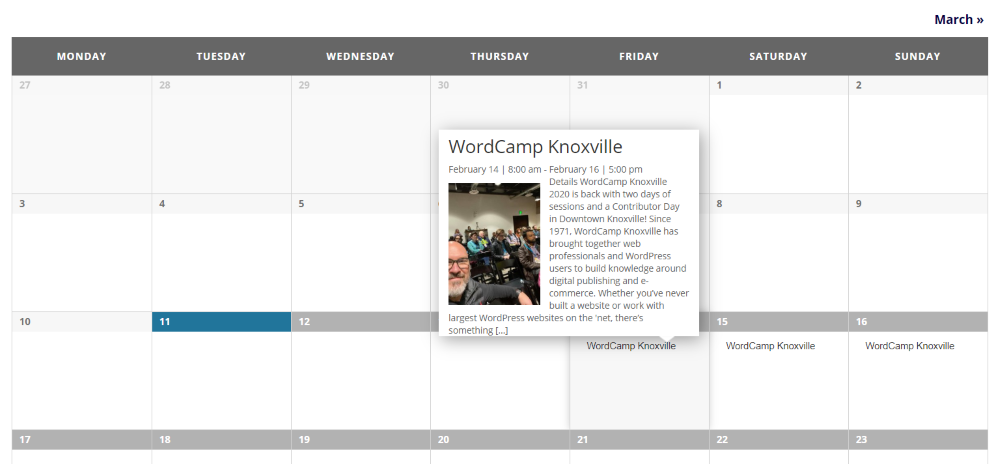
Hovering over an event shows details in a popup. Clicking on it takes you to the event’s detail page.
Day View

For day view, you’ll need to choose the day you want to view. Selecting the date opens a date-picker.
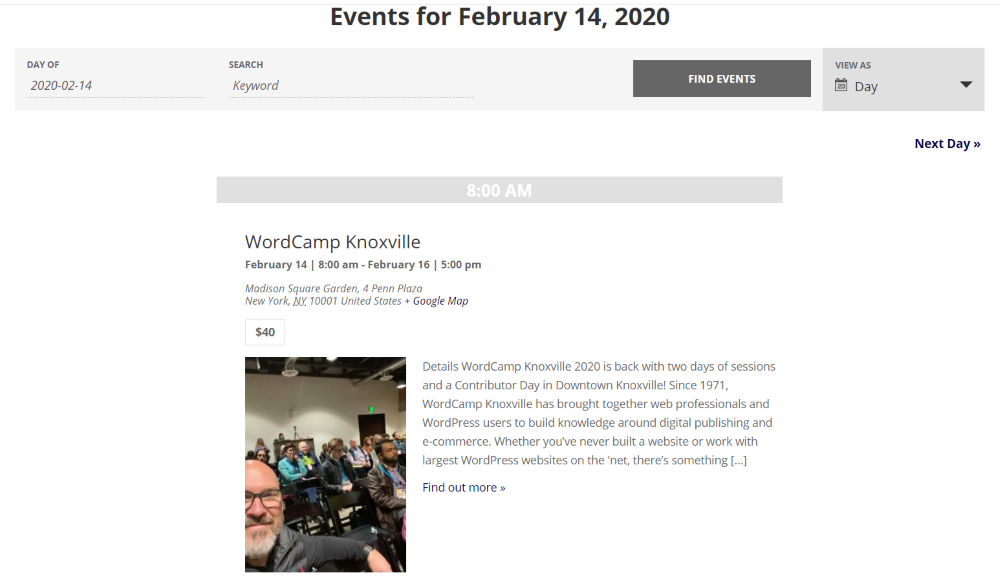
All of the events for that day are displayed. It adds navigation for the previous and next day.
Adding the Events Page to Your Menu

At the top right of the WordPress Menu page, select Screen Options and make sure Events and Event Categories are selected. This adds the Events post type to your list of menu options.
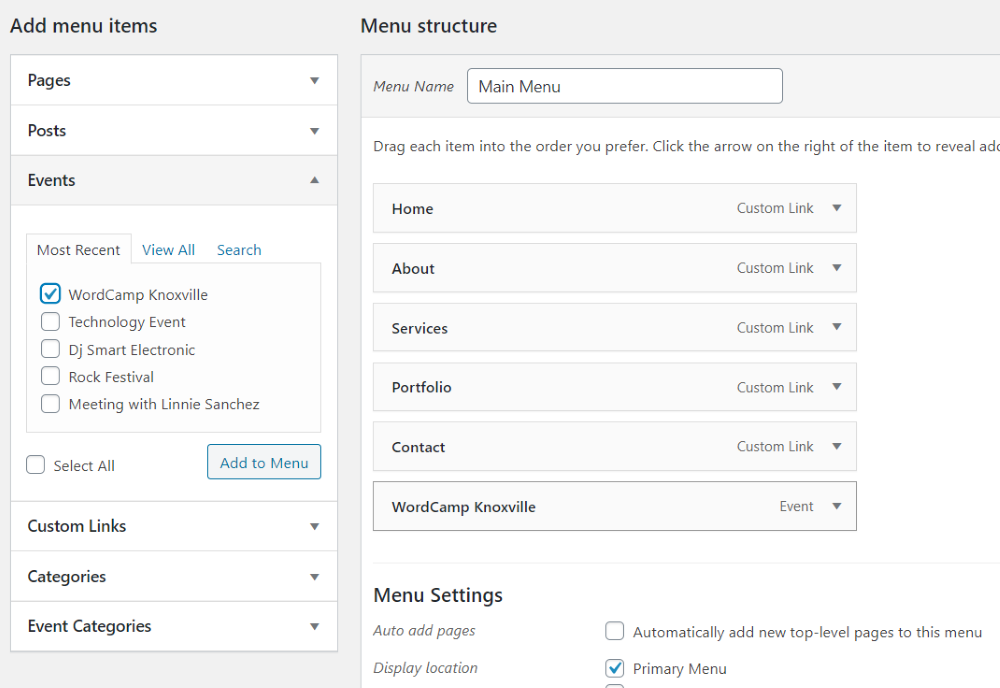
You can now add specific events and event categories to your menu. This example adds my WordCamp Knoxville Event to the menu.
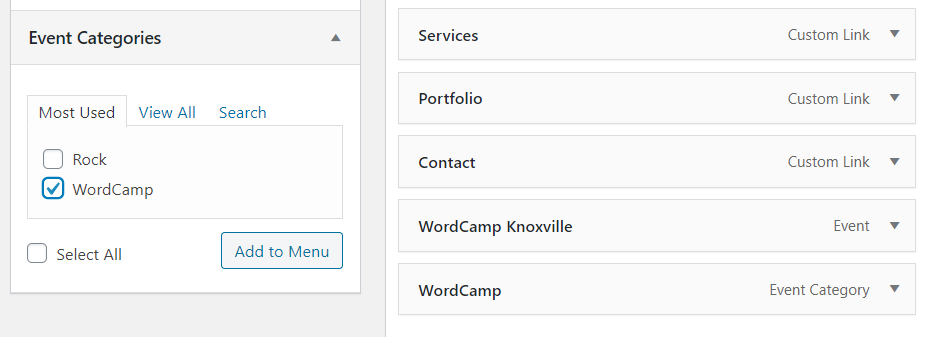
For this one, I’ve added WordCamp as a category.
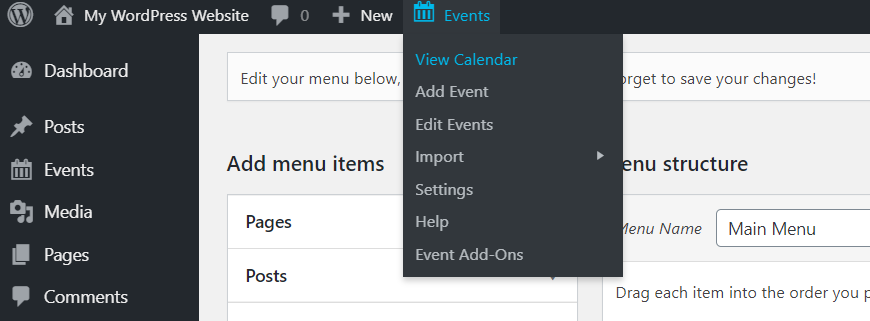
Another option is to add the Events category page to the menu. You can access the page’s web address by clicking View Calendar in the top menu. Go to that page and copy the URL.
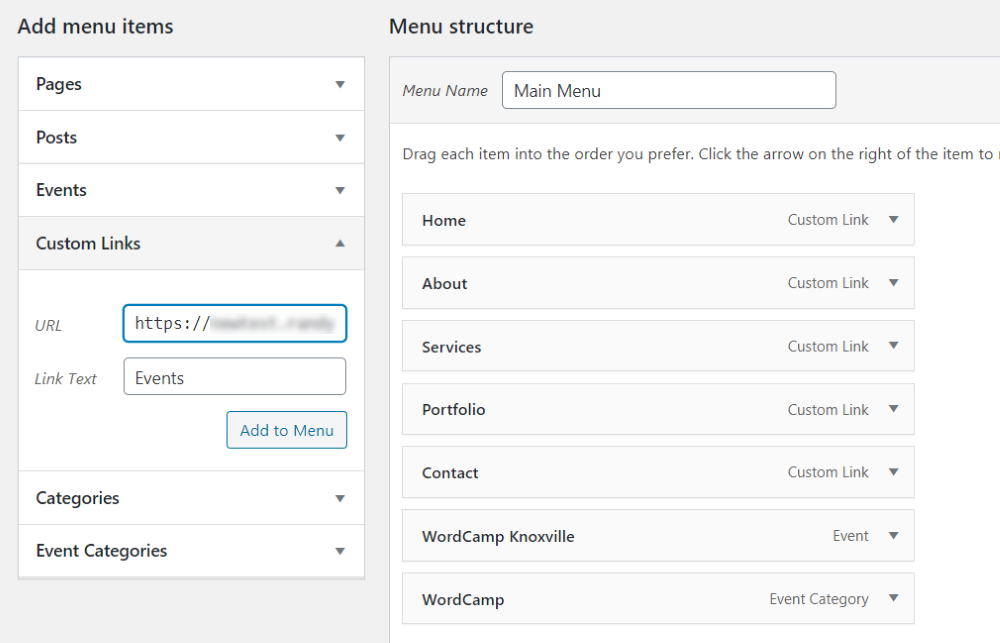
Paste the URL in the Custom Links, give it a name, and add it to the menu.
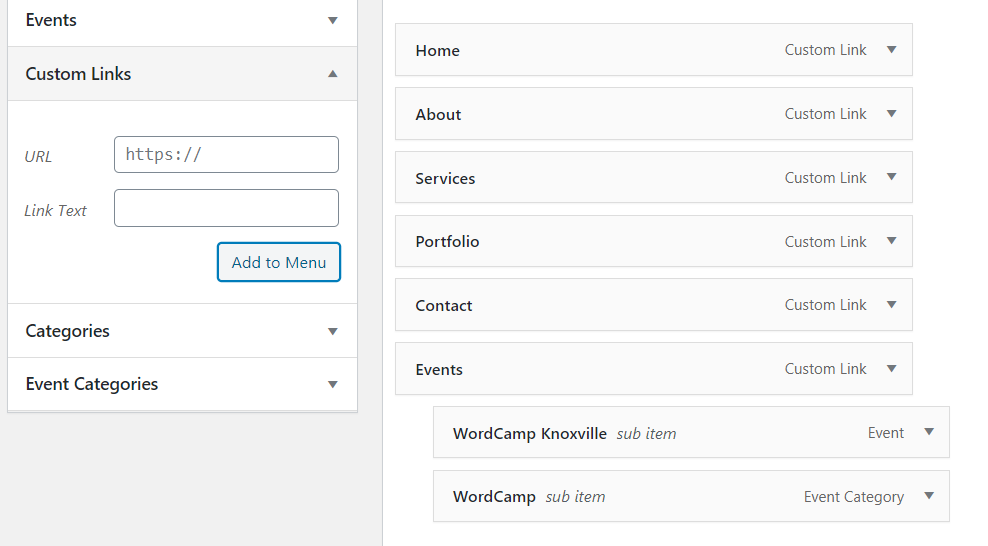
My menu now shows a custom link to the Events page and I’ve added my event and categories as sub-items.
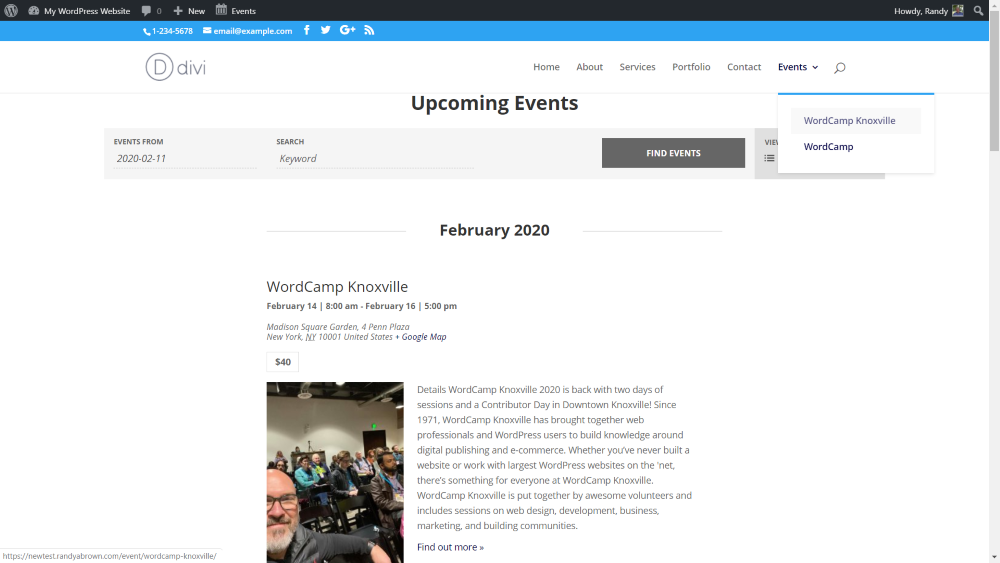
Here’s a look at the menu that links to the Events page.
Events Widget

The plugin includes a widget called Events List. You can place this widget within your sidebars or within your Divi layouts using the widget module. Give it a title, choose the number of events to show, show the widget only if there are upcoming events, limit it to featured events, and generate JSON-LD data.
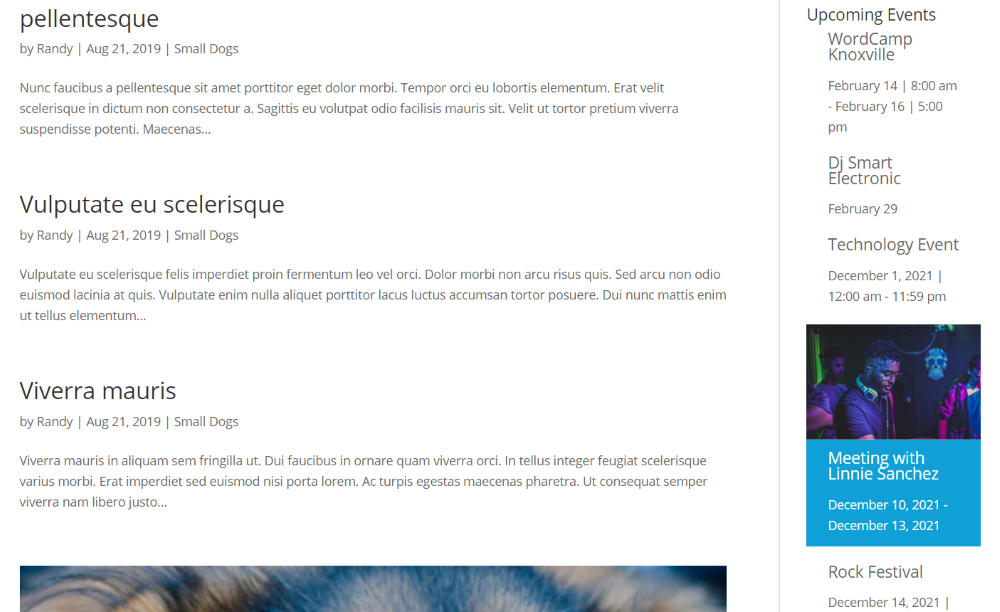
Here’s a look at the widget within the sidebar.
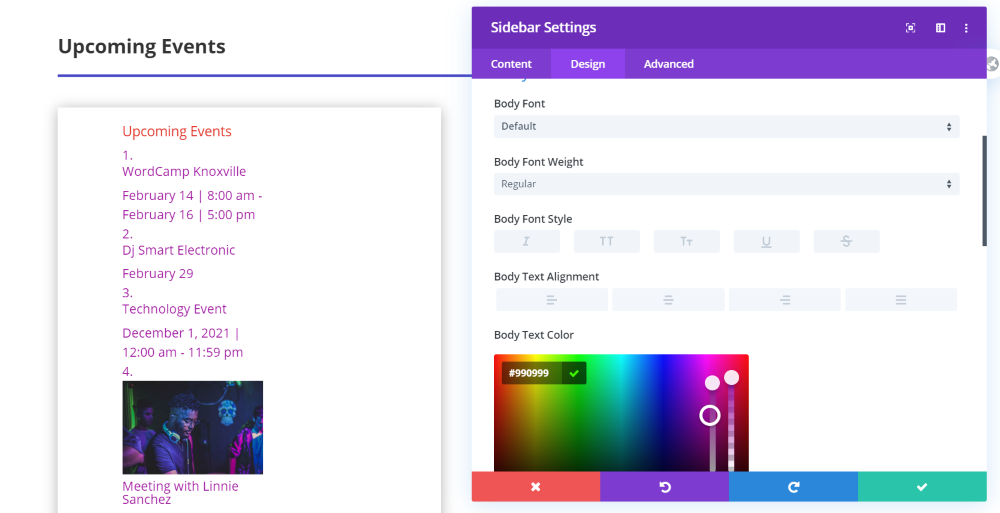
Here’s a look at the sidebar module in Divi showing the Events widget. Since this is a Divi module you can style it like any module.
Divi Theme Builder
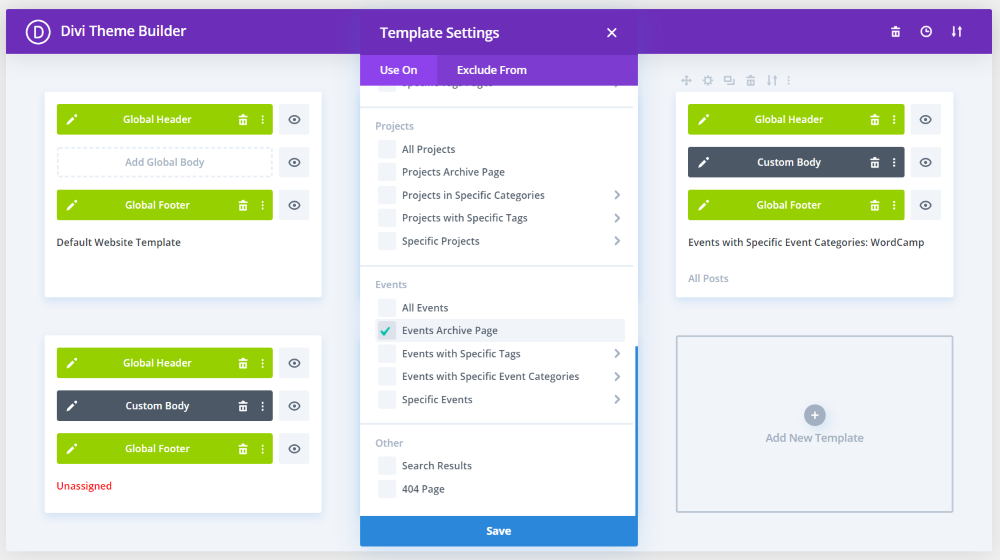
Since the plugin adds an events category, Events is an option to assign layouts in the Divi Theme Builder. Also, since blog modules can show content for the current page, the Theme Builder is a great way to design layouts for all of your Events pages.
The free version of the plugin is limited, though, so you won’t have full control over the design. The pro version adds shortcodes, so you can include the specific elements you want. In this example, I’ve added layouts to the events category page and the events pages.
Events Category Page

Here’s the Events page. The free version doesn’t include the filter, but it does have an elegant layout. The pro version’s shortcode would include the filter.
Individual Event Page
Here’s a look at the individual event page layout. The free version doesn’t include the post meta, so you’ll need to add that to the content details. The pro version’s shortcodes would include it.
Theme Customizer
The plugin adds several new features to the theme customizer. Features include general theme, global elements, month view, list-style views, single event, and widgets. In this example, I’ve (badly) styled the calendar using color elements in the header. This adds a lot of styling options to blend the events calendar with your own website’s styling.
Child Themes That Include the Events Calendar Plugin
There are several Divi child themes available in the Aspen Grove Studios shop that includes the Events Calendar plugin. Here’s a look at their event’s pages with links so you can see the plugin in action.
Divi Nonprofit

Here’s a look at the Divi Nonprofit child them event’s list. It shows the upcoming events with a light background with red highlights.
Divi Photography

Here’s the Divi Photography child theme’s events page. This page has a dark background with gold highlights.
Ending Thoughts
That’s our look at how to create an events calendar on a WordPress website. The Events Calendar plugin is an excellent choice for adding an events calendar to your website. It makes the task easy and the plugin itself is easy to use. Even the free version provides a lot of features. For even more features such as views, advanced widgets, recurring events, and lots more, we recommend the pro version.
We want to hear from you. Have you created an events calendar for your WordPress website? Let us know about your experience in the comments.

Thank you for a great post! Very detailed and helpful. Only with the free version, the plugin already provides a lot of essential functions.
Thanks for the post. Events looks necessary in my web.
Hi Randy,
Thanks for this great post!
I’d like to point out one thing: using UTC offset for the event time zone might result in the time being off around the DST date change. That is especially true if you are creating recurring events (which requires Events Calendar Pro).
So the recommendation is to use location-based time zones (e.g. Los Angeles) for your website (Settings > General) as well as your events.
Here is a good article from The Events Calendar Knowledgebase that explains this in more detail.
https://theeventscalendar.com/knowledgebase/k/how-daylight-saving-time-affects-events/
Cheers,
Andras