An excellent way to increase the size of your audience and reach is to provide your content in multiple languages. Fortunately, making your website multi-lingual isn’t that difficult and it doesn’t have to be expensive. In this article, we’ll look at how to create a multi-language WordPress website with a free plugin called Polylang.
What is a multi-language website?
Simply put, a multi-language WordPress website provides content in multiple languages. They include buttons somewhere on the website (usually within the navigation menu) with the name of a language or a flag. This button allows you to easily choose the language you want to read the content in. Once you select a language you’ll see the content, menus, and website meta change to the language you’ve selected.
Why not just let the visitor use Google Translate?
The standard text of a website can be translated by the user by right-clicking somewhere on the webpage and selecting to translate. Browsers can also detect when a website is in another language and ask if you want it to translate the website when the page loads.
The problem with this method is you have no control over the translation and Google Translate, while it can be a good translation tool, is not always accurate. This can lead to your message getting lost in translation.
A better method is to translate your content manually and allow the reader to choose their preferred translation.
Polylang

There are several popular plugins for creating a multilingual website. Polylang is the most popular free multilingual plugin in the WordPress repository. Translate pages, posts, custom post types, categories, tags, menus, media, custom taxonomies, sticky posts, RSS feeds, and widgets. It supports RTL and you can use as many languages as you want.
Create your content as normal and then add the language. It automatically creates a copy of the meta and ties the content together. It includes a customizable language switcher that can be used in the navigation menu and as a widget in the sidebar. Users can choose the language they want to see.
The Pro version adds even more features and there are lots of addons available. The translation can be handled by a professional or automatic translation service with an addon called Lingotek Translation. Lingotek is a complete translation management system that provides services for human and machine translation.
Let’s take a look at the free version.
Languages
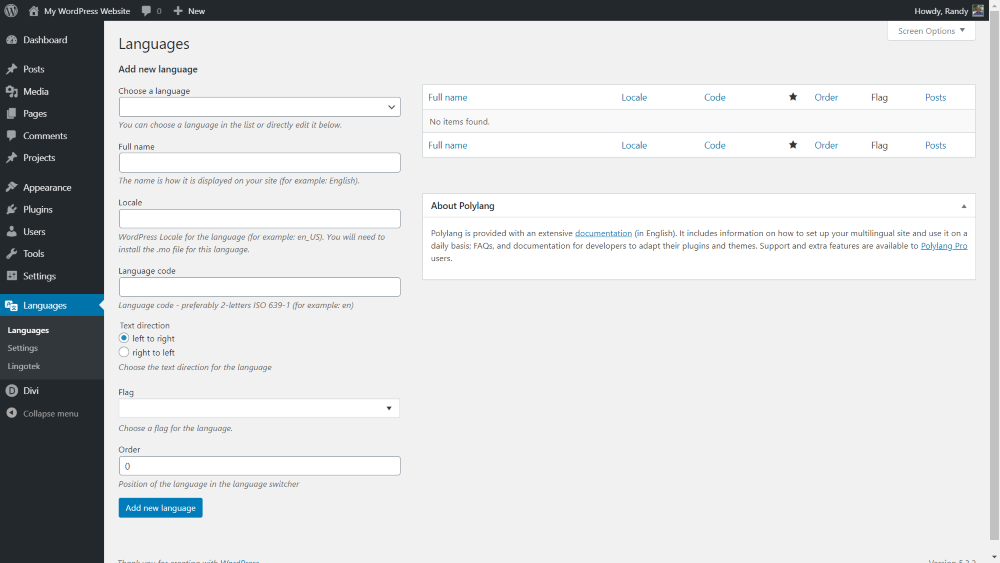
Once you’ve installed and activated the plugin a new dashboard menu will appear called Languages. Go to Languages > Languages to add a new language to translate your content into. This is where you’ll specify the default language and all the languages your visitors can select from the translation switcher.
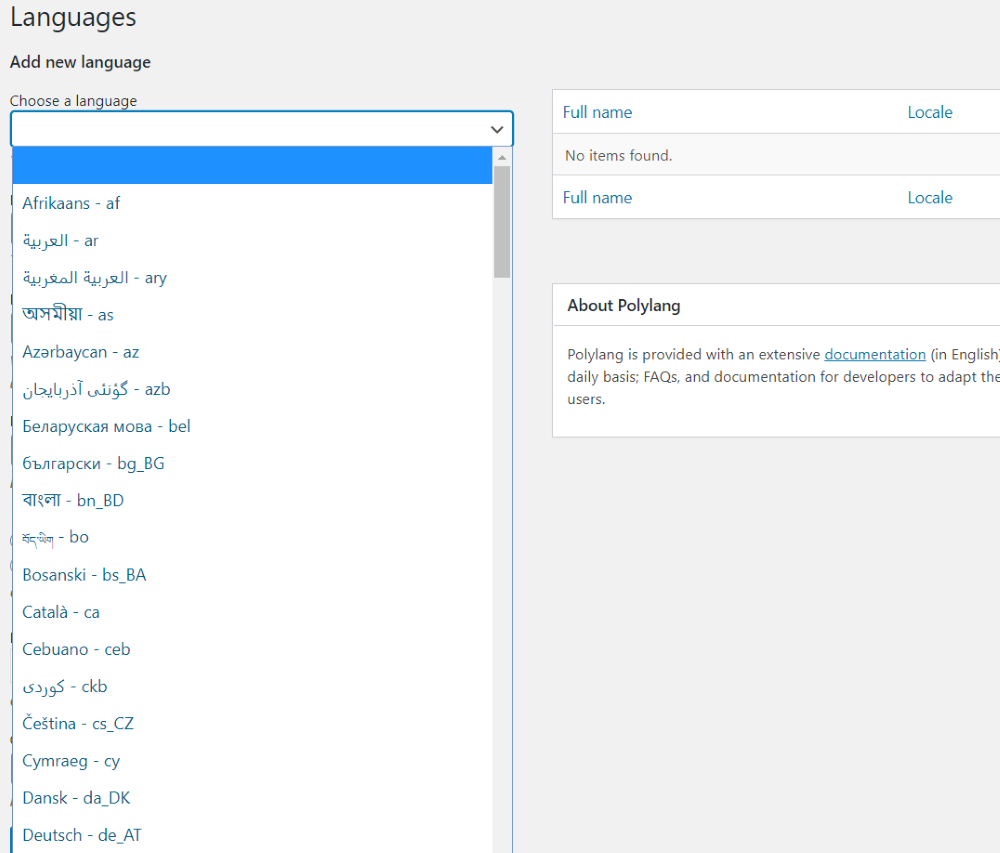
To add a new language, choose the language from the dropdown box. The first one will be your default language.
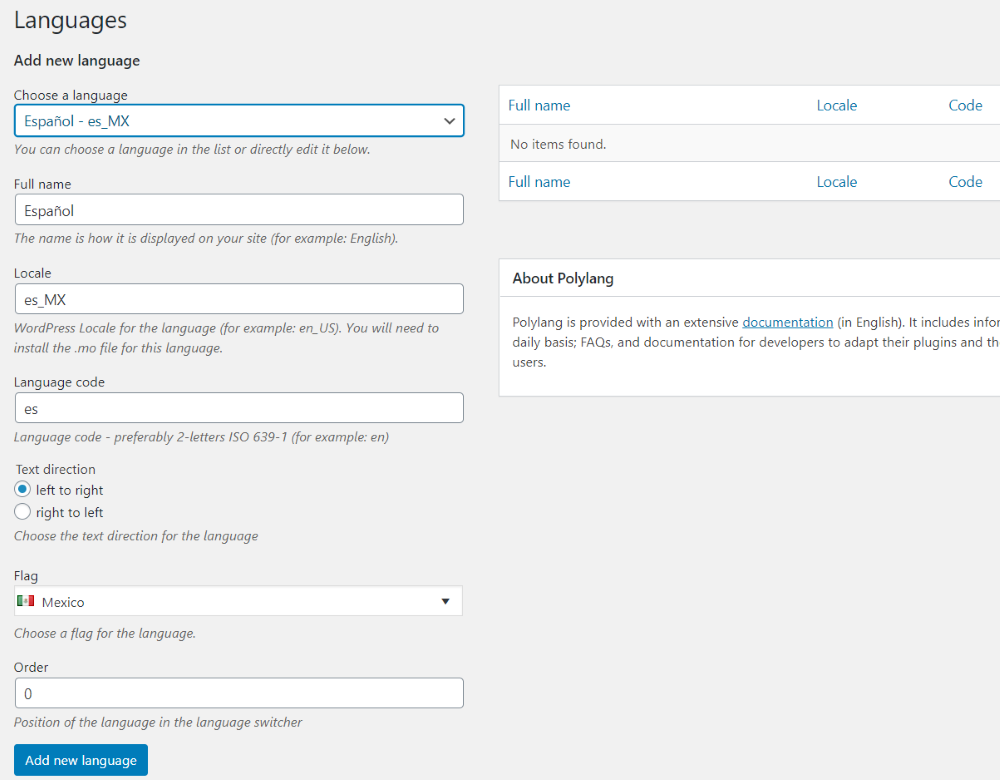
It will automatically fill in the rest of the fields for you. Click Add new language.
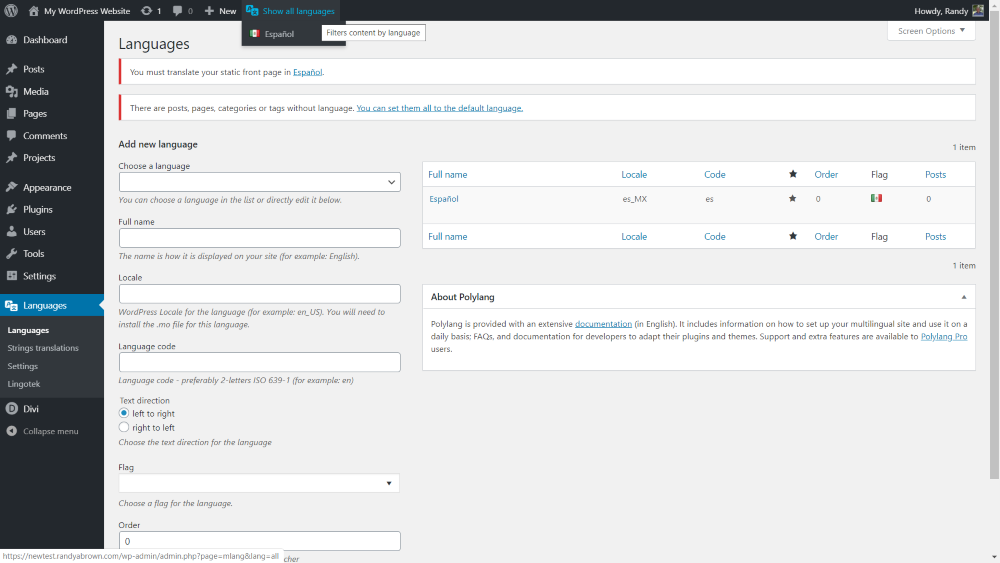
This will add the language to the list and provide you with a few notifications with links to create the translation for your new language. It will also add the language to the menu bar and a new option to the dashboard menu called String translations.

Change the order of how your translations appear in the switcher in the Order field at the bottom of the page.
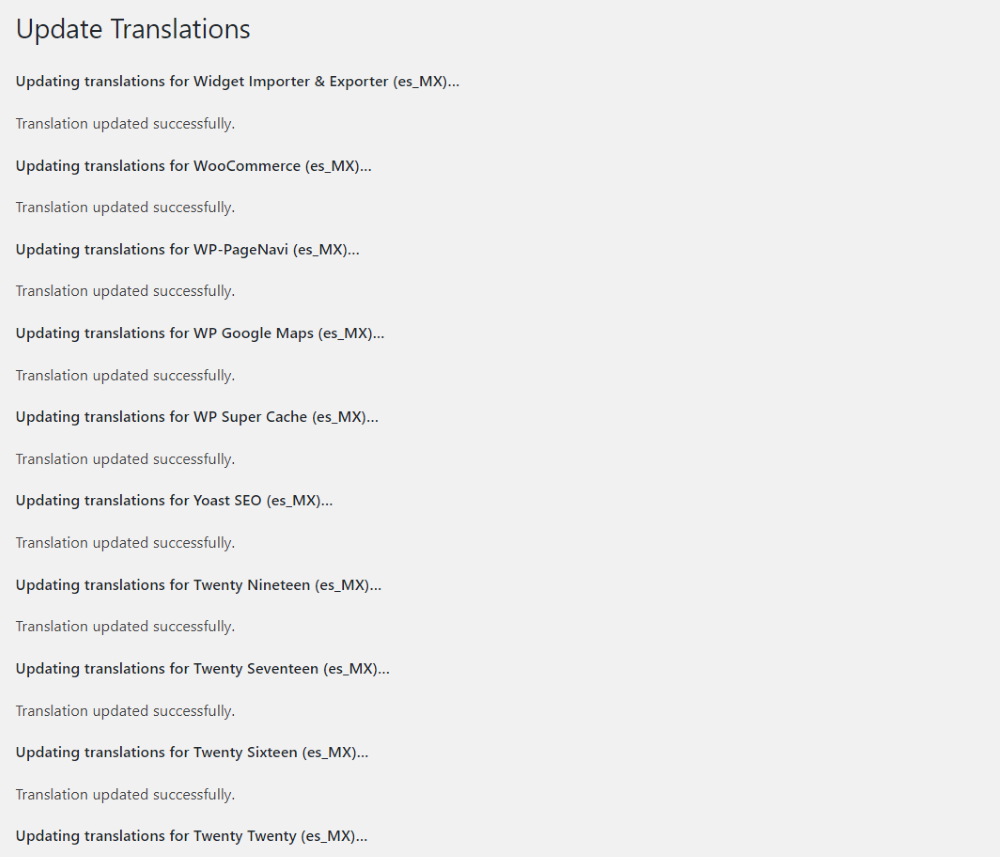
It will show that you have a translation update. Clicking to update translates all of the standard WordPress elements.
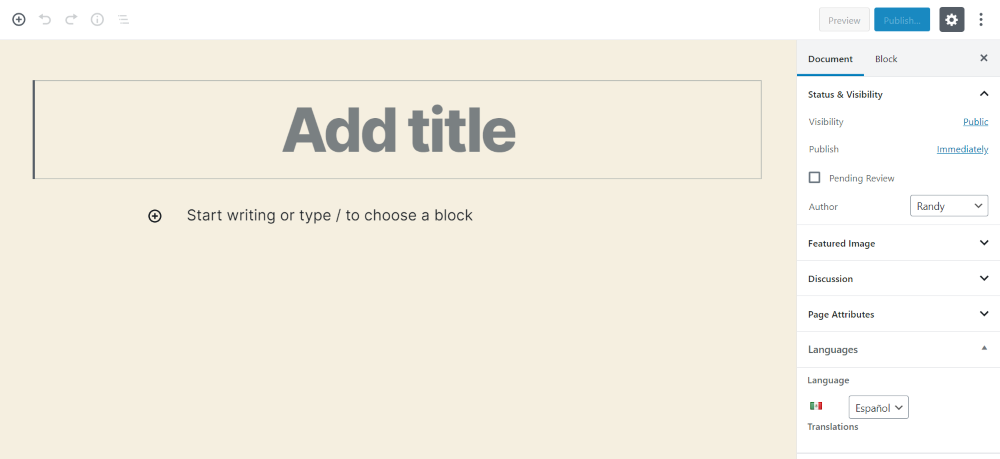
Clicking the notification that you must translate the static home page in your new translation opens the page editor with your translation selected under Languages in the document menu.
String Translations
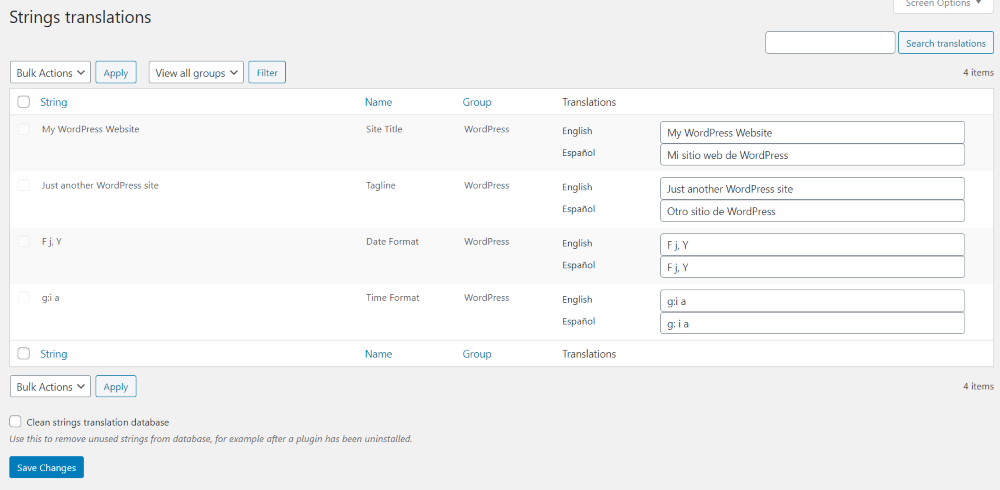
Once you’ve added your translations, go to Languages > String Translations in the dashboard menu to translate your site title, tagline, date format, and theme format. I’ve added English and Español. The text in all of the fields will be in your default language. Select the fields and manually add your translation. For my example, I used the translation from Google Translate (so it might not be perfect). Save your changes.
Settings

The Settings menu lets you make adjustments and activate or deactivate certain features.
URL modifications
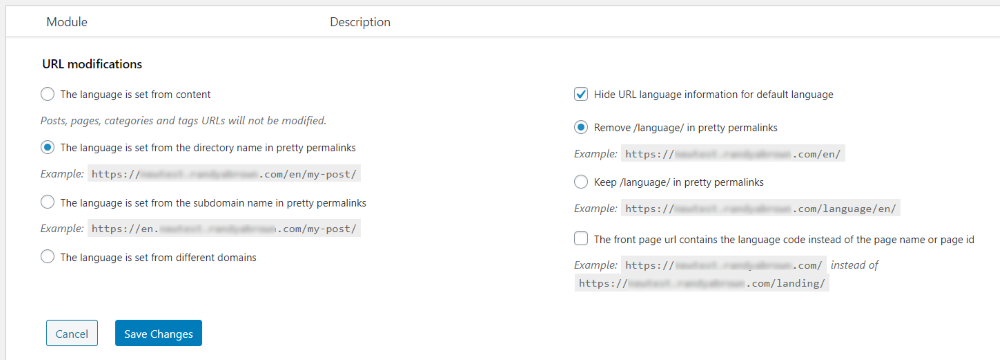
Choose from the list how you want the URLs to look and where it gets its translation. It can set the language from the content and get the language from the directory name or the subdomain in pretty permalinks. You can choose to hide the URL language information for the default language and remove or keep the language in pretty permalinks. You can also set the front page URL to contain the language code rather than a name or id.
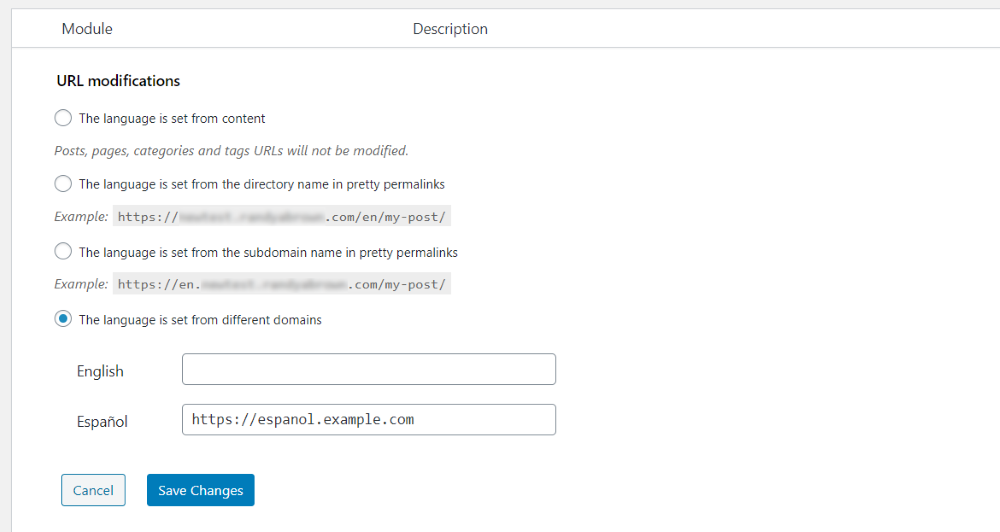
If you choose for the language to be set from a different domain, it will open a field where you can enter the domain for each language.
Synchronization

Synchronization allows you to maintain the values of meta between the translations of a page or post.
Tools

Tools allows you to remove the Polylang data when you delete the plugin.
Translating your WordPress website
You can translate posts, pages, menus, etc. Here’s a look at how to translate each of the WordPress elements into other languages. We’ll look at posts, categories, and menus. The other taxonomies work the same way.
Translating Posts and Pages
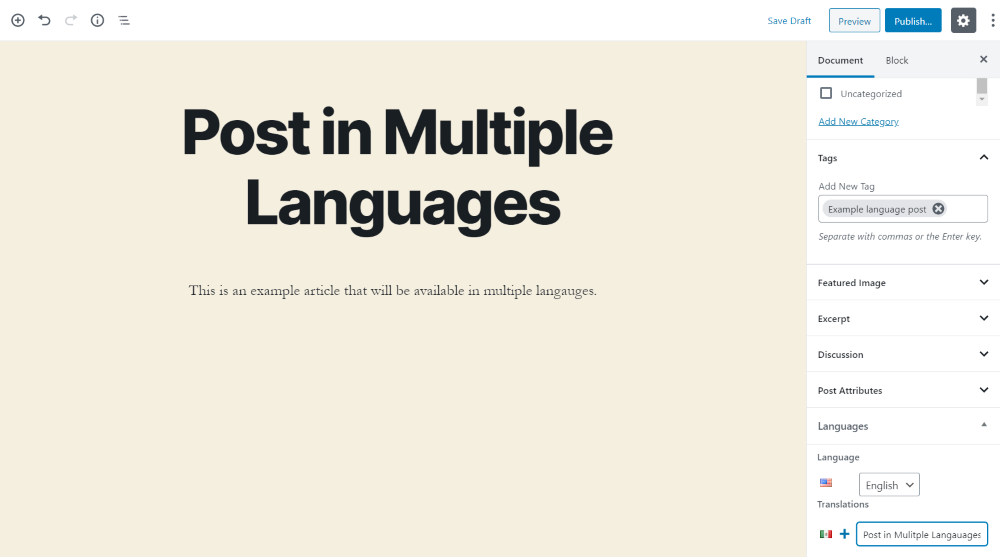
At the bottom of the Documents menu, you’ll find a section called Languages. Your default language is automatically selected and the other languages will appear in the fields below it. This allows you to select the language as the default and choose each of the languages you want to translate into. Once you’re ready to translate your post, click the + button after the flag.
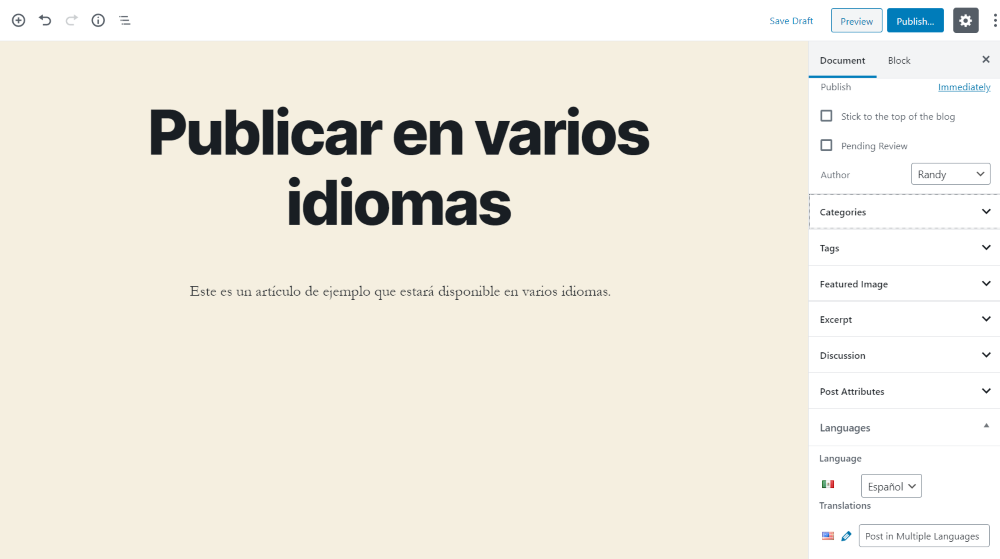
It will open an editor where you can add the content for the language that’s selected. Do this process for each language.
Translating Categories

To translate categories, go to Post > Categories and select to create a new category. The category list now shows the flags of each language and it shows the language that each category is available in. If it’s in the language it will have a check under that flag. If it has a plus symbol you can click it to create the category in that language.
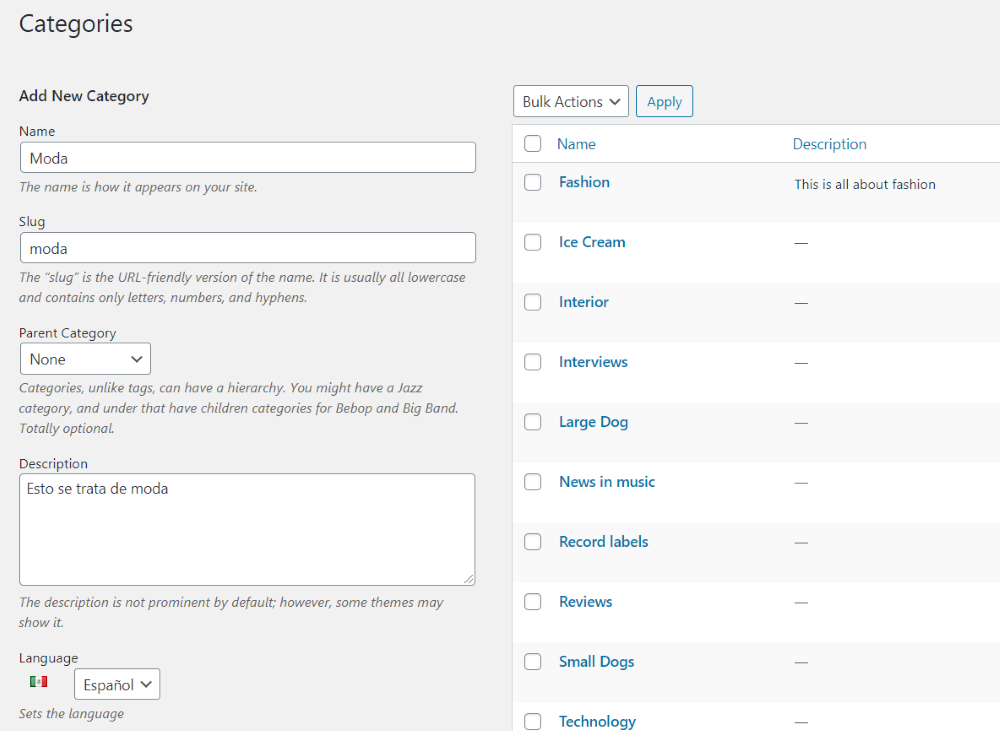
This opens a new category where you can create the category in the language you want.

The category will then appear in the list with a check under the flag and an edit option.

Clicking the edit option opens the editor and shows which category it’s tied to in the other languages.
Translating Widgets
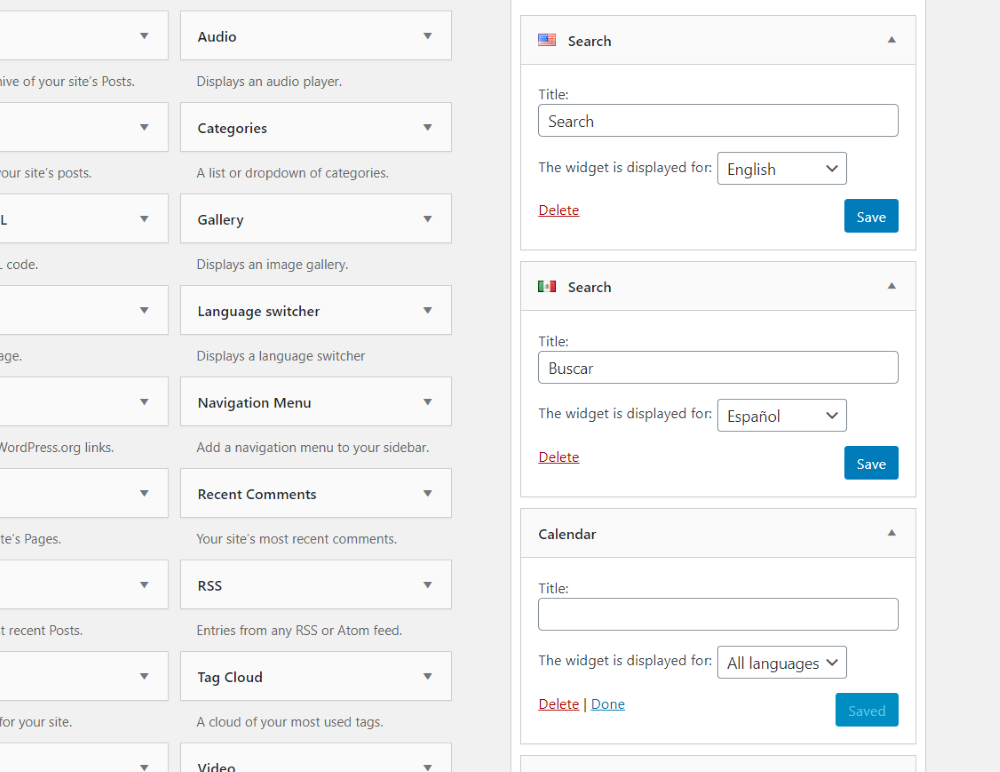
Each widget has a dropdown box that lets you choose which language it will display for. You can show the widget for all languages or just one language. This lets you create multiple versions of the widgets. In this example above, I’ve created two search widgets and I’m only displaying them for their specific languages. The calendar widget will show for all languages.
Creating Menus
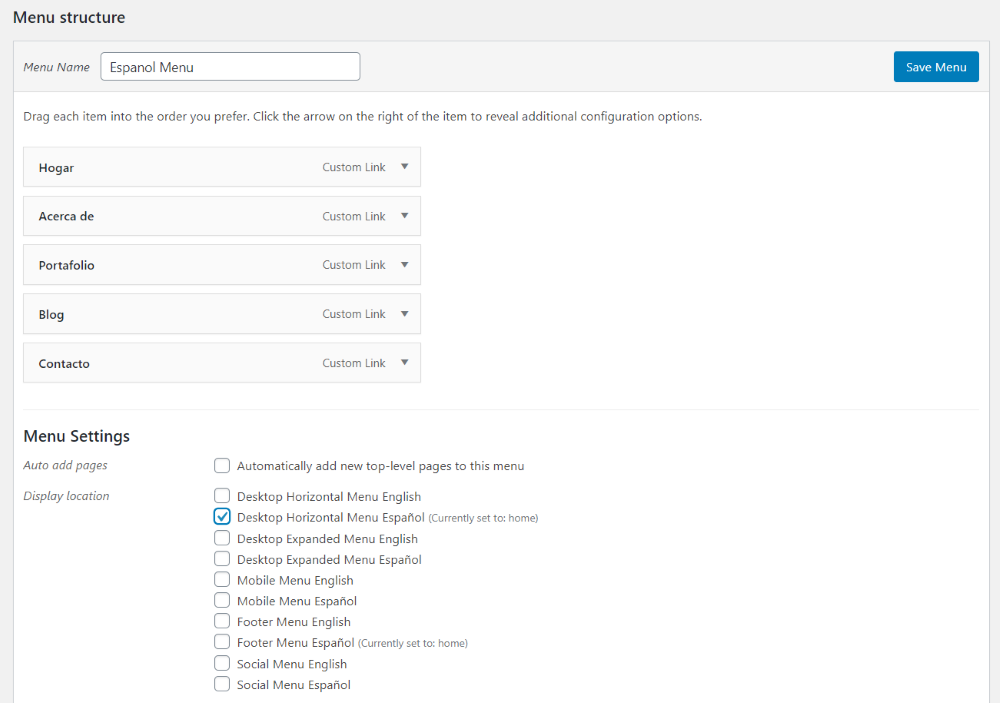
You’ll need to create a new menu for each language. Create a new menu and name it with the language’s name. Add your pages, categories, links, etc. Rename them according to their language. Assign the menu to the location and language and save it.
Add the Language Switcher to the menu

In the Menus screen select Screen Options and check the box labeled Language switcher. This is usually enabled by default.
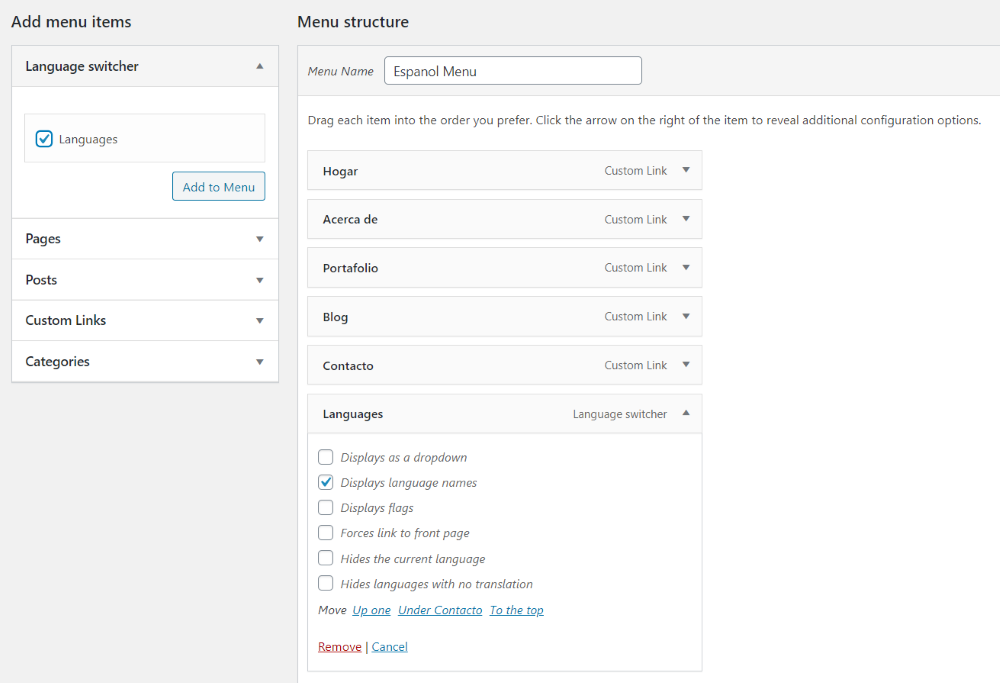
A new box is now available with an option called Languages. Add this to your menu and save it. The languages will only be available if there is at least one post with that language.
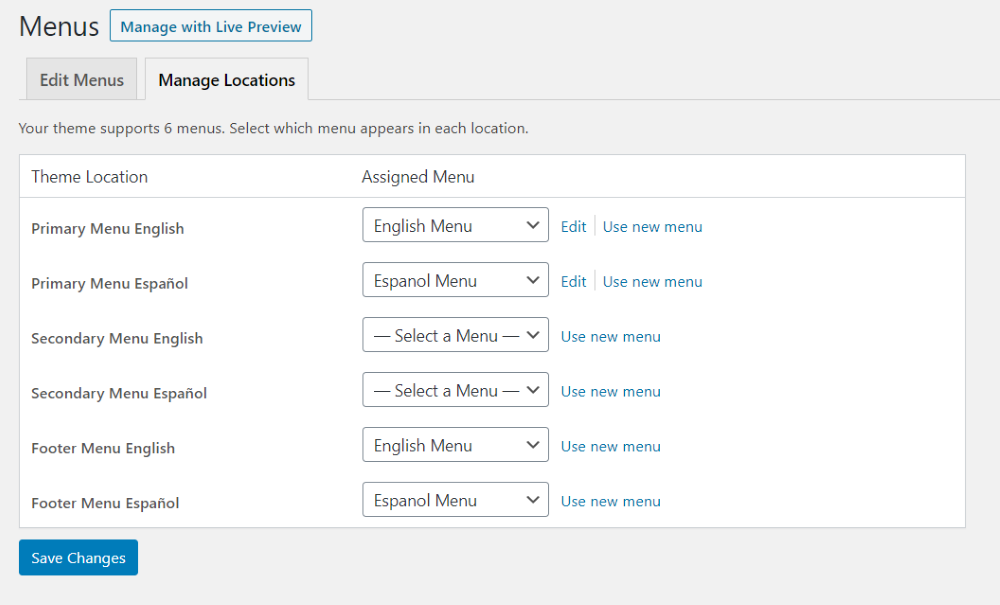
Once you create all of your menus you can manage them as normal. It adds each of your translations to the theme location list.
Language Switcher Widget
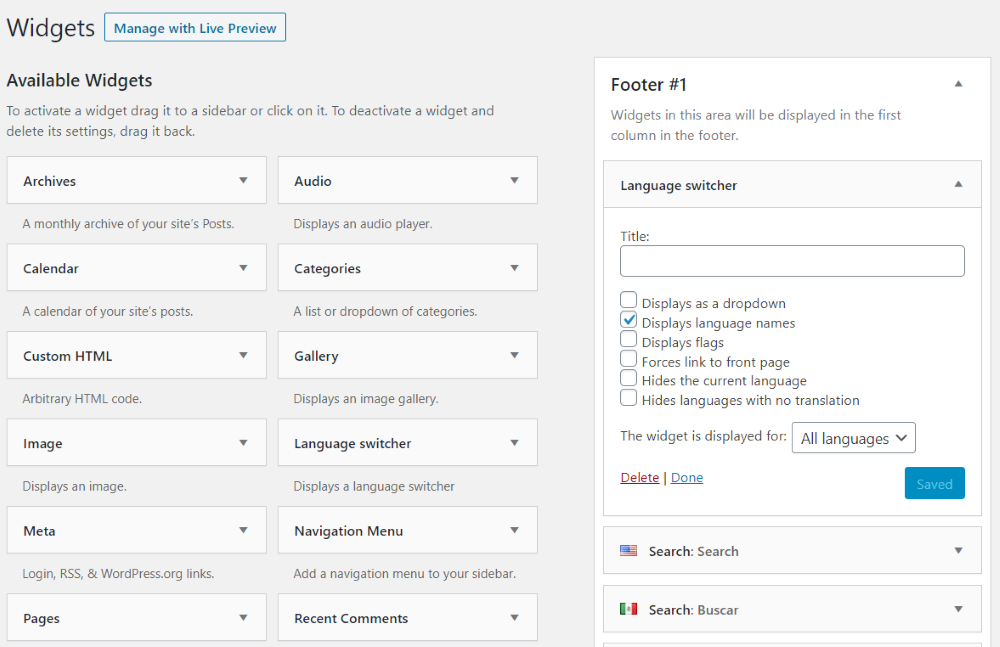
You can also display the language switcher in the sidebar using the included widget. Choose how they display, display their names, flags, force the link to the front page, hide the current language, and hide the languages with no translation.
Polylang Results
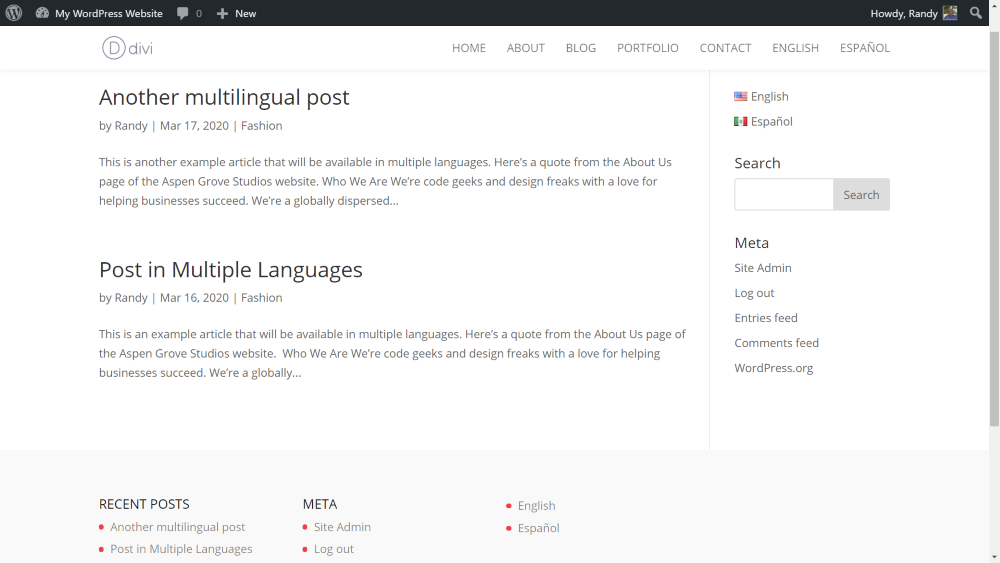
Here’s the list of blog posts in English. All of the content is in English and it adds an option in the menu and the sidebar to choose Español. I’ve also added the language switcher widget to the footer.
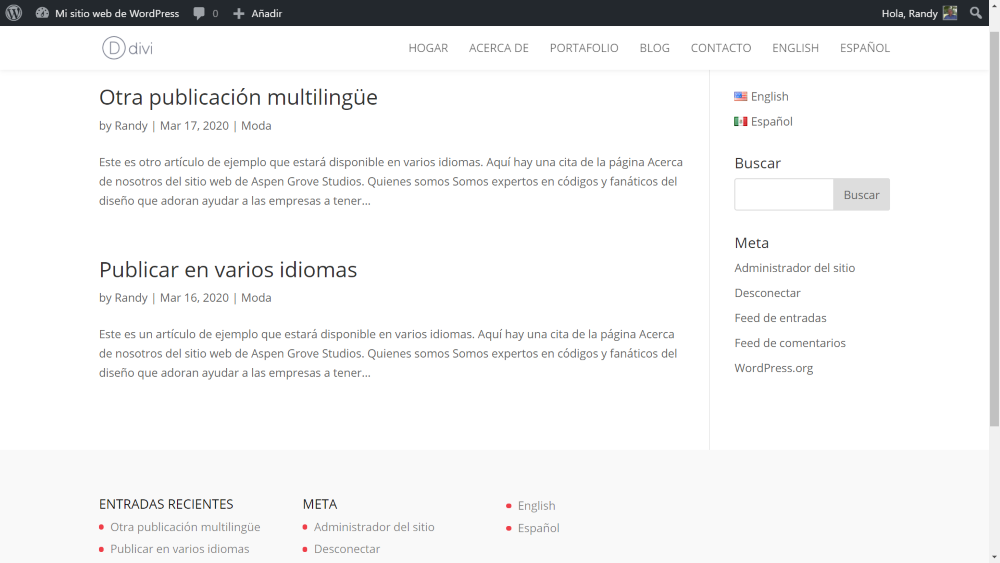
Here’s the same list of posts in Español. The posts, menu, admin top bar, search, and category are translated.
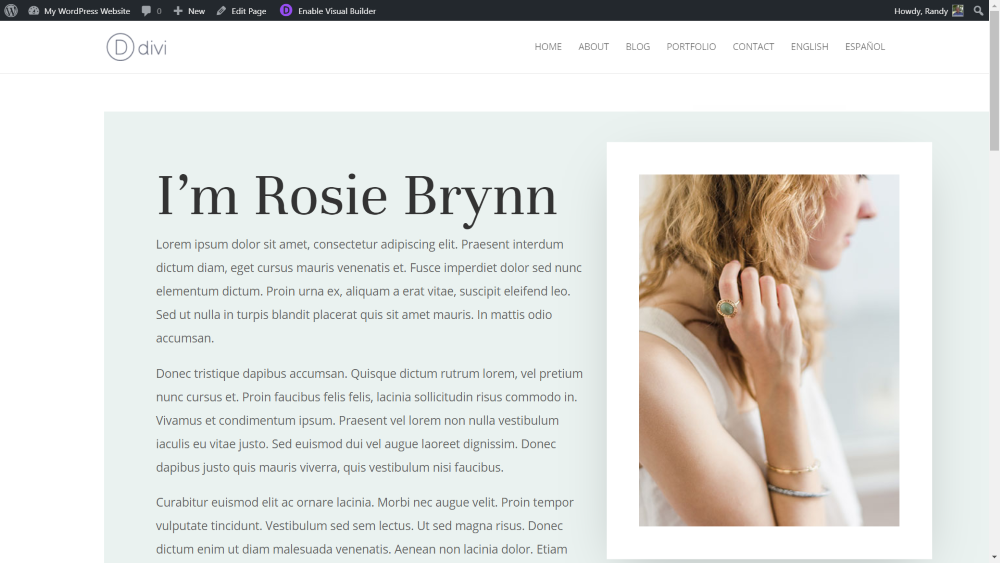
You can also create a different page or post based on the language. Here’s an About Us page in English from the Home Organizer a Divi Layout Pack.
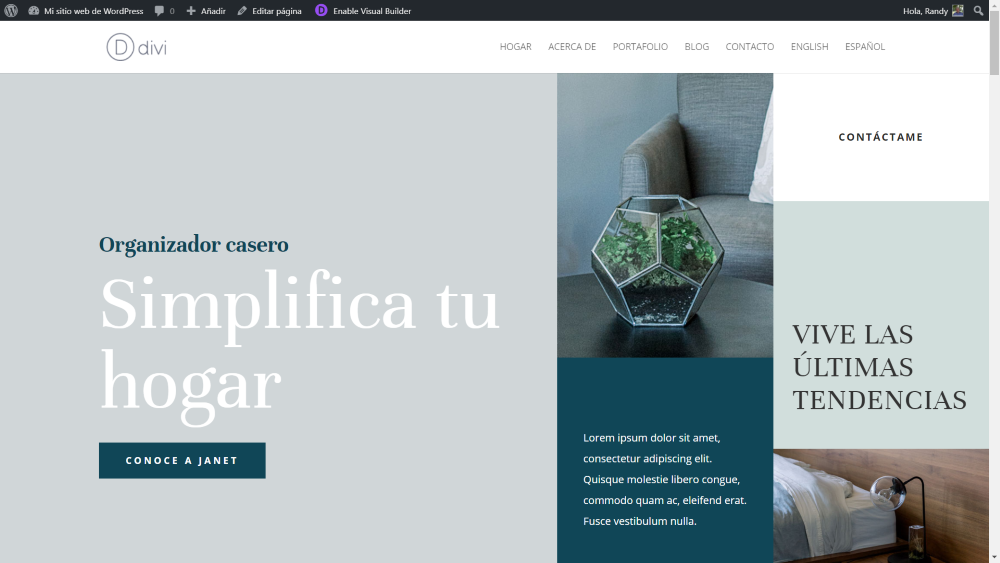
My Español version of the About Us page has a different layout. Of course, it could also have different colors, images, content, and services to match the location.
Ending Thoughts
That’s our look at how to create a multi-language WordPress website. Polylang makes it easy and cost-effective. It’s an excellent plugin to create posts in multiple languages and allow the user to choose their language of choice. The free version includes a lot of features and if you want to add more features you can purpose the specific add-ons you want. If you’re interested in creating a multi-lingual WordPress website, Polylang is worth a look.
We want to hear from you. Have you created a multi-language WordPress website? Let us know about your experience in the comments below.

Sounds interesting. I think I’m gonna try this on my site for my local readers. Thanks!
I followed the procedures and it worked, thanks a lot…
This is really helpful. I’ve been trying to research guides and recommended tools for translating my site, thanks for this!
Thanks for this post!
How can i translate the global header and footer that i created in the Divi Theme Builder?
What has been your experience using Polylang and Divi? Is it hard for the end-user to add in the second language?