We’re showing you ways in which you can use our plugin, Page Builder Everywhere, to create attention-grabbing Divi pages. In this tutorial, we’ll be showing you how to craft the user experience of your Divi site by adding unique calls to action at the bottom of various post types – such as blog posts, projects, product pages and more – of your Divi website.
Incredibly useful, this tutorial will show you how you can set a call to action to display anywhere that you have a custom post type on your Divi website. Going a step further, the tutorial will also show you how to set specific call to actions for certain post types, i.e. displaying a select call to action for product pages, a different call to action for projects, and a completely different call to action for blog posts.
Setting up and displaying different call to actions is a great way to create a richer and more meaningful experience of a website. With this, you’ll be able to craft more meaningful experiences of your website for your users, and really add texture to their user journey through your site. Displaying the same, stale and stagnant call to action across a website can cause site visitors to lose interest in parts of your website glaze over the areas that matter most, but with unique call to actions, set to display in undercapitalized places, you’ll be able to convey more brand messages to more consumers, more of the time.
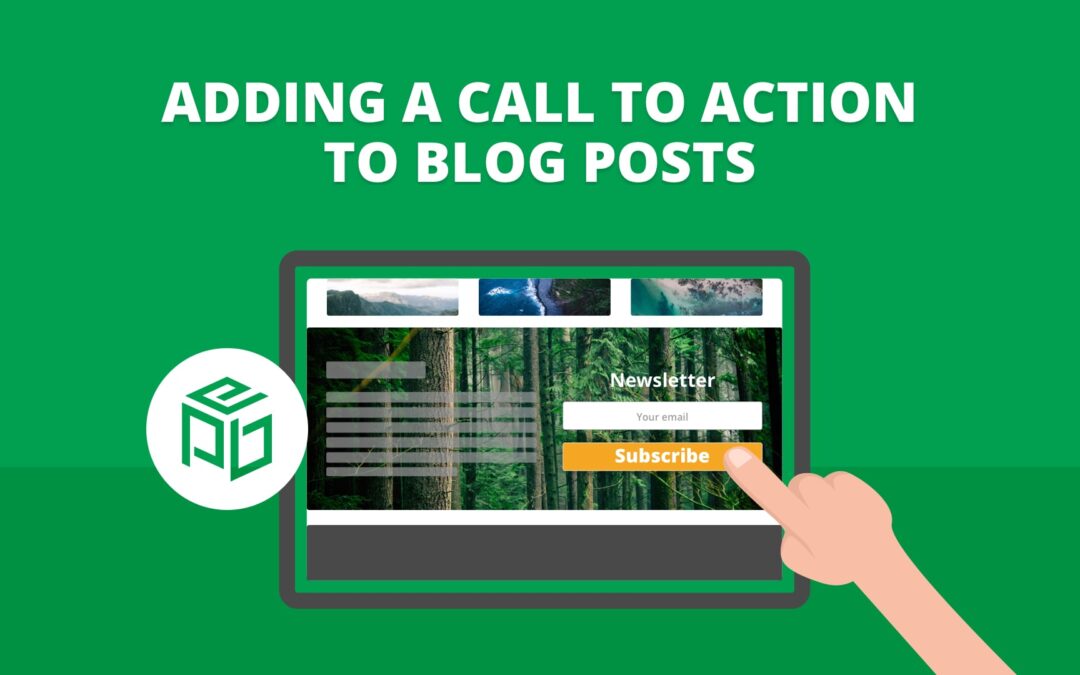
In this tutorial, we’ll be adding an attention-grabbing sign-up form to the bottom of each blog post. This will encourage more site visitors to engage with your content by signing up for the newsletter after they’ve read a blog article.
If you’d prefer to watch a video tutorial, check out Sarah in the video below as she walks you through the steps.
For this tutorial, you’ll need to have a WordPress installation set up and running, with the Divi theme already installed. For testing code and site changes, we recommend using a development or testing environment and not working on a live site.
If you’d also like to set up a testing environment for your website work, follow one of the following tutorials:
- How to Set Up a Local Development Environment Using DesktopServer (Aspen Grove Studios)
- How to Set Up a Local Development Environment Using Local by Flywheel (Divi Space)
- How To Create A Local WordPress Installation On A Mac Using MAMP (Elegant Themes)
How to Add a Call to Action to Blog Posts Using Page Builder Everywhere
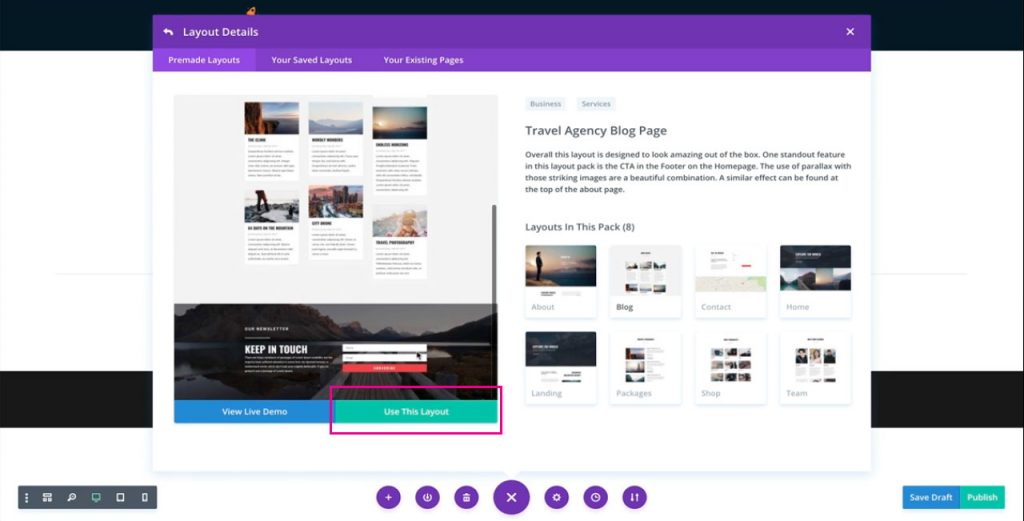
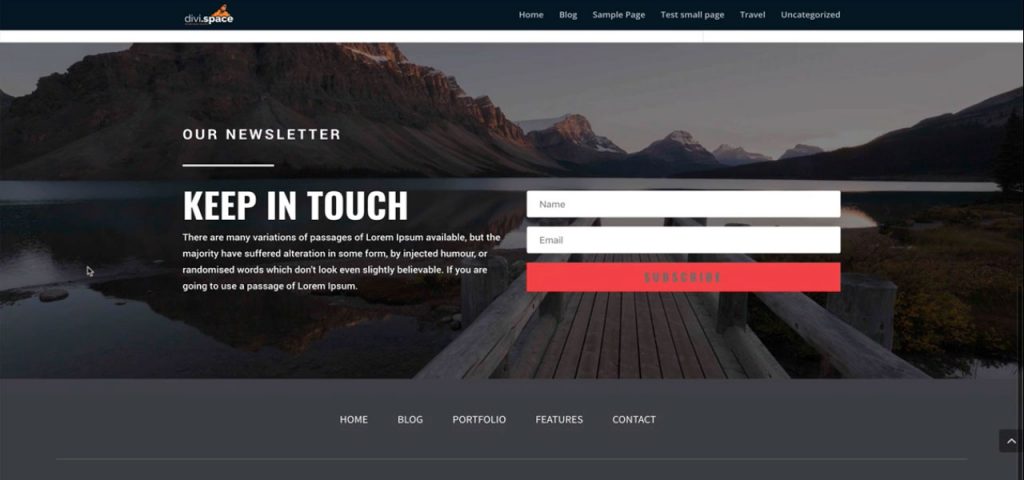
For this tutorial, we’ll be using one of the free Elegant Themes layouts, the Travel Agency layout. More specifically, we’ll be using the following newsletter sign-up form found on the blog page.

For our design, we’ll be isolating the newsletter sign-up section and using it for our designs. The Elegant Themes elements, sections and modules can easily be edited to suit your brand and business needs. Let’s begin!
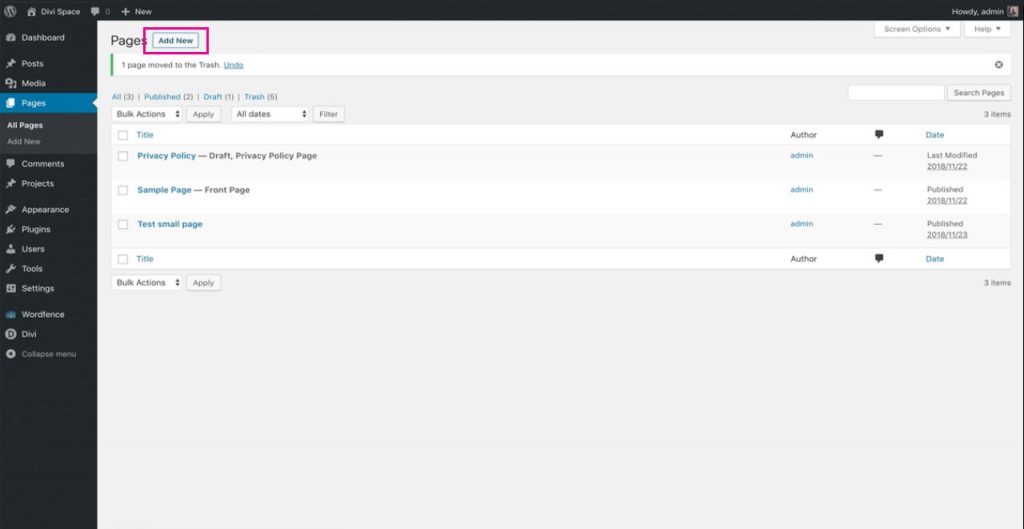
First, start by creating a new page to isolate on the signup form in the layout. In our demo example, we’re creating a page called Blog for a news feed, however, if you don’t actually need the page for your website, feel free to name it something arbitrary and delete the page once the element from the layout pack has been tended to.
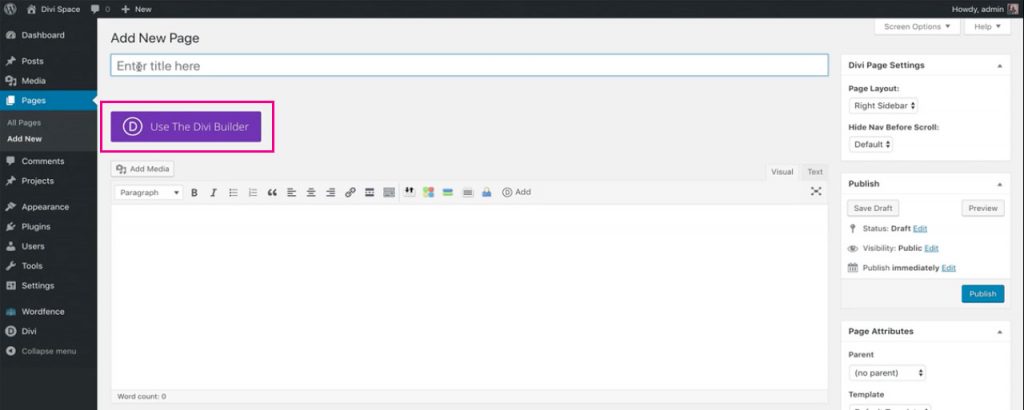
Then, select theDivi Builder. At this point, you can choose whether you’d like to work using the back or front end builder. In our example, we’re working with the front end visual builder.
Once the front end visual builder loads, select the Choose a Premade Layout option.
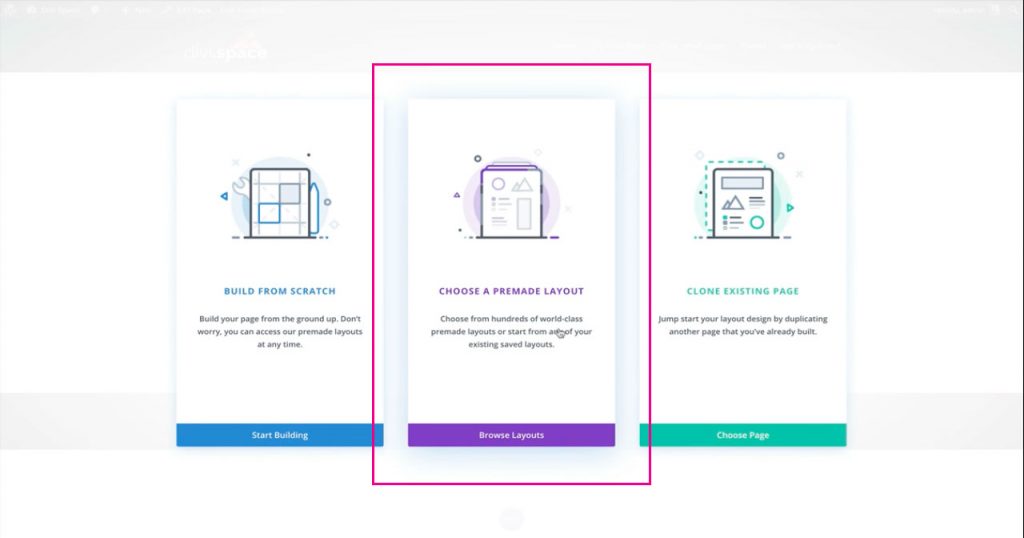
This pulls up every free layout pack ever made by Elegant Themes. From within this console, you can search through a full collection of unique layouts each designed for different niches. In our example, we’ve used the blog page from the Travel Agency layout. Once you’ve found a page layout you like, click Use This Layout and wait for it to load on the page.
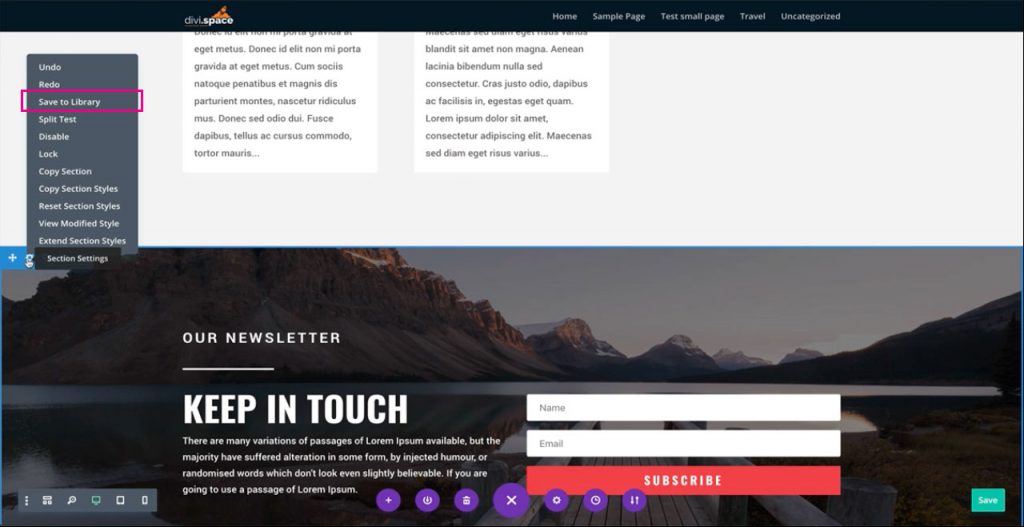
Now we’re going to isolate the newsletter sign-up section. To do so, click on the settings of the full section and click Save to Library.
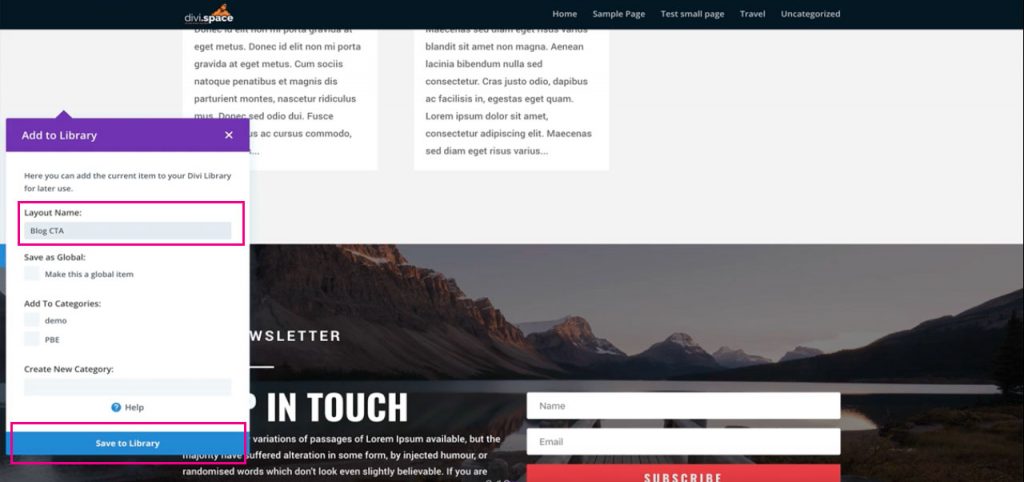
At this point, assign a name to the layout, do not make the layout a global item and assign the layout to a category if you prefer. Then, click Save to Library.
Now that the selected section is saved to the Divi Library, exit the visual builder and navigate to Appearance > Widgets on the WordPress dashboard.
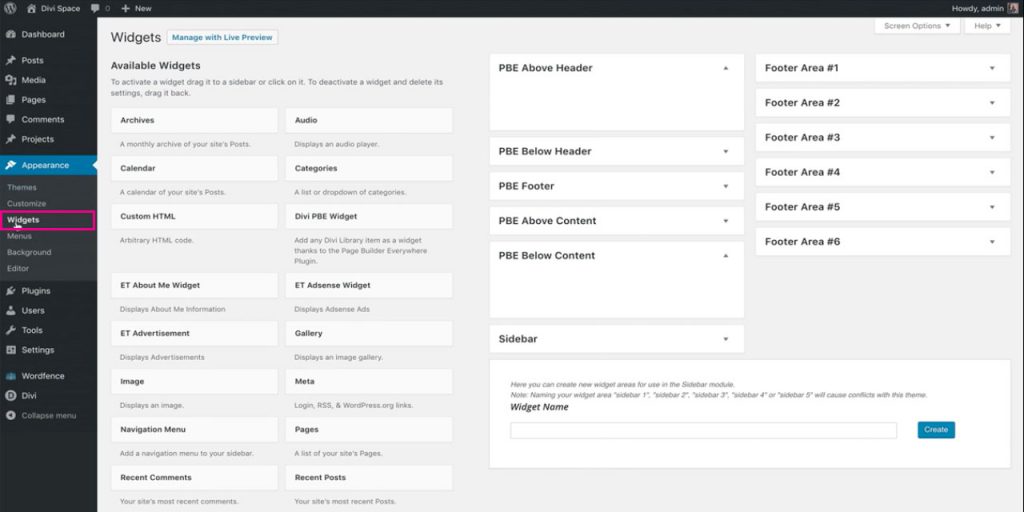
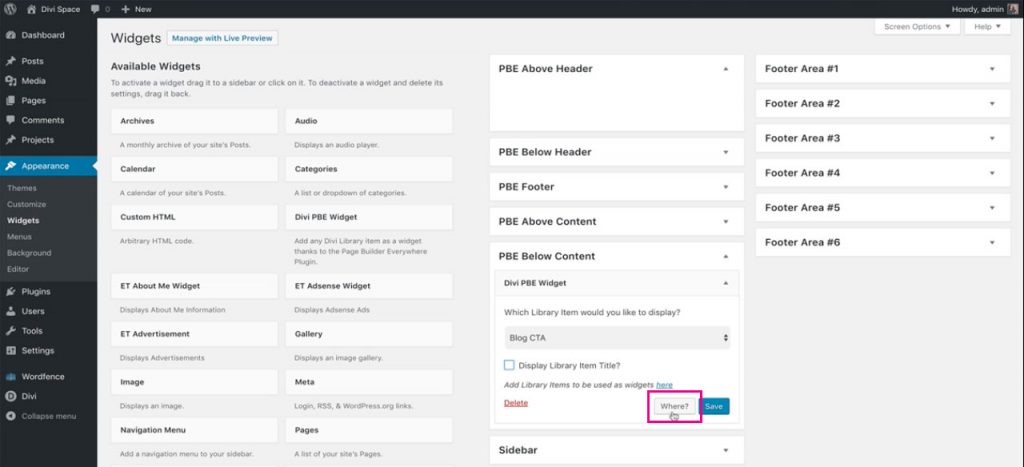
From the Widgets console, locate the Divi PBE Widget option in the left-hand column.
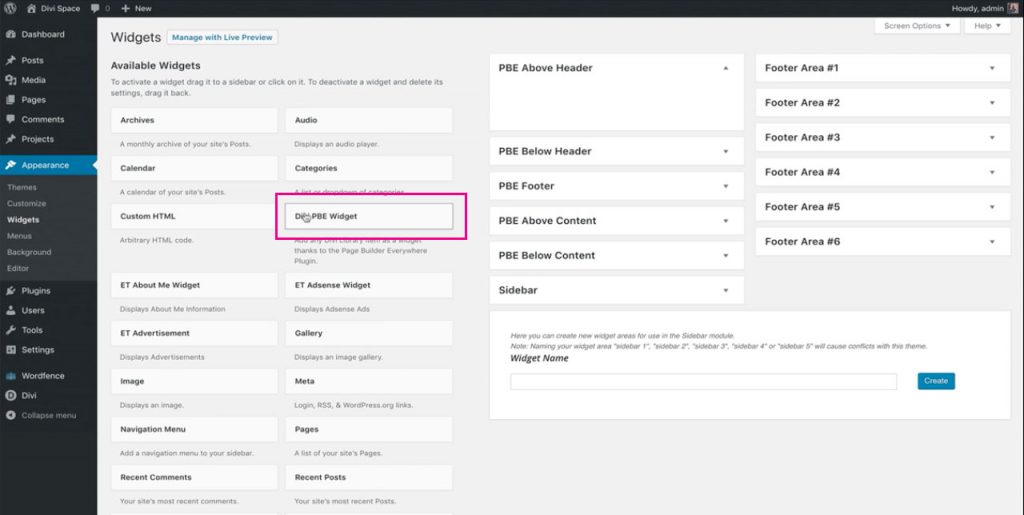
Click, hold and drag the Divi PBE Widget to the relevant section in the right-hand column. For this tutorial, place the widget into the PBE Below Content area.
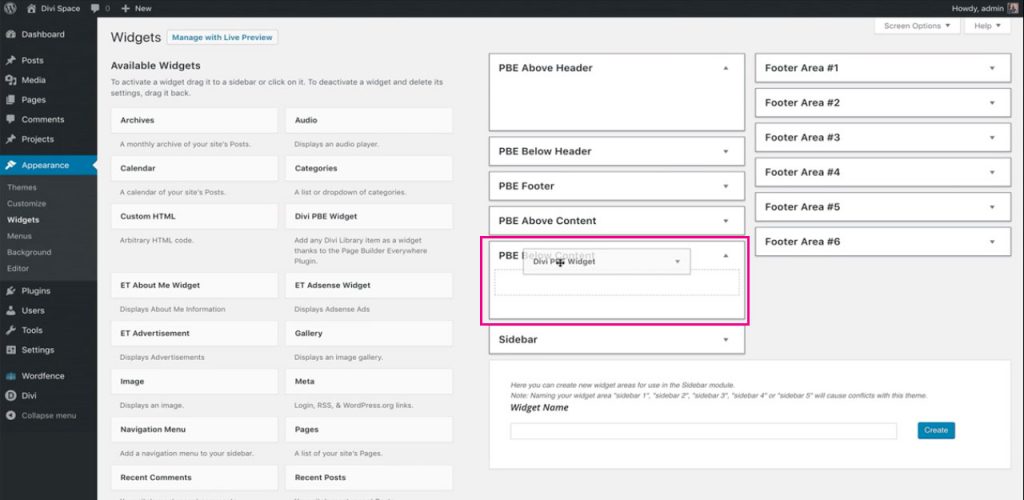
Once the Divi PBE Widget has been placed you’ll need to configure it.
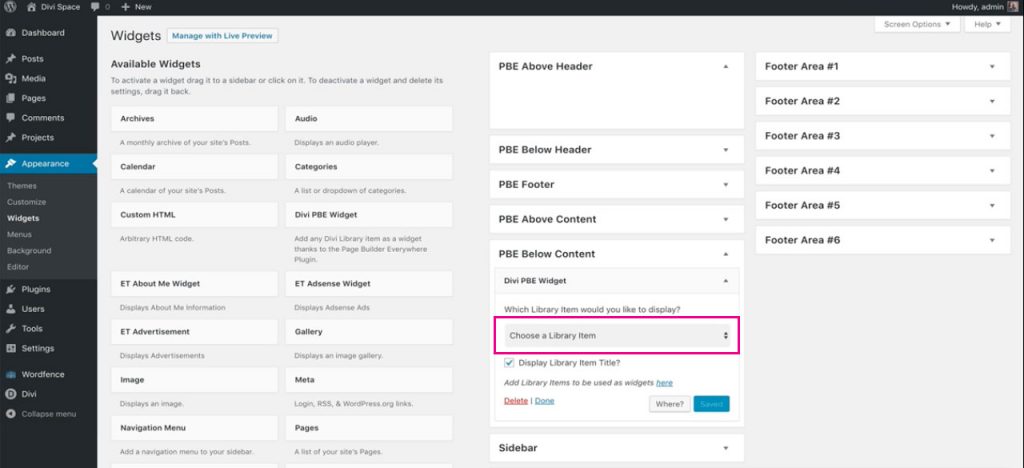
First, you’ll need to choose the library item that you’d like to display. In our example, we’ve named the Call to Action section Blog CTA. Select the correct Divi Library layout from the list and deselect Display Library Item Title.
Next, click the Where button.
This step allows you to decide where you’d like the Divi Library layout to be placed. Here, the Page Builder Everywhere plugin brings in conditional logic
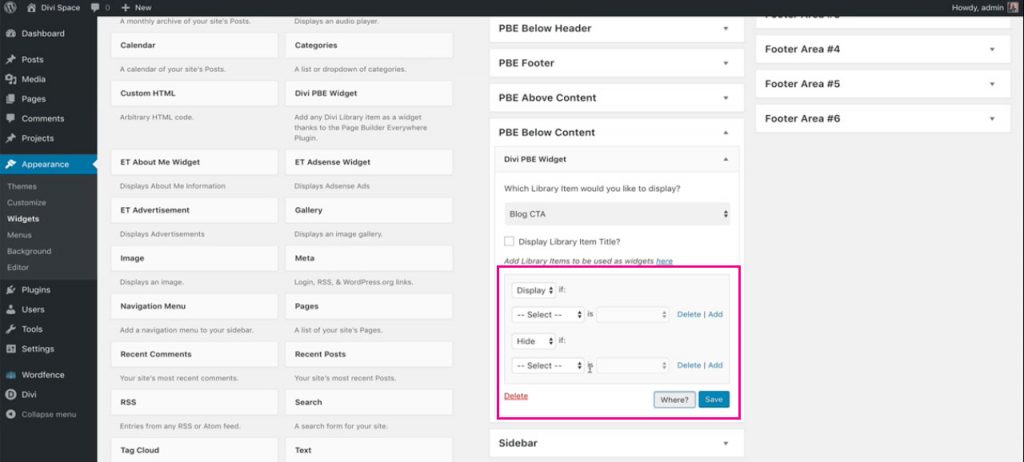
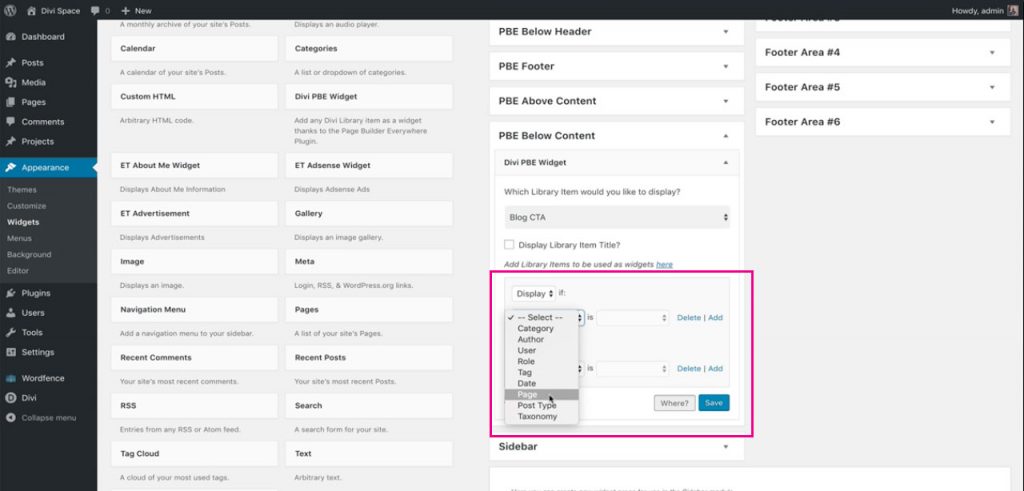
For example, if you’d like the Divi Library layout to display only on product page or a specific custom post type, this is where you’d make the settings. For our example, we’re making the layout display on the post type of blog posts.
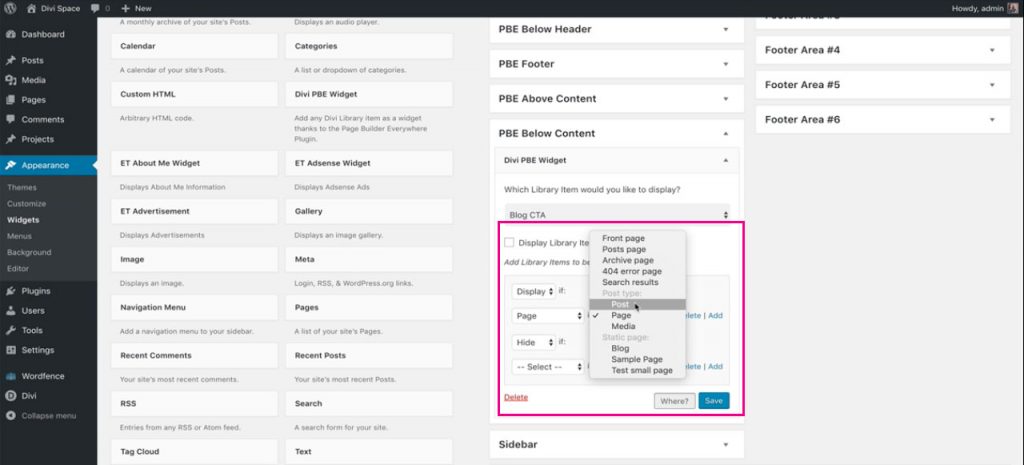
At the first drop down, select Page.
Then, at the second drop down, select Post and click Save.
Once saved, return to the front end of your Divi website and you’ll see the call to action added to the blog posts in your Divi website.
There you have it! In just a few clicks, you would have totally transformed your Divi website by adding a unique call to action to the blog posts. With this fix, you can use the classic WordPress editor for content publishing, and won’t have to use the Divi Builder for each and every post, just to have a Divi-esque call to action display.
Start building amazing Divi layouts today, purchase the Page Builder Everywhere plugin from Divi Space.
We’ll be following up this blog posts with more tutorials for the Page Builder Everywhere plugin. Be sure to sign up to our newsletter to get Page Builder Everywhere and Divi tutorials sent straight to your inbox!
We want to hear from you!
Does your website have captivating calls to action? Let us know your thoughts on the call to action design and the Page Builder Everywhere plugin in the comments below. We love receiving your feedback!
Thanks for reading!

Good and practical post..
Thank you for the blog it was very helpful
Hello, Lisa
Thanks to providing step by step guide. Hopefully, it will help me a lot to get more subscriber. Great post!