One of the most appreciated features for Divi users is certainly the possibility to easily import and export layouts created with the Divi Builder, which has made portability one of the most popular tools for developers. But with the arrival of Divi 2.7, those developers (including myself) who already loved the import / export functions, are sure to drool when they find out about the new features of portability.
The latest update of Divi 2.7 extended and improved the portability of the Divi Builder. It is now possible to import and export not only the layout, but also entire libraries, the customizer settings, the options panel settings, Divi roles and individual pages or individual modules. To top it off, the team at Elegant Themes achieves this with impressive simplicity and speed.
Ok Fabio, it sounds good, but what are the main advantages of this tool?
Imagine that your client has a live site and asks you to add one or more sections to its homepage. What are you going to do? Add the changes to the live site? Nooo …right? Put it in maintenance mode? uhmmm … a possible solution, but remember in maintenance mode the site will not be online and in the case of an eCommerce site, this may mean losing a lot of money and your client does not want to lose the money, right? Then you remember that fortunately you built the site with Divi and therefore you can create new sections on your backup server and use the portability feature to add new sections with two clicks – and no one notices.
To better understand the power and flexibility of this useful tool, I decided to let you see it in action by using one of the templates of our Divi Demo Zone, so you will see with your own eyes how to correctly use the portability feature.
Import / Export single Layout / Page
For this tutorial, I chose the FITZGERALD template from Aspen Grove Studios, and I’ll show you how to export a single page, and how to import it into a new installation.
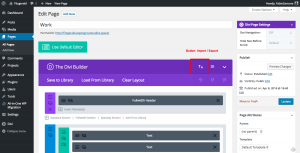
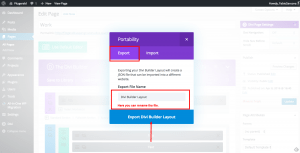
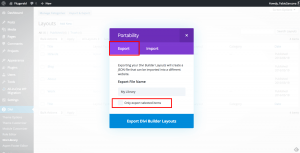
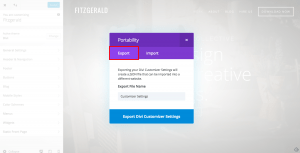
First, click on the import / export button. Once you have clicked it will open a modal window where you can choose whether to import or export the current layout.
You can rename the file to a name of your choosing, and when you’re done click on the button “Export Divi Builder Layout”. Wait a few seconds, and a JSON file will be automatically generated and contain all the information and settings of our layout.
Next we will have to import our template into a new installation, a process very similar to that used for export.
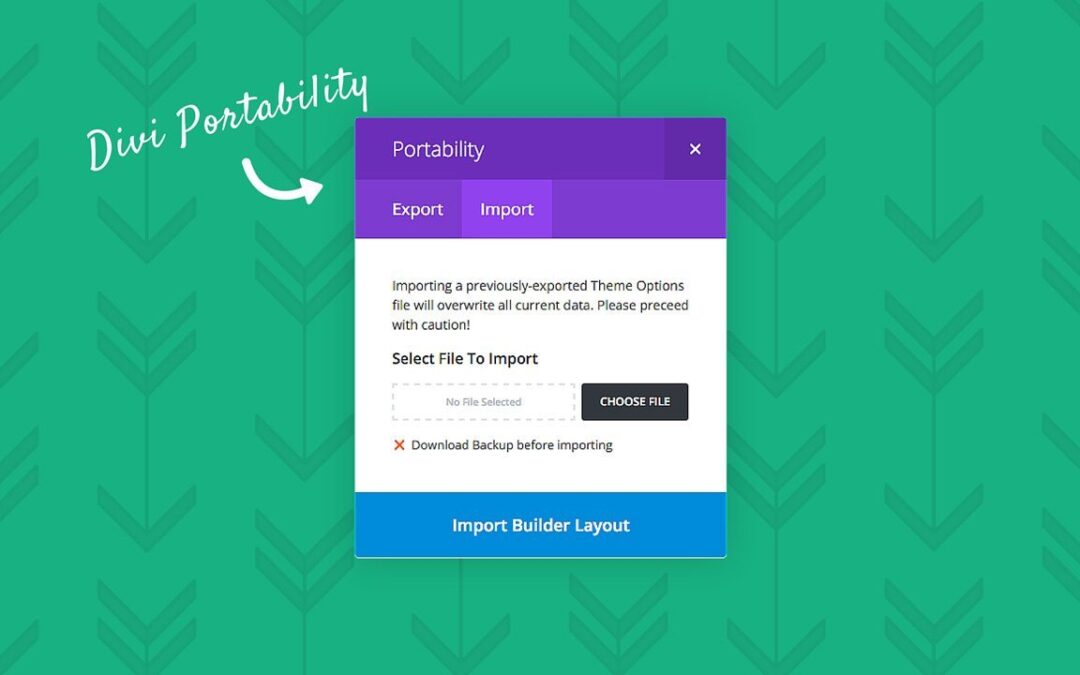
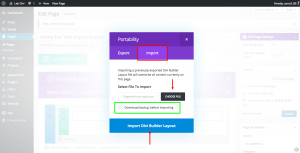
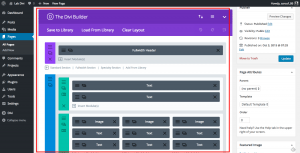
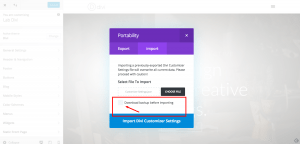
As before, the first thing to do is to click the Import / Export button within the Divi Builder, again a modal window will open up. This time you will need to select the tab Import. Now click on the Choose File button and upload the file you previously exported and click on the button “Import Divi Builder Layout”, after a few seconds your layout will be loaded.
NOTE: If your page already contains a layout, you may need to create a backup before the file is being imported.
As you can see importing a layout is very simple and fast. Next I want to show you how you can export and import an entire library.
Import / Export Library
Many times, you will have have the need to export and import an entire library, such as the Free Divi Landing Page Layout Kit, released a few days ago by Elegant Themes. The landing page layout kit allows you to add to your personal library layouts specific sections and modules with which allows you to create a landing page or to use for any of your other projects. So now let’s see how it works.
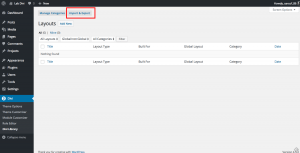
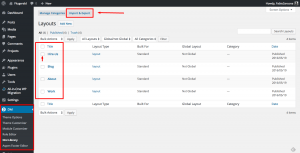
First, go in Divi Theme Options > Divi Library and click on the Import / Export button located at the top.
NOTE: on this page (screenshot 5) you can view all items stored in your library. You can filter them by category, by type, and you can export specific layout from your library.
Again, you will need to create the .json file with the same process as before, now we go to import into our new WordPress installation.
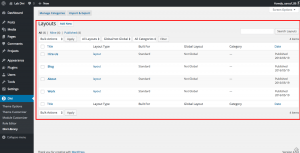
Again, you will need to create the .json file with the same process seen before, go ahead and import it into your new WordPress installation.
Now you understand the simplicity of this tool so you may have guessed that the new installation you will need to re-click on the Import / Export button, and import the file that contains your library. After a few seconds, all the layout of the library or only those that have decided to export will be uploaded and available in the Divi Builder.
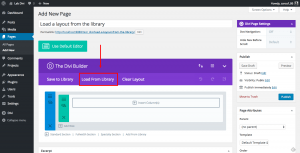
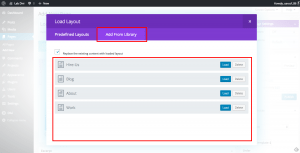
To use layouts loaded into the library is very simple. First, activate the Divi Builder and click on Load From Library > then click on the Add From Library tab. Here you will find all the layouts you’ve added to your library.
Import / Export Customizer Setting
One of the innovations introduced with the update at Divi 2.7 is the ability to import and export the Customizer settings. So now let’s see how to use this option.
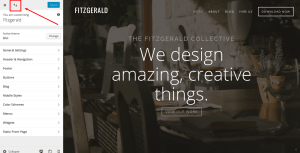
First, go to Theme Customizer> and then click on the Import / Export button, located at the top. Again a modal window will open that you should already recognize and then you also know that all you have to do is rename the file (not required) and click on the button to create the JSON file.
Now we just have to import it in our installation but be careful, if you apply the settings to the customizer you should create a backup copy first because the new settings will delete the current ones.
Import / Export Divi Options
Another great feature of Divi is the ability to import and export the settings of the theme options panel, including custom CSS and JavaScript code added in the panel.
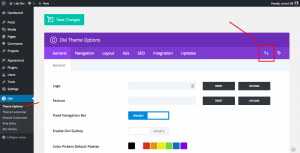
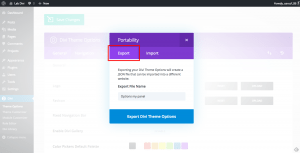
First go to Theme options > to the top right and click on the Import / Export button and export the JSON file as before.
Now you just need to import the file and you’ll also transfer the settings into the options panel.
NOTE: If you have added the options panel for your email provider’s API, and especially your Username and API Key in the Updates tab, remember to delete this data before generating the export file.
Import / Export Divi Rules
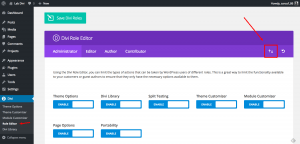
Last but not least, I want to show you how to import and export the Divi Rules settings. If you do not know what the Divi rules are please see Elegant Themes description here. This is one of the great strengths of Divi because it allows restricting the use of the Divi Builder based on the user’s role. A very useful option if your blog / website has multiple users.
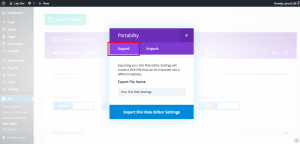
The process is very similar to that seen previously, this time you have to go on Divi Rules, click the Import / Export button and generate your export file, which you can then import it into another installation.
Conclusions
As you see, Divi has a complete system of import and export, which will allow you to have a unique flexibility during development. But now it’s your turn.
Was this article was useful to you?
How often do you use the import / export function in Divi?
Write it below in the comments.

Hello friend, very good post; I have downloaded some templates to work at home offline; after importing them correctly and wanting to access them from the library it keeps loading and does not give me access to the templates that I already have imported; Do you have any idea how I could use the templates offline? Thank you.
Hi, how we can export the layout with images in media library?
I was wondering about this too. Do we need to move the images manually?
Thanks for the great article, this is useful for using Divi.
If I were to outsource this to someone, is there anybody you would recommend? Or a site I could check out?
Hello Josiah, what exactly would you be outsourcing? Divi’s portability is very easy to use once you get the hang of it 🙂
Hello,
Is it possible to bulk import libraries (i.e. queue them up from a list) rather than importing them one by one?
If I could point the bulk importer to a folder full of .json files and let it go, that would be a lot easier than sitting, clicking, waiting and checking of .json files from a checklist.
Maybe there’s a Divi Library Bulk Import/Export Plugin waiting to be built here! 🙂
Thank you,
Chris
Hello, yes you will save the elements to the Library and then from Divi >> Divi Library click the Import & Export button. A portability window will pop up and you can export all layouts from there and import into another site by following the same process.
I have purchased divi theme. Please let me know how I can import demo content same as theme.
Thanks!!!
Fabio, I am trying to upload grid layout to wordpress and I can’t. I’ve tried all options to upload the layout and I only have export option. The import option deos not appear…how can I solve it?
Thanks a lot!
Hello, are you using the Divi Builder for this?
Hey Fabio, thanks for the article.
I have imported json settings into my theme customiser and now want to remove those settings that came with the json import.
I have manually changed them to my own preference, however one or two of the settings keep returning after I have saved the customiser with my own preferences.
Any ideas?
Hello, we apologize but we do not have a solution for this… It may be best to search the ET forum or open a support ticket with them. thanks!
is it possible to import json layout files for Divi via FTP? If so where does Divi store them?
No this is not possible… the json files are imported into the database and the information is stored/deciphered there.
Hi Fabio.
Great article. I tried as a test to export single pages and pages I did save in my library.
I had issues importing the single pages. The library items did work fine.
Any idea what the reason can be?
I search for an easy way to just export and import a full site. Yes, I know plugins like “search – replace” which I tried to use after just installing a backup but this screwed up the database. In fact I need 2 (almost) identical layouts for different domains.
Great article! Easy to get through fast and hit the high points. Saved me a bunch of time.
Thanks Korey we are glad it helped.
I am trying to upload Divi layouts to the library on a local host wp set up. I can not get that to work. Any ideas?
Hi Stephen,
We are using the Elegant Themes portability features, if you are having issues I would contact Elegant Themes support.
Super useful article, Fabio. ¡Bravo!
Fabio, I’ve missed some of these tricks. Excellent. One thing. Exporting and importing the theme customizer settings doesn’t work … especially with header settings. Try it. Export the customiser settings and then import them again straight away. You get full width menus going normal width … magnifying glasses appearing in the menu …. transparent menus going white and then refusing to change even when manually changing the settings. Do you agree? Thanks Mark
Thanks Fabio. You made an awesome feature clearer to us all.
This is great, Fabio! Thanks so much for the write-up. It is timely for me and many others as well, I’m sure!