
Typography has a strong effect on the overall aesthetic of a website and has tremendous power in expressing the tone of a brand or business. A great way to achieve a truly unique look and feel for a website is by adding custom fonts to the Divi theme.
Adding custom fonts to your WordPress and Divi website is relatively easy. It can be done by uploading a font directly to the builder or by uploading a custom font to your website’s server and making use of the CSS3 property @Font-Face within your website’s stylesheet.
For this tutorial, you’ll need to access your website’s child theme, and add custom fonts to the theme directory, as well as edit code in the style.css file.
If you don’t have a child theme, you can create one in just a few seconds with the Divi Space child theme generator.
In the following post you’ll learn:
- Various typography terms and rules such as fallback fonts, font formats, font conversions and more,
- How to add Divi custom fonts using the Divi Builder
- How to add Divi theme fonts via the server and referencing them through the stylesheet
If you’re interested in reading about the differences between desktop and web fonts, as well as understanding a bit more about font formats, scroll down. Otherwise, click here to jump straight to the tutorial.
Understanding Typography And Its Role In Modern Web Design
In this section, we’ll be discussing a few type-related principles that are likely to have an effect on your web development practices. For a thorough breakdown of typographical terminology, read this blog post from Elegant Themes.
What Is The Difference Between a Desktop Font and A Web Font?
While seemingly similar, there are differences between desktop and web fonts both in application, appearance and licensing. While desktop fonts are designed to be installed on a computer for use in Office, Adobe or similar software to create traditionally print-based assets, web fonts are designed specifically for use in web pages in accordance with specific standards to ensure browser compatibility.
Web fonts are designed with subtle nuances in character makeup (spacing, contrast etc.), all which aim to optimize and enhance the font’s readability on screens, particularly at smaller font sizes.
The licensing between desktop and web fonts differs. Often license agreements are issued for use either in print or the web, not both. To use custom fonts in both environments, separate licenses must be purchased, either per font family or for individual font subsets.
When you begin the process of integrating custom fonts for a website, make 100% certain that you’re not using a desktop font by mistake, and that you are in possession of the appropriate license (either paid or free for use in specific instances) that suits your specific needs.
Understanding Font Formats
Fonts come in an array of formats, all of which have been created to serve different browsers.
TTF (TrueType Font) and its evolutionary counterpart OTF (OpenType Font) are the most common font formats specified. Support for the TTF and OTF format is pretty much widespread across the browsers, with the exception of Internet Explorer below version 9.0.
To accommodate for this, the font format EOT (Embedded Open Type) is used explicitly for IE versions 6.0 and above. The most widely accepted font format is the WOFF (Web Open Font Format), but again, it is unsupported by earlier versions of IE. Often the WOFF font format (and the newer WOFF2) is a bit difficult to come by, in which case the OTF and TTF formats are suggested for best practice.
For much more in-depth explanations of font formats, have a read-through of these posts by W3 Schools and Creative Market.
Fall Back Fonts
A fallback font is specified as a backup font to ensure compatibility between browsers. In the event that a particular user’s browser does not have the custom font on their browser, the fallback font will load in its place.
Web developers will often list a series of fallback fonts, ensuring that one of the universal fonts are set as fallbacks: Arial, Courier New, Georgia, Times New Roman and Verdana. These fonts are considered 100% web-safe as they are intrinsic to both Windows and Mac operating systems.
Custom Fonts Vs. Google Fonts
If all of these technicalities are overwhelming, consider using a Google Font for your website. With the exception of fewer variants in the font families and a less overall unique look and feel for a website, there are a number of advantages in using Google Fonts:
- As Google Fonts files are stored on the Google server and are distributed by an international CDN (content delivery network), the speed of font delivery is often a slightly better, versus the load speed of a custom font stored on your individual server.
- With the Google Fonts CDN, font files are cached and stored in a browser’s memory. With this, once a site user visits a website that has a particular font, it is loaded and stored in the browser cache and will load automatically for any additional website that makes use of the same font. This helps with site speed.
- Google Fonts are already included within the Divi theme so there is no need to add the font, you can simply select a Divi Google Font from within the builder and begin designing. Previously, you’d need to reference the Google Font in the Divi Theme Options > Integrations tab, but now these fonts are already included and there’s no need to add Google Fonts to Divi.
- Finally, custom fonts come at an often high cost, while Google Fonts are 100% free, forever.
Sourcing Great Custom Fonts
Even though adding custom fonts to a WordPress and Divi website does include a bit of code work, some might find that the greater challenge is actually deciding on which font groupings to select in the first place.
With thousands of fonts readily available in billions of different combinations, actually deciding on the best fonts for a website might be the hardest part.
To help you along with font decisions, have a look at Typespiration, Font Pair, Monotype and Typewolf. Fonts can be downloaded/purchased from a number of sources, including:
- Font Squirrel
- Adobe Fonts
- Typekit
- My Fonts
- Font Shop
You can also purchase fonts directly from a font foundary or type designer.
A Few Notes on Purchasing Fonts:
- While some fonts are free, others come at a cost, so be 100% certain of your brief, budget and design specifications. Not all free fonts are applicable for commercial purposes, so be sure to read through the font’s license agreement and abide by the specifications.
- Most font stores will either sell fonts as full family packages (inclusive of all font variants) or as individual font subsets. These prices of the individual fonts will vary based on the intended application (i.e. print, web, app etc.) and often, pricing packages are broken down based on anticipated user views.
- Font retailers will specify a particular price for a particular font application (i.e. print and design, web or app) and break these down per either page view or installations. Again, make sure that you’re 100% certain of your font choices as to keep costs down.
- As a general unwritten rule, it’s best to not have more than three fonts loaded onto your site. Any more than this will cause your website to slow down and drive the price up.
- Finally, in the event that you are creating a website which has particular language requirements, be sure to check the available special language characters within the font package.
Converting Fonts
Once you have purchased a font you’d like to use, you must make sure it is in the correct format, ideally TTF or OTF, as mentioned above. To convert a font, either head to the Font Squirrel Webfont Generator or Convertio to convert your font.
Here’s a demonstration of using Conevertio to convert a font, Ginora Sans, from OTF to TTF.
First, head to Convertio. Click the Choose Files button.
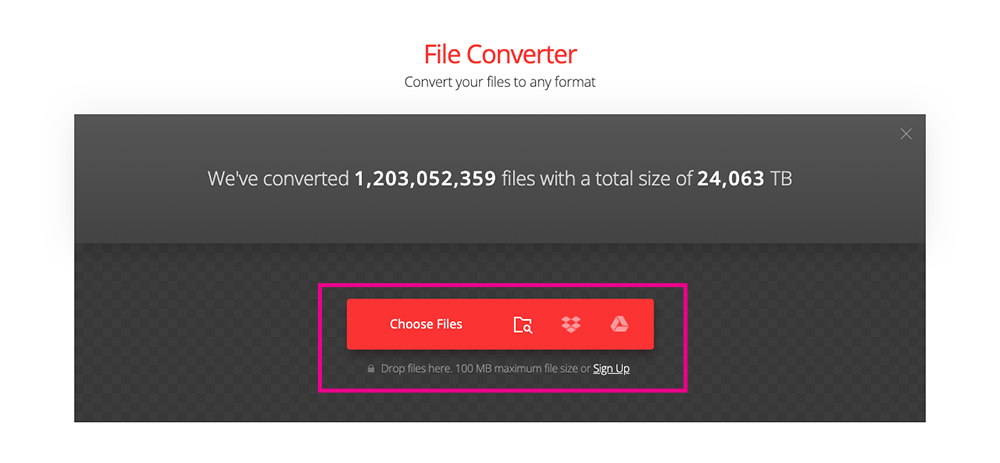
Click Choose Files to upload a font
Next, select the font from your desktop.
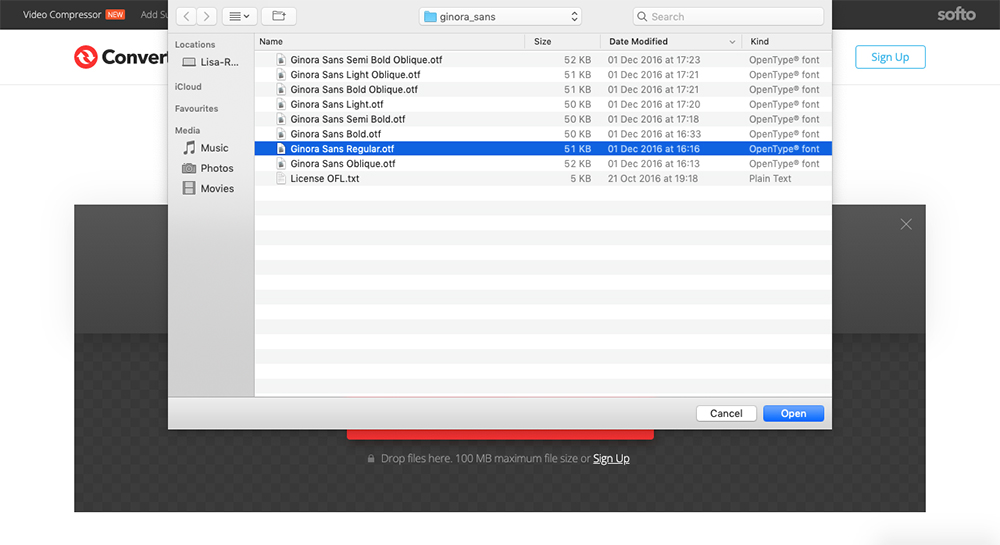
Choose the file from your desktop
Click the drop-down menu and select the new format you’d like to convert your font into.
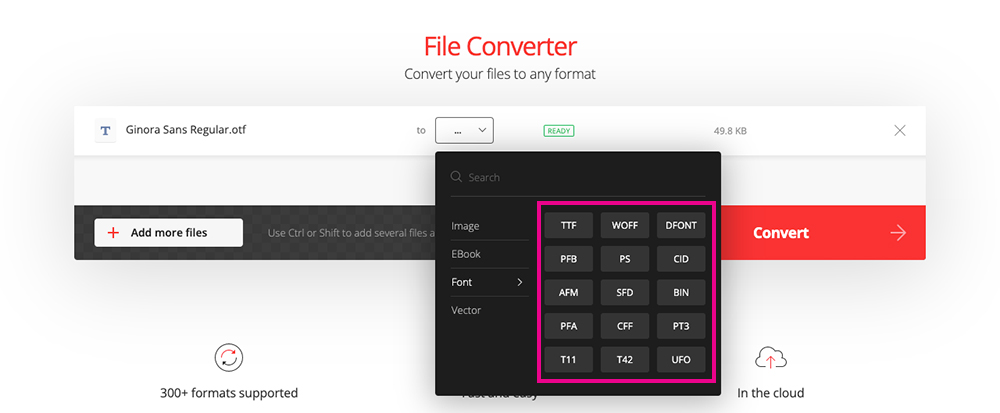
Select the font format you’d like
Once you’ve selected the font format, click convert.
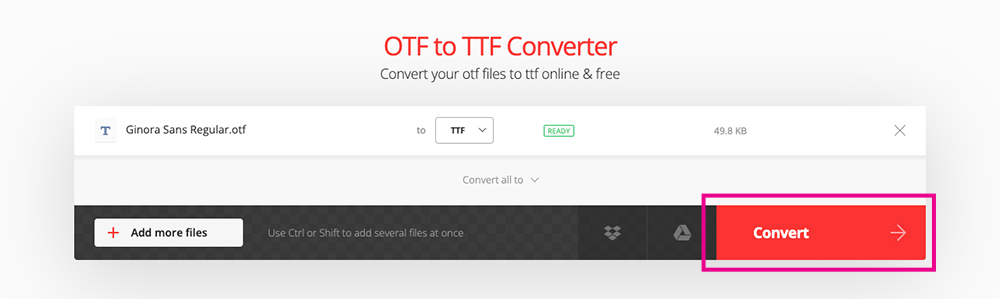
Click Convert
When the file has converted, click download.
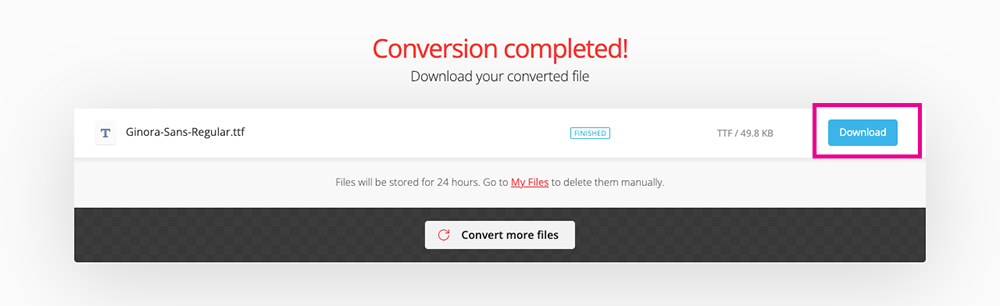
Click Download to save your font
Now you’ll have a font in the correct format for your site.
How To Add Custom Divi Fonts To Your Website
There are two ways that you can add fonts to Divi websites. The first method sees you upload the fonts directly into the Divi Builder itself. The second method is a lengthier, manual route.
How to Add Fonts to Divi Using the Divi Builder
The first method of adding custom fonts to Divi is to upload fonts to Divi, directly to the builder itself. Below is a demo of a heading and some paragraph text.
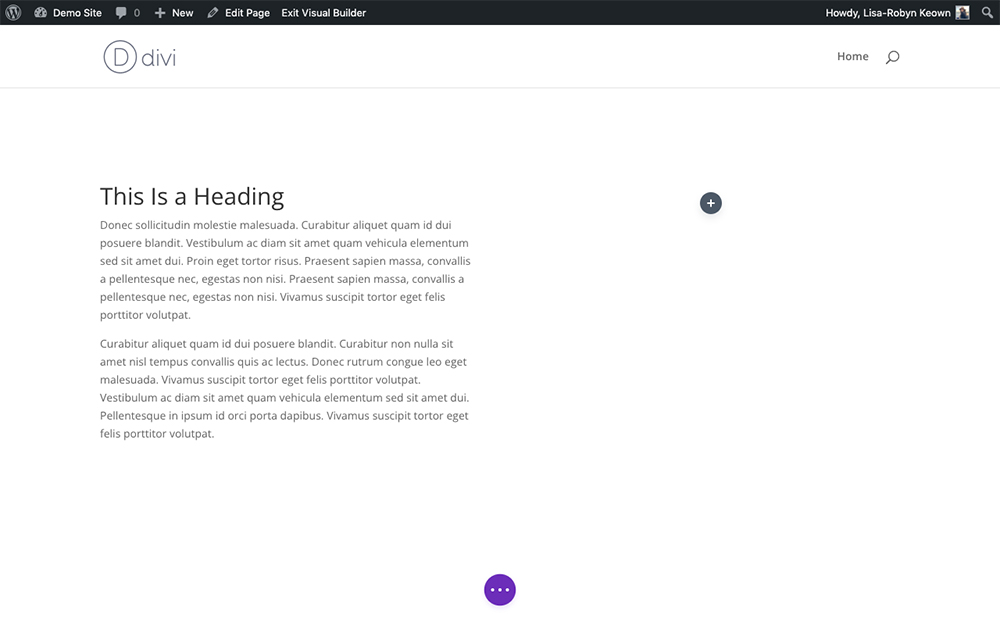
A demo of a heading and paragraph text in the Divi default font
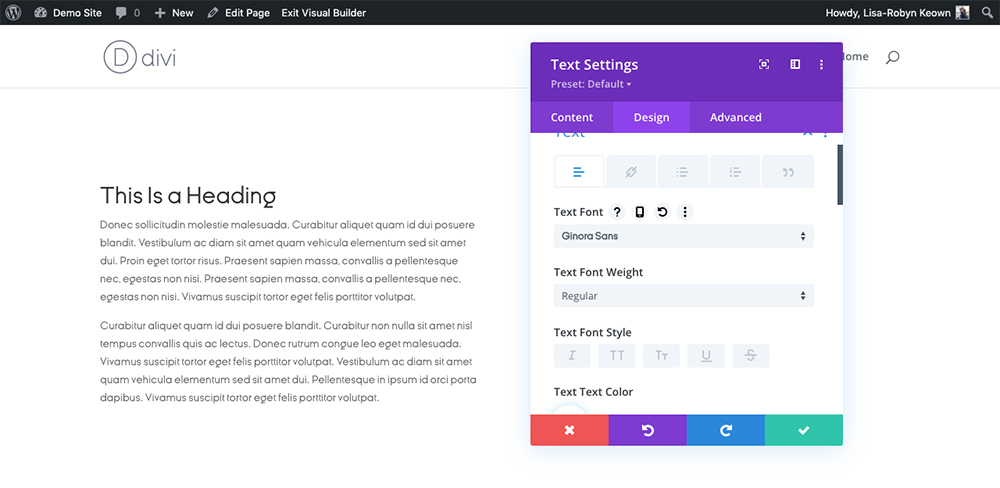
To begin, open the Divi text module, click on the Design tab and open the Text option. Click the drop-down list below Text Font.
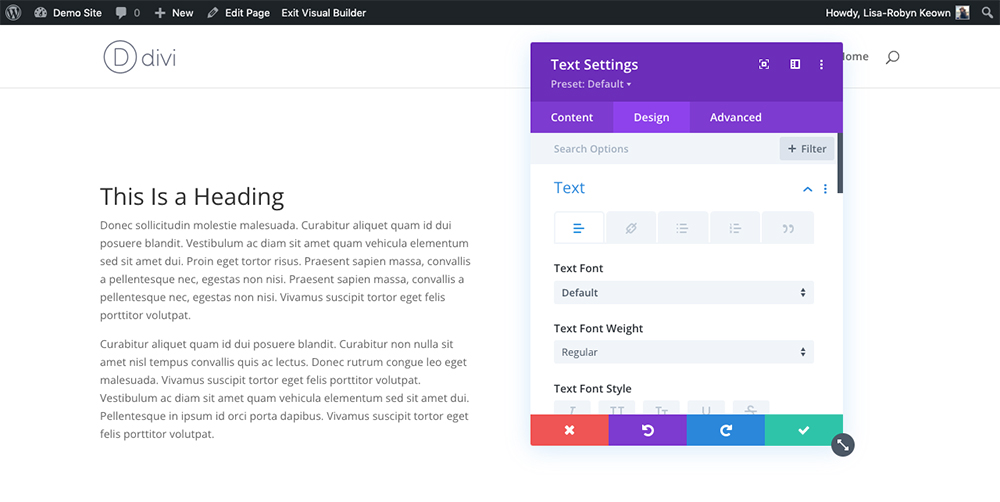
Click on the Text Font drop-down menu
Click the button that says Upload Font.
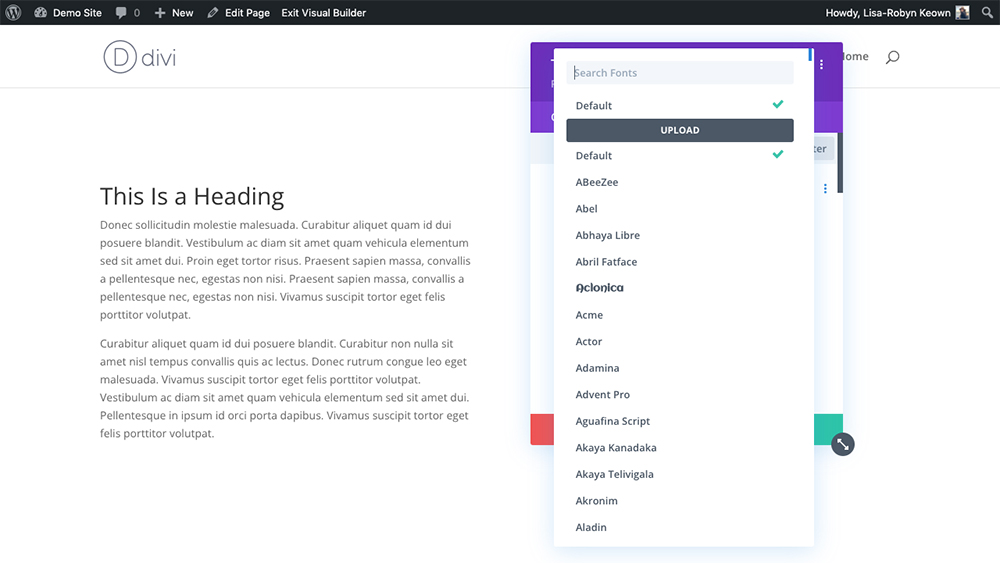
Click Upload
Next, a pop-up will appear. In the text area, assign a name to your font, then click Choose Font Files.
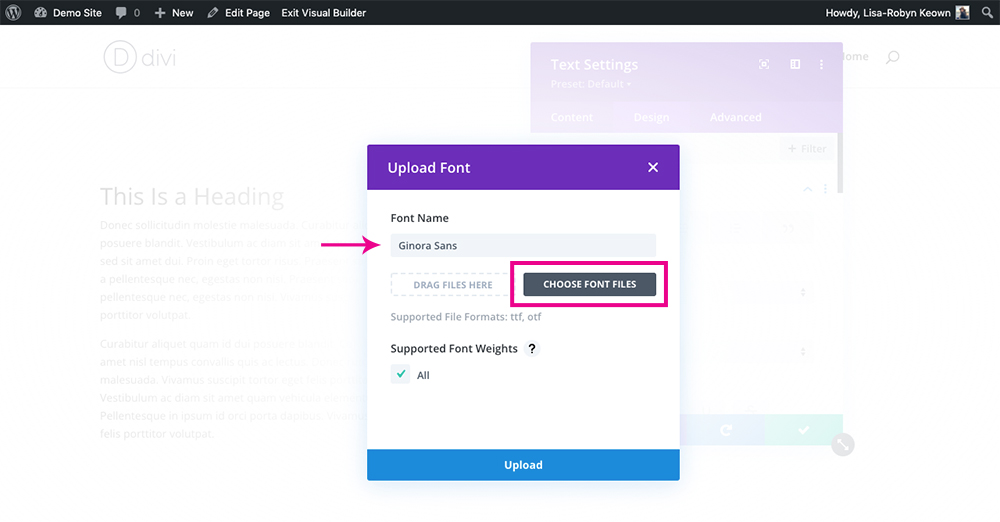
Click Choose Font Files
Select the font from your desktop and click Upload.
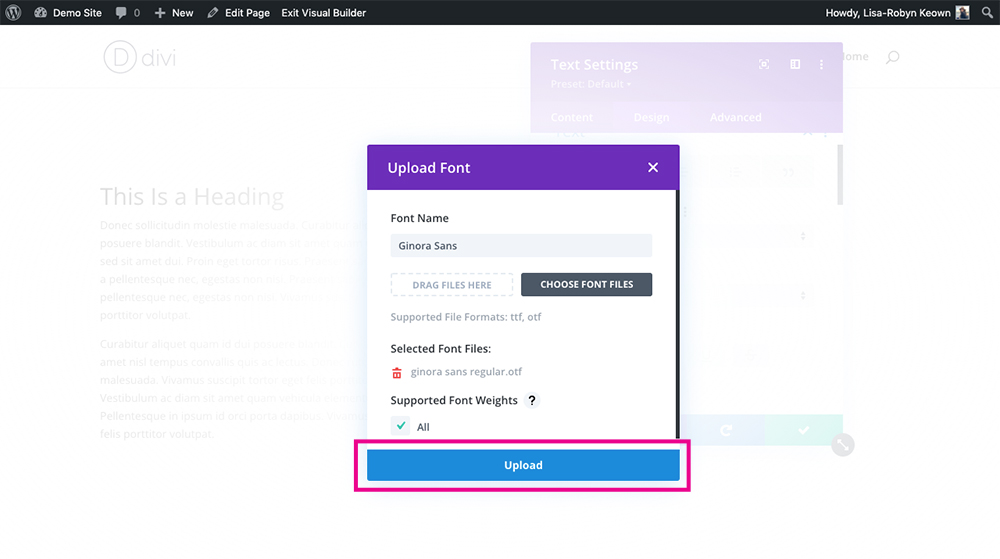
Click Upload
By default, WordPress doesn’t allow the upload of different extensions files due to security reasons. Sometimes, you may return an error.

If you get this error message, don’t panic
If you get the following error message, “Sorry, this file type is not permitted for security reasons,” copy the following line of code and add it to the very bottom of your site’s wp-config file. To locate your wp-config.php file, log into your server either directly or using FTP.
define('ALLOW_UNFILTERED_UPLOADS', true);
This line of code will allow you to add the custom font through the Divi Builder. Once added to your wp-config.php file, you’ll be able to upload the custom font, no problem. Return to the Divi Builder and click Upload
Click Upload
Now you’ll see the custom font, Ginora Sans in this demo, has been added to the Divi Builder. You can start using this font in your designs and give your site a unique look and feel.
You’ve successfully added a custom font to the Divi Builder
If you need to delete a font, click the tiny trashcan icon.
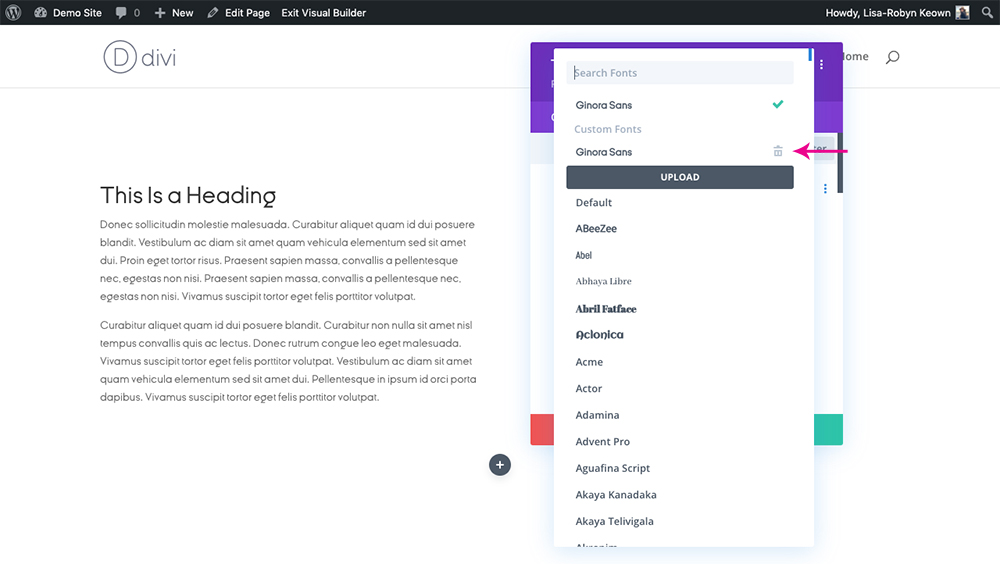
Click the trash can icon to delete a custom font
Note: Once you’ve added the custom font to the Divi Builder, return to your site’s wp-config.php file and remove the line of code you added.
How to Add Custom Fonts to the Divi Theme via the Child Theme Directory
If you’d prefer a more robust solution than adding a font to the Divi Builder, you could opt to add the font to your child theme directory. This method is longer. It requires you to add the font file to your server and then referencing it in your child theme. Although it is a longer route with a bit of code work, this method is great as it allows you to set the site-wide typography of your website in the stylesheet instead of having to set fonts from the builder. Again, if you are not using a child theme, you can create and download one using the Divi Space child theme generator.
If you’re working locally, the child theme folder will be located within your computer files. If you’re working on a live site, access the child theme files by using an FTP client (such as FileZilla or Cyberduck).
Step 1: Add the font to your server
Using FTP or accessing the server manually, locate your child theme folder (wp-content > themes > your-child-theme) and add a new folder called ‘fonts’. Next, upload the font files (in all relative formats) into the fonts folder.
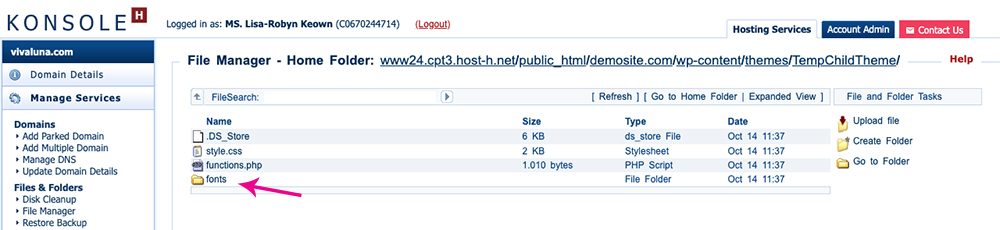
The “fonts” folder is within the child theme
Within the “fonts” folder, add the font file.
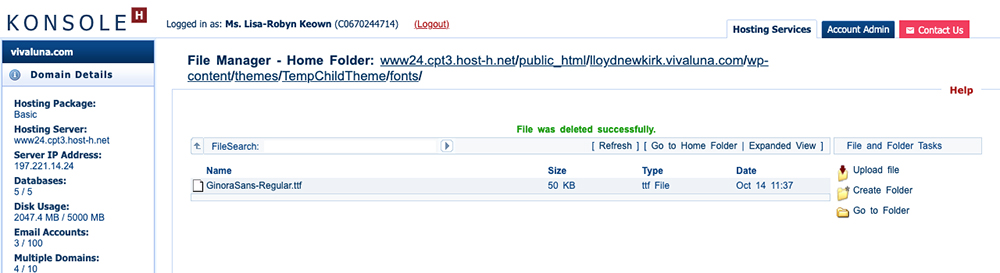
Here you’ll see the TTF font added to the server
Step 2: Reference the fonts in your stylesheet
Next, locate and open the style sheet within your child theme. You can either do this from within the backend of your website by navigating to Appearance > Themes and selecting your child theme, or via your server using FTP ( wp-content > themes > your-child-theme > style.css ).
Copy and paste the code below into the stylesheet. Remember to change the font-family name and the path to reflect the location of your font from within the child theme.
@font-face {
    font-family: 'GinoraSans-Regular';
   	src: url('/wp-content/themes/TempChildTheme/fonts/GinoraSans-Regular.ttf') format('ttf');
}
A few things to note:
- Assign a custom name to the font in the font-family declaration. Whenever you define type in your style sheet. you’ll use this naming convention
- Case matters. If your child theme uses all lowercase in its naming, make sure you reference it with lowercase when declaring the pathname in the source
- Make sure you’ve referenced the font in the path identical to the font file added to the server
Repeat this step until each of the fonts on your server have been registered.
Another thing to note, if for some reason the font format doesn’t register, a good idea is to add the font files in all formats (OTF, TTF, WOFF and WOFF2). You can convert your OTF or TTF fonts to WOFF and WOFF2 using FontSquirell’s Webfont Generator.
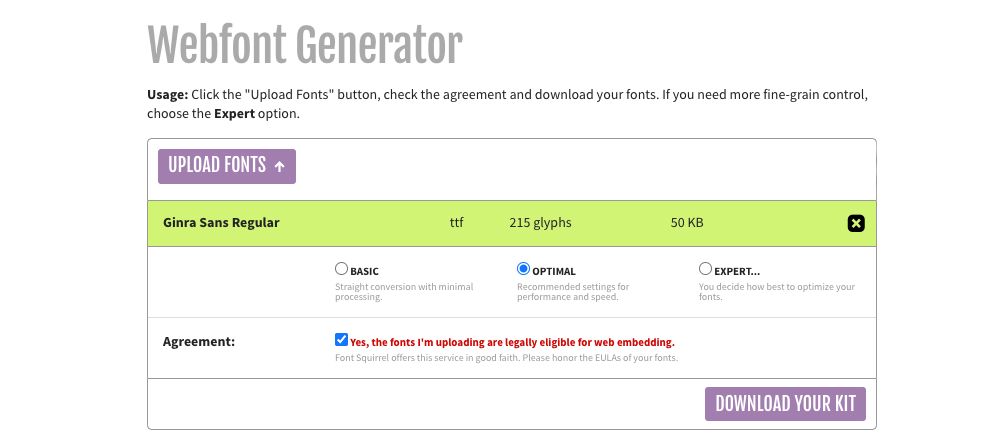
Upload your fonts and WOFF and WOFF 2 formats will be generated
Upload all of the font files to your server.
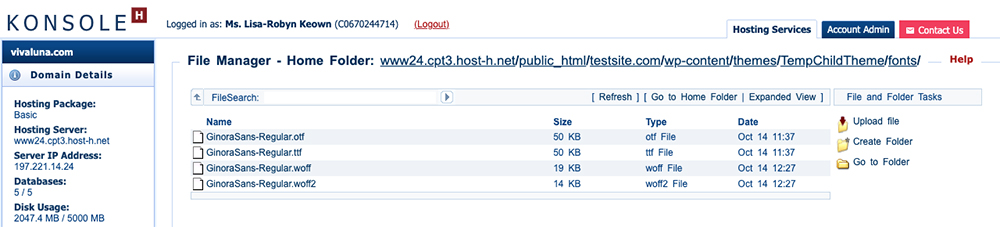
An example of the server with all font formats added
And reference them in your stylesheet.
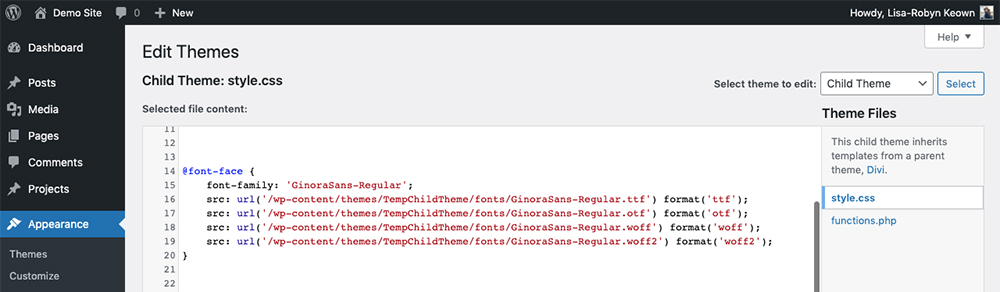
An example of the stylesheet with all font formats referenced
Step 3: Assign typography variables
The final step is to set the site-wide typography using the new font. Unlike adding the font via the BUilde rin method one above, the custom font added to the server and referenced in the stylesheet won’t reflect in the text options panels anywhere within the Divi Builder. To set site-wide font settings with your custom font, you’ll need to write a few lines of CSS.
Copy and paste the following code into your stylesheet. Remember to update this based on your font-family name and design preferences. Also remember to save your changes.
h1 {
    font-family: GinoraSans-Regular, Raleway, Helvetica, sans-serif;
    font-size: 48px;
    color: blue;
}


p {
 	font-family: GinoraSans-Regular, Raleway, Helvetica, sans-serif;
    font-size: 16px;
    color: red;
}
This will produce the following result
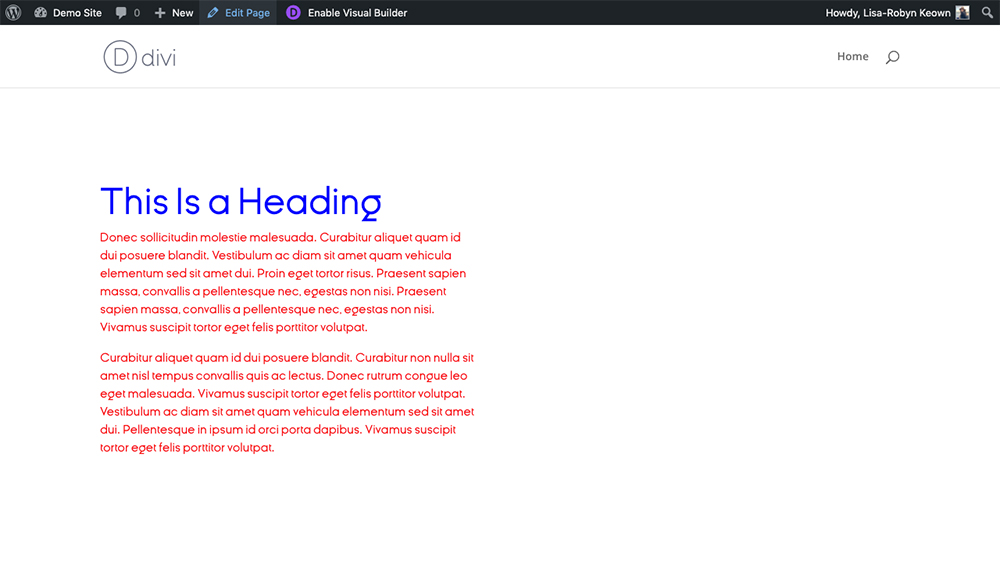
The Ginora Sans font is added to the site and assigned to the H1 and P tag
Ending thoughts
The Divi theme includes hundreds of amazing fonts ready for you to use directly from within the builder itself, but sometimes, using custom fonts is really great because it’ll make your website stand out from the rest. Knowing how to add custom fonts in web design is a great skill as it’ll open up more doors for your designs as you can communicate more brands’ visual identities.
Adding custom fonts can be confusing at first, especially if you’re going the manual route, but with time and practice, this process will become second nature. If you’re interested in learning more about fonts, check out our Divi Fonts List.
We hope that you’ve enjoyed reading this tutorial and that it helped you shake up your Divi fonts use by introducing custom fonts.
We want to hear from you!
Have you used custom fonts on your Divi website? If so, which are your favorite fonts to use? Leave your comments below! Thanks for reading!

Thanks Lisa for sharing this blog. i was actually looking for the same. My search end here. btw i’m using elementor for my site. should i move to divi?
Hello, you should be able to add custom fonts to Elementor as well. We are huge proponents of Divi, but I don’t think that this should be your sole reason for switching from Elementor. Are you experiencing any other pain points with Elementor?
Hello LISA-ROBYN KEOWN, Thanks for sharing tips on Divi Builder. Please make a blog on elementor tutorial.
Hi Lisa,
Thank you for the tutorial. We followed all the steps and added a couple of fonts. They appear in our child theme’s stylesheet, but they do not appear in the Divi builder’s menu (e.g. when you choose the font for whatever module). Any thoughts were we went wrong? I would appreciate it.
Thanks,
Saskia
Hi, is there an easy way to work with Adobe Fonts and the Divi theme without a plugin?
Hello, yes, Adobe provides the embed code to load the fonts into your website. https://helpx.adobe.com/fonts/using/add-fonts-website.html
Thanks for the tips. I went through the whole issue of using custom fonts on my Divi theme and this was a helpful post.
Here’s my 2cents to add. I created a child theme for Divi just to be sure my fonts were not overridden by updates in the future.
When calling the fonts with @font-face. I recommend using the file path like this.
src: url(‘/wp-content/themes/Divi/fonts/founders-grotesk-light.woff2’) format(‘woff2’);
(If you make adjustments to your URL or SSL in the future the fonts will still work then)
Also when you target the font such as h1 include !important and dont set the font colour or font size here. Do that within the Divi visual builder.
Quite a mission. Goodluck everyone
Hi Lisa. Do you happen to know how to fix troubles with ET fonts located in core/admin/fonts/modules.ttf? This/these fonts reports overwhelms according to GTMetrix Waterfall. Its been around 200 ms.
Hi Lisa,
thanks for the tutorial. I uploaded the font as per your steps, and also using “upload font” in text, directly from Divi menu. However, when I am logget out, it replaces it automaticalyl with Montserrat. Is there something I should change?
ecocrochetbarcelona.com (titles should be Sophia, brush handmade font)
Hi Sara, you have a problem with mixed content (HTTPS / HTTP) and that can be a reason
Thanks for this article just what I was looking for. I was able to upload my fonts without any issues!
Hi
I tried this, but when I entered it into style.css, I got the warning: “@font-face declaration doesn’t follow the fontspring bulletproof syntax”
Much better solution than using plugins. Great article thankyou
Dear Team
I want to put this font ” Federico” for this site http://massagetainha-hanoi.com/ and want to display on Header Banner ( MASSAGE TAI NHA HA NOI” But I can not do that as your guide
How can I do it please teach me?
Looking forward to hearing from you
Tim
Thanks for the tutorial. It looks easy to upload fonts. I just want to know is there any other way to upload font?
Hi Nirmal! You could try the plugin ‘Use Any Font’ – https://wordpress.org/plugins/use-any-font/. Hope this helps! 🙂
Great Post, Understanding Typography to design compelling Web Design is very import, Divi is great and easy to customize, thank you for your great tips