Your website is only as fast, stable, and secure as its server. Even websites built with powerful tools like Divi and WordPress are limited by how good or bad the hosting service is. Whether you’re just looking for a performance upgrade or are experiencing server issues and need a more reliable delivery method, finding the right host is essential for your website.
But choosing the right host is challenging. There are so many options! It feels like you need to be a server admin just to narrow down the best features at an affordable cost and to figure out what type of hosting to use.
In this post, we deep-dive into Divi Space Hosting, what makes it special, and explore why it is the best hosting option for WordPress page builders. Divi Space Hosting is a premium managed host. It is not only optimized for speed, security, and stellar performance, it’s built with extra features for Divi and page builder users. Here’s what we’ll cover:
- What is managed hosting
- The difference between managed WordPress hosting and other host types
- Features of Divi Space Hosting
- Why you need special hosting for WordPress page builders
- A tour of the Divi Space Hosting platform
So, let’s get started!
What is Managed WordPress Hosting?
WordPress web hosting comes in many shapes and sizes. Depending on your website and business needs, you’re guaranteed to find the correct package for hosting a WordPress site. Typically, when people discuss WordPress hosting options, they’re referring to regular or standard hosting. Here, a plan is purchased from one of the many web hosting companies. As soon as the purchase has gone through, the owner of the hosting package can start building their WordPress website in typical do-it-yourself fashion.
This hands-off approach is what most hosting companies present, offering little more than the product (the hosting package itself), a knowledge base of articles and resources, and sometimes, support.
There’s another form of website hosting available; managed hosting.
Managed WordPress Hosting vs Regular Hosting
Managed hosting, often called managed WordPress hosting, is an incredibly high-quality hosting package with servers constructed specifically for WordPress websites. Admittedly, the term ‘managed’ is a bit misleading as it could imply that the website is managed, which it is not. The website owner will still be responsible for the general working and maintenance of their site, such as updating plugins, and themes etc.
For a premium price (higher than regular hosting), the hosting company will take care of several steps in the website management process. With regular hosting, the majority of the work is the web developer’s responsibility, whereas, with managed WordPress hosting, the host offers extra care for your website. This includes daily automated backups, enhanced website security measures, unparalleled support, speed and performance enhancements to ensure a blazing fast site, and so on. With managed hosting, the servers have been set up specifically for WordPress websites.
Divi Space Hosting takes managed WordPress hosting a step further with premium managed hosting options designed specifically for Divi and other premium page builders. Divi is a very intricate framework, and it requires a few tweaks at the server level to ensure its success. Instead of purchasing web hosting and having to fiddle with the server settings, opt for a host that understands the needs of your website, and gets it right the first time.
In our opinion, Divi Space Hosting is the best web hosting for WordPress and Divi sites, but don’t just take our word for it, have a look at some of these incredible features:
Divi Space Hosting Features
Below is a list of key features that make Divi Space Hosting one of the best managed hosting service providers around:
- One-click install of WordPress and Divi. Most hosts offer an instant installation for WordPress, but Divi Space Hosting goes a step further. If you’re using the Divi theme, you can select the Divi package and have the WordPress core and up-to-date Divi theme files auto-install on your site. This saves you from having to download the latest version of Divi and install it manually.
- WordPress Installer. As well as setting up a default WordPress instance with Divi ready to go, Divi Space Hosting’s WordPress Installer also lets you add, update and manage plugins and themes from the hosting panel itself. With this, you can install WordPress, Divi, and your selection of plugins from the Divi Space Hosting console before you’ve even logged into the WordPress dashboard – talk about time-saving!
- Server settings optimized for Divi. Elegant Themes, the team behind the Divi theme, has suggested a series of server settings to ensure the best functioning of the Divi theme. While most hosts don’t take these settings into account, Divi Space Hosting’s servers are set up specifically for this, such as always having the latest version of PHP installed and setting the PHP.ini values to match and exceed Divi recommendations.
- 99.9% uptime guarantee. ‘Uptime’ measures the amount of time that a server is online versus the time the server is down. Divi Space Hosting promises 99.9% uptime, a notch above the 98% that most companies guarantee and important for critical sites and businesses that rely on their site to make money.
- Automatic daily backups. To make sure your website is kept safe at all times, Divi Space Hosting takes care of backups for you. Each day, automatic backups of your site will run, and be stored on our servers. This means that you don’t have to spend on excess cloud storage or take up space on your computer storing your backups. If you ever need to restore your site, you can open a support ticket and your site will be restored in no time.
- Dedicated bare-metal servers. These days most hosting providers use a cloud infrastructure to provide hosting to their customers, meaning they do not have control of the physical servers. With Divi Space Hosting, there is no cloud, and all websites and services are hosted on real servers with software installed to provide hosting. Using bare-metal servers means that each server’s resources can be fine-tuned and controlled, providing better performance than cloud-based hosting services.
- Low latency with instant responsiveness. As Divi Space Hosting uses real servers and not a cloud-based solution, the servers respond to requests immediately and are not bound by other services connected to the particular cloud platform.
- Top-shelf servers. Divi Space Hosting’s servers are built with leading-edge technology, with each server equipped with a minimum of 16-core processors, enabled with hyperthreading and offering no soft limits.
- Staging site. To make sure your web development processes are as efficient as possible, each website on Divi Space Hosting comes equipped with a staging environment. With a one-click feature, you can clone your live site to your staging environment in seconds. Here you can test new plugins and code, check plugin and theme updates, and make site edits safely. When your site is updated and ready to go, you can clone the staging site into the live site.
- Free SSL certificates. Online security and data protection are vital for a website. Divi Space Hosting is Integrated with Let’s Encrypt to include free SSL certificates for all websites.
Enhanced security measures. To protect your website, each Divi Space Hosting server is equipped with a firewall based on iptables, a well-known and trusted firewall running on Linux. If you suspect there’s been a breach in security, Divi Space Hosting offers a one-click virus removal feature called ImmunifyAV. - NGINX-based servers with optimized caching. Built using NGINX, the most reliable and fast webserver available, Divi Space Hosting’s servers promise the highest level of speed and performance when managing resources. On top of this, to make sites run even faster, Divi Space Hosting offers even more speed enhancements from a caching perspective. If you decide to use the free caching plugin WP Super Cache, you can expect even more speed to your site thanks to a new caching method implemented thanks to NGINX.
- SSD RAID10 storage. Another performance enhancement, each of Divi Space Hosting’s servers use SSD RAID10 storage, of four solid-state drives as storage, each running multiple-disk configurations of RAID10.
- Free migration of your first three sites. To help you make the move, the Divi Space Hosting team will migrate your first three websites for free.
- Dedicated support. Where some hosting companies are a nightmare with their support channels, Divi Space Hosting offers top-notch dedicated support from a team that specializes in WordPress and Divi. Any question you may have, the tech team already knows the answer to!
- Pricing. Starting at only $15 per month for a single site, Divi Space Hosting pricing is competitive with other big names in the managed WordPress hosting space. Pricing packages are available based on the number of websites you’ll be building and the volume of resources required.
Ready to check out Divi Space Hosting’s managed hosting services? Let’s take a look at the platform!
Divi Space Hosting Overview
Once you’re ready to join Divi Space Hosting, head over to the website and click Register. Enter your details and you’re ready to begin! If you already have an account, click Login.
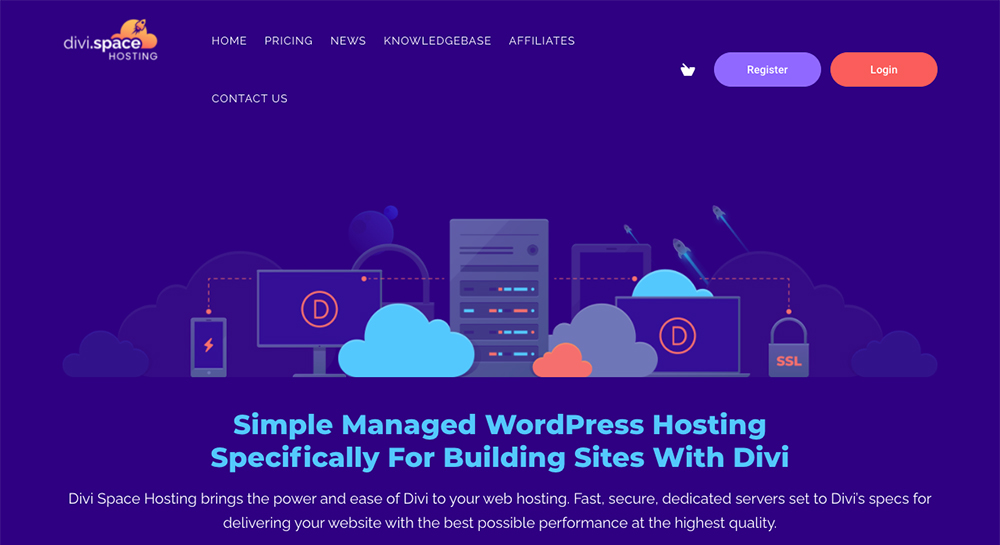
If you already have an account, click Login, if not, click Register to create your account
Here, enter your login details to access the platform.
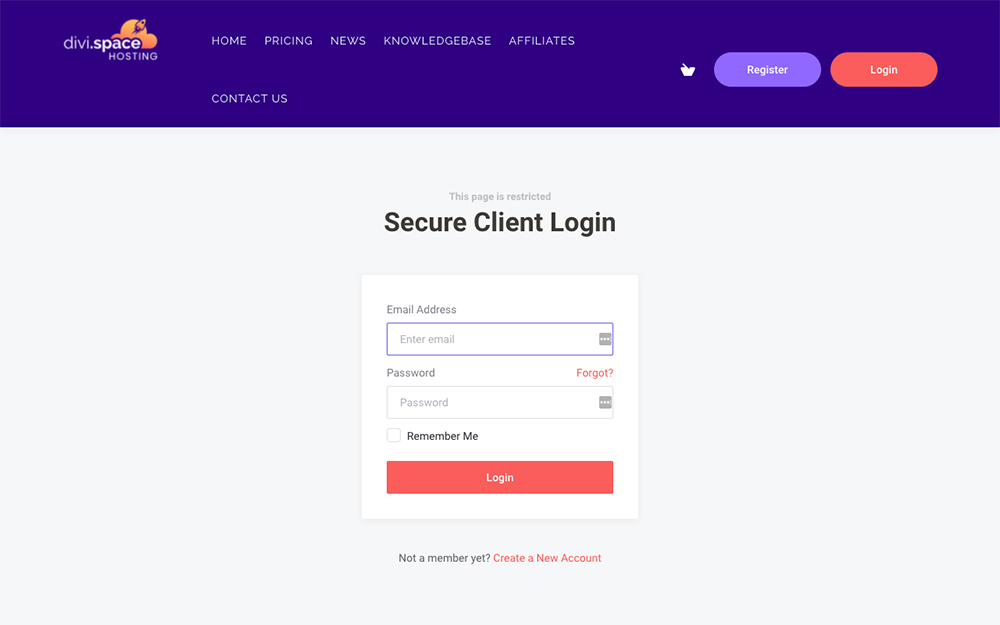
Enter your login details
First, you’ll be taken to your dashboard. From here, click the relevant hosting plan.
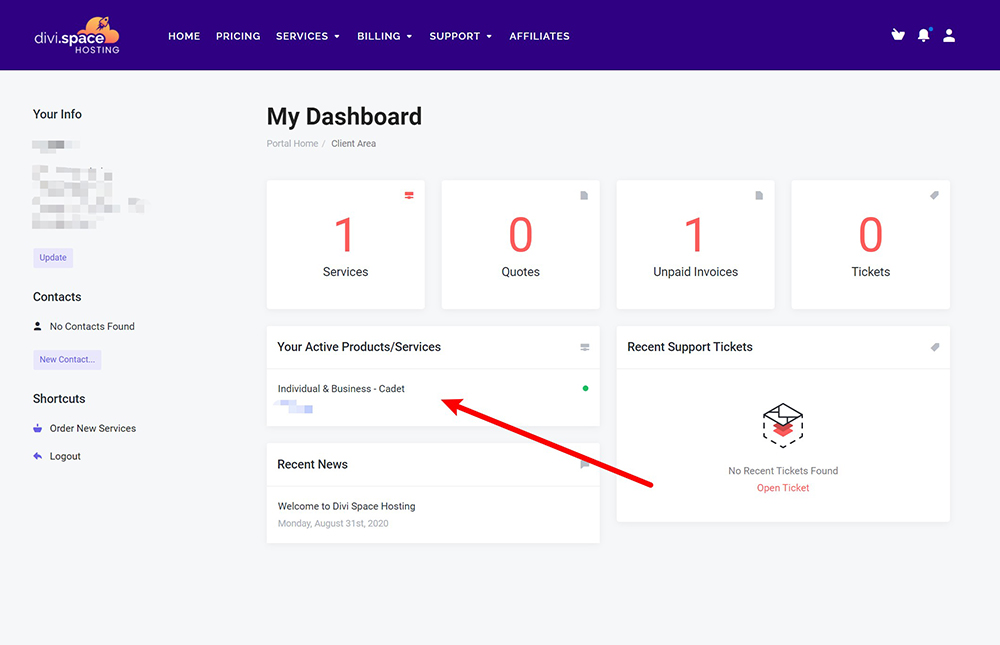
View your products
Then, click the Login to Hosting Control Panel button and you’ll be automatically redirected.
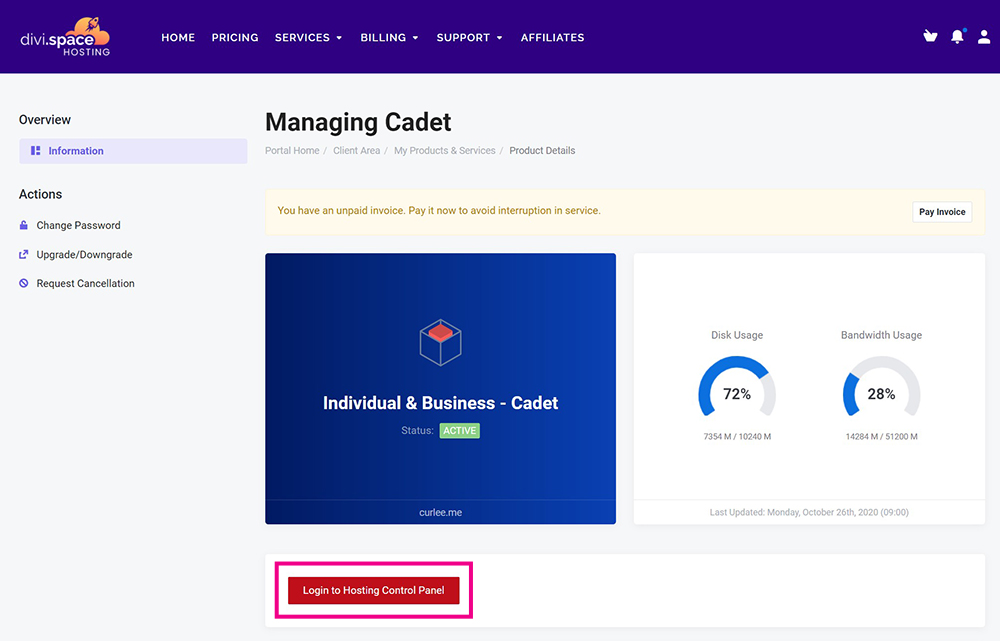
Click ‘Login to Hosting Console Panel’
Alternately, you can also access your Hosting Control Panel directly by opening a Support Ticket. The Divi Space Hosting team will then send you a direct link, username and password.
Once you’ve logged into the Hosting Control Panel, you’ll see your existing sites. There are three different view options for this control panel. Click on the Change View button and select a view that fits your style.
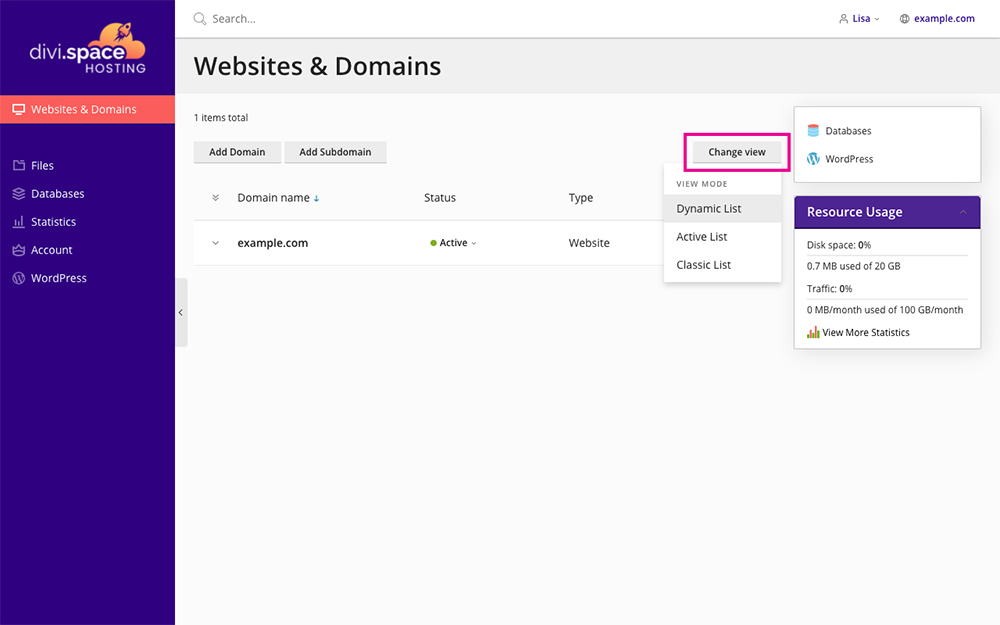
Click Change View to browse the alternate views
Here is an example of the Dynamic List View:
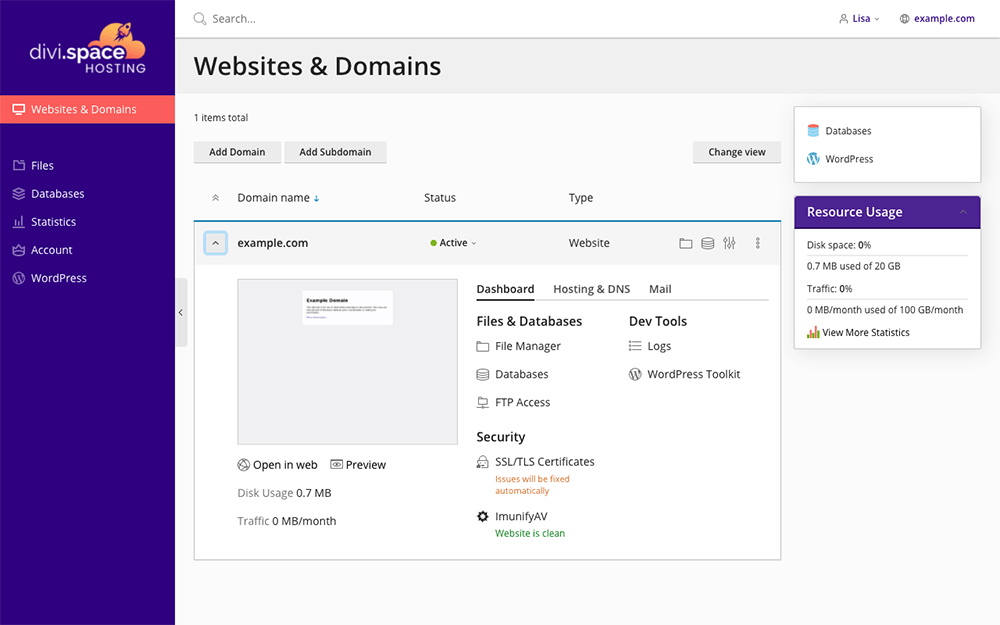
An example of Dynamic List View
Here is an example of the Classic List View:
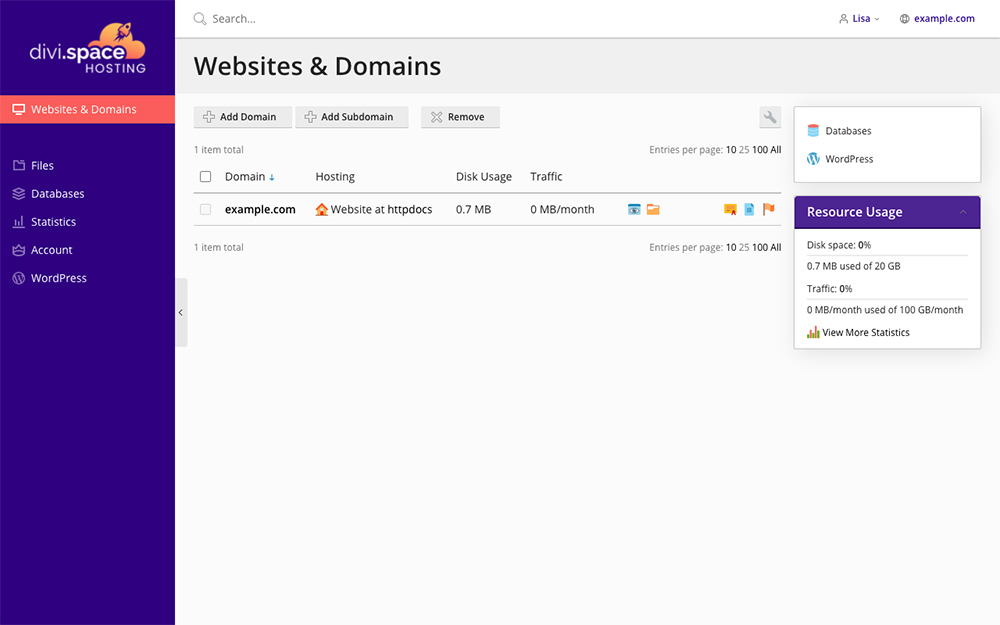
An example of Classic List View
Here is an example of the Active List View:
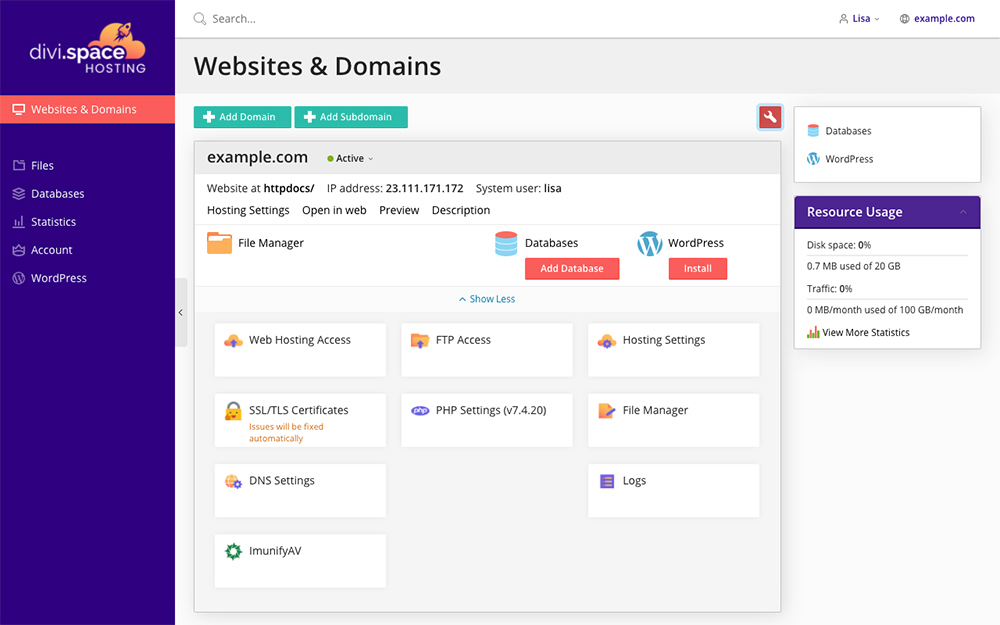
An example of Active List View
How to Add a Domain and Subdomain
To begin building your site, you’ll need to create a domain first. To do so, click on the Add Domain button.
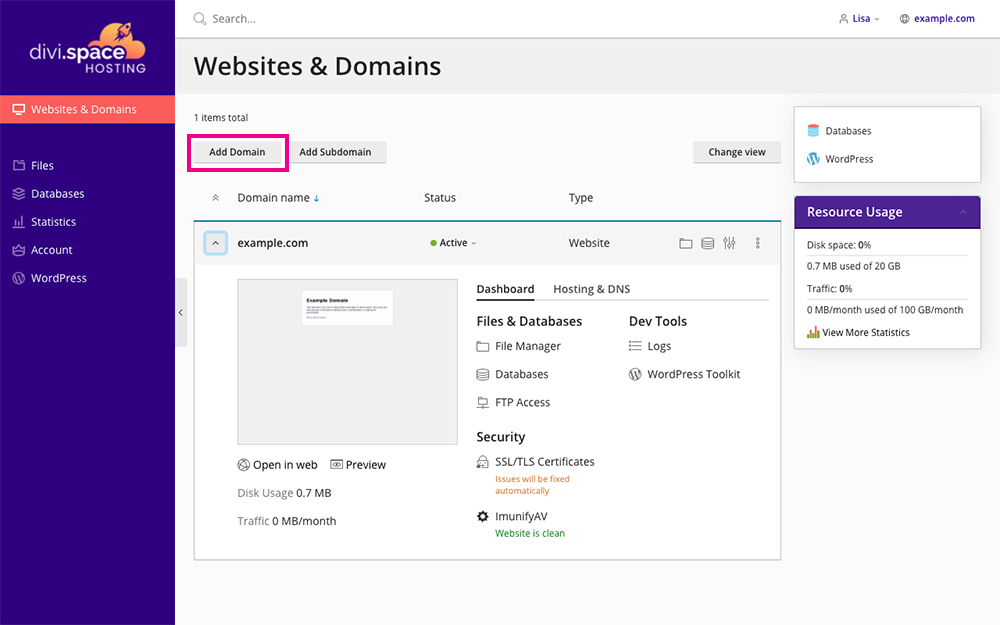
Click Add Domain
This will open up a panel that allows you to either set up a temporary domain or add a registered domain. If you haven’t purchased a domain from a registrar like GoDaddy yet, you can proceed by creating a temporary domain. These temporary domains will have arbitrary naming conventions.
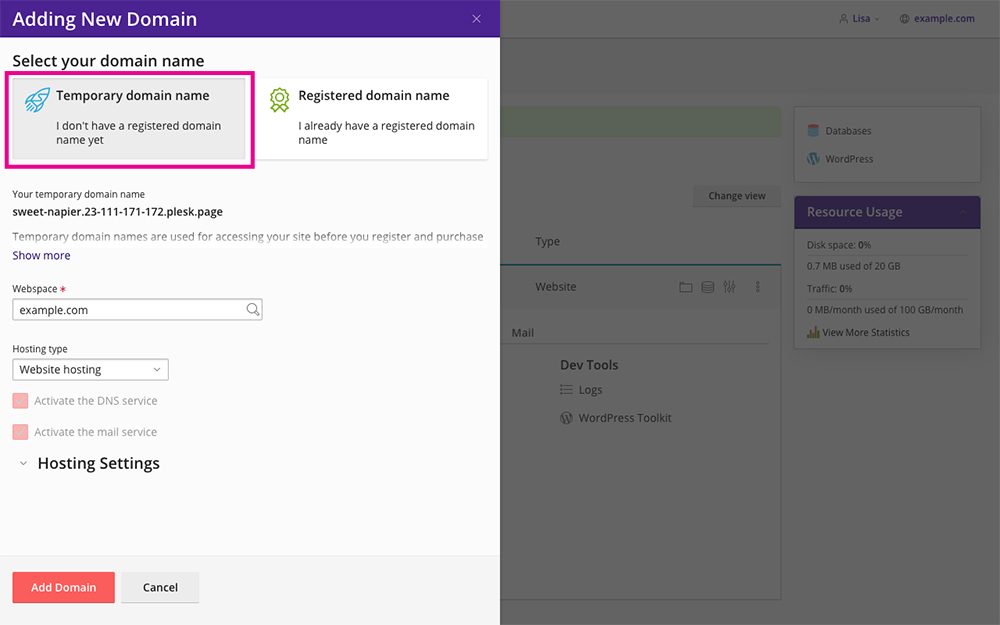
Add a temporary domain name
If you’ve already purchased a domain name, select the second tab and follow the on-screen prompts.
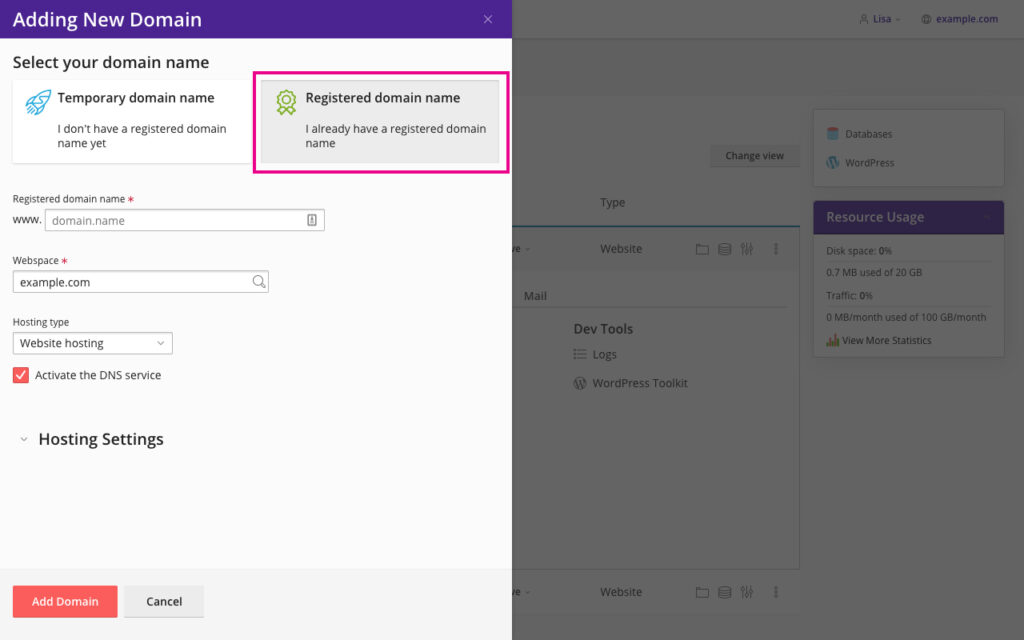
Add a registered domain name
If you’ve created a temporary domain, you can always go back and change the domain name at a later stage once you’ve purchased a domain.
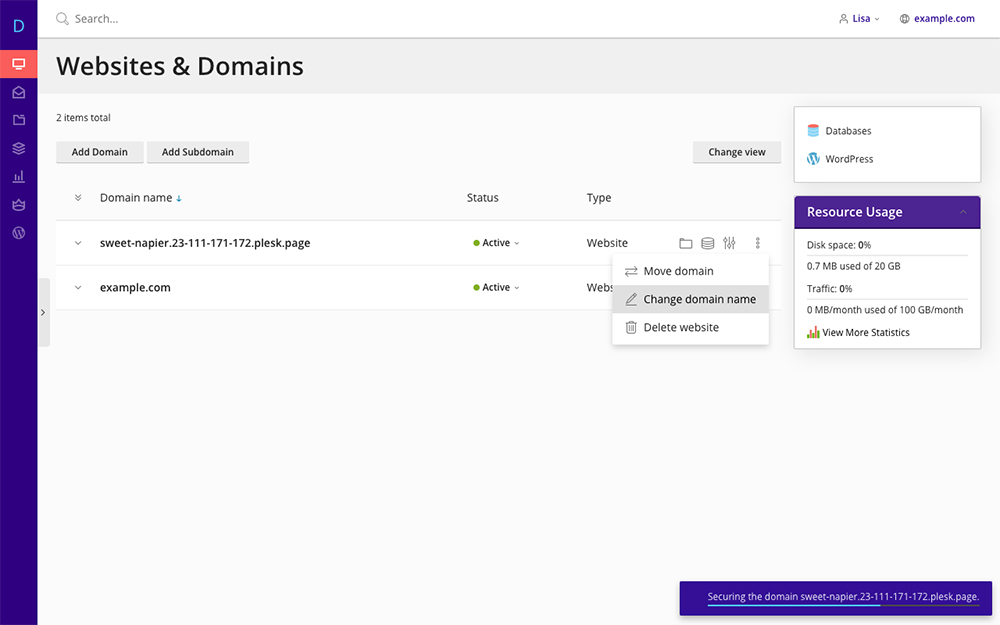
When ready, you can change the domain name at any time
To add a subdomain, click the Add Subdomain button on the Websites & Domains tab. Enter the name of the subdomain, select the correct domain from the drop-down list and click Ok.
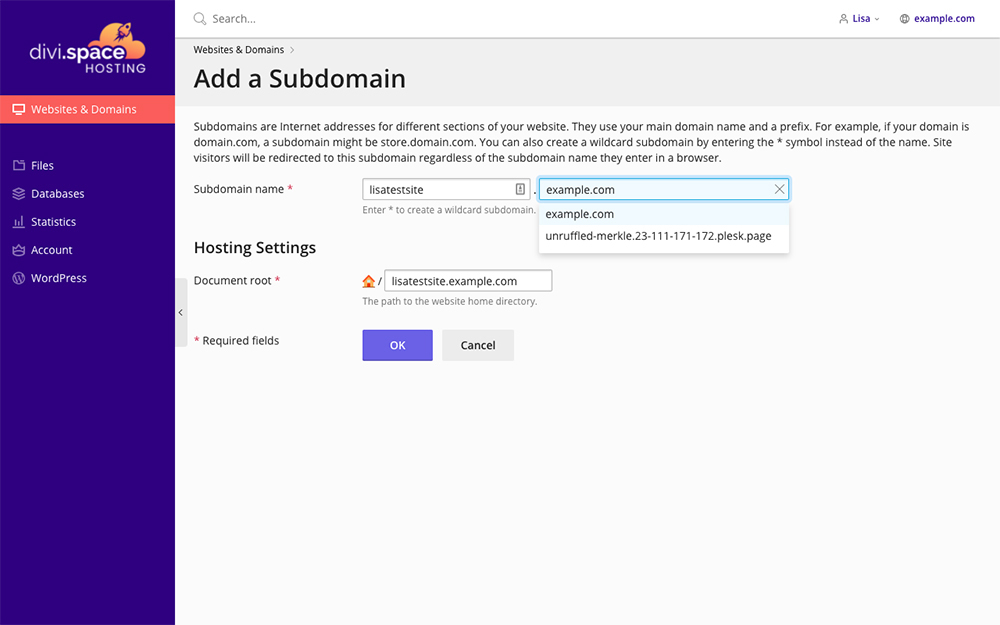
Enter the subdomain name
How to Install WordPress and Divi
Now that your domain is set up, you can begin by installing WordPress. From the Websites & Domains panel, select the website that you’ll be installing WordPress on and click the WordPress Toolkit button.
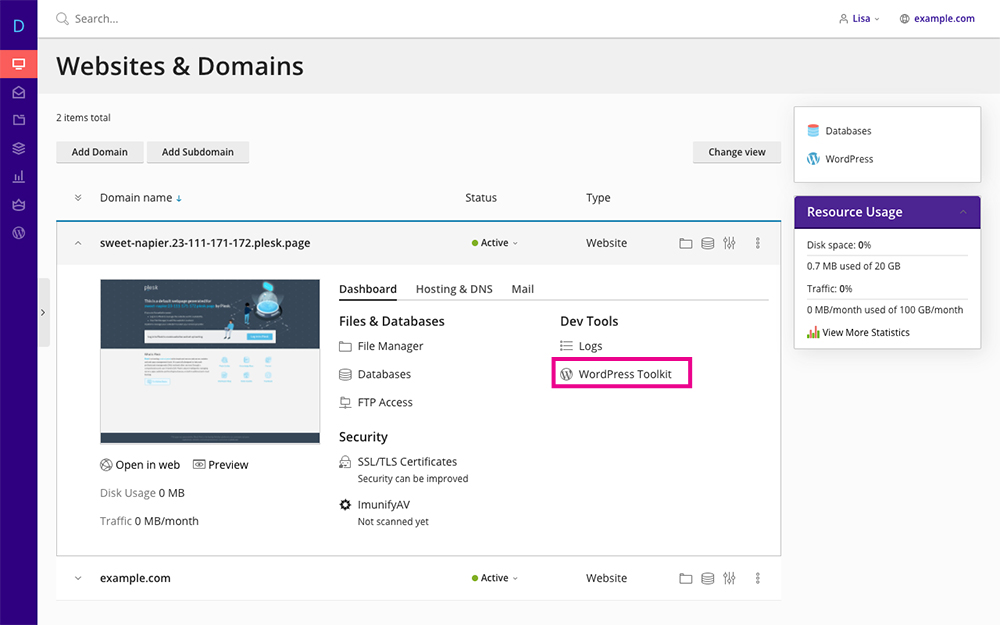
Exploring the WordPress Toolkit
Once you’re inside the WordPress Toolkit, click the Install WordPress button.
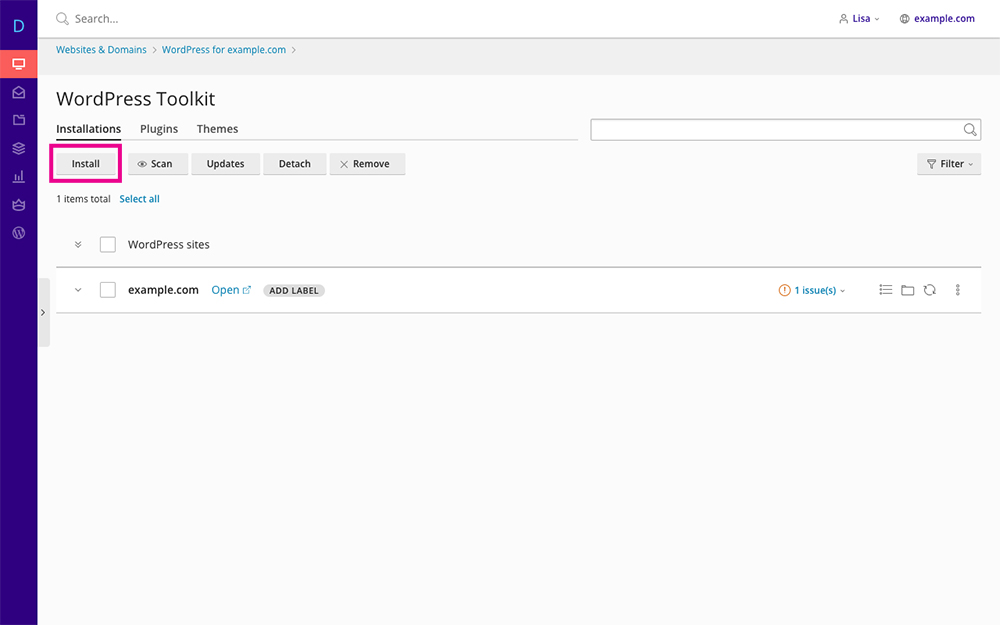
Click Install
From the Installation Path drop-down menu, select the website that you want to install WordPress on. You can also give your site a unique site title by entering custom text into the Website Title box.
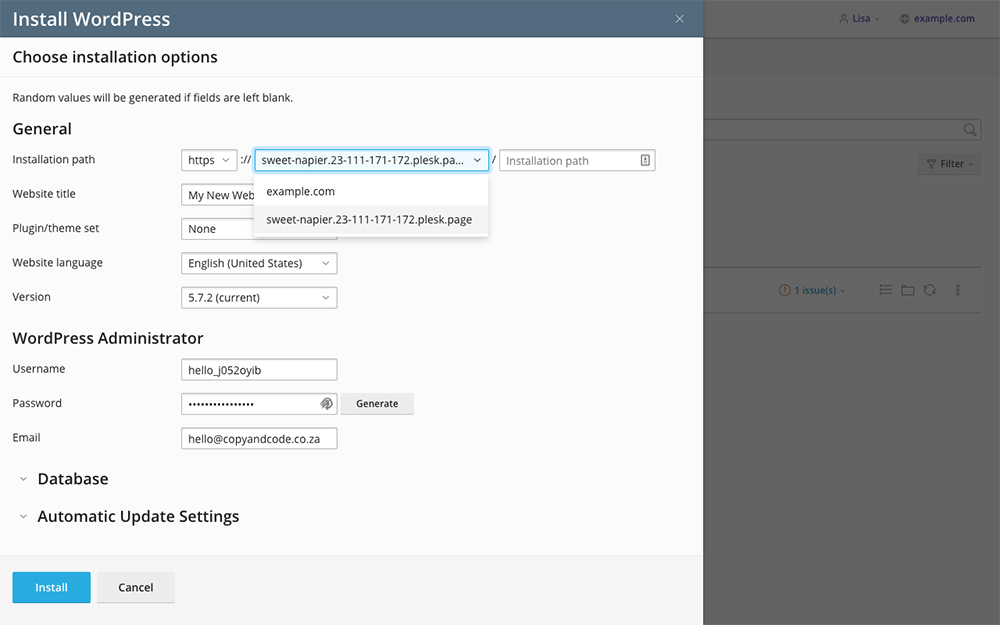
Select the correct Installation Path
From the Plugin/Theme Set drop-down menu, you can choose from a collection of pre-set configurations. Selecting ET Divi Theme will automatically install the Divi theme for you.
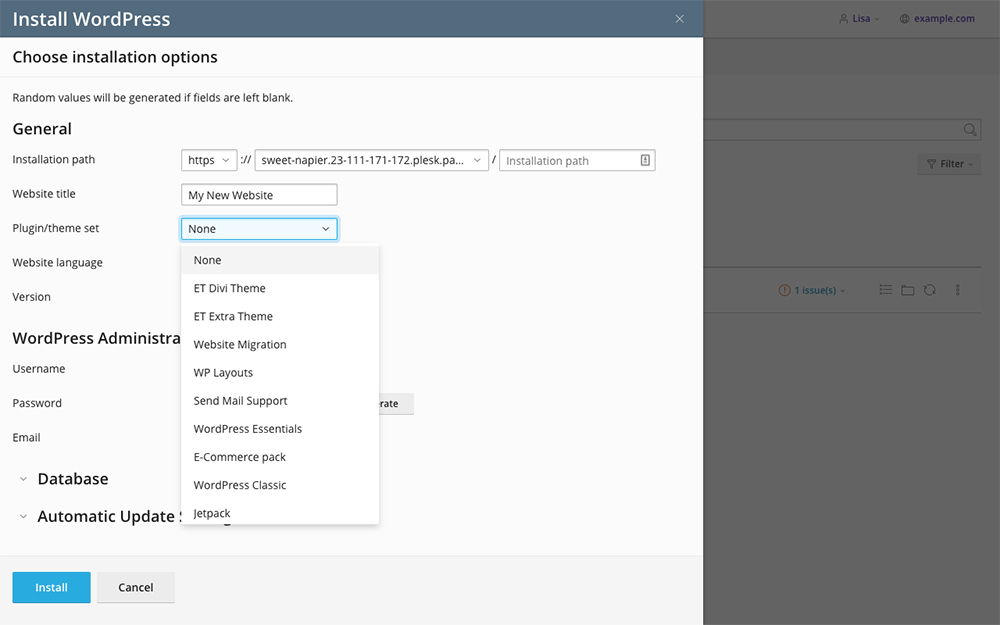
Select s Plugin or Theme set
The WordPress Installer will automatically suggest database variables, but if you’d like to enter custom variables, hit the down arrow next to the Database tab. Then, if you’d like to enable automatic updates for WordPress, themes or plugins, do so by hitting the down arrow at the Automatic Update Settings tab.
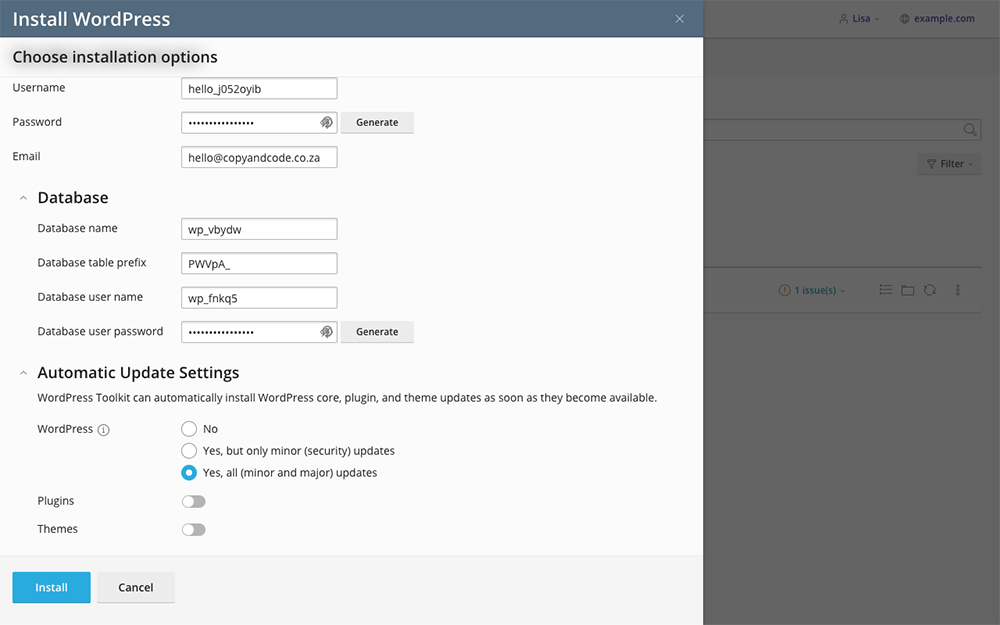
Enter the relevant details and click Install
Once you’ve configured everything to your liking, click Install. The installation can take a few moments to complete. First, it’ll install WordPress, then it’ll install the theme and plugin set.
When the installation has completed, click the Login button.
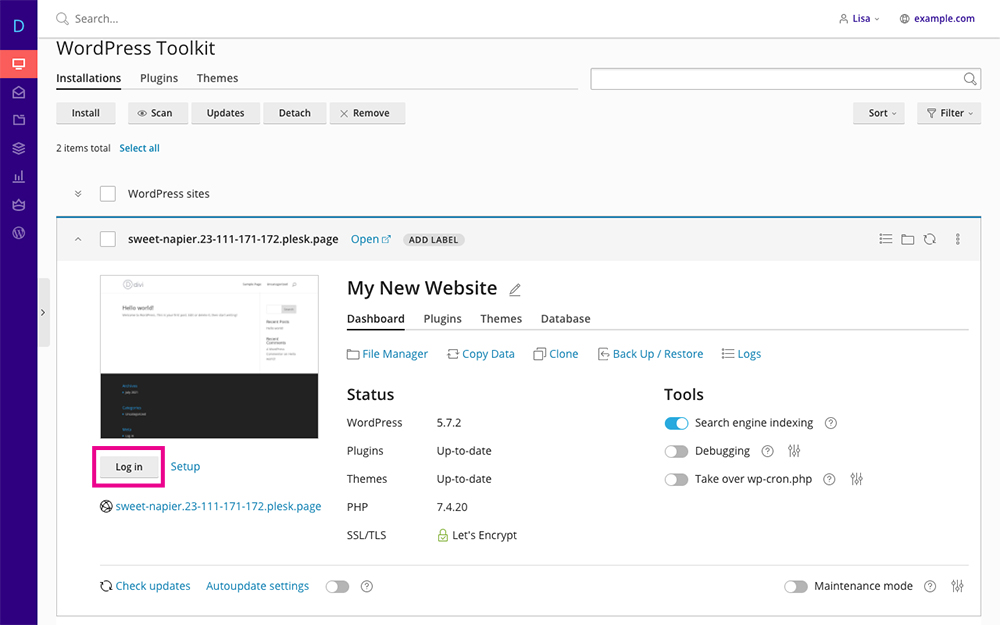
Click Login
This will take you directly to the WordPress dashboard and you can start building. Divi users will see the familiar purple notice bar that signals the Divi theme is installed.
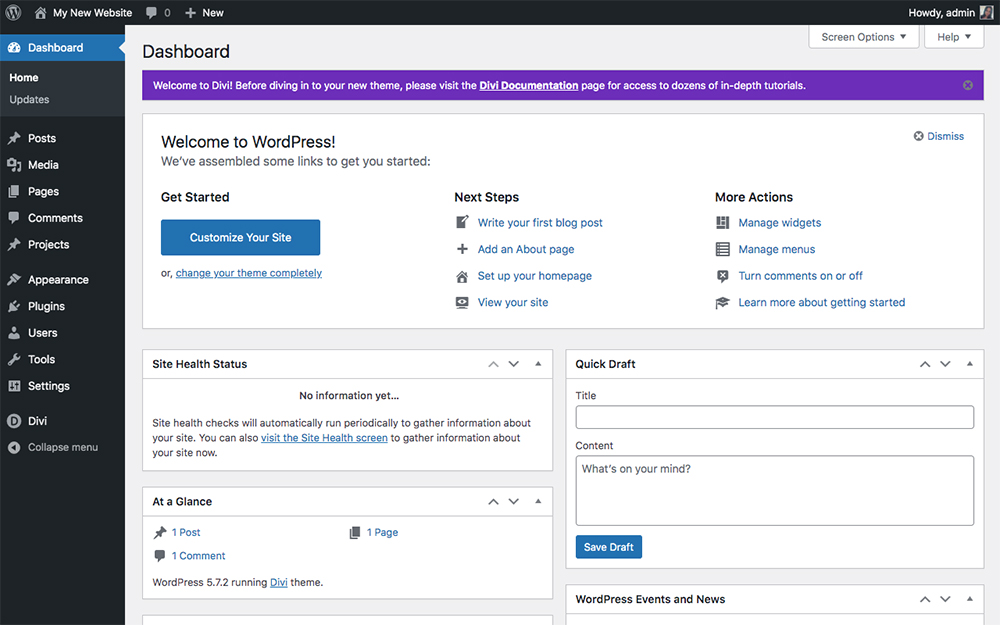
The Divi theme is successfully installed
If you head to the front-end of the site, you’ll see the default Divi homepage. Now you can begin building your website!
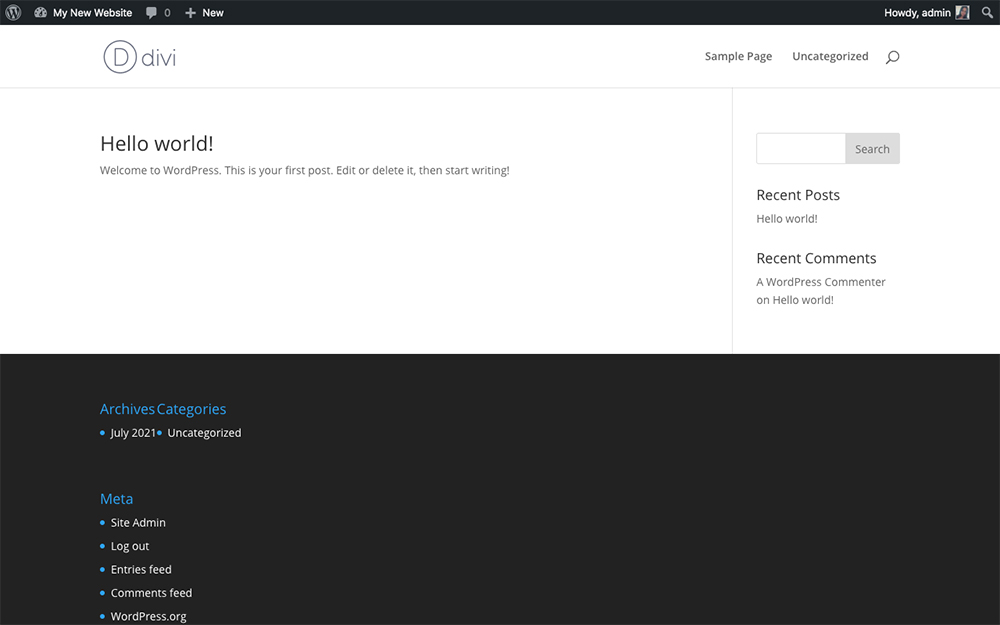
The familiar Divi default page lets you know that the theme is installed and activated
Navigating the WordPress Toolkit
Divi Space Hosting’s WordPress Toolkit makes managing your WordPress website from a central location a breeze. Here’s a quick rundown of the WordPress Toolkit’s options:
If you click Open, you’ll be taken to the front-end of your website.
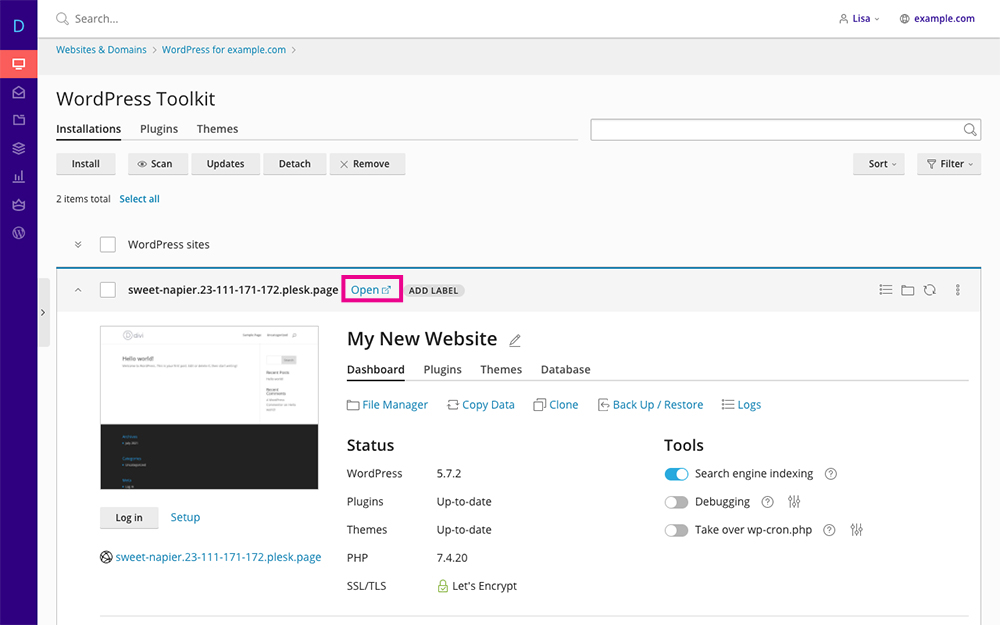
Click Open to view the front-end of your website
The Add Label button allows you to assign a label to each site, such as Production, Demo, Staging and so on.
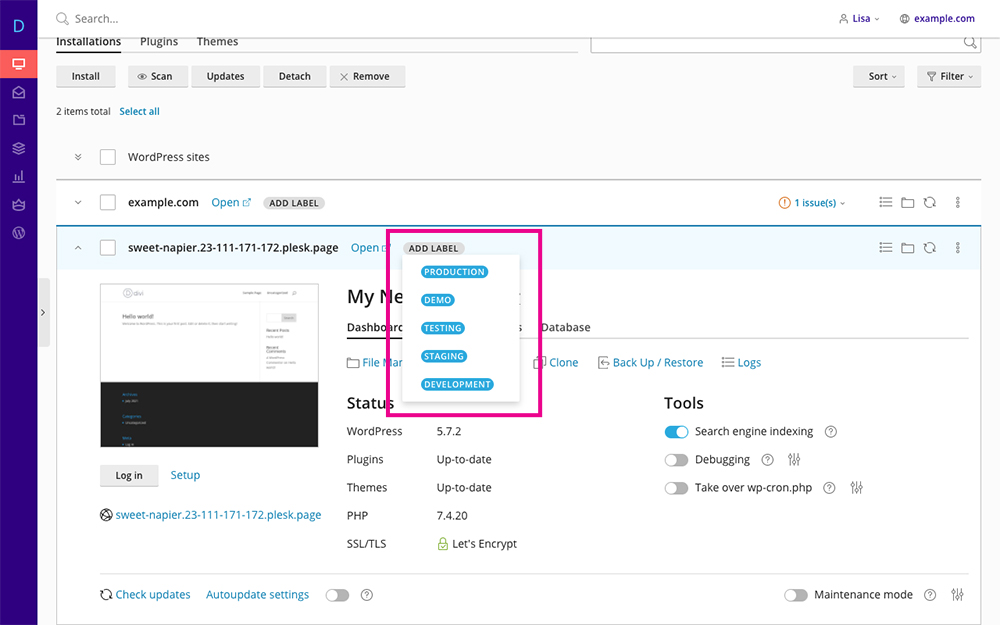
Assign a label
The Dashboard tab gives you an overview of your website. From here, you’ll get an overview of the site including any outstanding updates, whether the SSL certificate is enabled and the latest version of PHP. You’ll also have a direct link to the File Manager and Logs. From here, you can copy, clone and restore your site with the click of a button.
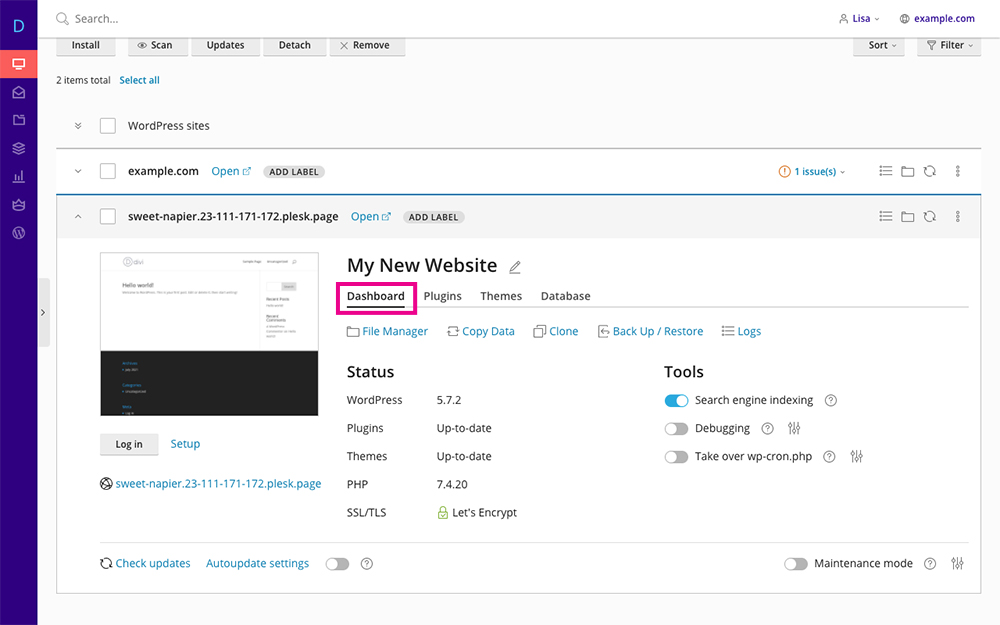
The Dashboard tab
The Plugins tab shows a list of the installed plugins on your site. You can toggle the Stage toggle on or off to activate or deactivate a plugin and use the trash can icon to delete one.
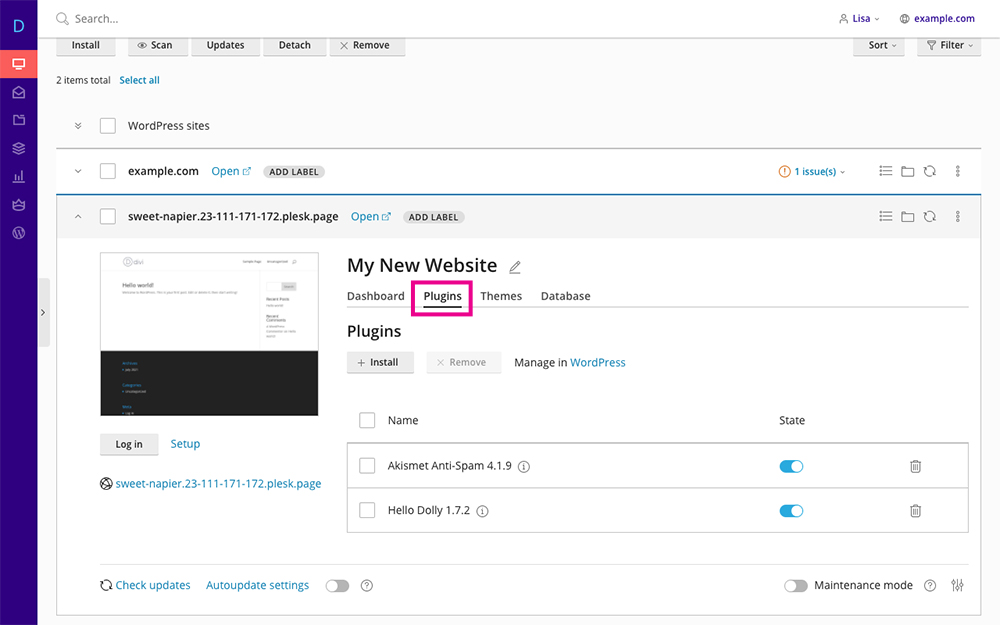
The Plugins tab
If you click the Install button, a modal will pop up showing all of the plugins available to you. You can choose to install them from here, from within the hosting console, or you could install them via the site.
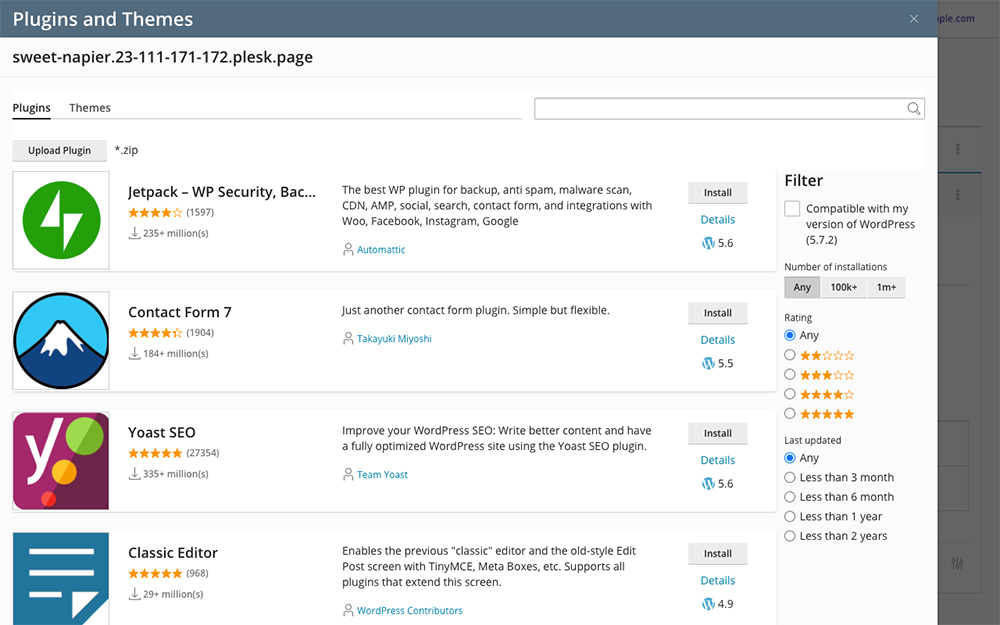
Install plugins from your hosting console
Similarly, the Themes tab will show you every theme that’s active on your site.
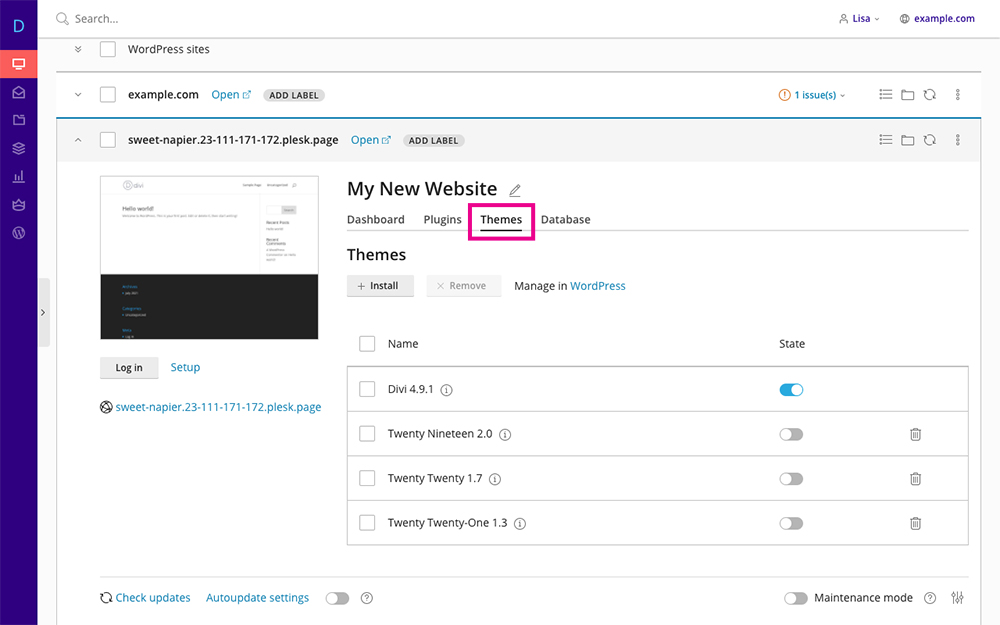
The Themes tab
Again, you can hit the Install button and a list of available themes will display.
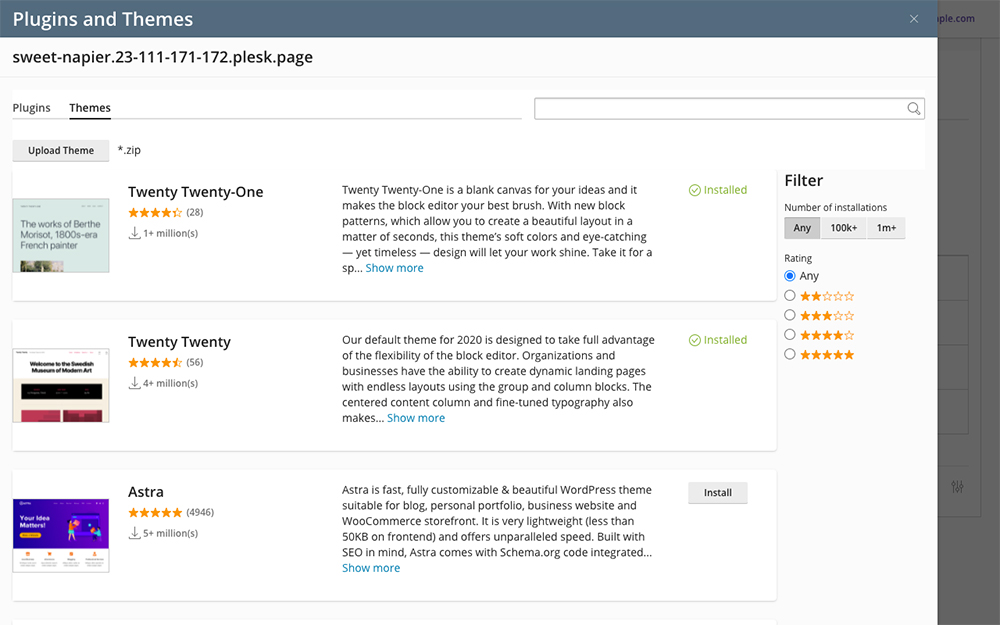
Install WordPress themes from your hosting console
The Database tab shows your database details. There is also a direct link to open the database in phpMyAdmin.
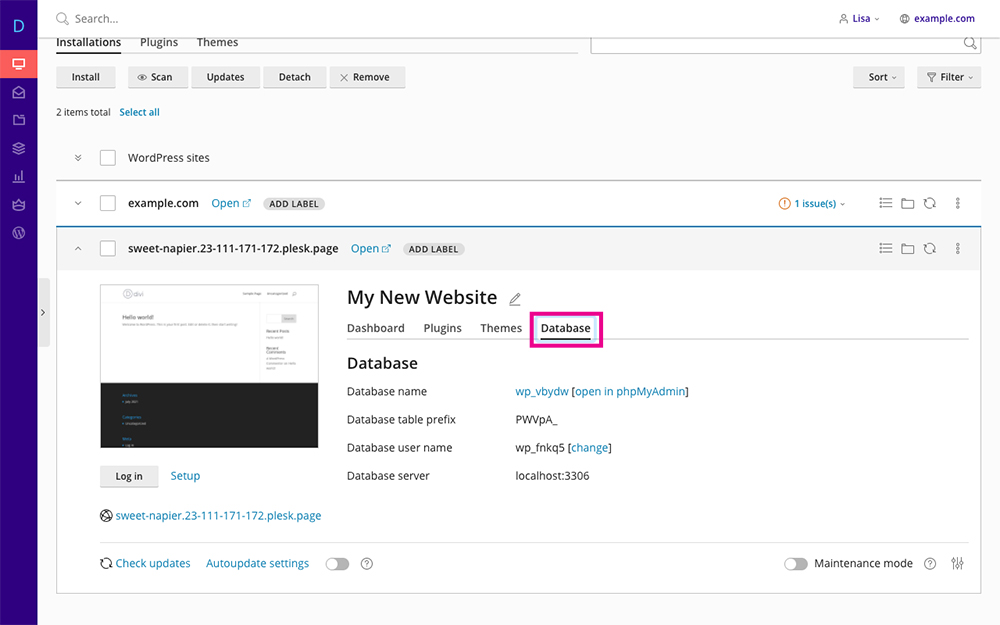
The Database tab
In this section, you’ll see a preview of the front-end of your site. Below the picture are three buttons:
- Clicking the Log in button will take you to the dashboard of the website
- Clicking the Set Up button will display the website’s admin details
- Clicking the URL name will return you to the Websites & Domains section for the website.
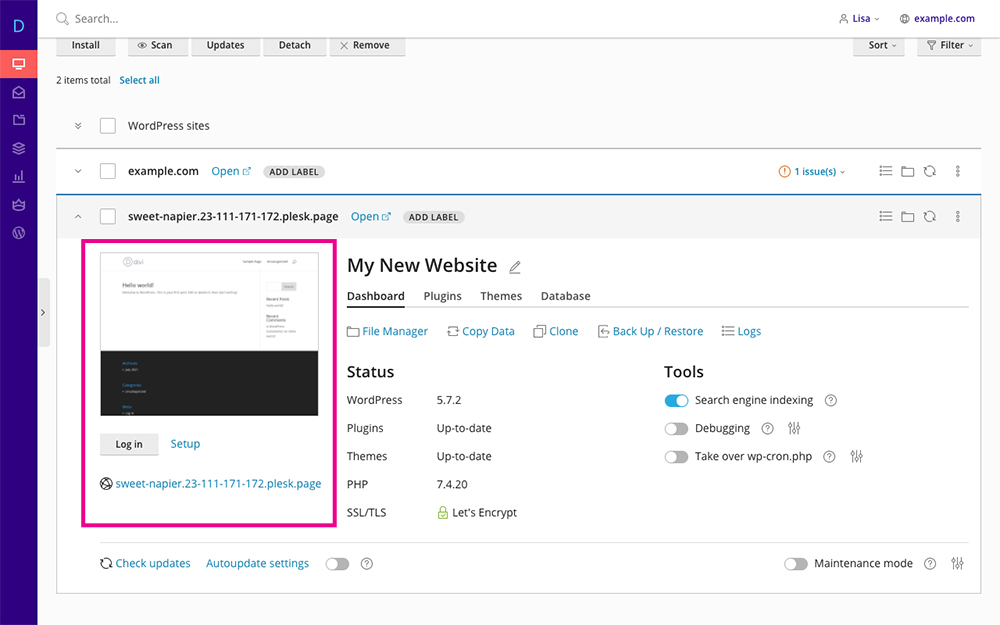
Preview the front-end of your website
The second last section has two options.
- Clicking Check Updates will run an assessment to see if there are any updates available.
- Clicking the Auto Update settings will open a panel that’ll ask if you’d like the WordPress core, themes and plugins to be auto-updated.
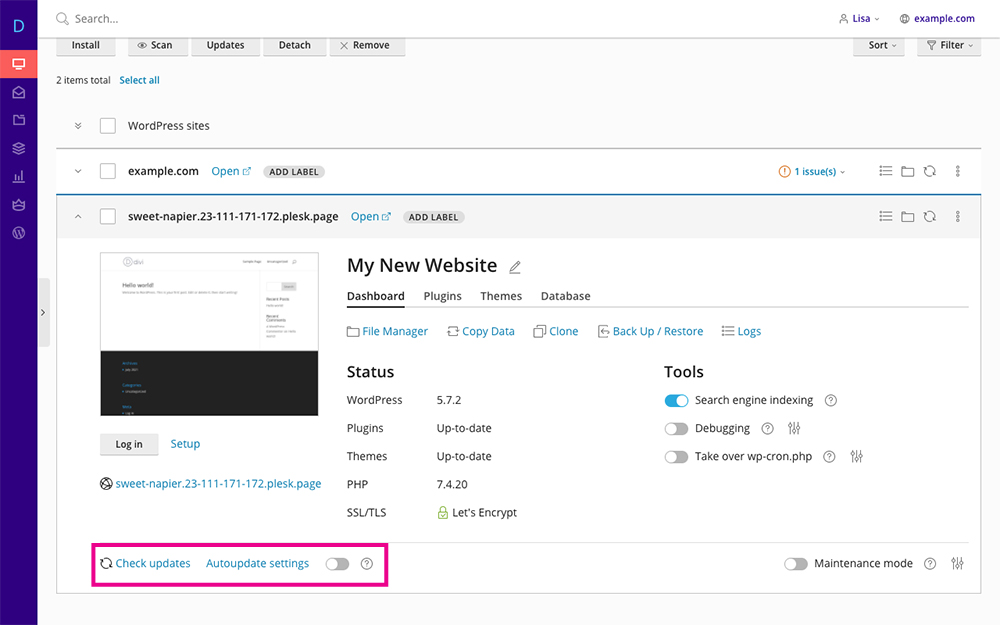
Check for updates directly from your hosting console
Finally, a great feature of Divi Space Hosting is the Maintenance mode option. By simply toggling Maintenance Mode on, you’ll display a maintenance page on the front of your website.
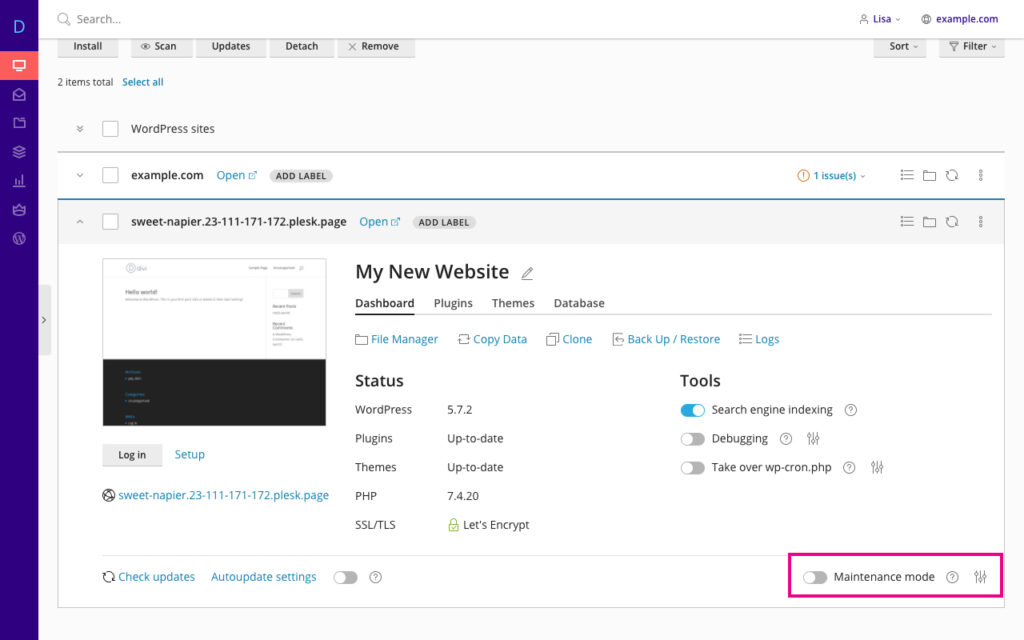
Put your site in Maintenance Mode from the hosting panel
The settings panel opens up and you’ll be able to set the text to customize the maintenance page.
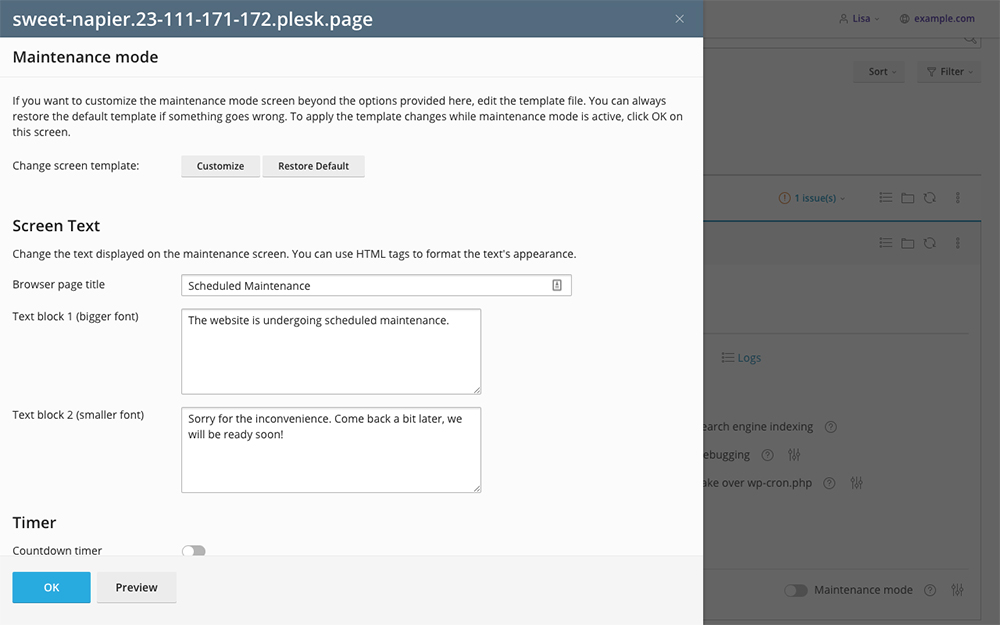
Create a custom notification for your site in Maintenance Mode
Navigating the Hosting Control Panel Dashboard
To help you get familiar with the Hosting Control Panel, the next section will give you an overview of the menu items and options.
The Websites & Domains tab (pictured here in Dynamic View) gives you an overview of all websites on your account. The console offers you quick links to the front-end of the site, FTP user details, file manager, database, DNS settings and more.
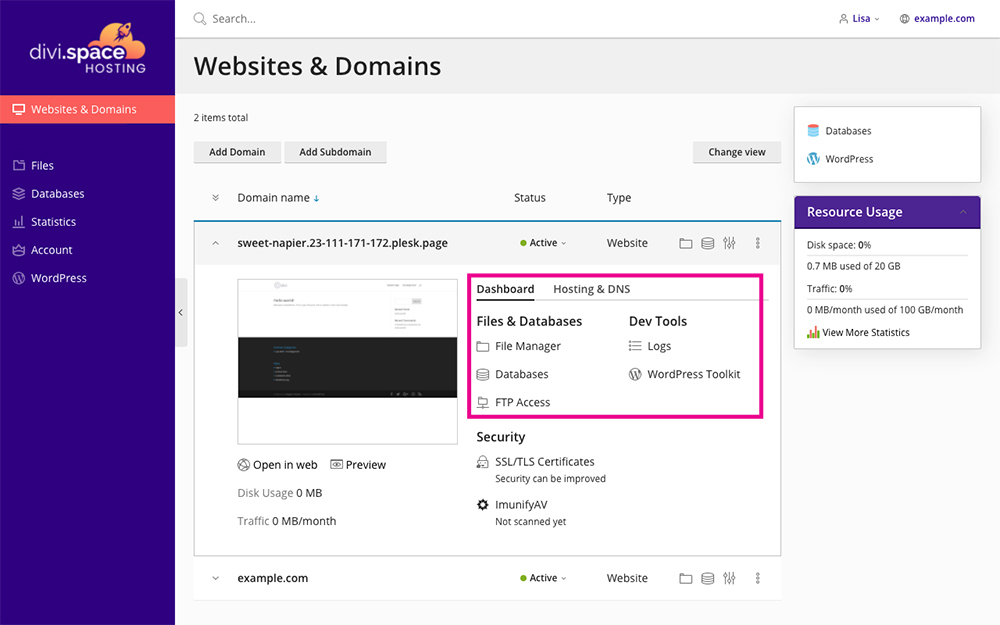
Quick links to the File Manager, Databases, and more
Under the Security tab, you’ll see two options:
- Clicking on the SSL/TLS Certificate button will open up the SSL certificate details.
- Clicking the ImunifyAV button will open a security scan page where you can begin a scan to find malicious files or malware on your site.
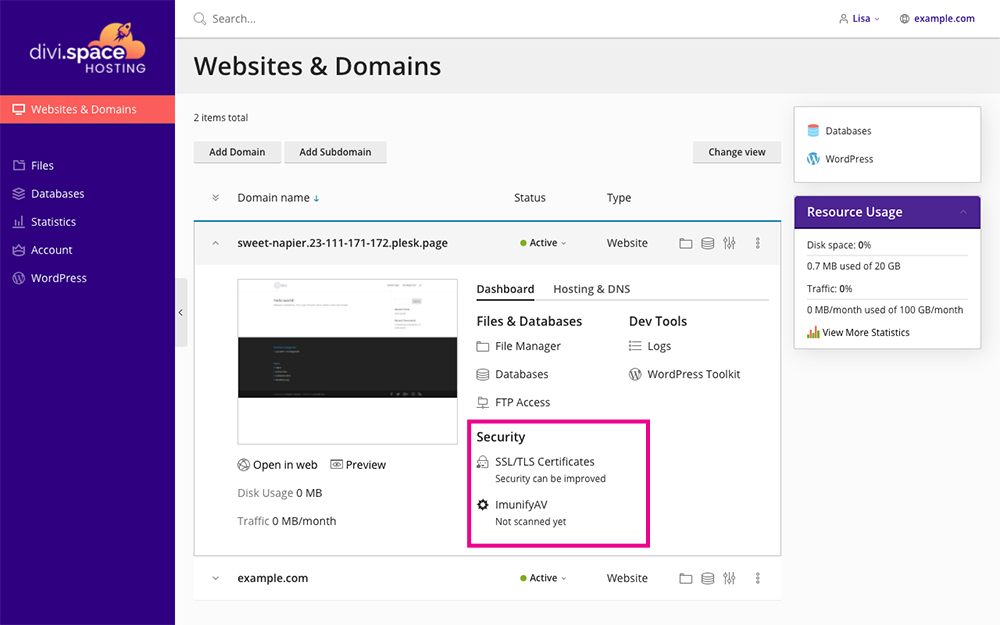
Quick links to the SSL certificates section and ImmunifyAV security scanner
You’ll also see an overview of the server’s Resource Usage so you can keep track of traffic.
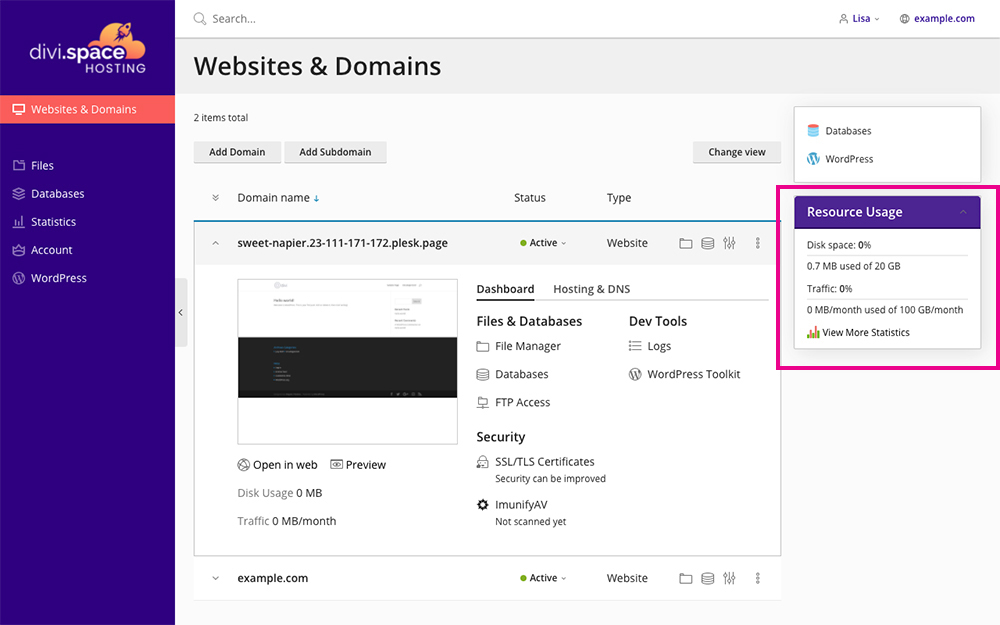
Quick view of the resource usage of the site
The next tab, Files, opens up the File Manager. Here you’ll find all of the site files on your server.
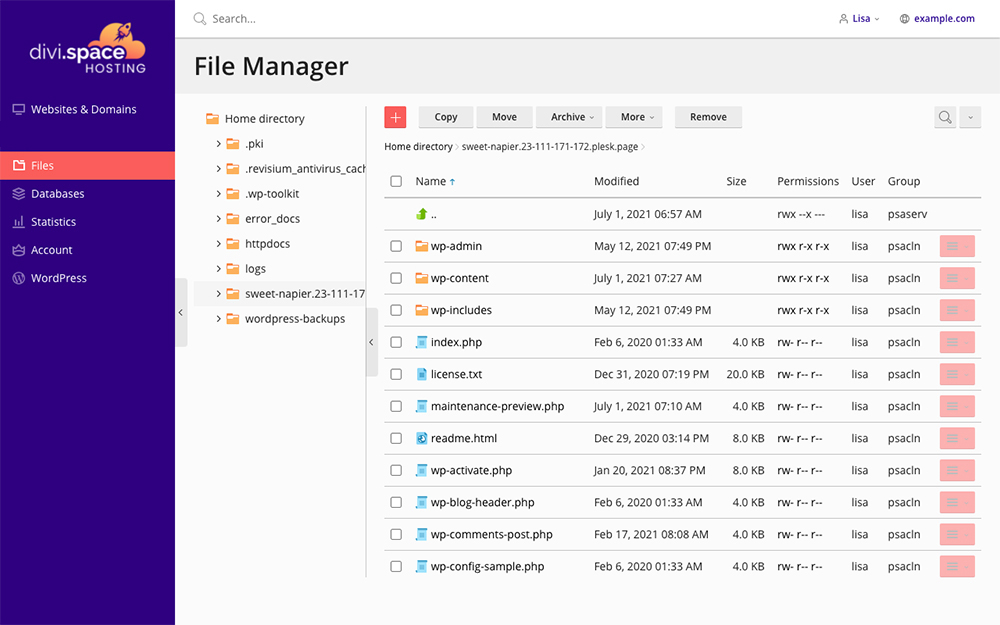
The File Manager
The next tab, Databases, lists all of the databases associated with your account. From this console, you can create and manage databases, log in phpMyAdmin and manage users.
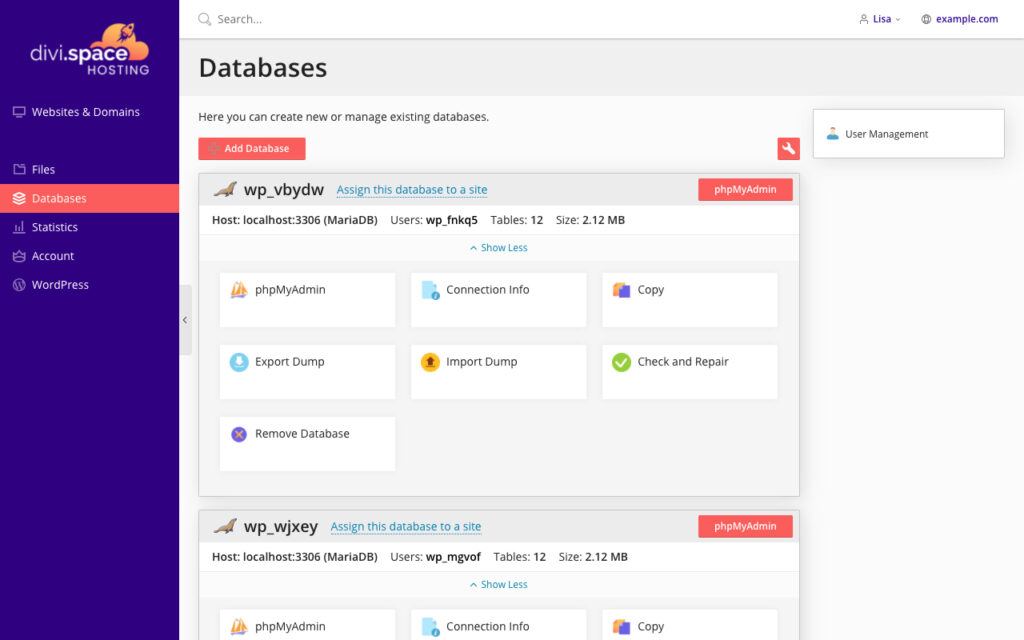
The Database tab
Next, the Statistics tab gives you a detailed report on the resource usage of the site.
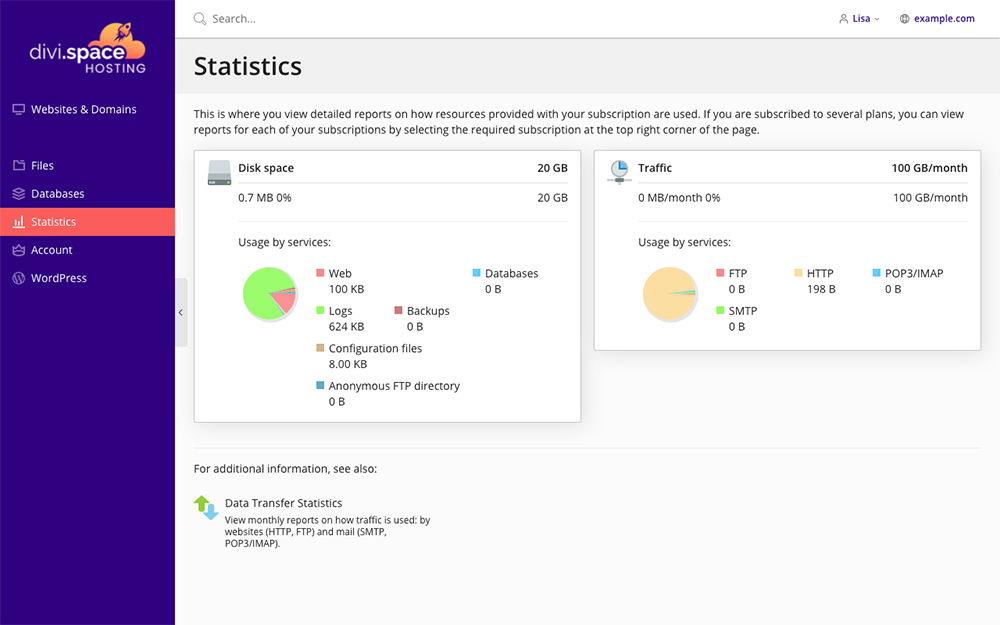
The Statistics tab
Then, the Account tab shows you the Account Information associated with your profile, such as the name of the plan you’re on, how many domains and subdomains you’ve used on your account, various hosting options and more.
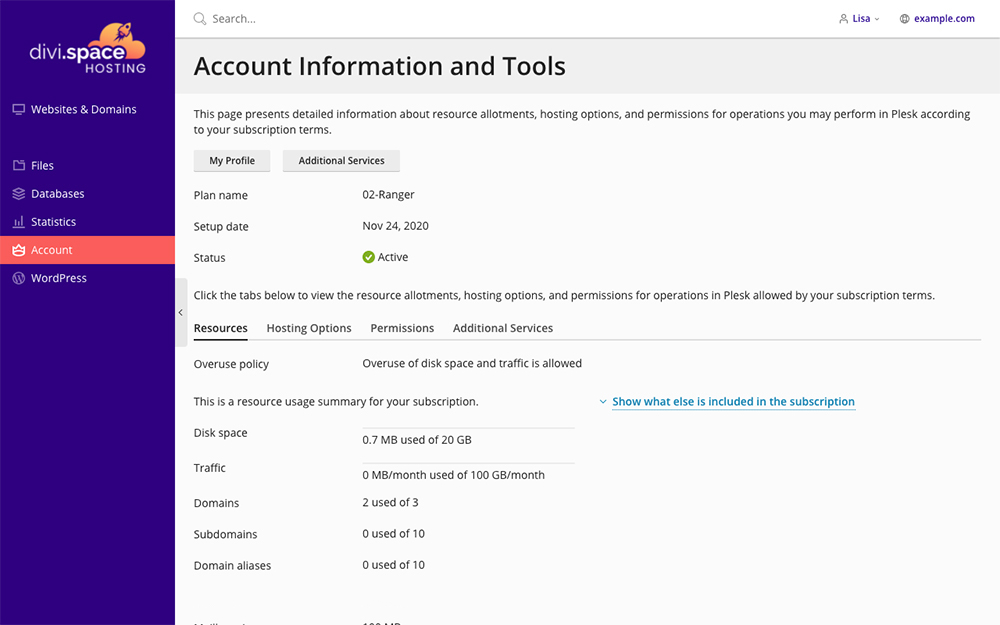
The Account tab
Finally, the WordPress tab opens the WordPress Toolkit which we’ve already explored.
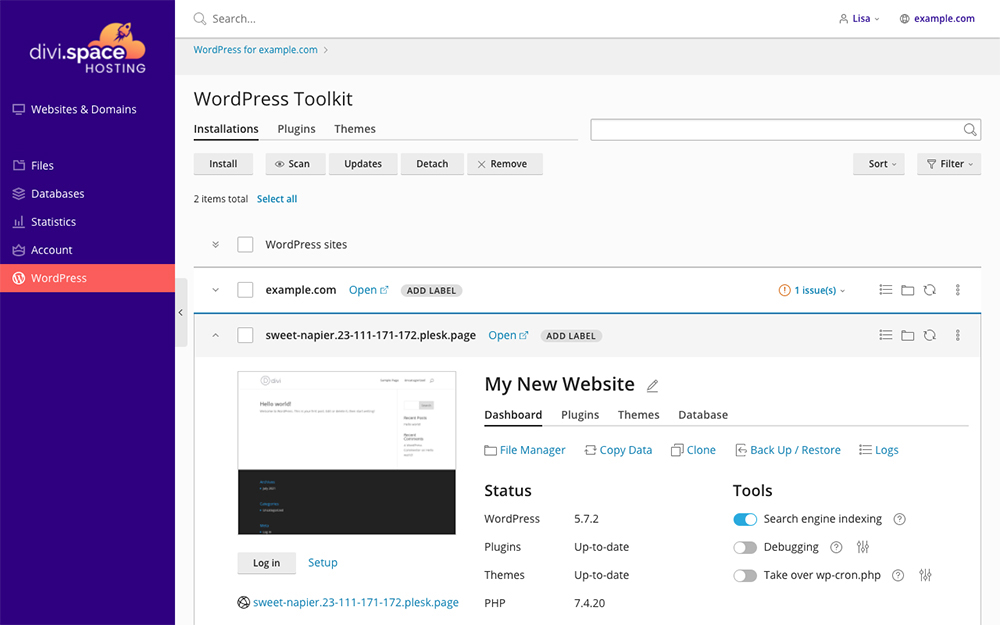
The WordPress Toolkit
Getting Started with Divi Space Hosting
If you’re ready to host your next WordPress website with Divi Space Hosting, head over to the website and purchase a hosting package.
The entry package, Cadent, starts at $15 per month for a single site, increasing in cost based on the number of sites you’ll create and manage.
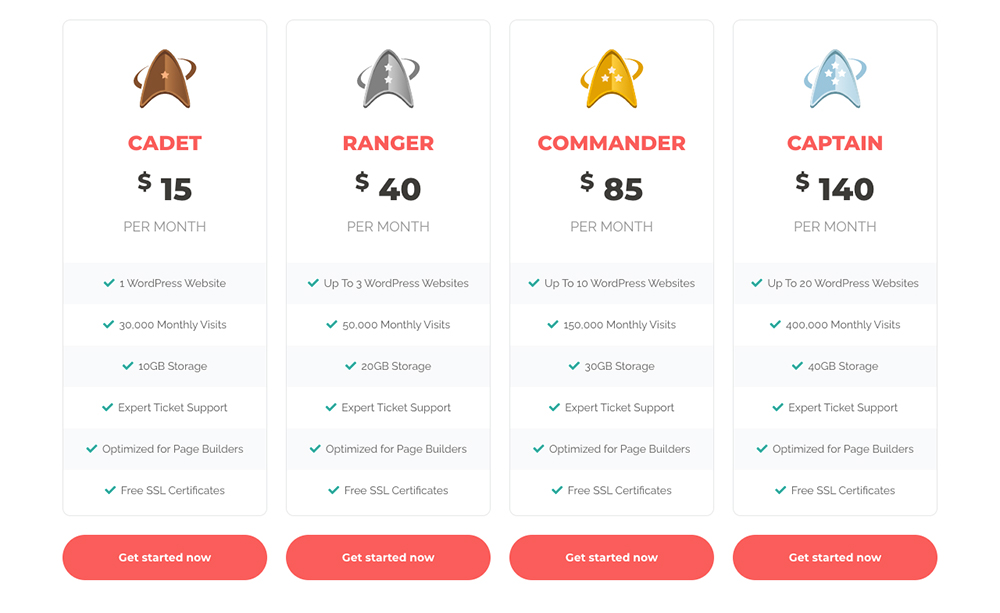
Begin your Divi Space Hosting journey for as little as $15 per month
Ending Thoughts
If you’re looking to build a WordPress website that lasts, we highly recommend investing in managed WordPress hosting with Divi Space Hosting. From automated backups that can be restored at the click of a button, to using a staging site to test updates and develop your website safely, there are so many premium features that you’ll get access to that you won’t find when using a standard WordPress host.
Beyond the standard managed hosting service, Divi Space Hosting’s focus on and optimization of Divi websites makes it one of the best managed WordPress hosting companies for developers using page builders. To start your journey with Divi Space Hosting, head over to the website and register.
Remember, the migration of your first three websites is free, so take advantage of this awesome hosting option!
We want to hear from you! Have you used managed hosting solutions for your WordPress and Divi websites? If so, what has your experience been? Let us know your feedback in the comments section below!


Recent Comments