
If you’ve tried and failed to grasp writing CSS for Divi, don’t worry, you’re not alone. Not only is CSS for general web development a considerable task, but writing CSS for the Divi theme takes it a step further.
As a Divi developer, you’ve got to understand how the theme is made up as well as the naming conventions of the elements in order to know which selector to target to apply CSS to. You’ll also need to know exactly how to script CSS with your child theme’s stylesheet, which can also be a challenge and take some time getting used to.
Thankfully, our plugin Divi Module Custom CSS Selectors lets you write Divi CSS in rapid time without having to script ground-up code in the stylesheet. The plugin works by adding over 500 selectors to the Custom CSS section of the Advanced tab of each Divi module, extending the default options included in the theme framework.
In the following post, we’ll discuss:
- What CSS is and how to write CSS
- How to add custom CSS to Divi (and why it’s quite tricky)
- How our plugin, Divi Module Custom CSS Selectors, helps you write CSS for Divi at rapid speed
- How to use the plugin to write hover state CSS and responsive code without venturing into the stylesheet
What is CSS and What is the Difference Between HTML and CSS?
Websites are typically coded using HTML. Functioning sort of like the walls, windows, and doors of a house, HTML establishes a framework for a web page or layout.
Once the HTML foundation is laid down, CSS styling is applied to the HTML elements to bring them to life by adding colors, hover effects, animations, and much, much more. CSS is used to style a website by decorating it. If HTML is the foundation, such as windows and doors, CSS is the paint color on the walls, the color of the roof, the pictures hung up, and so on.
Both HTML and CSS are not programming languages. They do not allow you to build frameworks and applications. Instead, HTML and CSS are ‘syntaxes’ that can give form and decoration to the frameworks created by programming languages.
Typically, CSS styling is added to what’s called a website’s stylesheet. When writing CSS, you’d need to target the correct HTML element and apply the CSS styles by writing CSS rules.
How to Write CSS for Web Design
When writing CSS, you’ll create ‘rules’. These rules will format the HTML elements within your website.
Here is an example of a CSS rule:
h1 {color: red; font-size: 16 px;)
In the above CSS rule, the scripting styles all of the headings with the H1 tag in a website to display with the color red, in a font size of 16px.
What is a CSS Selector?
The CSS rule is made up of two parts: the selector and the declaration.
- The selector is used to target the specific HTML element within a website that you’d like to style. In the example above, the selector is the ‘h1’, targeting all h1 tags in a site.
- The declaration is how you’ll be ‘decorating’ this element. The declarations style the h1 tag in a particular way, in this example, by setting all h1 tags on the site to display in red and at size 16px.
The declaration is also made up of two parts: the property and the value. In the example above, the property is color and the value is red. There are countless other options that you could choose for the property of color, you could choose blue, yellow, black, or specify these as hex codes of #000000, #f4f4f4, or #f3f3f3.
Diving a bit deeper, there are a few well-known selectors available:
- Element Type Selectors: as demonstrated above, these selectors target a particular HTML element
h1 {color: red; font-size: 16 px;) - Descendant Selectors: if you’d like to get really specific with which elements you’re styling, you can style an element that’s a descendant of another. For example, the following syntax will style all italicized text within the H1 heading tags to be blue in color
:
h1 em {color: blue;) - CSS Classes: Say, for example, you have a very particular way you’d like to style the heading text on the blog and contact page of your website, you could assign the heading tag to a particular CSS class. Assign the heading 1 tags on the Contact and Blog pages with the class name of something unique and memorable, like ‘blogcontact’. Declaring a CSS class uses a period symbol before the class name, like so: .blogcontact. You’ll then add the class to the element you’d like to target, .blogcontacth1, and then any CSS declaration will target only the heading 1 tags with the class blogcontact.
.blogcontacth1 {color: yellow;} - CSS IDs: Similar to classes, CSS IDs function in the same way, allowing you to customize a specific section of a website. Unlike classes, IDs can only be used once, and are specified with a hashtag symbol. For example, #homepageh1 will target the heading 1 tag on the homepage only.
#homepageh1 {color: pink;}
There are plenty of selectors available; some popular ones include:
- font-size
- font-weight
- color
- background-color
- text-decoration
- And much more.
Writing CSS can be tricky for new users. There’s a lot to learn, such as which HTML elements to target, when to use class vs. IDs, and what to write if you have complex HTML elements within a layout.
How to Write Divi Custom CSS
It can sometimes be difficult to know how to add custom CSS to Divi. The page builder’s framework has been extremely intricately developed, and so adding by figuring out which HTML elements should be targeted to achieve the correct effect can be tricky.
For example, the Divi theme combines multiple CSS classes to target the various elements within a page layout, and sometimes, targeting Divi elements requires you to write CSS code that looks like the following:
div.et_pb_module et_pb_text et_pb_text_3 et_pb_text_align_left et_pb_bg_layout_light
This can be extremely confusing, especially for new users. Thankfully, the team at Elegant Themes recognized how tricky writing Divi theme CSS could be, so they built a cheat into the framework.
Instead of writing CSS ground-up within the stylesheet, there’s an easy-to-use CSS scripting section built into each module in the Divi theme package.
Each module is made up of three sections:
- The Content tab
- The Design tab, and
- The Advanced tab
In the Advanced tab, you’ll find an option called Custom CSS. Here, you’ll be able to add CSS styling to the module by targeting the Main Element, the element Before, and the element After.
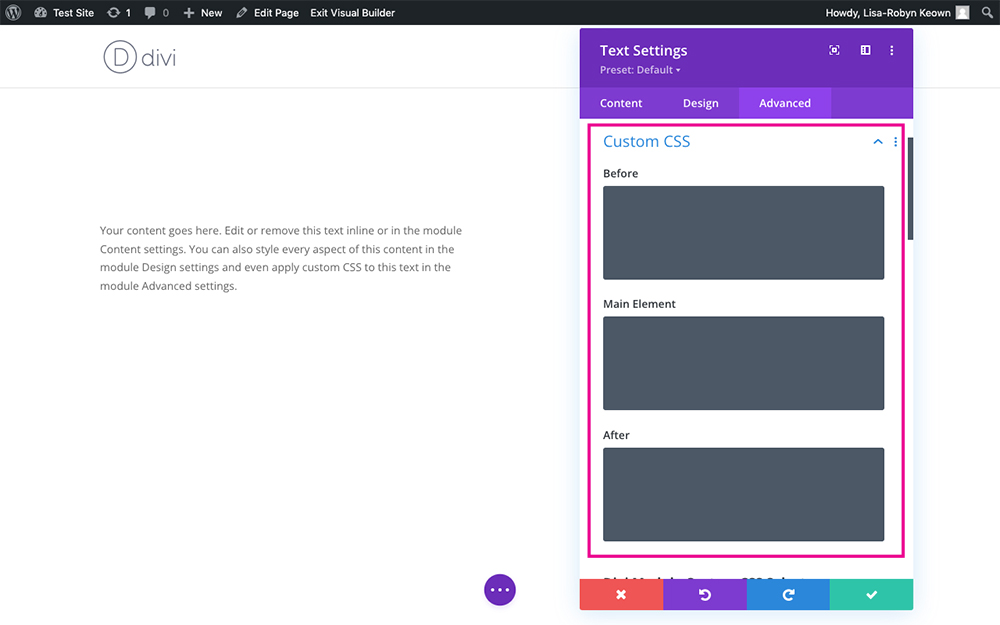
The default Custom CSS options in the Advanced tab
Here’s an example of CSS added to the native Custom CSS Divi console
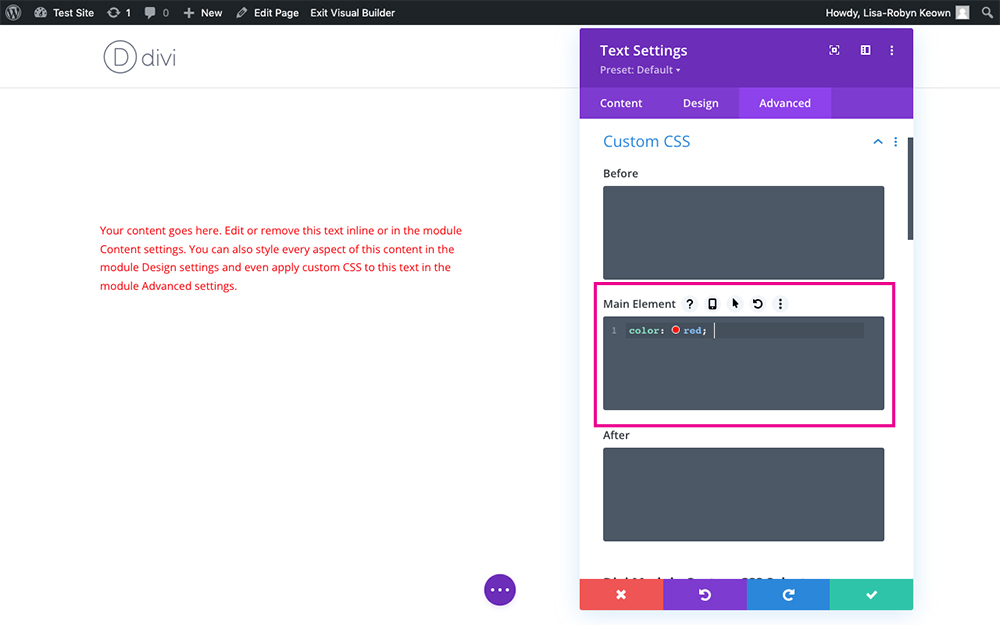
By default, there are a few selector options included in the Divi theme
Using the Custom CSS selectors is great for writing short snippets of CSS. You can bypass the stylesheet scripting, which is a much more complicated route as it requires adequate knowledge of the Divi theme setup and the correct elements and classes to target. However, as great as the Custom CSS section is, it has its limitations.
By default, there are only a handful of CSS selectors included in the Divi theme out-of-the-box. If you’re looking for a very specific selector to target, and it’s not within the custom CSS section of the Advanced tab, you’ll be forced to find the correct selector and write CSS from scratch.
Thankfully, our plugin, Divi Module Custom CSS Selectors, comes to the rescue. The Divi Module Custom CSS Selectors extends the number of Custom CSS selectors so that you can target each and every aspect of a module within the Divi builder.
How to Add Custom CSS to Divi
In total, our plugin adds over 500 new selectors across each module in the theme, meaning you can get really specific with your design, and never have to worry about painstakingly searching for the correct selector again.
For example, by default, the Divi blurb module’s Advanced Custom CSS tab offers CSS styling for the following selectors:
- Before,
- Main Element,
- After,
- Blurb Image,
- Blurb Title,
- Blurb Content
This is an adequate number of selectors, but what if you wanted to add more customization and didn’t want to write script code, such as styling the blurb icon?
With the Divi Module Custom CSS Selectors, an additional three selectors are added, including styling the including Blurb Container, Blurb Description, and Blurb Icon.
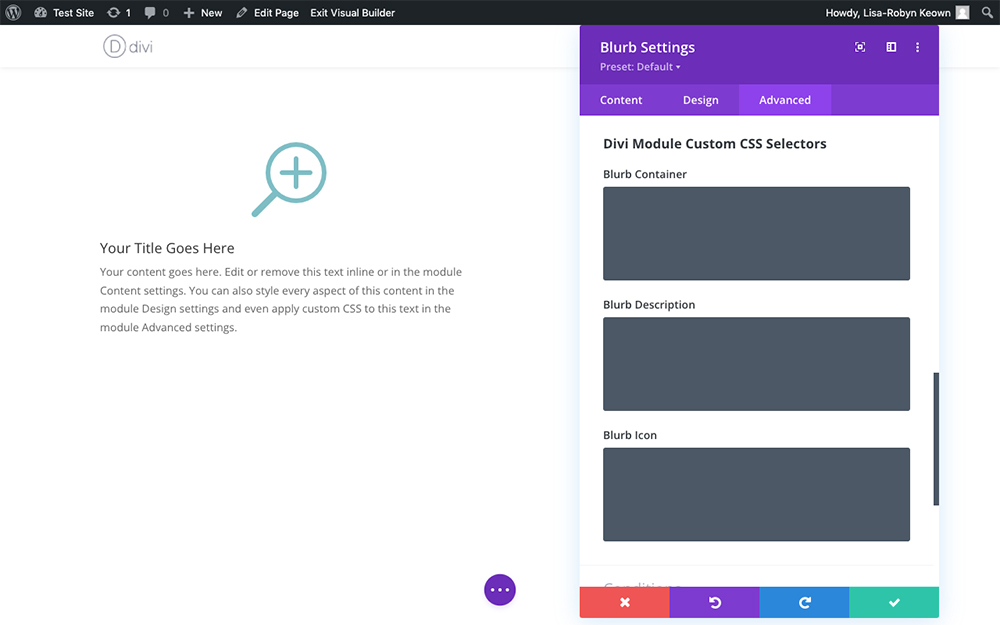
An example of the blurb module’s new CSS selectors
Here’s an example of the blurb icon selector styled.
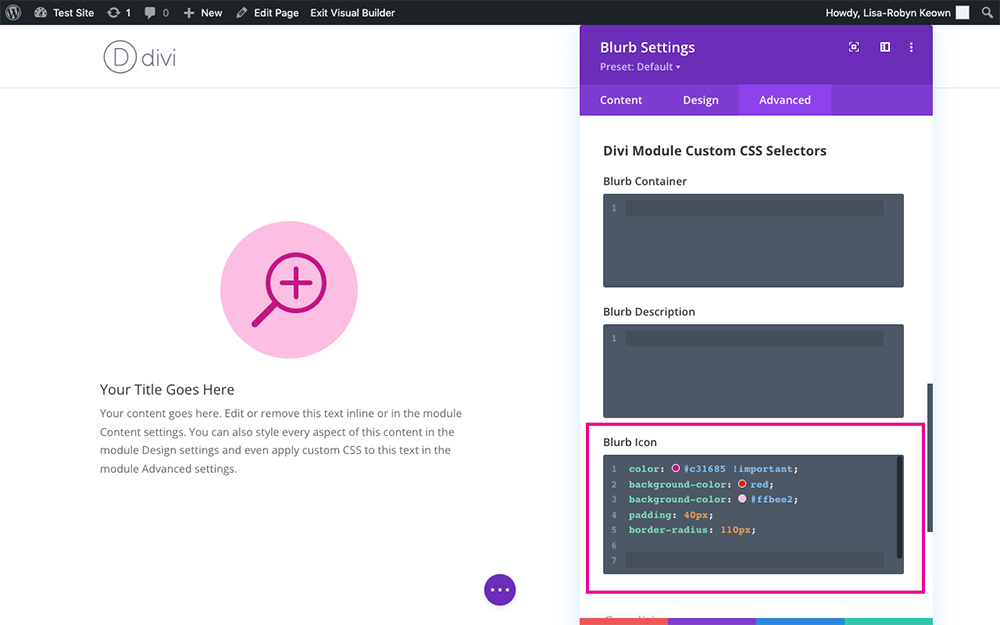
A custom styled blurb module
With the Divi Module Custom CSS Selectors plugin, you’ll be able to style your page, post or project layout modules with deep levels of customization, all while fully bypassing the stylesheet.
How to Install the Divi Module Custom CSS Selectors Plugin
Once you’ve purchased the Divi Module Custom CSS Selectors plugin from the Divi Space store, log into your Account to download the plugin. Next, install and activate the plugin via the Plugin > Add New tab.
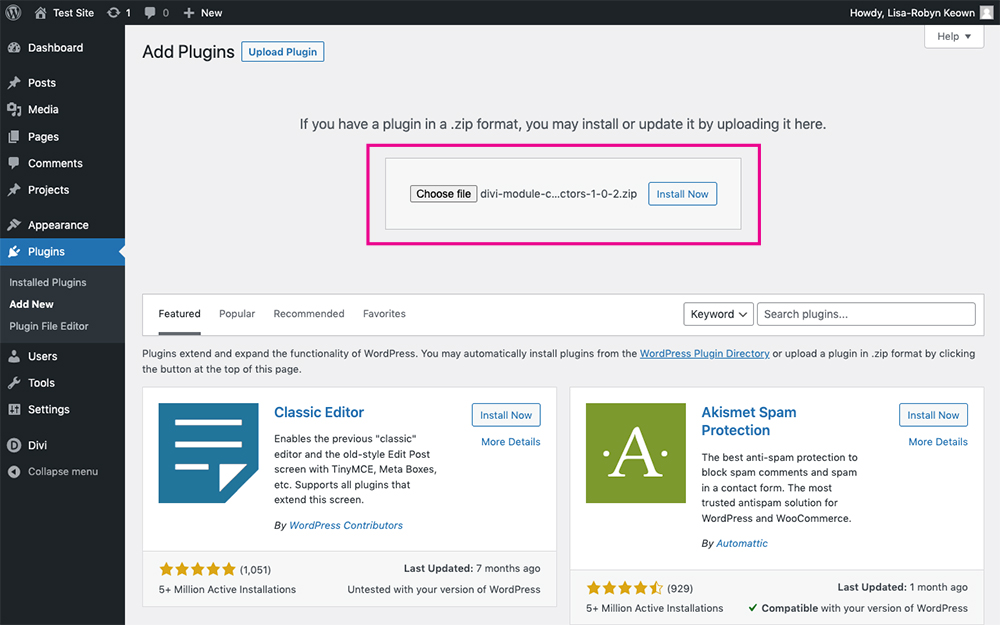
Select the plugin file and click Install Now
Once the plugin has been installed, remember to click Activate to ensure it’s set up correctly and ready to go.
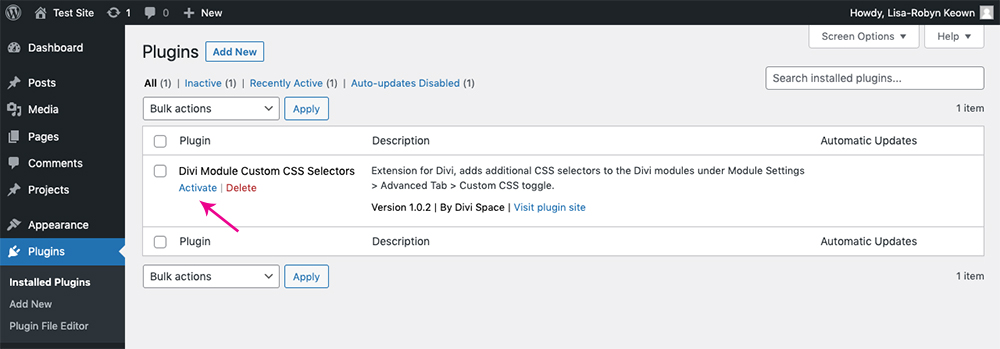
Click Activate
Once the plugin is installed and activated, it will add a new menu item to the Divi menu. Here, you’ll be prompted to enter your license key, which can be found in the My Account section of your Divi Space account. When authenticated, the plugin will automatically add new selectors to the respective models within the Divi Builder. The plugin dashboard merely serves as an information hub.
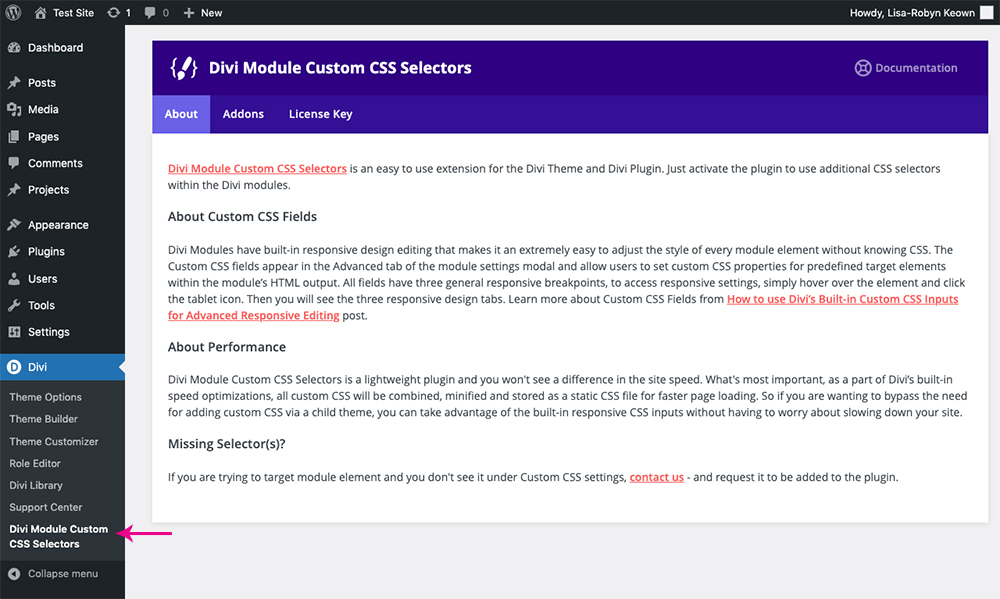
Plugin information screen
Now for the fun part, create a new page post or project, add a Divi module, and head to the Advanced tab. Scroll down to the Custom CSS option and you’ll see a plethora of new selectors under the Divi Module Custom CSS Selectors menu.
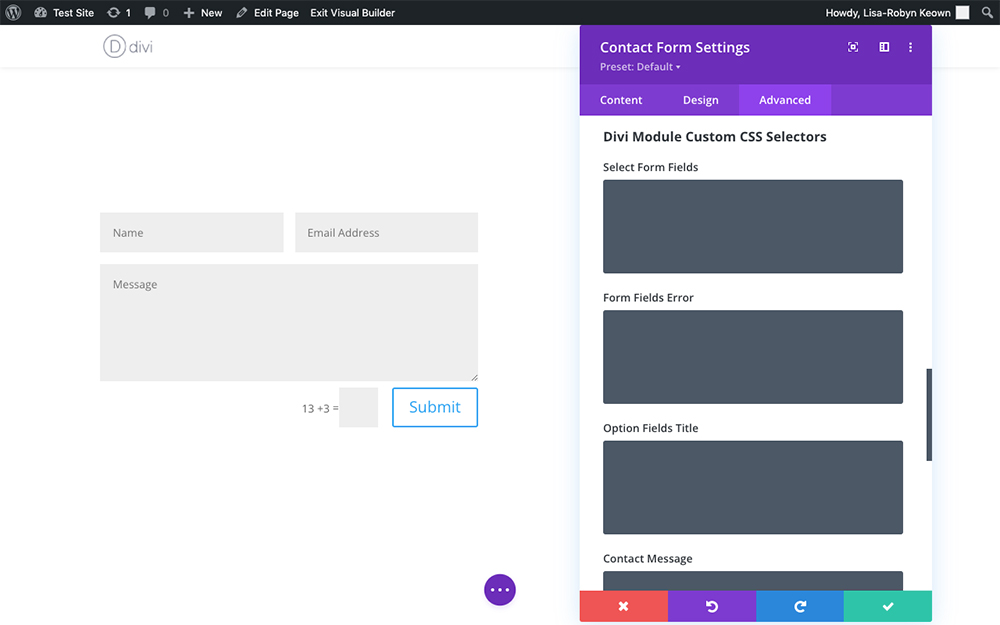
An example of the Divi Module Custom CSS Selectors plugin active with the contact form module
How to Use the Divi Module Custom CSS Selectors plugin
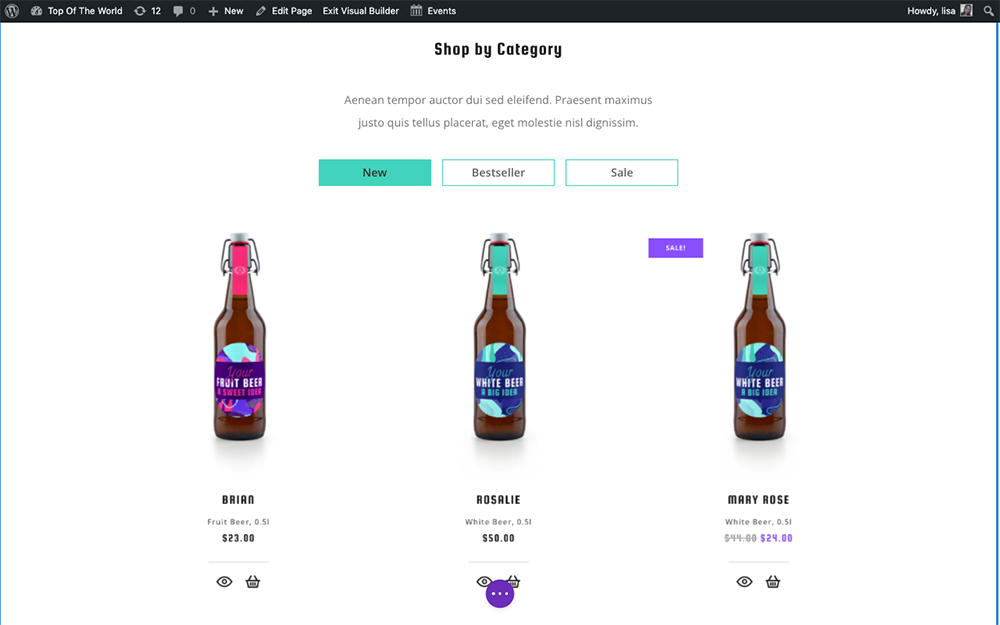
With the plugin installed, you can start creating amazing designs using basic CSS knowledge. We created a striking layout for a child theme using the plugin. Here’s the Divi tab module custom-styled to have all elements fully center-aligned with custom colors. Here’s the final result:
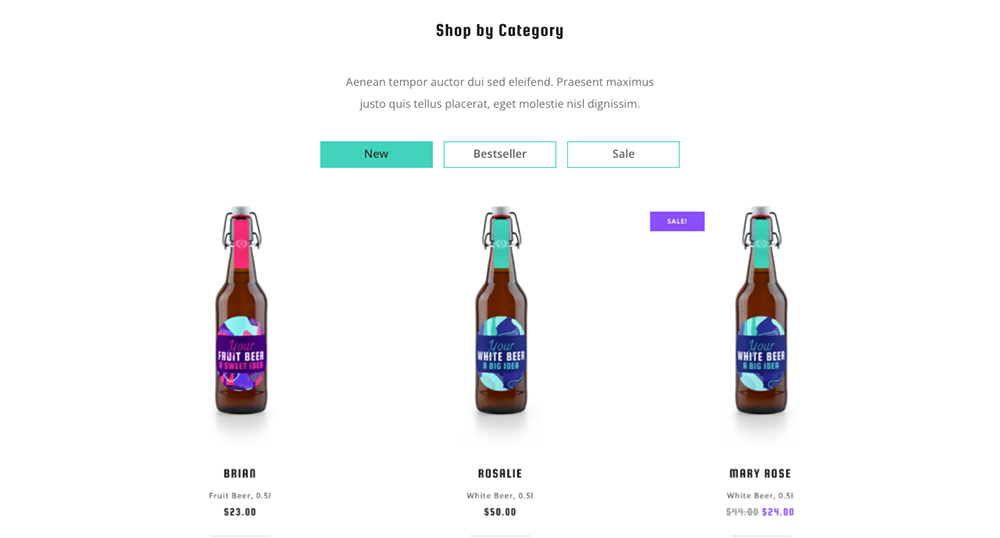
Our demo
Here’s a step-by-step breakdown of how we achieved this look.
We began by adding the Divi tab module to the page. By default, it’s pretty boring, using a gray color and left-aligned positioning.

First, we added some CSS to the default Custom CSS selectors
First, we added a bit of Divi tabs CSS. We added:
To the ‘Tabs Contols’ option, we added:
- background: 0 0;
- text-align: center;
To the ‘Tab’ option, we added:
- float: none;
- display: inline-block;
- border: none;
- padding: 8px;
This gave us the following result:

This looks better than the default aesthetic; however, it’s not quite where we want it to be. At this point, we’d have to get creative with CSS and write various rules in the stylesheet, but thankfully, the Divi Module Custom CSS Selectors plugin is installed, and we have more selectors to work with.
For the tab module alone, the Divi Module Custom CSS Selectors plugin adds the following additional selectors:
- Tab Controls After
- Tab Link
- Active Tab Link
- Tabs Content Wrapper
- Tab Controls After
- Tab Link
- Active Tab LInk
- Tabs Content Wrapper
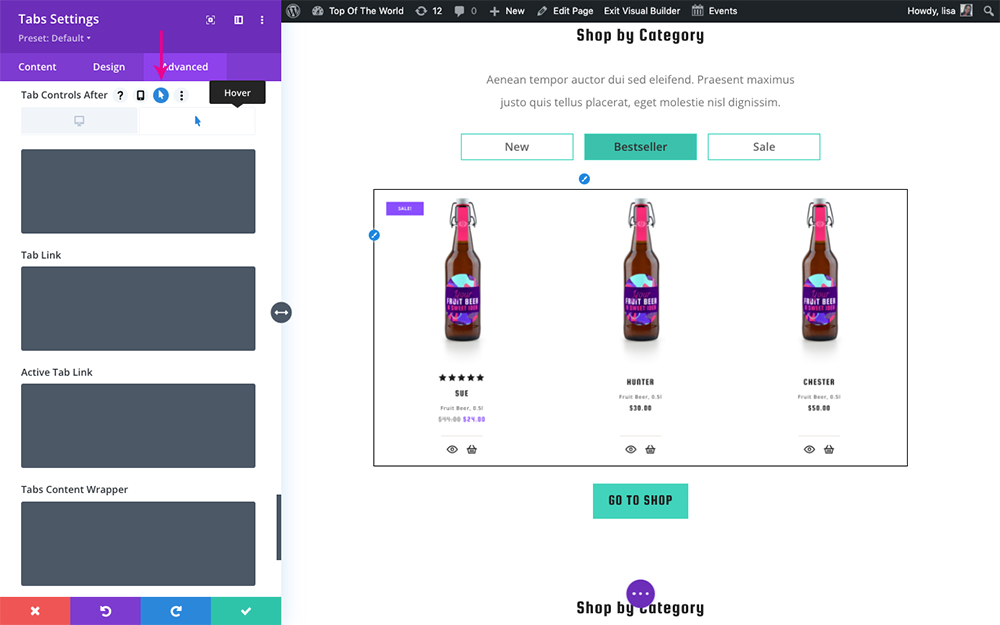
First, to the Tab Controls After option, we added
- display: none;
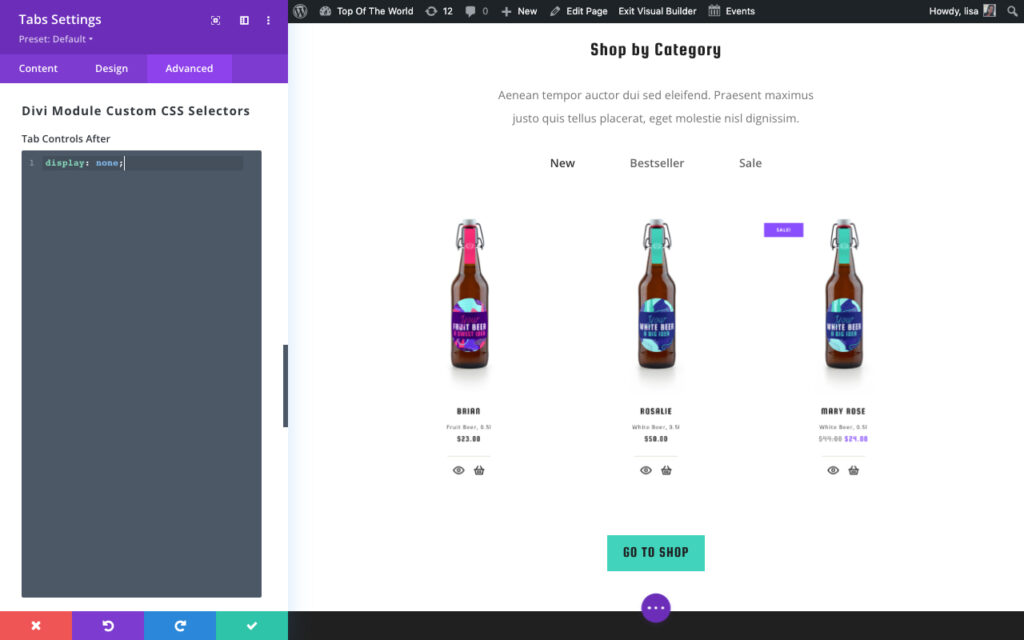
We added some CSS to the Tab Controls After option
Next, to the Tab Link option, we added:
- border: 1px solid #41d3bc;
- min-width: 160px;
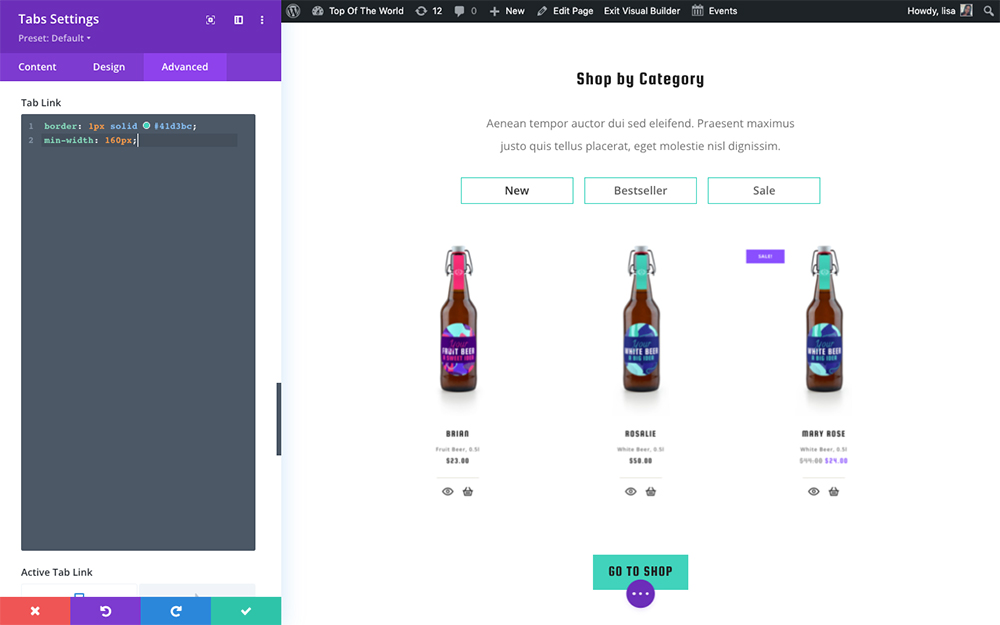
We added some CSS to the Tab Link option
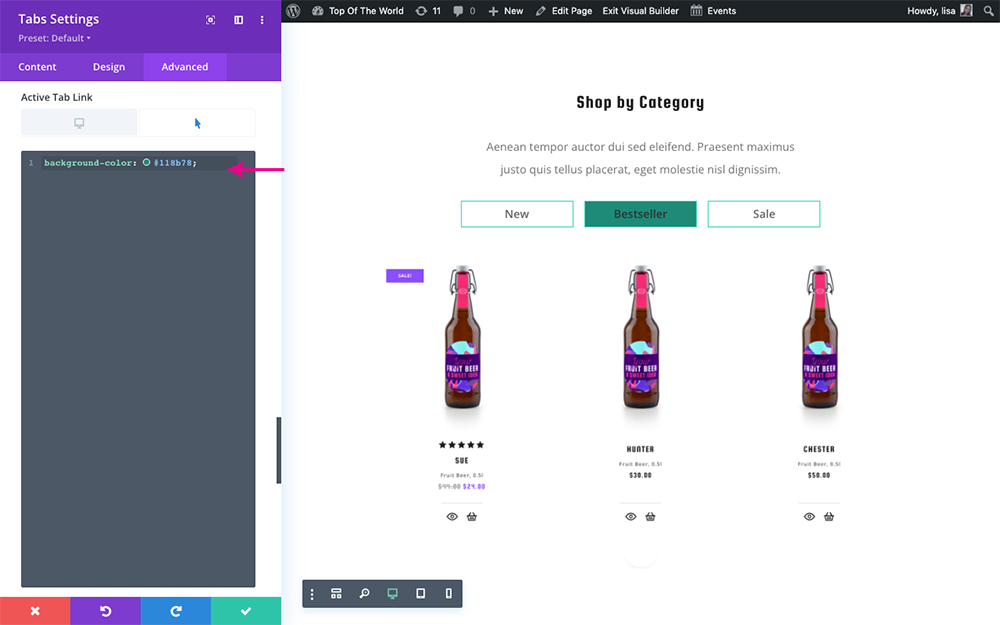
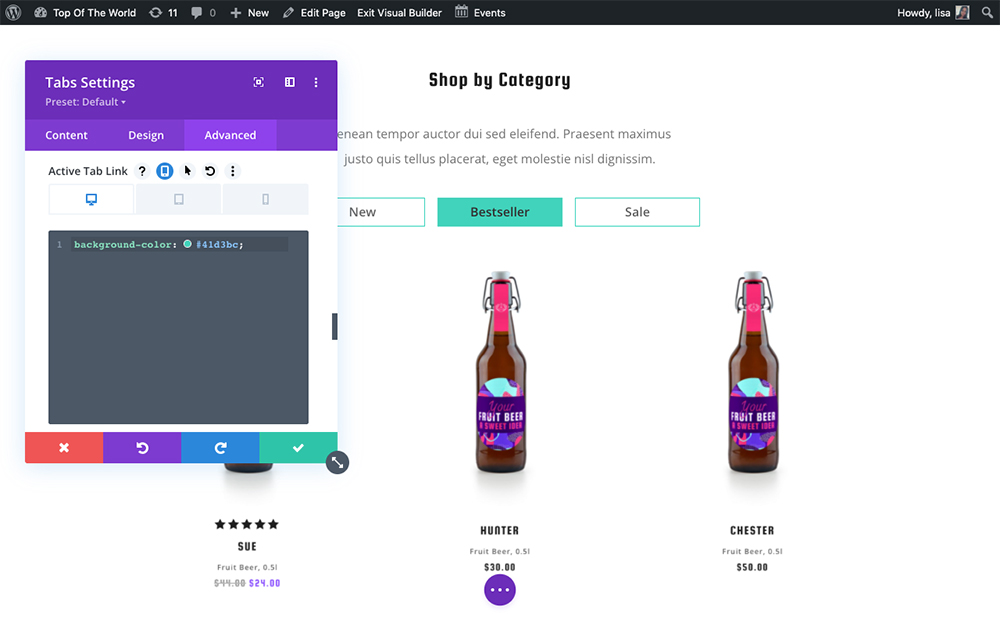
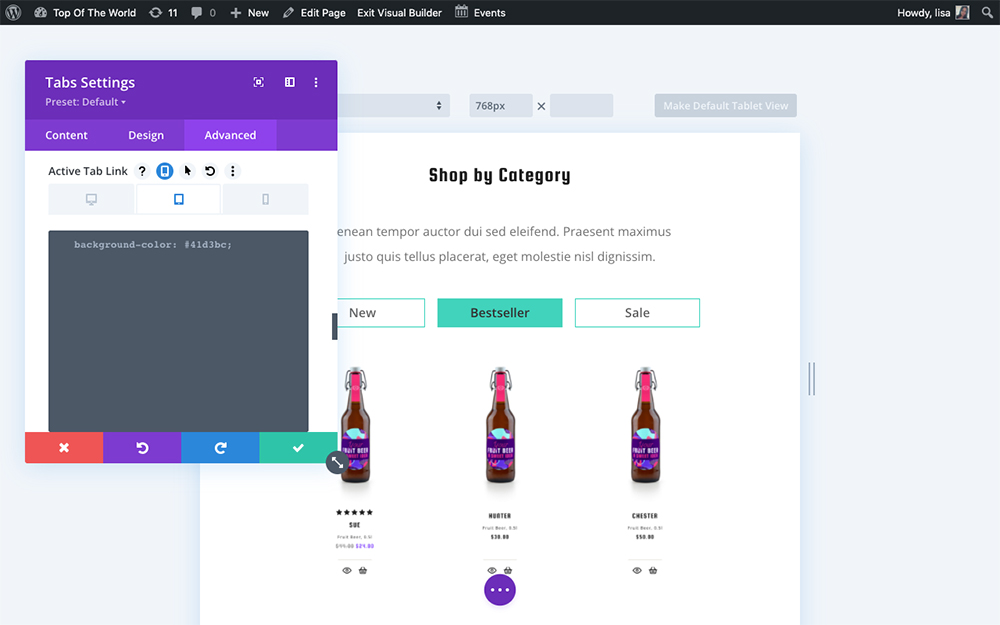
Then, to the Active Tab Link option, we added
- background-color: #41d3bc;
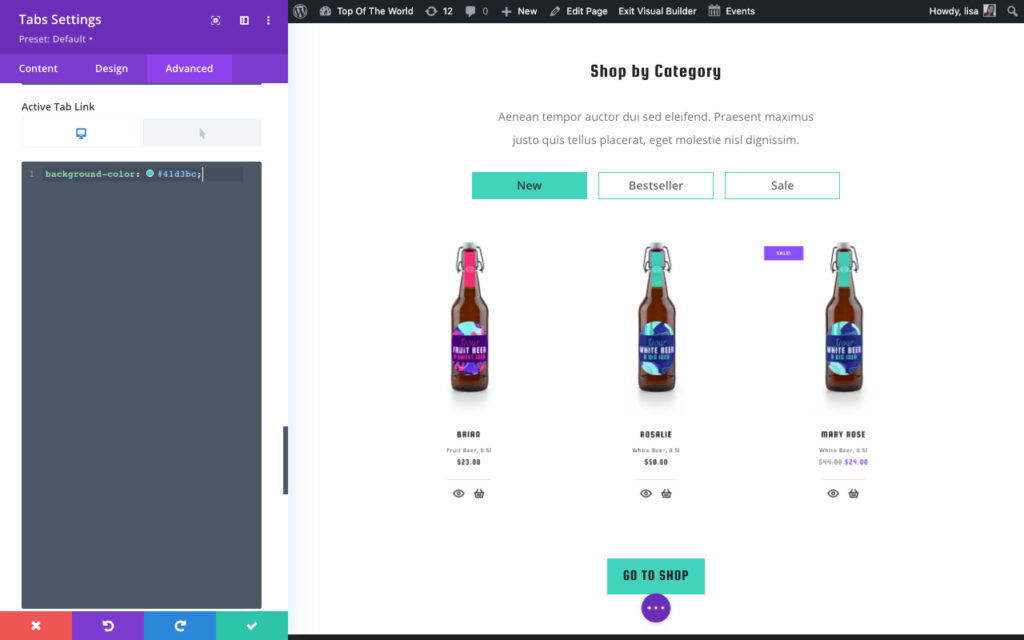
We added a background color to the Active Tab Link option
This left us with a beautiful tabs module that aligns with the rest of our design effortlessly.
Feel free to copy the code and style your tabs module in the same way. You’ll need the Divi Module Custom CSS Selectors plugin, which you can purchase from the Divi Space store here.
How to Add Hover State CSS with the Divi Module Custom CSS Selectors
One of the best features of the Divi Module Custom CSS Selectors plugin is that it allows you to add hover state CSS right from within the plugin. Typically, you’d have to write CSS from the ground-up to add hover effects, but with the plugin, it’s super easy.
To add hover states to the selectors, hover your mouse/cursor over the option name and an additional menu will display. Click on the cursor icon and a new code entry section will display.
Click on the cursor icon
Here, whatever hover state CSS you add will display when you hover over the element in question. In our example, we’ve set the hover color to be a deep, dark green.
Enter the CSS that’ll display on hover
Creating Responsive Design with the Divi Module Custom CSS Selectors
One of the most important steps in the web design process is making sure your page layouts are fully responsive and that they adapt to various mobile and tablet devices of all shapes and sizes. Making sure a site is responsive is another CSS-related process, and requires the scripting of what’s known as media queries or @medias.
Writing Divi media queries is a complex task, especially for new developers: you need to know all of the ‘CSS breakpoints’—each pixel point whereby a website displays in a different orientation per screen—for each device, including all desktops, tablets, and mobile devices. If you want to achieve a few customizations here and there for different device sizes, it’s off to the stylesheet for you, writing media queries from scratch.
With the Divi Module Custom CSS Selectors plugin, we’ve included an extremely handy and easy-to-use feature that lets you write responsive code directly from within the new Custom CSS section for the new selector.
First, hover over the option name as you did before to reveal the hover state styling option. This time, click on the mobile icon.
You’ll be left with just the responsive design options
Now you’ll see that some new options will display: a desktop, tablet, and mobile icon.
You’ll be left with just the responsive design options
You can deselect the cursor icon and the hover state options will disappear, leaving only the responsive design options. Here you can see that, by default, the option displays the desktop version, where we have set the background color to teal-green.
You’ll be left with just the responsive design options
If you’d like to add different styling options, click on the different devices, and you’ll see the grayed-out text of the desktop-version styling. This is to give you an idea of what has been set for the primary device that can be rewritten.
The tablet and mobile options will be grayed out
Here, I’ve styled the background color of the button to display as red for tablet devices.
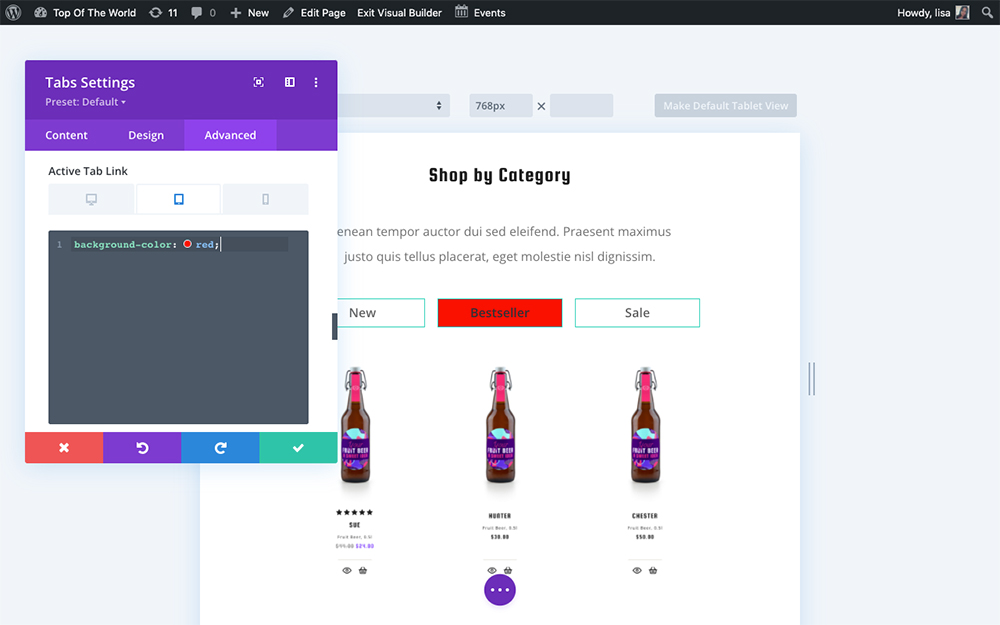
Enter custom CSS for the tablet layout
I’ve also styled the mobile device layout to display in pink.
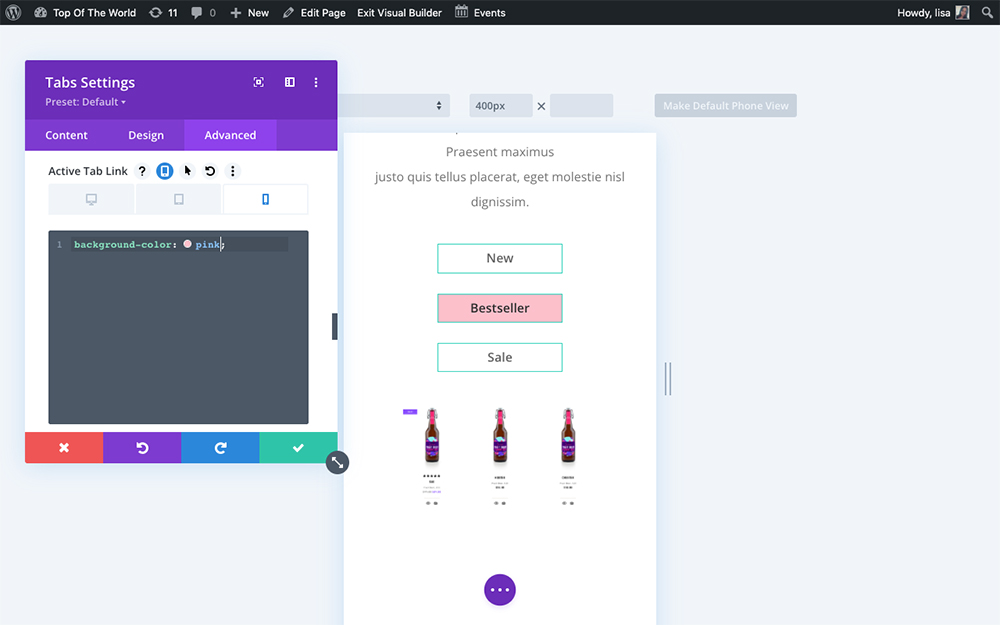
Enter custom CSS for the mobile layout
Thanks to the Divi Module Custom CSS Selectors plugin, you can go really deep with your designs, customizing every pixel of your page layouts without having to do too much heavy lifting and code writing.
Ending thoughts
The Divi Module Custom CSS Selectors plugin certainly makes any Divi developer’s day brighter; it lightens the workload, speeds up the tasks and streamlines the entire process of building a Divi website.
Another great aspect of this plugin is that it can really help newbie Divi users slowly learn CSS over time. The plugin automatically displays the selectors for each individual element, and over time, after learning the selectors naming conventions, new users may become more comfortable with scripting CSS ground up. Thankfully, there’s no time lost in this process; they don’t have to teach themselves CSS first in order to begin writing CSS. They can learn as they go, in a sense.
If you’re interested in learning more about CSS, we have an incredible online course that teaches the ins and outs of writing CSS as well as jQuery for Divi. However, if you don’t have the time to take a course and learn the skill of scripting, get the plugin.
The Divi Module Custom CSS Selectors plugin is lightweight, powerful, and packs a serious punch while working silently in the background of your site. Install it and watch as it instantly amps up your Divi designs.
To purchase the Divi Module Custom CSS Selectors plugin, head over to the Divi Space store and add this amazing plugin to your cart. If you love the rest of our plugins, you can purchase a lifetime or annual membership and get immediate access to all of our child themes, plugins, and more.
We want to hear from you!
Do you enjoy writing CSS? Do you struggle to find the correct selectors to target? What has your experience of writing CSS, hover states, and responsive code for the Divi theme been like? Share your experiences below in the comments section!

Recent Comments