Shop Builder Theme for Divi
Welcome to the documentation for the Shop Builder Theme for Divi! This guide will provide detailed instructions on installing, activating, and customizing your child theme. It will also cover setting up various pages and customizing specific features.
Table of Contents
- Installation and Activation
- Assign Menus in Divi Theme Builder Header Template
- Start Customizing Pages
- Customize Menu Call to Action Button
- Customize Mini Cart Feature
- Advanced Documentation
Whenever you update child theme, all of the files are updated so if you have made any changes to these files, those changes will be erased. We don't recommend making any changes to the child theme files.
Installation and Activation
Requirements
Before you can install and use our child theme, you need to ensure that you have the proper environment setup. The requirements are provided here
For the Shop Builder Theme to work, you must have Divi from Elegant Themes and Divi Shop Builder plugin. If you do not have it you can purchase it here, Divi Theme, Divi Shop Builder. Once you have it, please install it on your self-hosted WordPress website before attempting to install Shop Builder Theme. Also, please install the WooCommerce plugin, you can get it here.
1. Install Child Theme
-
Download the Child Theme:
- Download the Shop Builder Theme for Divi child theme from your account, membership page or the link provided after purchase.
-
Upload the Theme:
- Go to your WordPress dashboard.
- Navigate to Appearance > Themes.
- Click Add New and then Upload Theme.
- Choose the downloaded .zip file of the Shop Builder Theme for Divi and click Install Now.
-
Activate the Theme:
- After the installation is complete and Divi is installed, click Activate to activate the child theme.
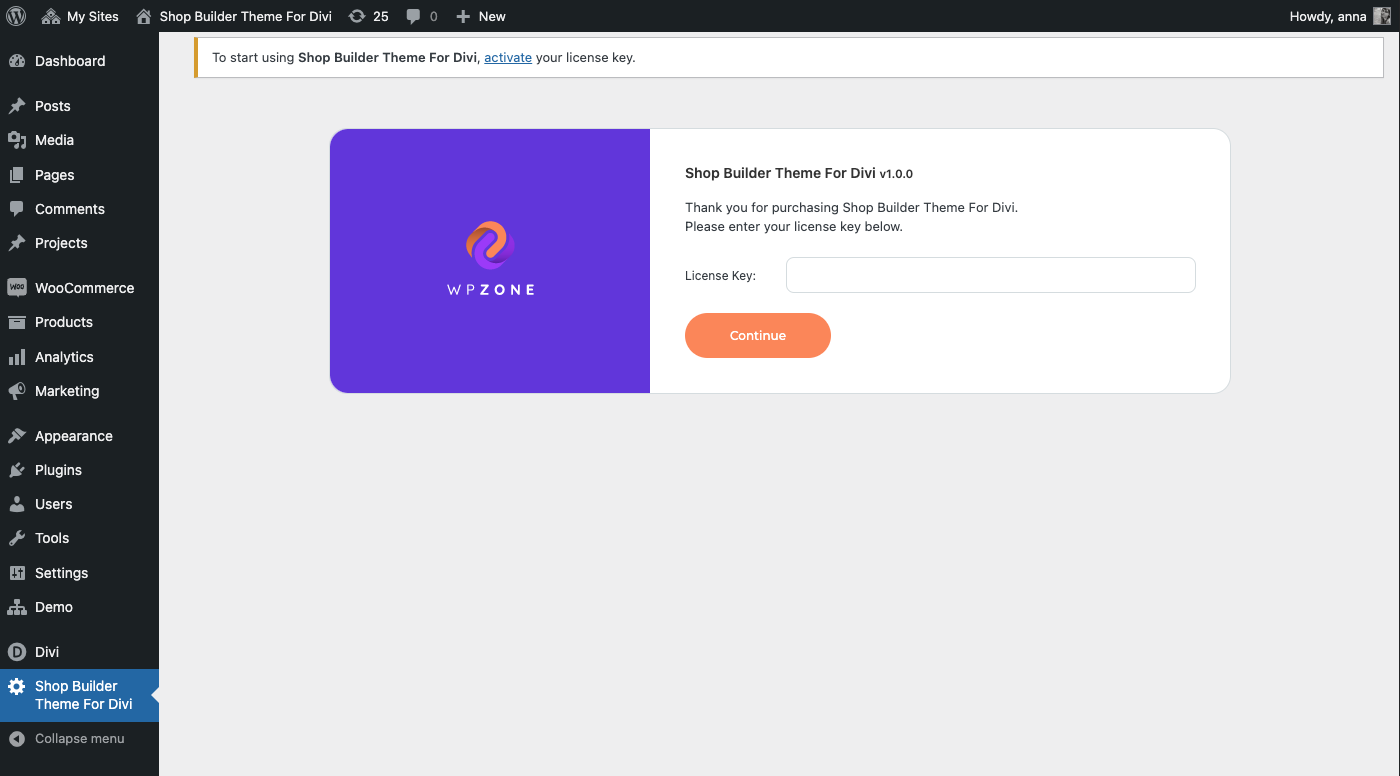
2. Activate License
Enter License Key:
- Navigate to Shop Builder Theme Settings in your WordPress dashboard.
- Enter the license key provided at the time of purchase.
- Click Activate License.
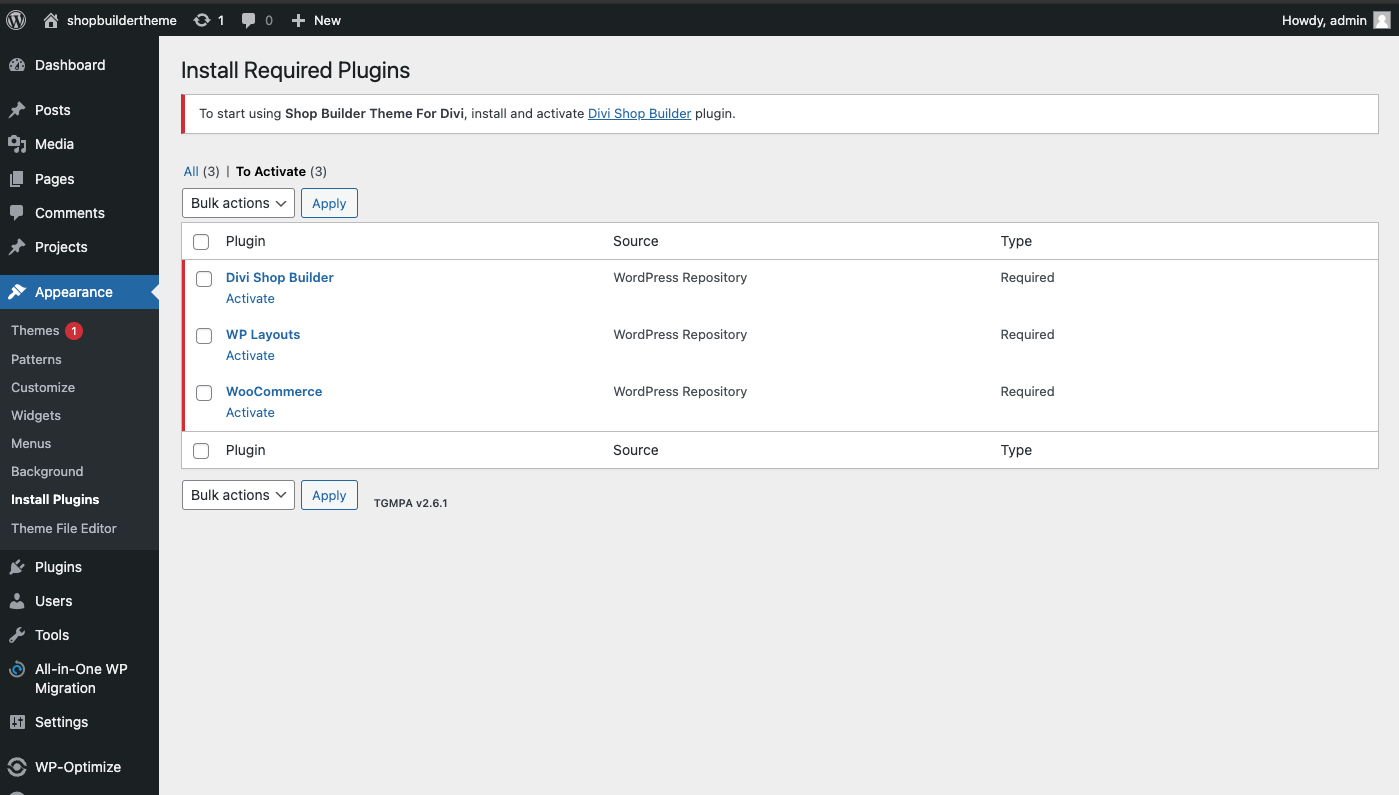
3. Activate required plugins
If you haven't already, activate required plugins:
- WooCommerce
- Divi Shop Builder
- WP Layouts (required to import demo data)
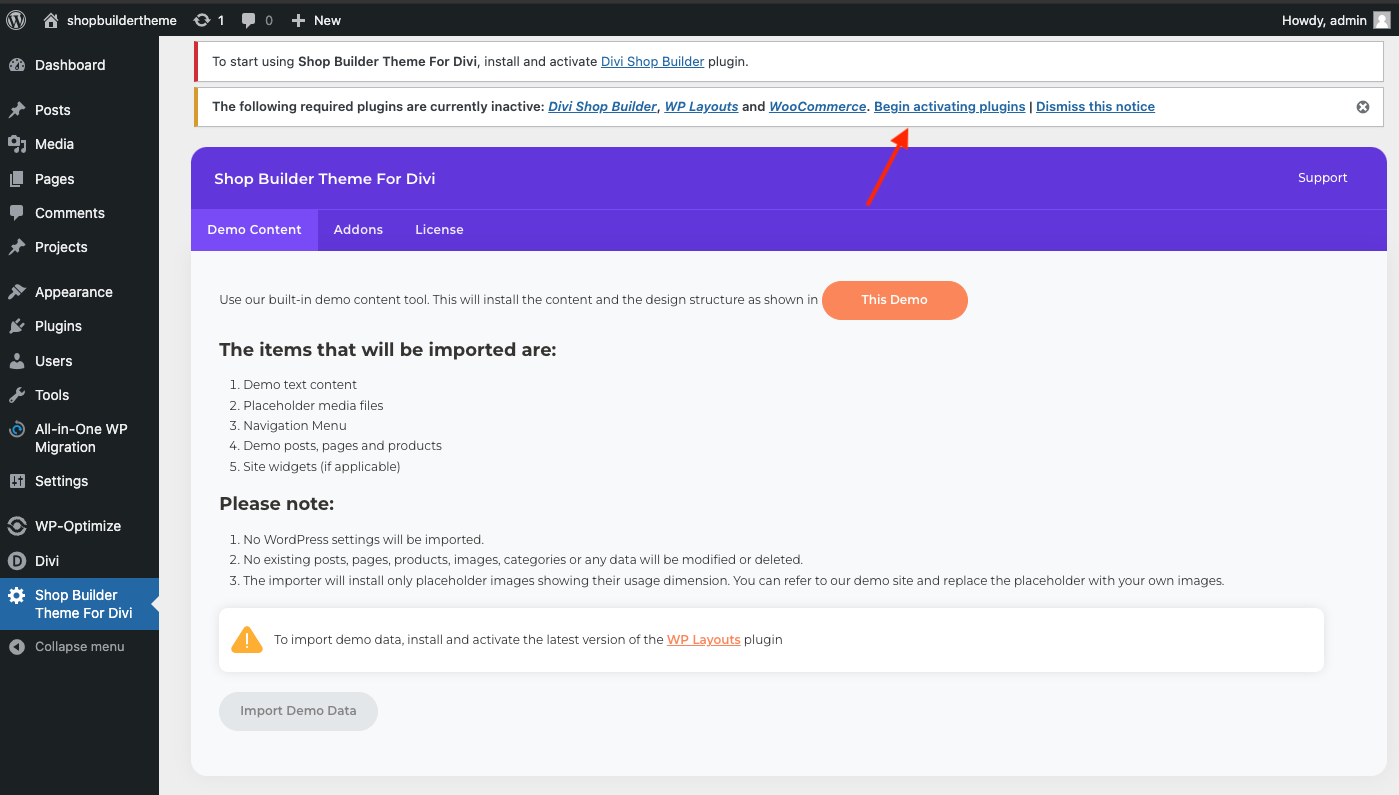
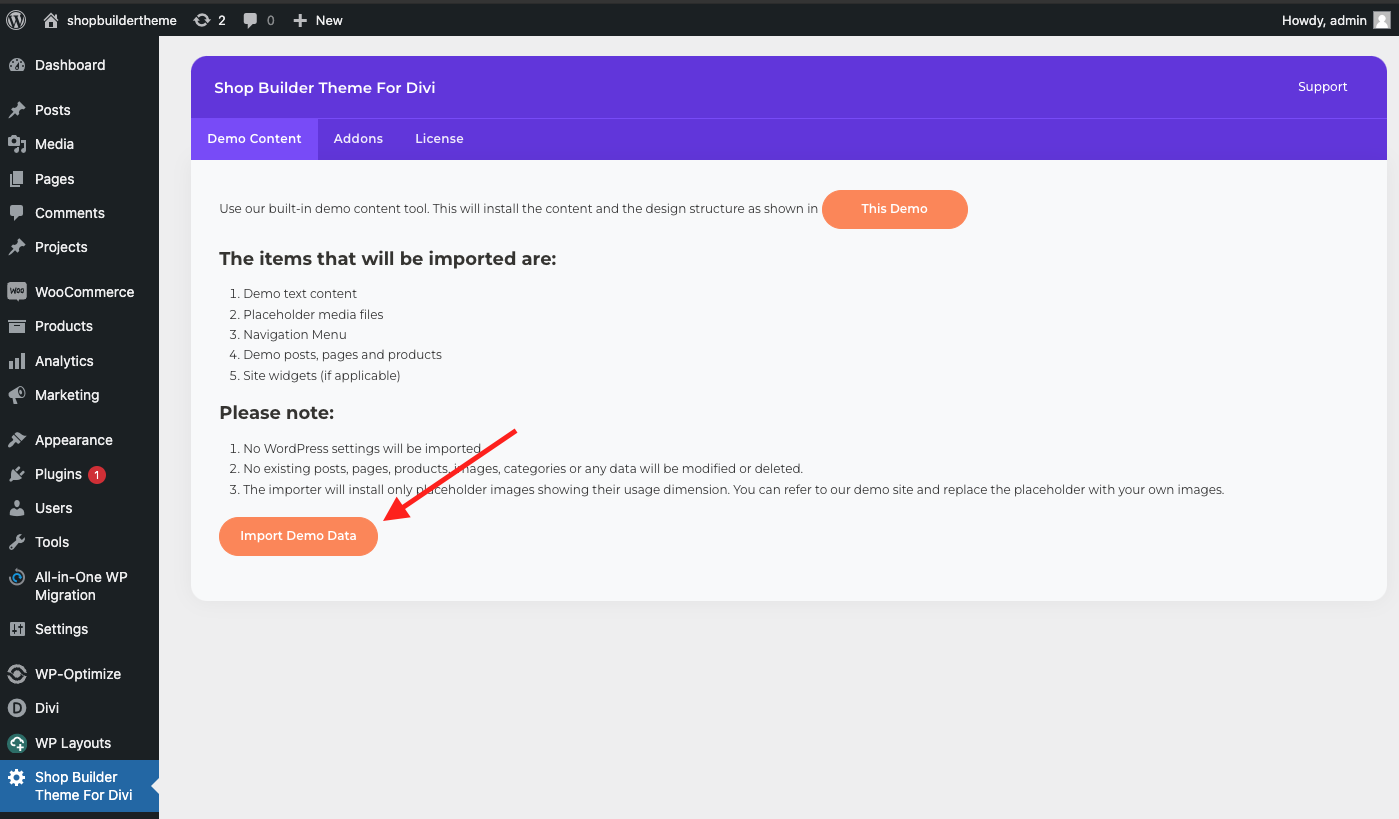
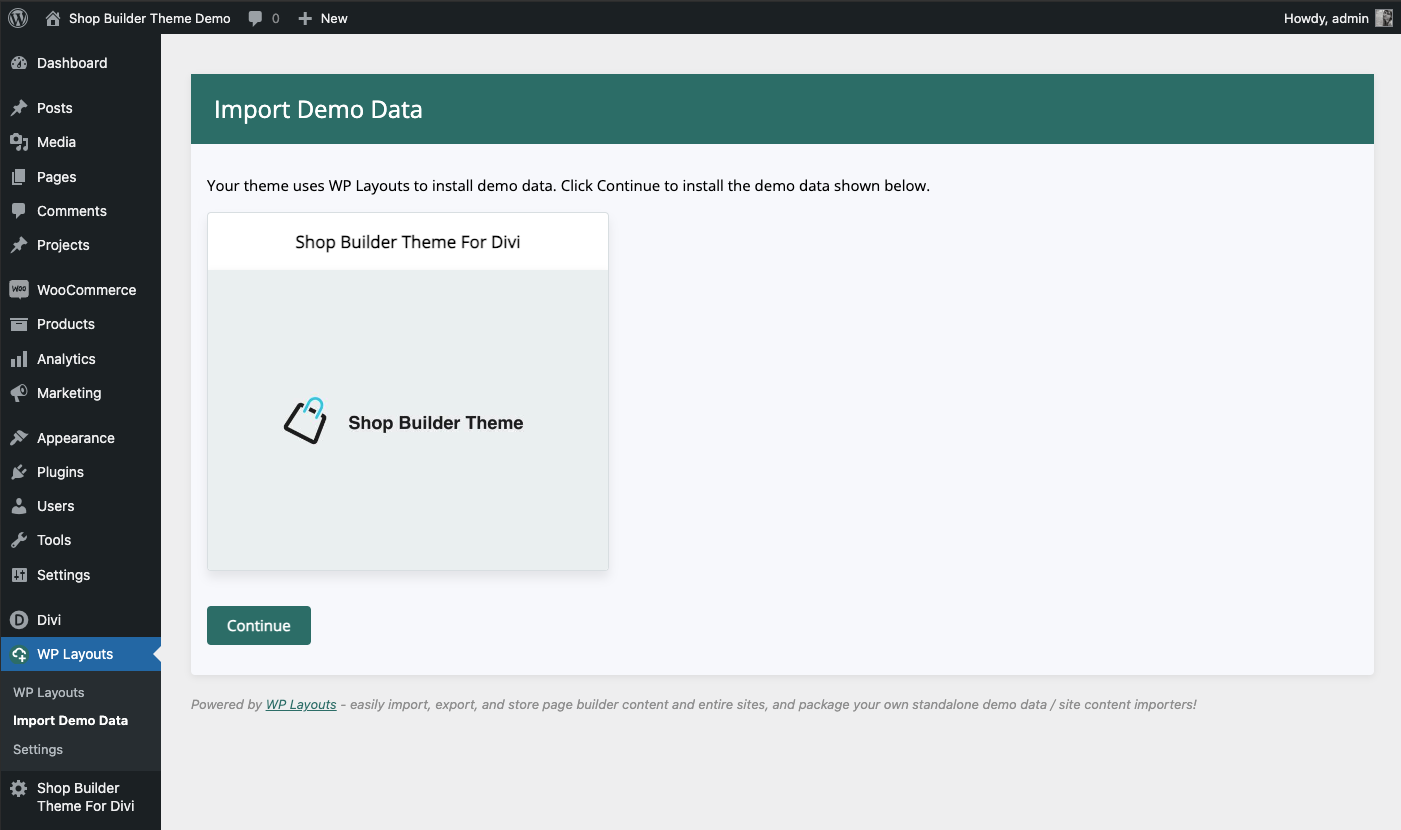
4. Import Demo Data
Import Demo Content:
- Go to Shop Builder Theme Settings.
- Click on the Import Demo Data tab.
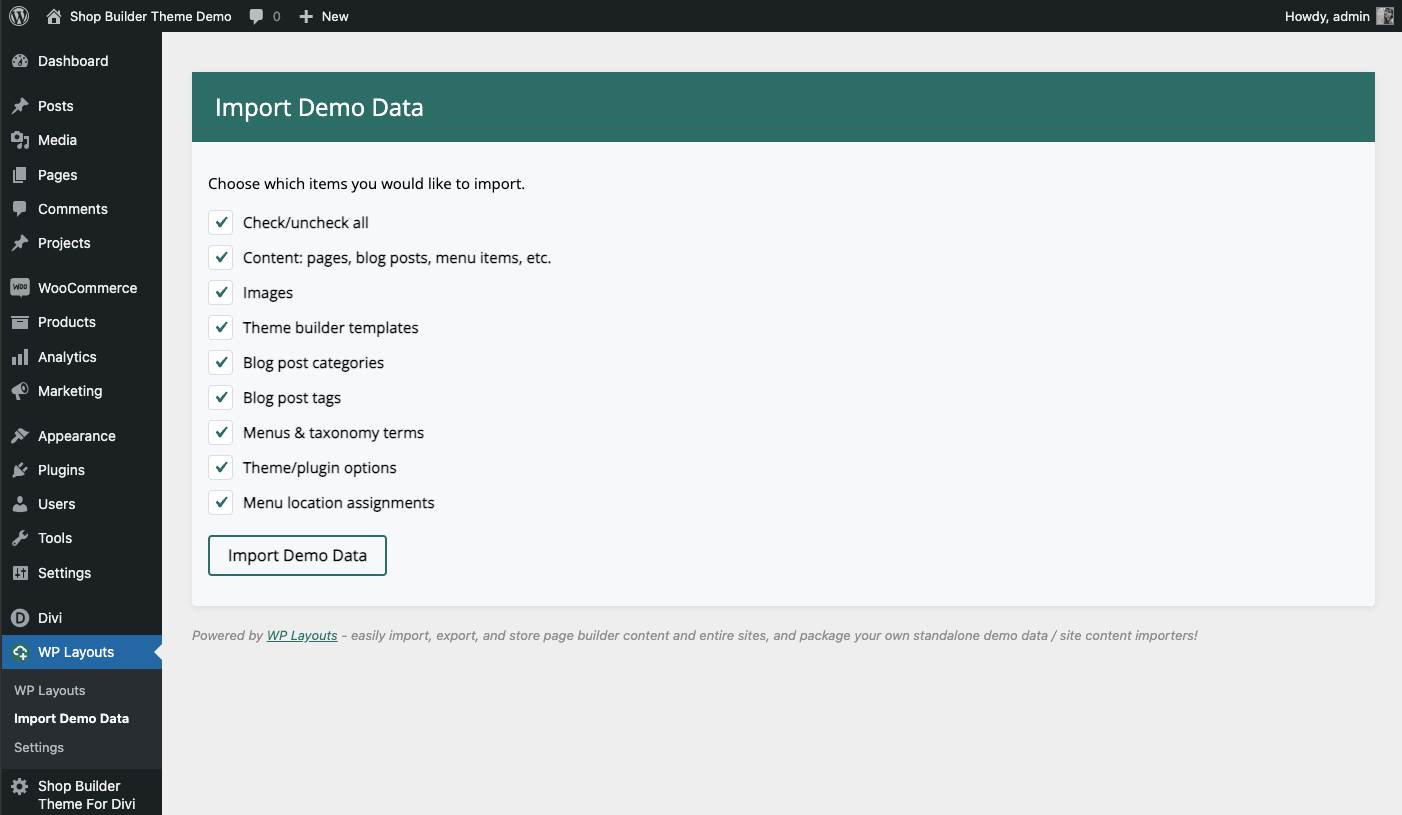
- Select the demo content to import and click Import.
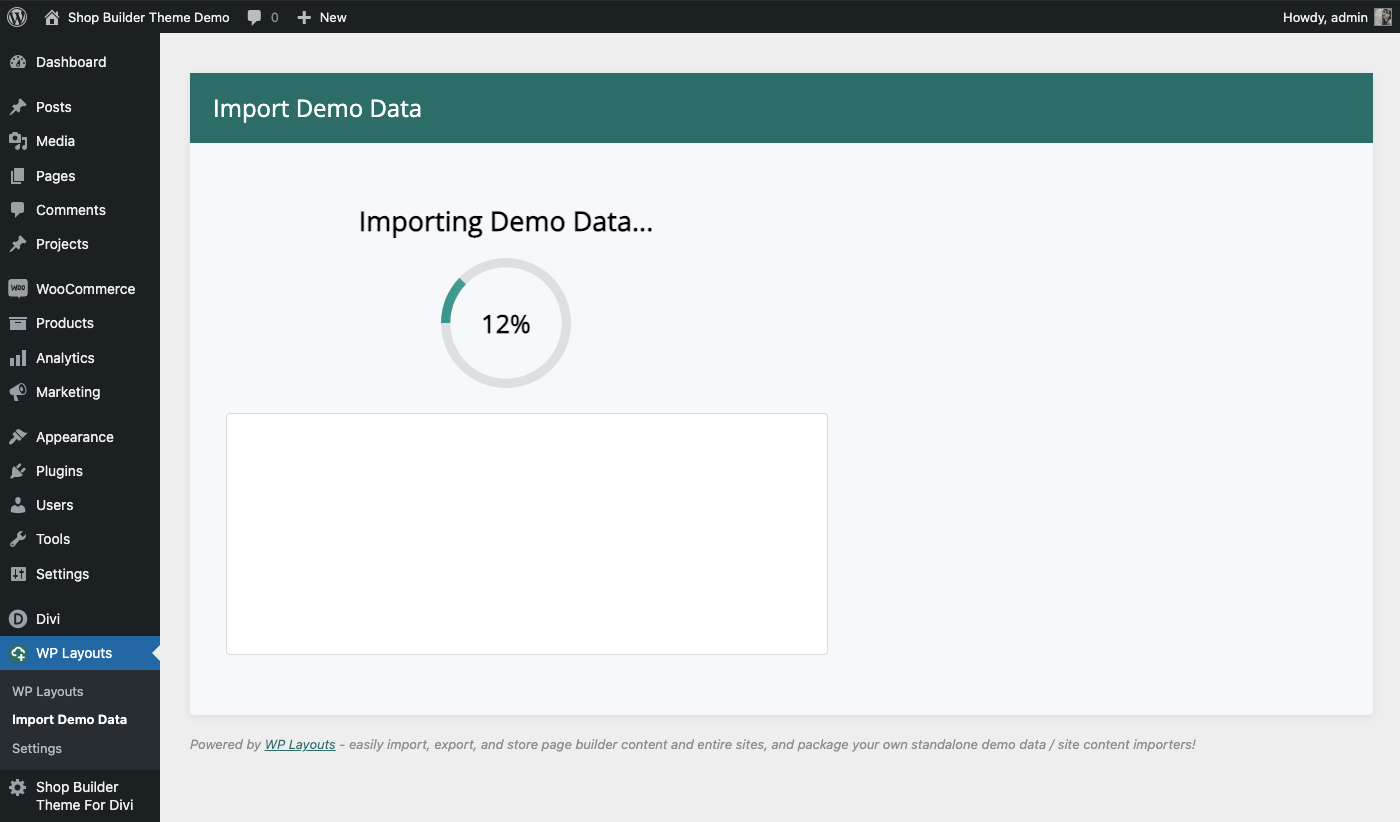
- Wait for the process to complete. Your site will now have the demo content installed.
Customizing Child Theme
Set homepage
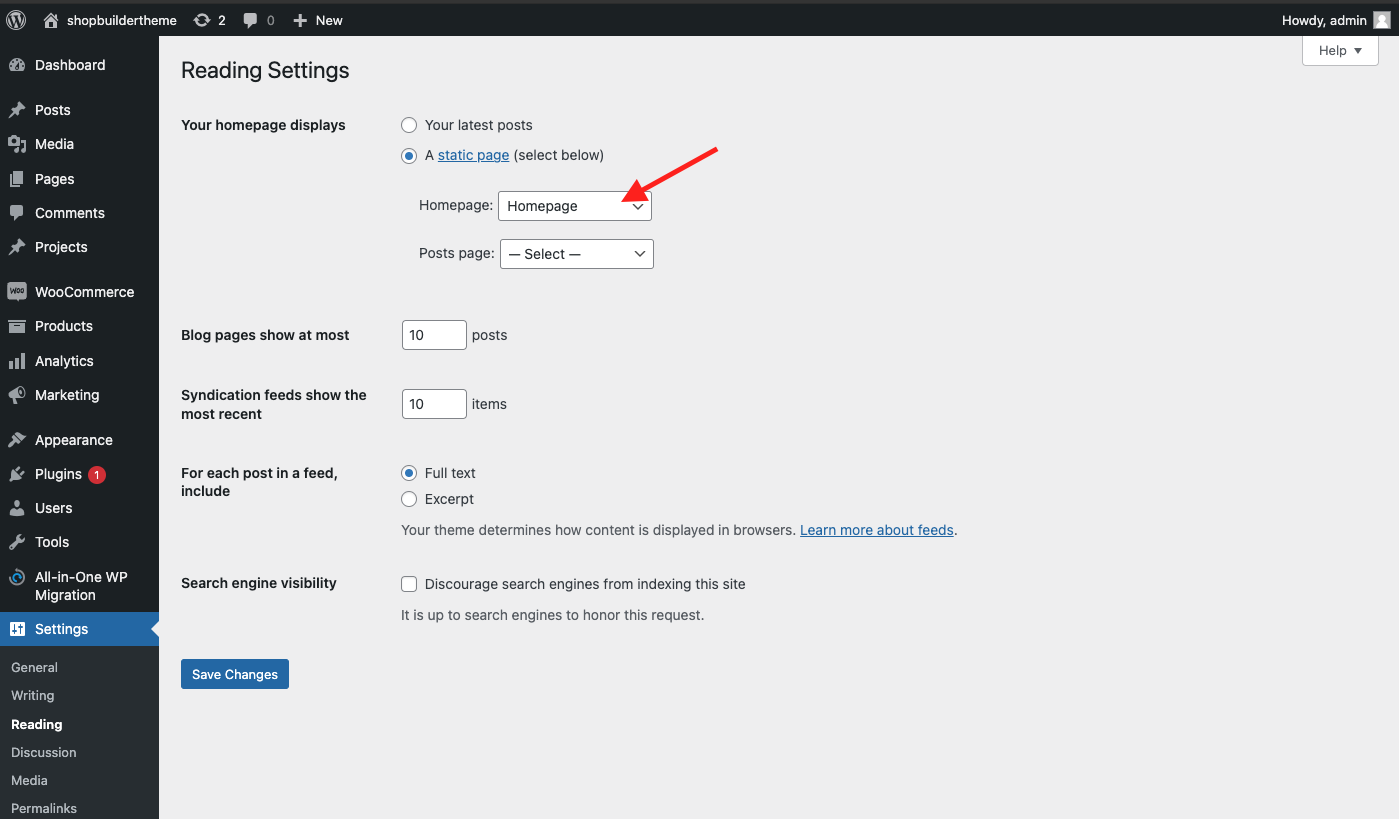
Move to the settings area in your left Admin panel. Click ‘Reading’. Under ‘Your homepage displays’ select ‘A static page’ and for the Homepage drop-down menu select either 'Home'.
Setup WooCommerce
Navigate to WooCommerce >>Settings, click on the Products tab and set the Shop page to "Shop" by selecting it from the drop-down menu. Save Changes.
Finally, on the Advanced tab set the rest of the WooCommerce pages as shown.
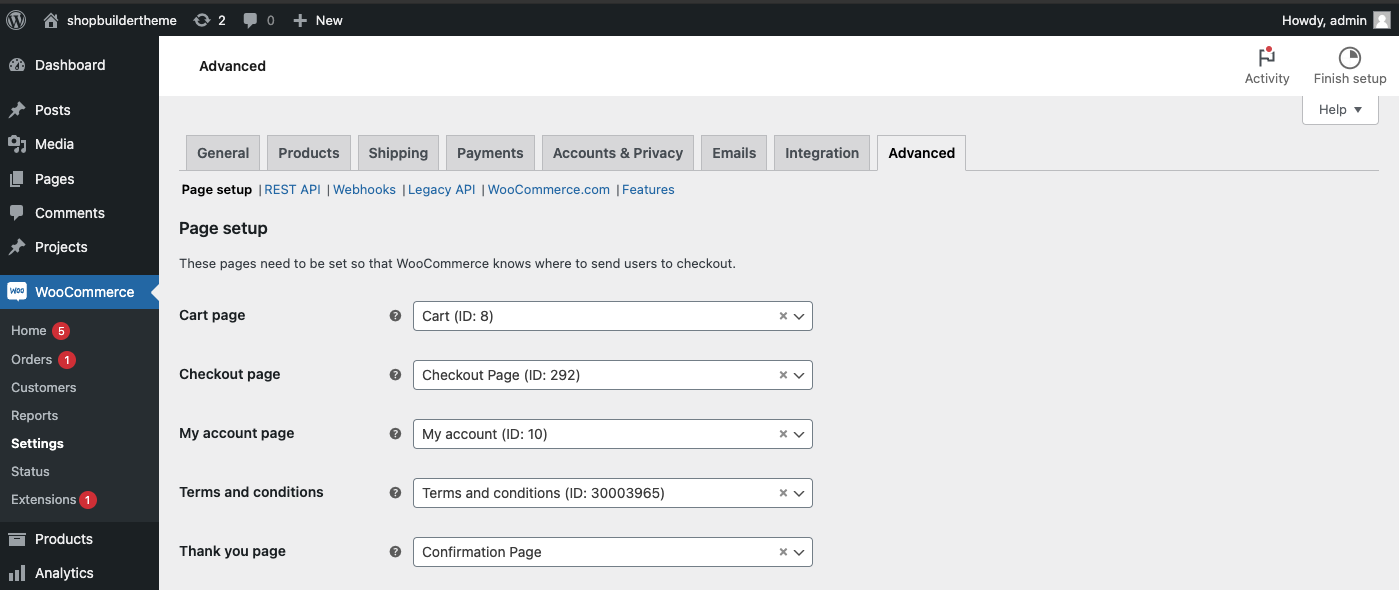
We also recommend going to Pages and removing duplicated, not used pages, like Sample Page, Cart, and Checkout and Shop.
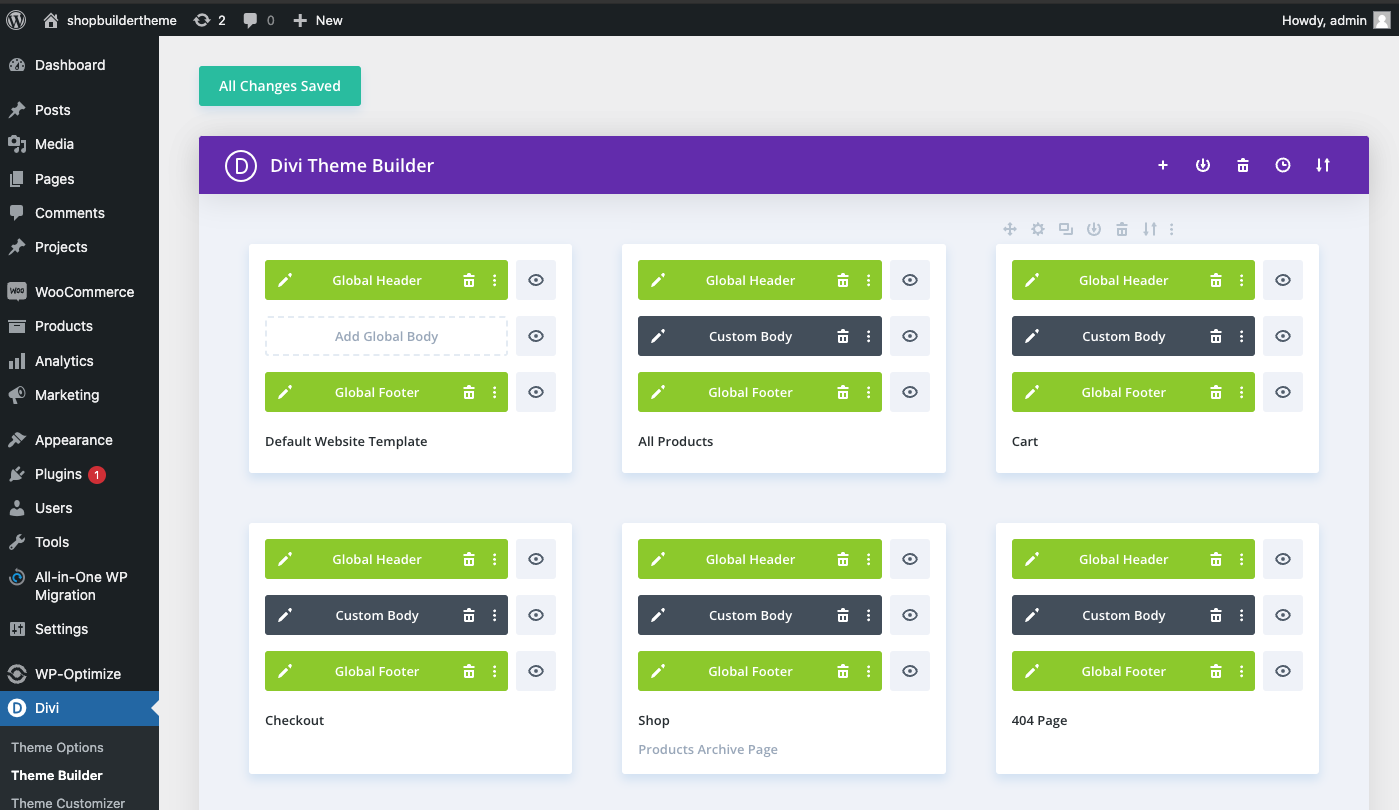
Theme Builder Templates
Child Theme uses Divi Theme Builder templates for following pages or page elements:
- Header
- Footer
- Shop page
- Product pages
- 404 Page
- Cart Page
- Checkout Page
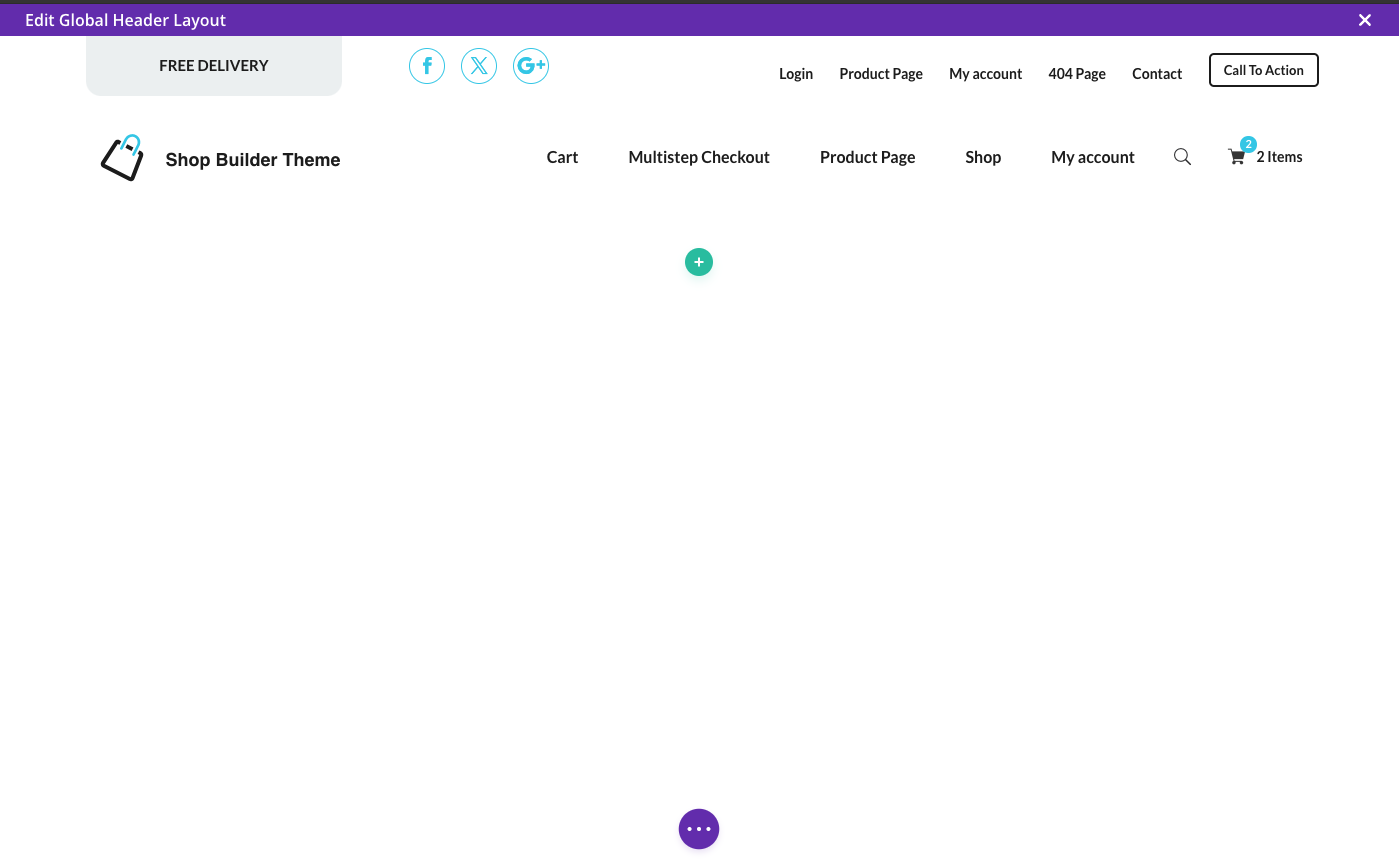
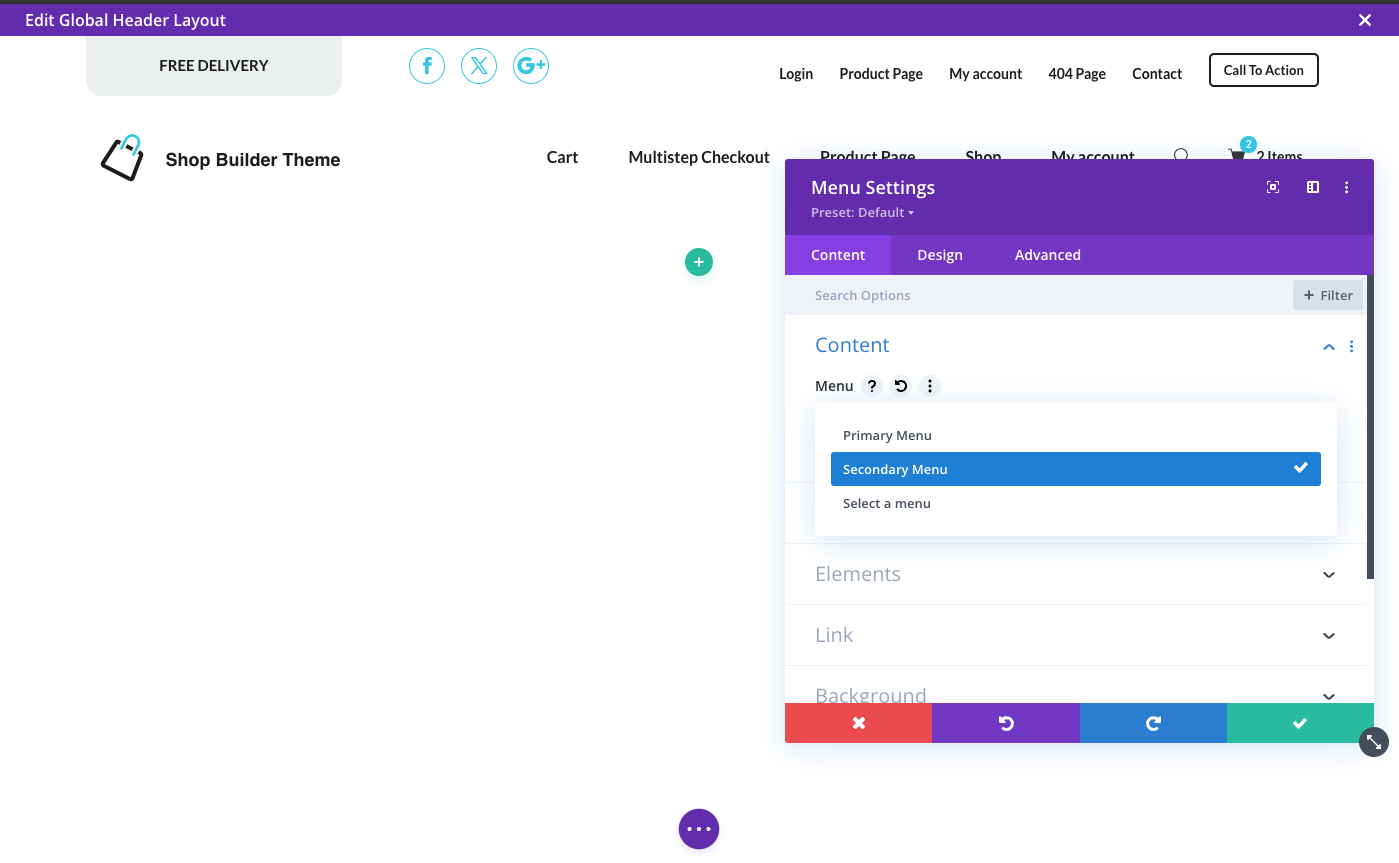
Assign Menus in Divi Theme Builder Header Template
-
Access Theme Builder:
- Navigate to Divi > Theme Builder.
-
Edit Header Template:
- Click on the Edit Header template.
-
Assign Menu:
- In the Header template, locate the menu module.
- Open the menu module settings.
- Select your desired menu from the dropdown menu.
- Save changes and exit.
Start Customizing Pages
Product Pages
- Navigate to Divi > Theme Builder and find your product template.
- Click Edit with Divi.
- Use the Divi Builder to customize the layout, modules, and design of your product pages.
- After making your customizations, click Save and exit the Divi Builder.
Shop Page
- Navigate to Divi > Theme Builder and find shop page template.
- Click Edit with Divi.
- Use the Divi Builder to customize the layout, modules, and design of your product pages.
- After making your customizations, click Save and exit the Divi Builder.
404 Page
- Navigate to Divi > Theme Builder and find 404 template.
- Click Edit with Divi.
- Use the Divi Builder to customize the layout, modules, and design of your product pages.
- After making your customizations, click Save and exit the Divi Builder.
Contact Page
- Navigate to Pages > Contact.
- Click Edit with Divi.
- After customizing, click Save and exit the Divi Builder.
Cart Page
-
Navigate to Divi > Theme Builder and find Cart template.
-
Click Edit with Divi.
-
Use the Divi Builder to customize the layout, modules, and design of your product pages.
-
After making your customizations, click Save and exit the Divi Builder.
-
Different section will be displayed if the cart is empty based on the conditions set under section settings. See more here

Multistep Checkout Page
- Navigate to Divi > Theme Builder and find Checkout template.
- Click Edit with Divi.
- Use the Divi Builder to customize the layout, modules, and design of your product pages.
- After making your customizations, click Save and exit the Divi Builder.
Thank You Page
- Navigate to **Pages > Confirmation Page **.
- Click Edit with Divi.
- After customizing, click Save and exit the Divi Builder.
Login/Register Page
- Navigate to **Pages > Login/ Register Page **.
- Click Edit with Divi.
- After customizing, click Save and exit the Divi Builder.
Required script to make togglable section work is located under Theme Options > Integration > Add code to <head>
Different section will be displayed based on the conditions set under section settings. See more here
Homepage
- Navigate to **Pages > Homepage Page **.
- Click Edit with Divi.
- After customizing, click Save and exit the Divi Builder.
My Account Page
- Navigate to **Pages > My Account Page **.
- Click Edit with Divi.
- After customizing, click Save and exit the Divi Builder.
Customize My Account Page: Depending on the plugins you will use on the site, some items may be missing from the navigation. To add them, in the Account Navigation Module settings click "add new item" and select the tab. Follow the same steps for account content.
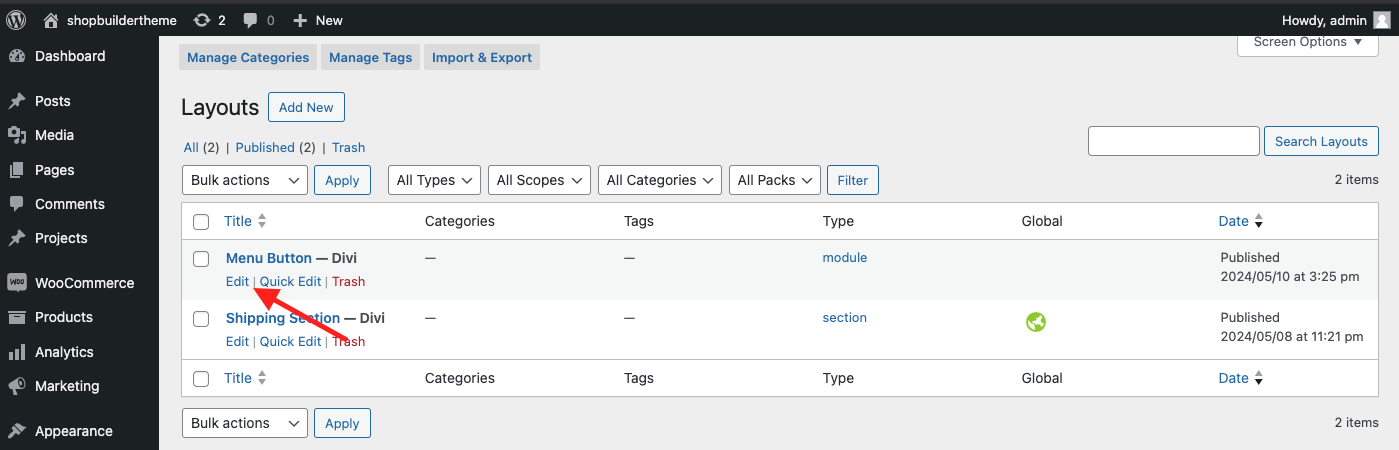
Customizing the "Call To Action" Button with Divi Shop Builder Plugin
The "Call To Action" button, part of the Divi Shop Builder Plugin, is displayed using a Divi Library Template in the navigation bar.
How to Customize the Button
- Navigate to Divi > Divi Library and locate the layout named "Menu Button".
- Click Edit to customize the button's appearance, text, and link.
- After making your changes, click Save and exit the Divi Builder.
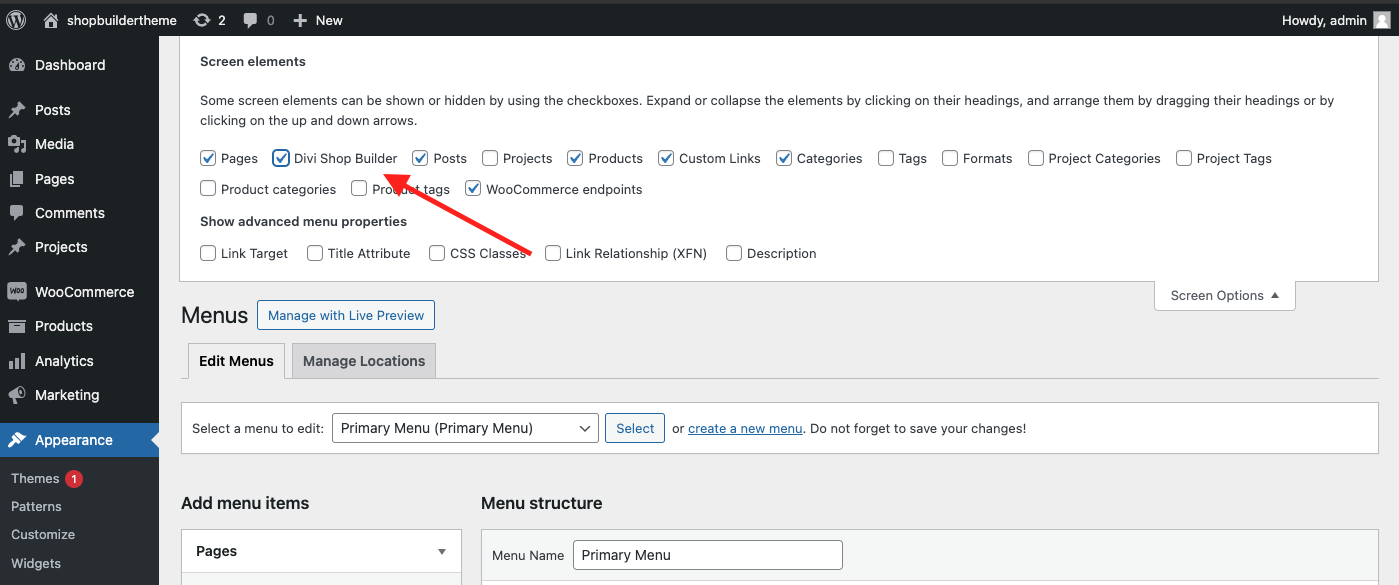
Modifying the Button's Position or Removing It
- Go to Appearance > Menus > Secondary Menu and click Select.
- Ensure that "Divi Shop Builder" is enabled in the Screen Options settings.
- Find the menu item that includes the call to action button to reposition or remove it.
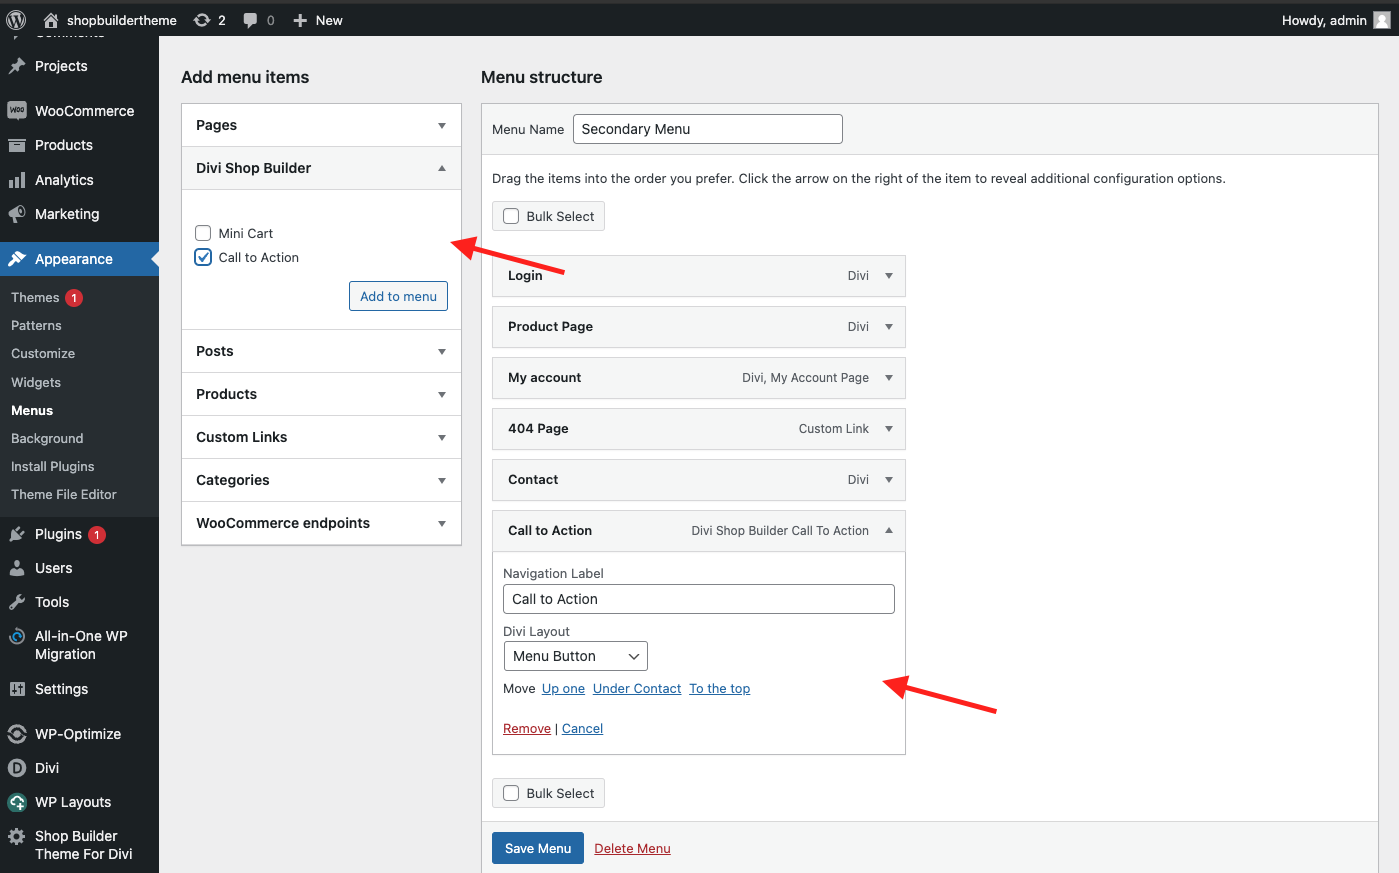
Adding a New Button
- Under the "Divi Shop Builder" tab, select "Call to action" and click Add to menu.
- Choose the Divi Library item that contains the button module.
Finally, remember to Save Changes.
For detailed instructions on the button module, visit this link.
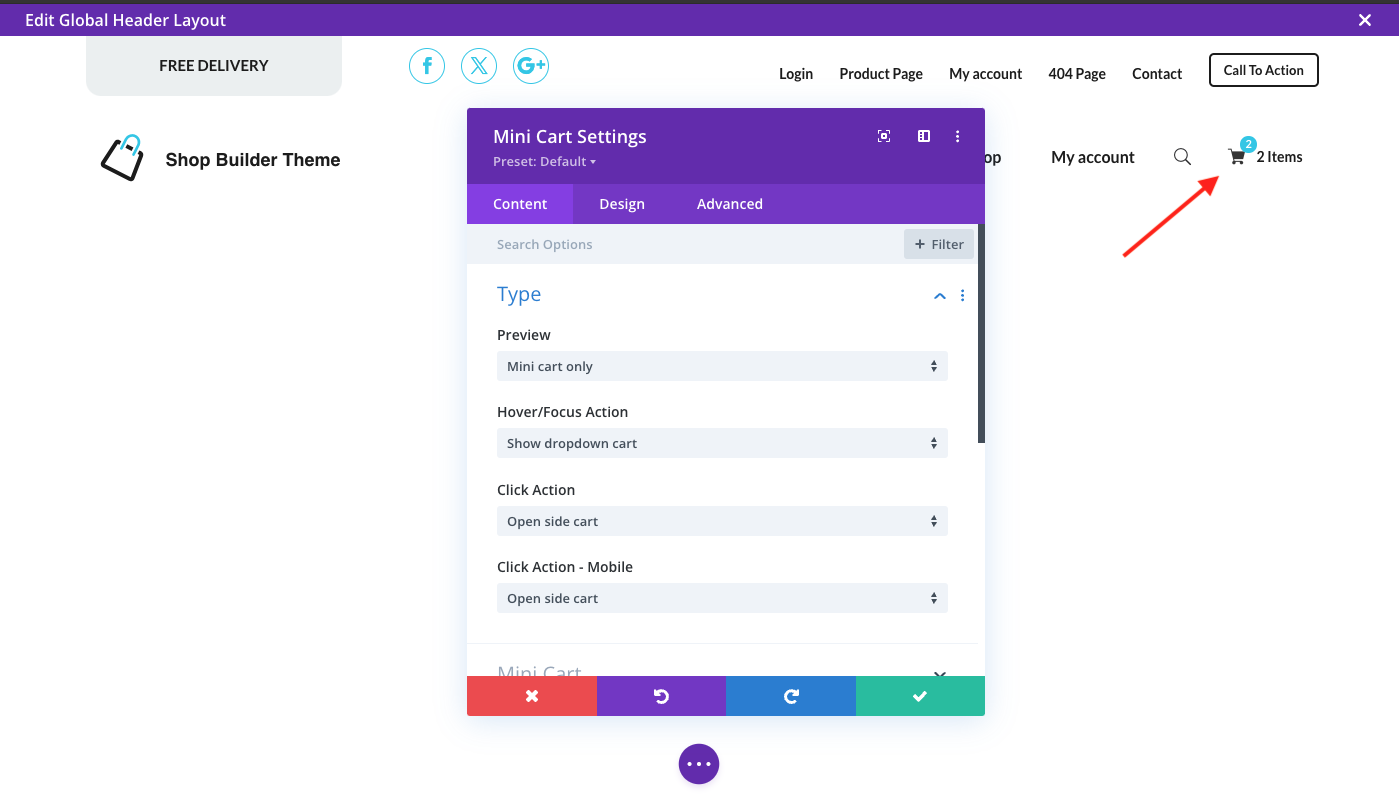
Customize Mini Cart Feature
-
Edit Header Template:
- Navigate to Divi > Theme Builder and edit the Header template.
-
Locate Mini Cart Module:
- Locate the mini cart module within the header template.
-
Customize Mini Cart:
- Click on the mini cart settings to customize its appearance and functionality.
- Adjust settings such as the cart icon, dropdown style, and display options.
-
Save Changes:
- After customizing, click Save and exit the Divi Builder.
For more information about Mini Cart module, click here.
Advanced Documentation
For more advanced customization, please refer to the Divi Shop Builder documentation.
This comprehensive guide should help you set up and customize your Shop Builder Theme for Divi effectively.