Written September 12, 2018 by Stephen James, Updated March 27, 2020 by Randy Brown
The comments section is included at the bottom of all standard posts in Divi. By default, it includes fields for a name, email, URL and a comment. There is also some boilerplate text above the comment section that is hard-coded into the template files.
In this post, I’m going to show you how to change the text, remove and add fields to the comment section, and how to do it all without the need for any plugins.
All of the code below can be added to the functions.php or custom.js files in your child theme. For this, you’ll need to have a child theme set up and running.
If you are unfamiliar with the concept of a child theme, read the following to posts:
- Everything You Need to Know About Using a Child Theme with WordPress and Divi, and,
- What Is The Difference Between a Child Theme and a Premium Divi Child Theme
If you’re ready to create a child theme for your Divi website, you can use the Divi Space Child Theme Generator. If you need some help using the generator, read our post, “How to Use the Divi Space Child Theme Generator.”
How to Edit the Divi Comments Section Without a Plugin
To begin the tutorial, we’ll start with the easy bit of adjusting the comments title and description.
The Standard Divi Comment Section
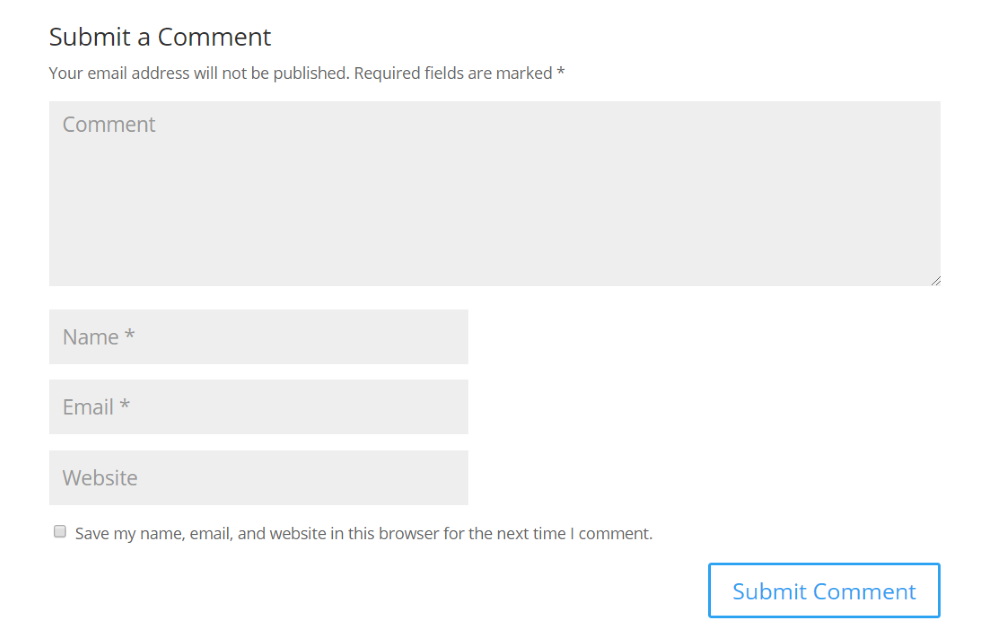
For comparison, here’s a look at the standard Divi comment form. It includes a title, description, fields for the comment, name, email, website, a cookie option, and a submit button. The code in this article will customize most of these elements.
PHP
Here are several things you can do using PHP. The code in this section is added to the functions.php sheet in your child theme.
To add the PHP, go to Appearance > Theme Editor and select functions.php. Add the code under the last line of code within the sheet.
Hide the URL Field
The standard Divi comment form includes the field so commenters can include their websites. This places a link on their name that leads back to their site. You can disable the website field with the code below.
// don't display url field in comments form
function ds_customize_divi_comments_url_field ($fields) {
// Remove the website url field
if(isset($fields['url']))
unset($fields['url']);
return $fields;
}
add_filter('comment_form_default_fields', 'ds_customize_divi_comments_url_field');
Here’s the comment form without the Website field. The form is now shorter and cleaner, and users can’t comment for the sole purpose of having a link back to their site, which will help reduce spam comments.
Add a New Field for a Mobile Number
The standard form includes fields for the commenter’s name, email, and website. You can add a new field to include their mobile phone number with the code below.
// add new field for mobile number to comments form
function ds_customize_divi_comments_mobile_field($fields){
  // Add a new field for mobile number
  $fields[ 'mobile' ] =
    '<p class="comment-form-mobile">'.
    '<label for="mobile">' . __( 'Mobile Number' ) . '</label>'.
    '<input id="mobile" name="mobile" type="text"/>'.
    '</p>';

  return $fields;
}

add_filter('comment_form_default_fields', 'ds_customize_divi_comments_mobile_field', 10);
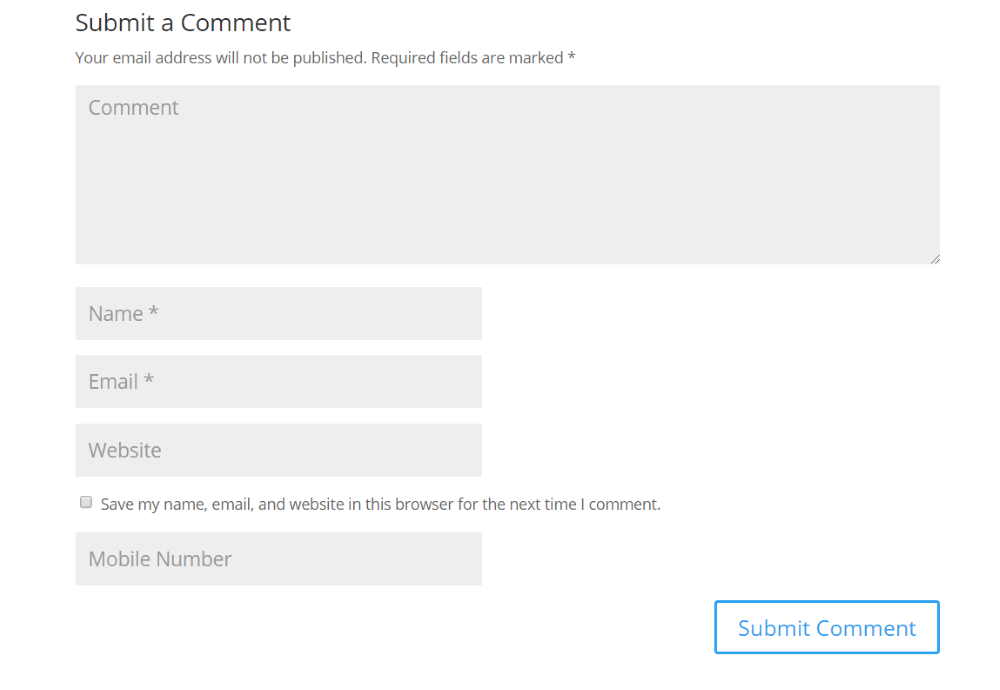
Here’s the form with the mobile number field added to the bottom. This is helpful for professional services or collecting leads.
Hide the Cookies Field
The comment form includes a checkbox that lets users allow their browsers to save their name, email, and website. This information is saved through a cookie. This checkbox can be hidden if you want to require commenters to sign in every time they comment. Hide the cookie checkbox using this code:
// don't display cookies field "Save my name, email, and website ..." in comments form
function ds_customize_divi_comments_cookies_field($fields){
  if(isset($fields['cookies']))
    unset($fields['cookies']);
  return $fields;
}

add_filter('comment_form_default_fields', 'ds_customize_divi_comments_cookies_field', 10);

Here’s the form without the checkbox. This gives the form a cleaner look and allows you to create your own cookie checkbox if you want.
Change the Cookie Field Text and Display Location
The checkbox is normally located under the Website field. If you add a field for the mobile number (as seen above) the field is placed below the cookie field. It’s possible to move the cookie’s checkbox to a different location. We can also change the description text. The code below will perform both tasks.
Change the phrase “TEXT FOR CHECKBOX HERE” to anything you want it to display. For this one to work, you’ll also need to use the code above this one. That code hides the original checkbox, while the code below creates a new one.
// Change the cookie field text and display it at the end of the comment form
// in order this to work, use with function customize_divi_comments_cookies_field
function ds_customize_divi_comments_cookie_field_order_and_text( $fields ) {
  $commenter = wp_get_current_commenter();
  $consent   = empty( $commenter['comment_author_email'] ) ? '' : ' checked="checked"';
  $fields['cookies'] = '<p class="comment-form-cookies-consent"><input id="wp-comment-cookies-consent" name="wp-comment-cookies-consent" type="checkbox" value="yes"' . $consent . ' />' . '<label for="wp-comment-cookies-consent">TEXT FOR CHECKBOX HERE</label></p>';

  return $fields;
}

add_filter( 'comment_form_default_fields', 'ds_customize_divi_comments_cookie_field_order_and_text', 99 );
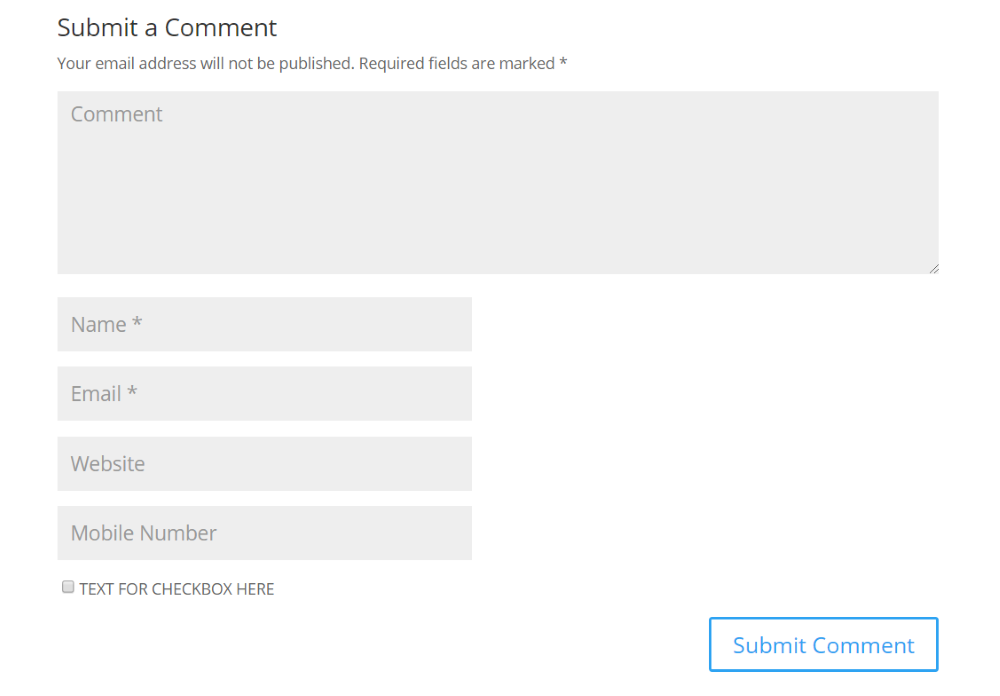
Here’s the checkbox with its new description and new location under the Mobile Number field. This gives you more control over the design. So, when you add a new field, such as the Mobile Number field, it can look like it’s integrated within the form rather than being stuck on at the end.
Save the Mobile Number Data
The mobile phone number isn’t stored with the cookie by default. Of course, it’s possible to save the mobile phone data to the database. Simply use the code below.
// Saving the ‘Mobile Number’ Data
function ds_save_mobile_comments_data( $comment_id ) {
  if ( ( isset( $_POST['mobile'] ) ) && ( $_POST['mobile'] != ’) )
    $mobile = wp_filter_nohtml_kses($_POST['mobile']);
  add_comment_meta( $comment_id, 'mobile', $mobile );
}

add_action( 'comment_post', 'ds_save_mobile_comments_data');
Adding a Comments Meta Box
Comments are editable on the backend of WordPress. If you add a mobile phone number field, this field isn’t automatically accessible by the comment editor. You can add a comments meta box to the comment editor and have complete editing control over the mobile phone number by adding the code below.
// Adding a Comments Meta Box
function ds_add_mobile_field_in_comments_meta() {
  add_meta_box(
    'mobile_meta',
    __( 'Added Comments Data' ),
    'ds_extend_comment_meta_box',
    'comment',
    'normal',
    'low' );
}
add_action( 'add_meta_boxes_comment', 'ds_add_mobile_field_in_comments_meta' );

function ds_extend_comment_meta_box ( $comment ) {
  $mobile = get_comment_meta( $comment->comment_ID, 'mobile', true );
  wp_nonce_field( 'mobile_meta_update', 'mobile_meta_update', false );
  ?>

  <p>
    <label for="mobile"><?php _e( 'Mobile Number' ); ?></label>
    <input type="text" name="mobile" value="<?php echo esc_attr( $mobile ); ?>" class="widefat" />
  </p>
  <?php
}
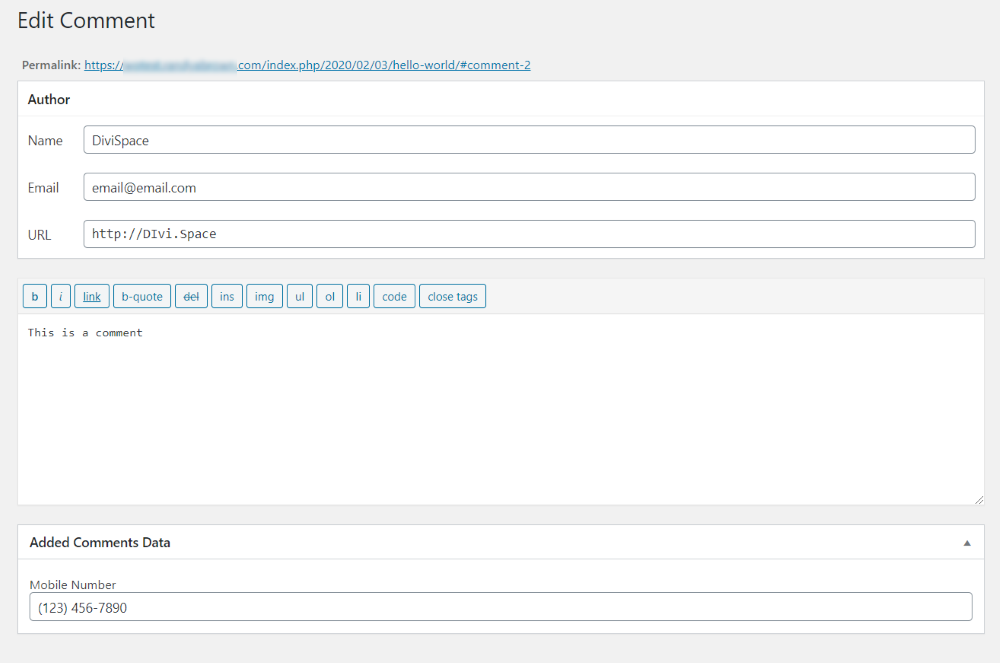
A new field is added to the comment editor where you can edit the mobile phone number. Now when you click to edit a comment you’ll see this field as well.
Editing Mobile Number Data
If you’re using the code to store the mobile number, you’ll need to allow that data to be edited in the database when a user enters a different number. The code below checks the data that’s entered and compares it to the data that’s stored. If the user adds a different number, the stored number will be updated.
// Editing Mobile Number Data

function ds_extend_comment_edit_metafields( $comment_id ) {
  if( ! isset( $_POST['mobile_meta_update'] ) ||
    ! wp_verify_nonce( $_POST['mobile_meta_update'],
      'mobile_meta_update' ) )
    return;
  if ( ( isset( $_POST['mobile'] ) ) && ( $_POST['mobile'] != ’) ) :
    $mobile = wp_filter_nohtml_kses($_POST['mobile']);
    update_comment_meta( $comment_id, 'mobile', $mobile );
  else :
    delete_comment_meta( $comment_id, 'mobile');
  endif;
}
add_action( 'edit_comment', 'ds_extend_comment_edit_metafields' );
Display a Mobile Field in the Comments List
If you’re using the code to allow users to enter a mobile phone number, you can add a new field to the comments list on the backend where you can see that number with the comment. Simply add this code:
// Display Mobile Field in the Comments List

function ds_customize_comments_display_mobile( $text ){

  if( $mobile = get_comment_meta( get_comment_ID(), 'mobile', true ) ) {
    $text = $text . '</p> <p class="phone-class">Phone number: ' . $mobile . '';
    return $text;
  } else {
    return $text;
  }
}

add_filter( 'comment_text', 'ds_customize_comments_display_mobile');
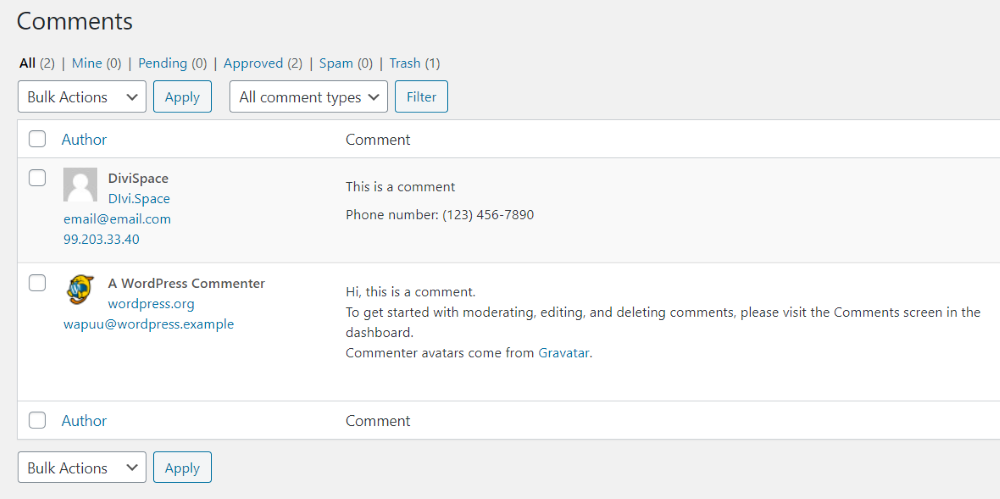
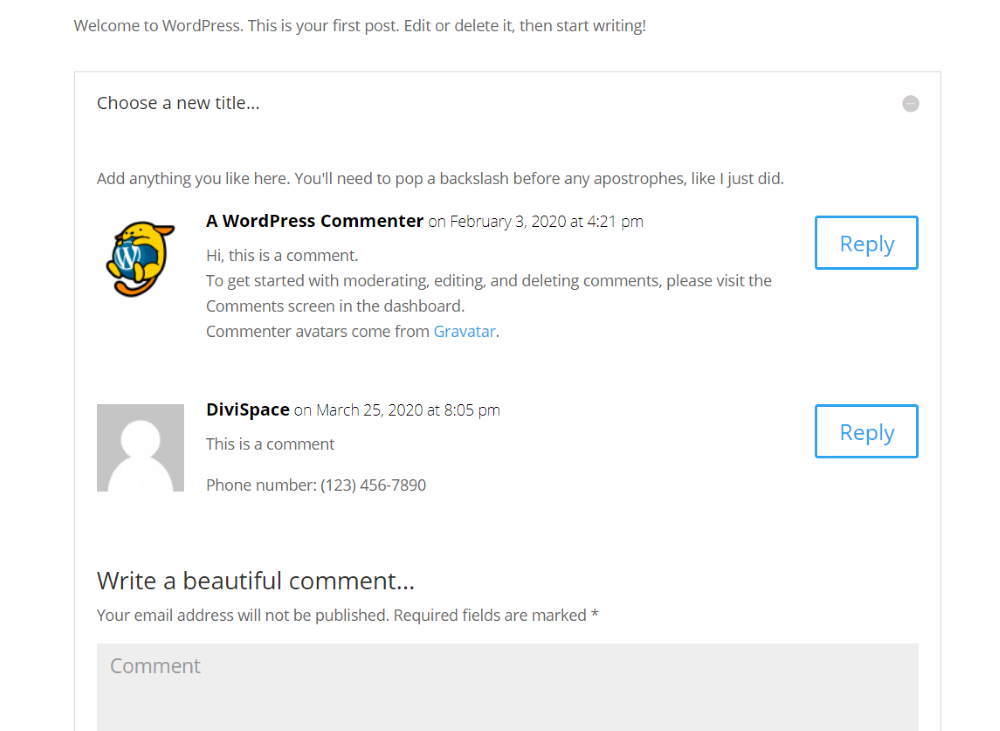
Here’s the result. The phone number is placed under the comment and it’s labeled so you’ll know what it is. This provides you with easy access to the phone number on the backend, making it more useful and efficient.
JavaScript
The following code adds features using JavaScript. JS can be added to the JS file of a child theme or the Divi Theme Options.
To add the code to your child theme, go to Appearance > Theme Editor and select the .js file. Add the code under the last line of code within the sheet.
If you use Divi Theme Options, go to Divi > Theme Options, select the Integrations tab and add it to the Body section. Place the code between <script>CODE GOES HERE</script> tags.
Editing the Comments Title
Normally, the comments section’s title includes the number of comments followed by the word “Comments”. You can change this to display any title you want. Use the following code and replace the text “Choose a new title..” with the title you want to display.
// Editing the Comments Title
jQuery(document).ready(function($){
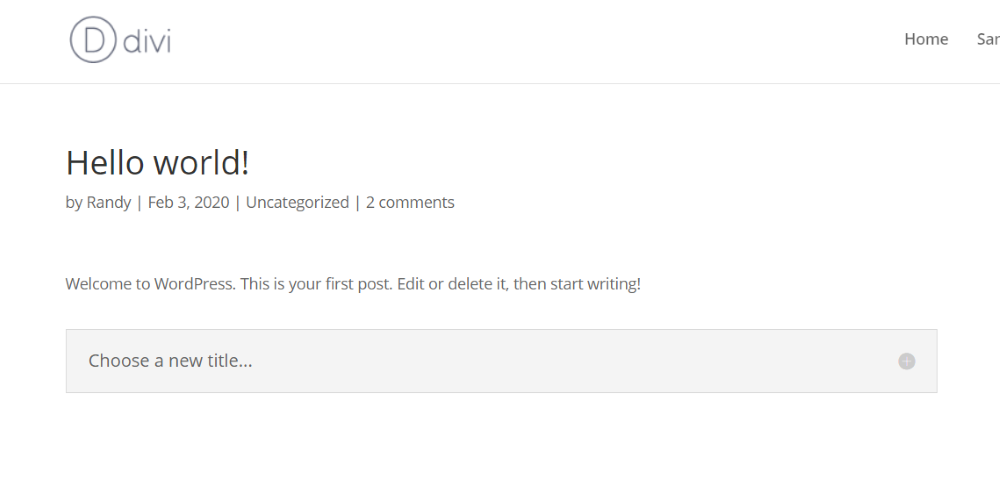
$('#comment-wrap h1#comments').html('<span>Choose a new title...</span>');
});
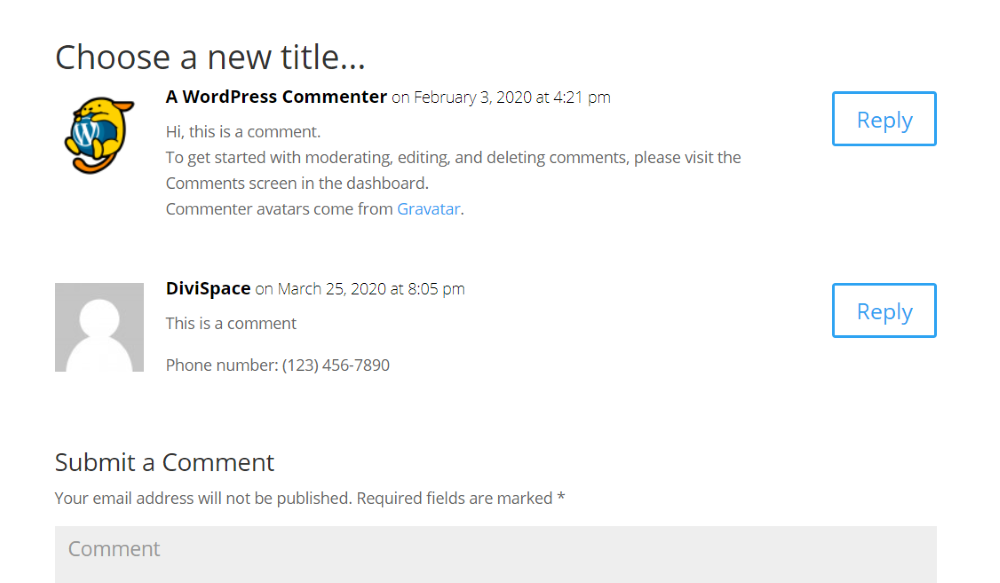
The title now displays my text, “Choose a new title..”. This gives you more control, allowing you to personalize your website even more.
Editing the Comments Description
You can also add a new set of text that will appear under the title. Use this code and replace the note within the code with your text.
// Editing the Comments Description

jQuery(document).ready(function($){

    $('#comment-wrap h1#comments').after('<p class="comment-notes" style="margin-bottom:15px" >Add anything you like here. You\'ll need to pop a backslash before any apostrophes, like I just did.</p>');

});
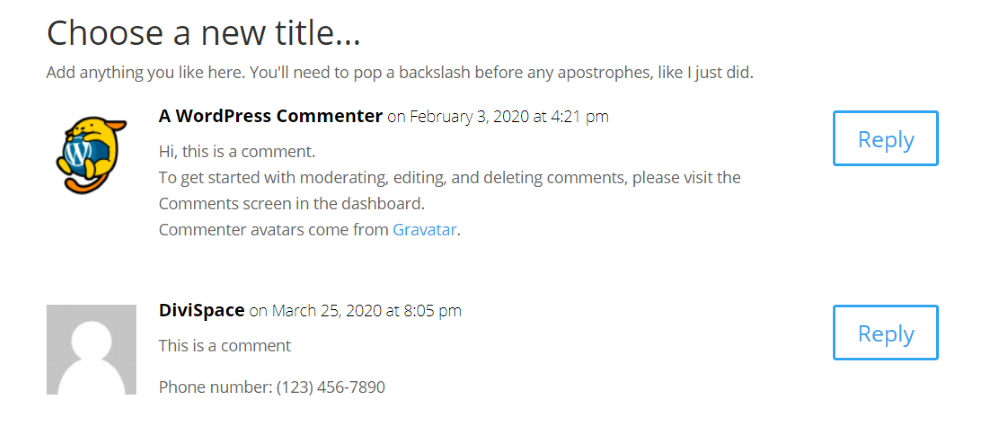
Here’s the example with the description under the title. This is helpful for providing information to commenters, such as guidelines, rules, or a quote to further personalize your website.
Editing the Submit Button Title
The standard submit button title simply informs the user to submit a comment. It works, but like anything else that users have seen hundreds of times, it can become easy to ignore. You can change the submit title with the following code. Add your title within the spans.
// Editing "Submit a Comment" Title

jQuery(document).ready(function($){

    $('#comment-wrap h3#reply-title').html('<span>Write a beautiful comment...</span>');

});
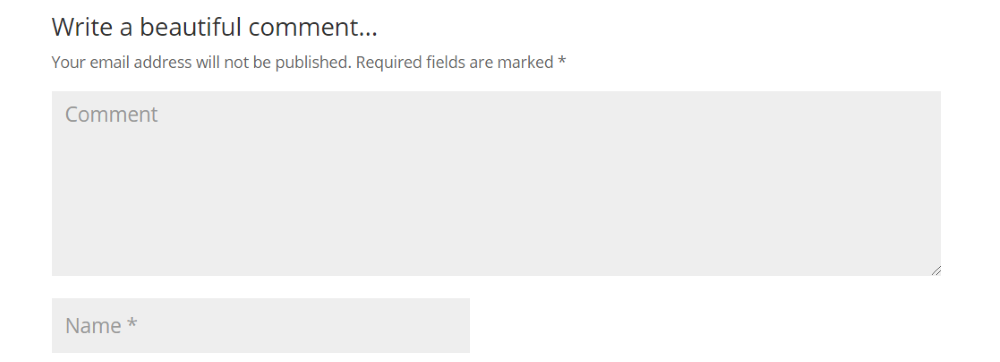
Here’s the example with the title “Write a beautiful comment…”. This is another great way to personalize your site or provide users with information.
Display the Comments in a Toggle
If you want an even cleaner commenting area, place the entire comment section within a toggle. Use it with the CSS that I’ve placed under the JS. The JS we’ve used for editing the comments title, description, and submit button title also works with the toggle.
// Display comments in Toggle ( use with CSS)

jQuery(document).ready(function($){

    $('#comment-wrap').wrap('<div class="ds_toggle_content et_pb_toggle_content clearfix">');
    $('.ds_toggle_content').wrap('<div class="ds_comments_toggle et_pb_module et_pb_toggle et_pb_toggle_item et_pb_toggle_close">');
    $title = $('#comment-wrap #comments').first().text();
    if (!$title.trim()) {
        $title = $('#comment-wrap #reply-title span').first().text();
        $('#comment-wrap #reply-title span').first().hide();
    }

    $('#comment-wrap #comments').hide();
    $('<h5 class="ds_comments_title et_pb_toggle_title">'+ $title +'</h5>').prependTo('.ds_comments_toggle');
});
Use this CSS
Add this CSS to your child theme in the CSS sheet or to the Divi Theme Options in the Custom CSS field at the bottom of the General options tab.
.ds_comments_toggle, .ds_toggle_content {
    margin-top: 30px;
    }
    .ds_toggle_content  {
    display: none;
    }
    .ds_toggle_content #comment-wrap {
    padding-top: 0;
    }
The entire commenting section is now closed within a toggle. This provides a cleaner page and users only see the comments if they want to.
Here’s the opened toggle, showing the comments a comment box. Everything works as normal, including the rest of the code we’ve added.
If you want an even easier way to add the toggle to Divi, take a look at Divi Switch in the Divi Space shop. It adds this exact feature along with over 50 others that you can activate just by clicking a switch. Divi Switch adds new features to the header, footer, body, and lots more. It even creates a custom branded plugin so you can use your Divi Switch settings on other websites without installing Divi Switch. It couldn’t be easier to customize Divi. Divi Switch is the #1 Divi customization plugin.
If you’re interested in learning more about what is possible with manipulating the comments section in this way, check out the following resources:
- Code Reference: Add Meta Box
- How to add custom fields to a WP comment form
- Customizing the WP comment form
We want to hear from you!
It’s easy to change up the form and function of the Divi theme with just a little bit of CSS and jQuery. Have you tried to change the comments section on your Divi website? Did you find this tutorial easy to follow? If you have other tutorial requests, let us know what they are!
Please feel free to share your comments, questions or feedback below! We love receiving your feedback!
Thanks for reading!

I try so many times to add select field in the comment form and to insert to the commentmeta table. But unfortunately it doesn’t work. Please if you know how to add select field in the comment form, please reply this message.
Hello, I followed the steps at the beginning of this article to hide the url (website) field.
After adding the suggested code in the functions.php file of my child theme, nothing changed,
I tried to add it to the parent theme, but it appears it’s impossible due to an error in the added code.
Any suggestions? Thanks!
Hello, is your child theme active? What is the error message?
For a long time I have been looking for a solution that would allow me to check whether the e-mail address entered by the user is not the address used to send spam and whether such an address actually exists. Do you have any suggestions on how to solve this problem?
we would suggest using a service like CleanTalk
Thanks a lot ! Very helpful…
Is it possible to change or remove the “on” from the comment date ?
Didn’t find anywhere how to do that.
The easiest would be to translate the string ‘on %1$s at %2$s’ that is used in et_custom_comments_display() function
Great post! how to do a coment without mention the email field
Hi folks, is it possible to move the reply-box above the comments in Divi? I’ve tried this (https://webhostinghero.org/how-to-move-the-comment-box-to-the-top-in-wordpress/), but unfortunately it didn’t work. Thanks in advance!
Hi, Thank you for this great post.
How do you change the “Your email address will not be published. Required fields are marked” line?
Is there a easy way like above?
Tank you and best regards
Hi!
Is there a way to add a second checkbox?
Thanks a lot for the article,
Vera
Hi Vera, yes, but in this tutorial we are just modifying the existing checkbox.
If you want to add a new checkbox, you would need to follow the part ‘how to add mobile field’ and change it to your needs, input type needs to be checkbox instead of text etc.
We will consider adding this to Divi Snippets Tutorials
When a try to edit the submit button title wordpress says “syntax error, unexpected ‘$'” but i did exactly what the article explains
Hi Yann, where are you pasting the javascript? In some places, you need to wrap the code with tags
This article may be helpful: https://wpzone.co/tutorials/how-to-add-javascript-and-jquery-to-divi/
// Editing "Submit a Comment" TitlejQuery(document).ready(function($){
$('#comment-wrap h3#reply-title').html('Write a beautiful comment...');
});
Does not work on the send button, is there a code that is suitable for changing the text of the button? thanks
This code will be working only for the comment section title. For button, the best way would be to translate the string with the translation plugin, for example, Loco Translate. You can also do it with jQuery:
jQuery(document).ready(function($){$('#comment-wrap .comment-form input#submit').val('test');
});
How can I remove date and time from the comments, so that the comment will show only the author name, but no date and time?
Maybe hide with CSS?
.comment_postinfo .comment_date {
display: none;
}
Anyway to change the “Submit comment” button text?
Hi Mario, the best way would be to translate the string with the translation plugin, for example, Loco Translate. You can also do it with jQuery:
jQuery(document).ready(function($){

$('#comment-wrap .comment-form input#submit').val('test');

});
Thanks for this.
How can I get the comment form to display above the submitted comments?
The problem: When I have 20 or more comments the people stop commenting because they give up scrolling to find the comment form.
I have a child theme but I’m struggling with just this little task.
Thank you.
Thanks a lot Stephen James! I was very confused about comments section of my blog. After this tutorial I am feeling easy to amend my blog’s comment section. Love your blog… Keep it up!
Thanks a lot guys for this great tutorial. I needed to edit the Divi comments section without a plugin for my customer and your tutorial helped me to configure it. I think that if there is any chance of adding a simple code without a plugin, then we should do that
Great post.
Btw, how to add “Post Title” in the title of the comments along with current comments number.
For example, 0 Comments on “How to Edit the Divi Comments Section Without a Plugin”.
That would really help.
Thanks,
Hi,
I’m not able to get the custom field to save in the backend or inside the comments. It shows the field on the frontend, but after the comment is submitted it doesn’t look like it’s storing anywhere. Does this code need updated for Divi 4.0+?
I take that back — it IS showing in the backend when you edit the comment. Your code just doesn’t provide how to show it inside the comments on the front end. Here’s that code, you can modify for your ‘phone’ use, mine is for ‘version’:
// Add the comment meta (saved earlier) to the comment text

// You can also output the comment meta values directly to the comments template
add_filter( 'comment_text', 'modify_comment');
function modify_comment( $text ){
if( $version = get_comment_meta( get_comment_ID(), 'version', true ) ) {
$version = 'Divi Version: ' . $version . '';
$text = $text . $version;
return $text;
} else {
return $text;
}
}
hi,
How can i do “display:none” in comments sections if the user is logged in?
Thanks
.logged-in .class-of-the-element-to-hide { display: none; }Thank you! Works perfect!
This is just what I needed, I removed Website field from comments. It worked. Thank you!
Great post! However, i want only the Comments title font style to change to Oswald. Kindly help. Thanks.
This is great but the second part “add anything you like…” doesn’t display. “Leave a comment…” part works great!
jQuery(document).ready(function($){$('#comment-wrap #reply-title span').html('Leave a Comment or Review');
$('#comment-wrap .comment-notes').replaceWith('Add anything you like here. You\'ll need to pop a backslash before any apostophes, like I just did.');
});
Great little post , Divi comments fields set to h1 annoys me such a stupid little error
thanks SJ, My client just asked me yesterday to change the comment title. 😉