One of the biggest frustrations with the WordPress Media Library is that once an image is uploaded, it’s set in stone. Once uploaded, an image’s path is set, the URL is concretized and these variables can never be altered or updated. Until now. In this post, we’ll share how you can easily replace an image in the WordPress Media Library while still retaining the path and cutting out admin.
When a media item is added to the Media Library, the URL or path to the file becomes fixed. This means that if you ever wanted to replace a specific image, you’d need to delete the initial image and related path (which could result in broken links and 404 errors) and then upload a new image and re-reference it. If you’ve used an image in several areas around your website, you’d need to manually revisit each URL and set the new image. Everywhere.
What a mission.
To help developers ease this gripe, we’ve created a nifty WordPress Media Library plugin that will quickly and easily replace an image in the WordPress Media Library. Our plugin is free to download, extremely easy to use and available right now on the repository.
If you’d prefer to watch a video tutorial instead, check out the Digital Buddha in action as he showcases the Replace Image plugin.
Why You Can’t Replace an Image in WordPress’ Media Library
If you’ve ever uploaded an image or a video to the WordPress Media Library, you’ll know that, once the file has been assigned its path, it’s impossible to make a change. But what happens if you need to give your site a refresh? What if you have new images you want to showcase, or are looking to reference an updated video but retain the URL, or want to update a PDF to share your latest prices?
Traditionally, you’d have to upload a new media asset and manually replace it wherever it is found on your site. If you’re building a small display site of +- 5 pages, this isn’t too much of a hassle, but if you’re managing a large site with hundreds of URLs, and have shared an image in countless areas across your build, you’ll have to track down each and every instance of the image and manually replace it.
Not only is this extremely time-consuming, but with human error in the mix, you may forget some of the pages or posts where the media is placed, and end up with broken links and error messages where images should be.
Another thing to keep in mind is that, when uploading an image to WordPress, the CMS itself will create multiple instances and duplications of the image in question, for example, as thumbnails. With this, if you need to replace an image, you may miss a few instances where duplicates and alternate versions of the image have been shared.
There are a few methods for changing images in the WordPress Media Library. These methods include SFTP, using Cpanel and editing the WordPress database directly, but these methods can be complicated, especially for new WordPress users.
To save you time, hassles and headaches, our plugin, Replace Image, will help you change and update any media file on your website in a matter of seconds. Let’s dive in!
How to Replace an Image in WordPress
To begin, head over to the WordPress repository and download the free plugin, Replace Image.
Download the free Replace Image plugin from the WordPress repository
Once the .zip file has been downloaded, upload the plugin as per normal by heading to the Plugin menu, clicking Add New and then uploading the .zip file from your computer. Don’t forget to activate the plugin.
When the plugin has been successfully installed and activated, if you open a file in the Media Library, you’ll see a new button available called Replace Image.
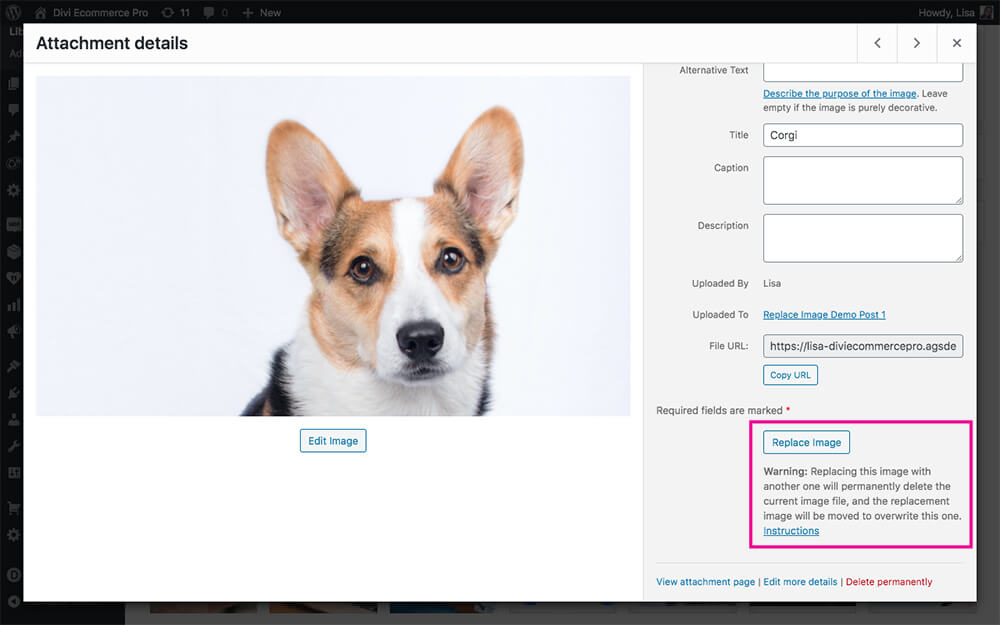
A new button, Replace Image, will display
If you click on ‘Instructions’ you’ll be taken to the plugin information page within the Tools menu.
For the sake of this tutorial, I’ve created a post with a very simple structure. You can see the post title, some dummy text using Lorem Ipsum, and added a few images of cute dogs.
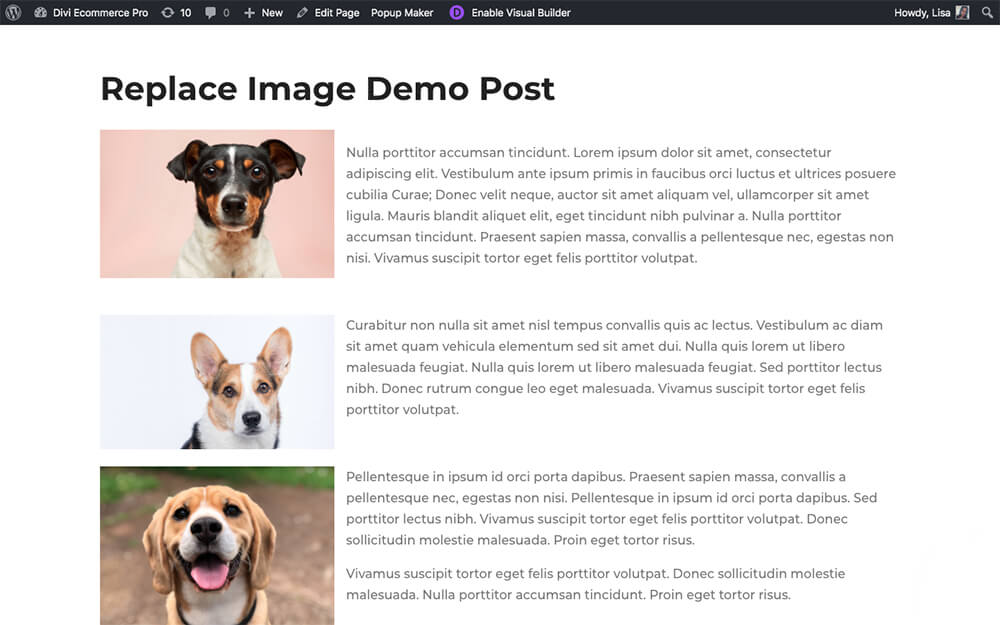
A sample page with three images
Here is a screenshot of the Media Library with these three images in the post.
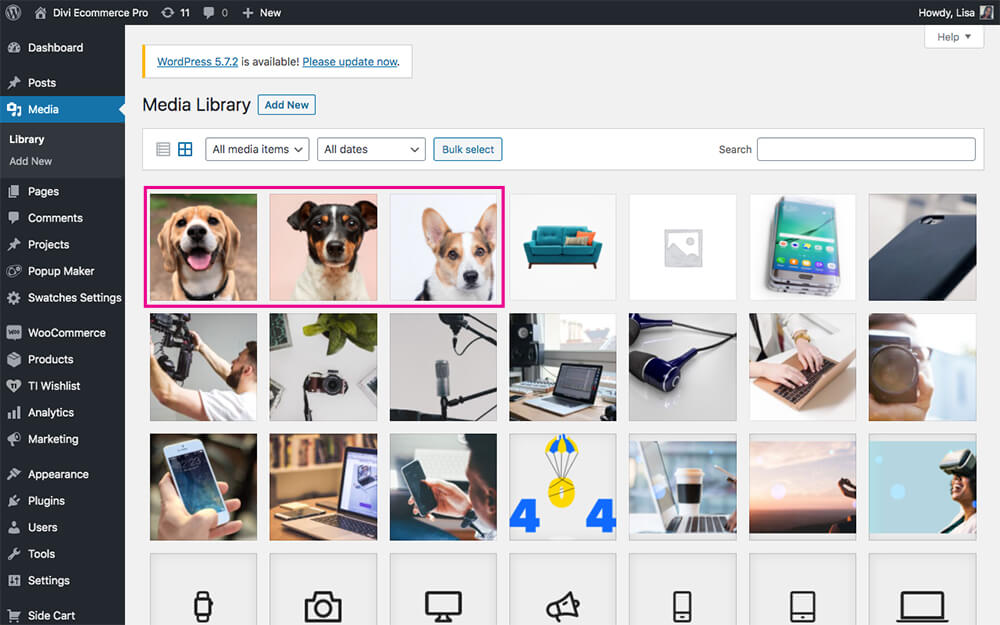
The initally uploaded images
Now, to replace one of the images, head over to the Media Library, open the image you’d like to replace. Alternatively, you can also access the Media Library directory from within the page or post by clicking the Add Media button. Once you have selected the image, click on the Replace Image button.
From here, you can select another image in the Media Library or upload a new image. When you’ve selected the replacement image, click the button titled Replace Image.
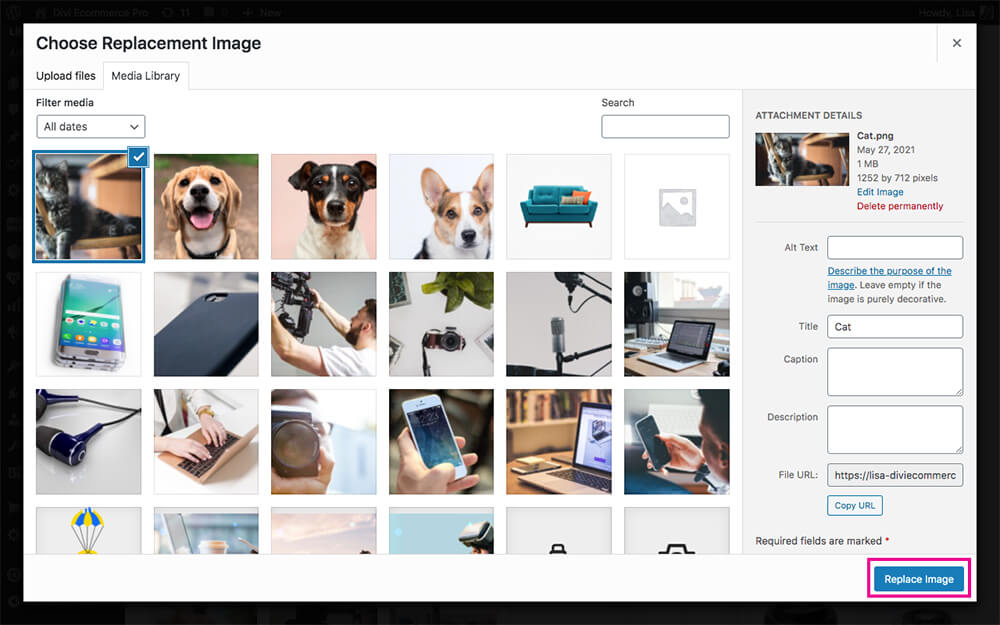
Select the image to replace the old image
Once the page refreshes, you’ll see that the old image has been replaced by the new image.
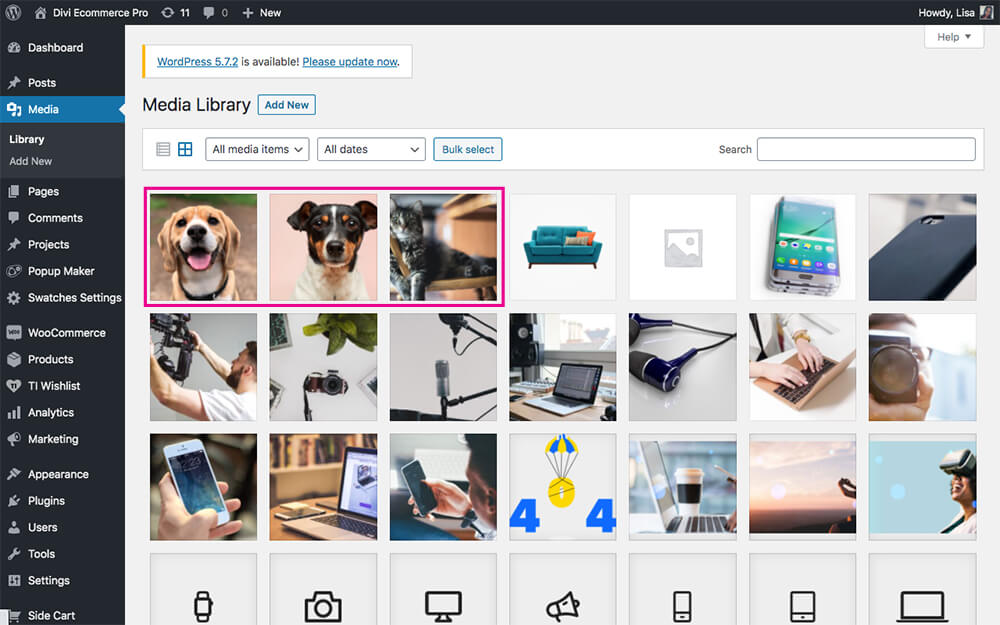
The new image has replaced the old image
When I return to the blog post, as soon as I refresh the page, the image has updated automatically.
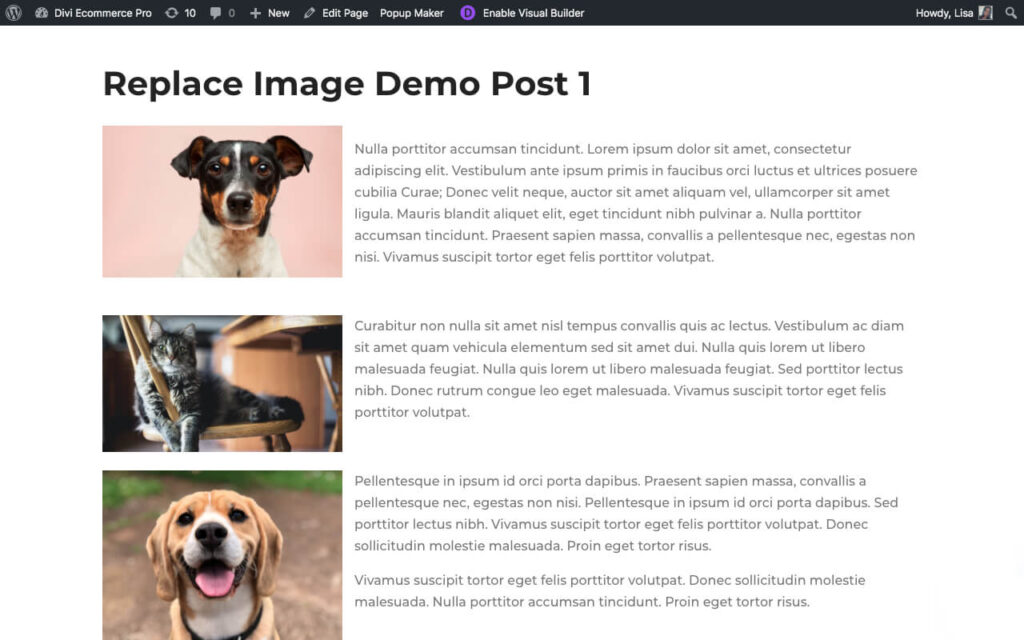
The image of the corgi has been replaced by the image of a cat
This tutorial is a very simple demonstration of how the plugin works. Sure, in this example, simply swapping the image would suffice, but what about cases where you have multiple instances of an image across a build?
Here is an example of a picture of an elephant used several times in a build; on the home page, shop page, as a featured image for a blog post and on the contact page.
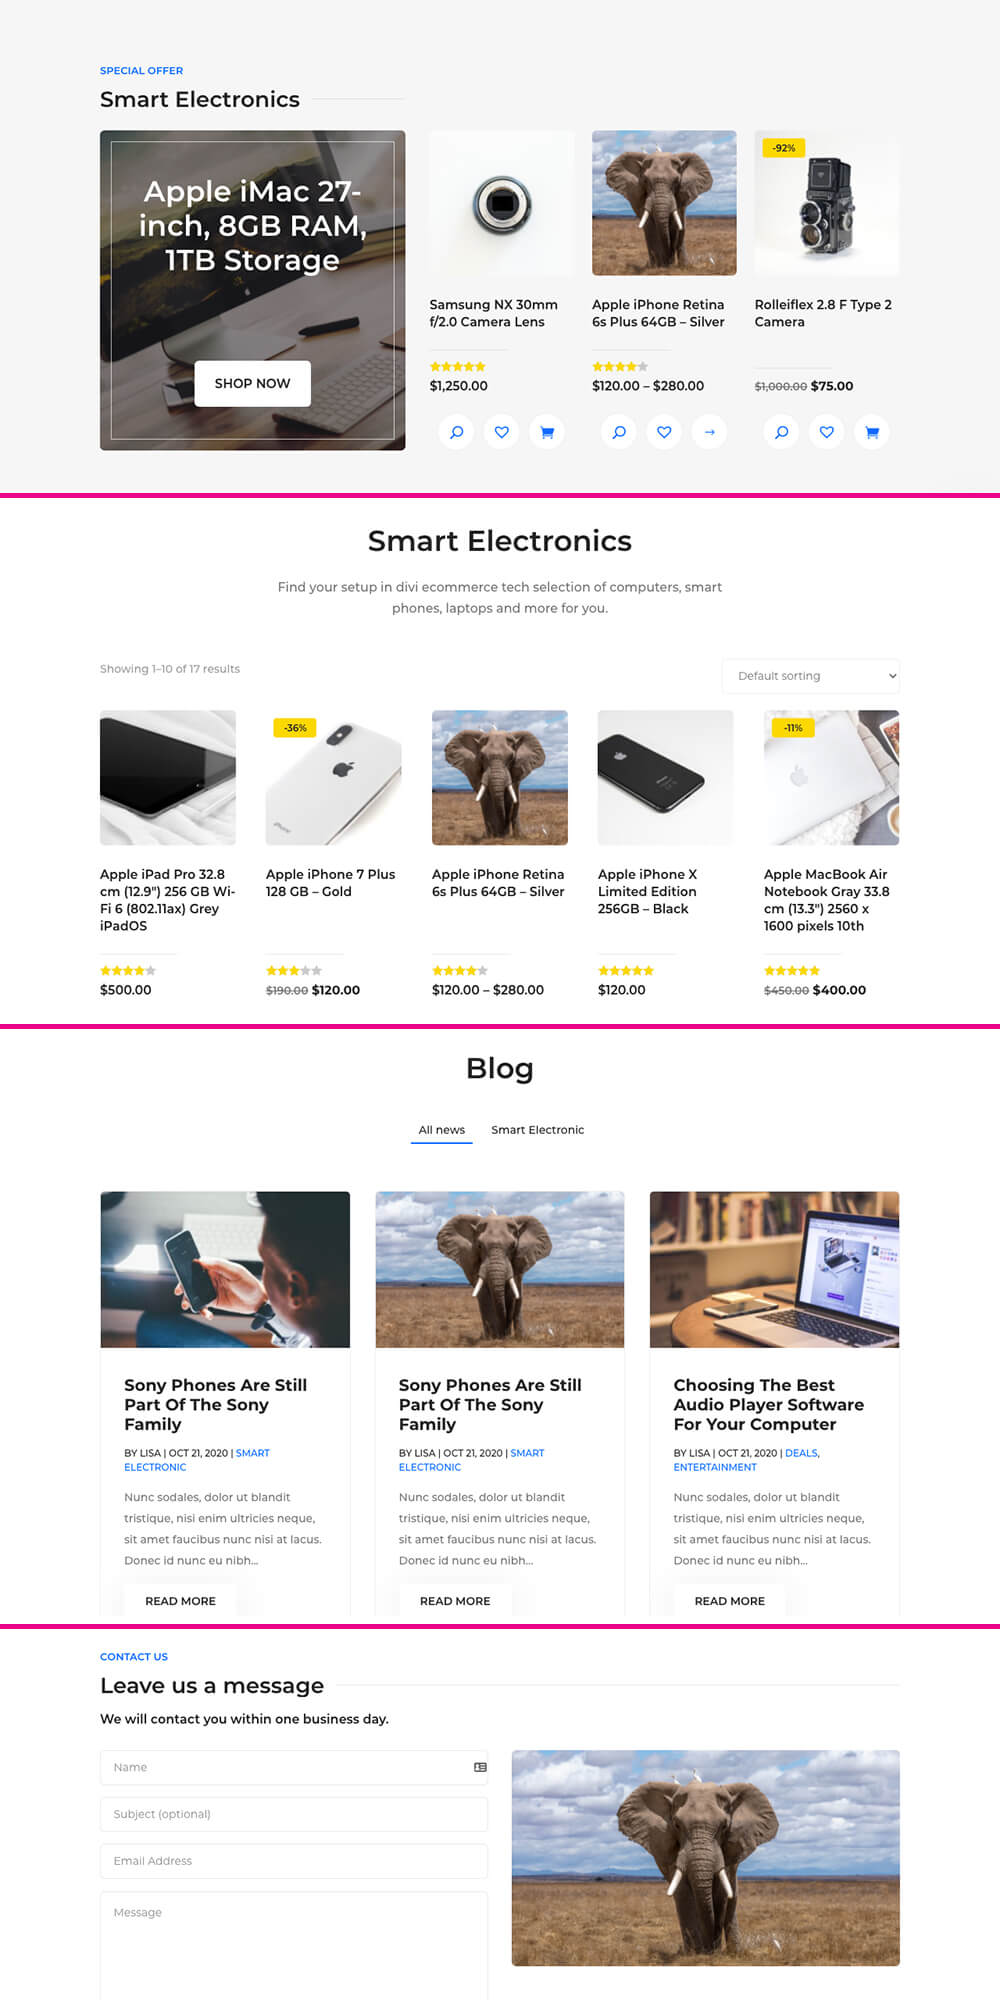
Showcasing an image site-wide
To replace the image of the elephant, I’ve opened the image and clicked the Replace Image button.
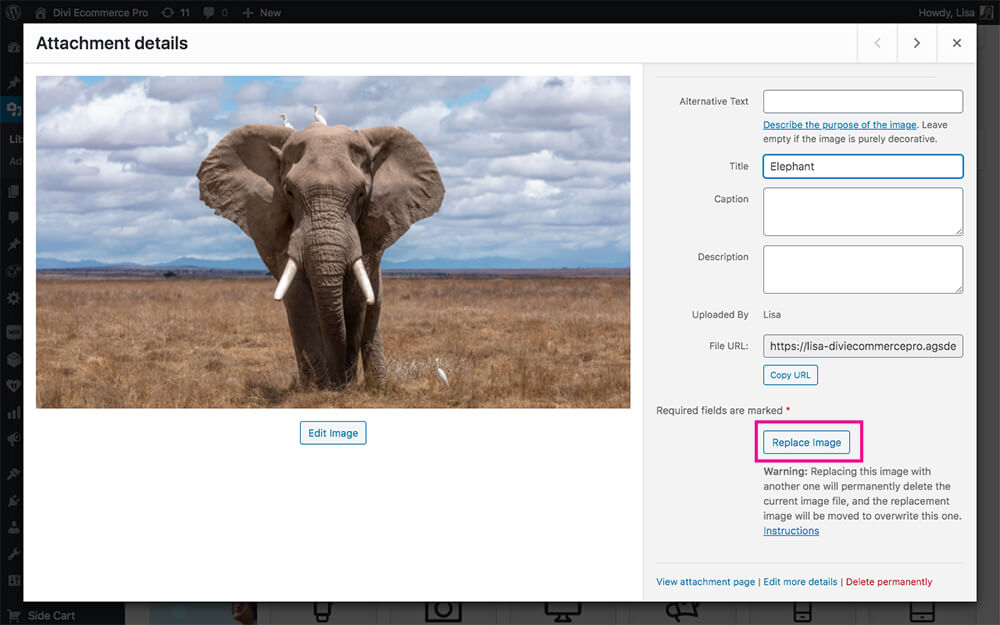
Click the Replace Image button
Next, I’ve uploaded an image of a lion and, when selected, clicked the Replace Image button.
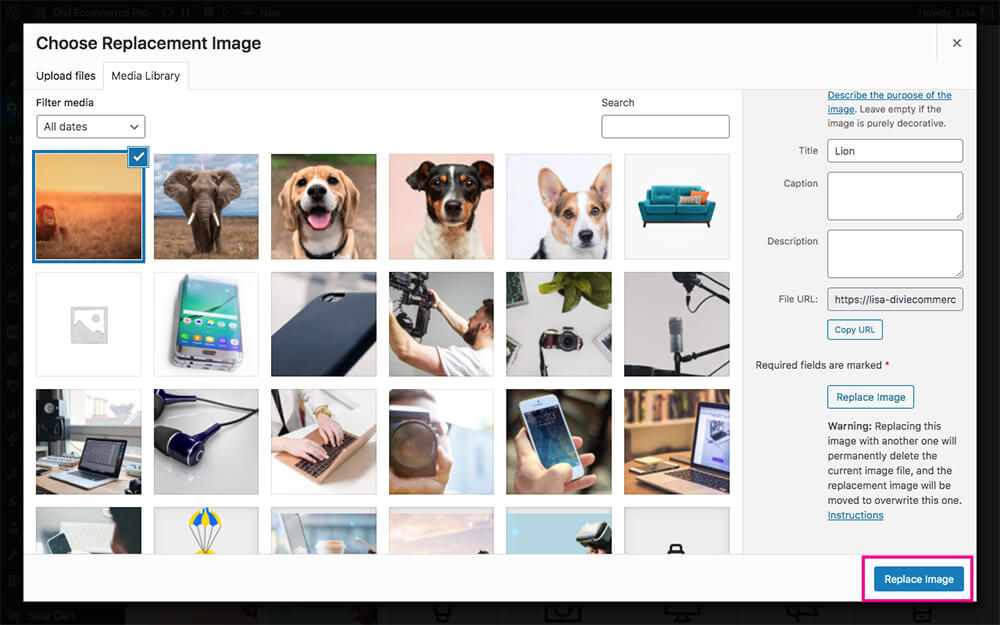
Select the new image to replace the old image
Once I refresh the pages, the images of the elephant, in all instances, will be replaced by the lion.

The original images have been replaced site-wide
Easy peasy!
Ending thoughts
Gone are the days of stressing and fretting about replacing media for a WordPress website. With the WordPress Media Library plugin, Replace Image, in your development toolkit, you’ll be able to replace images, videos and media files with little to no effort. Available for free, download this awesome plugin directly from the WordPress repository now!
Have you had to replace media, and struggled? Let us know your experience in the comments section below!


Recent Comments