There are plenty of reasons you may be considering migrating your WordPress website including cost savings, performance issues, downtime and more. Manually migrating to a new server can be stressful if you have never done it before. But moving your site without a plugin or automated migration tool is faster and can be useful for avoiding server errors once you get the hang of it.
If you are moving a site from cPanel to another hosting service and want to move it manually because it is large your you want to pick up a new skill, this post is for you.
If you are looking for simplicity, there are plenty of great one-click migration tools that can automate the process. Our recommendation is All-in-One WP Migration. But it is always good to know the ins and outs of the manual process.
In this example, I am going to show you how to move your site from a host using cPanel to Divi Space Hosting. But this process is essentially the same for any site migration. The only difference is where the settings are located. Also note, if you are new to our managed WordPress hosting service, our team will perform the migration for you. If you want to try the process for yourself, our support team is standing by to help if you run into any issues.
So let’s dive in!
Export the site files from the current host
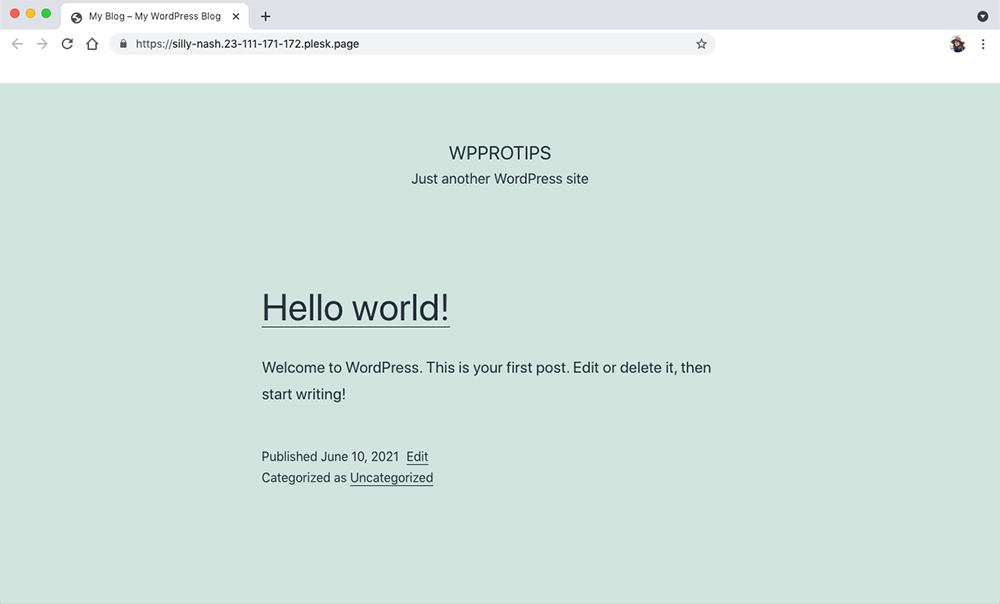
Before we begin, here’s an image of the site on the previous host. For this demo, we’ve set up a basic WordPress installation on a HostGator hosted server.
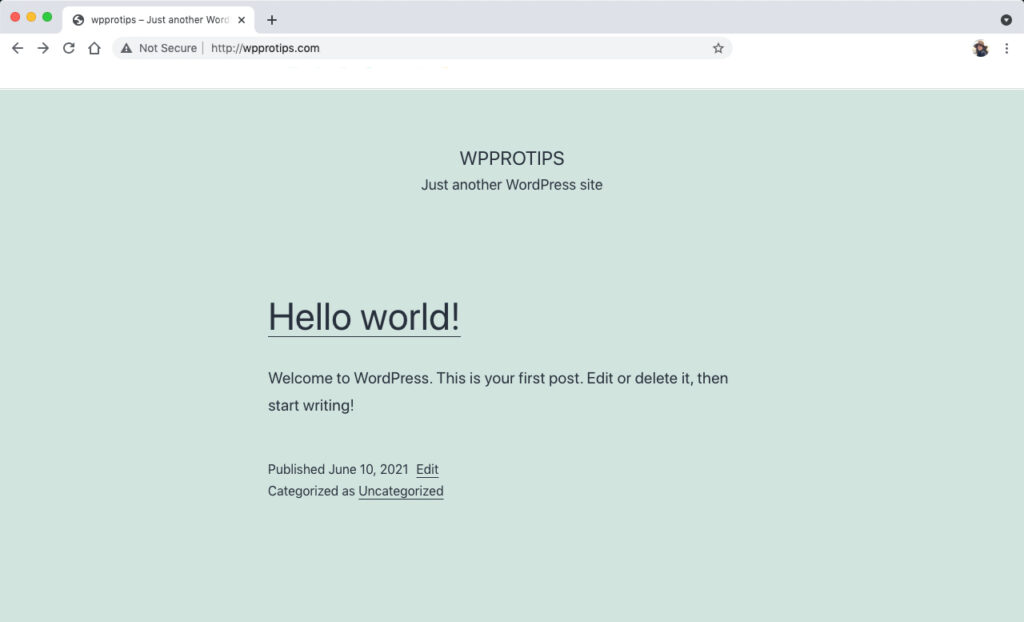
Here is the WordPress website hosted on cPanel
To begin, open the cPanel interface of your current host. Once you open cPanel, navigate to and click the File Manager icon.
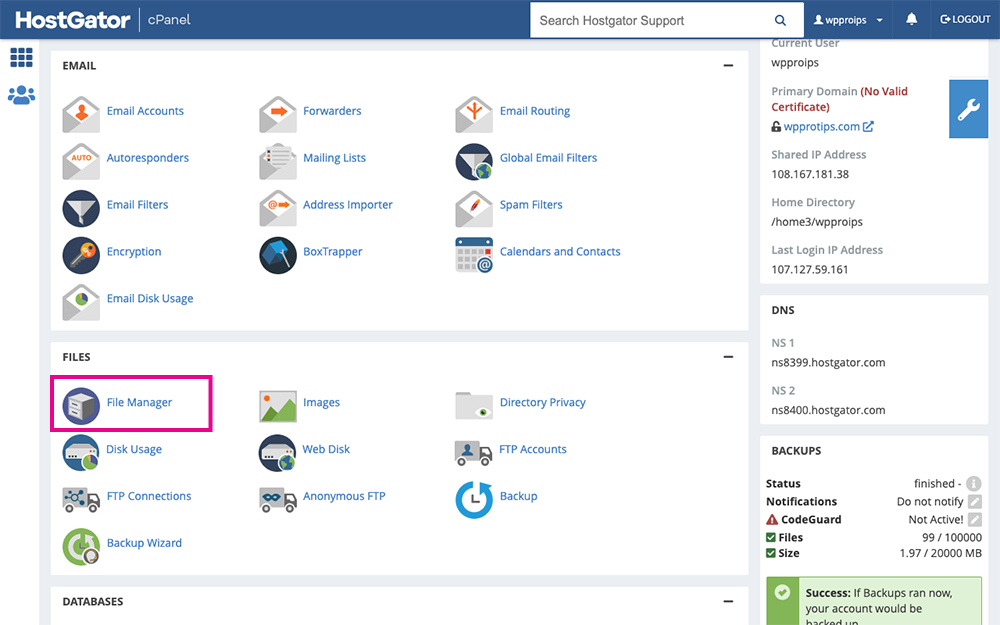
Click the File Manager button
This will open the File Manager in another window.
Click the File Manager button
By default, the File Manager opens on the root folder. Here, you’ll see everything that’s on your server.
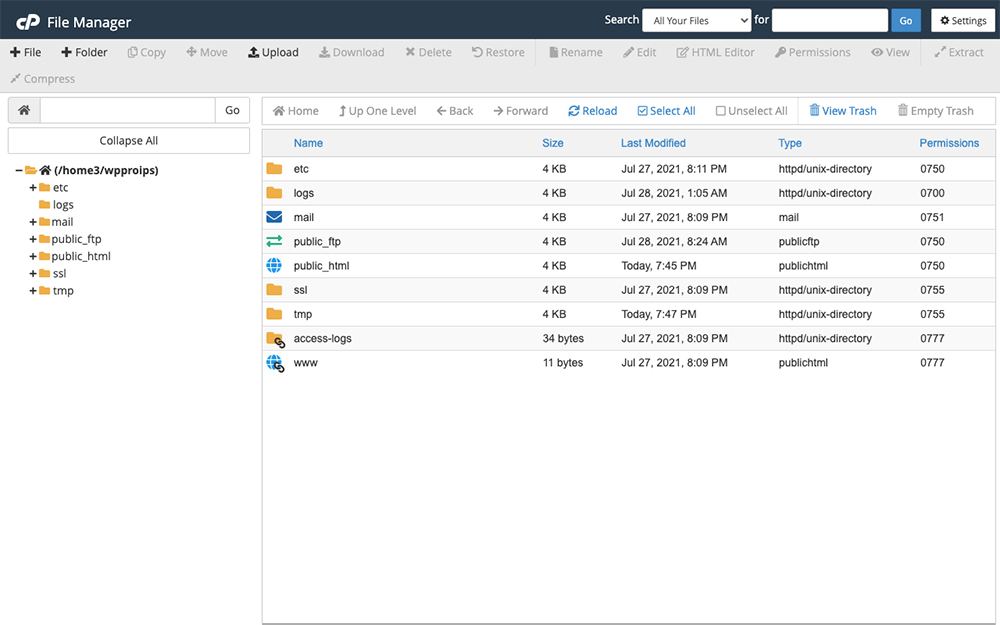
The root folder
If you click into the public_html folder, you’ll see all of the files within your WordPress website. To return to the root folder, click the Up One Level button.
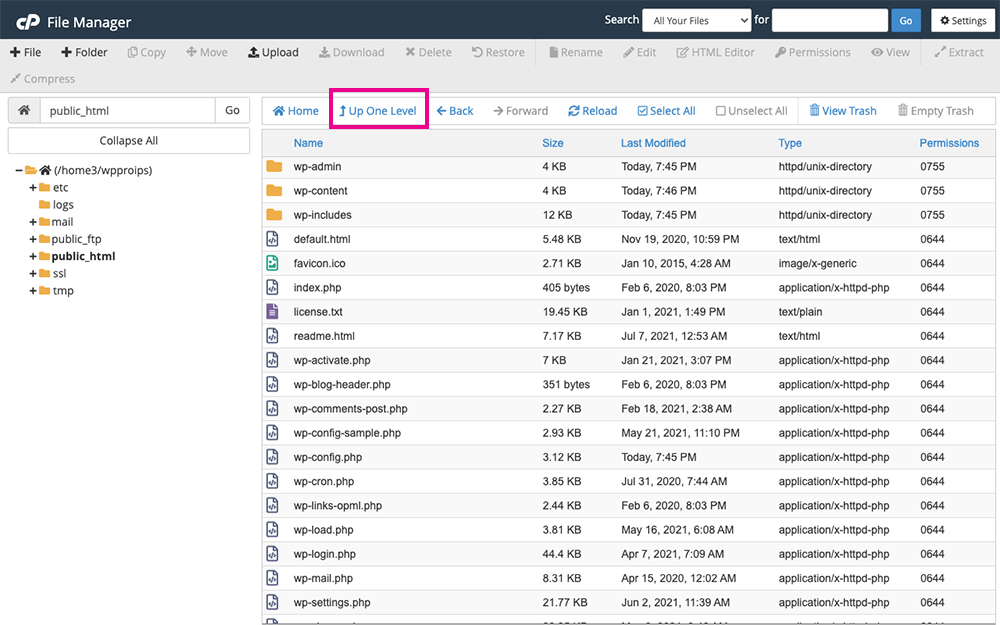
Click Up One Level
Back in the root folder, click on the public_html icon and click Compress.
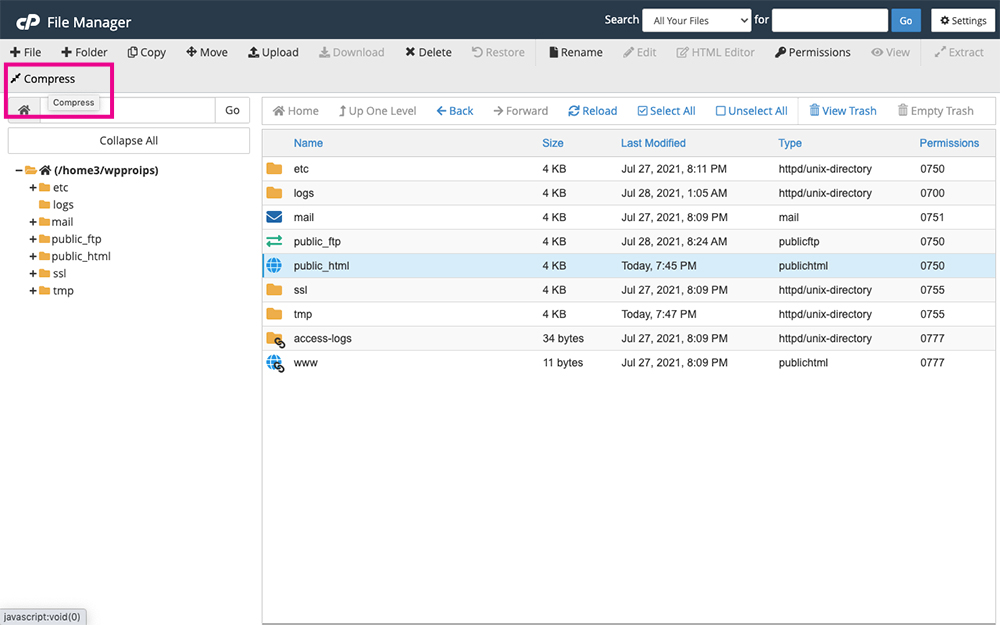
Click Compress
A pop-up will arrive and ask you which format the compression should be. Select Zip compression.
Click Download
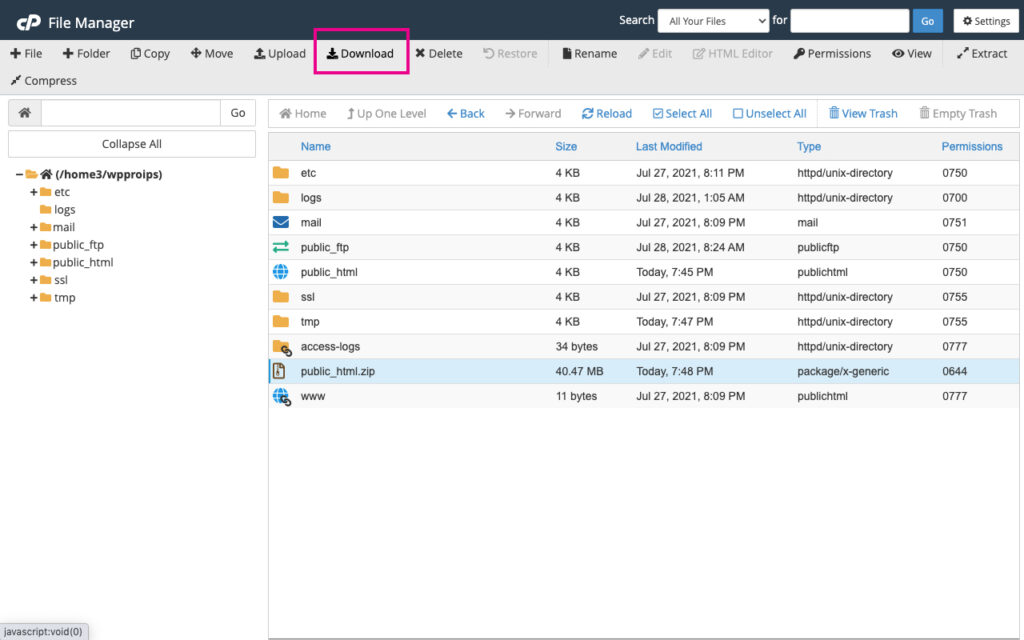
When complete, you’ll see the .zip file in the root folder. Select it and click Download.
Click Download
Once the download is complete, you can delete the compressed .zip file from the server.
Export the database from the current host
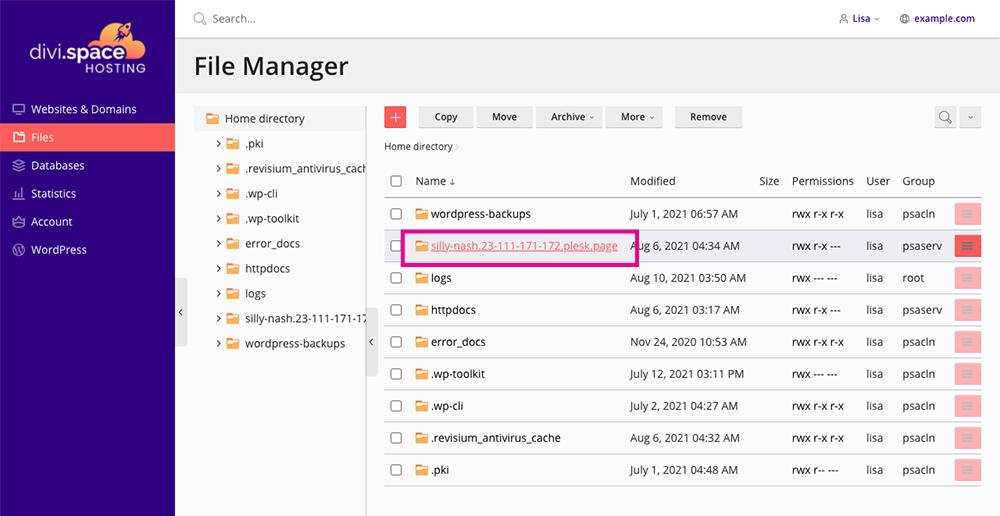
Next, you’ll need to export the SQL database for your website. If you have multiple subdomains and can’t remember which database is related to your website, head back to the File Manager, open the public_html folder, select the wp-config.php file and click Edit.
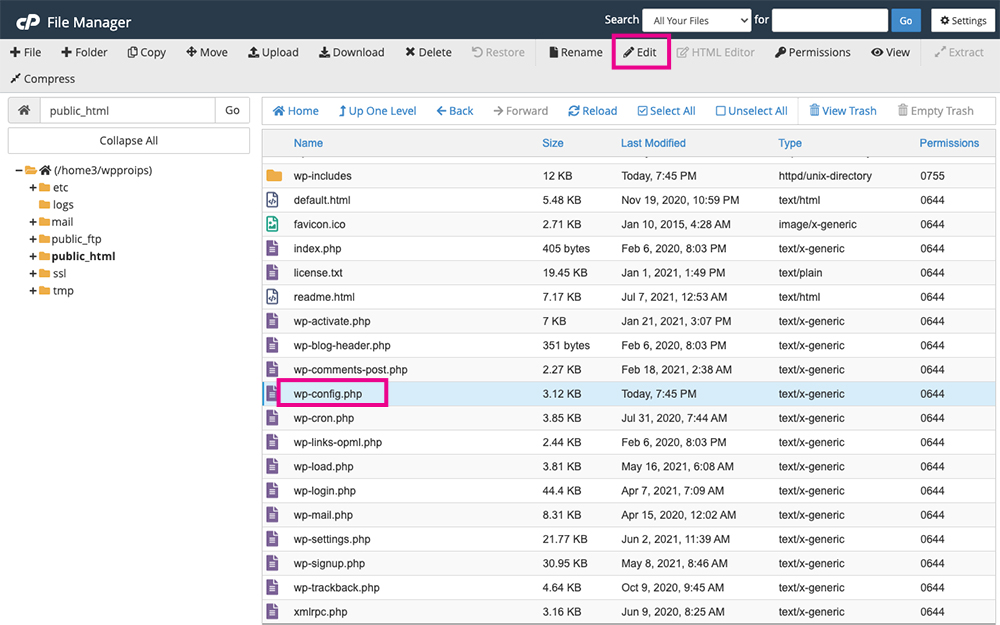
Select the wp-config.php file and click Edit
You’re not actually going to edit the file, just view it. Once it opens, look for the DB_NAME text and you’ll see the exact name of your website’s database.
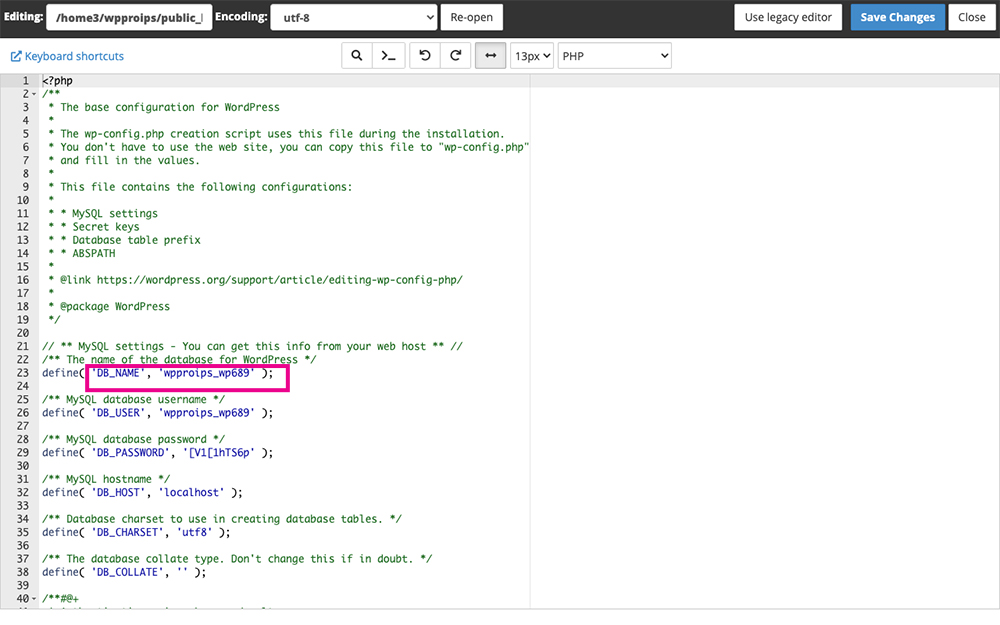
Find the database name
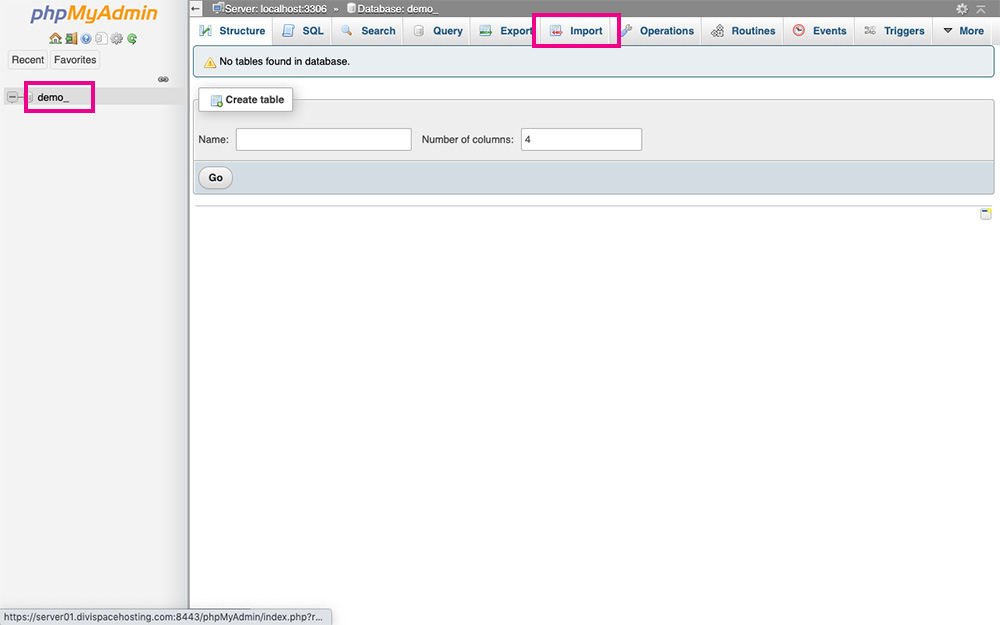
To export the SQL database, return to cPanel and click on phpMyAdmin. This will also open in a new tab.
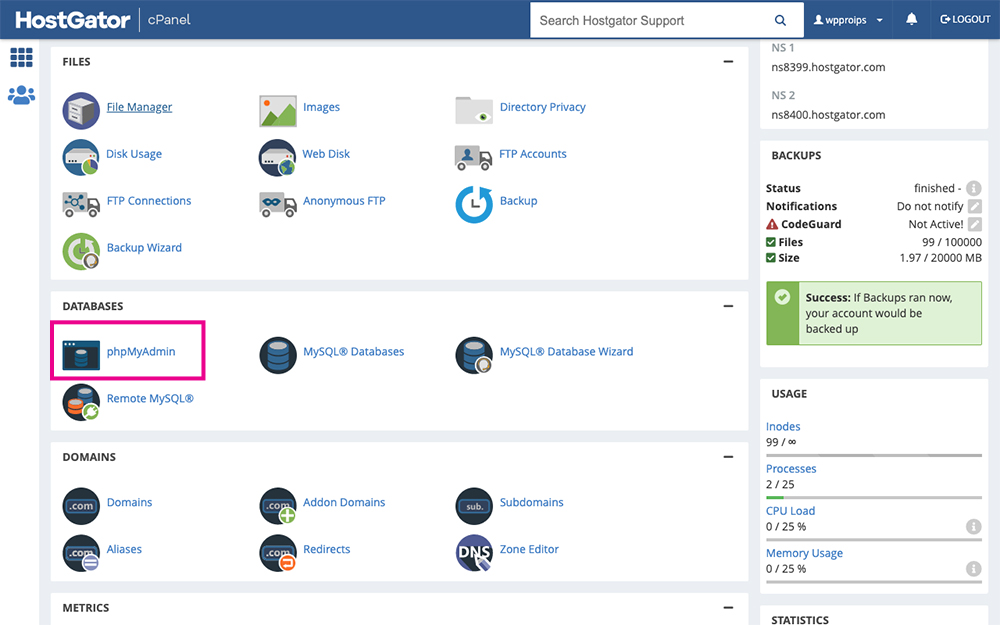
Click the phpMyAdmin button
Click on the database related to the site you want to migrate. On this server, there is only one website, hence one database, however, if you have multiple subdomains, each will have different databases. If this is the case with your server, make sure you select the correct database that corresponds to your website.
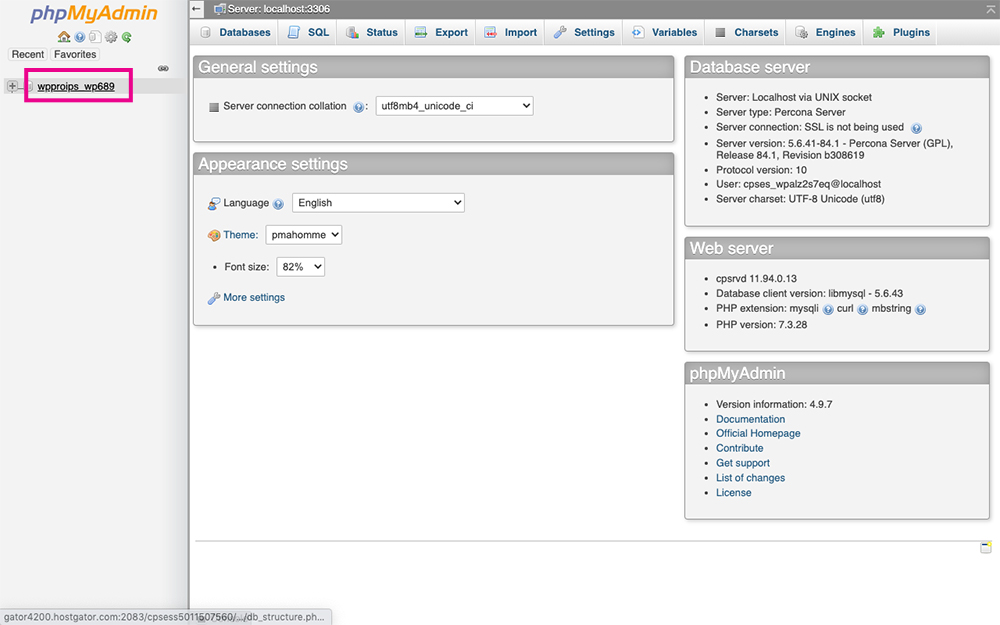
Select the database
Once you’ve clicked on the correct database, click the Export tab.
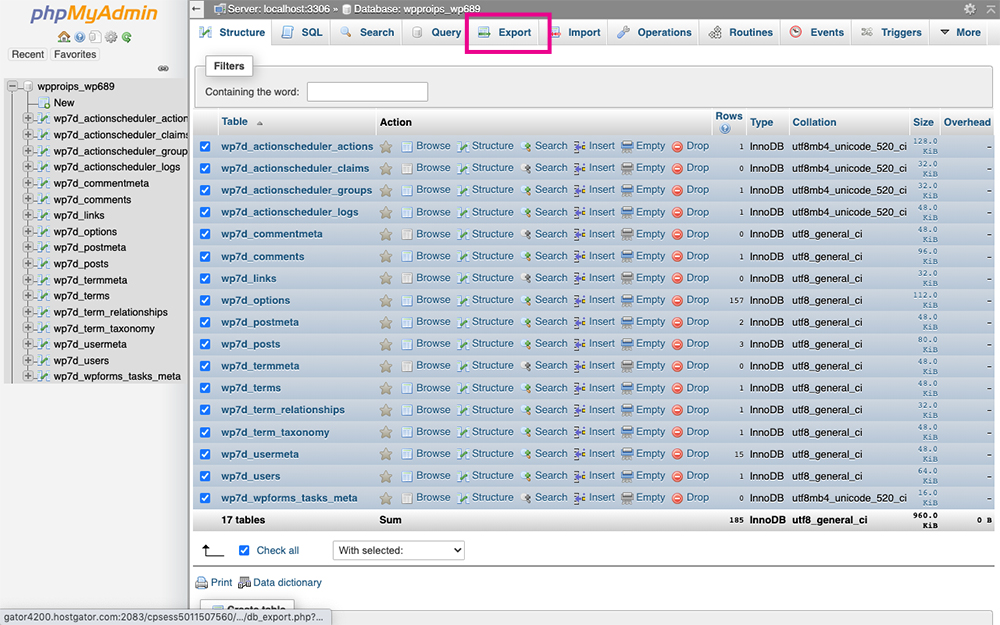
Click Export
Make sure that the Quick option is selected, then click Go.

Click Go
Now that you have the two essential components saved, the database and the site files, you can move onto the next part: moving the site to Divi Space Hosting. If you’re still on the fence about signing up for a Divi Space Hosting account, don’t be! Here’s a thorough rundown of our managed WordPress hosting service.
Upload the site files to Divi Space Hosting
To begin, log into your Divi Space Hosting account. From the dashboard, click Files.

Click the Files tab
Once you’re in the Files section, you’ll see the root folder of your server. If you have multiple sites, their folders will be listed here. In my example, you can see my demo site called “silly-nash”.
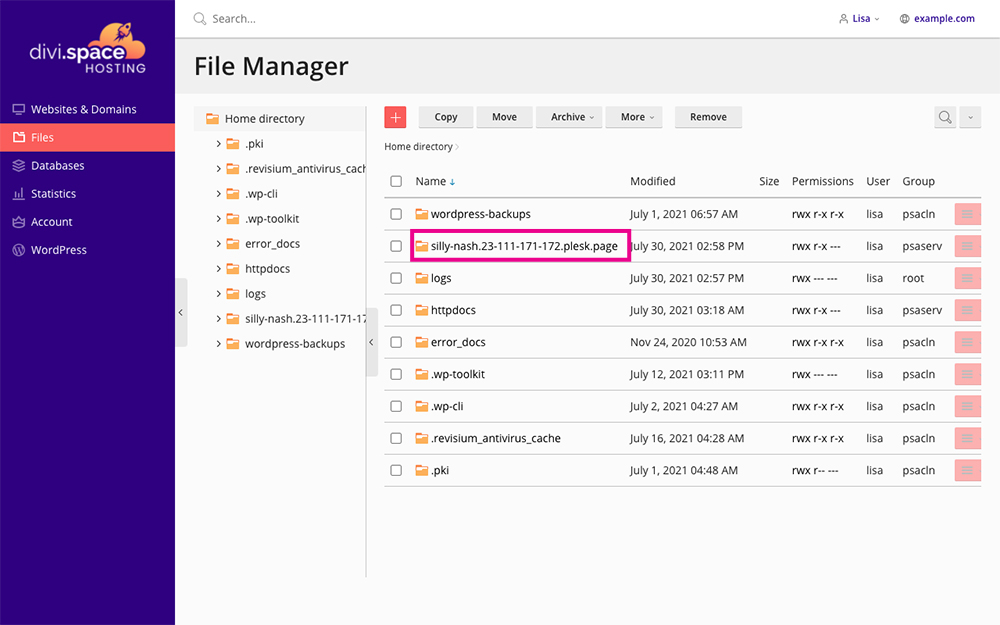
Click the folder of the website
If you click into the folder of the website, you’ll see that it’s basically empty. All that’s present are the index.html files. To add the site files, click on the red + icon.
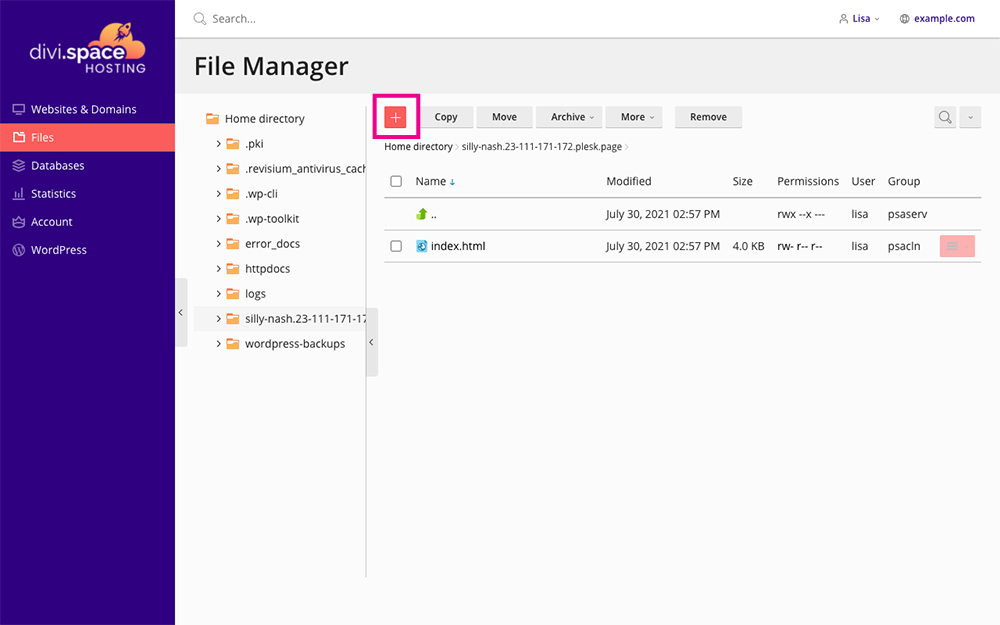
Click the red + button
From the drop-down menu, click Upload File.
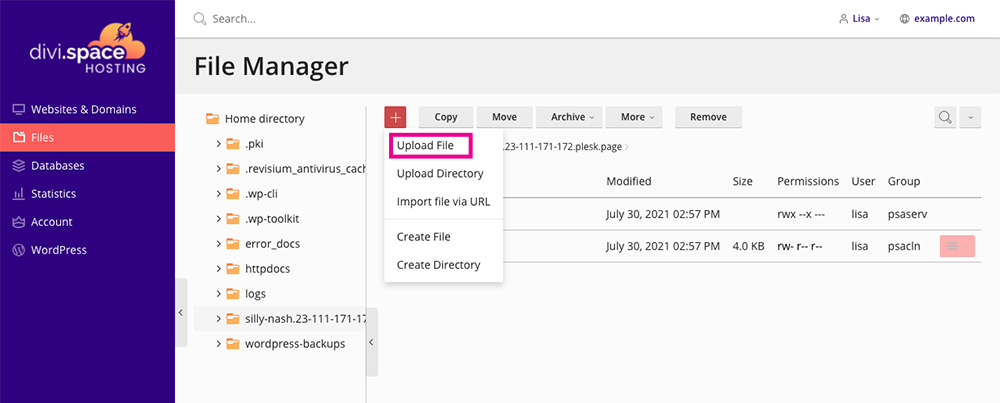
Click Upload File
Select the .zip folder of the site files, previously downloaded from your existing host. Let the uploading process run. This can take a few moments, depending on your internet speed.
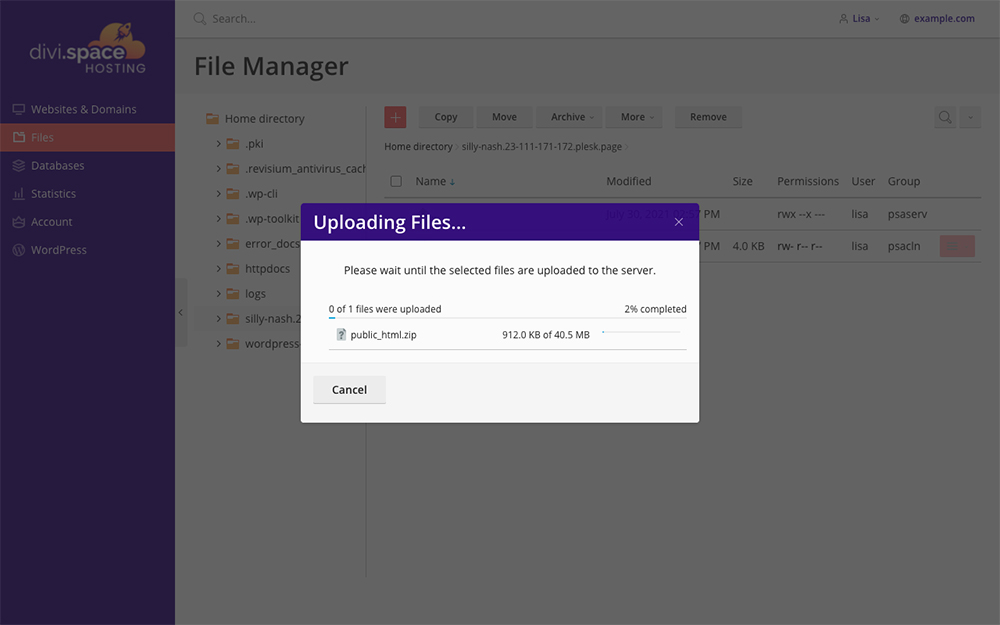
Wait as the file uploads
Once the file has been uploaded successfully, you’ll see the .zip file display.
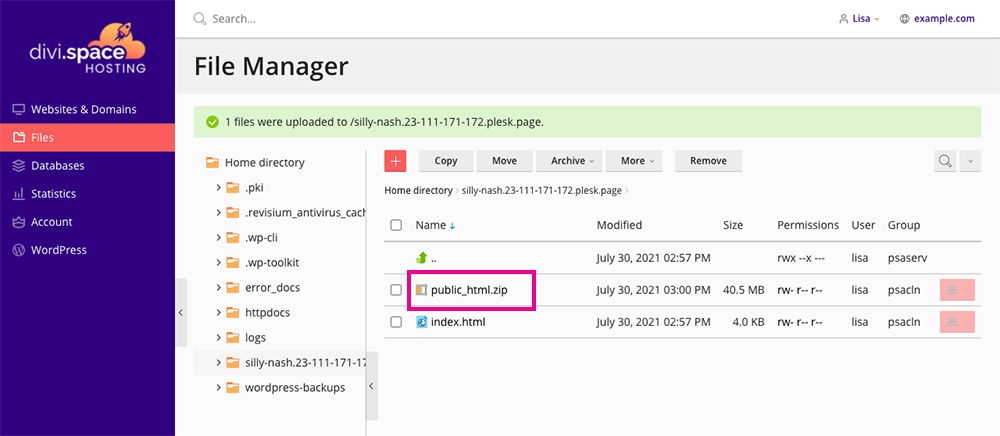
The public_html.zip file will have loaded
Next, extract the files from the .zip format. This happens directly on the server.
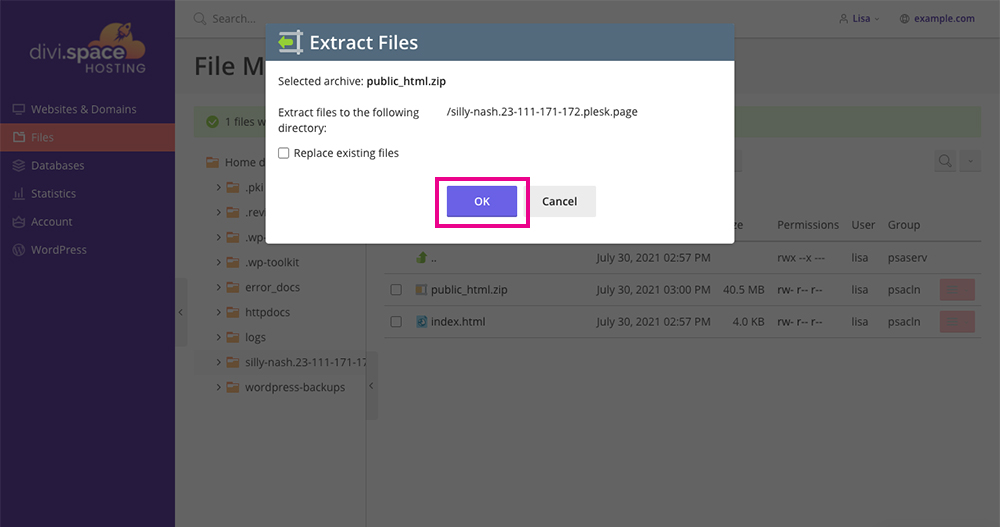
Click OK
Once the file is extracted, you’ll see it on the server.
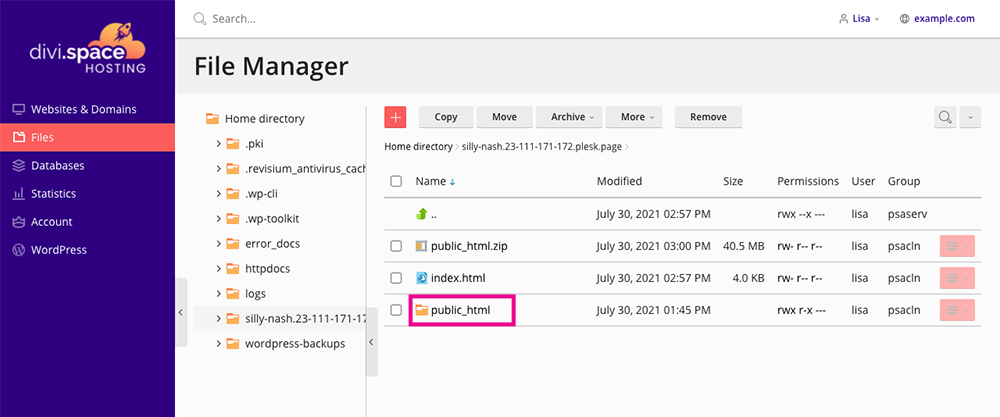
The public_html folder is now available
If you open the pucblic_html folder, you’ll see all of the files and respective folders are there.
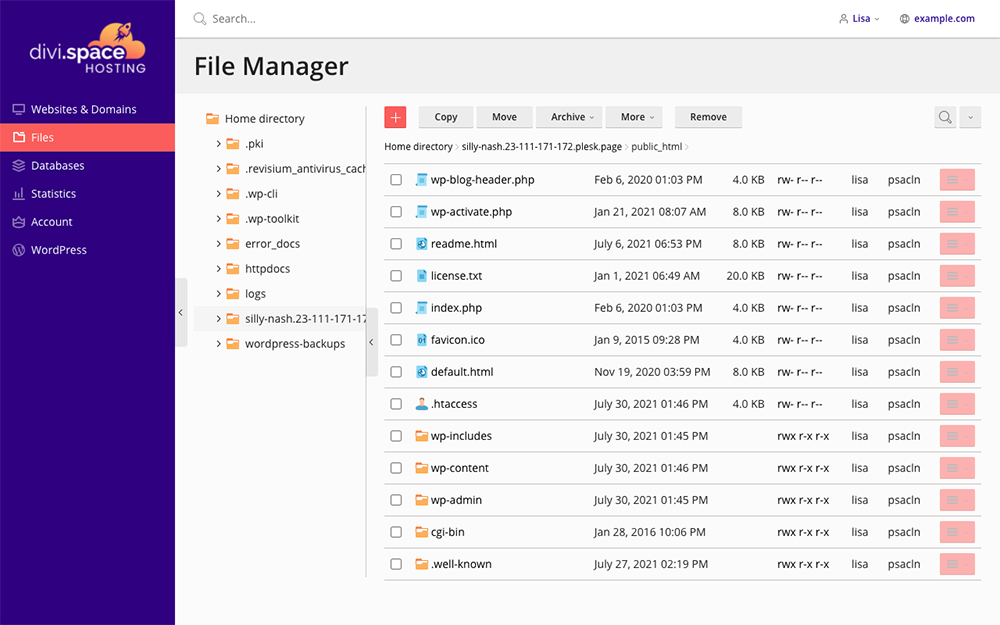
View the files inside the public_html folder
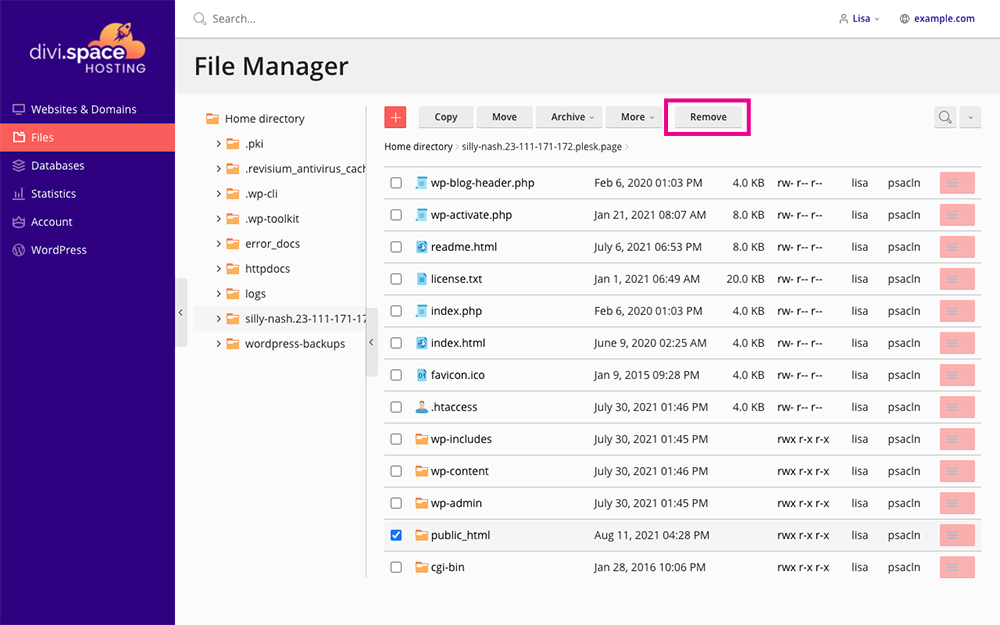
Jump one level back to the main folder of the website. Select the public_ html.zip file and click remove. This will delete the .zip file from your server, freeing up space.
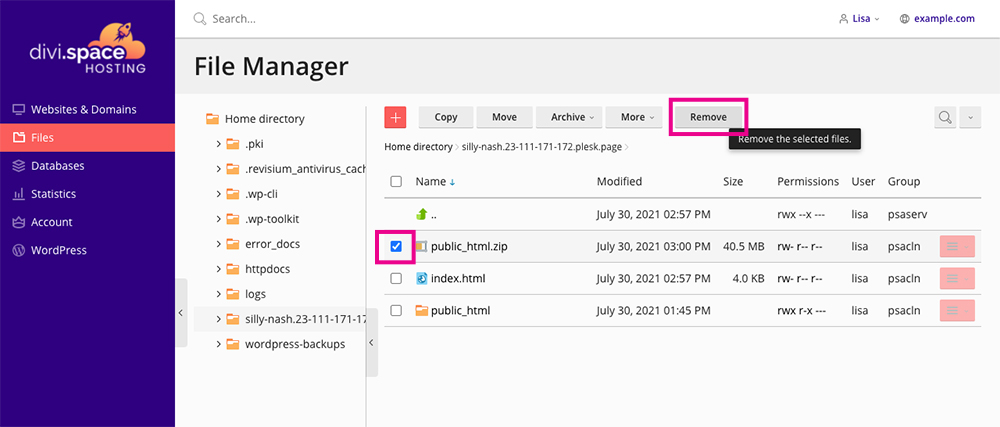
Select the public_html.zip file and click Remove
Then, select the index.html file and delete that too.
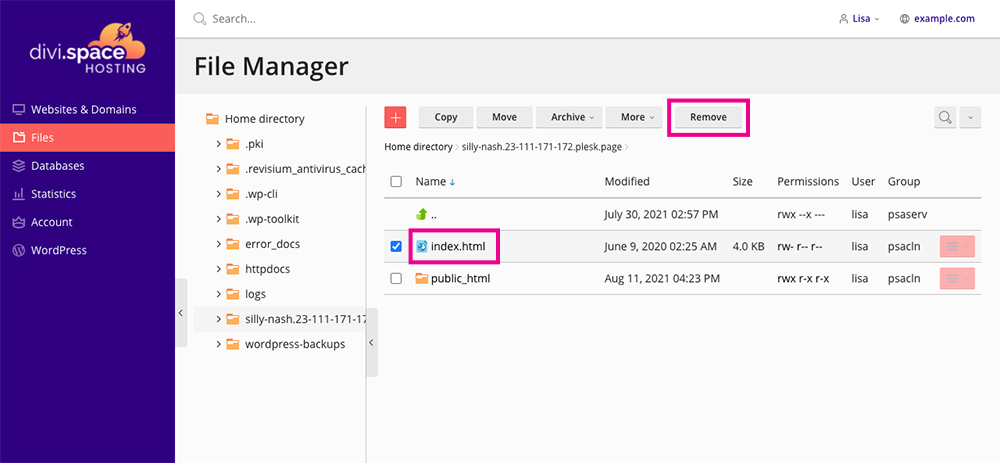
Select the index.html file and click Remove
One last thing to do is to move the contents of the public_html folder out, and into the main folder of the main website. To do this, re-enter the public_html folder, select all of the files present in the folder and click Move.
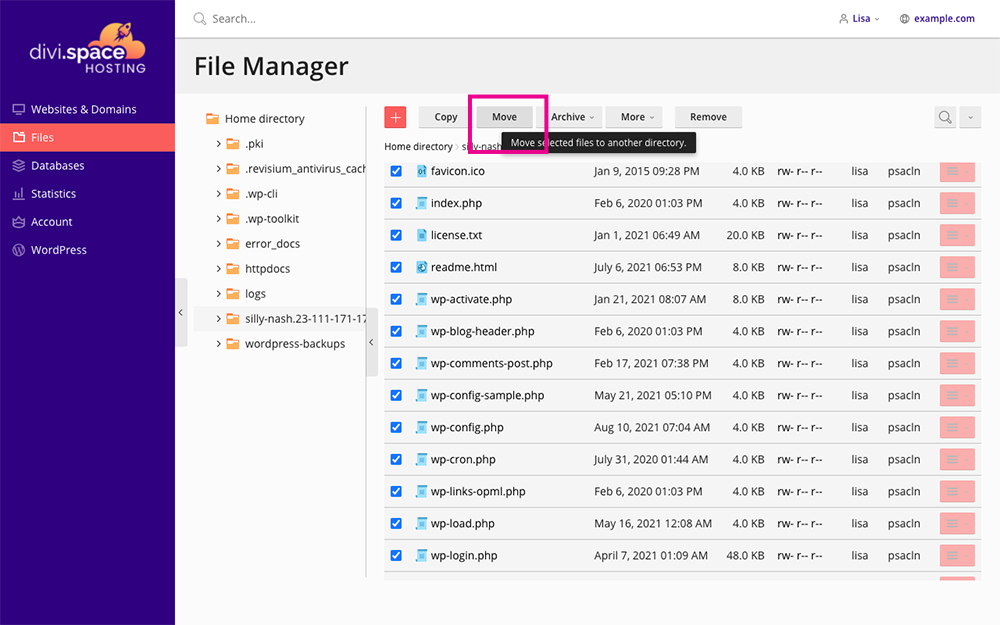
Select all of the files and click Move
Select the main folder of your website (in my case, it’s the “silly-nash” folder), and click OK. This will move all of the files to the correct place.
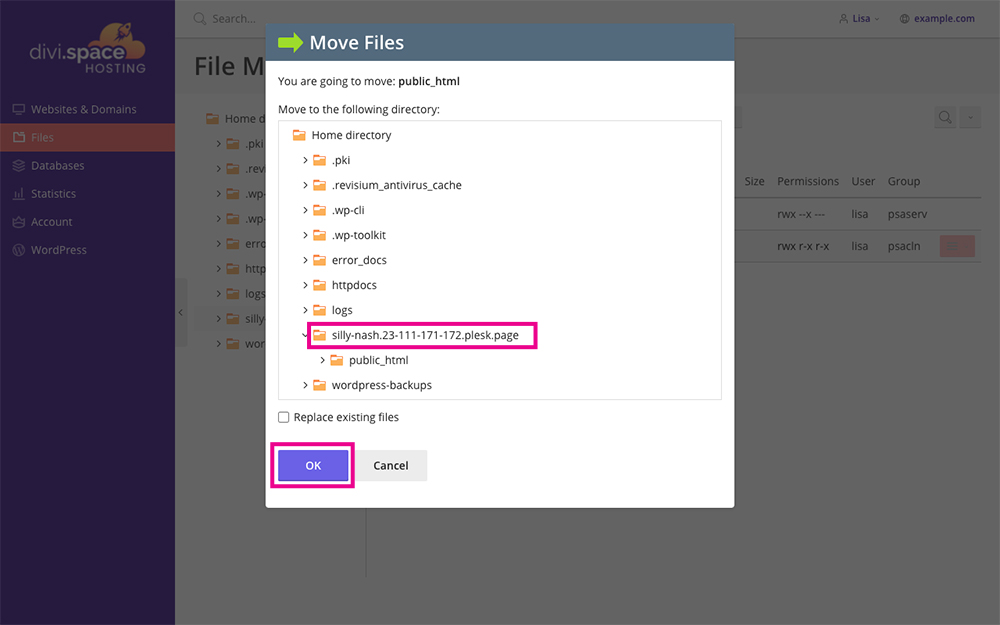
Seletct the correct folder and click OK
Finally, locate the old public_html folder and remove it.
Select the public_html folder and click Remove
Upload the database to Divi Space Hosting
Now that the site files are added, it’s time to add the database. Head over to the Database tab and click Add Database.
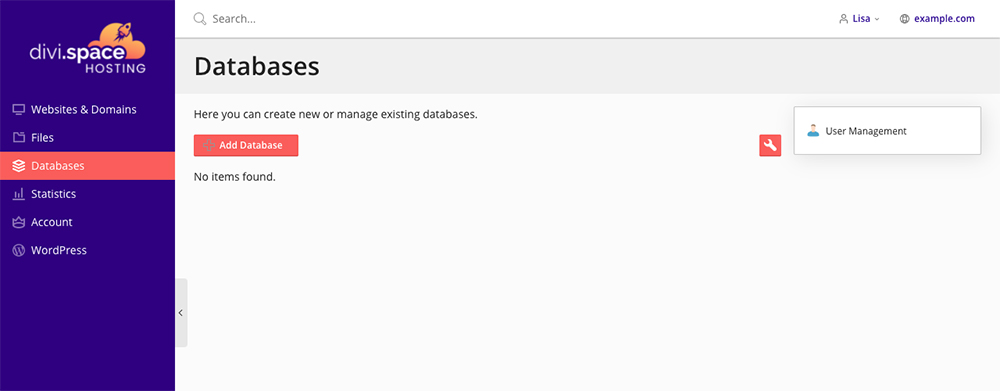
In the Databases tab you’ll see all of the databases associated with websites on your server
Enter the relevant details of your database, and when complete, click OK. You could choose to add the exact same details of the database before, or create a database with a new name, username and password. For this example, I’ve created a new database with the database name of demo_ and the username of demouser. When creating the database make sure to select the correct site from the Related Site drop-down menu and also make sure to select the checkbox that assigns the user to all databases.
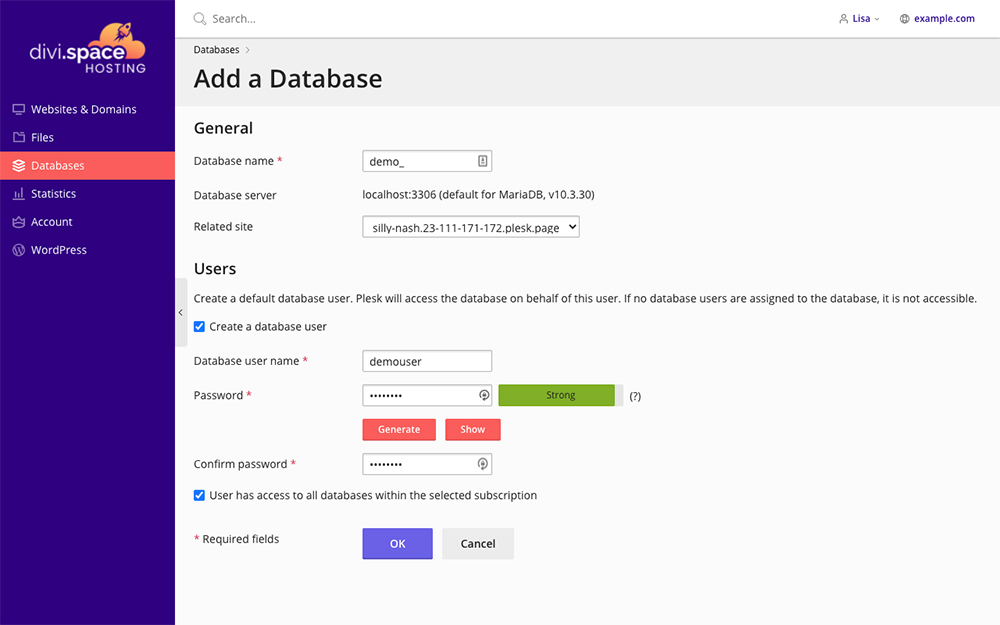
Enter the database details
When the database has been created, you’ll see a success notice. Before you can add the database itself, head over to the right-hand side of the console and click the User Management button.
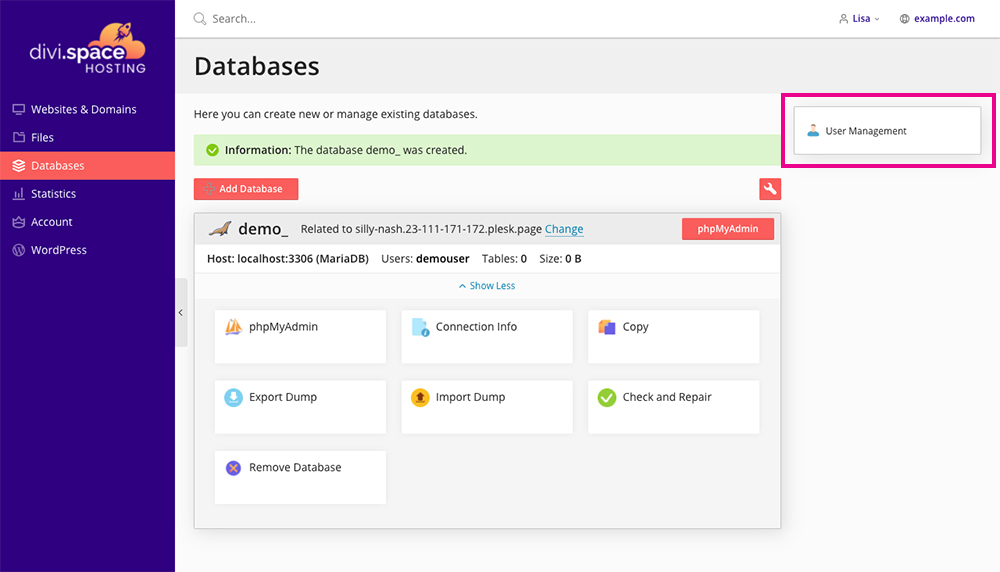
Click the User Management button
From here, click the Add Database User button.
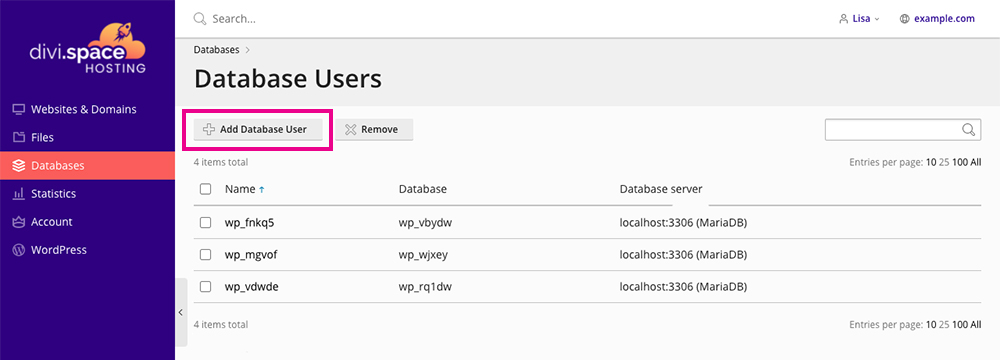
Click the Add Database User button
Enter the credentials of the user. If you want to assign this user to all databases, leave this as ‘Any’. If you’d like to assign a specific user to a selected database, select the specific database from the drop-down list. When complete, click OK.
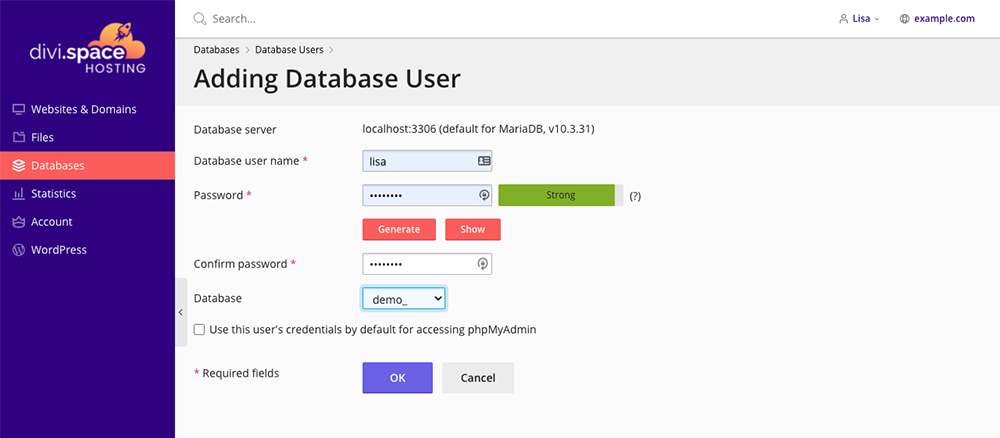
Enter the database user details
When you’ve completed this step, you’ll see the database listed along with other databases in your list.
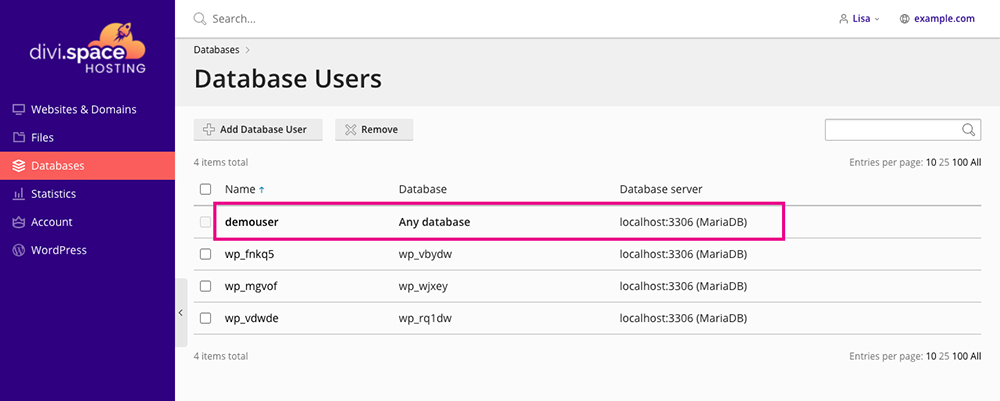
You’ll see the new database user added
Now that you’ve created the database and assigned a user, it’s time to add the SQL file into the database itself. From here, click on the phpMyAdmin button, and the console will open in a new tab.
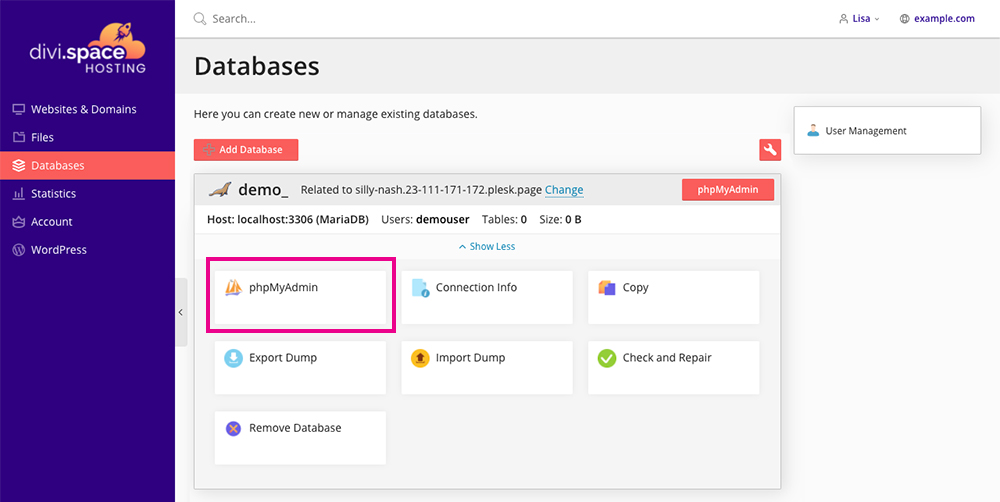
Click the phpMyAdmin button
Once inside phpMyAdmin, click on the database you’ve just created from the left-hand panel. When selected, click the Import tab.
Click Import
Once inside, click the Choose File button. A pop-up will arise, asking you to select the correct file from your computer. Select the previously exported SQL database from your old website.
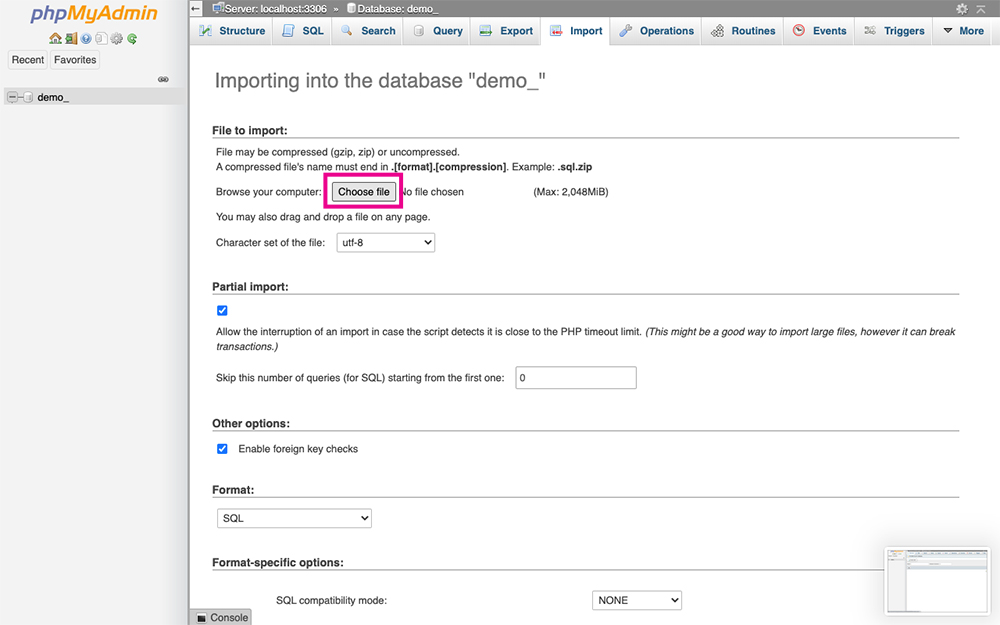
Click Choose File and select the .sql file from your computer
Scroll all the way to the bottom of the screen and click Go.
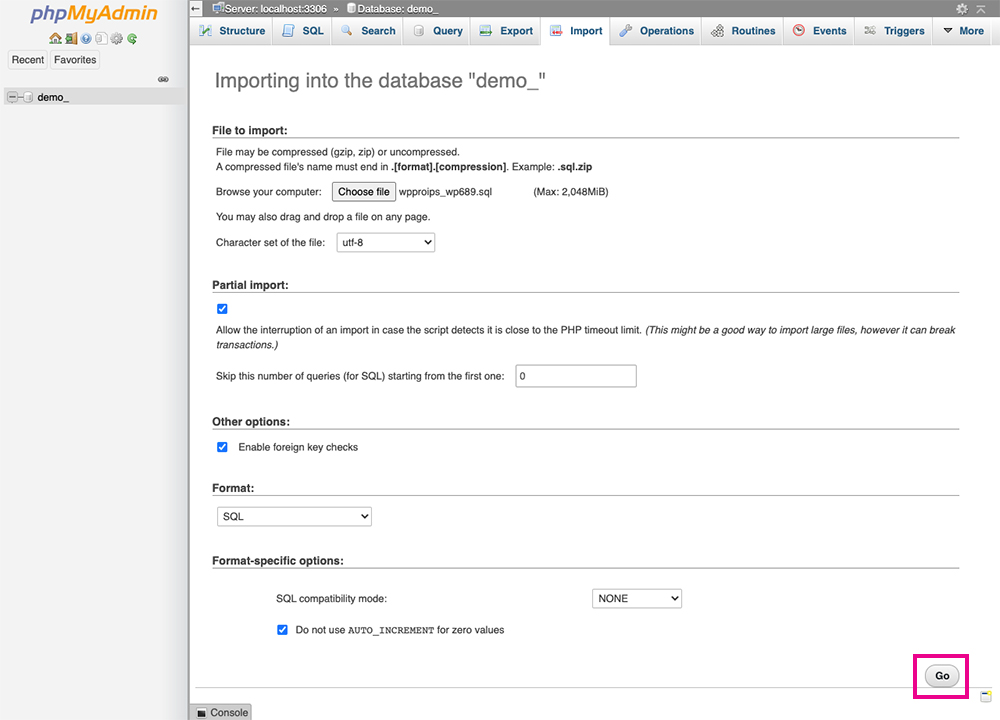
Click Go
When the import has run, you’ll get a success message.

Once imported, you’ll get a success notification
Connecting the database and site files
The final step in the process is to connect the database and the site files. To do so, you’ll need to change the details in the wp-config file to reflect the database details. Note, if you created the database with the same variables (database name, database user and password) as the previous website, you can skip this step.
To refresh the database details, in the database tab, click the Connection Info button.
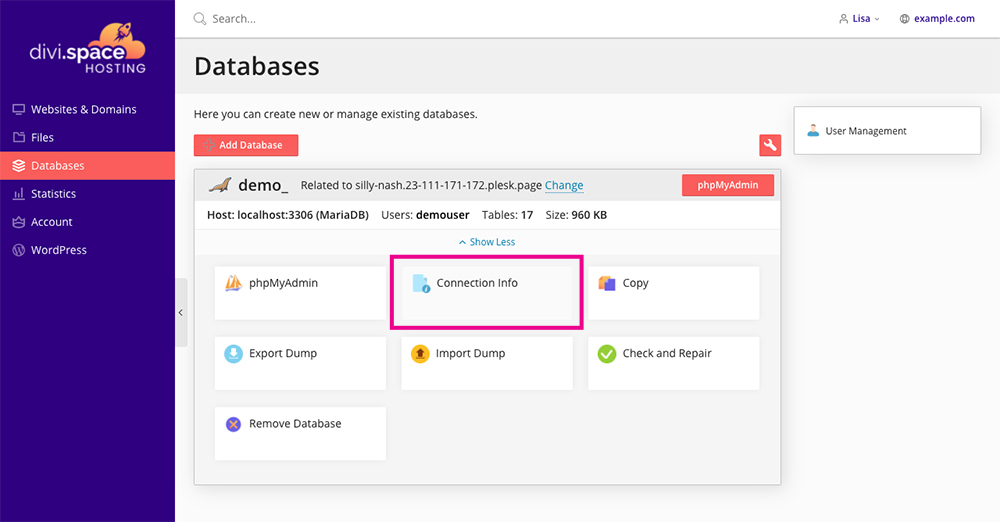
Click the Connection Info button
A pop-up will arise giving you a breakdown of the database details.
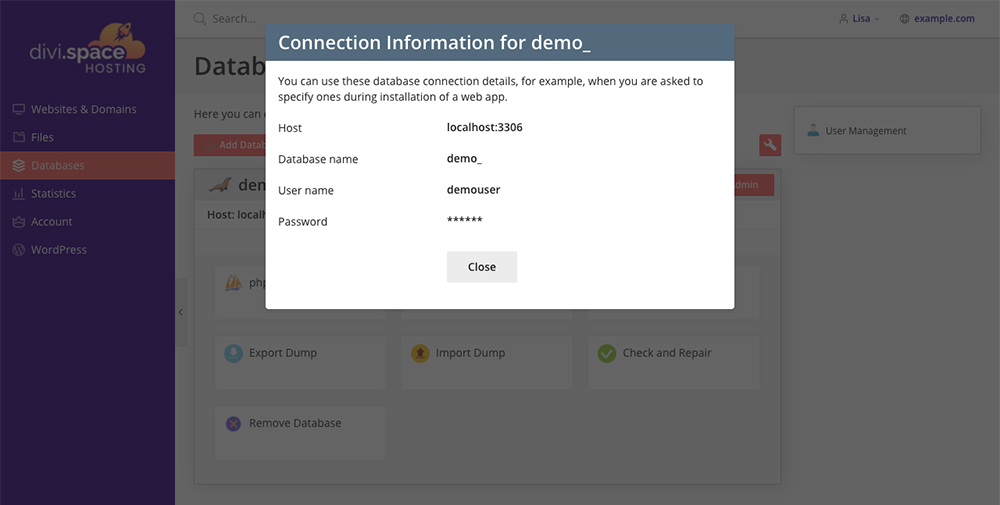
Clicking the Connection Info button will display your database information
Next, head back to the Files tab and navigate to the folder of your website.
Click on the website folder
Select the wp-config file and from the drop-down menu on the right-hand side, select Edit in Code Editor.

Click on the wp-config.php file and select Edit in Code Editor
Once inside the code editor, enter the database name, database username and password, and click Save.
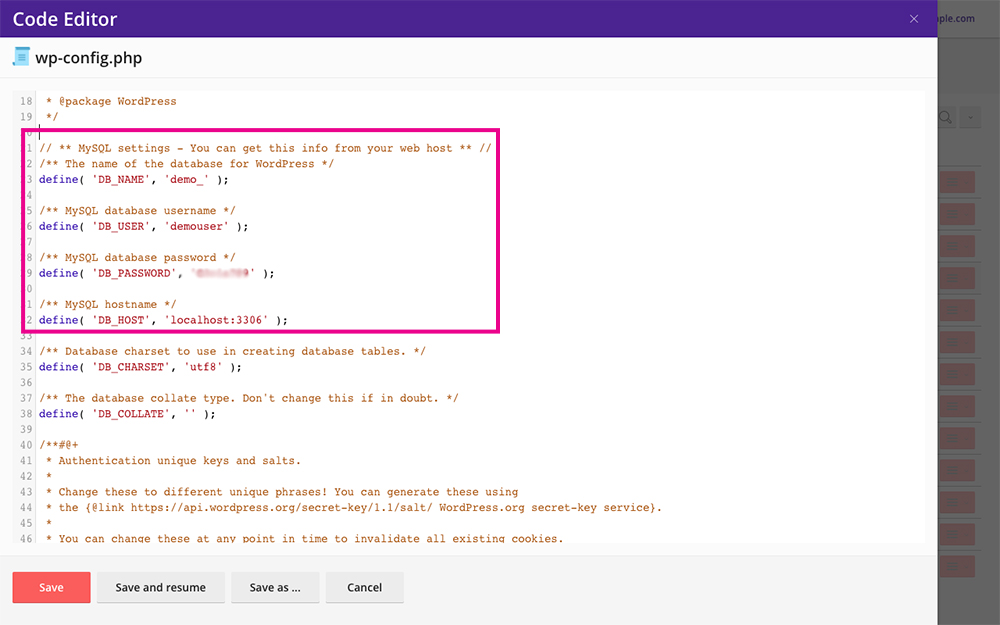
Enter the database information in the wp-config.php file
Now that the wp-config file is updated, your website should be good to go! Head back to the Websites & Domains tab and click the Open in web button.
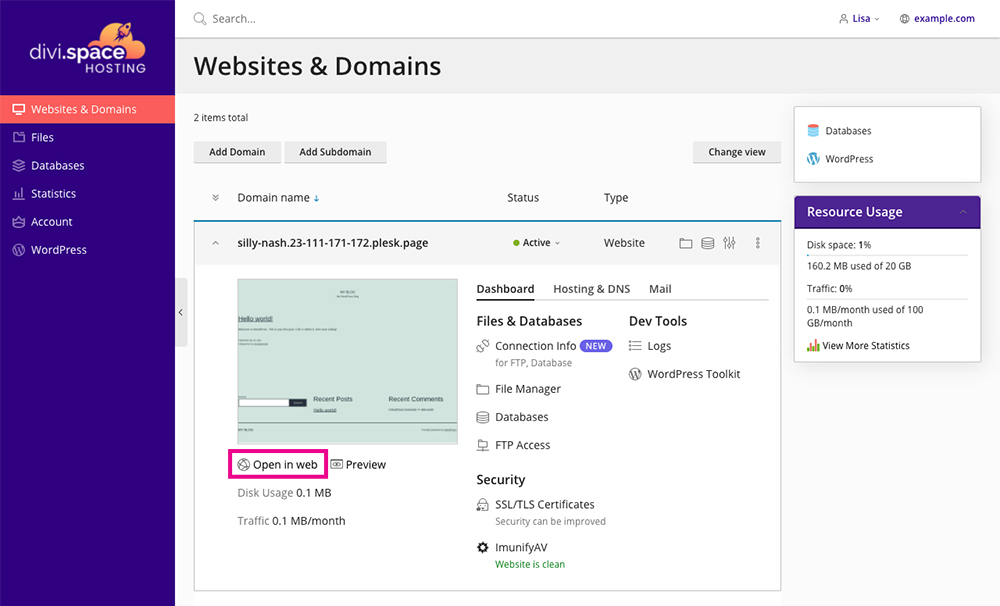
Click the Open in Web button
Your old site will now be on Divi Space Hosting!
Congrats! You’ve successfully migrated to Divi Space Hosting!
Ending thoughts
Migrating a website from one host to another is quite a process at first, but the more frequently you repeat the process, the easier it’ll get. If ever you get stuck, contact the Divi Space Hosting support team and our techs will help you along!
To help you get set up on Divi Space Hosting, our service includes three free migrations for you. Simply mail our support team and they’ll move your first three sites over, gratis!
Even though this tutorial is designed to show you how to move from an existing host to our host, the process technically should be identical for any site migrating between hosts.
If you have any questions about Divi Space Hosting or migrating your website to our managed WordPress hosting platform, drop your questions below! We love hearing from you!

Recent Comments