A great way to increase sales for your online store is to showcase more products in your collection; however, when using WooCommerce together with Divi, the Divi shop module is fixed with a three-column layout. Thankfully, there are ways and means to bypass this default setting. Today, we’ll show you several methods for extending the number of WooCommerce columns in your shop.
Unlike other ecommerce platforms, one of the advantages of using WooCommerce is that it is built with expansion in mind. With a little bit of tech-savviness, you can customize your WooCommerce store to display and function exactly as you please.
One of our favorite ways to enhance the appearance of WooCommerce is to change the number of product display columns in the shop. By default, the Divi theme sets the WooCommerce shop module with a three-column product layout, but what if you’d like to display four, five, or even six columns?
Changing the standard WooCommerce columns can’t be done via the plugin itself, so developers and store owners looking to shake up their store design will need to get a little crafty.
In the following post, we’ll demonstrate six ways that you can increase the WooCommerce columns in your store. You’ll learn how to do this using:
- Our WooCommerce and Divi plugin, Divi Shop Builder
- The Divi shop module
- Shortcodes
- CSS
- PHP
- Theme Customizer
- Let’s get cracking!
1. Customize WooCommerce Columns Using a Plugin
Kicking off this list is our plugin, Divi Shop Builder. Developed for Divi websites, the plugin brings countless WooCommerce customization options directly into the Divi Builder. With the Divi Shop Builder, you can create a custom Cart page for your WooCommerce store, add a ‘New!’ badge to your latest products, and much, much more.
Another great feature of the plugin is that it helps you change the WooCommerce column structure of the shop in a matter of seconds. Skeptical? Let’s check out the Divi Shop Builder plugin in action.
Once the plugin is installed, activated, and authorized on a WordPress and Divi website, it’ll automatically add a new module into the Divi Builder; no setup steps or configuration required. To use the Divi Shop Builder, create a new page, port, or project layout, open the Divi Builder and add the Woo Shop + module.

Add the Woo Shop + module from within the Divi Builder
By default, the Woo Shop + module will display as such:
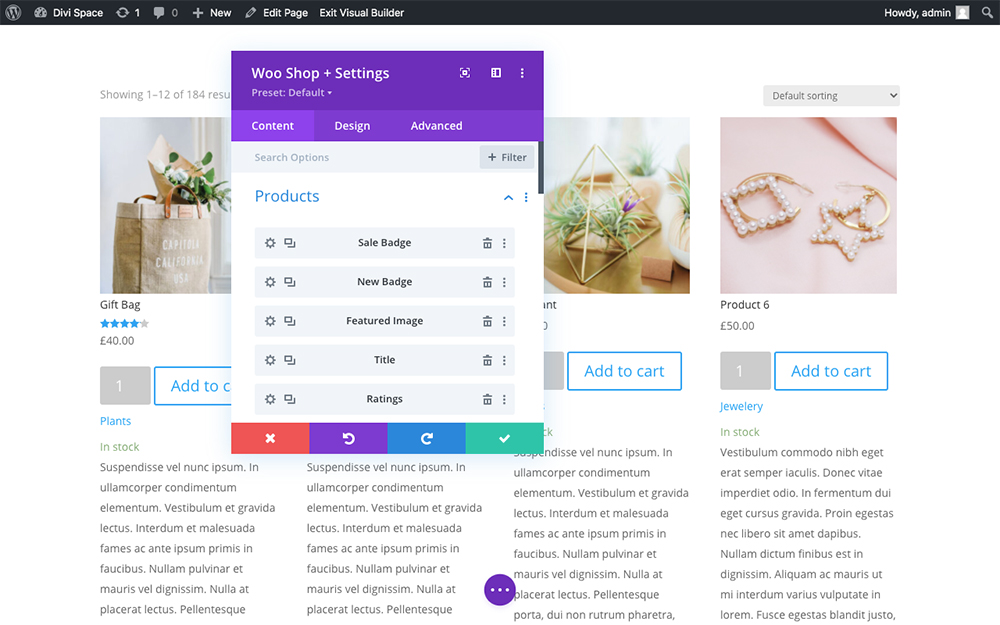
Default display of the Woo Shop + module
It’s a little bit cluttered for my liking, so I’m going to streamline the look and feel of the shop display by deleting a few of the elements. You can do this by clicking the trashcan icon on the right-hand side of the element. You can also drag the elements around to an order that fits your taste.
Now, scroll a bit further down until you see the option titled Product Columns. You can select the number of columns you’d like from the drop-down menu.
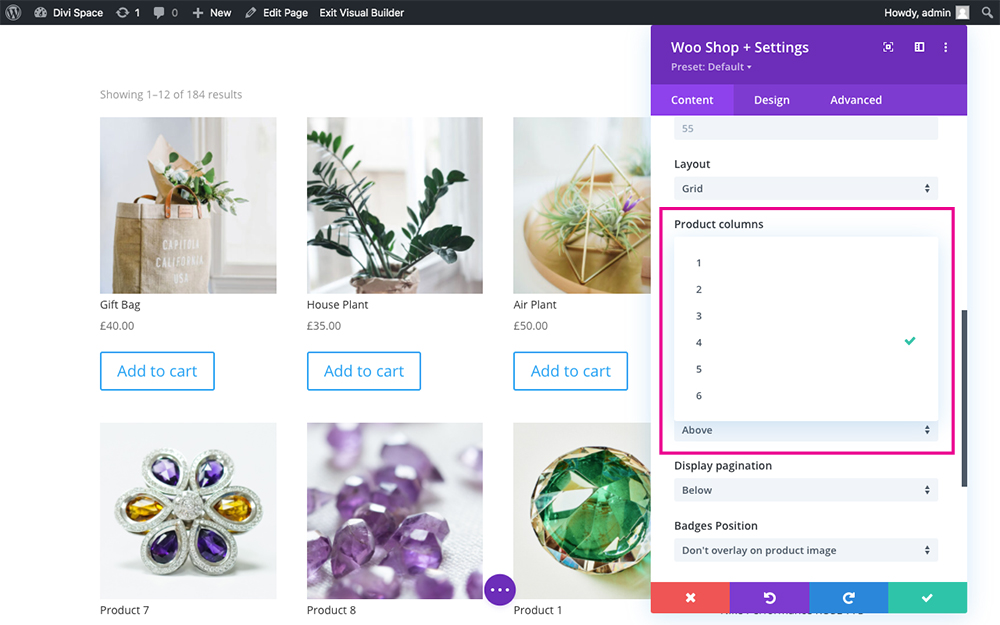
Select the ‘Product column’ option
Here is a run-through of each column option:
As you can see, you can manipulate WooCommerce to change the number of columns in the product display in a matter of seconds. As the plugin is fed directly into the Divi Builder itself, you can place shop modules of varying columns across your website; across pages, posts, or projects. You can even add the Woo Shop + module to layouts created with the Divi Theme Builder. Here, you can add product displays into your site-wide headers, footers, archive pages, post layouts, and much more.
The Divi Shop Builder is the quickest and easiest solution to changing the WooCommerce shop column structure. It requires no setup or configuration steps, or any knowledge of code. Stylish visual effects can be achieved by using the familiar Divi Builder, so even first-time Divi users can create an online shop to fit their specifications.
The Divi Shop Builder comes with a range of features, all designed to help you build a WooCommerce store that gets seen, makes sales, and brings repeat customers. Add this powerhouse plugin to your collection as soon as you can! You won’t regret it.
Find more information about our top-rated plugin Divi Shop Builder.
2. Customize WooCommerce Columns Using the Divi Shop module
The next method uses the Divi Shop module itself. Here are a few examples using the Divi eCommerce child theme. In this example, we’ve kept the right sidebar active.
Open the Shop module and scroll down until you see the option titled Column Layout. From the drop-down menu, select the number of columns you’d like to use.

Use the Divi shop module to change the column structure
You can select from one to six columns. Here is an example with one column:
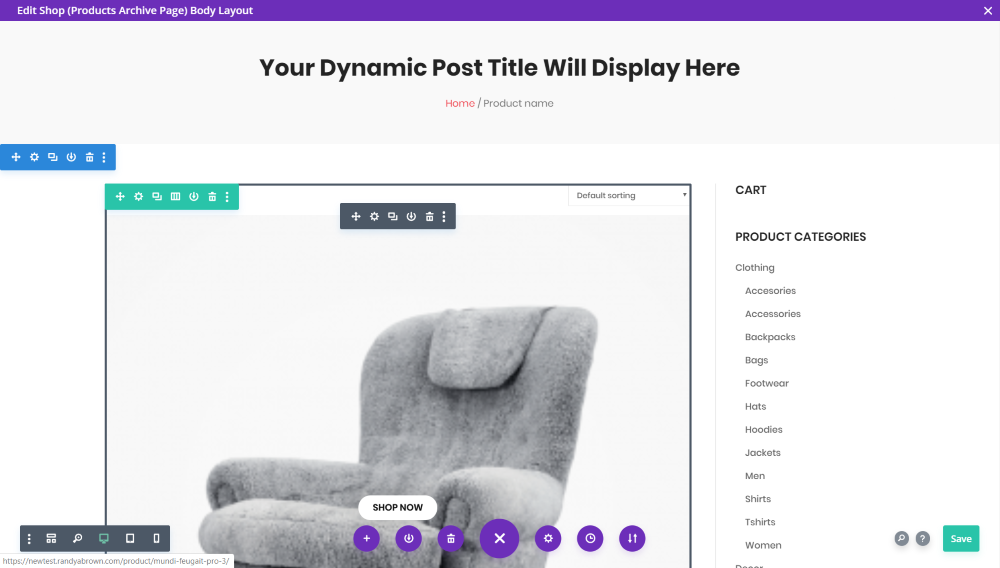
An example of the Divi shop module with a single column
Here is an example of the shop module displaying with four columns:
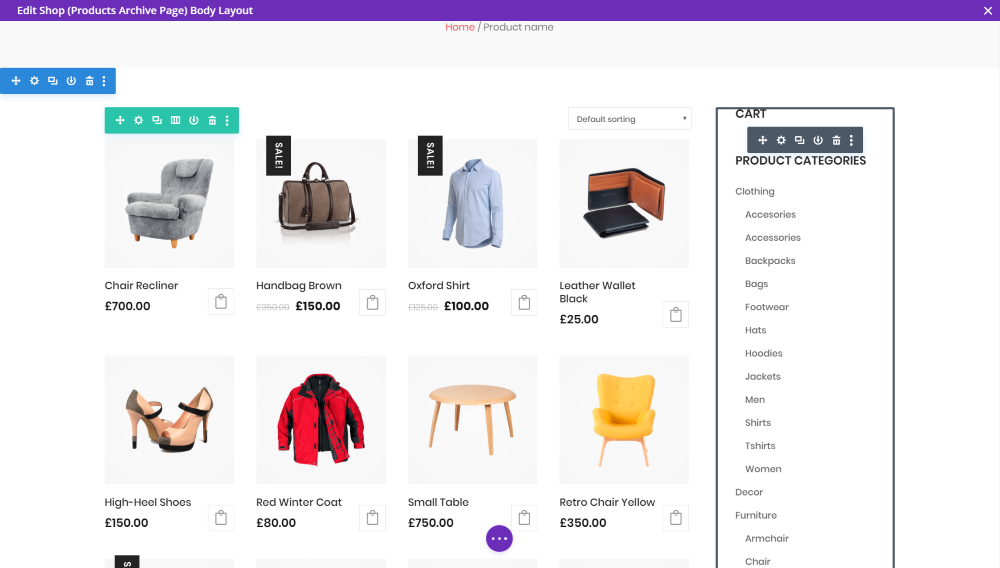
An example of the Divi shop module with four columns
And finally, an example of the shop module displaying with six columns:
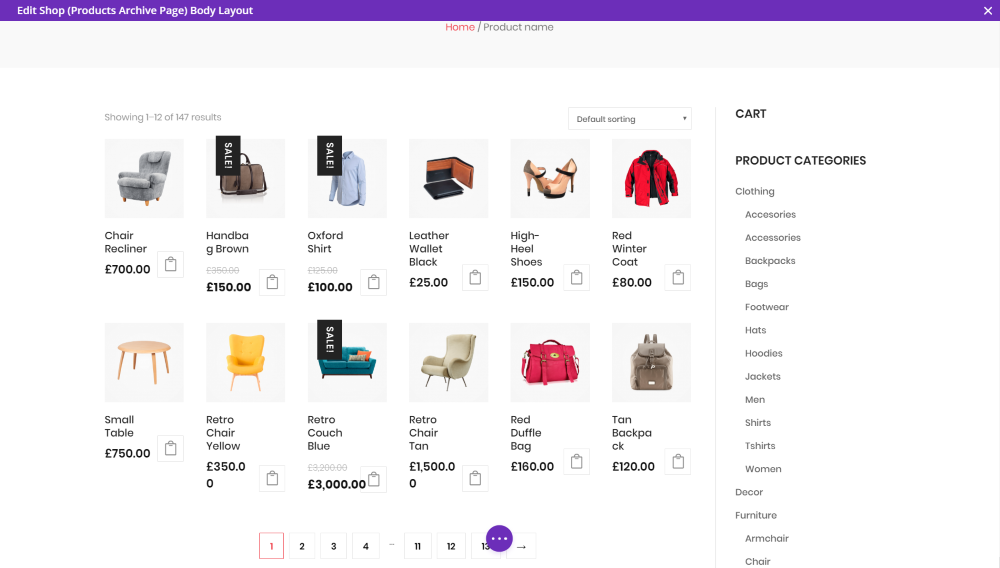
An example of the Divi shop module with six columns
3. Customize WooCommerce Columns Using Shortcodes
Another option for change the layout of the WooCommerce columns is to use a shortcode. For this method, you’ll need to use WooCommerce shortcodes. Here, you’ll be able to place various WooCommerce elements on pages and posts across your site.
WooCommerce shortcodes are not native to Divi. Adding a WooCommerce shortcode is done by adding either a code or text module and entering the relevant shortcode therein.
In the example below, I’m using the shortcode [recent_products] to display the products most recently added to the store.
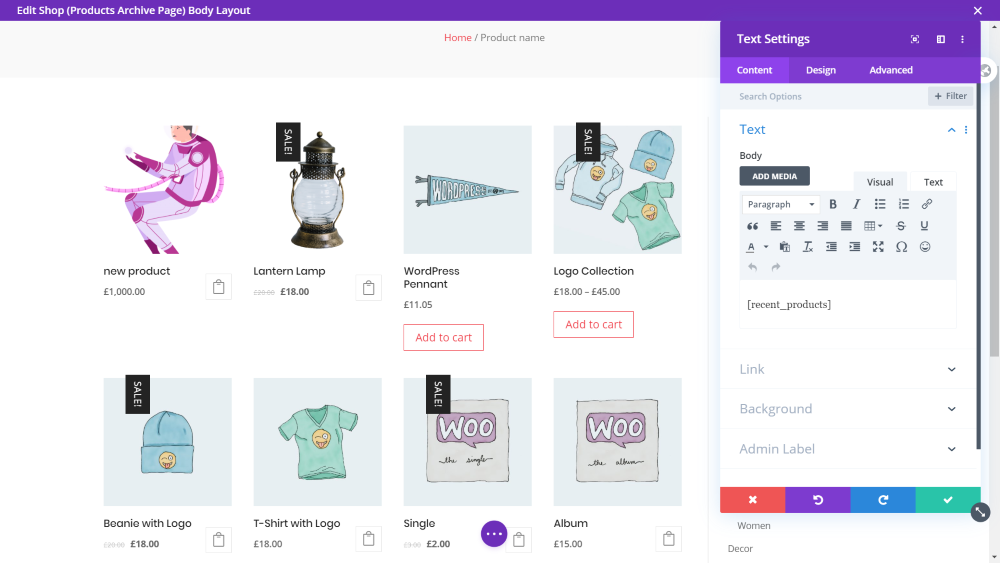
This WooCommerce shortcode displays the recent products
You can add limiters to this shortcode in order to specify the number of products and the number of columns you’d like to display.
In the example below, this shortcode specifies 12 items per page, displayed in five columns. You can play around with the WooCommerce shortcodes and their options to create a WooCommerce shop display that fits your taste.
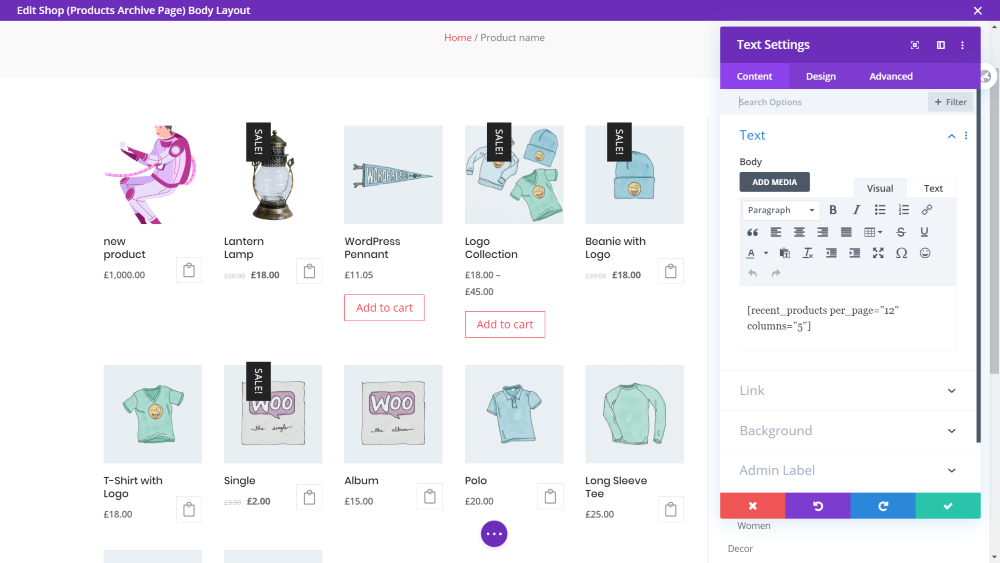
Customize the display of your WooCommerce
4. Customize WooCommerce Columns Using the PHP
Next on the list is a method that uses PHP to change the WooCommerce column count. This is a more advanced option suited to developers who have experience in editing PHP files, or those ready to play with code.
Before continuing this method, make sure you are either testing this on a development or testing environment or, if you are working on a live site, that you have made a backup. Also, ensure that you have a child theme up and running.
To begin, locate the functions.php file in your child theme. In the dashboard menu, go to Appearance > Theme Editor and select functions.php from the theme files in the right sidebar. Make sure you have the child theme selected at the theme to edit. Paste in the following code at the bottom of the file:
/*
* 07 - Change number of products per row to 3
* https://gist.github.com/woogists/11472c1f1b4982a83a4f7987d73575ed
*/ function ags_diviecommerce_loop_columns() { return 3; // 3 products per row } add_filter('loop_shop_columns' , 'ags_diviecommerce_loop_columns', 999);
This is the default code that shows 3 columns in the shop loop for the WooCommerce shop page and archive pages. The script return 3; is what determines the number of columns (the other places where 3 is mentioned are comments).
To change the WooCommerce product display, change this number to display the number of columns you’d like. In this example, I’ve changed the number of columns to 5. Remember to click Update File.

Add the PHP code to the functions.php file in your child theme
Any code that’s added to the parent theme will be erased when the parent theme updates. The child theme’s code will remain intact.
Here is the final product displayed on the front-end:

Using PHP to change the number of WooCommerce columns
The font size looks a little off, but this can easily be solved using CSS.
5. Customize WooCommerce Columns Using CSS
Another method of customizing the WooCommerce product display columns is to use CSS. As with the PHP method above, please make sure that you have a child theme up and running, and that, if you’re not working on a local site, that you have made a back up of the live site you’re working on.
With CSS, you can change the number of columns displayed per device. For example, you can have a different number of columns displayed on desktops, tablets, and smartphones.
Here is an example of the code for desktop display, showcasing four WooCommerce product columns:
/* 4 columns on desktop */

@media all and (min-width:1024px) {

[class*=woocommerce] ul.products li.product {

width: 22.1%!important;

margin: 0 3.8% 2.992em 0!important;

clear: none!important;

}

[class*=woocommerce] ul.products li.product:nth-child(4n) {

margin-right:0px!important;

}

[class*=woocommerce] ul.products li.product:nth-child(4n+1) {

clear: both!important;

}

}
Rather than rehash the code here, check out this Divi Snippet over at Divi Space. In this snippet, you can select the number of columns you’d like to display per each device. Simply copy the relevant code and paste it into the stylesheet of your child theme.
If you aren’t a fan of using the stylesheet, note that there are several ways to add CSS to Divi. Whether you prefer the Theme Customizer or Theme Options, you have plenty of choices at your disposal. Here’s the code added to the child theme’s stylesheet.
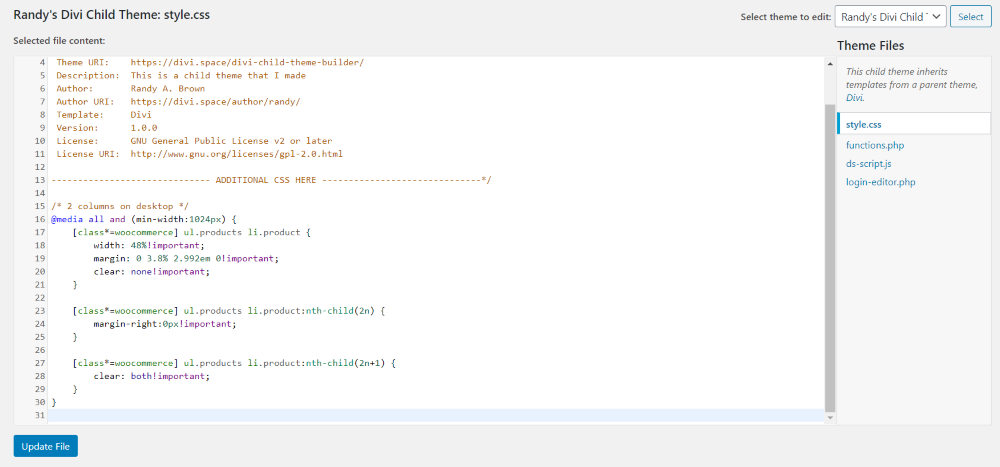
Using CSS to change the WooCommerce columns
6. Customize WooCommerce Columns Using the Theme Customizer
The final method on our list makes use of the Theme Customizer. Many themes include an option in the theme customizer to adjust both the number of products per row and the number of rows per page. Here is an example of this feature in the Twenty Twenty theme, however, this isn’t currently available in Divi. To make the adjustments, open the theme customizer and go to WooCommerce > Product Catalog and you’ll see the option at the bottom of the list.

Ending Thoughts
Whichever method you choose, if you follow the steps suggested above, you’ll be able to change the number of columns displaying the WooCommerce products with ease. Our top recommendation is to use the Divi Shop Builder plugin as it’ll give you the ability to change the WooCommerce columns, as well as plenty of other amazing enhancements for your online store.
We want to hear from you. Have you used one of these methods to change the number of columns in the WooCommerce shop? Let us know about your experience in the comments below.


Thanks for the valuable information.
How to make the “add to cart” buttons at the same height, regardless of the length of the text under the product?
Hi Aga, you can customise it with CSS. Try flex and align-content: https://css-tricks.com/snippets/css/a-guide-to-flexbox/