Selling an online course is a fantastic way to generate passive income. By simply installing a WordPress Learning Management System (LMS) on your website and populating it with course content, you will be ready to engage and educate countless students with your expertise.
Several Learning Management Systems offer brilliant, robust solutions to create and sell online courses, however, their backend management of students enrolling at different times can become a bit bothersome for the course master.
To solve this problem, Aspen Grove Studios developed the Course Scheduler plugin.
If you’re selling courses online, utilizing the Course Scheduler plugin can help you sell more courses and increase your profits. In the following post, we’ll show you how to install and set up the LMS Course Scheduler plugin compatible with Lifter LMS.
How Does The Course Scheduler Plugin Work
One area where many LMS’s fall short is the management of of multiple students with varying start dates.
To provide for numerous students, the course master must create multiple versions of the course, and issue this to each learner. As well as creating unnecessary entries in the website’s database, creating multiple courses can have a drastic effect on the efficiency of the course instructor’s availability.
The Course Scheduler plugin completely obliterates this pain point by allowing you to run the course as many times as necessary, giving you the power to set multiple start and end dates.
With the Course Scheduler plugin, you’ll be able to:
- Manage different intakes of students on a single course
- Set specific start and end dates for groups of students based on their purchase dates
- Lock content until a set course start date, but continue selling courses until said date
This means you have more time to update course content, focus on marketing, or take some time off for yourself!
Interested in learning more about our Course Scheduler plugin? Listen to episode 237 of LMSCast where LifterLMS co-founder Chris Badgett speaks with us about our plugin and his platform! Listen to the episode now!
Whether you’ve already set up an online course and are already selling courses, or are still in the planning and creating phase, our Course Scheduler plugin can help!
How to use the LMS Course Scheduler Plugin
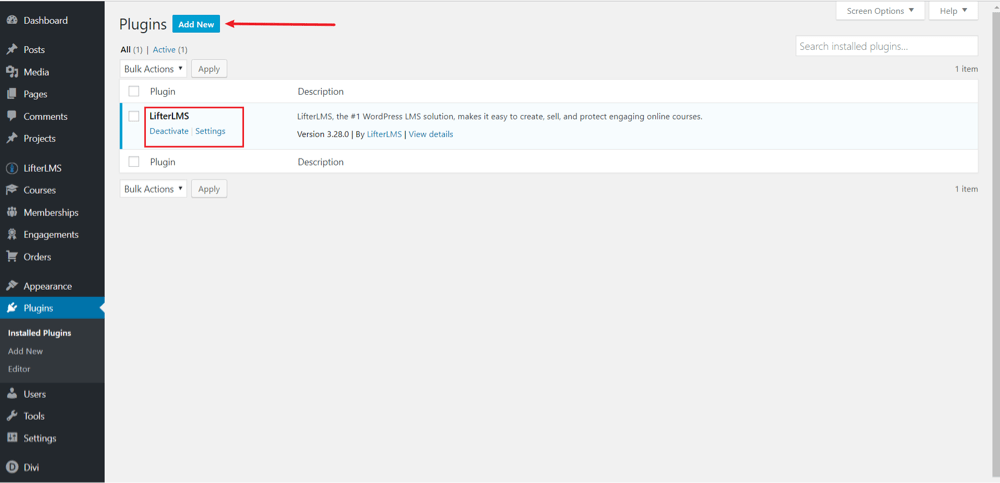
Log into your WordPress website, navigate to Plugins and click on the Add New button. Make sure you have the LifterLMS plugin already installed.
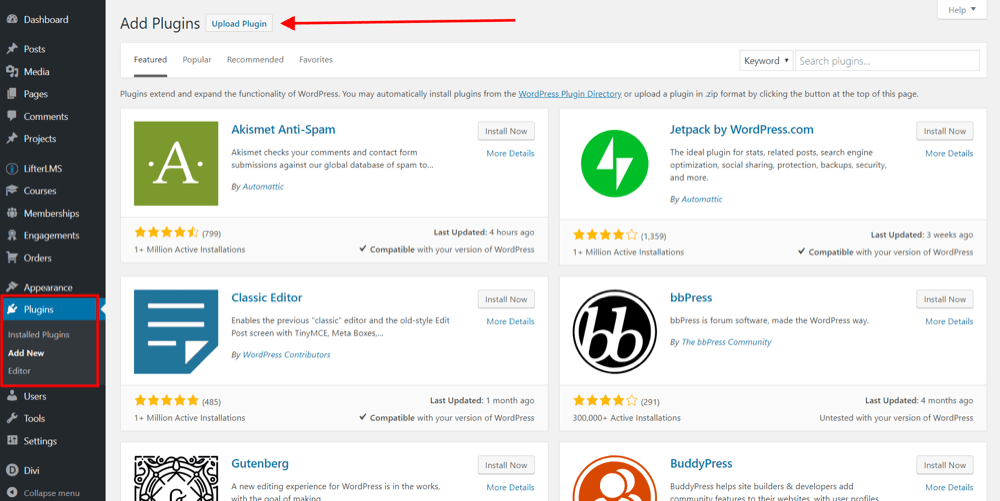
Again, click the Upload Plugin button.
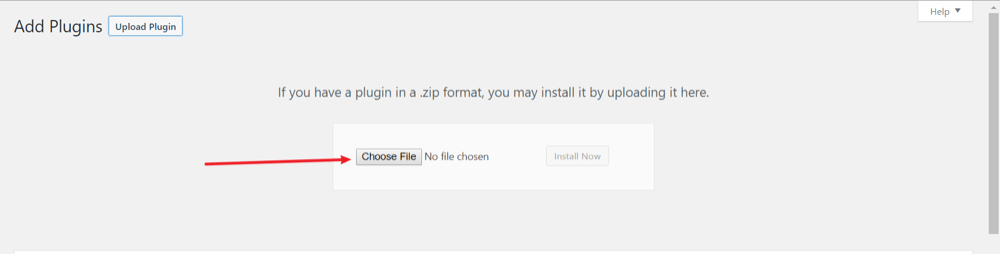
Select the .zip file from your computer’s Downloads folder and click Upload.
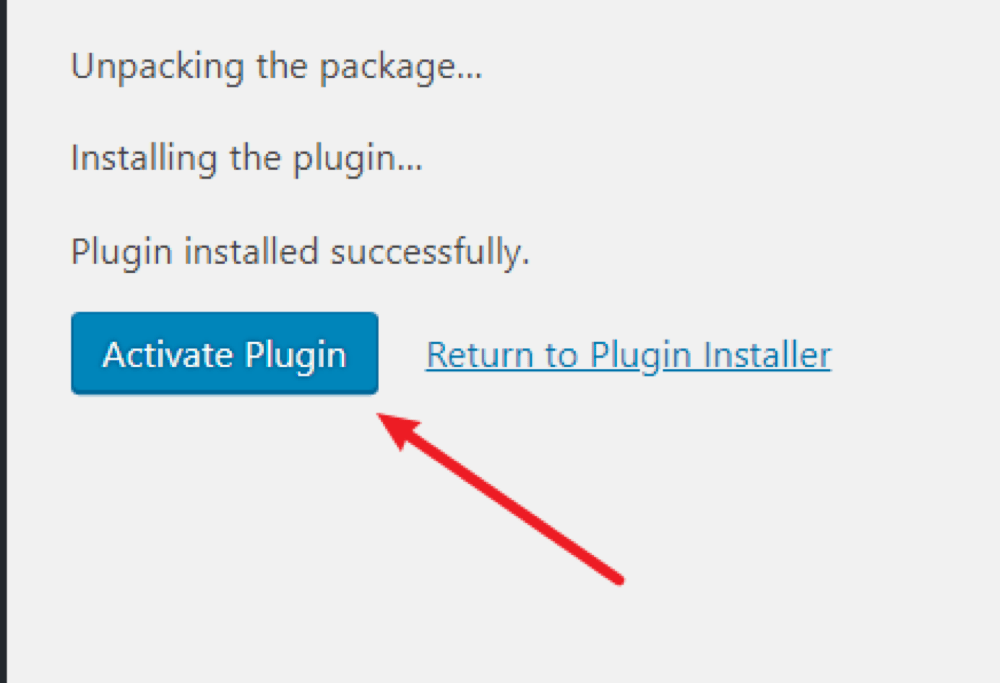
Once the plugin has been uploaded, be sure to click Activate.
If you’d like a more detailed explanation of uploading a plugin to WordPress, read this post.
Before you can begin setting course dates, you’ll need to register the plugin. To do so, navigate to the LifterLMS menu and click on the Course Scheduler button menu and enter the license key relating to your purchase.

If you can’t find your license key, return to your Account on the Aspen Grove Studios website, navigate to your purchase of the Course Scheduler plugin and you’ll find the license key.
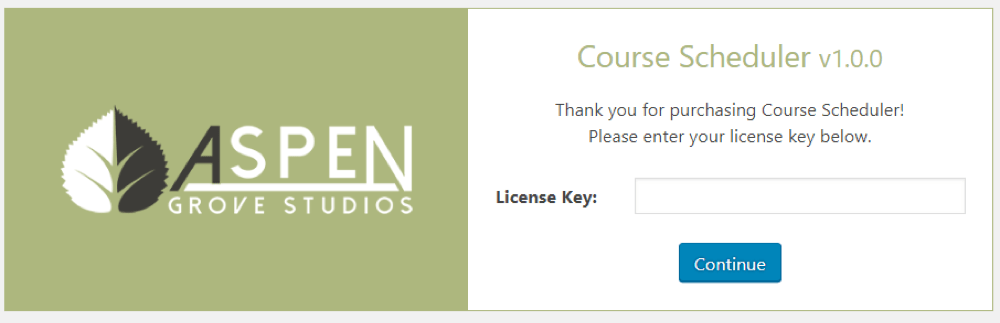
Once the license key has been entered, click Continue.

Now the plugin is set up and ready to go, and you’re ready to configure the start and end dates for a course.
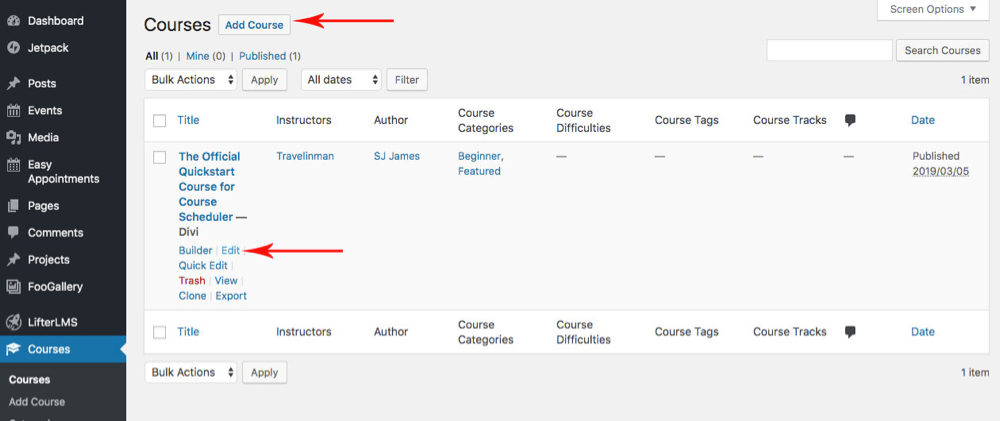
To begin, create a new course (navigate to Courses > Add Course), or, if you already have a course set up, hover over the course name and click Edit.
Head to the Course Options panel and click on Restrictions.
To set specific start and end dates for the course, navigate to the Enable Course Time Period toggle and switch it On.
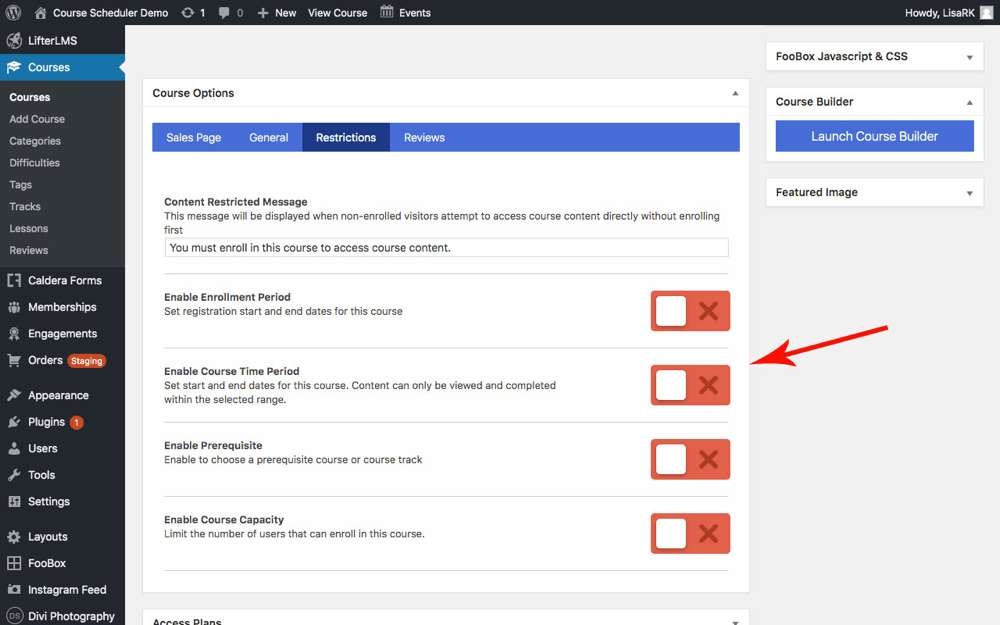
With the Course Time Period enabled, you can set both the start and end dates for your course. Be sure to enable this on both your new as well as existing courses.
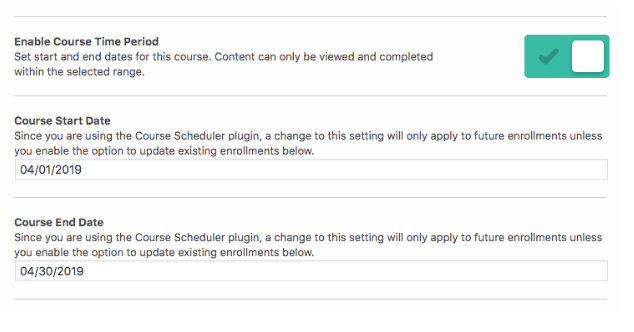
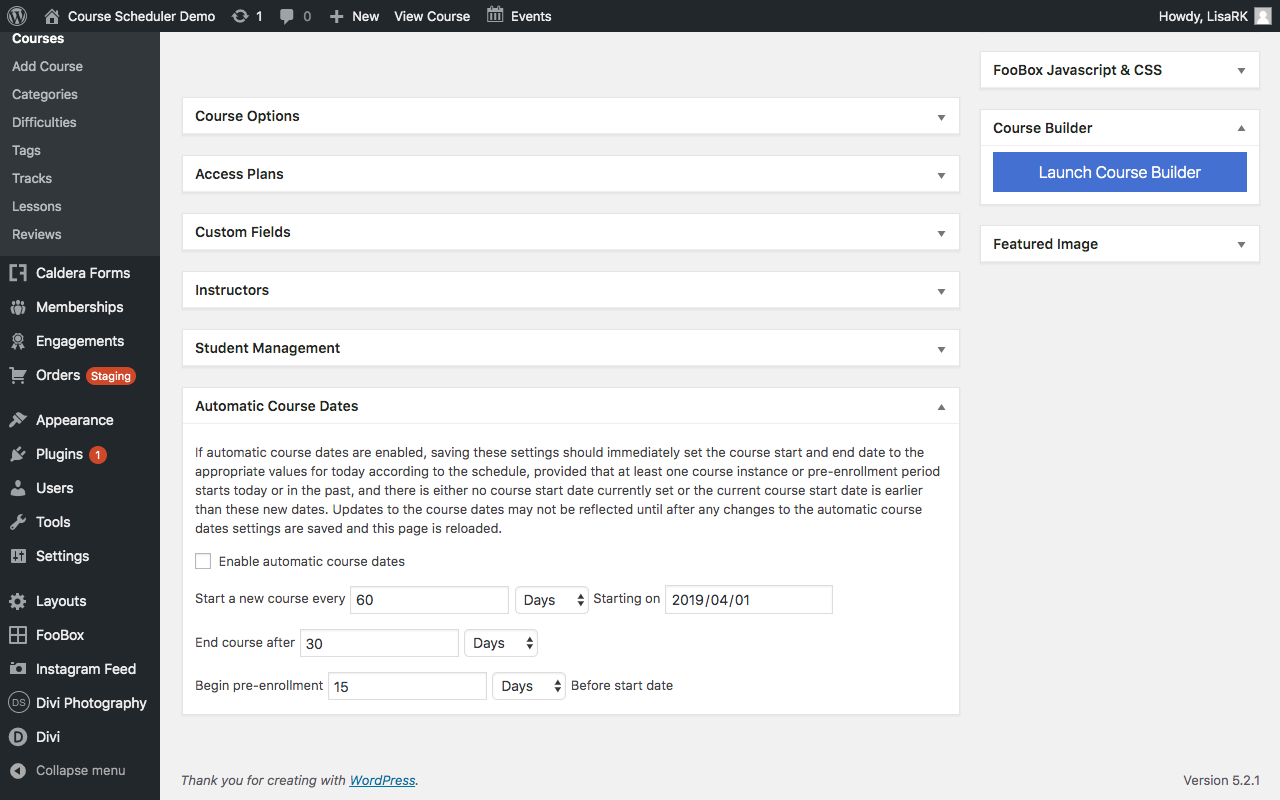
Here, check Enable automatic course dates and set the desired start and end dates for your course. You can also set a pre-enrollment period wherein interested students can enroll before the course begins. This is a great method for generating sales and building interest before the course has actually begun.
Another great feature of the Course Scheduler plugin is an improved Student Management interface. Here you’ll be able to see each student’s individual start and end date. You’ll also be able to filter your student’s lists by start date – an extremely useful feature for the course master.
If you’re ready to start creating and selling incredible courses, courses where your students are managed efficiently and with ease, purchase the Course Scheduler plugin from Aspen Grove Studios.
While the Course Scheduler plugin is only compatible with LifterLMS at present, the plugin will soon be upgraded for use with LearnDash and Learn Press. Stay tuned for future releases of the plugin!
If you’re ready to build, launch and sell a successful online course of your own, our brand new Divi child theme, Divi Courses Learning Management Child Theme, is perfect for you!

would be nice to have the learndash integration already///
Getting course dates on LearnPress courses is a key missing feature, as we deliver live-stream courses.
When are you scheduled to build this feature for Learnpress? This is critical function for our soon to be released website, so knowing your roll-out date would be very helpful.
Thanks,
Les