
If you’ve created Divi websites for some time, you may be looking to expand your offering and include digital products in the mix. A great product to sell is a Divi child theme, but the process of packaging a Divi child theme can be a bit tricky if you’re unfamiliar with the process.
Once you’ve finished building a website that you’d like to turn into a child theme, there’s a particular process of packaging the site so that it’s ready for someone else to use it. Packaging a child theme the manual route is a lengthy process that requires setting up and configuring a data exporter. This data exporter will export all of the demo data on the site—including your page structure, posts, individual page designs, all media, etc.—to make sure that when the child theme is imported on the new site, it includes the exact same set up as your demo site.
In the following post, we’ll discuss our platform WP Layouts and specifically the Demo Data Exporter and Importer features. The Data Exporter and Importers let you quickly export site data between web builds, and can be used to easily extend your child theme to include a one-click demo data import.
What You Need to Create a Child Theme
If you’re ready to begin creating Divi child themes, you’ll need a few things:
- A WordPress website with the Divi theme installed.
- A child theme installed after the Divi theme (or parent theme). If you’re unfamiliar with the terms, read about child themes and how they function, and when you’re ready, use the Divi Space Child Theme Generator to create one.
- A basic understanding of PHP and child theme development. WordPress runs on PHP so naturally, you’ll need to know how all of the moving parts fit together. Read about child theme production from the WordPress Codex.
Why Should You Create Divi Child Theme
Selling digital products is a great strategy for creating a new revenue stream that’s not solely reliant on your time, energy and service delivery.
- Work with more people at once. As a web developer, you’re more than likely working in a one-on-one capacity, fulfilling a single project for a single client. Even if you are running multiple web development projects at a time, you’re still only satisfying the needs of individual clients. Instead of working on a one-on-one basis, you can now work on a one-to-many premise, reaching and helping a wider audience.
- Increase your income. Selling digital products such as Divi child themes will open a brand new revenue stream for you. You could sell your child themes on your website, as well as through other online retailers such as the Elegant Themes’ Divi Marketplace.
- Repurpose existing web builds. As a web developer, you’ve got plenty of websites already built that can easily be edited, customized and used as child themes. All you have to do is repurpose and package, and you’ll have a digital product ready to go.
How to Package a Divi Child Theme for Sale
Once you’ve got a complete site build, you’ll need to package the site in a particular way for it to become a child theme ready for sale. Doing this the manual route requires a long and laborious process of exporting site assets and content, and tampering with code. If you’re looking for a faster, more efficient and less intricate process of packaging a child theme, our free platform WP Layouts is the answer.
WP Layouts
WP Layouts is a fantastic tool for Divi developers looking to speed up their development process. The plugin imports a series of additional layouts into your Divi installation, taking more stress off your plate from a design perspective. The plugin also lets you export complete site builds from one site and import them into a new site, saving you hours of time in development. All site data exported using WP Layouts is stored in the WP Layouts cloud storage system.
WP Layouts’ Demo Data Exporter and Importer
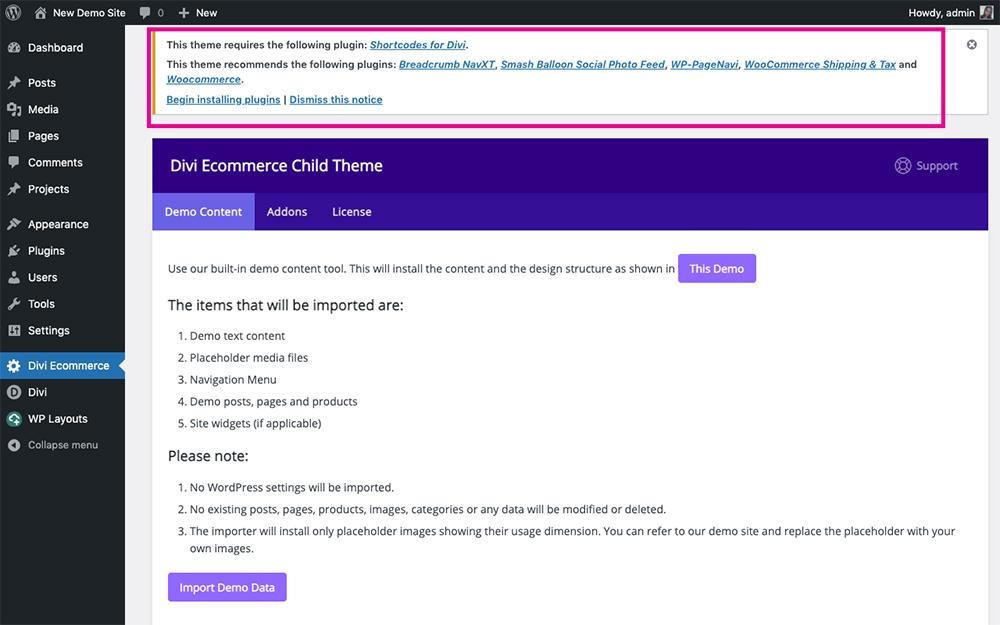
One of the top features of WP Layouts is the Demo Data Exporter and Importer that makes migrating sites easy, and can also be used to prepare a child theme for sale.
We use the WP Layouts Demo Data Export and Import functions on all of our Divi child themes. If you’ve had a look at our child themes, you’ll know that they’re incredibly robust and really detailed. As well as creating each element on the site, using unique color palettes and typography suites, and designing each page, we always go over-and-above and include premium site extensions like WooCommerce stores, events calendars, custom blogs and much more.
The demo data of our highly detailed child themes can be exported and packaged with no problem thanks to WP Layouts. No matter the size or complexity of your site, the plugin won’t fail you. When a customer purchases and installs your child theme on their site they’ll be able to import your demo site’s data at the click of a button.
When preparing to export a site, you have the choice of which data forms you’d like to export. Sections can be toggled on and off depending on your selection. The site data export includes:
- All Media Library assets, including images
- Menus, menu items and menu assignments
- Any Theme Builder templates and assignments
- All Posts
- All Pages
- All taxonomies including Tags, Categories and assignments
- Additional custom post types such as WooCommerce products, LifterLMS sample lessons and courses
- Divi Library layouts
- Divi Theme settings
- Theme customizer settings
Ready to see this amazing system in action? Next, we’ll show you exactly how to use the WP Layouts Demo Data Export and Import features. If you want to see how this plugin can add your site’s demo data to your child theme content, jump ahead to the Creating a Divi Child Theme Using WP Layouts section.
How To Export and Import Your Divi Site Data
Before showing you exactly how to package child theme content using WP Layouts, we’ll run through the process of exporting and importing site data. With WP Layouts, this can be done between sites, for example, you could use the plugin to migrate sites or duplicate them.
Export Site Data
To begin, you’ll need a Divi site that’s complete and ready to go. In my example, I’ve created a simple example site of only four pages for the purpose of this demo, but please note, WP Layouts can be used for extremely complex sites like Divi Ecommerce or Divi Ecommerce Pro.
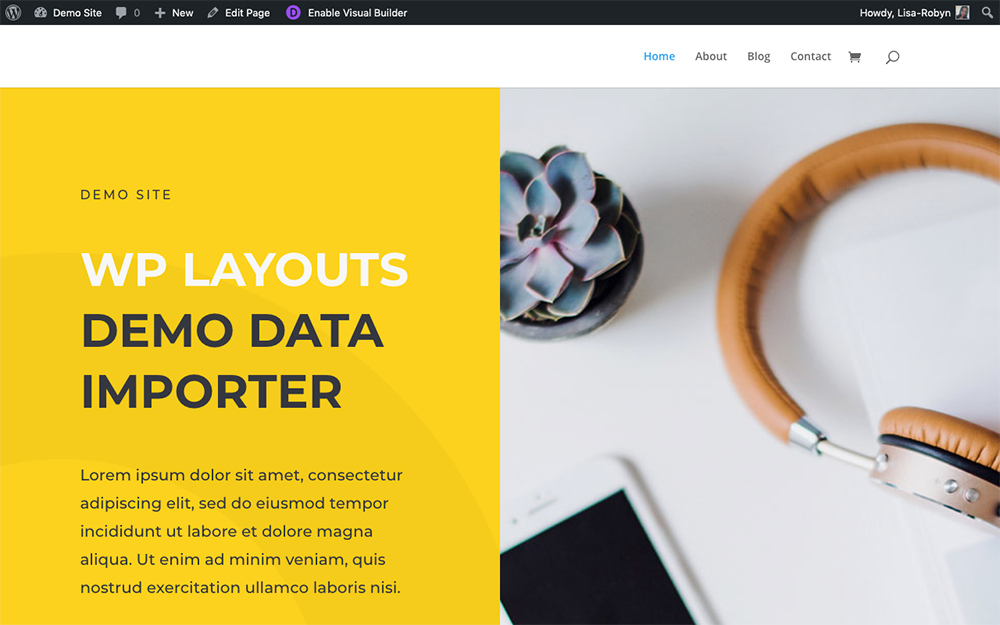
A demo site created with an Elegant Themes layout pack
First, head to the WP Layouts site and create a free account.
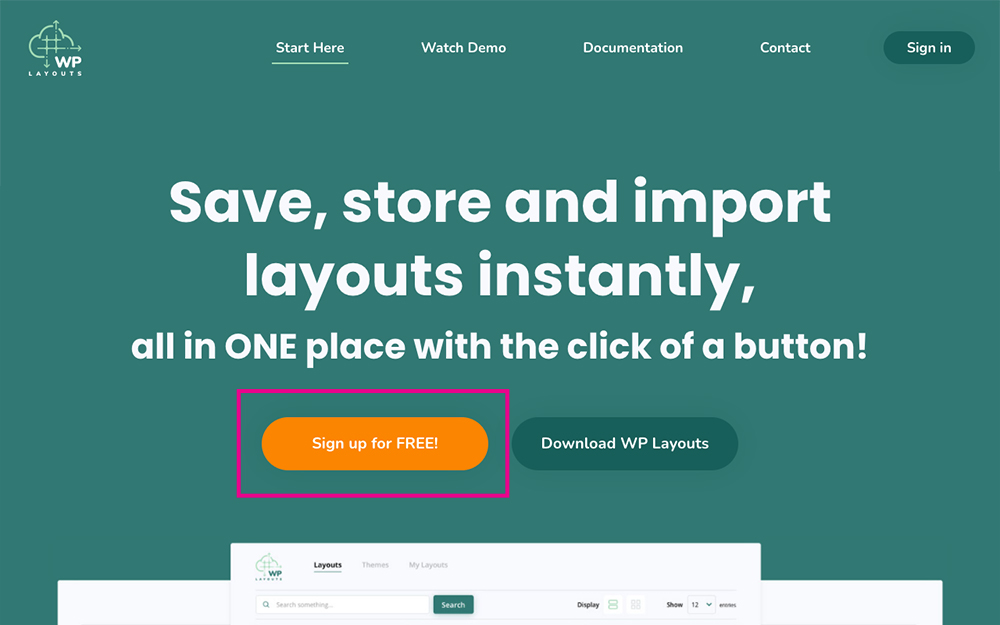
Create a new account
Once you’ve created your account, download the free WP Layouts plugin and install it on your WordPress website. When installed and activated, the plugin will create a new menu item. You’ll be asked to authenticate your account by logging in with your WP Layouts details, after which, the plugin will be ready to use.
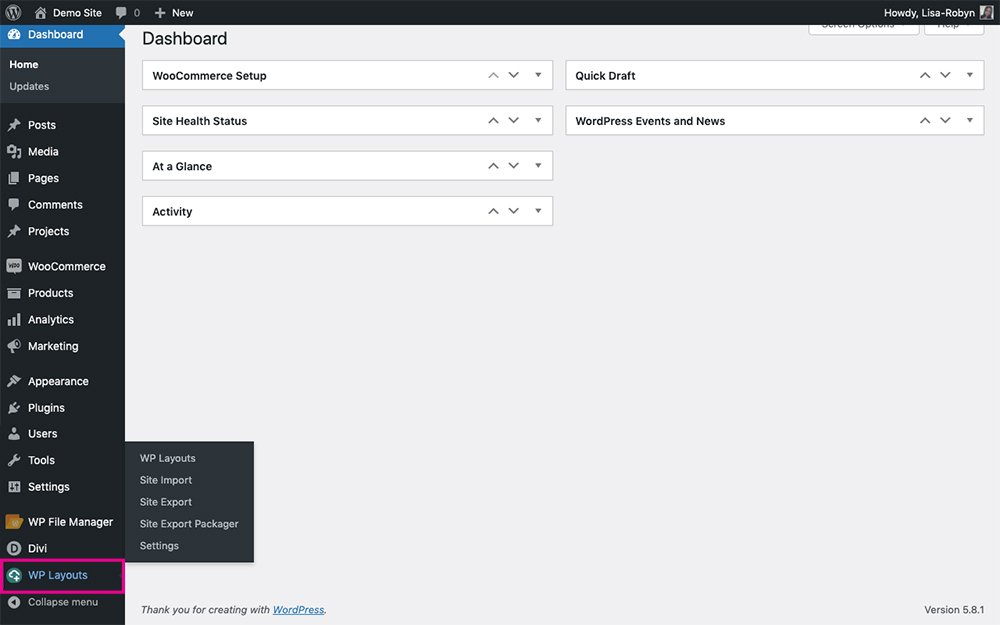
View the WP Layouts menu
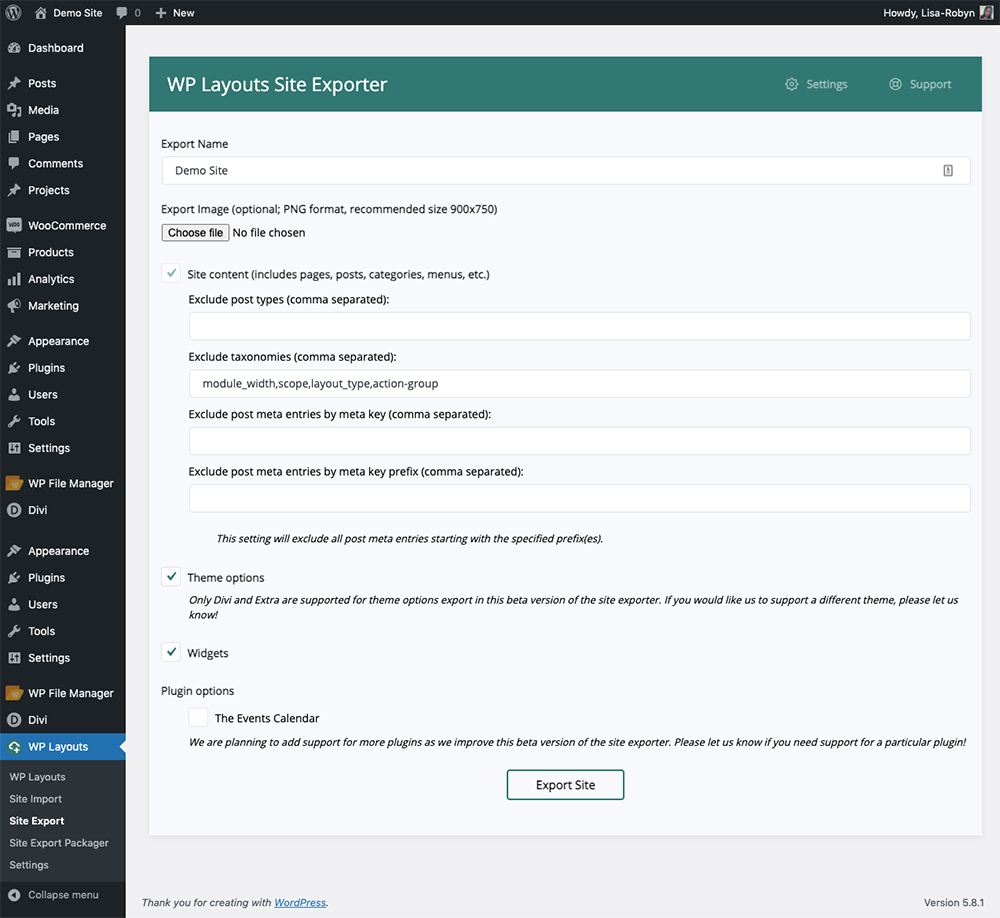
To export your website, click on the Site Export menu. Here you’ll be asked to enter a few details:
- Export Name: Assign a name for your website such as “My First Divi Child Theme”
- Export Image: If you like, you can choose to include an image for the export. The recommended size is 900×750 pixels.
Next, you’ll have a series of checkboxes giving you the option to include or exclude certain site assets into the export. You can select:
- Site content: Here you can refine which assets you’d like to include such as the pages, posts, taxonomies, menu and so on. If you’d like to exclude certain posts types, taxonomies or post meta entries from the export, you can do so by specifying the relevant items in the respective text box, separated by a comma. For example, the image below shows an example of excluding post types like Testify testimonials and Yoast SEO data.
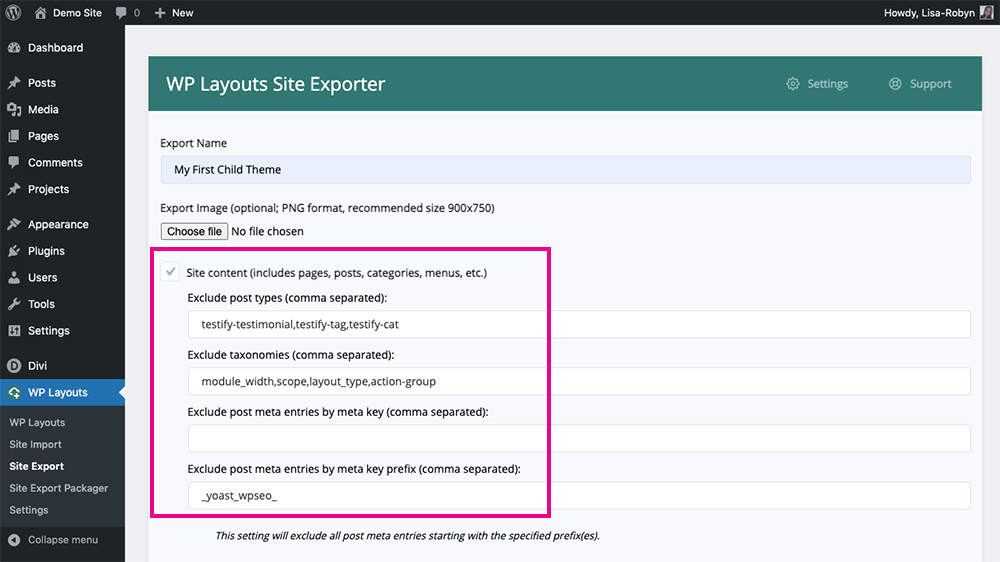
An example of Testify or Yoast SEO content being excluded
- Theme Options: If you’d like to include the Divi Theme Options settings, make sure to check this box
Widgets: If you’d like to include predesigned Widgets, check this box
Plugins: WP Layouts currently has special support for plugins like The Events Calendar, WooCommerce and LifterLMS among others
Once you’ve made your selection, click Export Site.
Click Export Site
When the export is complete, you’ll see a notice saying ‘Done!’.
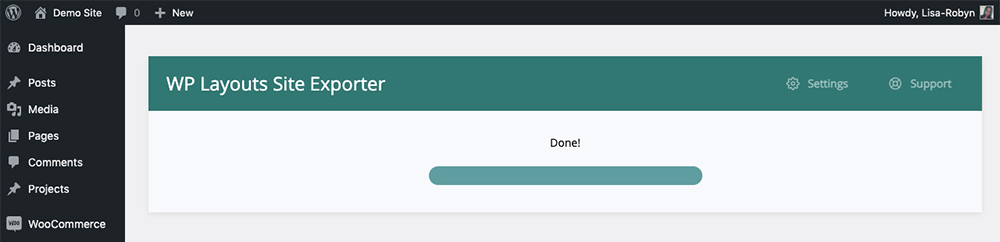
Wait for a success notice
At this point, return to the WP Layouts menu and you’ll see your export in the My Layouts tab.
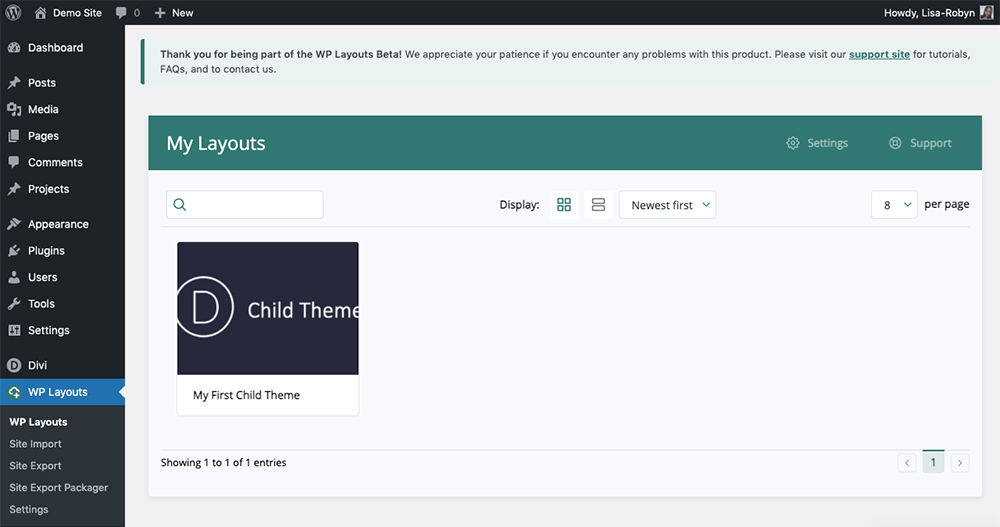
Now you’ll see your export in the WP Layouts menu
As mentioned above, the site export is stored within the WP Layouts cloud storage system so there’s no need for you to download any files. If required, you can return to this export in the My Layouts tab and change the name, change the image or replace exported data with new data. The latter will allow you to update the demo data export without having to release an entirely new version of the child theme.
Now that you’ve got an export of your site, you can reverse engineer the process and import the same site on another WordPress installation.
Import Site Data
If you want to move or duplicate a website from one installation to another, WP Layouts is a great plugin to use. As site exports are stored in the WP Layouts cloud storage, whenever you install WP Layouts on a site and log in with your credentials, you’ll gain access to every site you’ve ever exported.
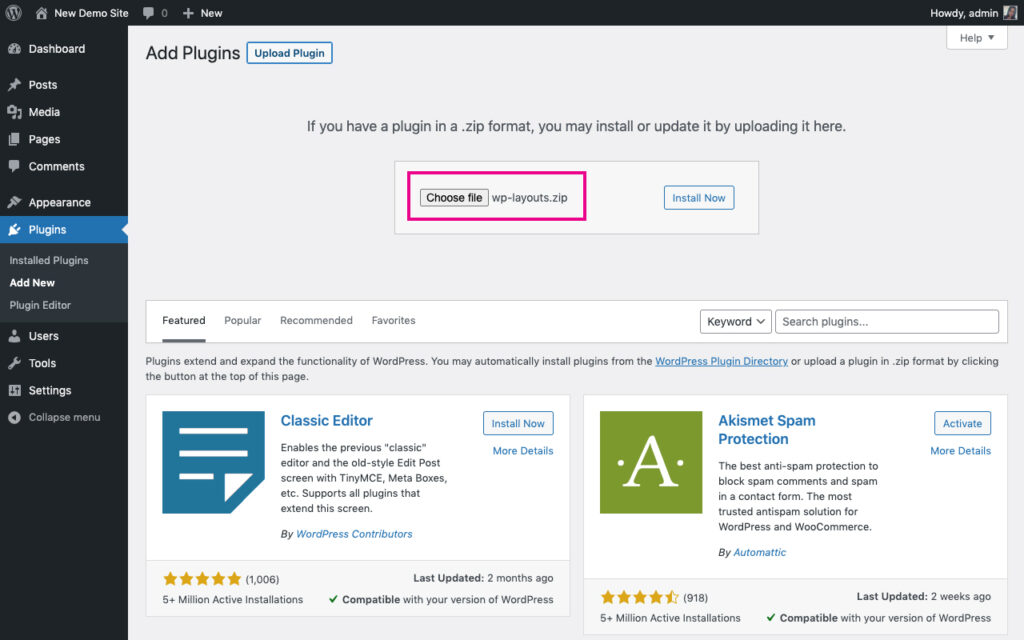
Once you have a new WordPress installation setup and ready to go, install and activate the WP Layouts plugin as per normal.
Install the WP Layouts plugin
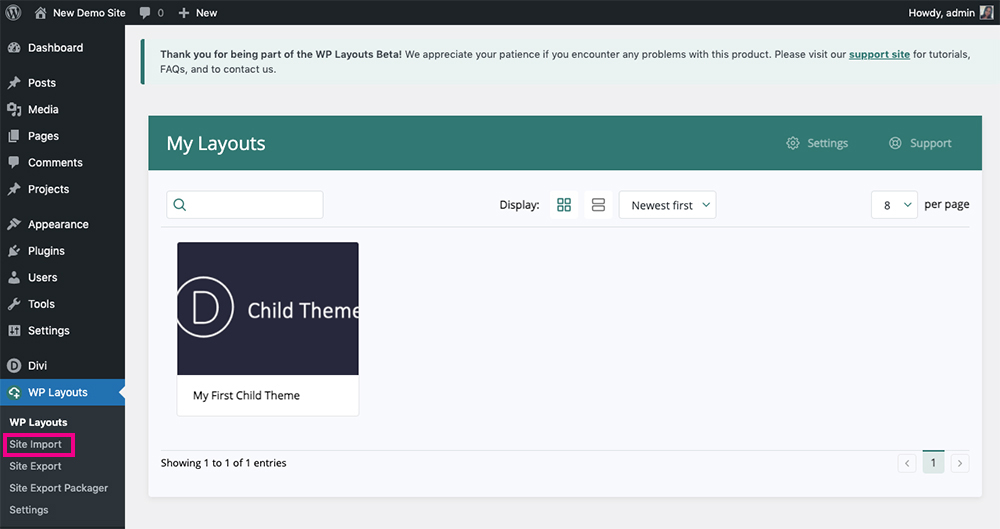
Sign in to your WP Layout account via the plugin installed on the new WordPress site, and once complete, you’ll see your existing exports in the My Layouts tab. To import the site data, click on the Site Import tab.
Here you’ll see a list of the available sites that you’ve previously exported. As soon as you click the site you’d like to import, the process will begin.
Your sites will display here
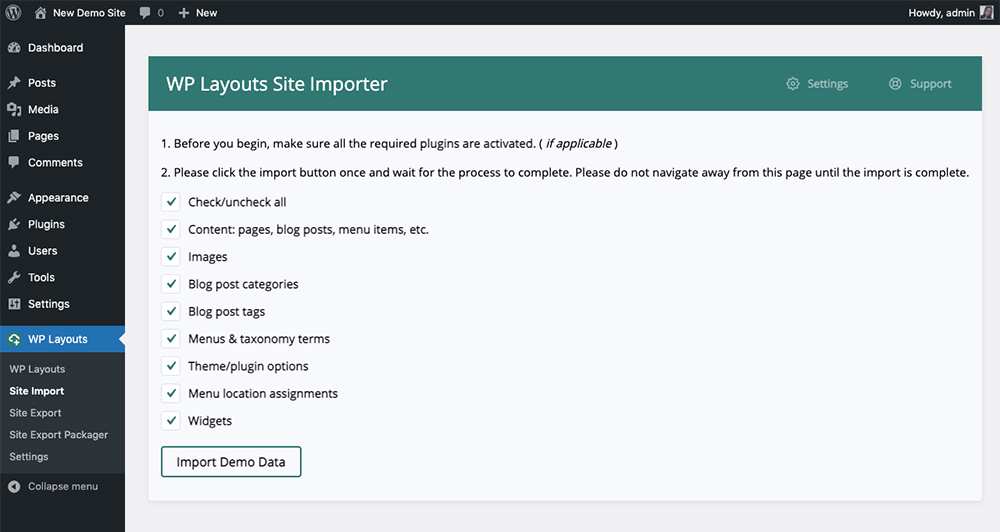
You’ll be asked a series of questions about the various assets you’d like to import. Check or uncheck whichever you’d like to include. When complete, click Import Demo Data.
Select the assets you want to include
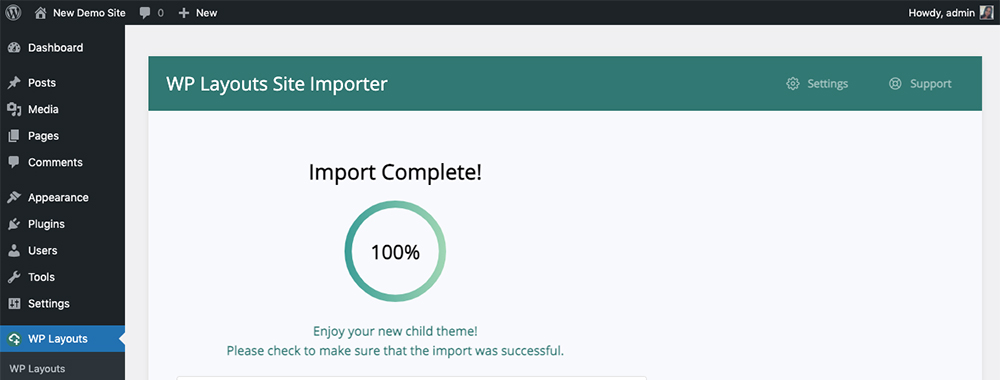
Once the import is finished, you’ll see a success message.
When the import is complete, you’ll see a success notice
From here, head to the Settings > Reading menu and assign the home page. When complete, click Save Changes.

Set the home page
Now, head over to the front-end of your site and you’ll see the site has been imported.

The demo data is successfully imported
Creating a Divi Child Theme Using WP Layouts
Beyond simply exporting and importing sites across builds, the WP Layouts plugin takes things a step further by allowing you to use your site as a child theme. The plugin includes an extremely easy-to-use, one-click packager, the Site Export Packager, that’ll export your site as demo content for a child theme.
The Site Export Packager works by outputting either a series of files of PHP code that you’ll then add to a child theme. To prepare, create a blank child theme on your computer and include the following files:
- functions.php
- style.css
- A screenshot (1200px x 900px)
Need a blank child theme to kickstart your development? We recommend using the Divi Space Child Theme Generator. If you need more information about developing a WordPress child theme, refer to this article from the WordPress Codex.
Once the Site Export Packager runs, you’ll return to this child theme and include a few outputs and in a few minutes, you’ll have your child theme ready to go.
After the child theme folder has been set up, when you’re ready to package your site as a child theme, head to the Site Export Packager menu.
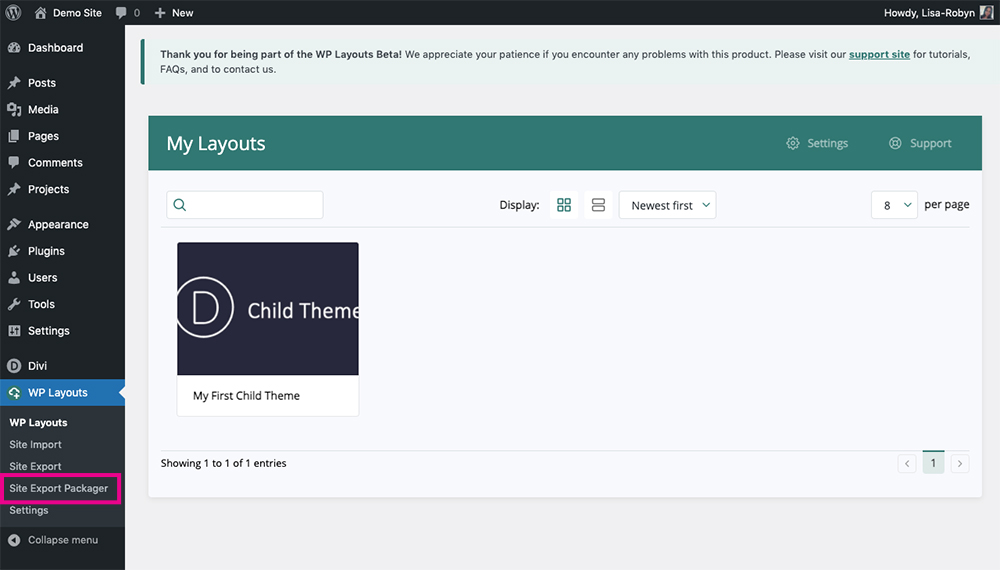
Click on the Site Export Packager menu
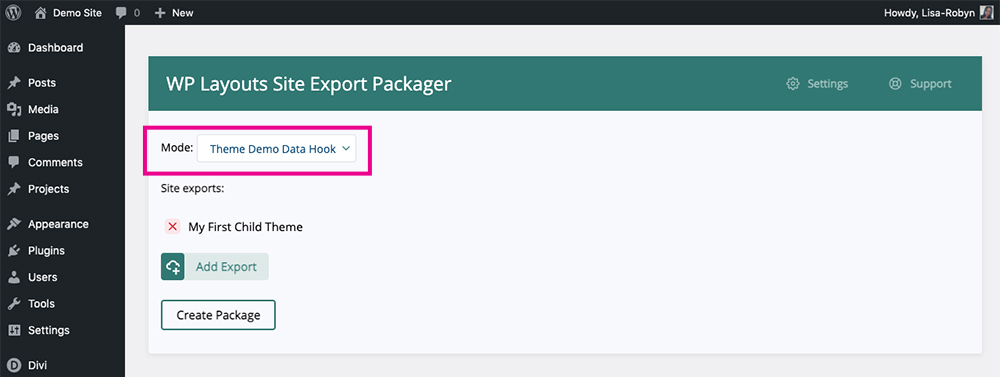
Here you’ll find a series of options to fill out.
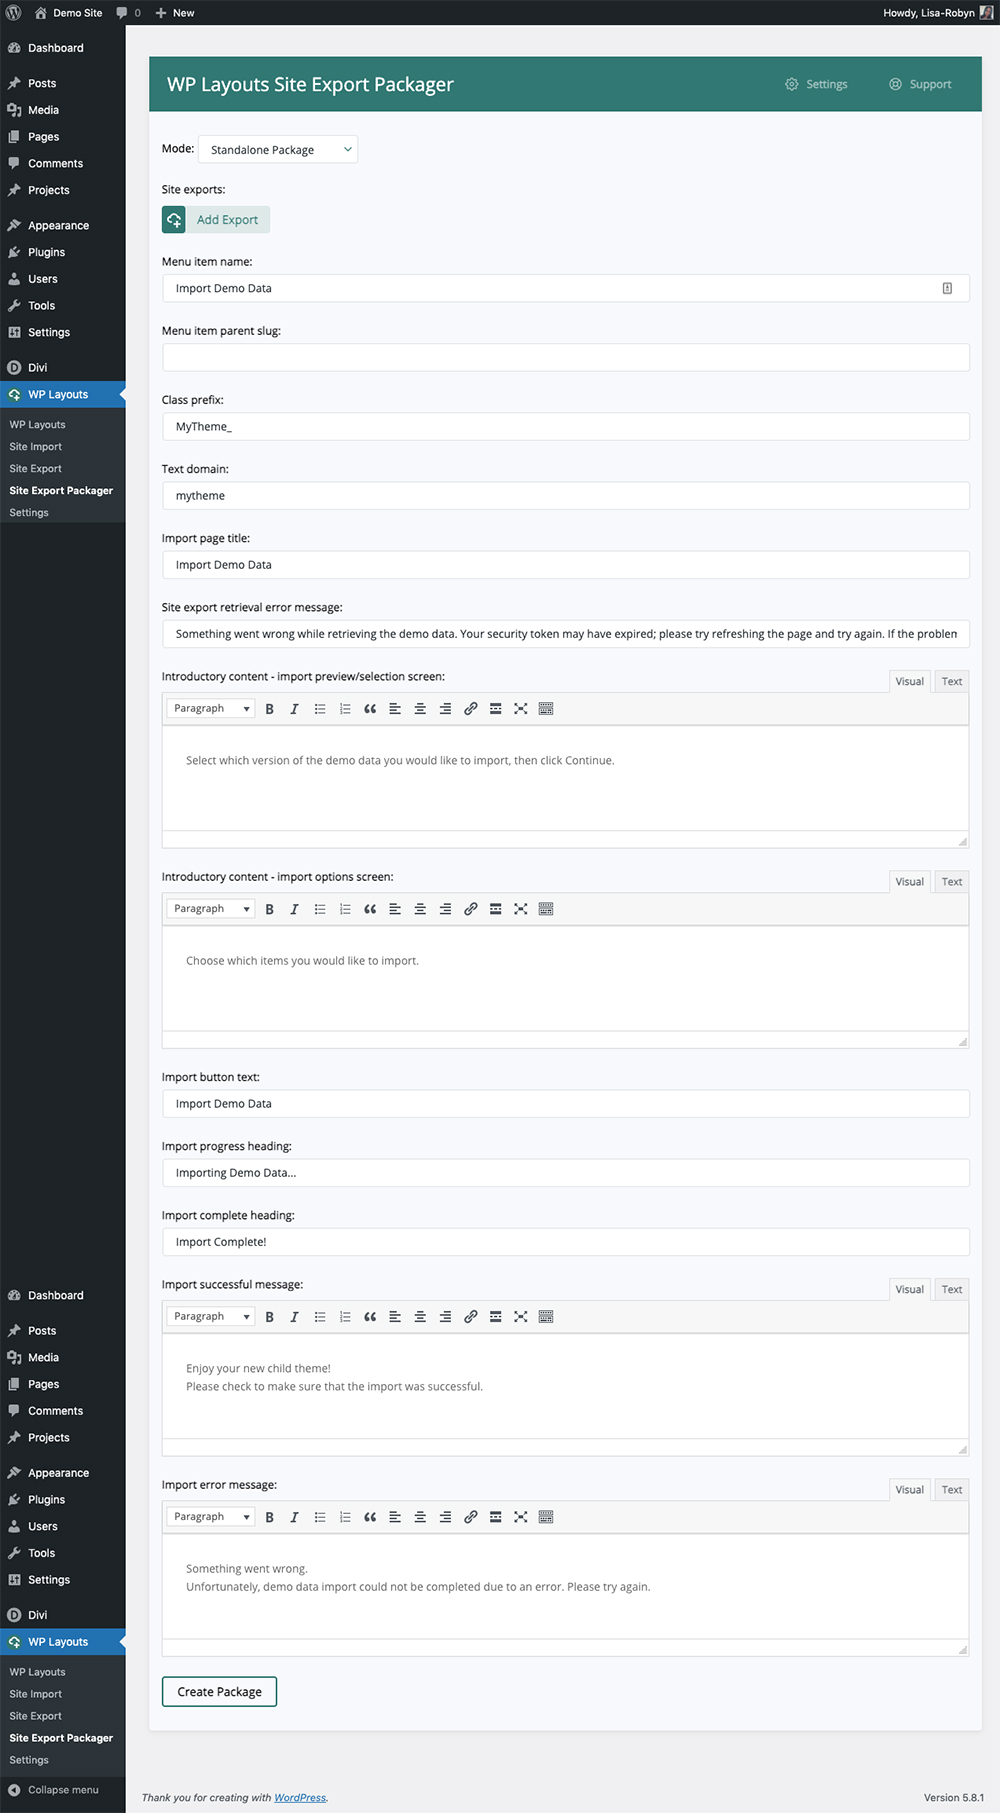
The WP Layouts Site Export Packager
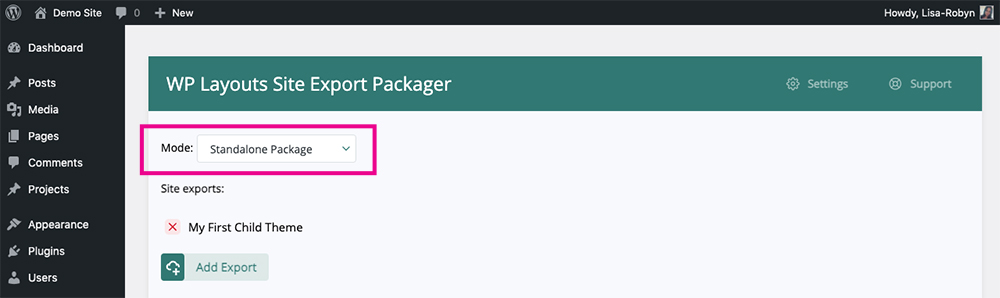
Mode: First things first, you need to choose which mode you’d like the package to export in. There are two options: Standalone Package and Theme Demo Data Hook.
- Standalone Package: When selecting this option, a .zip file will be generated. This .zip file will contain a series of files and other resources for the data importer that will need to be added to the child theme folder. When this is complete, you’ll need to add a few lines of code to the functions.php file in the child theme on your computer. These lines of code will be the include() declaration, a function that enables PHP to introduce another set of files into the running of the site. In this case, as soon as the child theme is installed on your customer site, the include() declaration will register that the demo data importer should be included. If you do not specify the include() declaration in your functions.php file, the demo data importer won’t run as it won’t be referenced and activated.
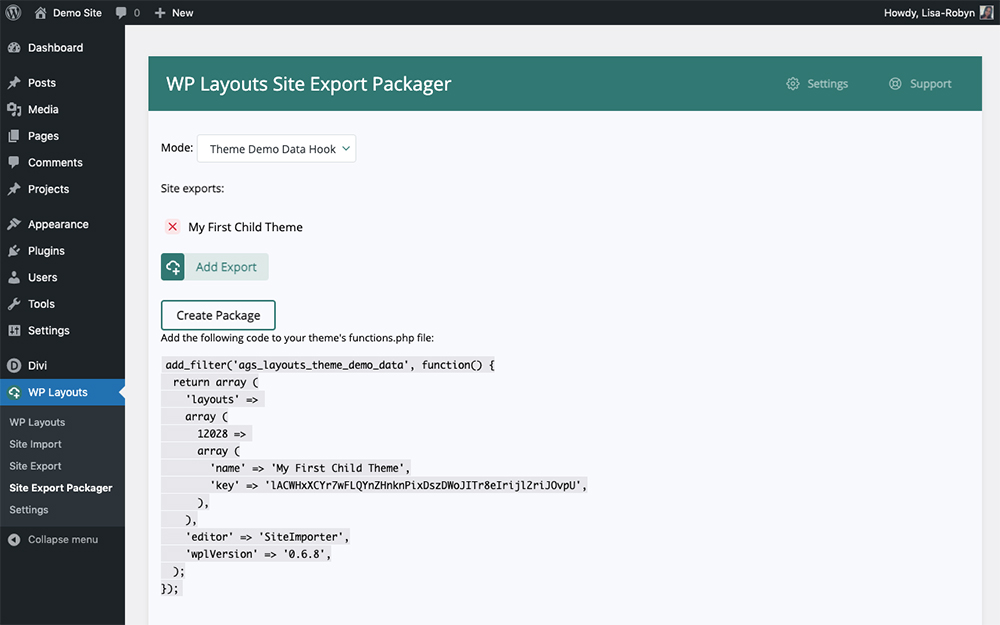
Now, when your customer gets the final child theme zip file from you, they can simply install and activate the child theme, run the demo importer and the site will be ready to use. - Theme Demo Data Hook: When selecting this option, you’ll be presented with a few lines of PHP code that needs to be added to the functions.php of the child theme. The code here is a filter hook that connects to the WP Layouts plugin. It initiates the site data information of ID and unique key.
For this method to work, the WP Layouts plugin will need to be activated on every site that the child theme will be installed on. You’ll need to inform your customers that they’d need to install this plugin as well as your child theme. This can be a deterrent as adding another step in the mix can make the process more complicated for your customers.
Site Exports: Here, you’ll need to select the site that you’d like to export. Click the “Add Export” button and a popup will arise showcasing all of the available sites. Select the one you’d like to use in the child theme
Menu Item Name: Here you can set the title of the menu item. When a customer installs your child theme, they’ll look for a way to import the site demo. By default, the name is set to “Import Demo Data” but you could change this to “Import Site Content” or “Import Theme Content.” Inside this menu, they’ll find the demo importer and can begin the process.
Menu Item Parent Slug: Here you can change the menu slug where the menu item will be displayed as a submenu of its parent item. If you are using Divi, use ‘et_divi_options’. If you are registering your own menu item for your Child Theme, you can use it here as well. Read more about navigation menus on the WordPress Codex.
Class Prefix: Here you can assign a custom prefix for the functions of your child theme. This ensures that the function created by the Site Export Packager on behalf of your child theme won’t conflict with other functions from either the parent theme or plugins on your site.
Text Domain: A WordPress internationalization function used for translations, the text domain declaration is a unique identifier that allows WordPress to distinguish between all of the loaded translations in its database. Text-domain is defined in the header of the child theme. If your child theme loads translations, you can add its text-domain here, so the demo data importer strings can easily be translated into other languages.
Import Page Title: This is the text that will display at the top of the import screen. You can change this to say something like, “Thank you for purchasing my theme, please use the prompts below to import the demo data.”
Site Export Retrieval Error Message: If there’s a problem with the demo import, this message will display. You can customize it here.
Introductory Content – Import Preview/Selection Screen: Here, you can enter custom text that’ll display before the import data selection.
Introductory Content – Import Options Screen: This text will display above the checkbox that allows your customers to select which assets they’d like to import. You can change it to something custom.
Import Button Text: Add custom text to change the default ‘Import Demo Data’ button text.
Import Progress Heading: Add custom text to change the default ‘Importing Demo Data…’ text that displays while the data is loading.
Import Complete Heading: Add custom text to change the default ‘Importing Complete!’ text that displays when the data has been successfully installed.
Import Successful Message: When the demo data has been successfully installed, it’ll display a success message. Here, you can change the default text.
Import Error Message: If the demo data does not install correctly, it’ll display an error message. Here, you can change the default text.
When you’ve entered all of the particulars, click the Create Package button.
Exporting Your Child Theme Using the Standalone Package Method
If you choose to package your child theme using the Standalone Package mode, you’ll need to do a few things to finalize your child theme.
Select the Standalone Package mode
As soon as you click Create Package, a .zip file titled “wpl-export.zip” will automatically begin downloading and will save to your computer. A short notice will display below the Create Package button instructing you on what to do next. This notice also has the include() declaration that needs to be added to your child theme’s function.php file. Keep note of this declaration, we’ll return to it shortly.
Head to your Downloads folder and drag the wpl-export.zip file into your child theme folder. Here you can see I’ve got a blank child theme called “divi-theme-demo” setup with a functions.php file, style.css file and a screenshot.
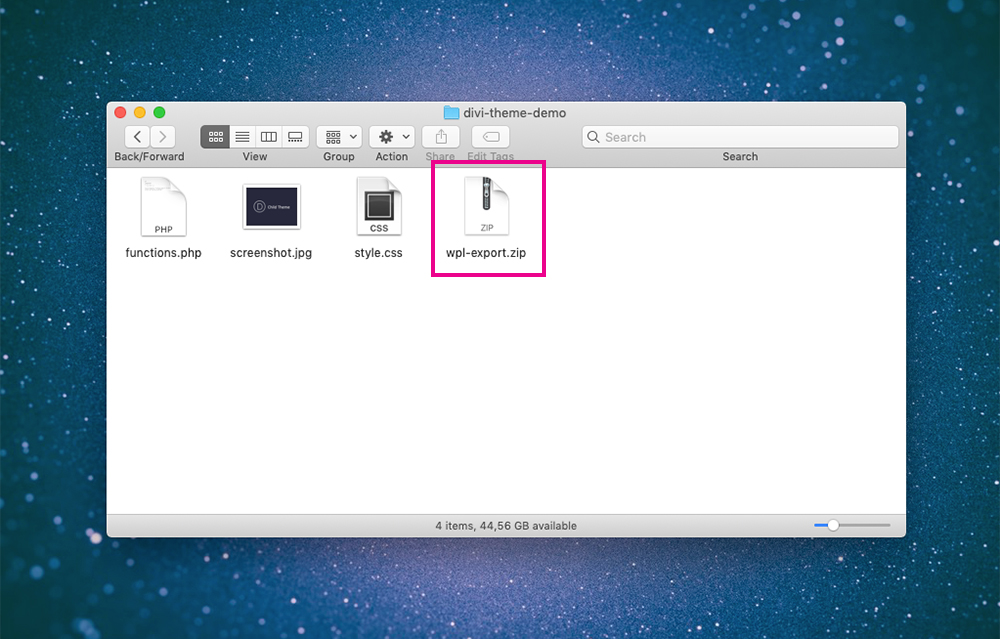
Select the wpl-export file
Once the wpl-export.zip file is in your child theme folder, unpackage the .zip file.
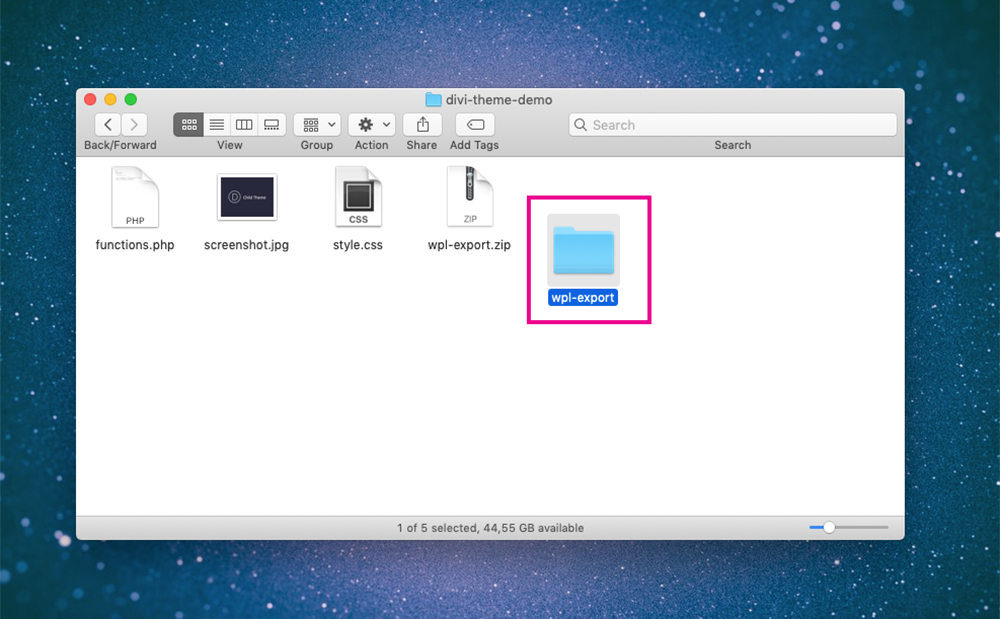
Unzip the wpl-export file
When the contents have been unpackaged, delete the original wpl-export.zip file, leaving the wpl-export folder intact.
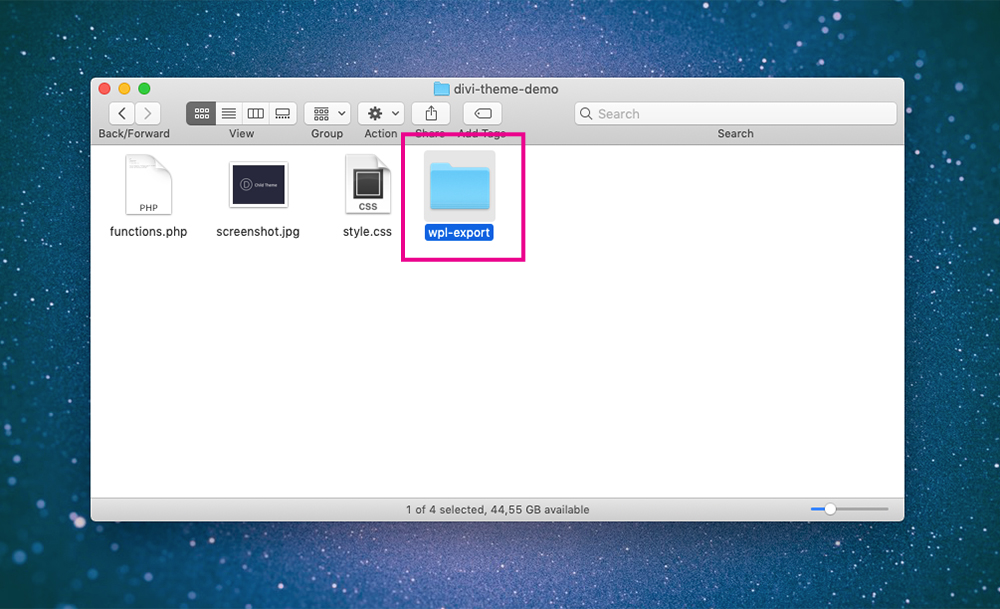
Selct the wpl-export folder
Now you need to rename the folder from wpl-export to a single word, something unique. We recommend renaming the folder to ‘importer’.
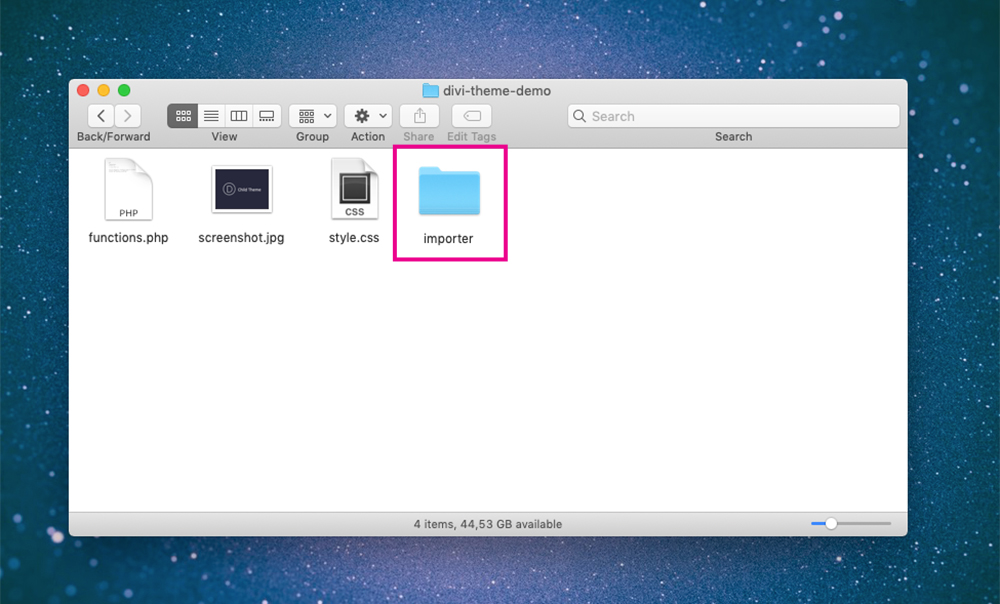
Rename the folder
Within this ‘importer’ folder lies a series of files that, when executed, will run and display the demo data installer when the child theme is installed. You need to reference these files, namely the importer.php file that rests within the importer folder.
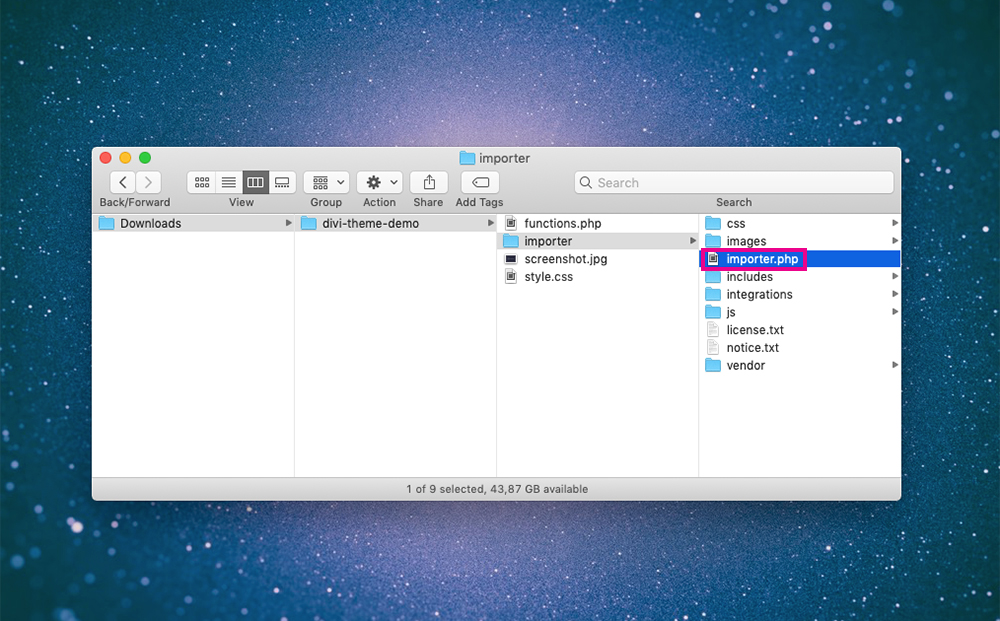
Reference the importer.php file
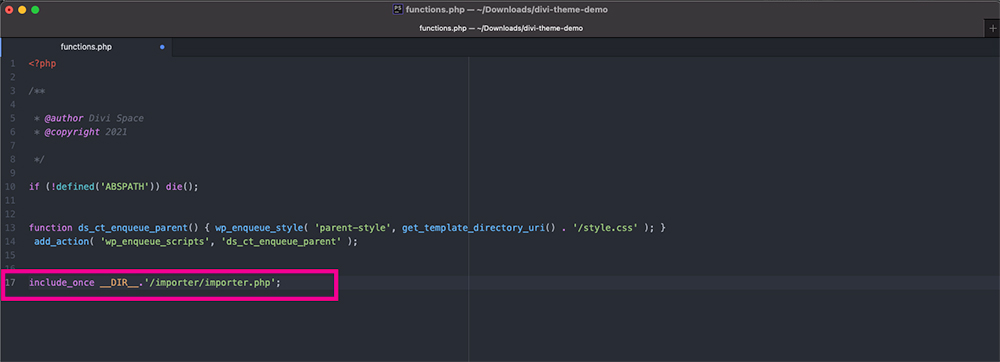
One final step is to reference the demo importer within your functions.php file. Return to your WordPress website and visit the Site Export Packager menu. Return to the short notice that displayed below the Create Package button and copy the line of code.
include_once __DIR__.'/path/to/importer/importer.php';
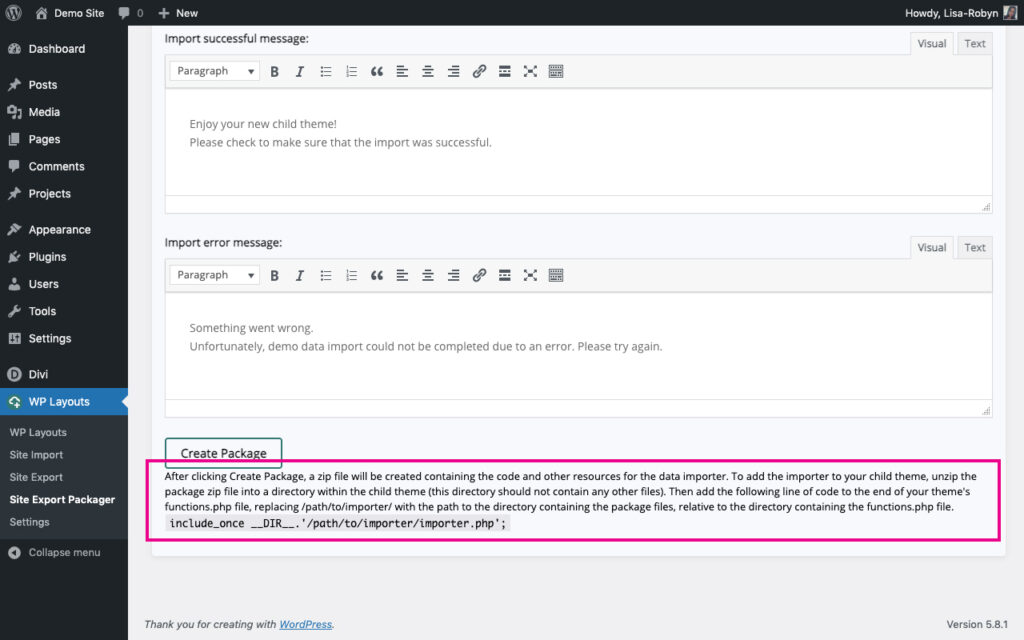
Copy the “include” code
Open the functions.php file and paste in the code. Before saving, you need to double-check and edit the path to make sure it is referencing the correct folder, the ‘importer’ folder, followed by the importer.php file.
In this case, change the original text from:
include_once __DIR__.'/path/to/importer/importer.php';
To:
include_once _DIR_.'/importer/importer.php';
Remember to save the file.
Add the code to your functions.php file
Finally, compress the entire contents of your child theme.
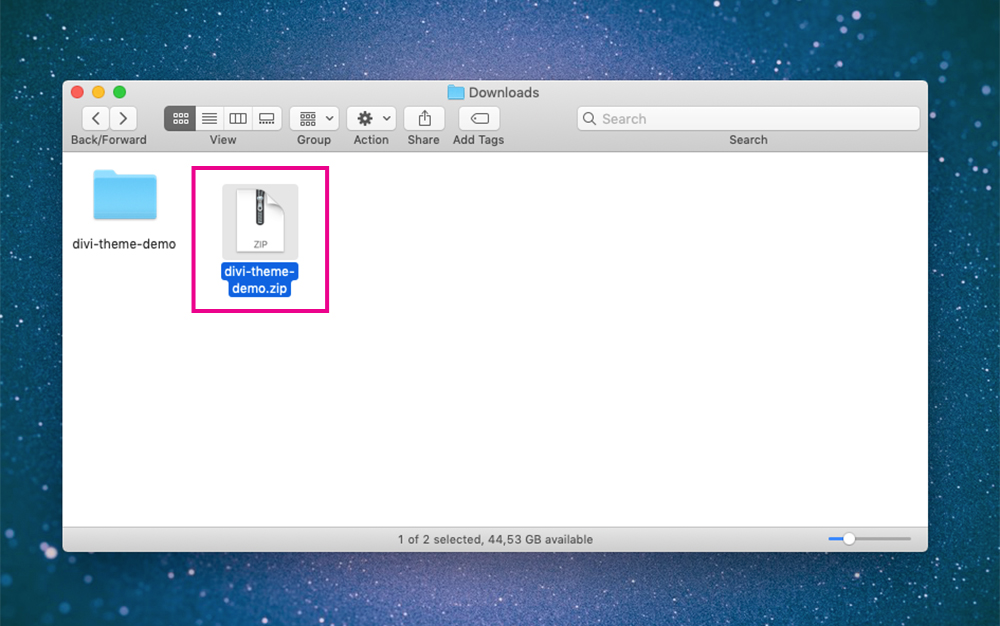
Compress the child theme
Now, install and activate the child theme as per normal.
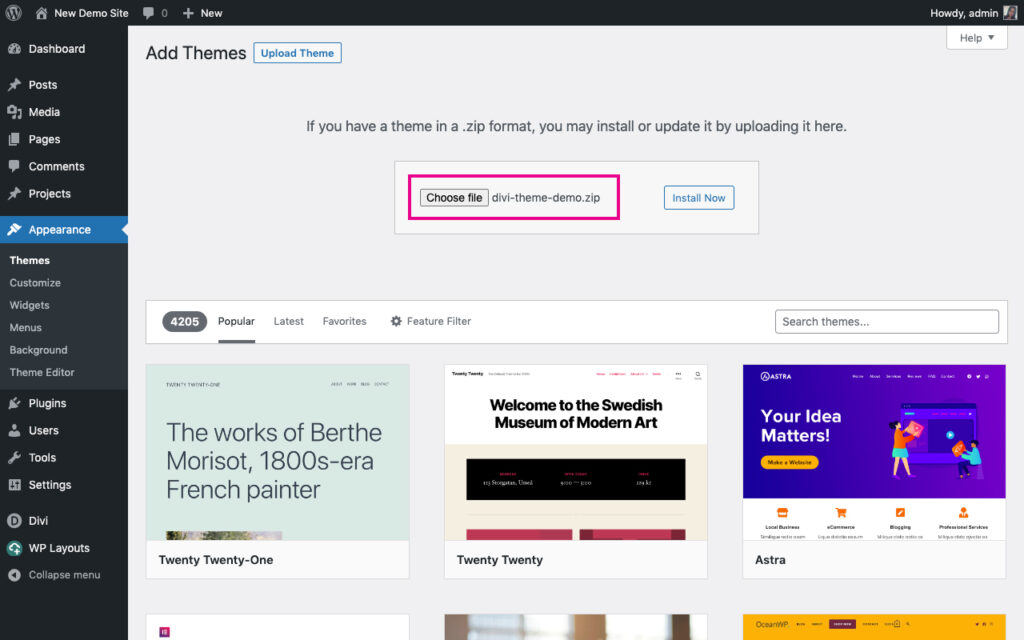
Upload the child theme
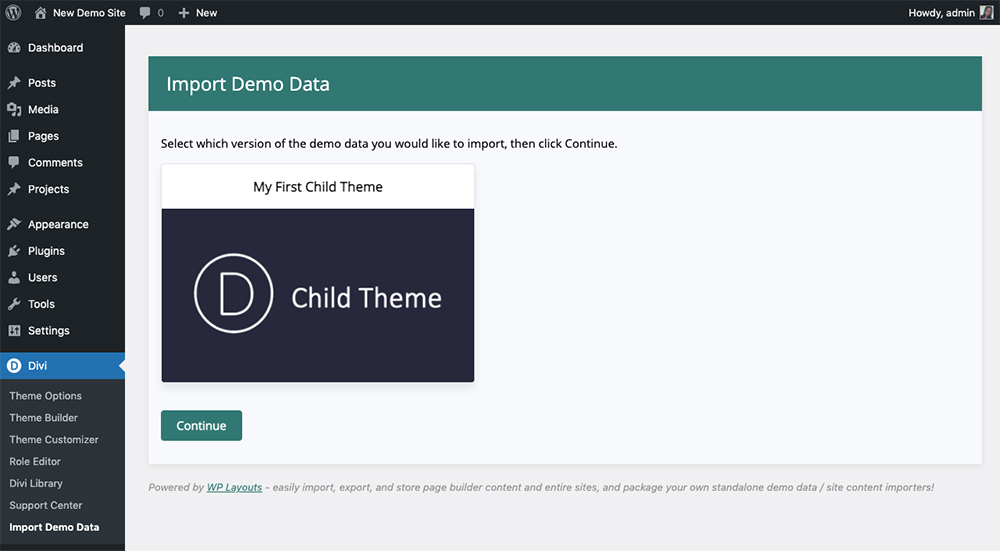
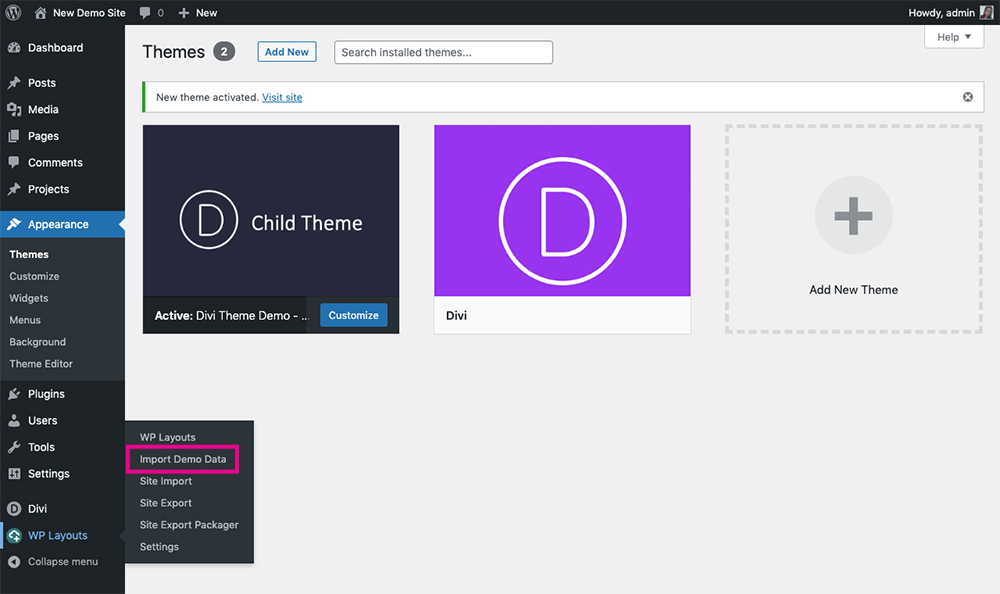
When installed, you’ll see a new menu item added to the Divi menu titled Import Demo Data (or whatever custom name you assigned the menu name title in the packaging phase).
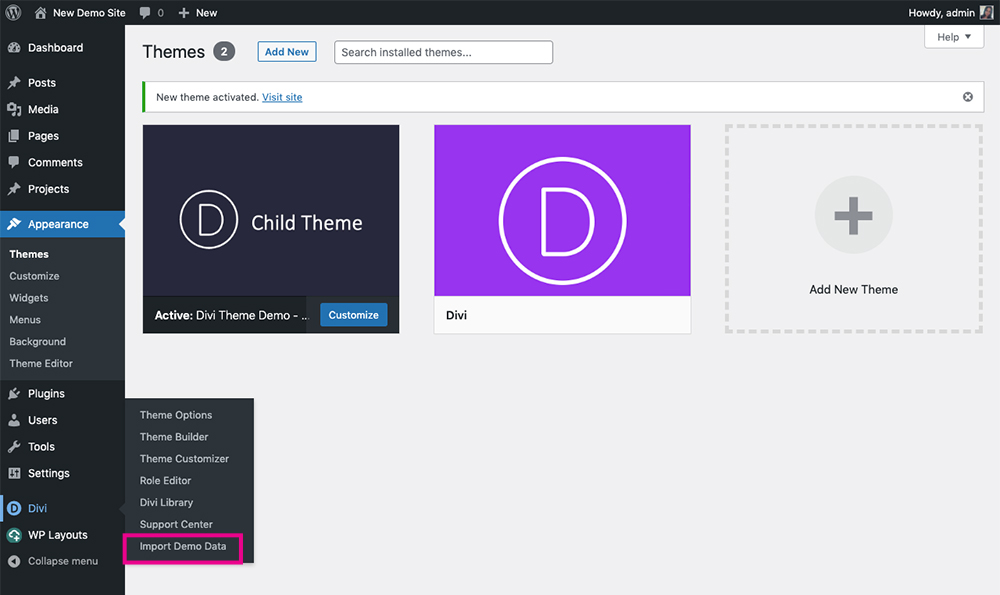
View the Import Demo Data menu
From here, when your customers use and purchase your child theme, they’ll be able to import the demo site data in a few clicks.
Now your customer can import the site demo quickly and easily
Exporting Your Child Theme Using the Theme Demo Data Hook Mode Method
If you choose to package your child theme using the Theme Demo Data Hook mode, there are just a few steps to go before your child theme is finished.
Remember, for this method to work, your customer, the end-user, must have WP Layouts installed on their WordPress website as well as install the child theme .zip file.
Select the Theme Demo Data Hook option
Once you click Create Package, you’ll be presented with a few lines of PHP code. Copy and paste this into the functions.php file in your child theme.
Copy and paste this into the functions.php file in your child theme
Once the code has been added, remember to save your changes.
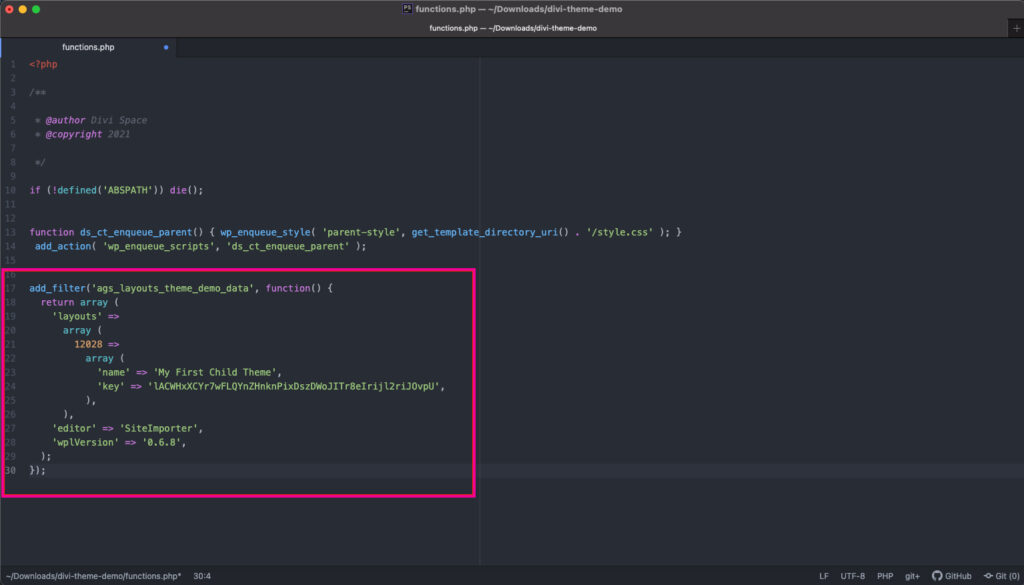
Add the code to your functions.php file
Compress all of the files in your child theme to one .zip file.
Compress the child theme
Upload the child theme .zip file to your WordPress website. Make sure you activate it too.
Upload the child theme
With the child theme installed, your customer will see a new item in the WP Layouts menu called Import Demo Data.
Select the Import Demo Data menu
When they click on the Import Demo Data menu, they can begin the process of importing the demo site content.

Select the demo data to install it
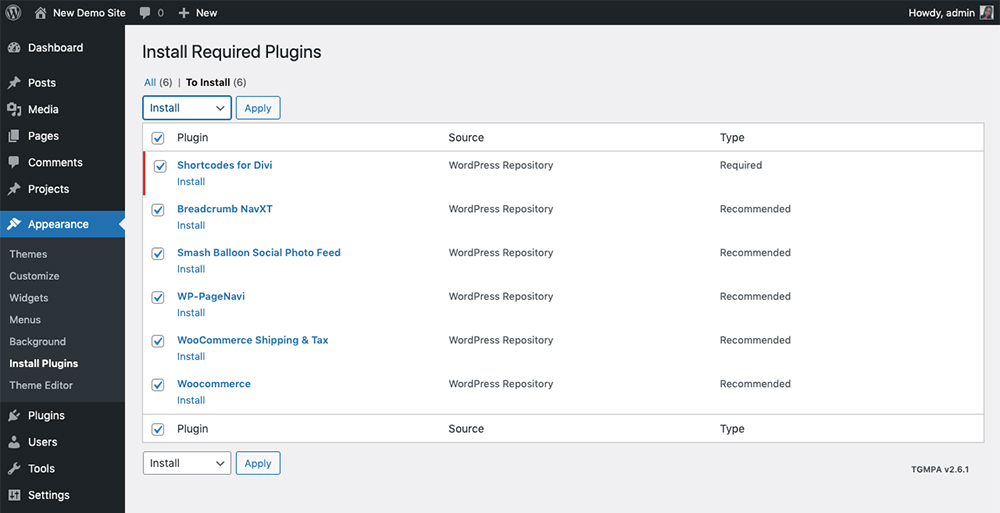
Including a “Required Plugins Installer”
A feature we are currently contemplating adding into the WP Layouts plugin is a Required Plugins Installer. This feature is present in all of our Divi child themes.
With this feature, it would extend the child theme functionality on the backend by displaying a list of required or suggested plugins that your customer should install. For example, if your child theme is for an online store like Divi Ecommerce, the plugin WooCommerce will be listed as a required plugin. After the customer activates the child theme, a required list of plugins will be displayed.
A WordPress required plugins notice
If the customer clicks Begin Installing Plugins, they’ll be taken to a screen that allows them to bulk install the plugins in one single click.
How to bulk install required plugins
Once the plugins have all been installed, they can also be activated in bulk.
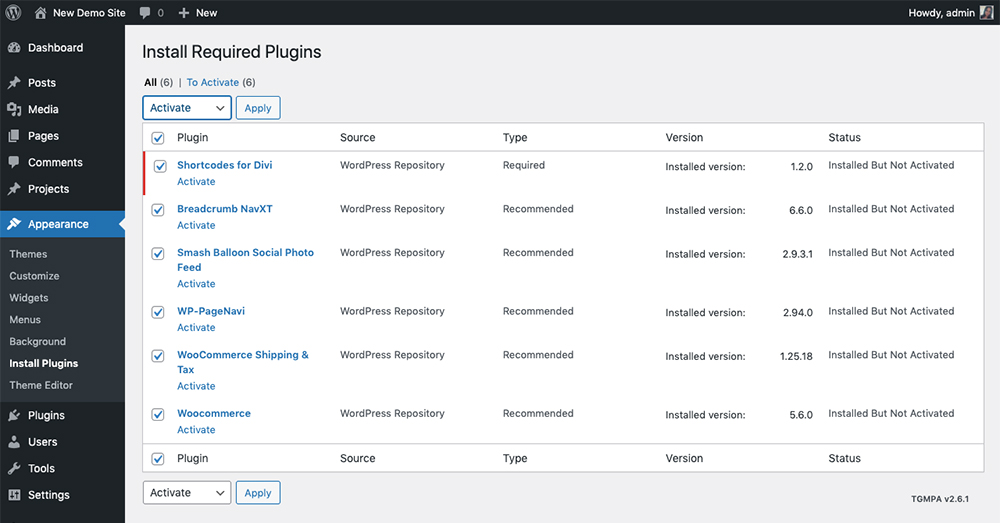
How to bulk activate required plugins
If this is a feature that would help you and your customers, let us know in the comments below and we’ll flag it as a feature request for our developers.
Ending Thoughts
Now that you’ve seen part of the import and export capabilities of the WP Layouts plugin, we hope you’re excited to start using this plugin in your development practice. We highly encourage developers to start creating child themes and selling them. We’ve been selling our child themes for years now, and not only is it a great revenue stream for our company, but it’s truly satisfying knowing we’ve helped so many more people build a great website.
If you’re ready to start building child themes, sign up for a WP Layouts account and start using the plugin. It’s 100% free. If you ever get stuck, our helpful support team is just a short email away.
We want to hear from you!
Have you developed and sold child themes before? What has your experience been like? Also, let us know whether we should include a Required Plugin Installer in the WP Layouts plugin.

I have followed all the steps but at the end Divi did not show the “Import Demo Data” Options. Can you please help me in this
Hi, please contact with our support https://wpzone.co/contact/
Hello, thank you for your guide.
I installed WP Layout to export a Divi theme to sell on marketplaces. I followed all the procedure correctly (even several times) choosing the Standalone Package mode but something is not working. I can correctly import the exported theme, but the option to import the demo does not appear.
I placed the code generated after export into the function.php file in the main folder (the one where I extracted the child theme files). I renamed the import folder “importer” and inside it there is the file importer.php. The path entered in the function.php file is: include_once _DIR_. ‘/importer/importer.php’ ;
I’m not sure if the path is correct though.
I would like help from you. Thanks.
Hello! Please contact our support: https://wpzone.co/contact/