Divi Business Pro
Visually striking, engaging and driven to help maximize conversions, Divi Business Pro has been designed to help brands thrive online. Suitable for a range of businesses, Divi Business Pro can be adapted for businesses that operate online as well as offline businesses that require a display site. With a beautiful color palette, bold typography, attractive hover states and playful use of opacity throughout the theme, Divi Business Pro will make a brand stand out from the get-go. Beyond aesthetics, Divi Business Pro boasts a range of deeply valuable elements and premium features, all geared to help businesses showcase their offerings with pride and convert potential customers into loyal followers. Bonus: Includes a single site license for the Testify plugin.
Quick Links
FAQ
- What are the child theme server requirements?
- What is demo data and how it works?
- Where to find help?
- What is a child theme and why should I use one?
- What is the difference between Divi Space's premium child themes and a standard (blank) child theme?
- What do I get when I buy a child theme?
- How do I choose the right child theme for my website?
- I don’t know how to code. Will I be able to customize my child theme?
- I’m looking for a standard, blank Divi child theme. How can I make one of those?
- What about support, licensing, and updates?
- Are child themes included in your membership?
Whenever you update child theme, all of the files are updated so if you have made any changes to these files, those changes will be erased. We don't recommend making any changes to the child theme files.
Requirements
Before you can install and use our child theme, you need to ensure that you have the proper environment setup. The requirements are provided here
Installing the child theme
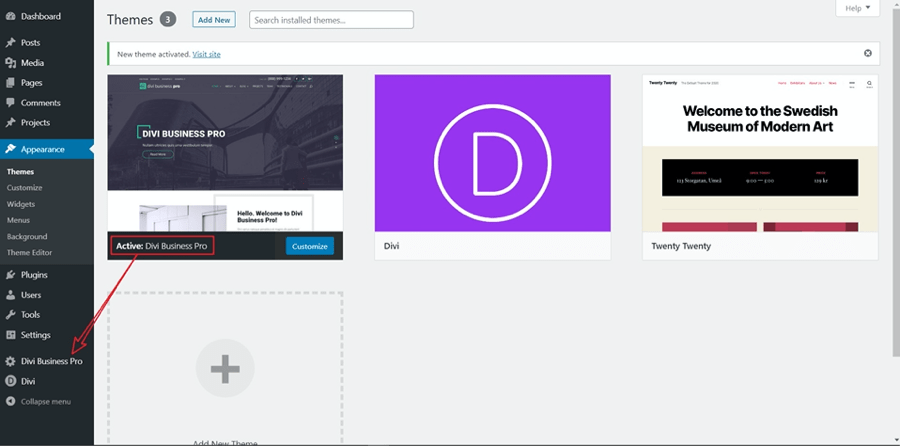
Please upload the Divi Business Pro Child Theme to you your self-hosted WordPress website. Make sure the Divi theme is already installed and activated.
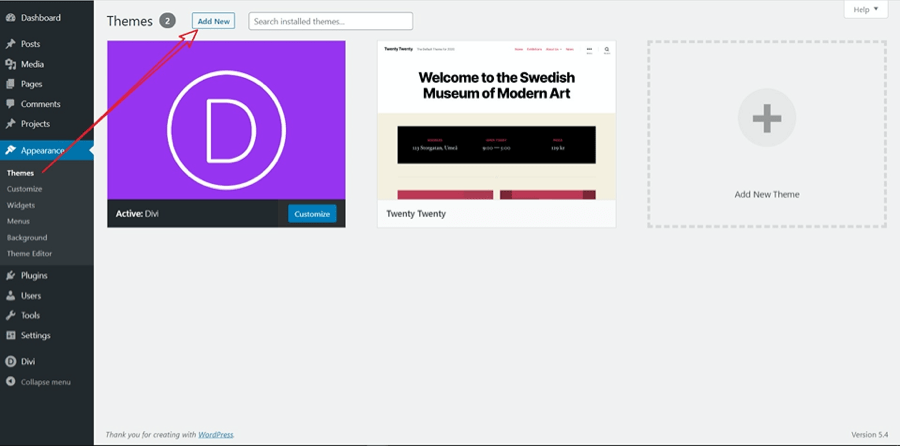
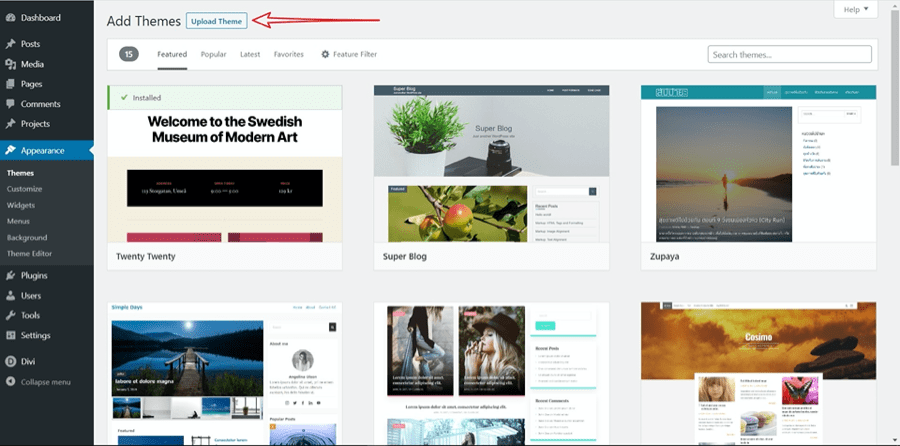
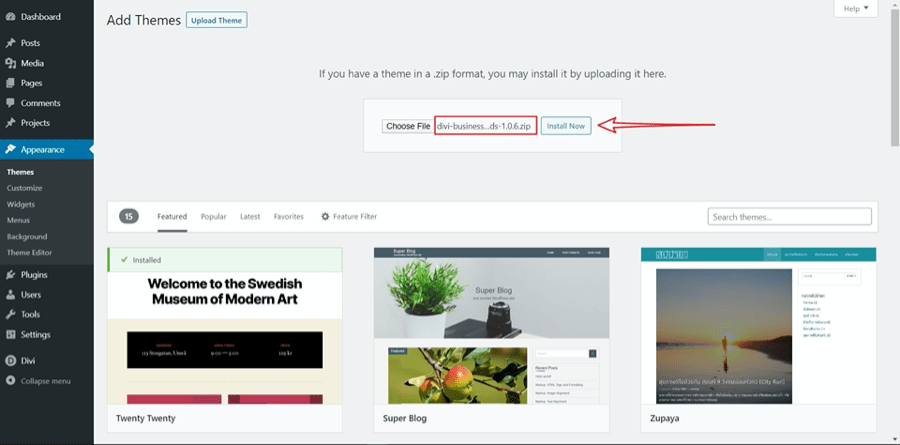
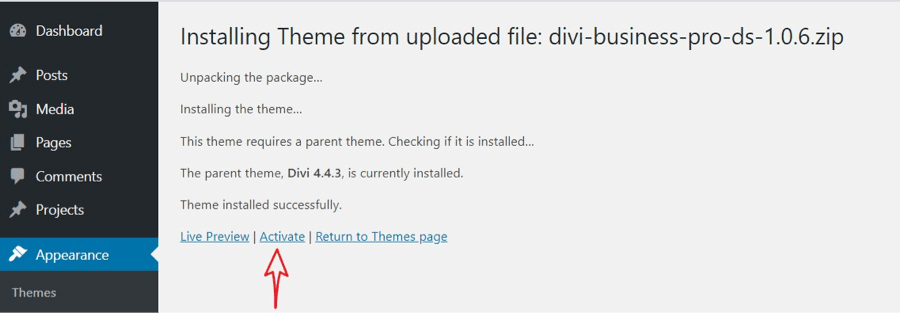
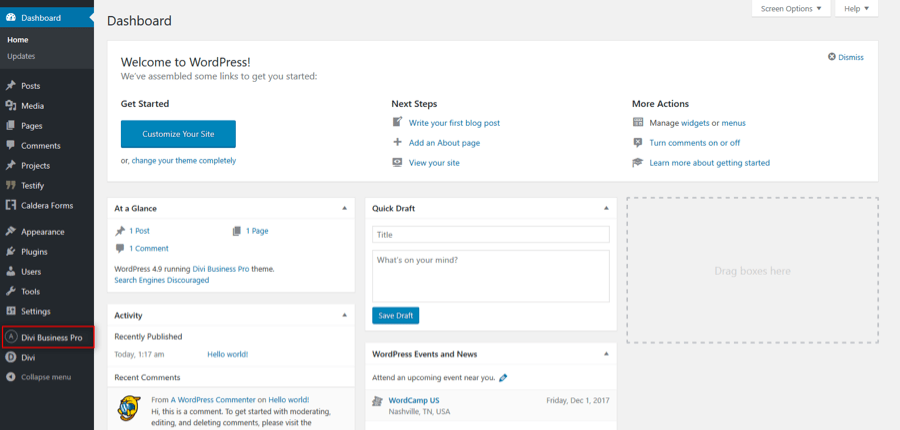
After you have activated the child theme, click on the 'Divi business pro' menu item on your left panel.
Installing required plugins
Once the theme is installed on your site, the system will suggest you install & activate some Plugins. Please click the Plugin Names or Begin Installing Plugins link on the dashboard screen and start the process. This function is, however, optional.
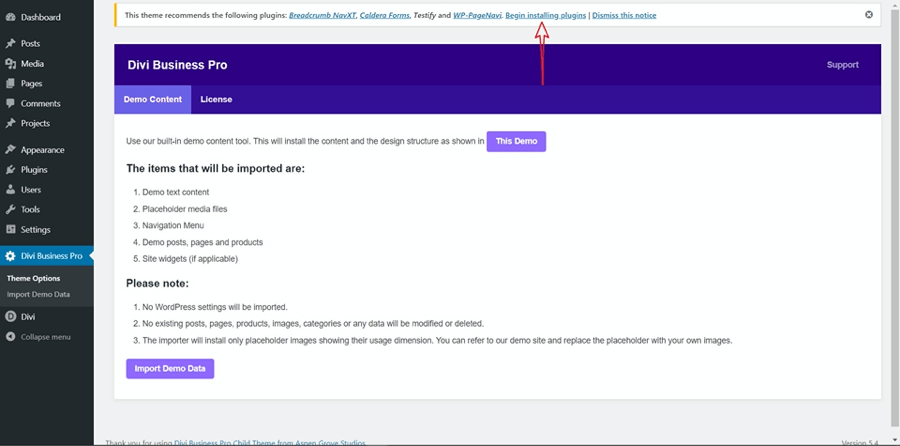
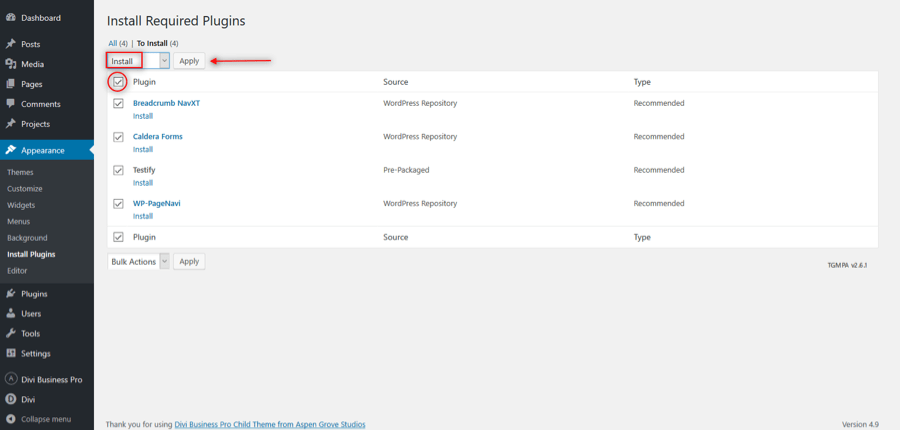
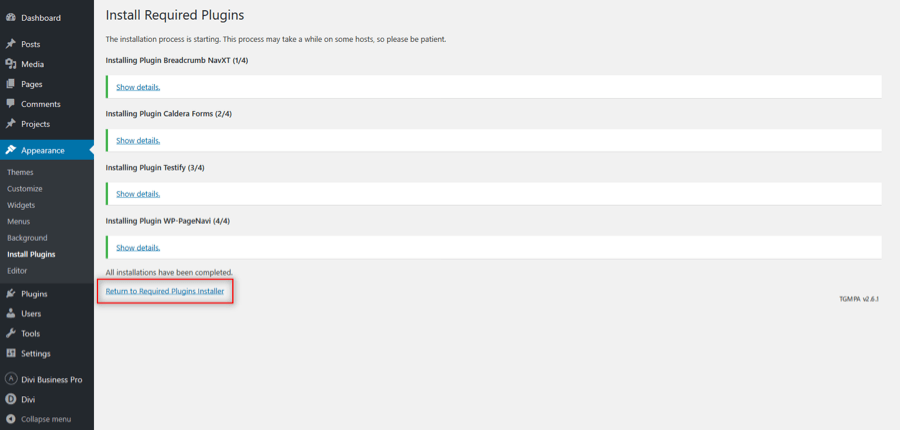
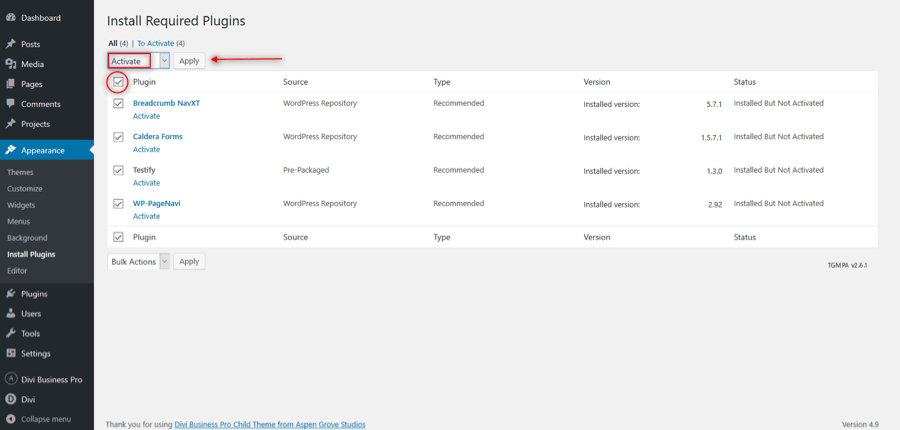
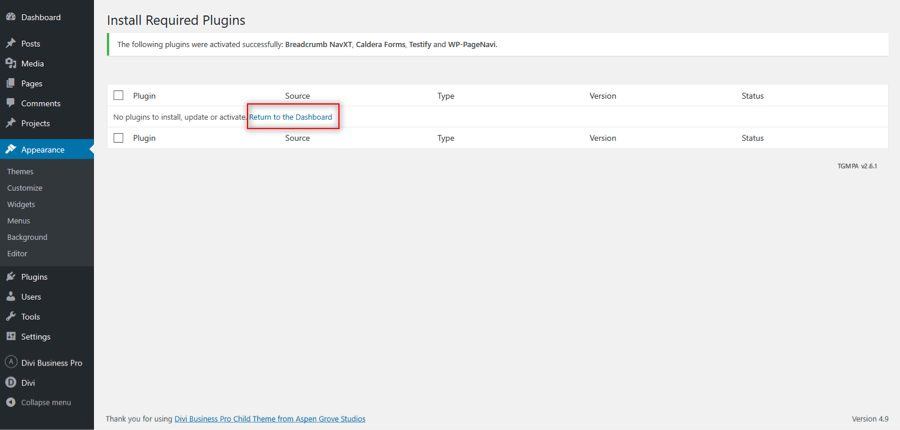
For the next step, click on the 'Divi Business Pro' menu item on the left panel.
Import Demo Data
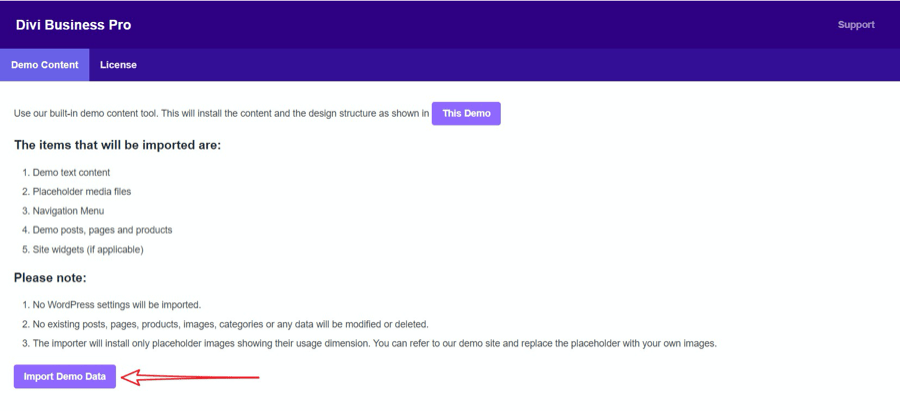
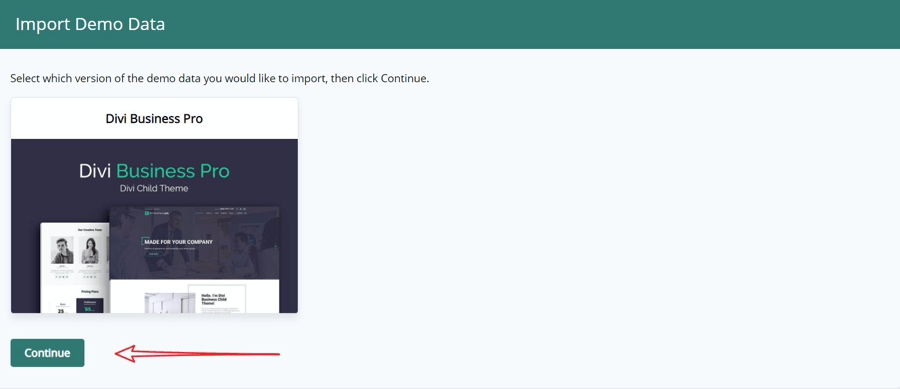
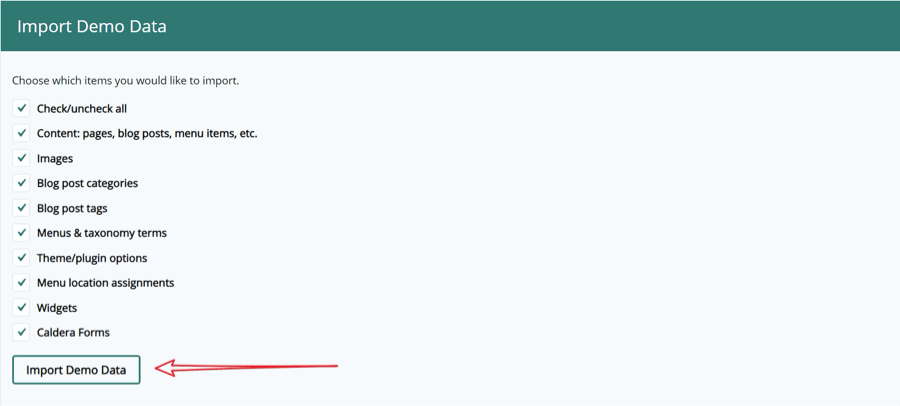
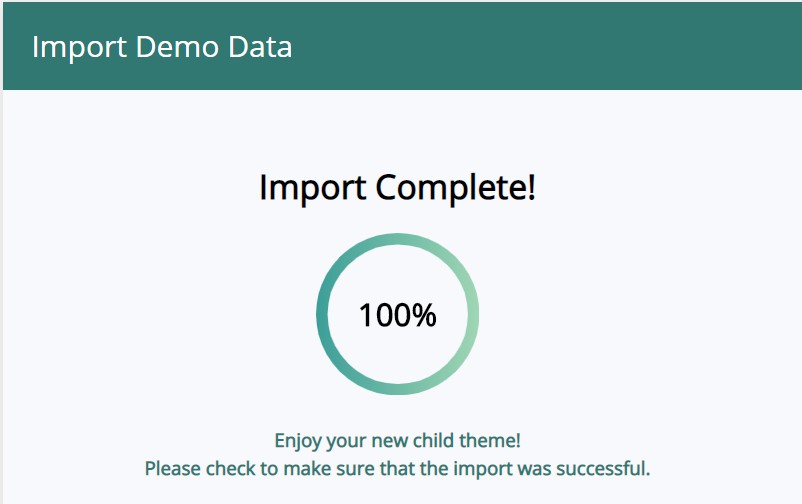
From the WordPress Dashboard, go to the newly added tab bearing the name of your "Divi Business Pro" child theme on the left admin panel. Under that menu, please click on ‘Import Demo Data’ and then follow the instructions provided on the page. Please be patient while the demo data of the Divi Business Pro child theme is imported into your site.
Homepage Settings
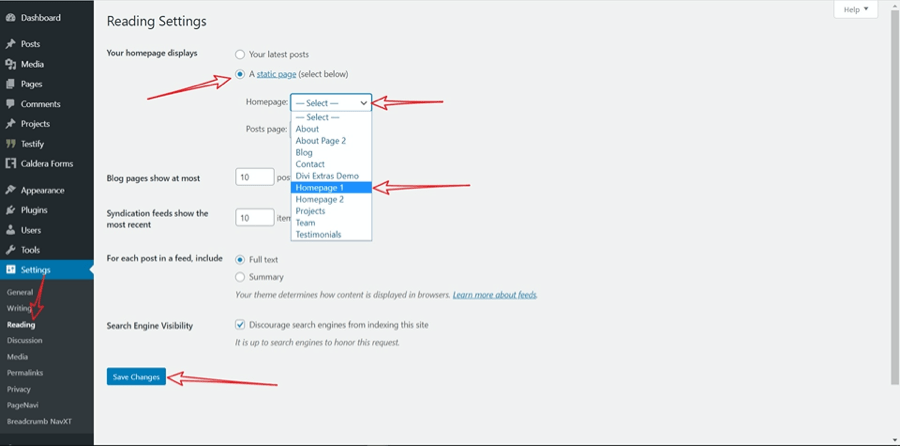
Move to the settings area in your left Admin panel. Click ‘ Reading’, under ‘Your homepage displays’ select ‘A static page’ and for the Homepage drop-down menu select either ‘Homepage 1’ or ‘Homepage 2’.
Posts page settings
While you are in the ‘Reading’ settings, under the ‘Posts page’ select ‘Blog’.
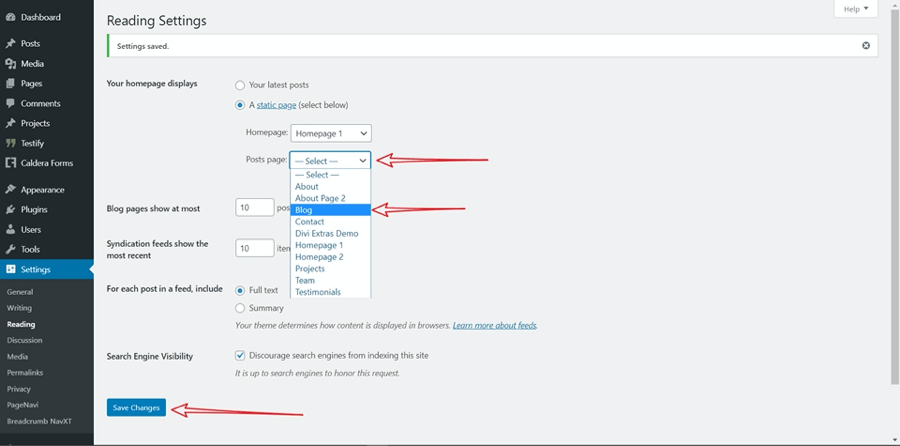
Remember to Save Changes before moving on to the next step.
Widget sesttings
Move back to the ‘ Appearance’ tab in your left Admin Panel and select ‘Widgets’. Make sure the Sidebar and Footer Area #1 widget areas contain only the widgets shown below:
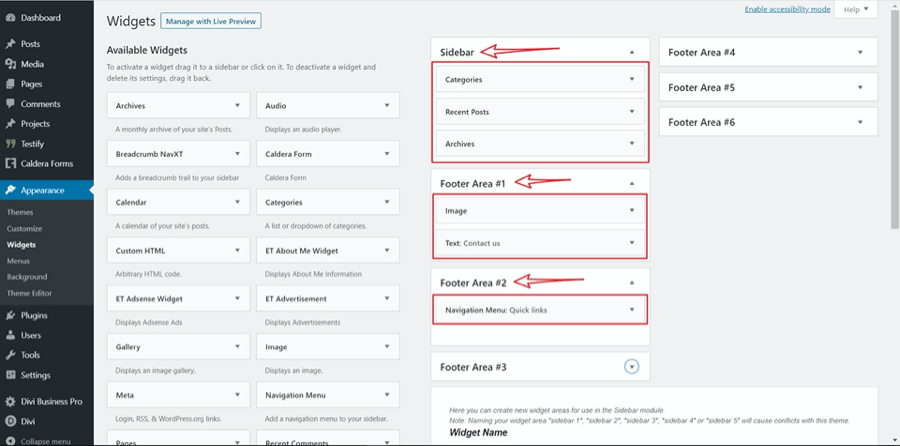
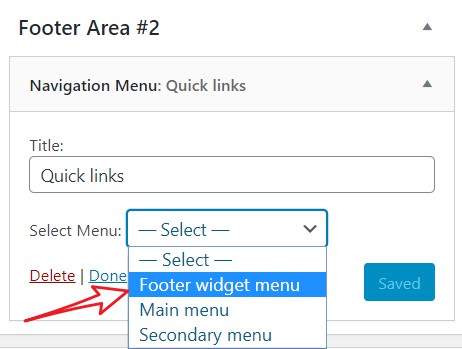
Open the widget in the Footer Areas #2 and select the Footer widget menu from the dropdown:
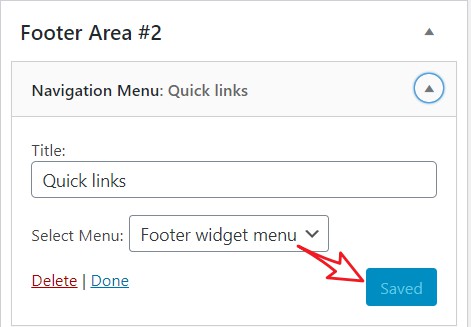
Don't forget to save the widget settings.
Customizing Divi Business Pro
A new set of controls are added to the theme customizer to make it easy to make adjustments.
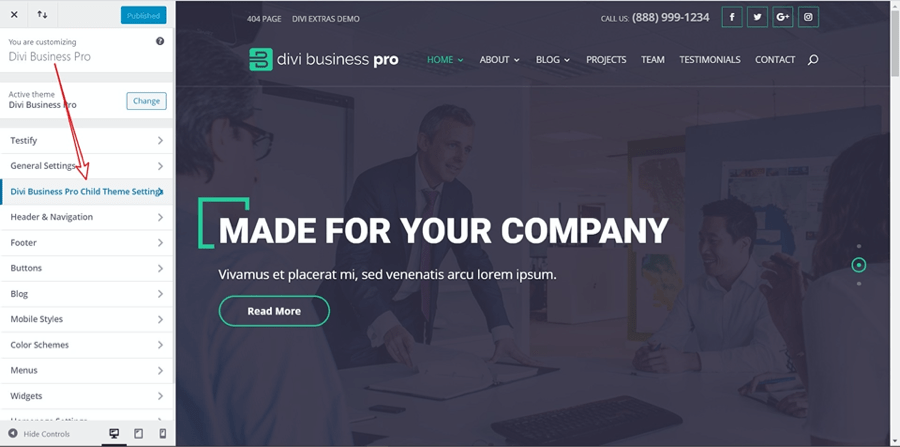
These are the options found under this new Customizer section.
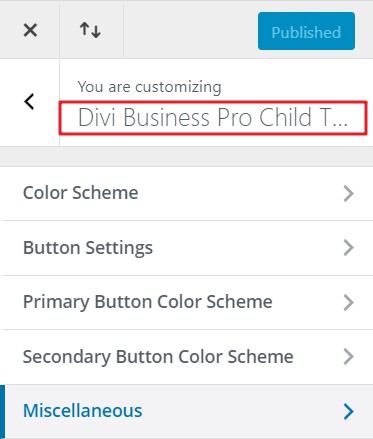
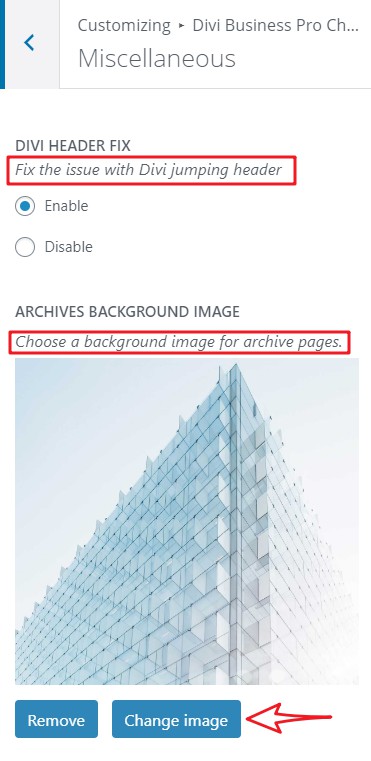
The miscellaneous has two options that are very useful, the first is a fix for the "Divi Jumping Header Issue" which sometimes appears on certain hosting environments, and the second is the ability to add a background image to your site's archive pages.
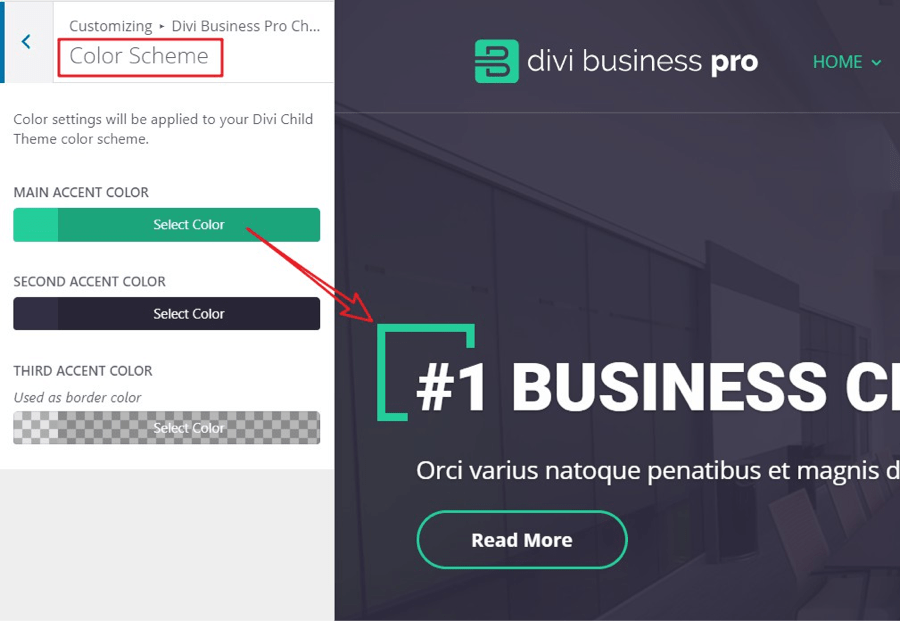
The Color Scheme adds adjustments for the main, second, and third accent colors.
Button Settings let you change the text size and border-radius.
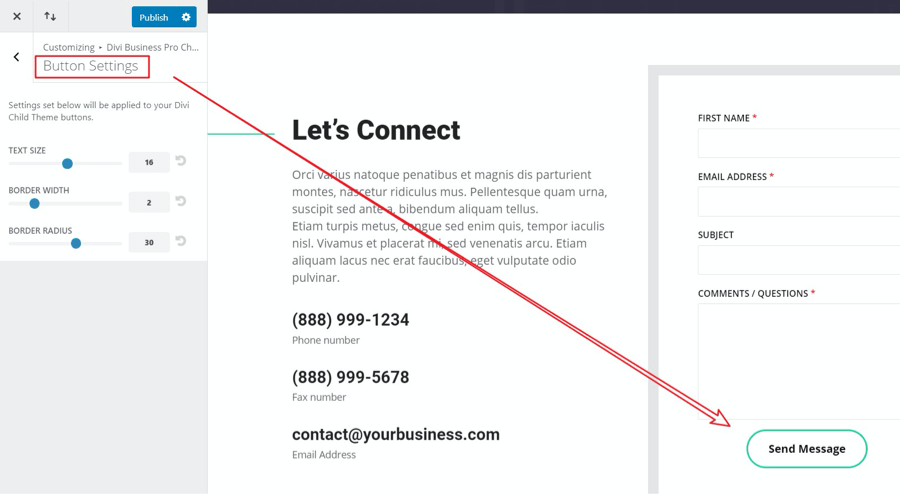
The Primary Button Color Scheme lets you change the text, border, and background colors for the button. You can change the default colors and background colors independently. The Secondary Button Color Scheme changes the default and hover-colors for the Caldera form.
How to inject a Divi Layout in Divi Business Pro's 404-page
Here's what you need to do:
This will add your Divi layout below the page title, replacing existing content.
- Take your 404-page designed in Divi and save the layout to the library
- Navigate to Appearance >>> Editor
- On the right sidebar find 404.php and click on the link to open the template
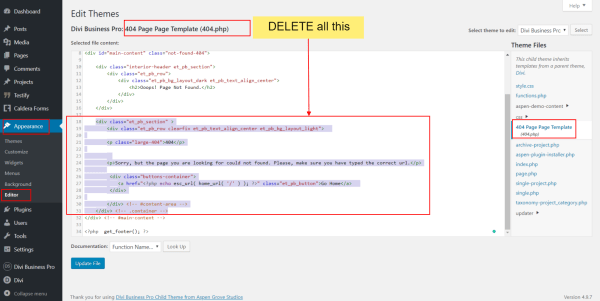 4. Select all content from line 18 to line 31 and delete it
5. In place of the deleted content add this line:
<?php echo do_shortcode('[et_pb_section global_module="MY LAYOUT ID"][/et_pb_section]'); ?>
- Replace MY LAYOUT ID for the ID of the library item that is your 404 designAfter performing steps 4-6, It will look like this:
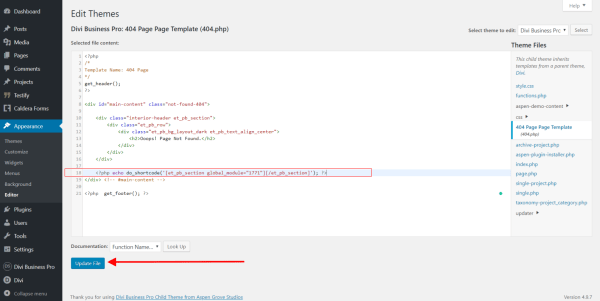
- UPDATE FILE
Changelog
See the ChangeLog text for this child theme by following this link https://wpzone.co/product/divi-business-pro/changelog/