Walden
Developed specifically for fitness and exercise brands in mind, the Wodster premium Divi child theme is sure to create the perfect website for a range of independent gyms, training facilities, and online physical coaches. Along with bold fonts, attention-grabbing image sections and striking color accents, Wodster is designed to stand out from the pack, ensuring that your fitness brand will maximize conversions from the second that visitors land on your site. From communicating brand objectives and introducing staff and trainers through the About section to helping new users navigate through both the site itself as well as the sign-up process, Wooster takes care of every aspect of marketing an online fitness and exercise brand.
Quick Links
FAQ
- What are the child theme server requirements?
- What is demo data and how it works?
- Where to find help?
- What is a child theme and why should I use one?
- What is the difference between WP Zone's premium child themes and a standard (blank) child theme?
- What do I get when I buy a child theme?
- How do I choose the right child theme for my website?
- I don’t know how to code. Will I be able to customize my child theme?
- I’m looking for a standard, blank Divi child theme. How can I make one of those?
- What about support, licensing, and updates?
- Are child themes included in your membership?
Whenever you update child theme, all of the files are updated so if you have made any changes to these files, those changes will be erased. We don't recommend making any changes to the child theme files.
Requirements
Before you can install and use our child theme, you need to ensure that you have the proper environment setup. The requirements are provided here
Installing the child theme
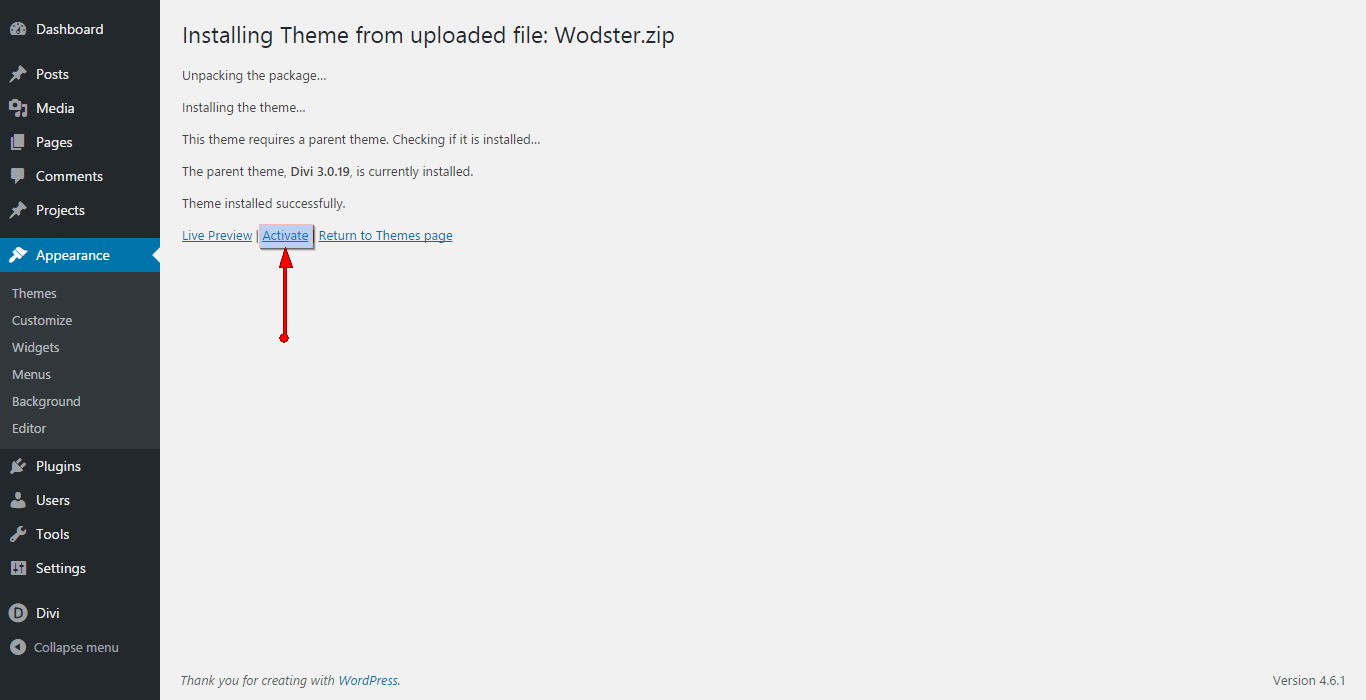
Please upload the Wodster Child Theme to you your self-hosted WordPress website. Make sure the Divi theme is already installed and activated.
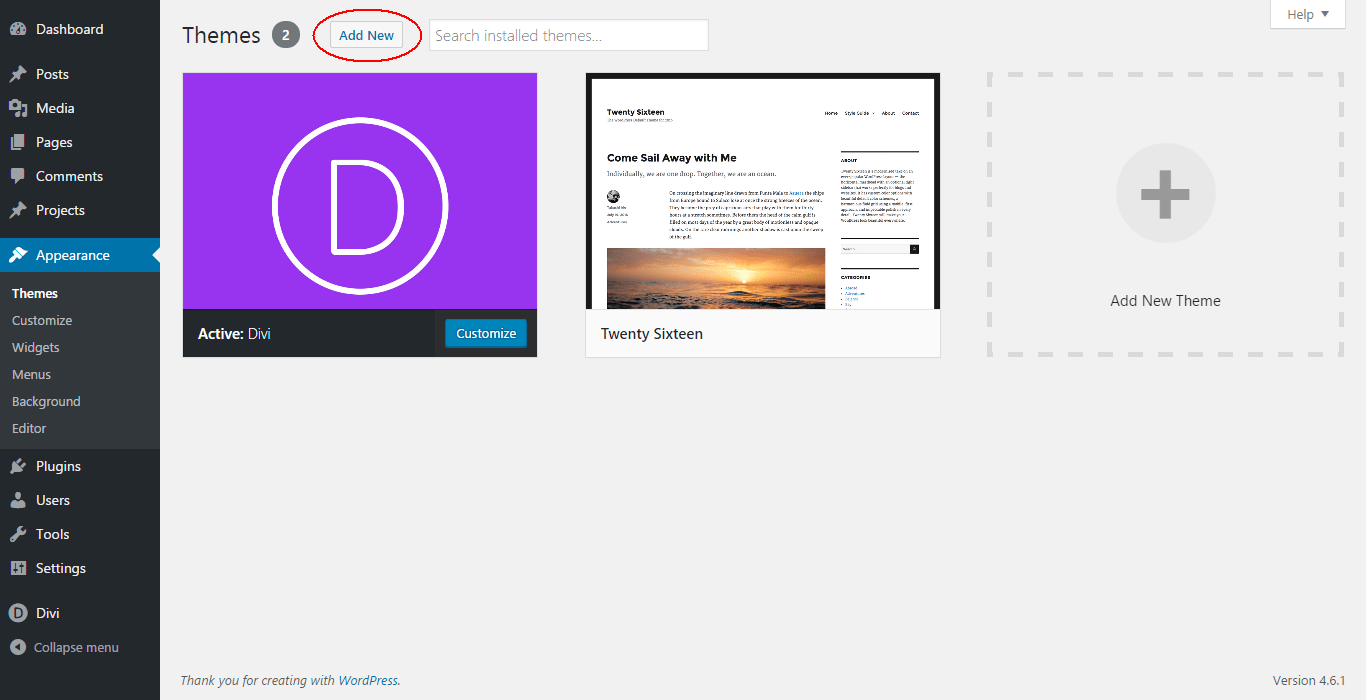
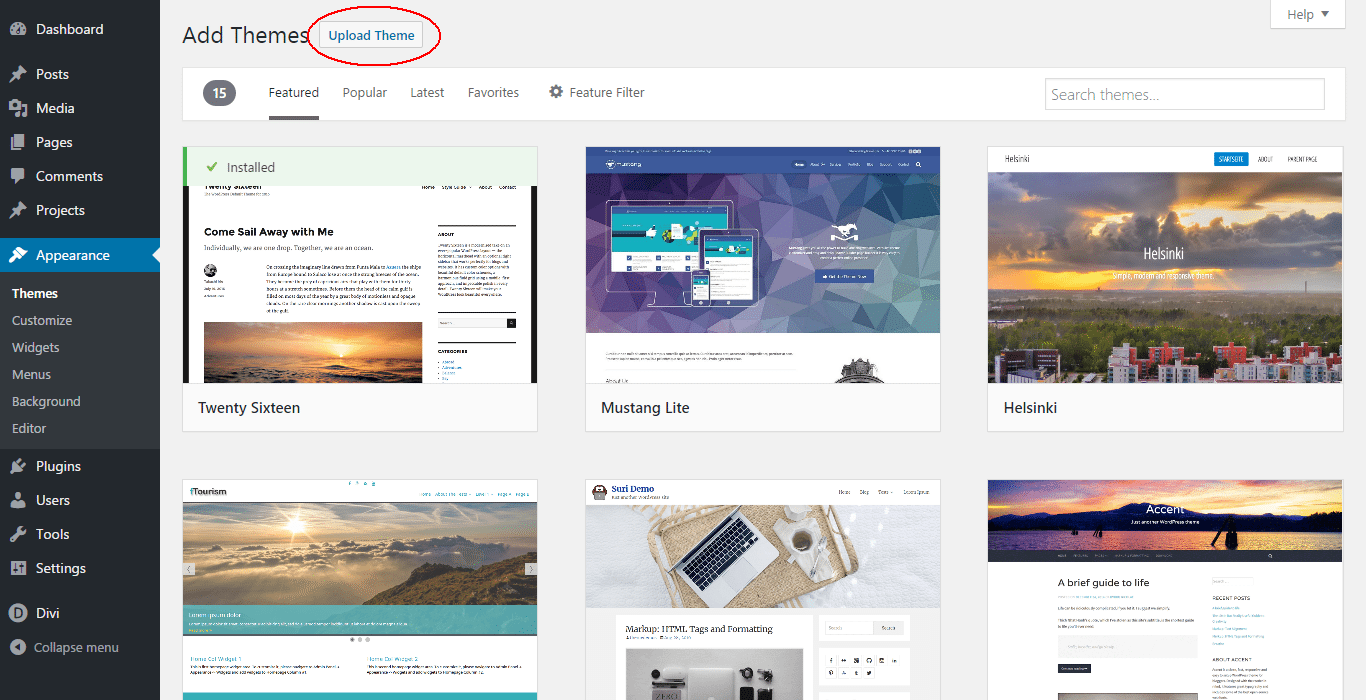
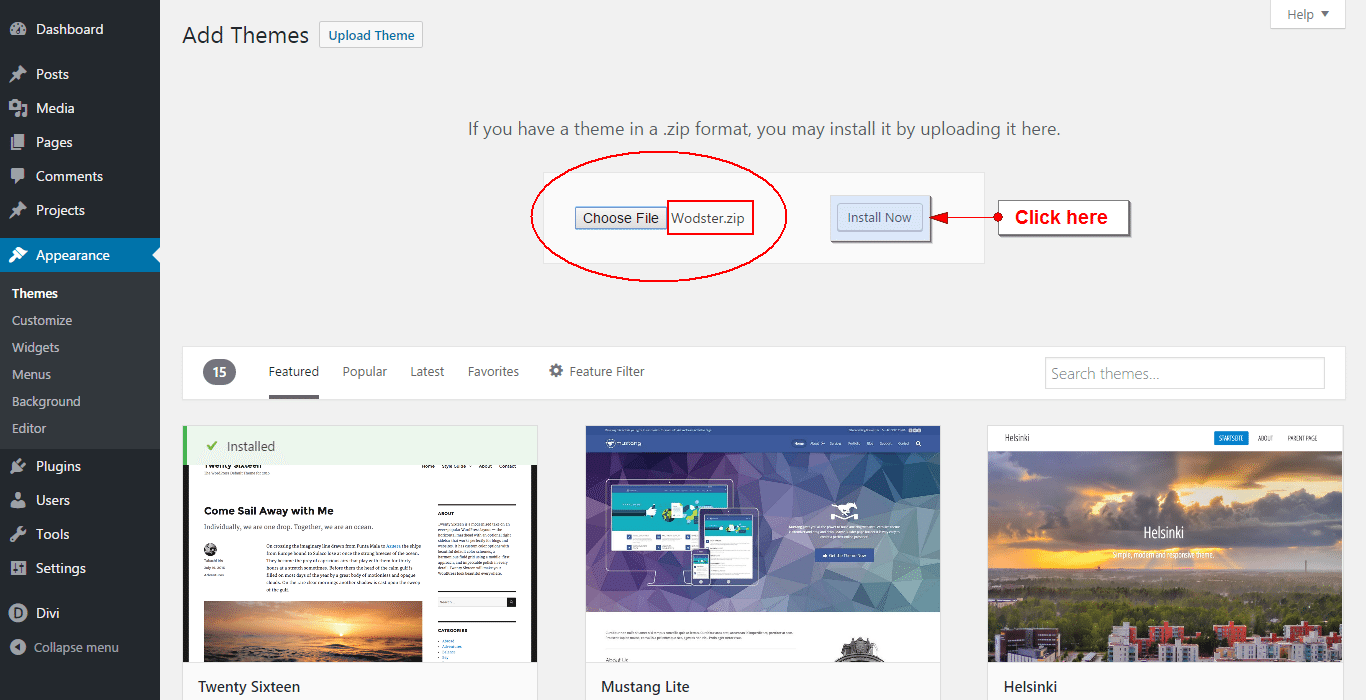
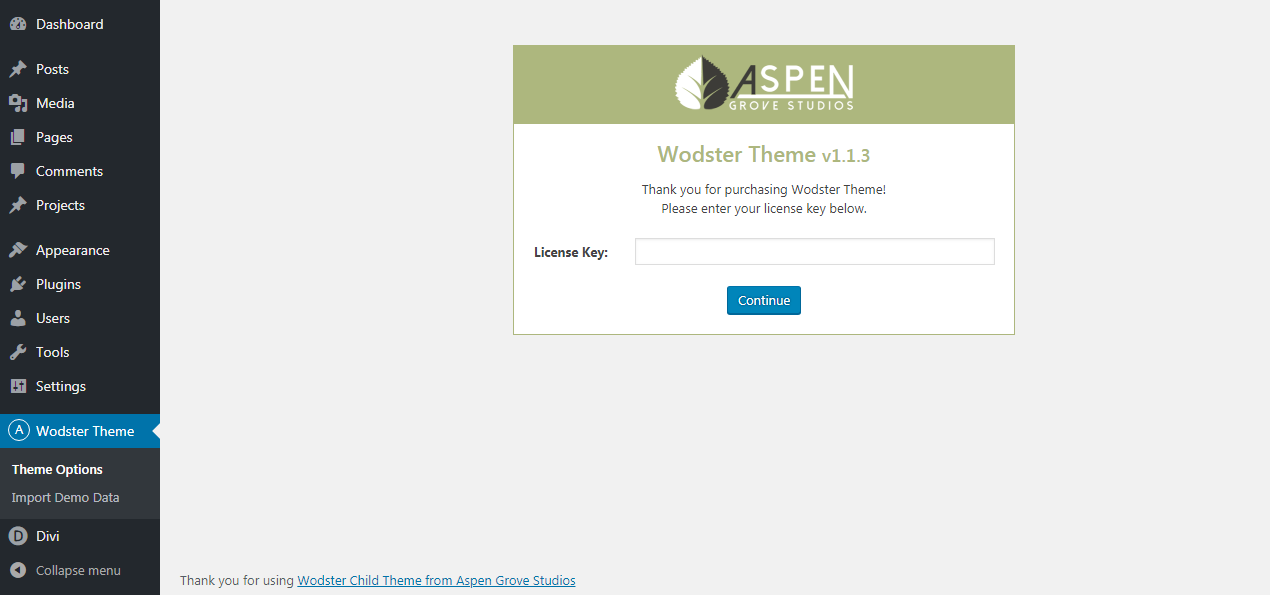
Enter license key
After you have activated the Child theme, click on the 'Wodster' menu item on your left Admin panel and register your license key in the input field provided in the dialogue box that pops up; then click 'Continue'.
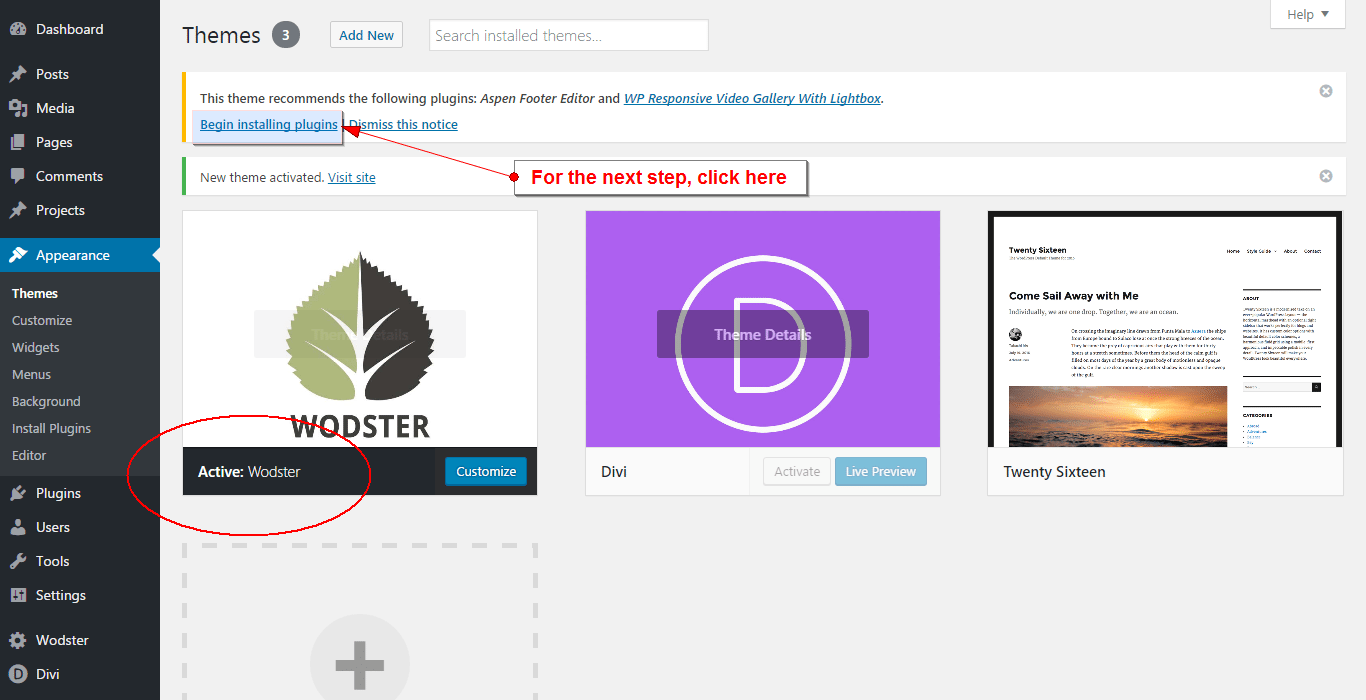
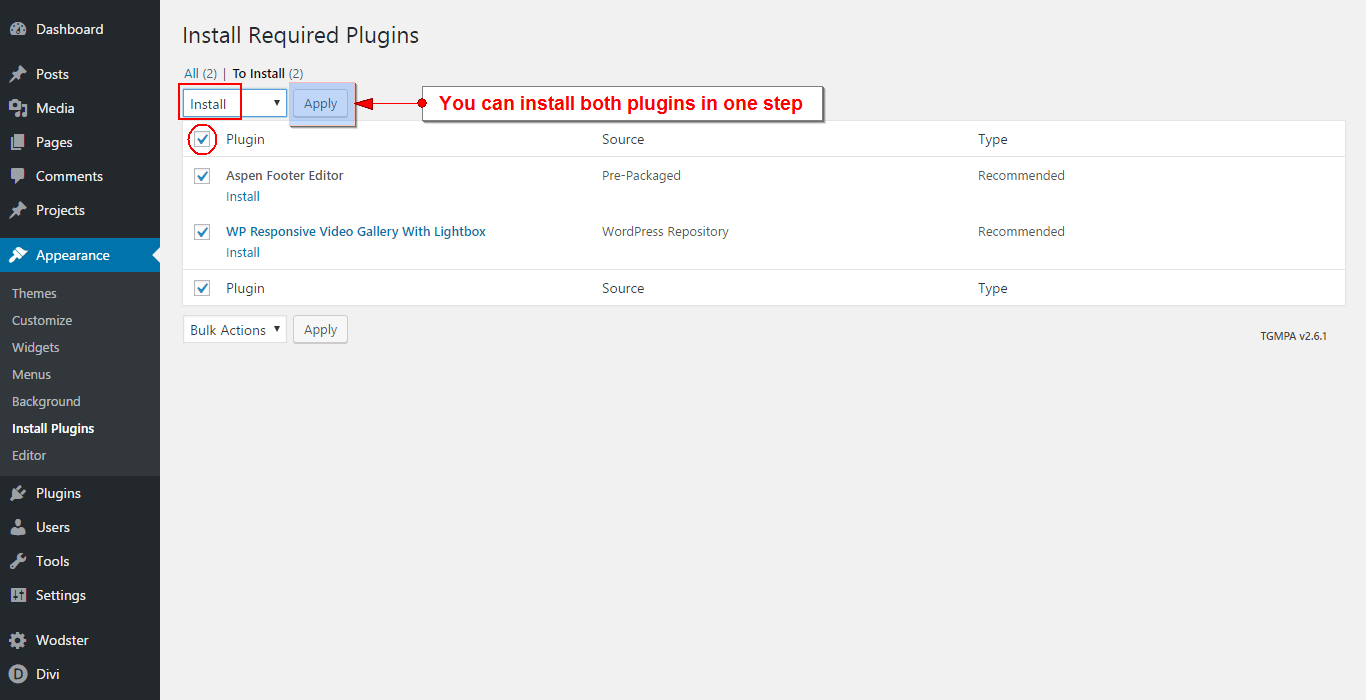
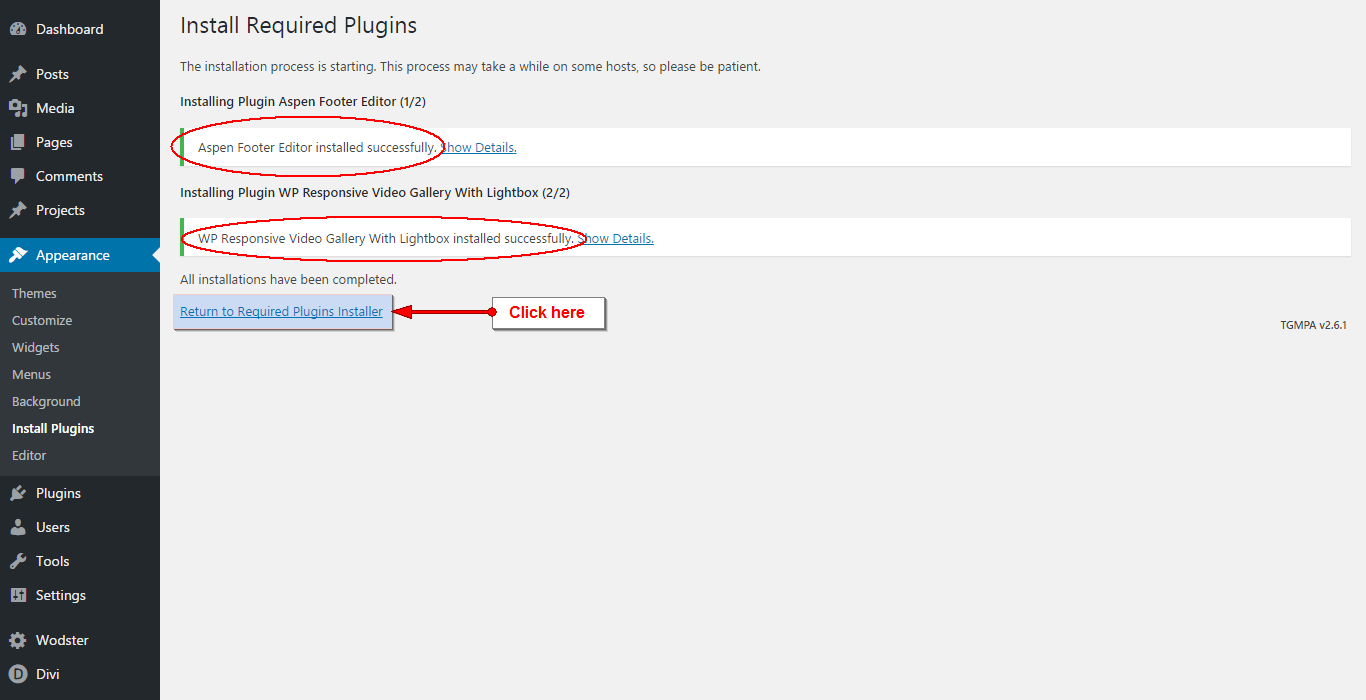
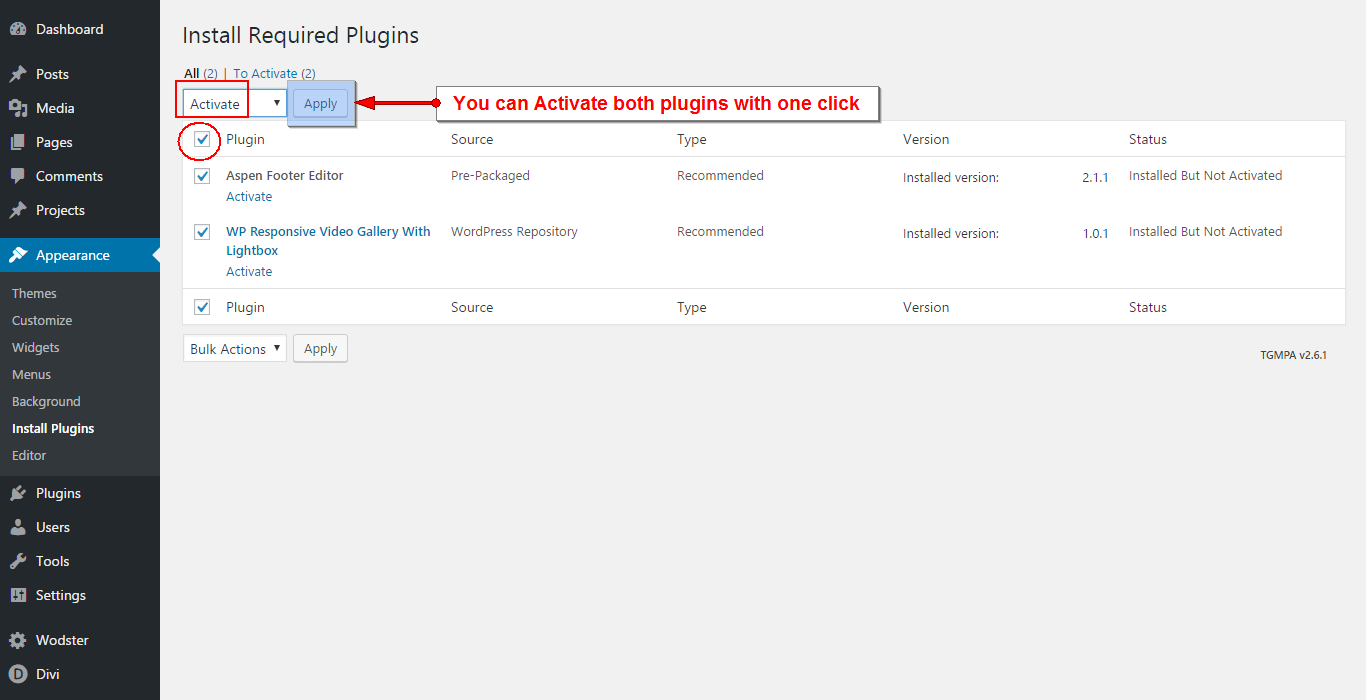
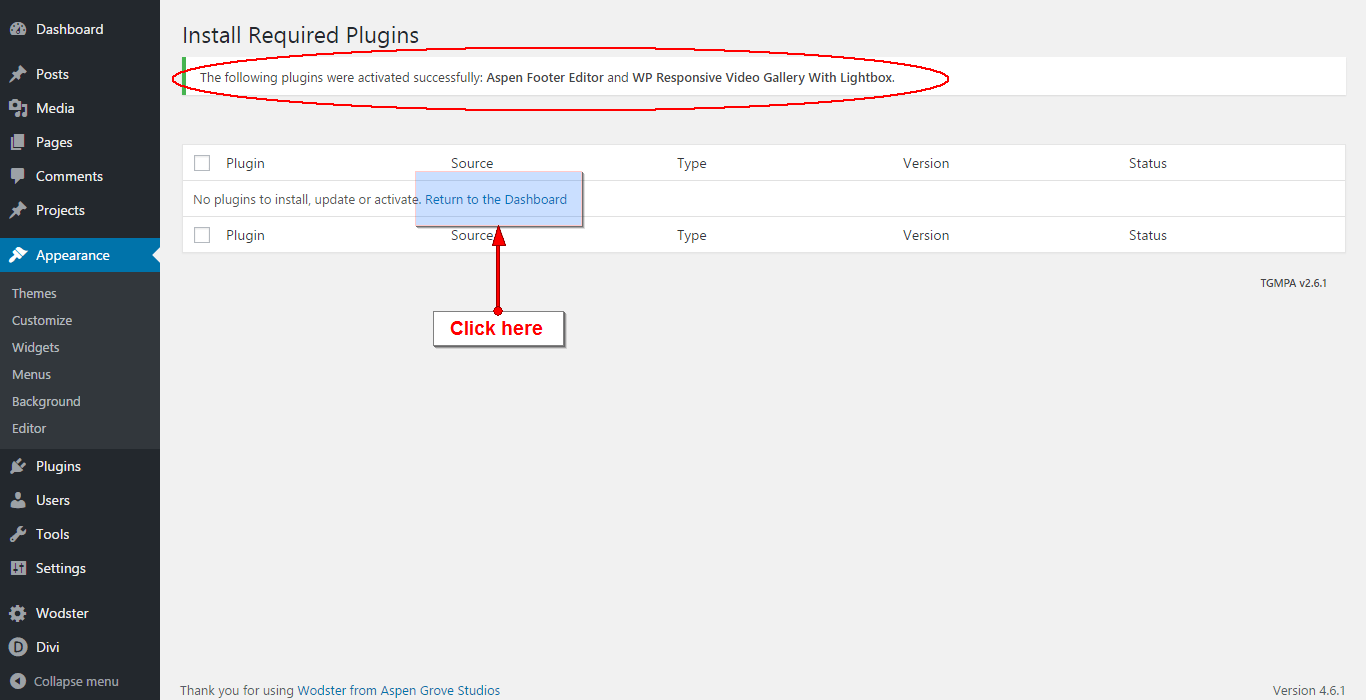
Installing the required plugins (WP Responsive Vide Gallery with Lightbox and the Aspen Footer Editor
Please click the Plugin Names or Begin Installing Plugins link on the dashboard screen and start the process.
Install Bloom plugin (optional)
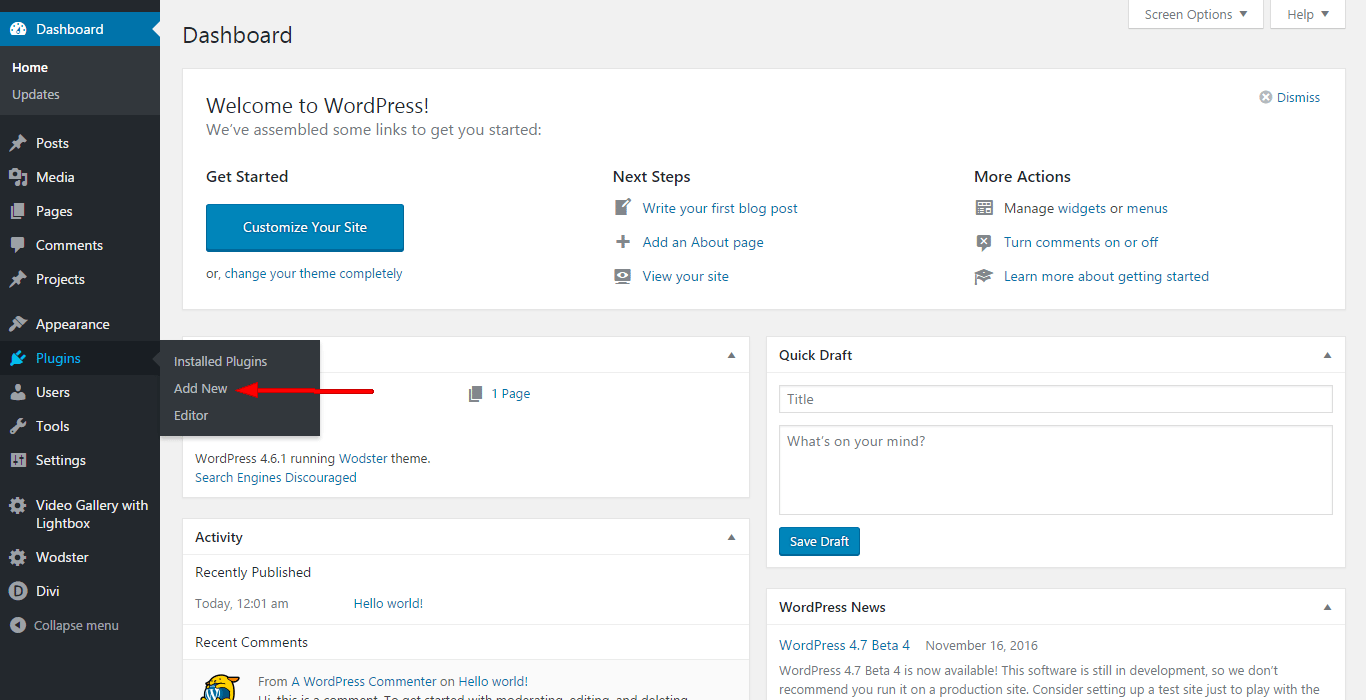
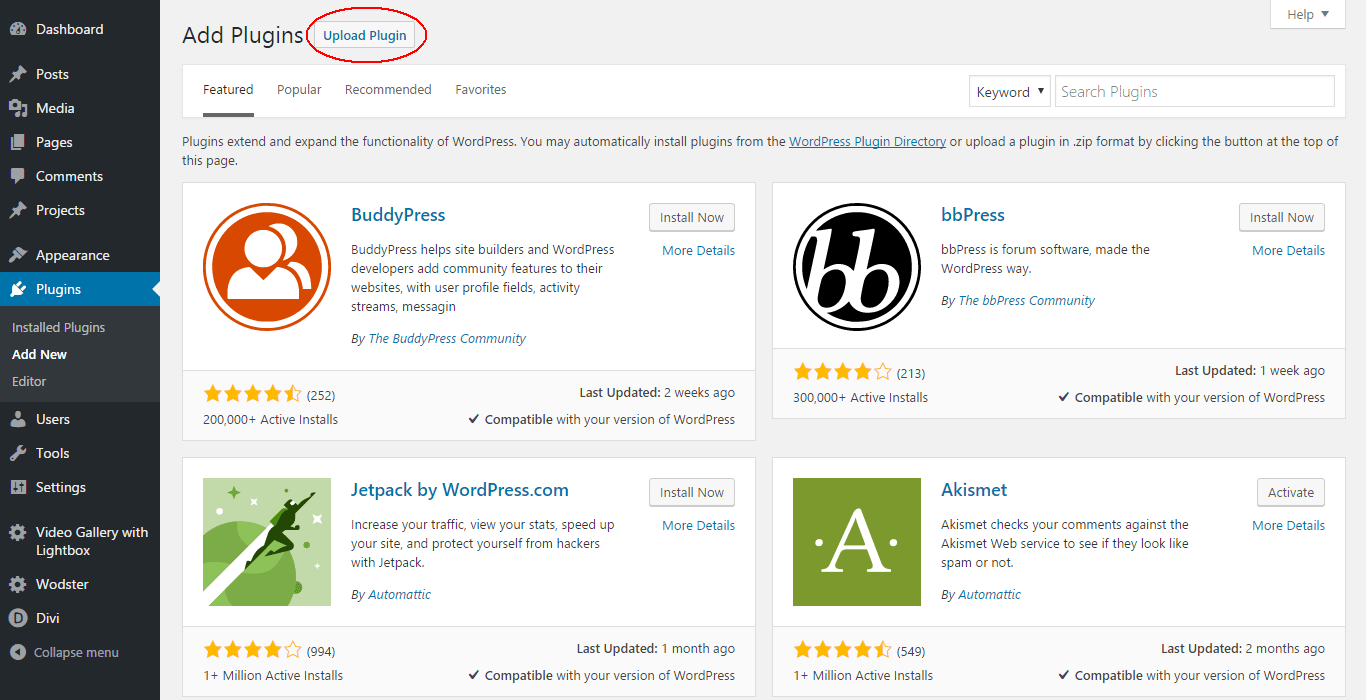
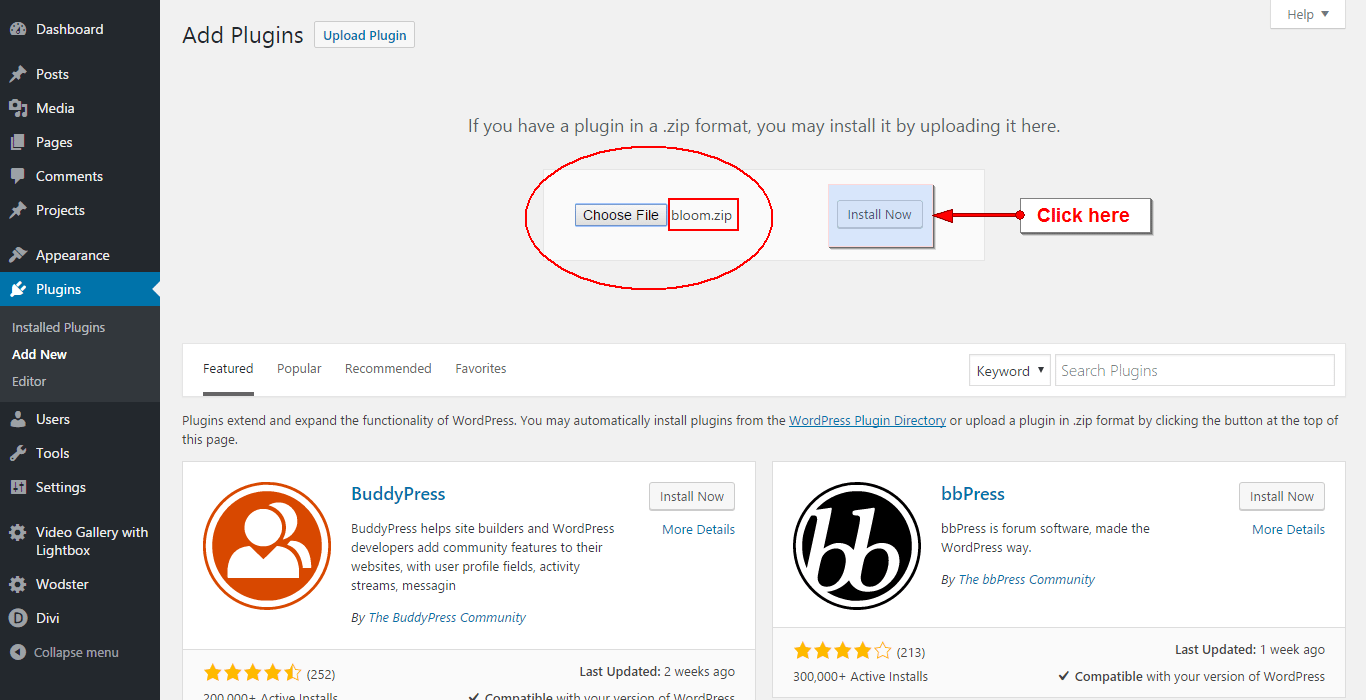
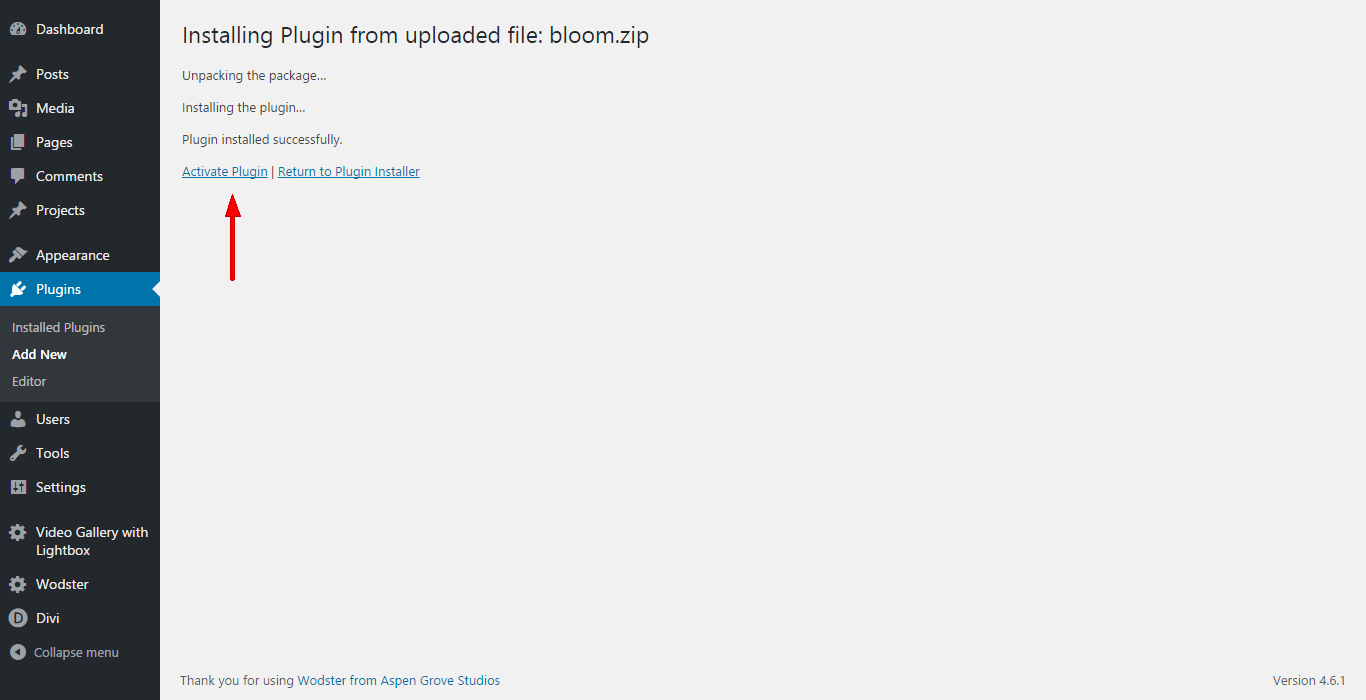
Download the Bloom Plugin from Elegant Themes. From the WordPress Dashboard go to the Plugins page and select "Add New Plugin", on the next page, click "Upload Plugin". Then select the Bloom zip file from your computer and click "Install". Once Bloom is installed, go ahead and activate the plugin. While this plugin is optional, you must install it BEFORE importing this theme’s demo data.
Import Bloom settings
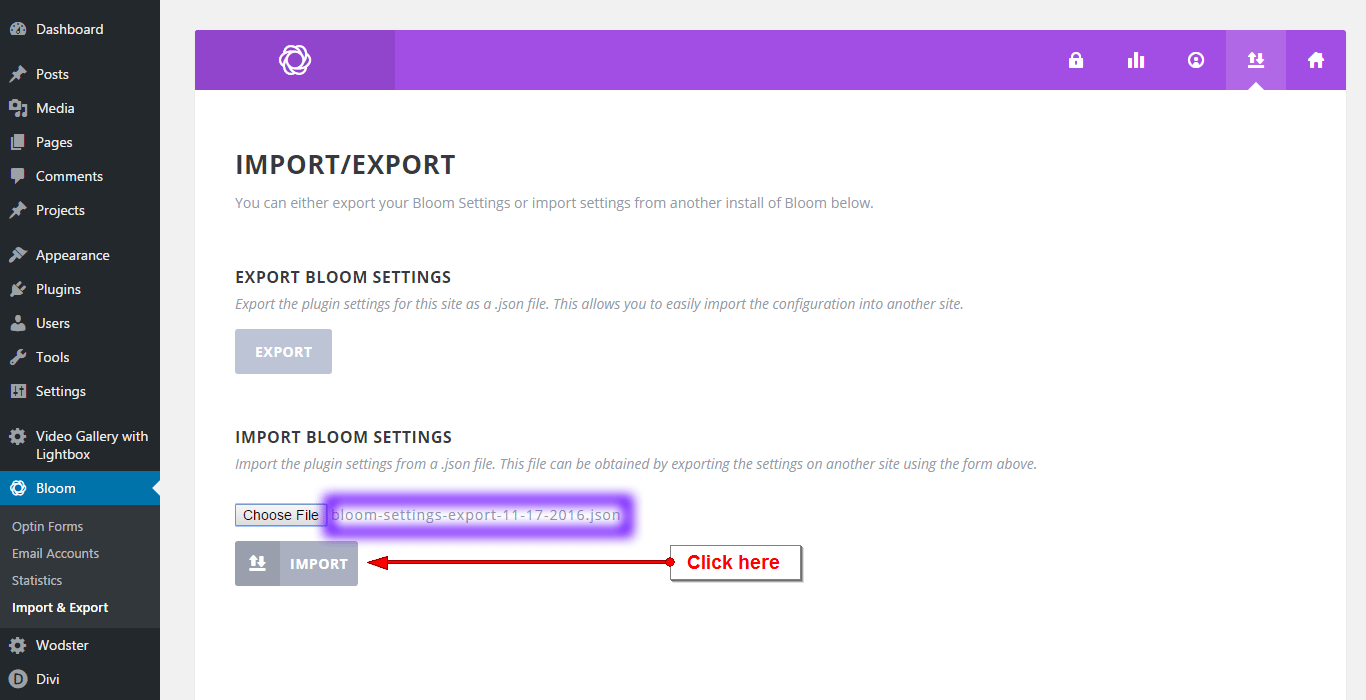
Locate the Bloom Setup .json file on your computer. This .json file can be accessed from your account downloads dashboard along with the child theme file. From the WordPress Dashboard hover over the Bloom Menu item and click on the Submenu Item "Import & Export".
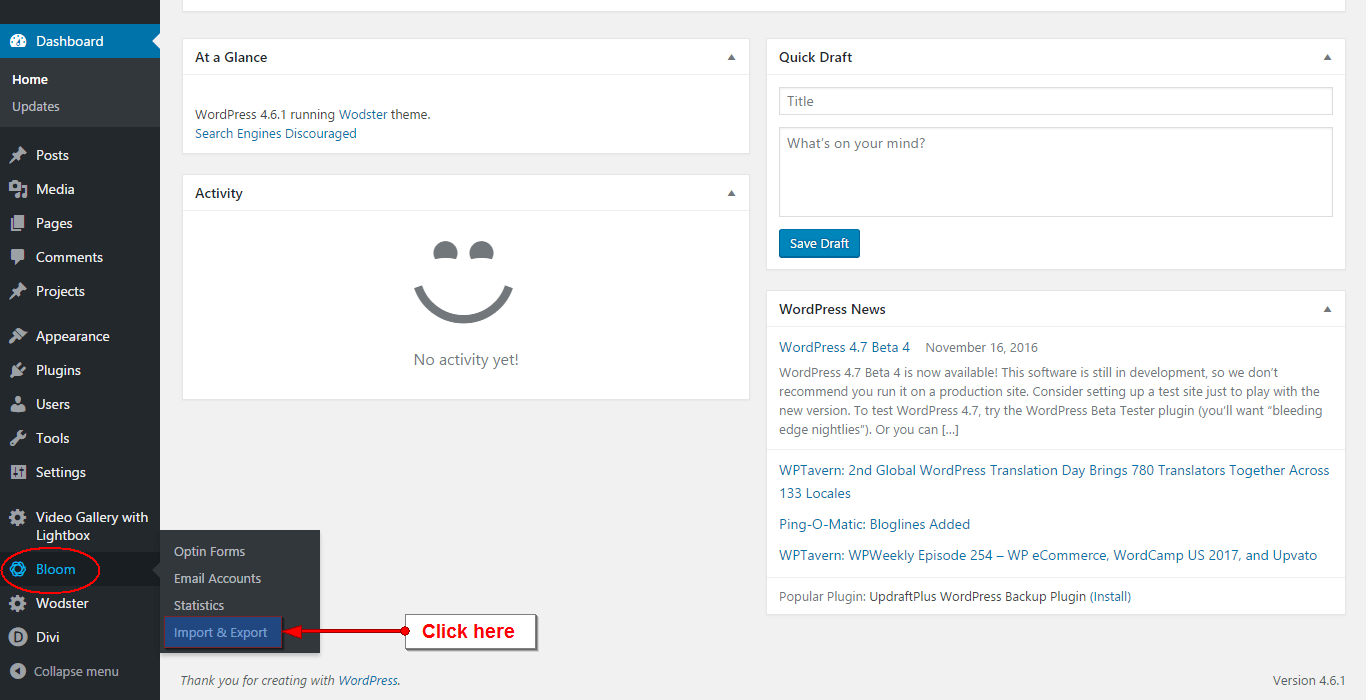
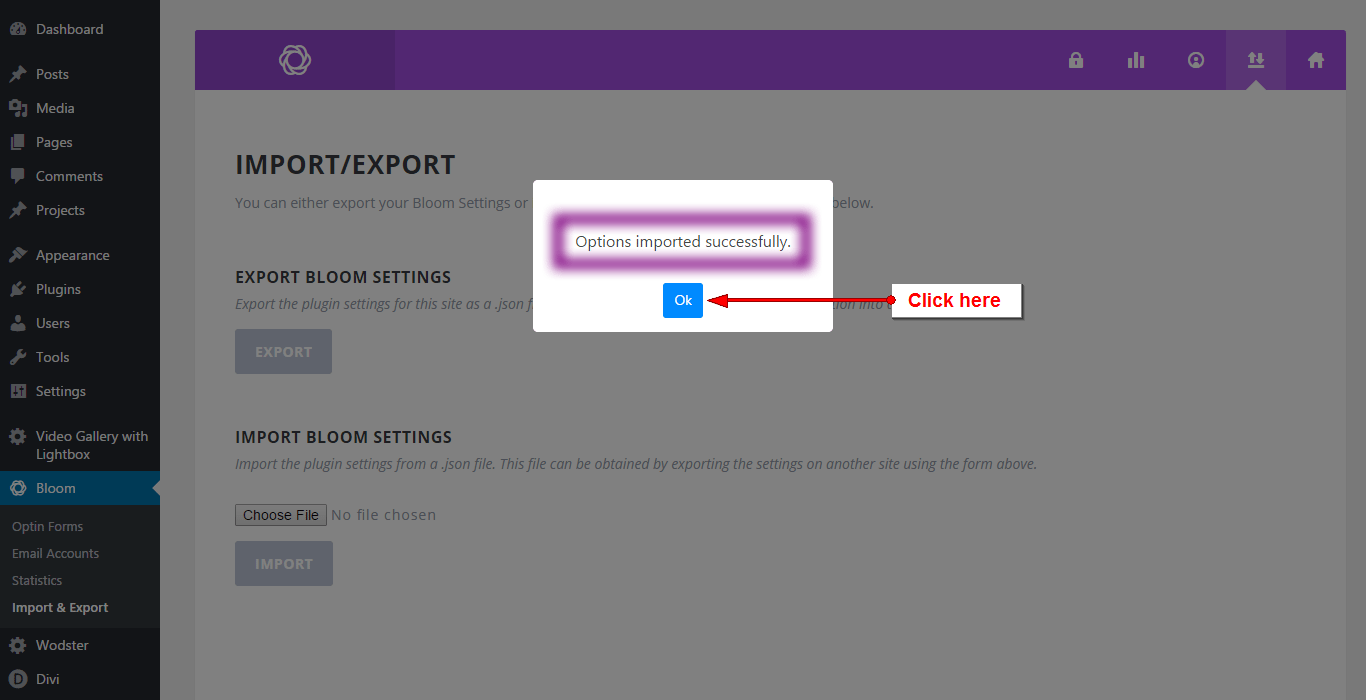
Under the IMPORT BLOOM SETTINGS subtitle, click the "Choose file" button and select the appropriate .json file from your computer. Click the "IMPORT" button.
Activate Bloom opt-in
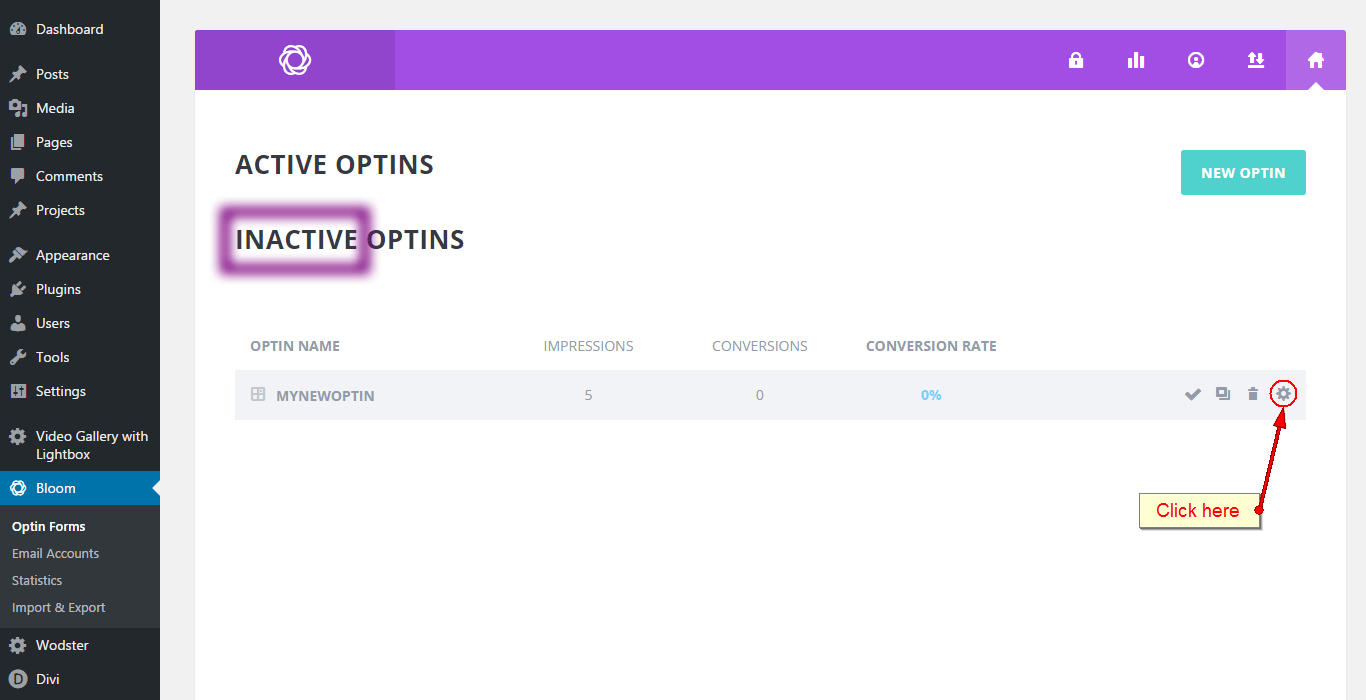
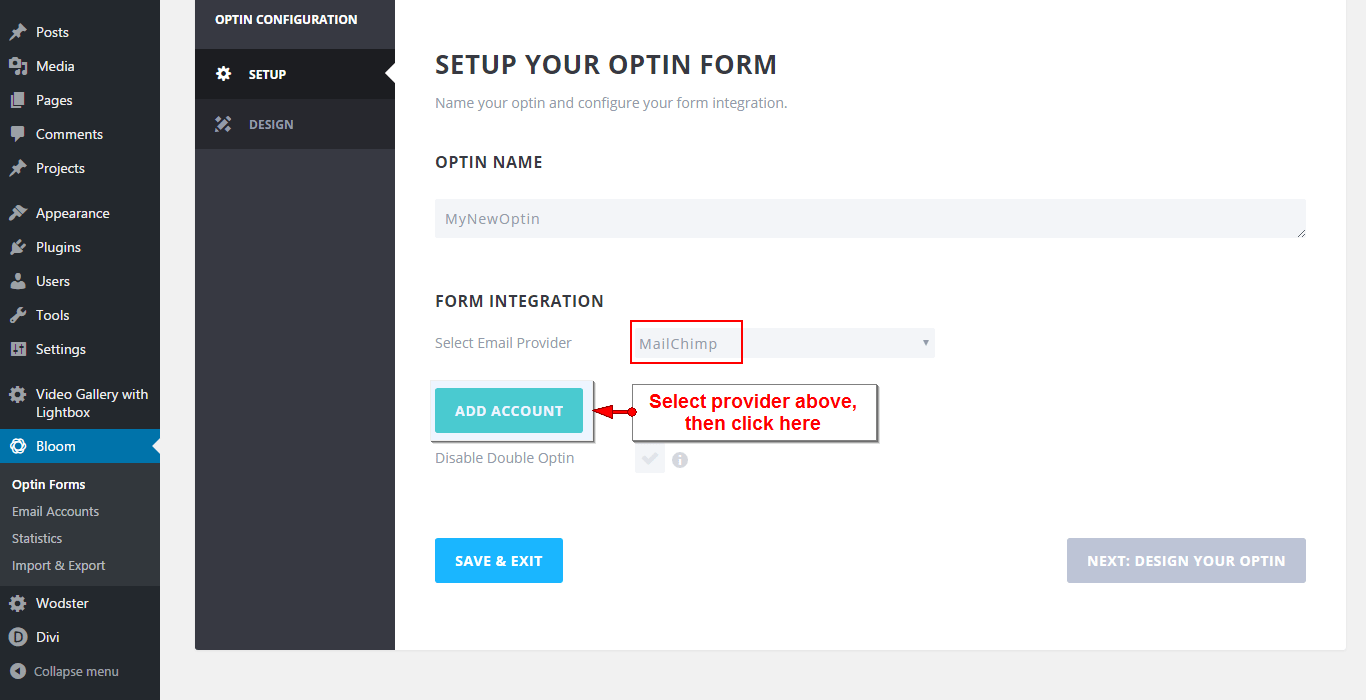
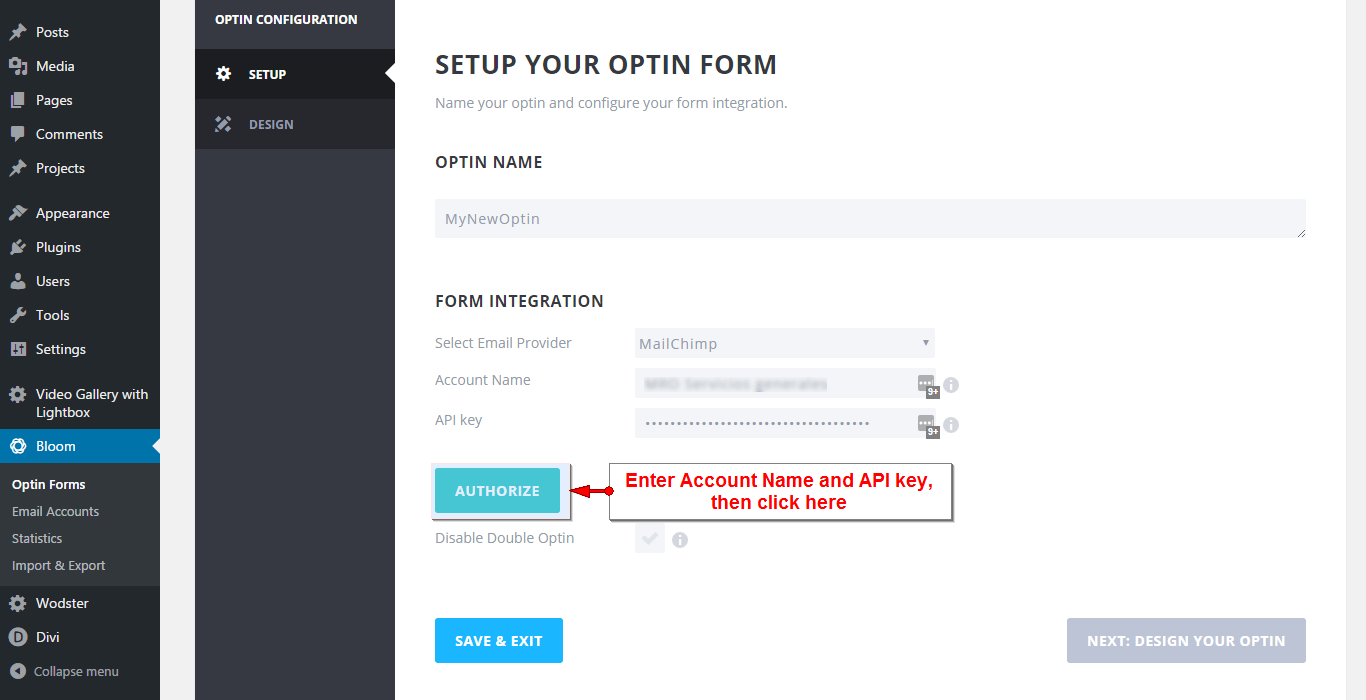
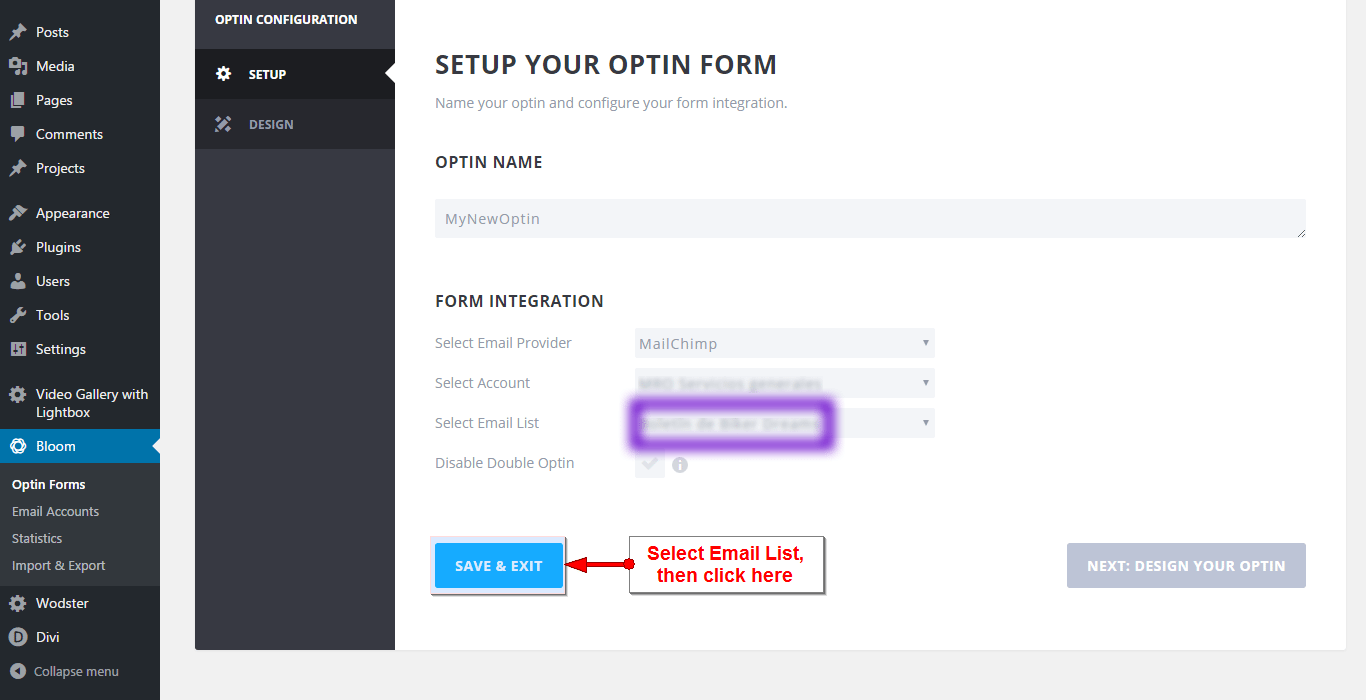
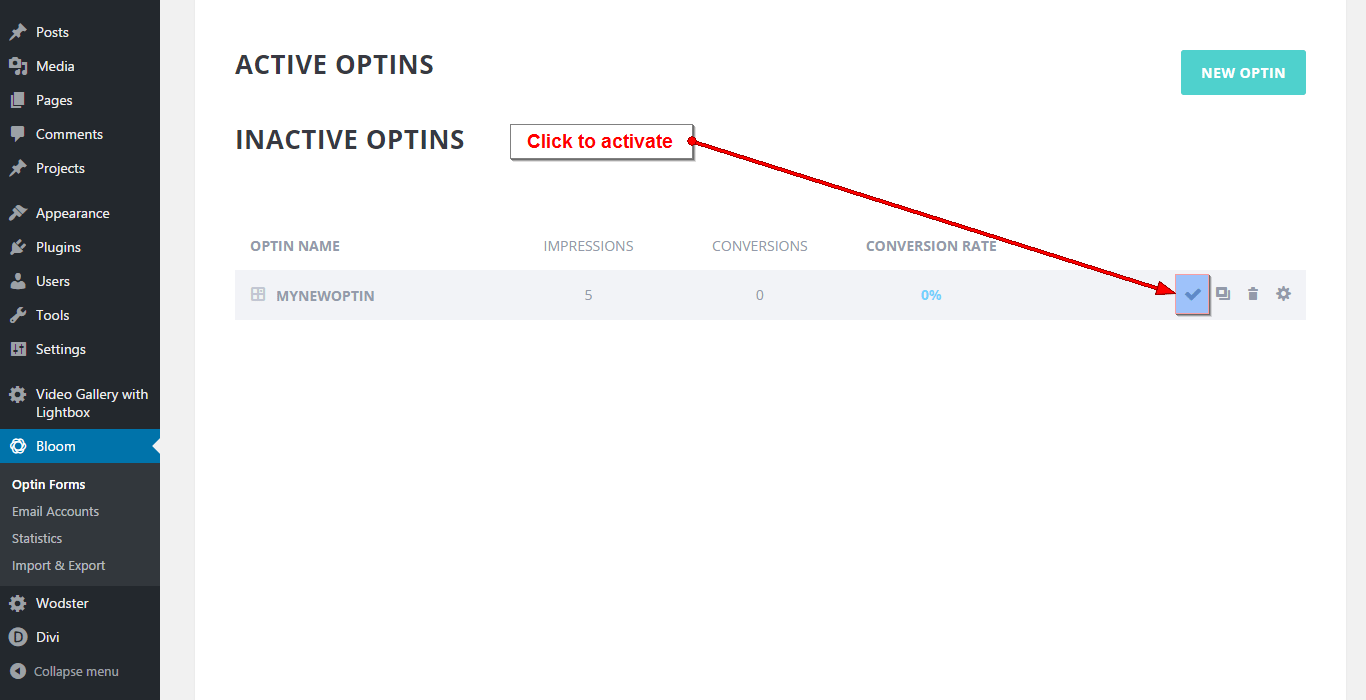
To activate the Bloom Optin, follow the steps as illustrated below. Shown is the process for Mail Chimp provider; other providers follow a similar process.
Install Monarch plugin (optional)
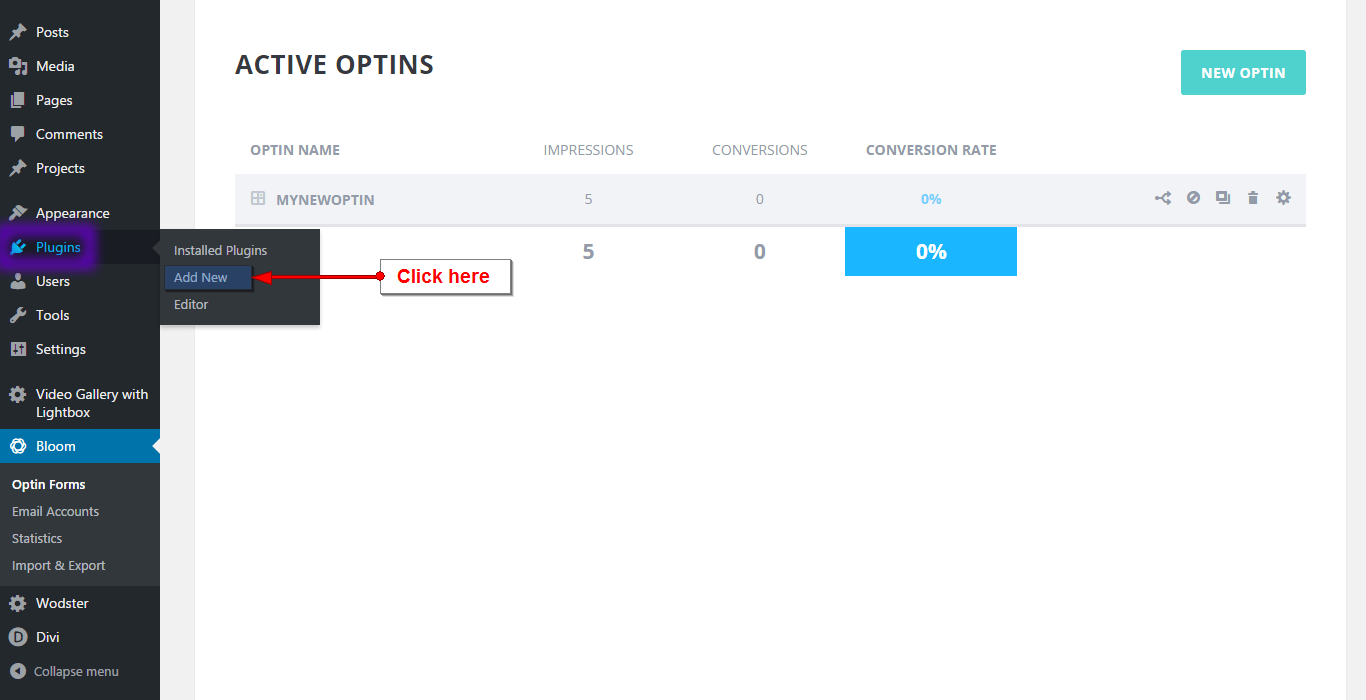
Download the Monarch Plugin from Elegant Themes. While this plugin is optional, you must install it BEFORE importing this theme’s demo data. From the WordPress Dashboard go to the Plugins page and select "Add New Plugin", on the next page, click "Upload Plugin". Then select the Monarch zip file from your computer and click "Install". Once Monarch is installed, go ahead and activate the plugin.
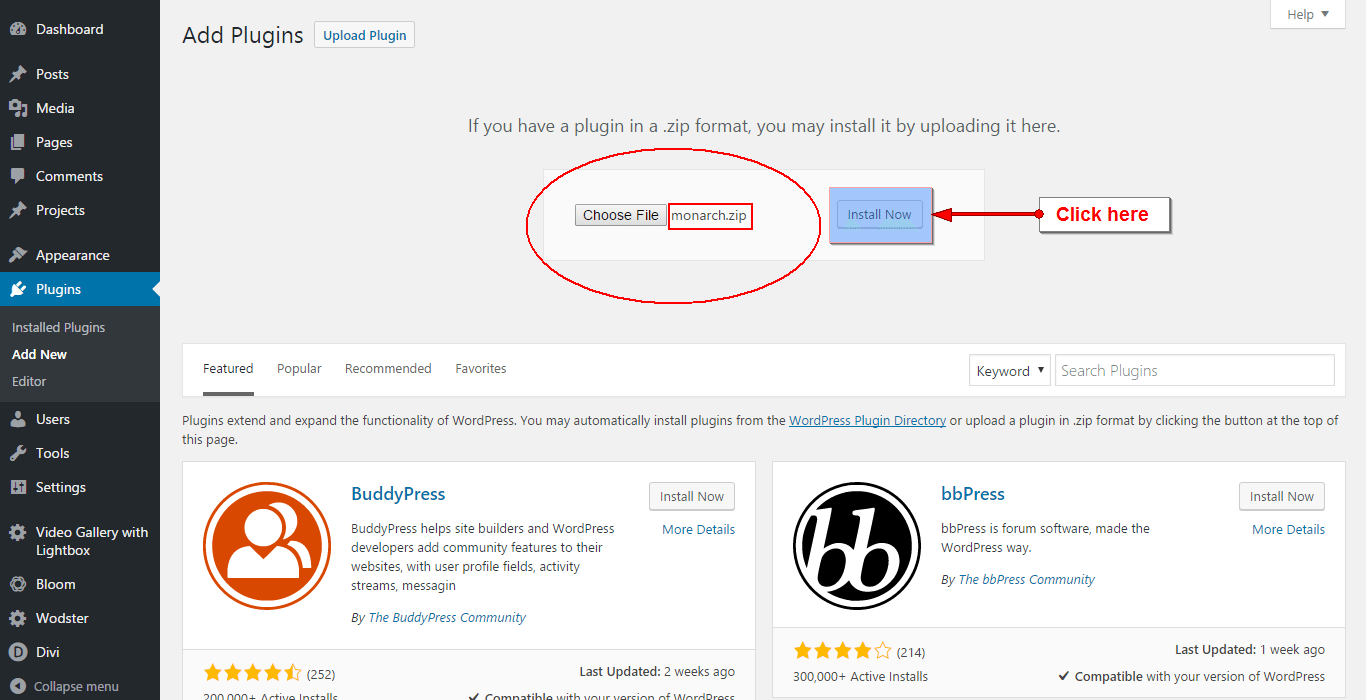
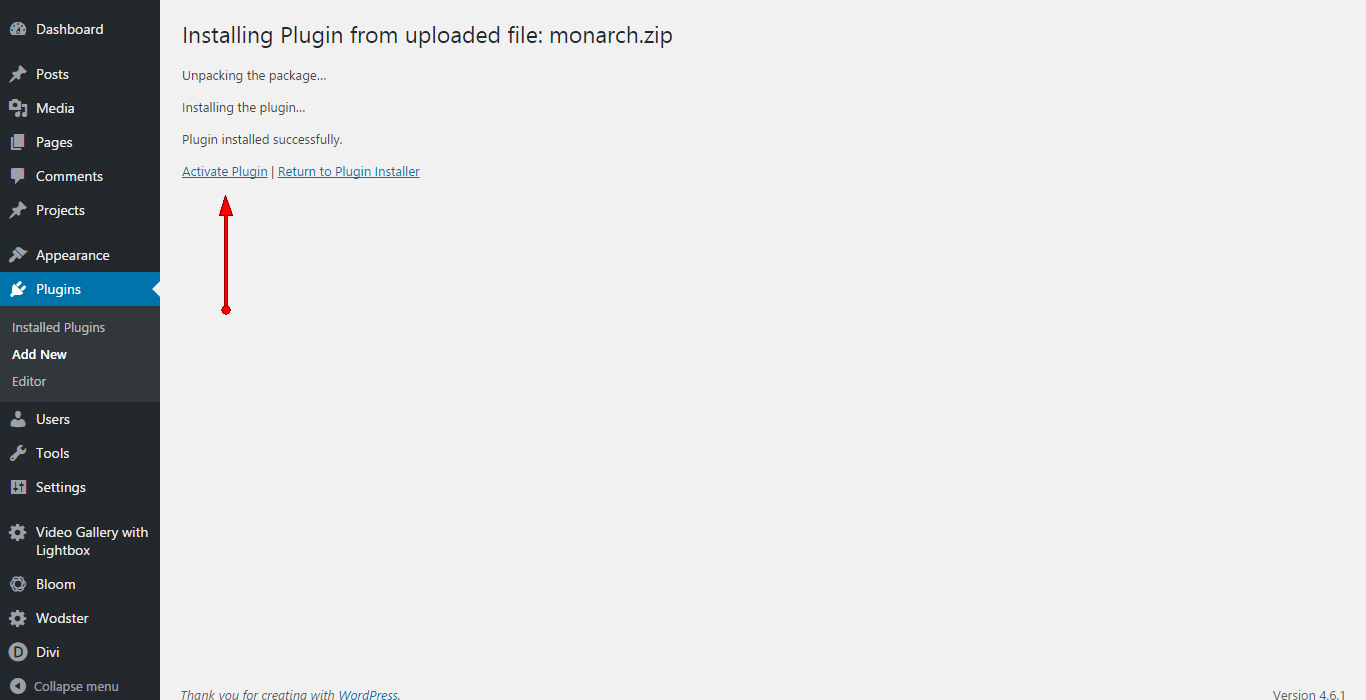
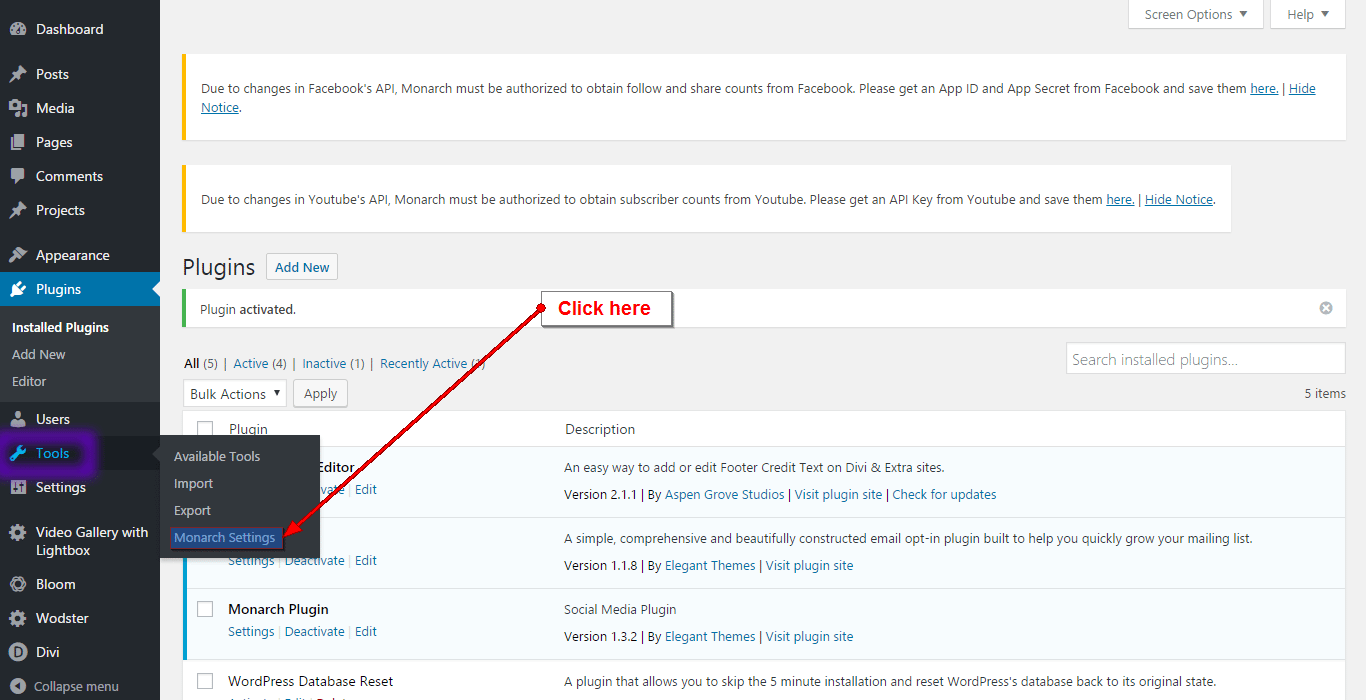
Setup Monarch plugin
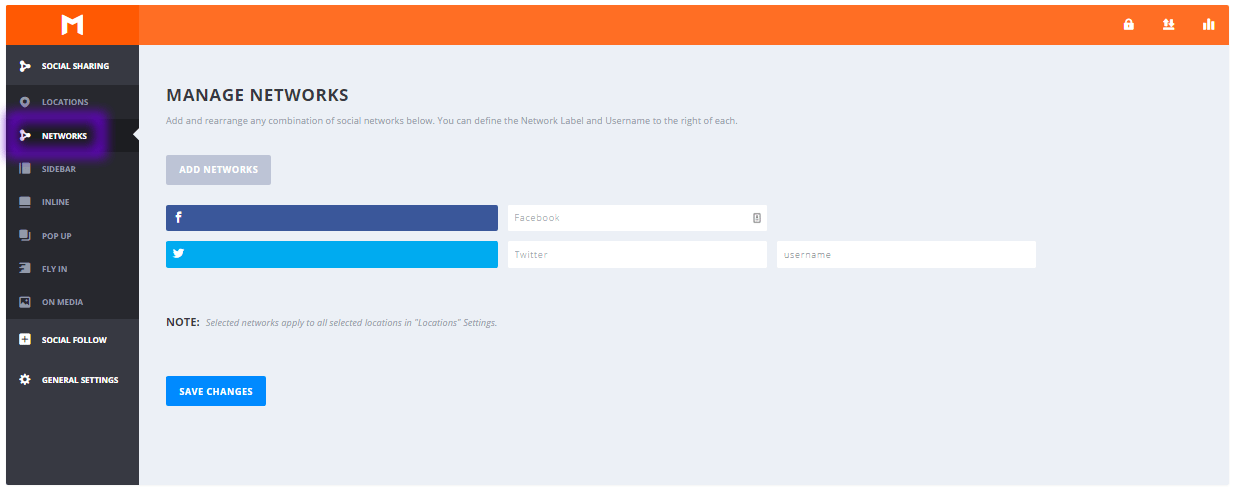
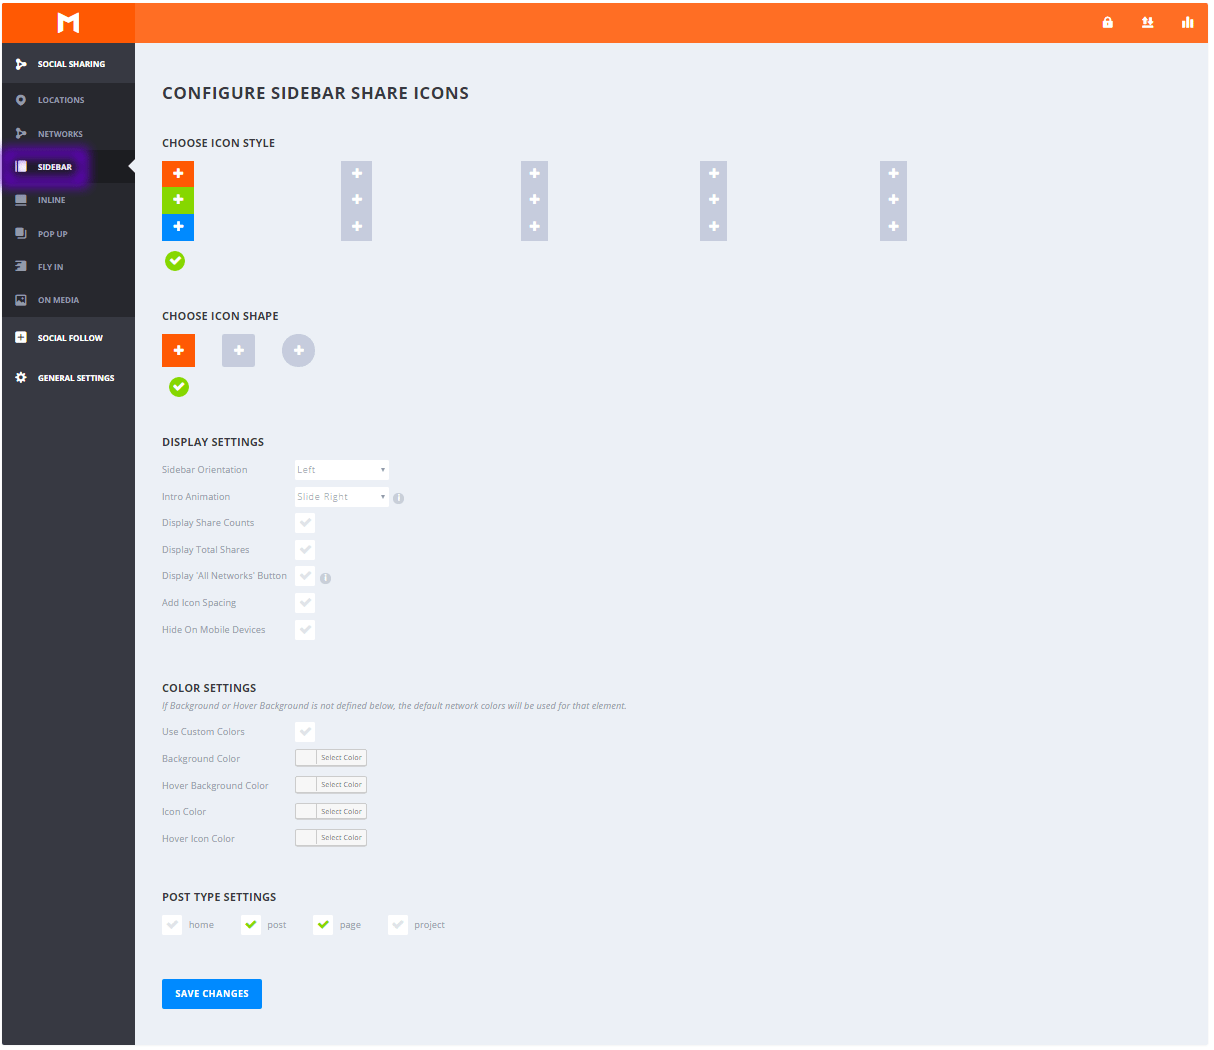
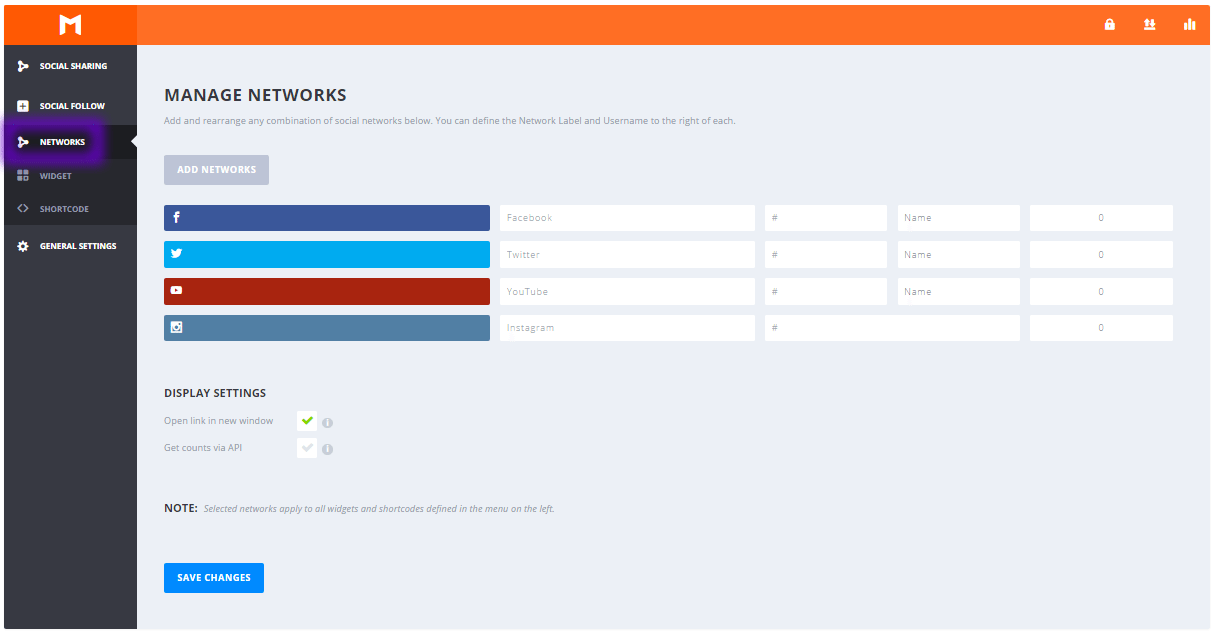
Once you have successfully imported the plugin, you need to configure the settings. Follow the steps as illustrated below.
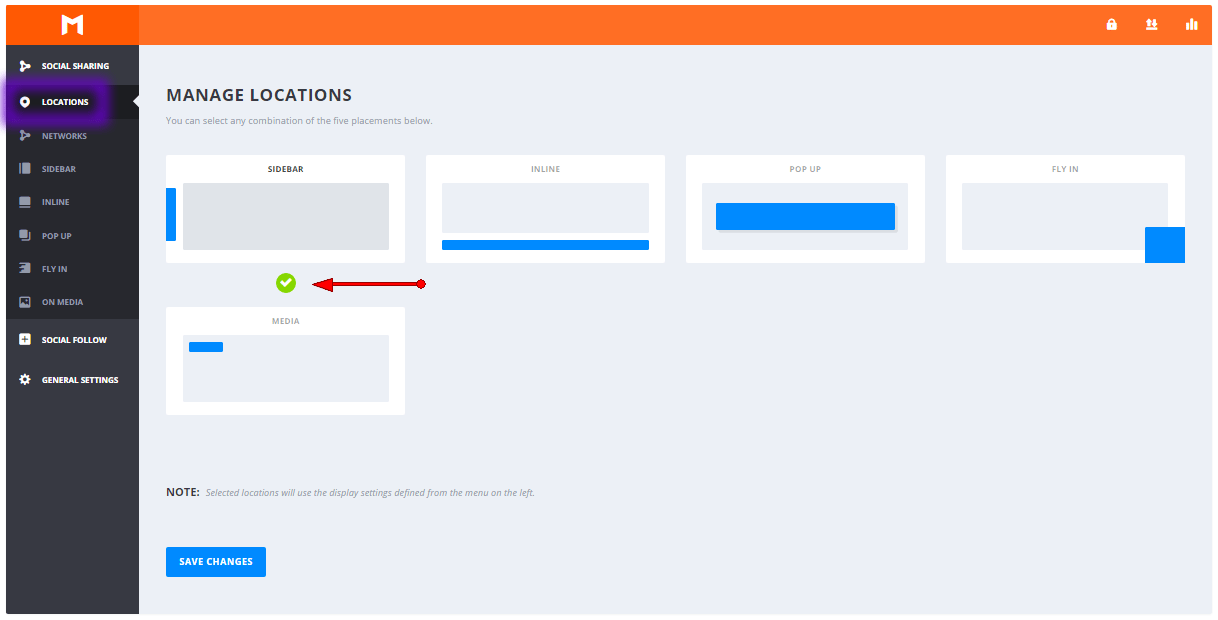
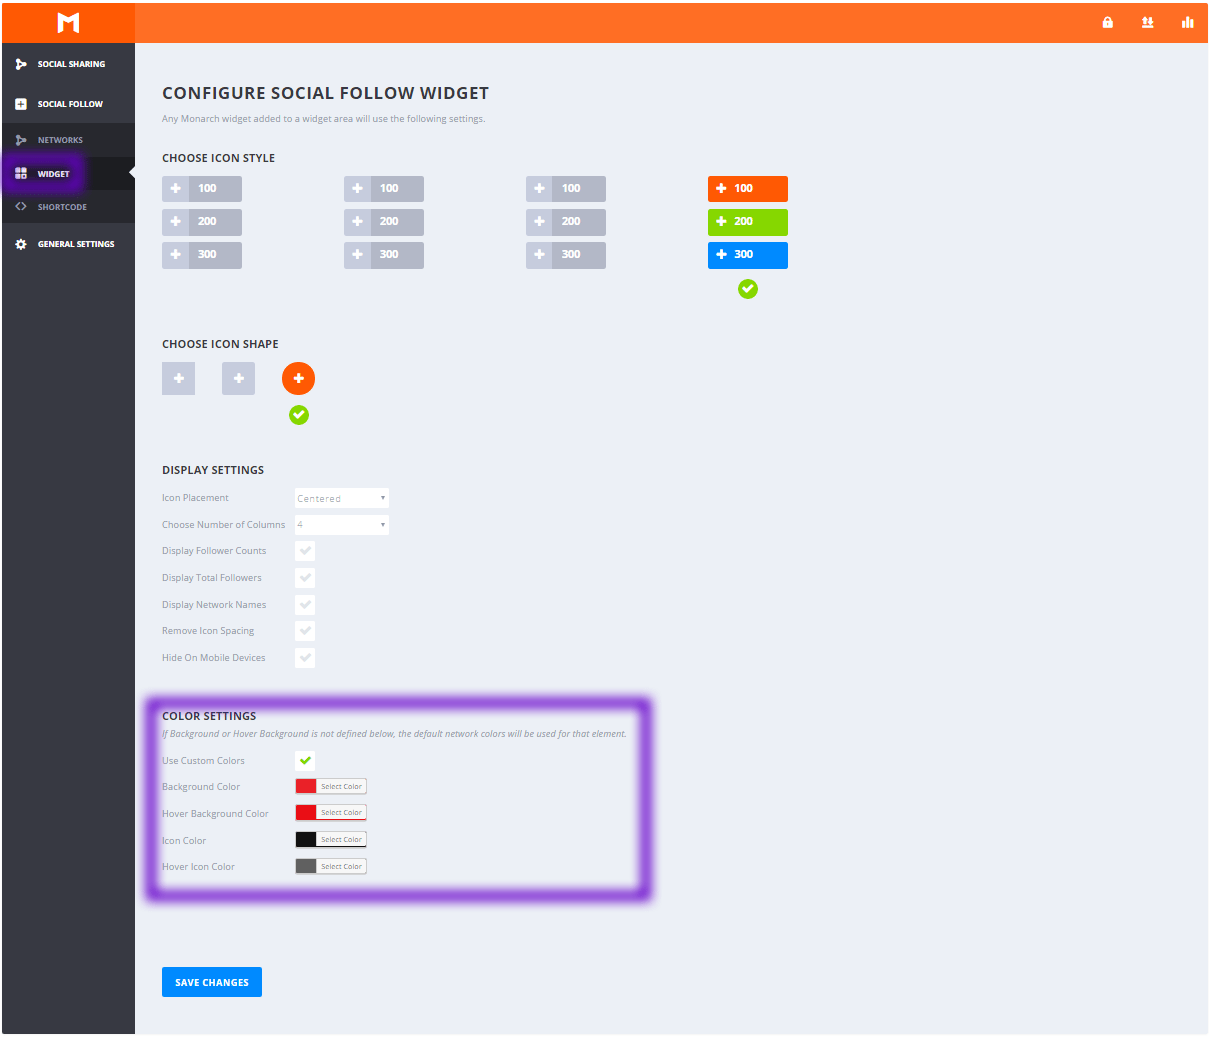
Color Codes
Background Color: #ea2128 Hover Background Color: #ea0e15 Icon color: #111111 Hover Icon Color: #606060
Import Demo Data
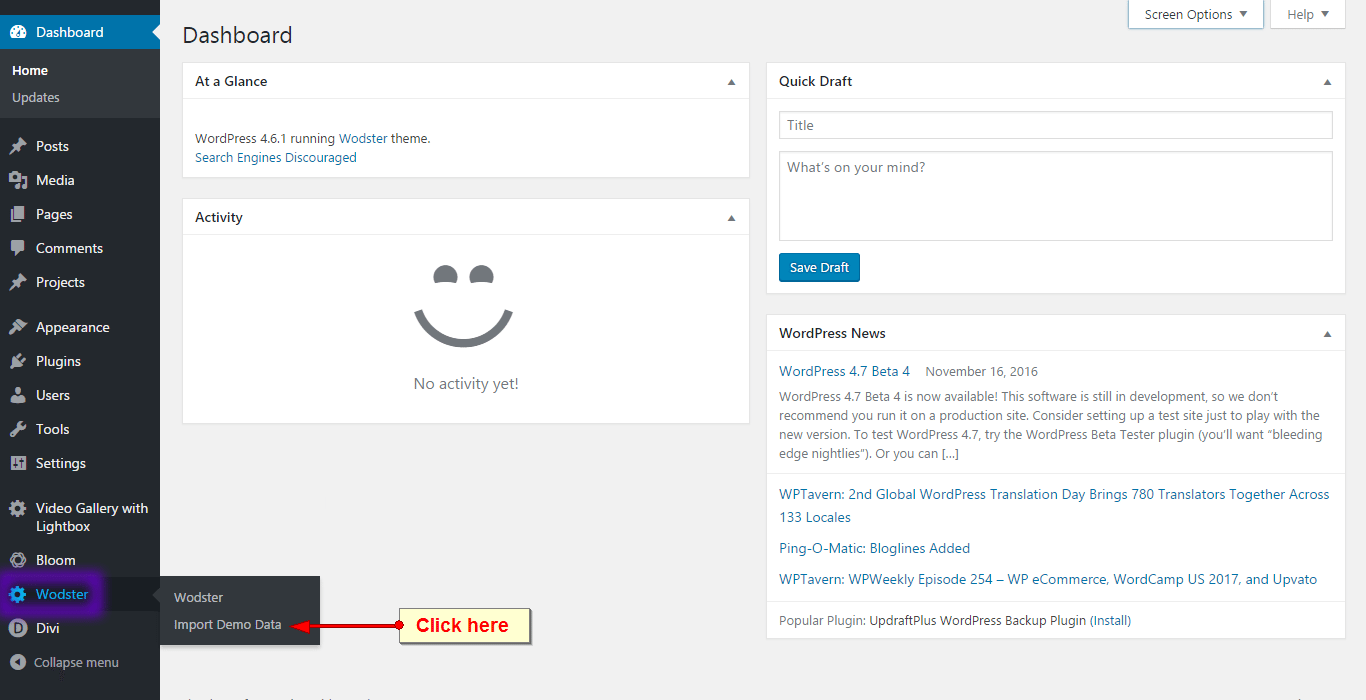
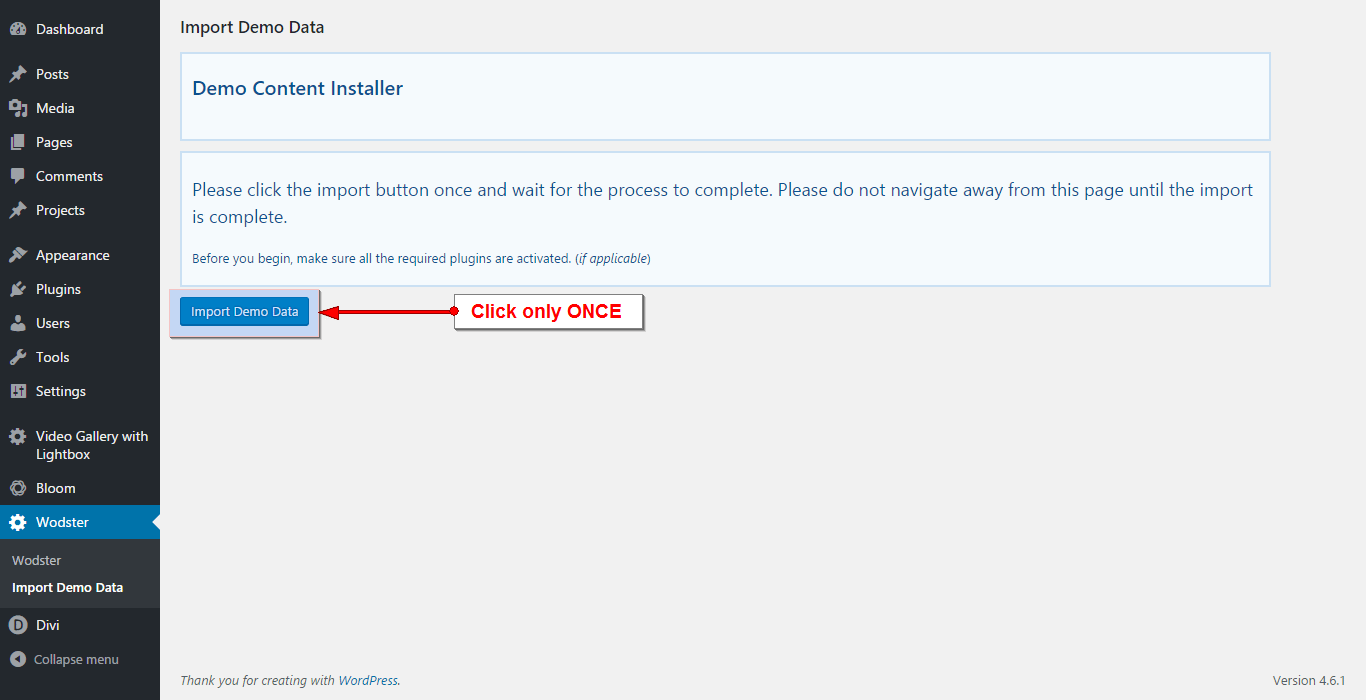
From the WordPress Dashboard, go to the newly added ‘Wodster’ tab on the left admin panel. Under the ‘Wodster’ menu, please click on ‘Import Demo Data’ only once. Please be patient while the demo data of the Wodster Child Theme is imported into your site.
Homepage Settings
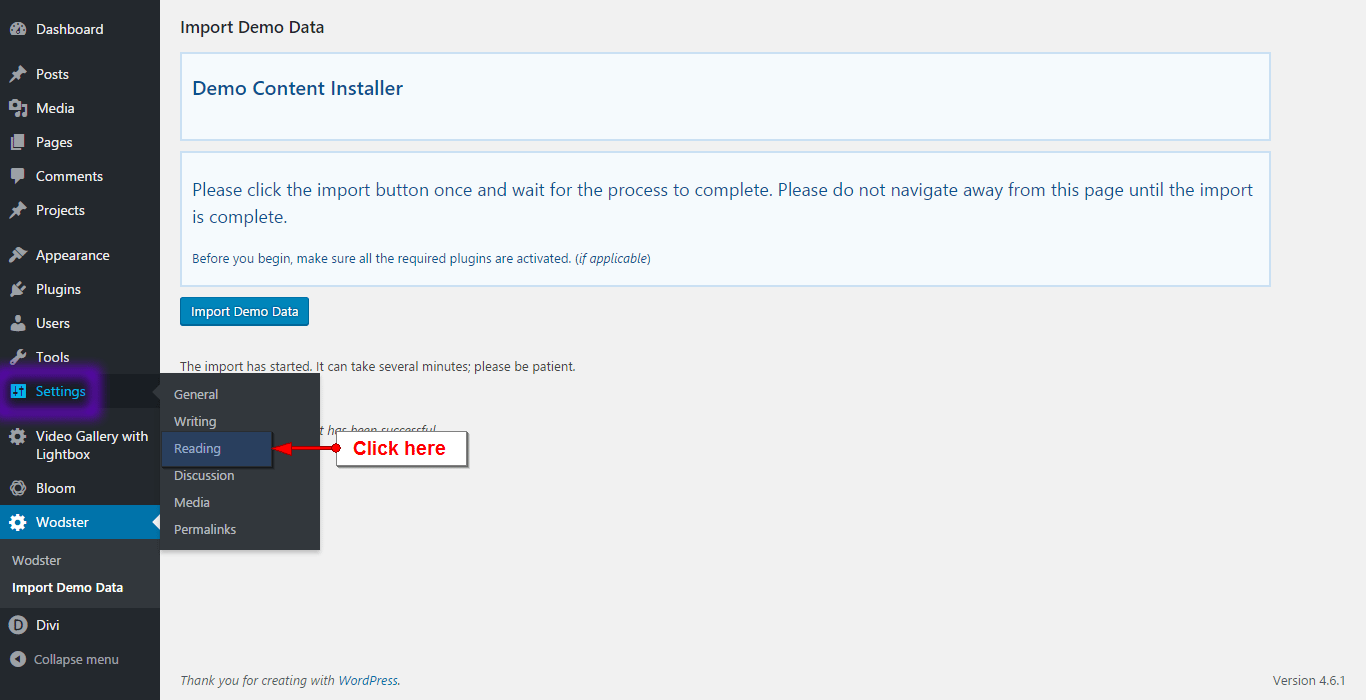
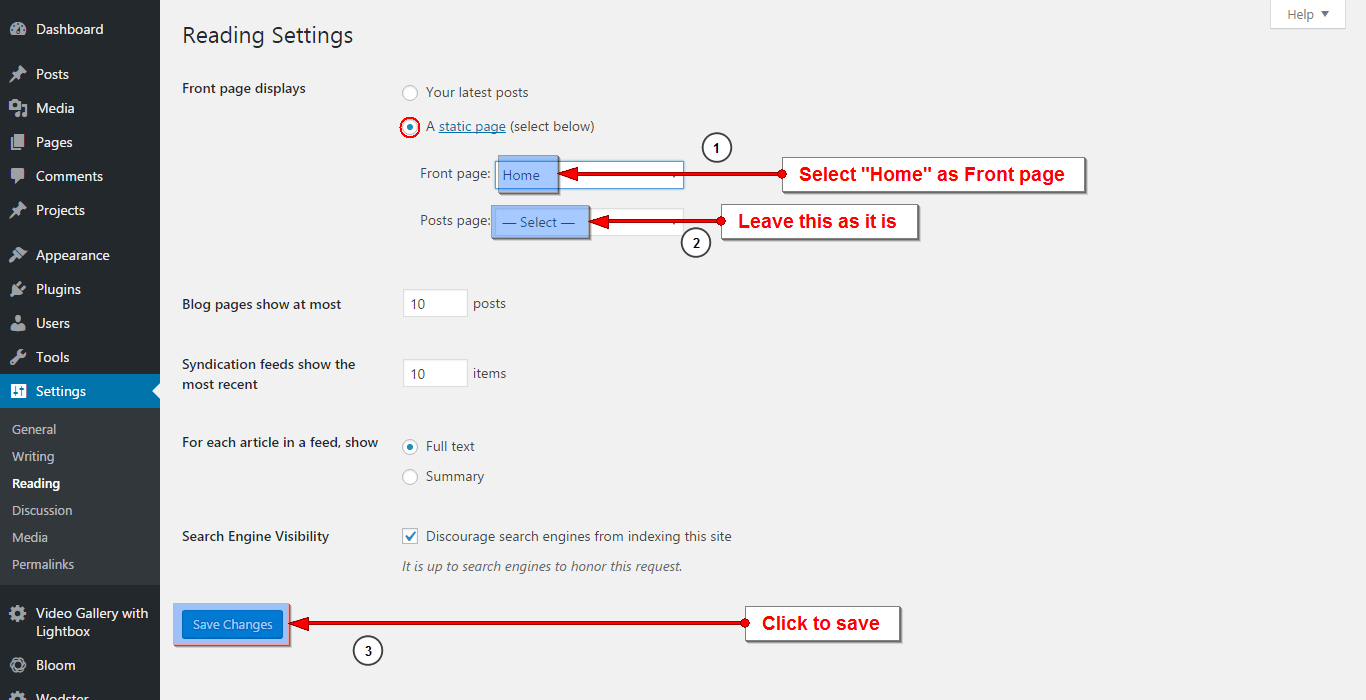
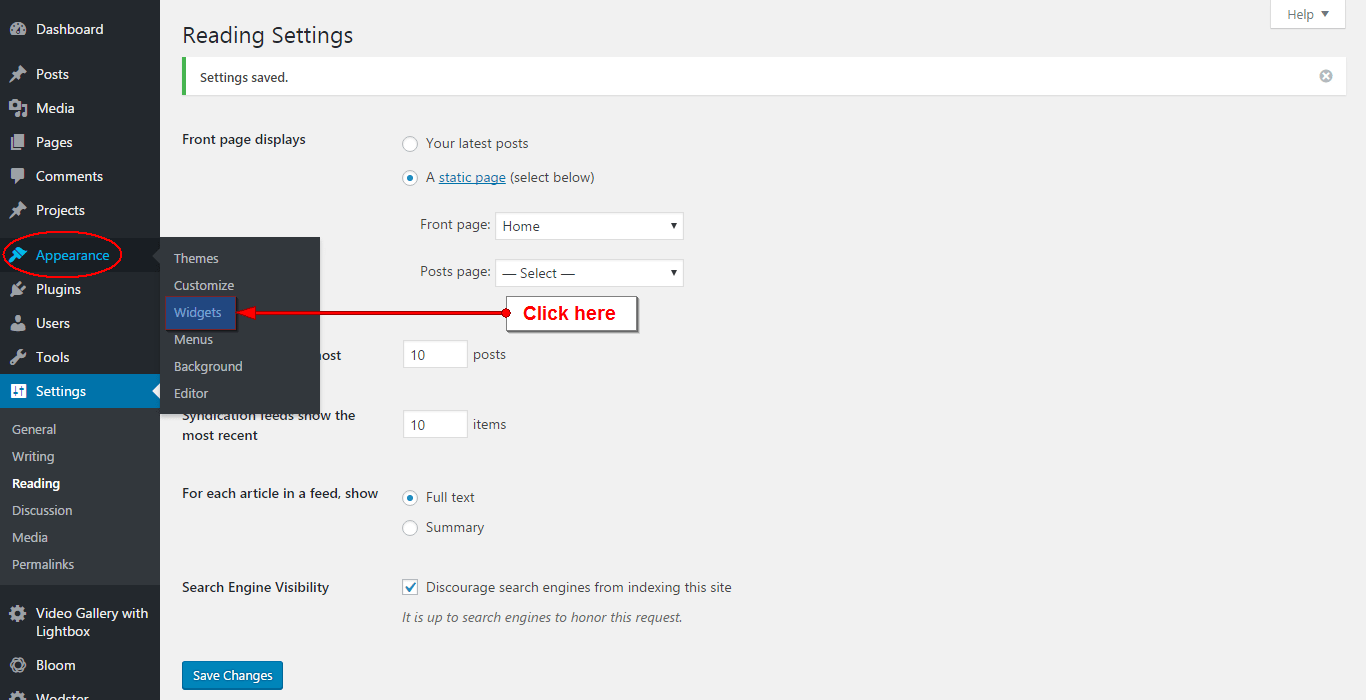
Move to the settings area in your left Admin panel. Click ‘ Reading’, under ‘Front page displays’ select ‘A static page’ and for the Frontpage drop-down menu select ‘Home’, leave Posts page as is, do not select anything.
Menu settings
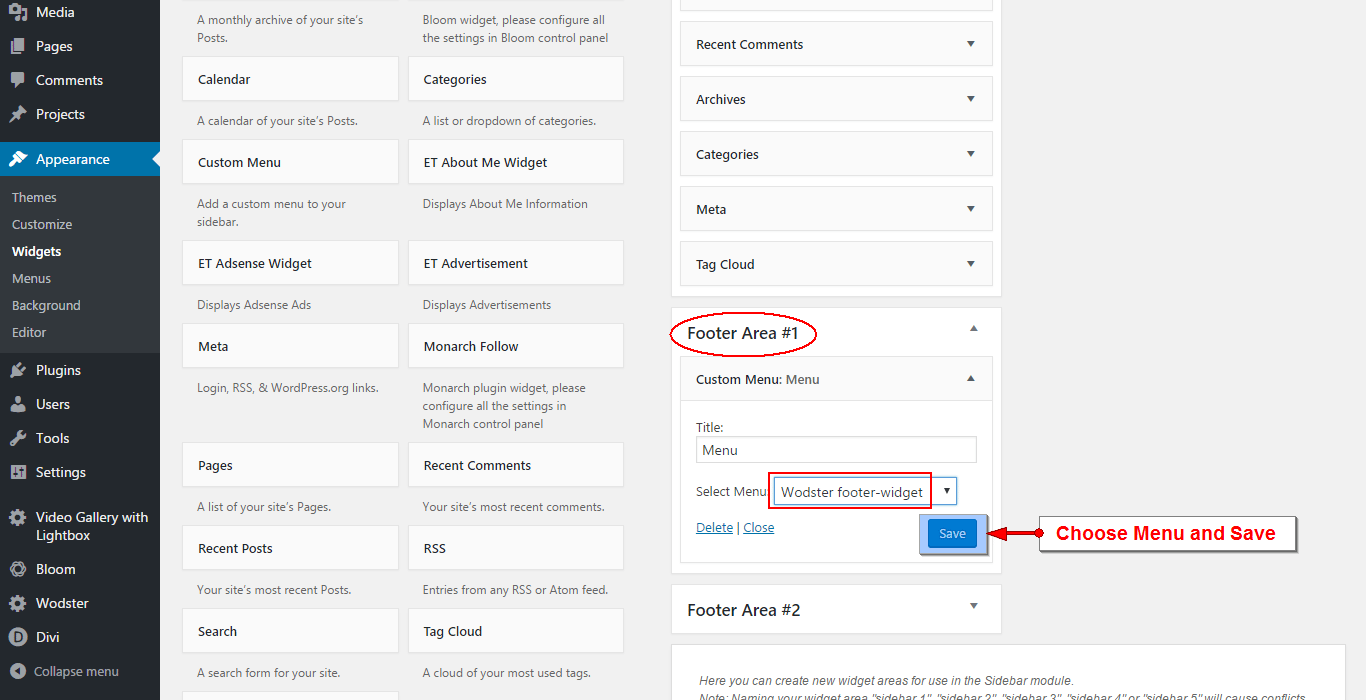
Move back to the ‘ Appearance’ tab in your left Admin Panel and select ‘Widgets’. Toggle open the Footer Area #1 and make sure "Wodster footer-widget" is the selected menu. Hit the Save button.
WP Responsive Video Gallery with Lightbox ConfigurationION
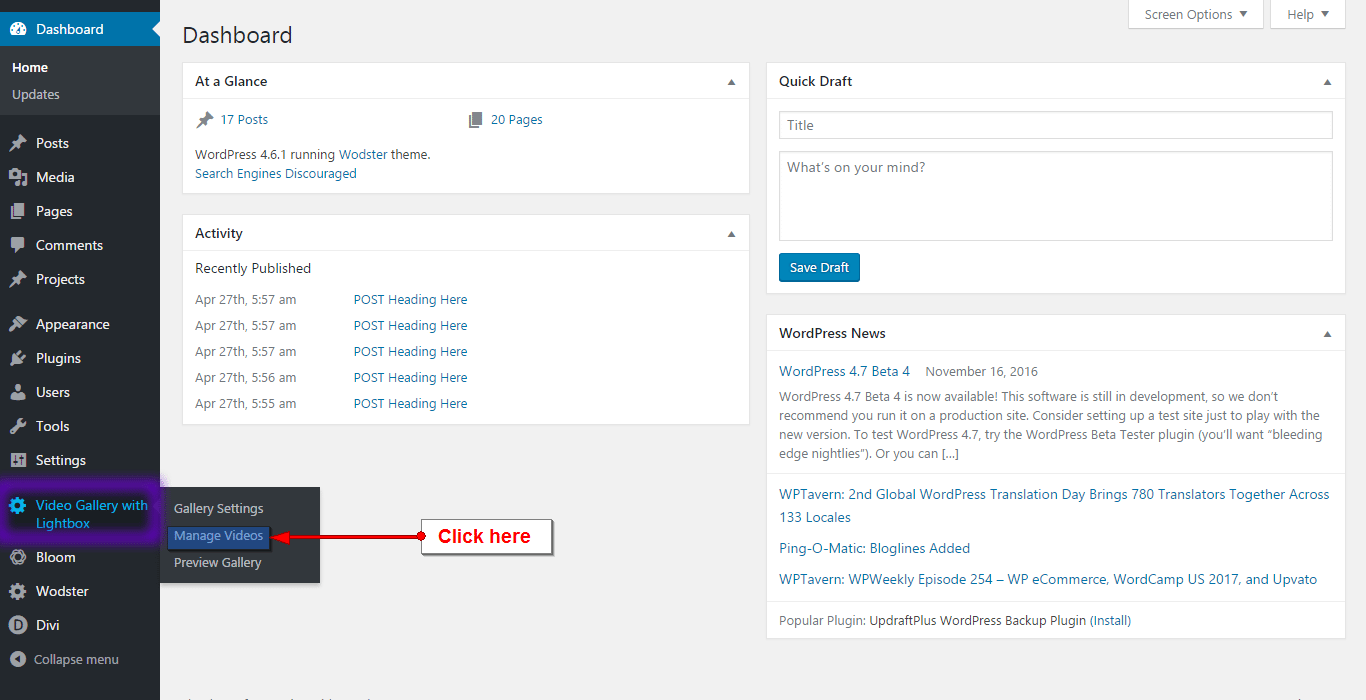
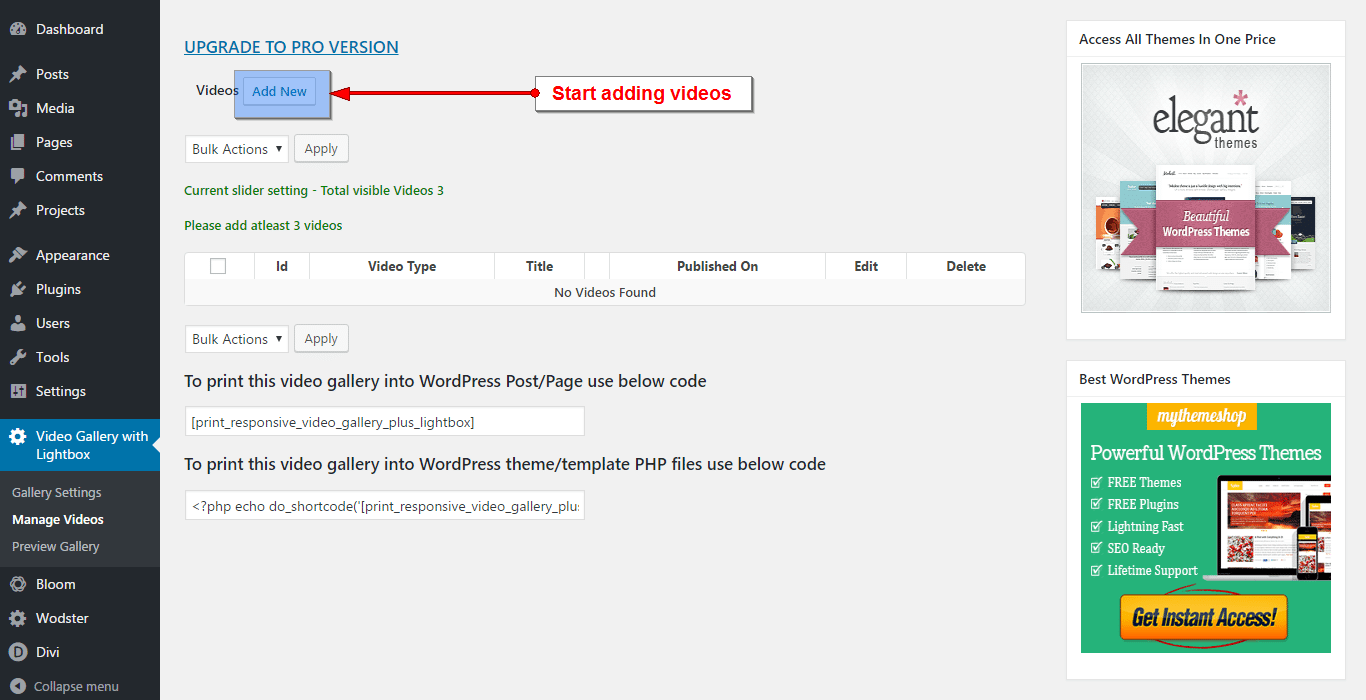
Move to Video Gallery With Lightbox tab. Select Manage Videos and start adding videos from YouTube, Vimeo or other outside sources.
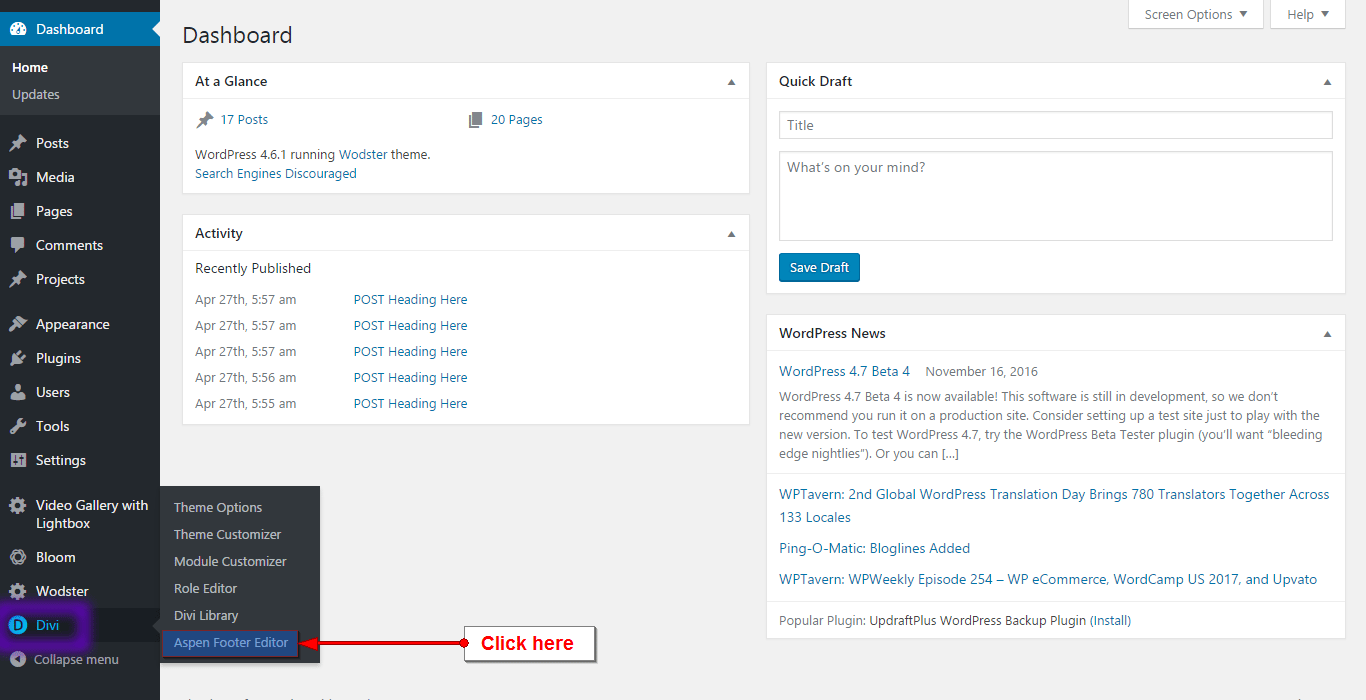
The Aspen Footer Editor
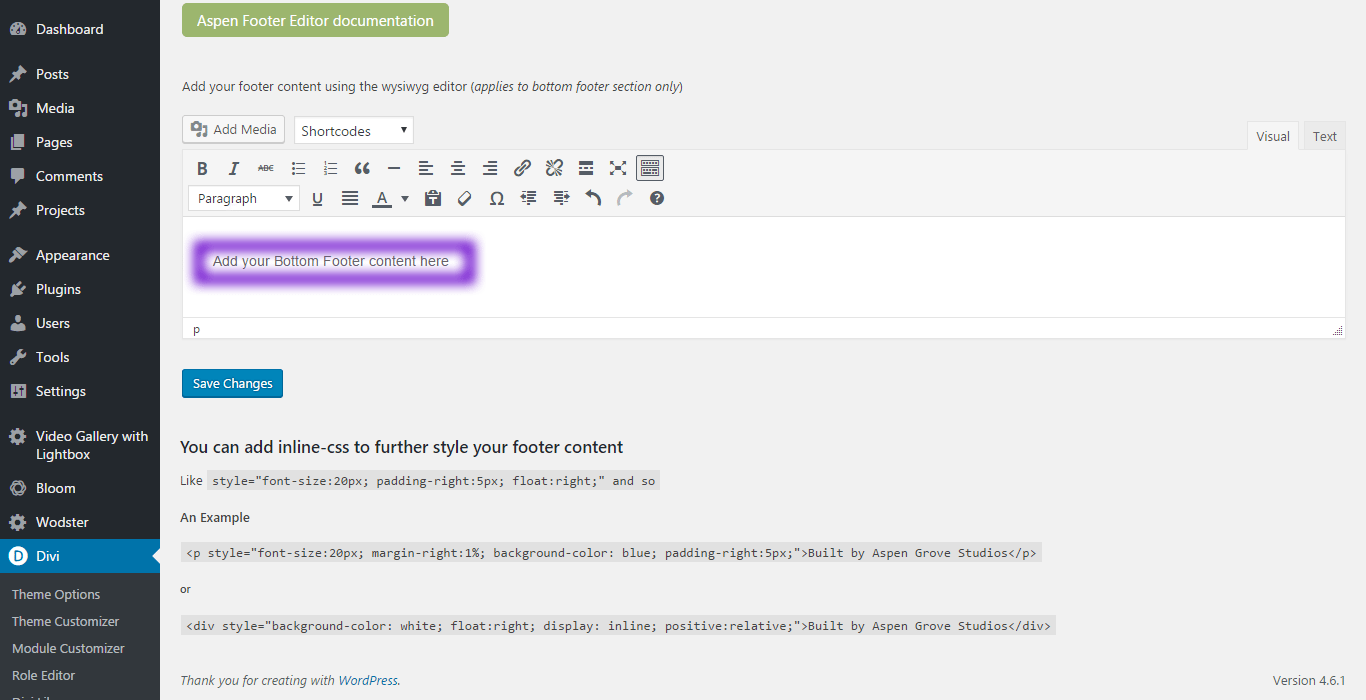
Aspen Footer Editor is an ultra-lightweight, yet powerful tool that allows you to easily edit your Divi or Extra website’s footer information (copyright). With this feature, you can add custom footer text and change the color, size, hyperlink, and even add images & videos! The best part? All of this is done within a simple to use WYSIWYG editor just as if you were editing a post or page. Once you have installed the Wodster Child Theme, you will see a new Submenu Item titled ‘Aspen Footer Editor’ in your Divi Menu (left sidebar). Select this item and you will be taken to this feature’s dashboard. Once inside the Aspen Footer Editor’s dashboard, you will be greeted with a familiar sight: the standard WordPress page/post/WYSIWYG editor. Within this editor, you can add and style text, insert hyperlinks, add dynamic dates with the included shortcodes, and even insert photos/embed videos. Once you are finished styling your footer, simply click ‘save’ and you’re all done
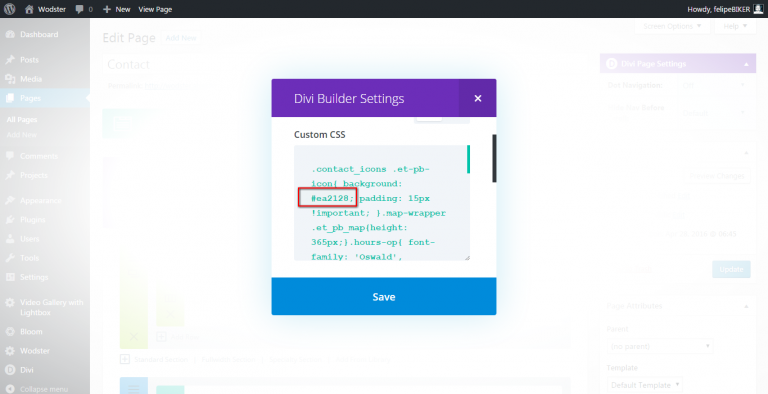
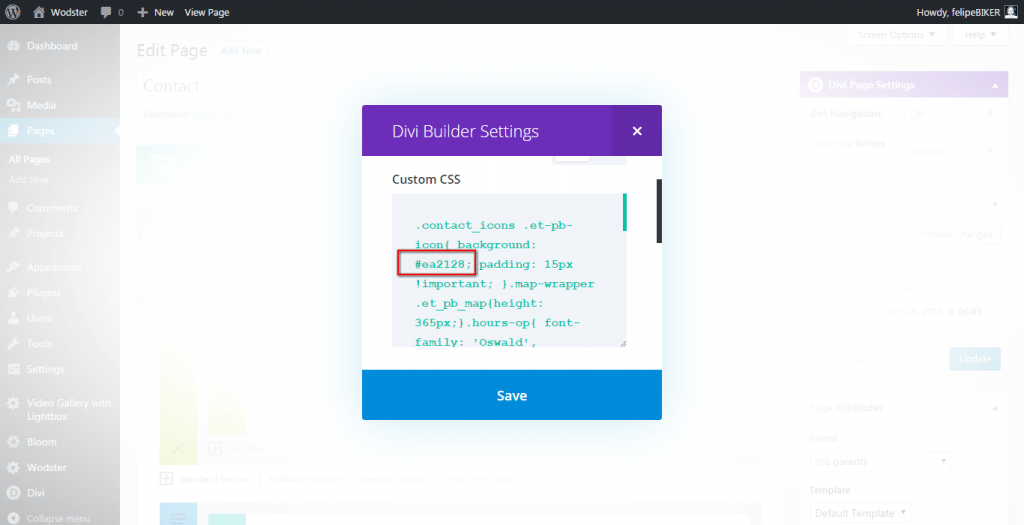
Where I can change the background color of the icons on the Wodster contact page
The settings for the contact icons color is in the page specific Divi Builder Settings Custom CSS box:
