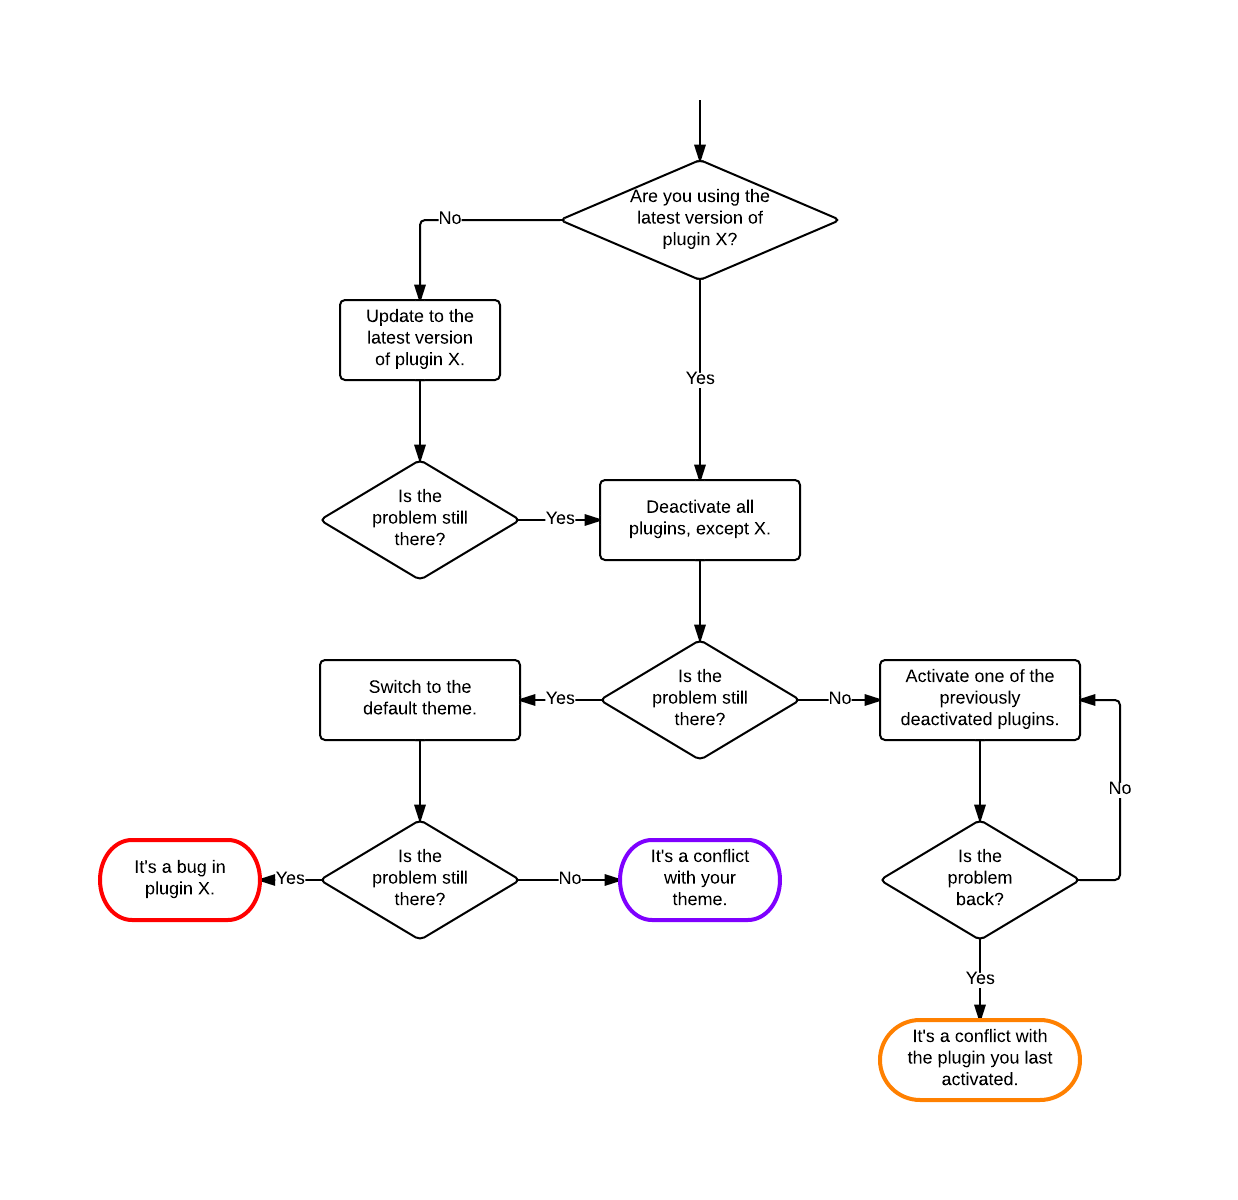
Plugin troubleshooting procedure
Follow these steps:
- Go to the Plugins page.
- Tick the checkbox at the top of the plugin list to select all plugins.
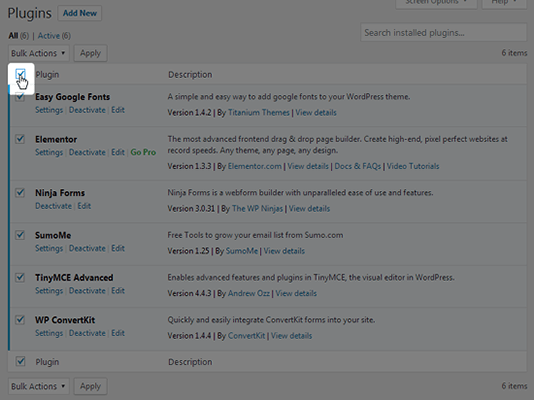
- Click Bulk Actions, and select Deactivate.
- Click Apply.
- This should deactivate all of the plugins on your site. Check to see if it’s indeed fixed. If it is, a plugin is at fault. Follow the rest of the steps if that’s the case. If there’s still an issue, the culprit is elsewhere, likely a corrupted theme or WordPress core file.
- Activate the first plugin on the list.
- Check your site to see if it breaks. If it does, the plugin you activated is the culprit. Continue if all is well.
- Repeat steps 6 and 7 until you find the plugin causing the issue.
[source: GiveWp article]
Ever since plugins have been a part of WordPress, one of the first steps a support technician for WordPress has given when confronted with a problem or error is "Have you tried deactivating all plugins and switching to a default theme?" Many WordPress users have chafed at the idea of deactivating all plugins since many plugins dramatically affect the appearance and functionality of the site for visitors. It’s often not worth it to diagnose a problem if it means essentially bringing the site down.
A plugin called Health Check is here to change that. With Health Check, it’s possible to troubleshoot the live site, without disturbing the site for visitors.
Here’s a video to walk you through how it works:
The first step in troubleshooting the site is to install the Health Check plugin. Navigate to Plugins > Add New and search for "Health Check." The plugin by "The WordPress.org Community" is the one you want.
You can also download it directly from the WordPress Plugin Directory.
Once it is installed and activated, you’ll see a new "Health Check" section under the "Dashboard" menu item on the back end of your site. Click that to be taken to the Health Check Settings.
There are all sorts of diagnostic goodies on the tabs there, but for this tutorial, let’s focus on the Troubleshooting tab.
Click to acknowledge that you understand how Troubleshooting mode works, and then activate Troubleshooting mode.
Now, when you visit the front end of the site, everything has been made as though the site is using a default theme, as well as no active plugins.
To confirm that entering troubleshooting mode does not affect the other users and visitors to the site, visit the site in an incognito or private browser window to see that the live site remains untouched!
This enables you to reactivate the plugins and/or theme one at a time to see when the problem returns. Once you’ve isolated how to reproduce a problem (for example, if the problem only happens when Plugin A and Plugin C are active at the same time) you’ll be able to pass that information on to a support technician, and drastically speed up the timeline on isolating and patching conflicts between plugins and themes.
Having a true staging site where plugins and themes can be tested is still best practice. But for quick fixes and isolating conflicts on the live site, the Health Check plugin is the new standard in diagnostics. [source: https://givewp.com/documentation/resources/troubleshoot-wordpress-websites-health-check/]